This post may contain affiliate links. Please read our policy page.
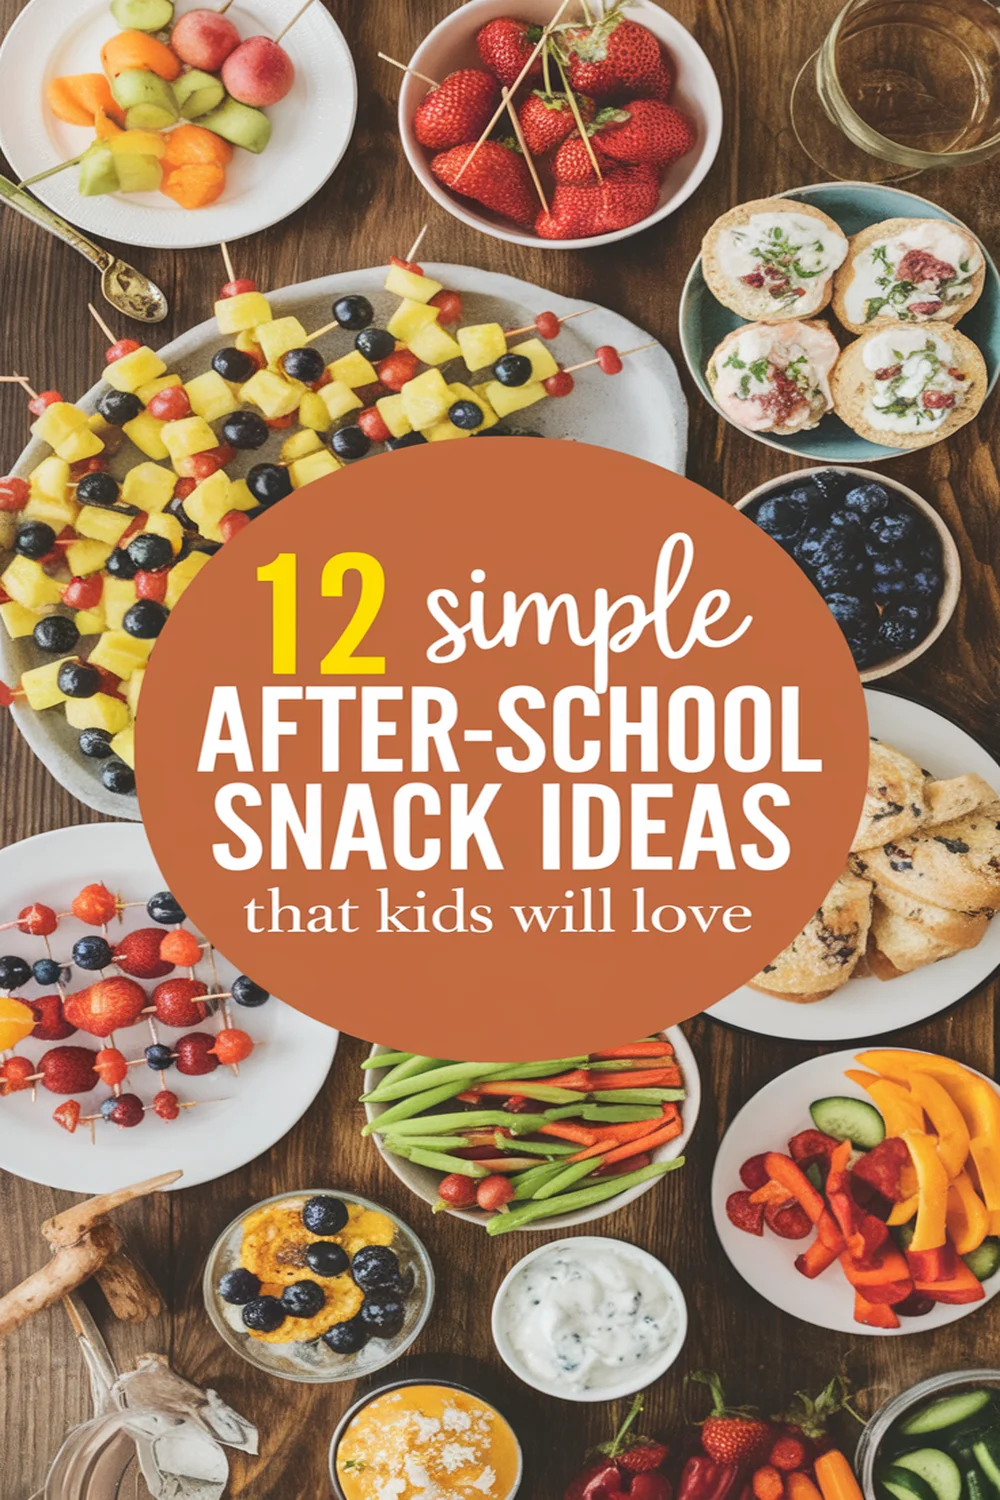
Looking for simple after-school snack ideas your kids will love? Try yogurt parfaits with granola and berries for a fruity treat, or apple slices with nut butter for a crunchy combo. Veggie sticks with hummus and mini pita pizzas let kids get creative. Don’t forget a cheese and cracker platter, rice cakes topped with avocado, or peanut butter and celery sticks for a satisfying crunch. For a sweet finish, frozen grapes make a revitalizing snack. Keep exploring for more tasty options!
Yogurt Parfaits With Granola and Berries
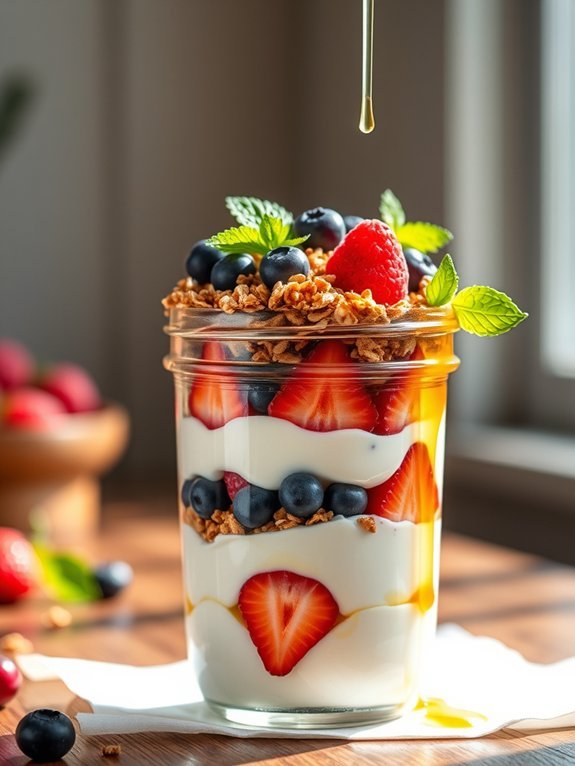
Yogurt parfaits are a delicious and nutritious after-school snack that kids will love. Not only are they quick and easy to prepare, but they also provide a great opportunity to incorporate a variety of healthy ingredients such as fruits, granola, and yogurt. This colorful layered treat not only satisfies hunger but also offers a boost of energy and essential nutrients. In just a few minutes, you can create a creative and visually appealing snack that’s sure to delight the little ones.
To make yogurt parfaits, you can personalize them with your kids’ favorite flavors and ingredients. You can use Greek yogurt for a creamier texture or opt for plant-based yogurt to cater to different dietary needs. The layers of crunchy granola and sweet, juicy berries create a delightful contrast that keeps every bite exciting. Additionally, this snack can easily be adjusted depending on the season or what you have on hand, making it a versatile option for busy afternoons.
- 2 cups of yogurt (Greek, regular, or plant-based)
- 1 cup of granola
- 1 cup of mixed berries (strawberries, blueberries, raspberries)
- Honey or maple syrup (optional)
- A pinch of cinnamon (optional)
To assemble the yogurt parfaits, start by selecting clear glasses or jars to showcase the layers. Begin by spooning a layer of yogurt into the bottom of the container, then add a layer of granola followed by a layer of mixed berries. You can repeat these layers until you reach the top of the container, finishing with a sprinkle of granola and a few berries for a beautiful presentation. Drizzle honey or maple syrup on top if desired for added sweetness.
When making yogurt parfaits, feel free to get creative! You can try different combinations of fruits, such as bananas or peaches, or even add a handful of nuts for added crunch and nutrition. Adjust the sweetness to your liking by varying the amount of honey or syrup, and consider using flavored yogurts for a fun twist.
Preparing parfaits as a DIY project with your kids can also make them more excited to enjoy their wholesome snack.
Apple Slices With Nut Butter
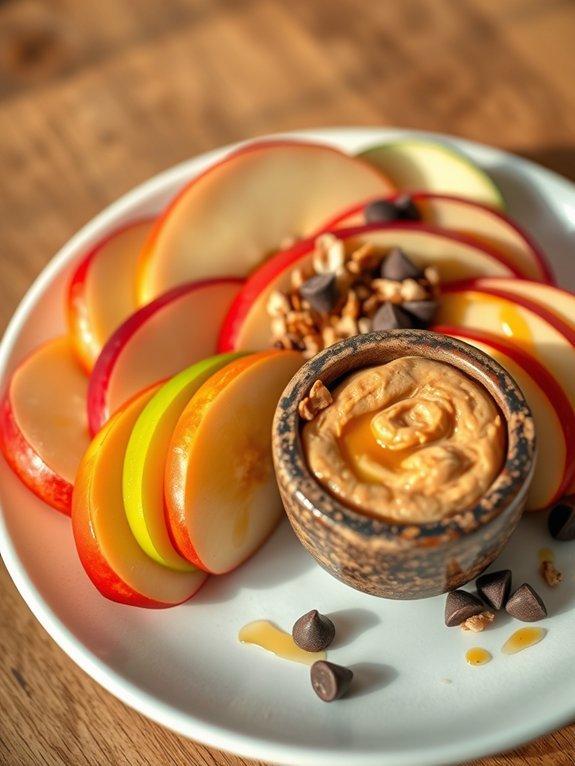
Apple slices with nut butter is a delightful and nutritious after-school snack that kids will love. This simple yet delicious combo offers a satisfying crunch alongside the creamy texture of nut butter, making it an ideal choice for a healthy energy boost. Not only is it quick to prepare, but it also packs a punch of vitamins, minerals, and healthy fats, keeping your little ones full and happy until dinner time.
Choosing the right apple is essential for the best flavor and texture. Varieties like Fuji, Honeycrisp, or Gala are sweet and crisp, making them perfect for pairing with nut butter. You can use any nut butter your family prefers, whether it’s classic peanut butter, almond butter, or a nut-free option like sunflower seed butter. This flexibility allows you to customize the snack to accommodate various tastes and dietary needs.
- 1 medium apple
- 2 tablespoons nut butter (peanut, almond, or sunflower seed)
- Optional: honey or maple syrup for drizzling
- Optional: granola or mini chocolate chips for topping
Begin by washing the apple thoroughly under running water. Once clean, slice the apple into wedges or rings, removing the core as necessary. Arrange the apple slices on a plate and serve them alongside your chosen nut butter. Drizzle honey or maple syrup on top if desired, and sprinkle granola or mini chocolate chips for an extra treat.
When preparing apple slices with nut butter, it’s best to prepare them right before serving to maintain the apple’s freshness and prevent browning. If you need to prepare them ahead of time, you can brush the slices with a little lemon juice to keep them crisp and bright.
Remember to adjust the nut butter amount based on your child’s preferences; they may enjoy more or less depending on their taste!
Veggie Sticks and Hummus
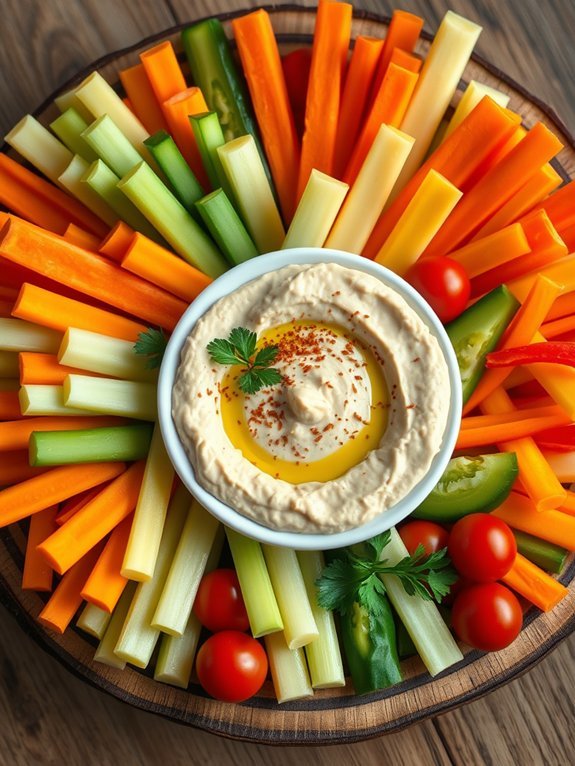
Veggie sticks and hummus make for a delightful and nutritious after-school snack that kids will love. The crunchiness of fresh vegetables paired with the creamy texture of hummus offers a satisfying combination that’s both tasty and healthy. Not only are you providing your little ones with essential vitamins and minerals, but you’re also encouraging them to enjoy more vegetables in a fun and appealing way.
Preparing veggie sticks and hummus is a breeze and allows for plenty of creativity. You can choose from a variety of colorful vegetables, which can make the snack visually appealing. Keep in mind that the more colors you include, the better your kids will benefit from a range of nutrients, and they may even be more inclined to try new veggies if they look vibrant and festive on their plate.
- Carrots
- Celery
- Cucumber
- Bell peppers (red, yellow, or green)
- Cherry tomatoes
- Hummus (store-bought or homemade)
- Olive oil (optional, for drizzling)
- Paprika or sesame seeds (optional, for garnish)
To prepare the veggie sticks, begin by washing and peeling the carrots and cucumbers if desired. Cut the carrots, celery, and cucumbers into thin, finger-sized sticks.
Slice the bell peppers into matchstick shapes and leave the cherry tomatoes whole. Arrange all the veggies on a platter and serve alongside a bowl of hummus. You can also drizzle a little olive oil over the hummus and sprinkle with paprika or sesame seeds for an extra flavor boost.
When preparing veggie sticks and hummus, consider encouraging your kids to get involved. Allow them to choose their favorite vegetables or help in cutting (with supervision) and arranging them on the platter.
This involvement can make snacks more exciting and foster a sense of ownership over their healthy eating choices. Additionally, if you opt for homemade hummus, experiment with different flavors by adding ingredients like roasted garlic or herbs to personalize your dip.
Mini Pita Pizzas
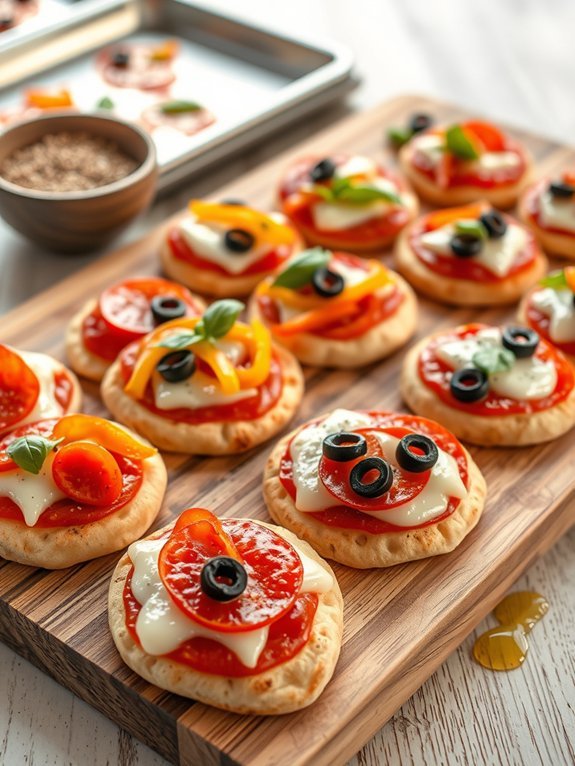
Mini pita pizzas are a fantastic and versatile after-school snack that kids will adore. Not only are they simple to prepare, but they also allow for a variety of toppings, making it easy to cater to individual preferences. Using pita bread as a base, these mini pizzas can be whipped up in a matter of minutes. They’re perfect for little hands and can be served as a fun project for kids in the kitchen.
To make these mini meals even more exciting, let kids customize their pizzas with their favorite toppings. From classic cheese and pepperoni to adventurous combinations like barbecue chicken or veggie-loaded options, the possibilities are endless. This snack not only satisfies hunger but also sparks creativity and encourages kids to try new flavors.
- Mini pita bread
- Pizza sauce or marinara sauce
- Shredded mozzarella cheese
- Pepperoni slices
- Sliced bell peppers
- Black olives
- Fresh basil leaves
- Italian seasoning
- Olive oil
To prepare the mini pita pizzas, preheat your oven to 375°F (190°C). Spread a thin layer of pizza sauce over each mini pita. Sprinkle a generous amount of shredded mozzarella cheese on top, followed by your choice of toppings, such as pepperoni, bell peppers, or olives.
Place the topped pitas on a baking sheet and bake for about 8-10 minutes or until the cheese is melted and bubbly.
When making mini pita pizzas, don’t be afraid to experiment with different ingredients. Consider using whole wheat pitas for added nutrition or trying out various cheeses like cheddar or goat cheese.
Remember that kids can get creative with their toppings—encouraging them to mix and match is part of the fun. Finally, to avoid a soggy base, be sure to use just enough sauce without overdoing it.
Recommended Items
Get ready to make snack time fun and delicious with our top picks!
Cheese and Cracker Platter
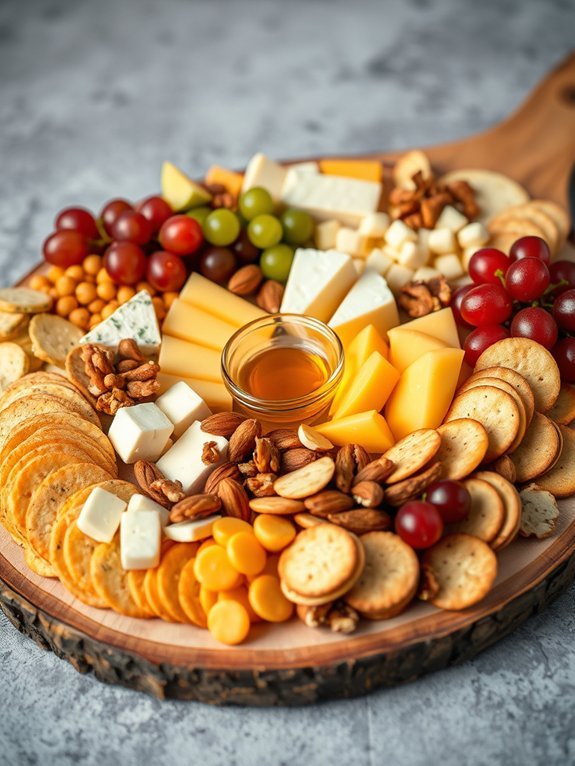
A cheese and cracker platter is a delightful after-school snack that can easily become a favorite among kids. This versatile snack allows for a variety of flavors and textures, making it not only tasty but also visually appealing. With an assortment of cheeses, crackers, and even a selection of fruits or nuts, it can cater to different preferences. Not only is this dish simple to prepare, but it also encourages kids to engage in creating their own combinations, promoting creativity and independence.
To assemble a perfect cheese and cracker platter, you can tailor it to your children’s likes and dislikes. Consider using a mix of hard, soft, and creamy cheeses to provide a range of options. Pair these with an assortment of crackers, from classic saltines to more exotic flavors. Add fresh fruits like grapes or apple slices, and perhaps a small bowl of honey or jam for a touch of sweetness. This snack is great for sharing, making it a fun activity to do together after a school day.
- Assorted cheeses (cheddar, mozzarella, gouda, brie)
- Variety of crackers (plain, whole grain, flavored)
- Fresh fruits (grapes, apple slices, strawberries)
- Optional nuts (almonds, walnuts, pistachios)
- Honey or jam (for dipping)
- Sliced meats (optional, such as salami or turkey)
To prepare the cheese and cracker platter, start by selecting a large serving board or platter. Arrange the cheeses in different sections, cutting them into bite-sized pieces for easy serving. Next, fill any remaining gaps with a variety of crackers, creating a colorful and inviting display.
Add fresh fruits in small clusters and, if desired, a bowl of honey or jam in the center. Finish by sprinkling some nuts around the platter for added crunch and a touch of elegance.
When making a cheese and cracker platter, remember that presentation is key! Encourage the children to be part of the process, letting them pick their favorite items and arrange them however they like. This not only makes the platter more appealing but also encourages children to try new flavors.
If you have dietary restrictions, substitute items accordingly, such as using gluten-free crackers or dairy-free cheese options. This snack is flexible and can easily be adapted to suit various tastes and dietary needs.
Banana and Oat Energy Bites
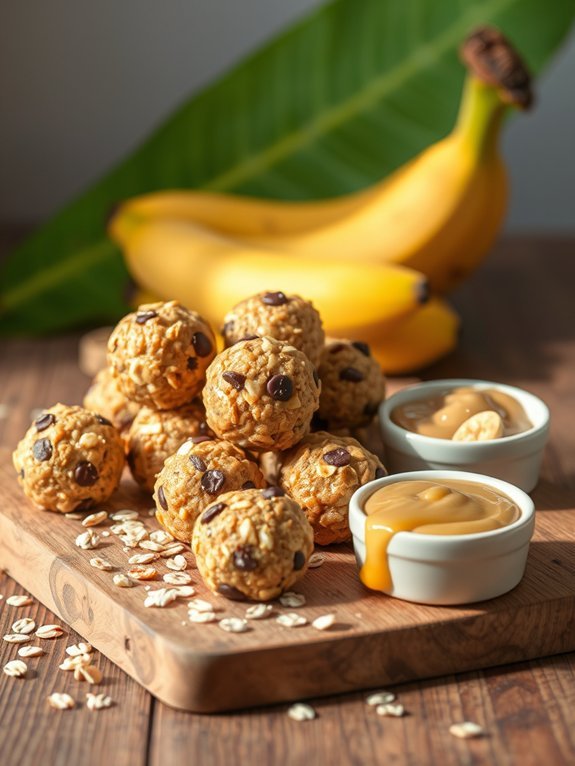
Banana and Oat Energy Bites are a perfect after-school snack that combines the natural sweetness of bananas with the wholesome goodness of oats. These little bites pack a nutritional punch while being incredibly easy and quick to make.
Ideal for busy parents looking for a healthy treat, they can be prepared in advance and stored for use throughout the week. Your kids will love the chewy texture combined with the delightful bursts of flavor from the optional add-ins!
These energy bites aren’t only simple to create but also versatile. You can customize them with various ingredients like chocolate chips, dried fruits, or nuts to suit your children’s taste preferences.
As a no-bake recipe, it’s safe for children to help out in the kitchen, turning snack time into a fun and educational experience. With just a few ingredients, you can make a nutritious snack that fuels their activities after school!
- 2 ripe bananas, mashed
- 1 cup rolled oats
- 1/2 cup peanut butter (or any nut butter of choice)
- 1/4 cup honey or maple syrup
- 1/2 teaspoon vanilla extract
- 1/4 cup chocolate chips (optional)
- 1/4 cup chopped nuts or seeds (optional)
- A pinch of salt
In a large mixing bowl, combine the mashed bananas, rolled oats, peanut butter, honey (or maple syrup), vanilla extract, and salt. Stir until all ingredients are well mixed.
If desired, fold in the chocolate chips and chopped nuts or seeds. Once combined, use your hands or a small cookie scoop to form the mixture into bite-sized balls, then place them on a parchment-lined baking sheet.
Chill in the refrigerator for about 30 minutes to firm up before serving.
When making Banana and Oat Energy Bites, feel free to experiment with various nut butters and sweeteners according to your family’s dietary preferences. If the mixture feels too wet, you can add a little more oats to help it bind.
These bites can be stored in an airtight container in the fridge for up to a week, making them an excellent grab-and-go snack for busy days. Enjoy them fresh or as a quick energy boost after sports and activities!
Trail Mix With Dried Fruits and Nuts
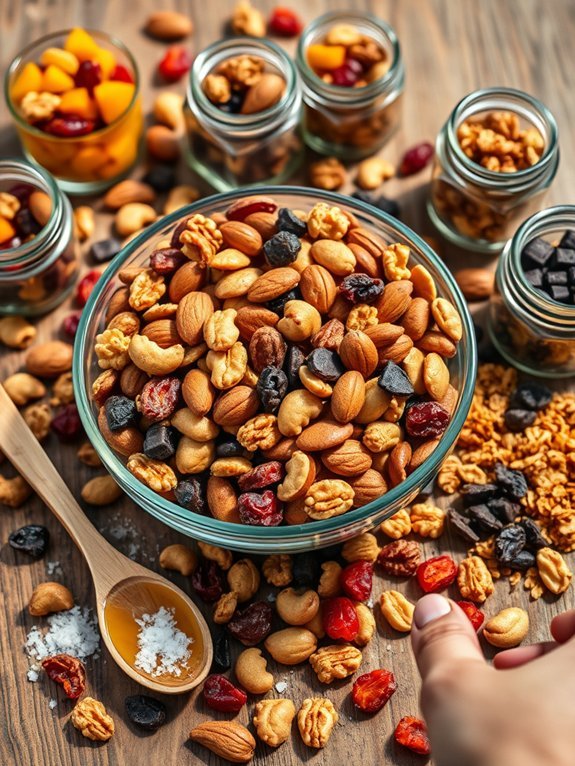
Trail mix is a delicious and nutritious snack that kids can munch on after school. It provides an excellent energy boost, making it a perfect choice for those who need a little pick-me-up before heading out to play or tackle homework.
This simple trail mix recipe combines an assortment of dried fruits and nuts, offering a delightful mix of sweetness and crunch. It’s easily customizable based on your children’s preferences and dietary needs, guaranteeing a healthy snack that everyone will love.
Making your own trail mix isn’t only cost-effective, but it also assures that you’re using wholesome ingredients without any added preservatives or unhealthy additives. This recipe encourages kids to get involved in the kitchen, allowing them to select their favorite fruits and nuts to include in their mix.
The end result is a colorful and inviting snack that can be stored in the pantry for easy access throughout the week.
Ingredients:
- 1 cup mixed nuts (almonds, walnuts, cashews)
- 1 cup dried fruits (raisins, cranberries, apricots)
- ½ cup granola or whole grain cereal
- ½ cup dark chocolate chips (optional)
- ¼ teaspoon sea salt
- 1 tablespoon honey or maple syrup (optional for sweetness)
To make the trail mix, simply combine all of the ingredients in a large bowl. Stir gently until everything is evenly distributed.
If you opted for honey or maple syrup for added sweetness, drizzle it over the mix and stir again to confirm it’s well incorporated. Once mixed, transfer the trail mix into an airtight container for storage.
When preparing this snack, encourage your kids to experiment with different combinations based on their tastes. They can add seeds, coconut flakes, or even popcorn for extra variety and texture.
Additionally, prepping large batches allows for portioning the trail mix into snack-sized bags, making it convenient for on-the-go munching. Be sure to store the mix in a cool, dry place to keep the nuts fresh and crunchy.
Proposed Snack Ideas
Smoothie Popsicles
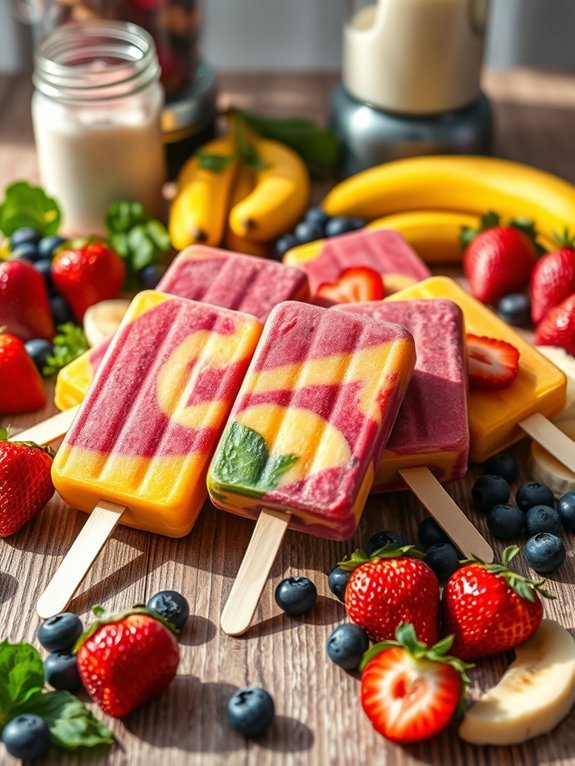
Smoothie popsicles are a delightful and nutritious way to keep your kids happy and healthy after school. Packed with vitamins and filled with flavor, these frozen treats are an excellent alternative to sugary snacks. You can customize the ingredients based on your child’s taste preferences, making it easy to incorporate various fruits and even some greens into their diet.
Making smoothie popsicles also offers an excellent opportunity to involve your children in the kitchen. Allowing them to choose their favorite fruits and help blend the mixture can make the process more fun and engaging. Plus, they’ll feel more excited about enjoying a snack they helped create!
- 1 cup of fresh or frozen fruits (such as bananas, strawberries, or blueberries)
- 1 cup of Greek yogurt or dairy-free yogurt
- 1/2 cup of milk or a milk alternative (like almond or coconut milk)
- 1 tablespoon of honey or maple syrup (optional)
- A handful of spinach or kale (optional, for added nutrition)
- Popsicle molds
Blend the fruits, yogurt, milk, and any optional ingredients in a blender until smooth. Pour the mixture into popsicle molds and insert sticks. Freeze for at least 4-6 hours, or until completely solid. To serve, run warm water over the outside of the molds for a few seconds to help release the popsicles.
For best results, use ripe fruits to achieve better sweetness and flavor. You can also experiment with different combinations of fruits and yogurts to create unique flavors that your kids will love. If your children are a bit picky, adding a touch of honey or maple syrup can’t only enhance the taste but also encourage them to enjoy the nutritious elements in the smoothie.
Rice Cakes With Avocado
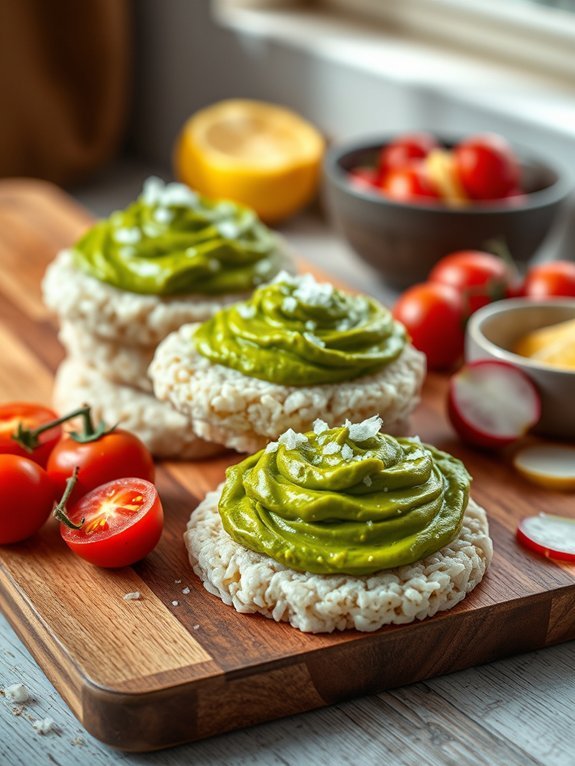
Rice cakes topped with avocado make for a nutritious and delightful after-school snack for kids. This easy-to-make recipe utilizes the creamy texture of ripe avocado to create a satisfying spread atop crunchy rice cakes. The combination isn’t only tasty but also packed with healthy fats, vitamins, and minerals, ensuring that your little ones are refueled and ready for the rest of their afternoon activities.
Preparing this simple snack allows for creativity and adaptability. You can customize the flavors by adding a sprinkle of salt, a dash of lemon juice, or even other toppings like cherry tomatoes or slices of turkey. Whether enjoyed plain or dressed up with additional ingredients, rice cakes with avocado serve as a fun and healthy way to keep growing kids energized and happy.
- Rice cakes (plain or flavored)
- Ripe avocado
- Salt
- Lemon juice (optional)
- Olive oil (optional)
- Toppings (optional: sliced cherry tomatoes, radishes, or sliced turkey)
To prepare the rice cakes with avocado, start by selecting a ripe avocado. Cut the avocado in half, remove the pit, and scoop the flesh into a bowl. Mash the avocado with a fork until it’s smooth or leave it slightly chunky for added texture. If desired, mix in a pinch of salt and a squeeze of lemon juice to enhance the flavor. Spread a generous amount of the mashed avocado onto each rice cake and enjoy!
When choosing avocados, it’s important to pick ones that yield slightly when pressed gently; this indicates ripeness. To keep the avocado from browning, consider adding lemon juice as mentioned in the recipe.
For variety, experiment with different toppings; incorporating a few slices of cherry tomato or a pinch of freshly ground pepper can elevate the flavors of this simple snack.
Peanut Butter and Celery Sticks
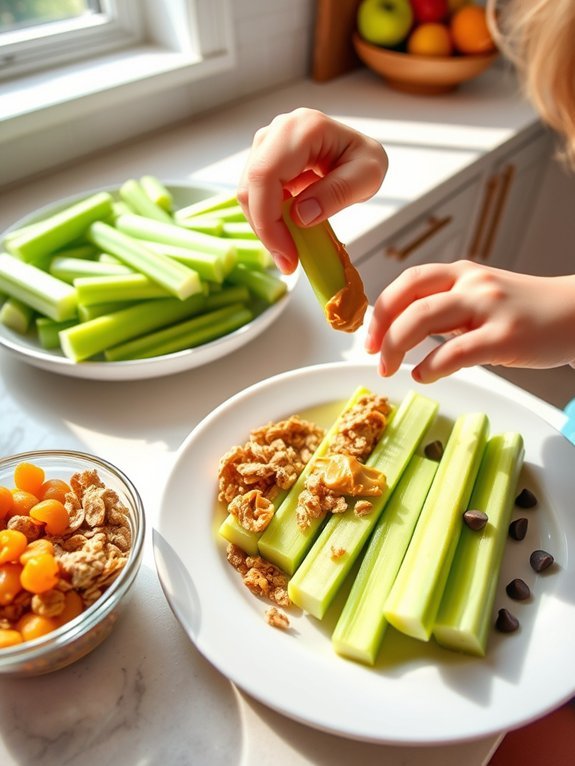
Peanut butter and celery sticks are a classic and nutritious after-school snack that kids love. This simple yet satisfying treat combines the crunchy, fresh taste of celery with the rich, creamy flavor of peanut butter, making it a perfect source of energy for active youngsters.
It’s quick to prepare, requires minimal ingredients, and is a fun way to incorporate more vegetables into your kids’ diets.
This tasty snack not only satisfies hunger but also packs a nutritional punch. Celery is a low-calorie vegetable that’s loaded with vitamins and minerals, while peanut butter provides healthy fats and proteins necessary for growth.
Plus, you can personalize this snack with various toppings and additions like raisins or granola to make it even more exciting for your little ones.
- Celery sticks
- Peanut butter (smooth or crunchy)
- Optional toppings: raisins, granola, or chocolate chips
Start by washing the celery stalks thoroughly to remove any dirt or pesticides.
Then, cut the celery into manageable sticks, about 3 to 4 inches long, making it easy for kids to hold.
Using a butter knife or a spoon, spread a generous amount of peanut butter into the crevice of each celery stick.
For an extra touch, add toppings like raisins for “ants on a log,” granola for extra crunch, or a sprinkle of chocolate chips for a sweet twist.
Remember to choose a natural peanut butter that contains minimal additives for a healthier option.
When serving, you can create fun designs or cater to your child’s preferences by varying the peanut butter amount.
For example, some kids might love a thicker layer of peanut butter, while others enjoy a lighter spread.
Always supervise younger children to guarantee they handle the knife safely while spreading.
Frozen Grapes or Berries

Frozen grapes or berries make for an exhilarating and healthy after-school snack that kids can enjoy. Not only are these frozen treats delightfully invigorating, but they’re also packed with vitamins and antioxidants. Great for warm days or just when you need a quick pick-me-up, these snacks are as easy to prepare as they’re fun to eat. You can use any variety of grapes or berries, whether they’re fresh or just starting to ripen, which makes this recipe easily adaptable to what you have on hand.
To prepare frozen grapes or berries, simply wash them thoroughly and remove any unwanted stems or leaves. Both grapes and berries freeze beautifully, and the freezing process enhances their natural sweetness while providing a crispy, cool texture. This snack is perfect for kids coming back from school or as an addition to a fun family BBQ, ensuring there’s always something delicious to crunch on. They can also serve as a great topping for yogurt or smoothies, making them a versatile option for light meals or desserts.
- Seedless grapes (red, green, or black)
- Fresh berries (strawberries, blueberries, raspberries, or blackberries)
- Optional: a drizzle of honey or a sprinkle of cinnamon for added flavor
Begin by washing the grapes or berries gently under cold water. Once clean, dry them thoroughly with a paper towel to remove any excess moisture, which is essential for proper freezing.
Spread the grapes or berries in a single layer on a baking sheet lined with parchment paper, ensuring they aren’t crowded. Place the baking sheet in the freezer for about 2-4 hours, or until the fruit is fully frozen. Once frozen, transfer the grapes or berries into a zip-top bag or an airtight container for easy storage.
When preparing frozen grapes or berries, using fresh ingredients yields the best results. It’s advisable to eat them within a few months for ideal flavor and texture, but they can be safely stored longer if necessary.
You can also experiment with pre-freezing flavor enhancements by tossing them in a little honey, coconut flakes, or even cinnamon before the freezing process for an extra delicious kick.
Whole Grain Toast With Cream Cheese and Tomatoes
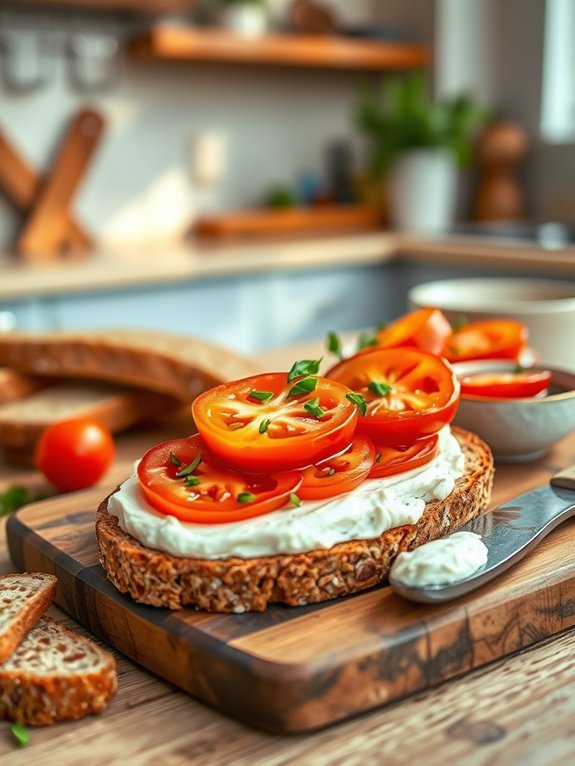
Whole Grain Toast with Cream Cheese and Tomatoes is a delightful after-school snack that combines healthiness with taste. The cream cheese adds a creamy texture and a subtle tang, while the juicy tomatoes lend a revitalizing burst that elevates the overall flavor.
This easy-to-make snack not only satisfies hunger but also provides essential nutrients, making it a perfect choice for kids who need a boost of energy after a long day at school.
This dish is versatile and can be enjoyed in a variety of ways. You can mix in fresh herbs like basil or chives to the cream cheese for added flavor, or use different types of tomatoes based on your preference.
Plus, whole grain bread offers more fiber and nutrients compared to white bread, making it a healthier option for your children.
- Whole grain bread slices
- Cream cheese (plain or flavored)
- Fresh tomatoes (any variety)
- Salt and pepper (to taste)
- Fresh herbs (optional, such as basil or chives)
To prepare, start by toasting the whole grain bread slices until they’re golden brown and crisp. While the bread is toasting, wash and slice the fresh tomatoes.
Once the toast is ready, spread a generous layer of cream cheese on each slice. Top the cream cheese with the sliced tomatoes, and season with salt and pepper. If desired, sprinkle with fresh herbs for an extra burst of flavor.
When making Whole Grain Toast with Cream Cheese and Tomatoes, feel free to experiment with different toppings. Consider adding avocado slices or a drizzle of balsamic glaze for a unique twist.
You can also prepare the cream cheese in advance by mixing it with your favorite seasonings or herbs, allowing the flavors to meld together. This quick snack can be tailored to your child’s tastes, making it a fun and customizable option!

