This post may contain affiliate links. Please read our policy page.
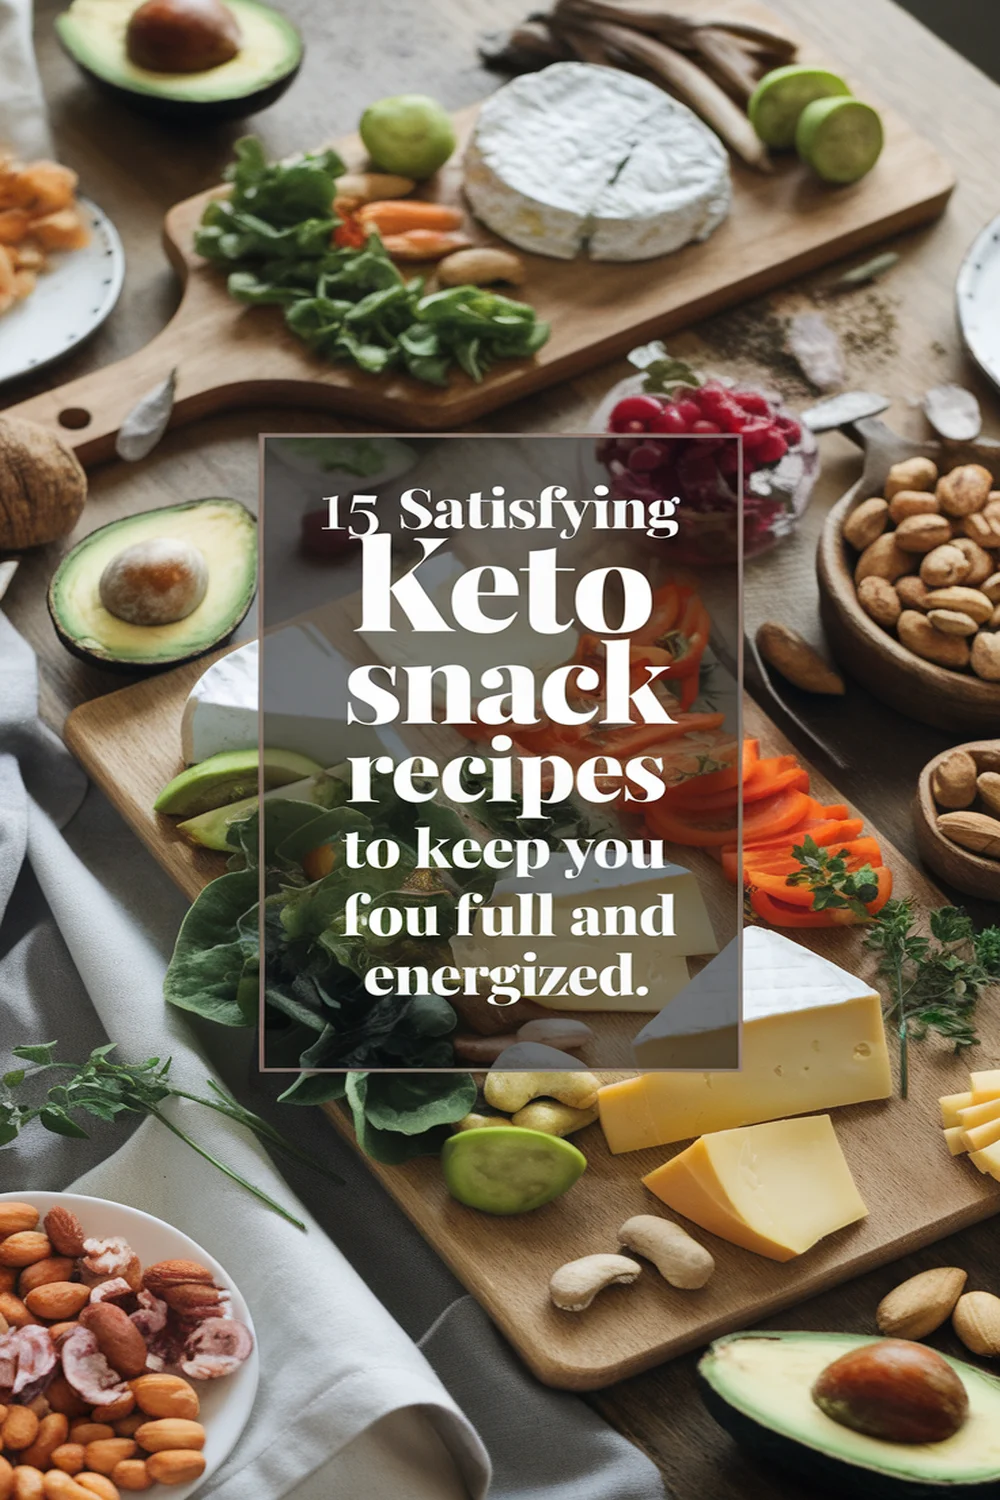
If you’re searching for satisfying keto snacks to keep you full and energized, consider recipes like Cheesy Cauliflower Bites or Avocado Egg Salad. Coconut Ranch Chicken Bites and Jalapeño Popper Fat Bombs provide great flavor while respecting your dietary goals. For crunchy options, whip up Spiced Pumpkin Seeds or Keto-Friendly Cheese Crisps. Don’t forget the delightful Herb-Infused Greek Yogurt Dip for a fresh accompaniment. Explore more tasty ideas and elevate your keto snacking experience!
Cheesy Cauliflower Bites

Cheesy cauliflower bites are a delightful low-carb snack that perfectly fits the keto diet. These tasty morsels aren’t just easy to prepare, but they’re also packed with flavor and can satisfy your cravings for something cheesy and crunchy. The secret lies in the combination of fresh cauliflower, sharp cheese, and aromatic herbs, which create a snack that feels indulgent without the guilt.
Preparing these cheesy bites is perfect for any occasion, whether you’re hosting a get-together or just looking for a snack to enjoy while watching a movie. Cauliflower is a great substitute for higher-carb ingredients, and when baked until golden and crispy, these bites deliver a satisfying texture that everyone will love. You can even customize the cheese mix or add your favorite spices for a personal touch.
- 1 medium head of cauliflower, cut into bite-sized florets
- 1 cup shredded cheddar cheese
- 1/2 cup grated Parmesan cheese
- 2 large eggs
- 1 teaspoon garlic powder
- 1 teaspoon onion powder
- Salt and pepper to taste
- 1/4 cup fresh parsley, chopped (optional)
Preheat your oven to 400°F (200°C) and line a baking sheet with parchment paper. In a large bowl, combine the cauliflower florets, cheddar cheese, Parmesan cheese, eggs, garlic powder, onion powder, salt, and pepper.
Mix until the cauliflower is fully coated. Scoop tablespoon-sized portions of the mixture and place them on the prepared baking sheet, leaving some space in between. Bake for 20-25 minutes until the bites are golden brown and crispy.
To enhance the flavors of your cheesy cauliflower bites, consider adding your favorite spices or herbs to the mix. You could try smoked paprika for a hint of smokiness, or even red pepper flakes if you enjoy a bit of heat.
For an extra cheesy experience, top the bites with additional cheese during the last few minutes of baking. Serve them warm with a side of low-carb dipping sauce, like a homemade ranch or a creamy garlic aioli, for the ultimate keto snack satisfaction!
Avocado Egg Salad
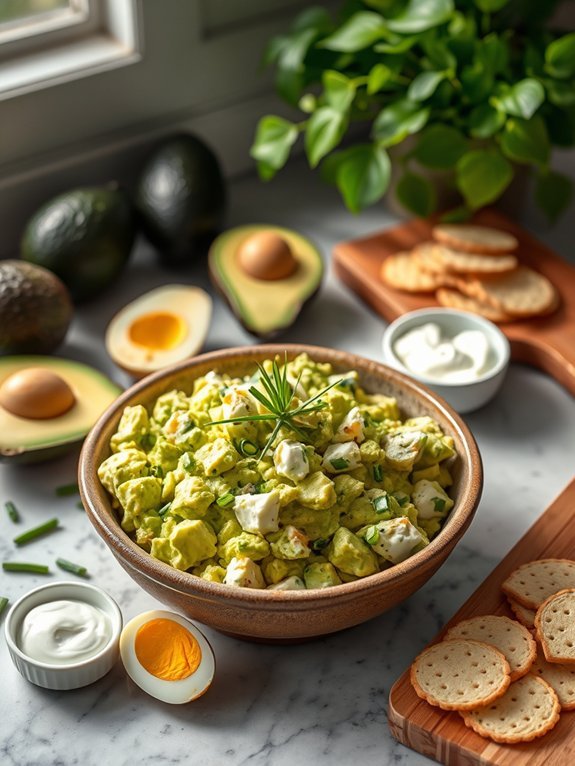
Avocado egg salad is a creamy, satisfying dish that’s perfect for a keto snack or a light lunch. Packed with healthy fats from avocados and protein from eggs, this dish isn’t only nutritious but also incredibly versatile. You can enjoy it on its own, with low-carb crackers, or in lettuce wraps, making it an ideal option for anyone adhering to a ketogenic lifestyle.
This recipe is quick and easy to prepare, making it a fantastic choice for busy weekdays or meal prepping for the week ahead. The combination of ripe avocados and hard-boiled eggs creates a rich texture, while the addition of various seasonings gives it a flavorful twist. Once you try this delicious avocado egg salad, it may just become a staple in your diet!
- 2 ripe avocados
- 4 hard-boiled eggs
- 2 tablespoons mayonnaise
- 1 tablespoon Dijon mustard
- 1 tablespoon lemon juice
- Salt and pepper, to taste
- Optional: chopped chives or green onions
Start by peeling and mashing the ripe avocados in a mixing bowl. Next, chop the hard-boiled eggs and add them to the bowl along with the mayonnaise, Dijon mustard, lemon juice, and a sprinkle of salt and pepper. Mix all the ingredients together until well combined, ensuring the eggs and avocados are evenly distributed.
When preparing your avocado egg salad, look for ripe avocados that yield slightly to pressure but aren’t overly soft. To hard-boil your eggs perfectly, bring water to a boil and then gently add the eggs, cooking them for about 9-12 minutes depending on your preference for firmness.
It’s also a good idea to chill the salad in the refrigerator for a bit before serving, as this allows the flavors to meld beautifully. Enjoy your delicious keto-friendly snack!
Coconut Ranch Chicken Bites

Coconut Ranch Chicken Bites are a delicious and satisfying keto-friendly snack perfect for any time of the day. These bites are made by coating tender chicken pieces with a coconut flour mixture that packs a punch of flavor and crunch. The combination of coconut and ranch dressing not only elevates the taste but also complements the juicy chicken, making it an irresistible option for a low-carb diet.
Ideal for meal prep or as an appetizer for parties, these chicken bites are quick to whip up and can be served with a side of ranch dressing for extra flavor. The high protein content combined with healthy fats makes them a great option for those on a ketogenic lifestyle, while the vibrant flavors are sure to please even non-keto eaters. Get ready to enjoy a savory treat that not only satisfies your cravings but keeps you on track with your diet!
Ingredients:
- 1 pound boneless, skinless chicken breast, cut into bite-sized pieces
- 1 cup coconut flour
- 2 teaspoons ranch seasoning mix
- 1/2 teaspoon garlic powder
- 1/2 teaspoon onion powder
- 1/2 teaspoon salt
- 1/4 teaspoon black pepper
- 2 large eggs, beaten
- Cooking oil (for frying)
Heat a skillet over medium heat and add enough cooking oil to cover the bottom of the pan. Set up a breading station by placing the beaten eggs in one bowl, the coconut flour mixed with ranch seasoning and spices in another. Dip each chicken piece into the eggs, then coat thoroughly with the coconut flour mixture.
Fry the chicken bites in the hot oil until they’re golden brown and cooked through, about 5-7 minutes on each side. Drain on a paper towel before serving.
When preparing your Coconut Ranch Chicken Bites, guarantee that the oil is hot enough before adding the chicken to achieve that perfect crispy texture. You can also bake the bites for a healthier option by placing them on a parchment-lined baking sheet and baking at 400°F (200°C) for about 20-25 minutes, flipping halfway through.
Feel free to experiment by adding additional spices or fresh herbs to the coconut flour coating for more flavor variations!
Jalapeño Popper Fat Bombs

Indulging in snacks while following a keto diet can be both satisfying and simple. Jalapeño popper fat bombs are a perfect low-carb treat that combines the creamy delight of cheese with the spicy kick of jalapeños. These little bites aren’t only delicious but also packed with healthy fats, making them an ideal option for curbing those midday cravings without sacrificing your dietary goals.
These fat bombs are ridiculously easy to make and require just a few ingredients that you likely already have in your kitchen. Whether you’re at home or on the go, these snacks can be stored in the fridge or freezer, ready to be enjoyed whenever hunger strikes. They’re perfect for meal prep and can even be shared at gatherings, where they’ll surely be a hit regardless of dietary preferences.
- 8 oz cream cheese, softened
- 1 cup shredded cheddar cheese
- 2-3 jalapeños, diced (seeds removed for less heat)
- 1/2 tsp garlic powder
- 1/2 tsp onion powder
- 1/4 tsp salt
- 1/4 tsp pepper
- Optional: crumbled bacon for topping
- Optional: fresh cilantro for garnish
In a large mixing bowl, combine the softened cream cheese, shredded cheddar cheese, diced jalapeños, garlic powder, onion powder, salt, and pepper. Mix until everything is well blended, then scoop out tablespoon-sized portions and roll them into balls. For extra flavor, you can roll each ball in crumbled bacon if using.
Place the fat bombs on a parchment-lined baking sheet and refrigerate for about 30 minutes to firm them up.
When making jalapeño popper fat bombs, freshness is key to the flavor. Use fresh jalapeños for the best bite, and if you prefer them spicier, keep a few seeds in the mix. Additionally, feel free to experiment with different cheese combinations—smoked cheese or pepper jack can add an exciting twist.
Storing these fat bombs in an airtight container will keep them fresh for up to a week in the fridge or even longer in the freezer, making them a convenient keto-friendly option to have on hand.
Spinach and Cheese Stuffed Mushrooms
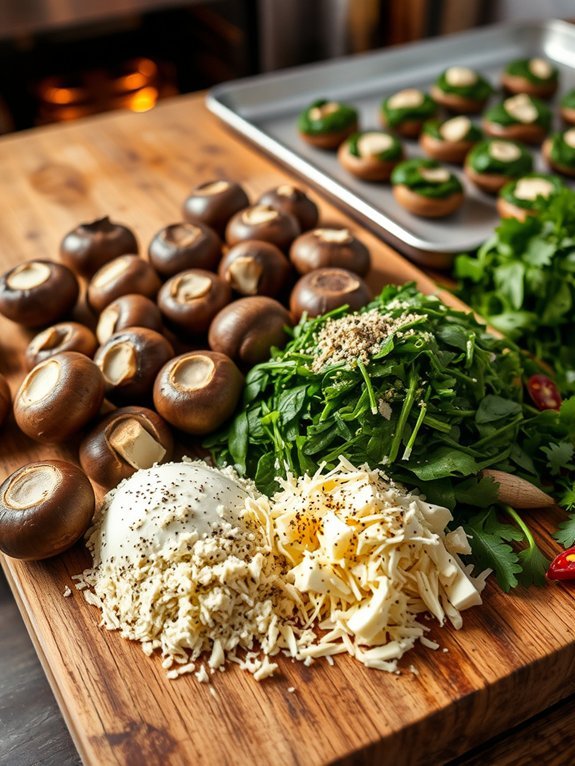
Spinach and Cheese Stuffed Mushrooms are a delicious, low-carb snack that perfectly fits into a ketogenic diet. These bite-sized delights aren’t only satisfying but also packed with nutrients, making them an excellent appetizer for any gathering or a quick on-the-go snack. The earthy flavor of mushrooms pairs wonderfully with the creamy richness of cheese and the vibrant taste of spinach, creating a flavorful combination that will please both keto dieters and non-dieters alike.
Making these stuffed mushrooms is a breeze, and they come together in just a few simple steps. The versatile nature of this recipe allows you to customize it based on your preferences—feel free to experiment with different cheese blends or add your favorite herbs and spices. Not only are they easy to prepare, but they’re also a guilt-free indulgence that will keep you on track with your keto lifestyle.
- 12 large button or cremini mushrooms
- 1 cup fresh spinach, chopped
- 4 oz cream cheese, softened
- 1/2 cup grated Parmesan cheese
- 1/2 cup shredded mozzarella cheese
- 2 cloves garlic, minced
- 1/4 tsp salt
- 1/4 tsp pepper
- 1/4 tsp red pepper flakes (optional)
- Olive oil for drizzling
Preheat your oven to 375°F (190°C). Clean the mushrooms and remove the stems, then set the caps aside. In a mixing bowl, combine the chopped spinach, cream cheese, Parmesan, mozzarella, minced garlic, salt, pepper, and red pepper flakes. Mix until well combined.
Carefully fill each mushroom cap with the spinach and cheese mixture and place them on a baking sheet. Drizzle a little olive oil over the tops of the stuffed mushrooms, then bake for 20-25 minutes, or until the mushrooms are tender and the cheese is melted and bubbly.
For an extra touch of flavor, consider garnishing your stuffed mushrooms with fresh herbs like parsley or basil before serving. These mushrooms are best enjoyed immediately, but you can store leftovers in an airtight container in the refrigerator for up to three days. When reheating, place them back in the oven to maintain their texture, rather than using a microwave, which can make them soggy.
Enjoy these delightful morsels at your next gathering or as a savory snack anytime!
Zucchini Chips With Dipping Sauce

Zucchini chips make for an excellent keto-friendly snack that satisfies your crunch cravings without compromising your dietary goals. They’re light, crispy, and oh-so-delicious, especially when paired with a tasty dipping sauce. By dehydrating the zucchini slices in the oven, you can achieve a satisfying texture that rivals traditional potato chips. Plus, they’re an easy and healthy alternative to store-bought snacks.
Making zucchini chips isn’t only simple but also allows for customization based on your flavor preferences. You can season them with a variety of spices, from garlic powder and paprika to Italian herbs, depending on your mood. The accompanying dipping sauce, a creamy concoction made from Greek yogurt and herbs, adds a delightful burst of flavor that will keep you coming back for more.
- 2 medium zucchinis
- 2 tablespoons olive oil
- 1 teaspoon salt
- 1 teaspoon garlic powder
- 1 teaspoon paprika (optional)
- 1 cup Greek yogurt
- 1 tablespoon fresh lemon juice
- 1 tablespoon chopped fresh dill or parsley
- Salt and pepper to taste
To prepare the zucchini chips, preheat your oven to 225°F (107°C). Slice the zucchinis into thin rounds, ideally about 1/8-inch thick, and place them in a bowl. Drizzle the olive oil over the zucchini slices, sprinkle with salt, garlic powder, and paprika if desired, then toss until evenly coated.
Arrange the zucchini in a single layer on a baking sheet lined with parchment paper. Bake for about 2 hours, flipping the chips halfway through, until they’re golden and crispy. While the chips are baking, you can whip up the dipping sauce by combining Greek yogurt, lemon juice, fresh herbs, and seasoning in a bowl.
An important tip for achieving the perfect zucchini chips is to make sure the slices are uniform in thickness so they bake evenly. Using a mandoline slicer can help with this. Additionally, if you prefer even crispier chips, you can pat the sliced zucchini with a paper towel to remove excess moisture before seasoning them.
Experiment with different flavor profiles in both the chips and the dipping sauce to find your perfect match.
Peanut Butter Chocolate Fat Bombs
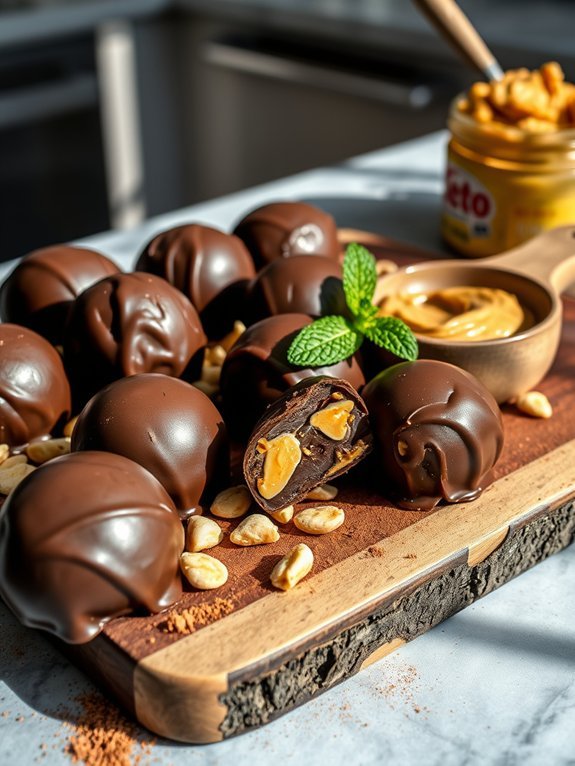
Peanut Butter Chocolate Fat Bombs are a delicious and easy snack option for anyone following the ketogenic diet. These little bites aren’t only low in carbs but also high in healthy fats, making them perfect for satisfying cravings while keeping you in ketosis. The combination of peanut butter and rich chocolate means you’ll indulge your sweet tooth without the sugar high or crash that comes from traditional sweets.
Making these fat bombs is a straightforward process, and they require minimal ingredients. You can prep them ahead of time and store them in the freezer, allowing you to grab a quick snack whenever hunger strikes. They’re perfect for an afternoon pick-me-up or a post-workout treat. Plus, you can customize them with different add-ins like nuts or seeds to suit your taste preferences.
Ingredients:
- 1 cup natural peanut butter (unsweetened)
- 1/2 cup coconut oil (melted)
- 1/4 cup unsweetened cocoa powder
- 1/4 cup powdered erythritol (or sweetener of choice)
- 1 teaspoon vanilla extract
- A pinch of salt
In a mixing bowl, combine the melted coconut oil, peanut butter, cocoa powder, powdered erythritol, vanilla extract, and salt. Mix everything together until smooth and well combined. Pour the mixture into silicone molds or a lined muffin tin, then place them in the freezer for about 30 minutes or until set.
Once firm, pop the fat bombs out of the molds and store them in an airtight container in the fridge or freezer for a convenient snack on the go.
When making Peanut Butter Chocolate Fat Bombs, verify that your coconut oil is fully melted but not too hot, as this can alter the consistency of the peanut butter when mixed. You can also swap peanut butter for almond butter or any nut butter of your choice if you prefer a different flavor.
Feel free to get creative with flavors—add a pinch of cinnamon or a few chopped nuts for added texture and variety!
Recommended Items
Check out our curated list of must-have products and equipment to elevate your keto snacking experience!
Crispy Bacon-Wrapped Asparagus
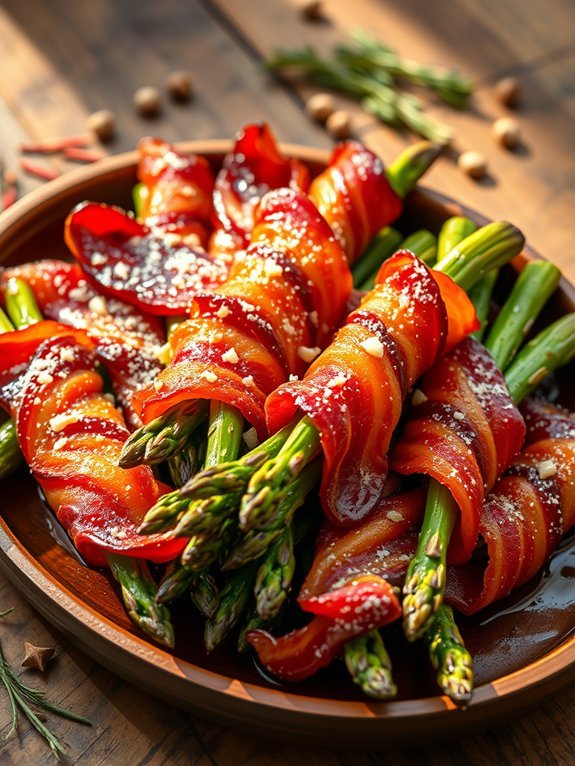
If you’re looking for a delectable and easy keto-friendly snack, crispy bacon-wrapped asparagus is a fantastic option. This dish not only satisfies cravings but also packs a flavor punch with the saltiness of bacon contrasted against the earthy taste of fresh asparagus.
Simple to prepare, it makes a great appetizer or side dish that can impress at your next gathering or snack time. The process is remarkably quick, allowing you to enjoy this crispy delight in no time. The inclusion of bacon not only elevates the flavor but also introduces an extra layer of crunchy texture to the tender asparagus.
As you savor each bite, you’ll appreciate how this dish is both low in carbs and high in taste, aligning perfectly with a ketogenic lifestyle.
- Fresh asparagus spears (about 1 pound)
- Thinly sliced bacon (12-16 slices)
- Olive oil (1 tablespoon)
- Garlic powder (1/2 teaspoon)
- Black pepper (to taste)
- Optional: Parmesan cheese (for garnish)
Preheat your oven to 400°F (200°C). Take each asparagus spear and wrap it in a slice of bacon, making sure that the ends are secured underneath.
Place the bacon-wrapped asparagus on a baking sheet. Drizzle with olive oil and sprinkle with garlic powder and black pepper. Bake in the oven for about 20-25 minutes, or until the bacon is crispy and the asparagus is tender. If using, sprinkle with Parmesan cheese and return to the oven for an additional 2-3 minutes to melt the cheese.
For best results, verify that the asparagus isn’t too thick, as this will allow it to cook evenly with the bacon. You may also experiment with adding spices or herbs to the bacon for added flavor.
If you want extra crunch, you can briefly broil the bacon-wrapped asparagus for a minute or two after baking. Enjoy experimenting with dipping sauces like a creamy ranch or spicy mayo to complement your snack!
Proposed Recipe
Mini Caprese Skewers

Mini Caprese skewers are a delightful and invigorating snack that’s perfect for any keto-friendly gathering or a light bite throughout the day. This no-cook recipe combines the classic flavors of mozzarella, basil, and tomatoes, bringing a burst of freshness and flavor with each bite. The simplicity of the ingredients makes it not only quick to assemble but also an elegant addition to any appetizer spread.
To make these mini skewers even more appealing, consider using colorful cherry tomatoes or heirloom varieties. Incorporating a drizzle of balsamic reduction adds a touch of sweetness that balances the savory cheese and fresh herbs. Plus, you can easily customize the recipe by adding olives or avocado for an extra hit of healthy fats, perfect for those following a ketogenic diet.
- Cherry tomatoes
- Fresh mozzarella balls
- Fresh basil leaves
- Olive oil
- Balsamic reduction (optional)
- Salt and pepper (to taste)
- Skewers or toothpicks
To prepare the mini Caprese skewers, simply thread a cherry tomato, a fresh basil leaf, and a mozzarella ball onto each skewer, repeating until you fill the skewer to your desired length. Arrange them on a serving platter, then drizzle with olive oil, balsamic reduction (if using), and season with salt and pepper to taste.
For added flavor, you can marinate the mozzarella balls in olive oil with garlic, herbs, or spices before assembling the skewers. This extra step infuses the cheese with delicious savory notes that complement the other ingredients beautifully.
Additionally, feel free to experiment with different skewer lengths or shapes for a more dynamic presentation at your next gathering!
Garlic Parmesan Meatballs

Garlic Parmesan Meatballs are an irresistible snack or appetizer that stays true to the keto lifestyle while satisfying your cravings for something savory and delicious. Packed with flavor, these meatballs feature a delightful blend of garlic and parmesan cheese, delivering a satisfying crunch on the outside and tenderness on the inside. Perfect for entertaining guests or enjoying as a protein-packed snack during the day, they’re sure to please both keto enthusiasts and meatball lovers alike.
To prepare these meatballs, you’ll need to gather simple yet flavorful ingredients. They can be easily customized to suit your taste preferences, making them versatile for various occasions. Once cooked, you can serve them with your favorite dipping sauce or enjoy them on their own – either way, these Garlic Parmesan Meatballs are bound to be a hit.
- 1 pound ground beef (or ground turkey)
- 1/2 cup grated parmesan cheese
- 2 cloves garlic, minced
- 1/4 cup almond flour
- 1 large egg
- 1 teaspoon dried oregano
- 1 teaspoon dried parsley
- 1/2 teaspoon salt
- 1/4 teaspoon black pepper
- Olive oil (for drizzling)
In a large mixing bowl, combine the ground beef, parmesan cheese, minced garlic, almond flour, egg, oregano, parsley, salt, and pepper. Mix thoroughly until all ingredients are well incorporated.
Shape the mixture into meatballs, approximately 1 inch in diameter, and place them on a baking sheet. Drizzle a little olive oil over the meatballs and bake in a preheated oven at 400°F (200°C) for 20-25 minutes, or until they’re golden brown and cooked through.
For an extra boost of flavor, consider adding fresh herbs or spices to the mixture, such as basil or red pepper flakes, to enhance the taste profile of your meatballs.
Additionally, make sure not to overmix the ingredients, as this can make the meatballs tough. If you prefer a crispier exterior, you can broil them for an additional 2-3 minutes at the end of baking.
Enjoy your homemade Garlic Parmesan Meatballs with a side of low-carb marinara sauce for dipping!
Dark Chocolate Almond Clusters
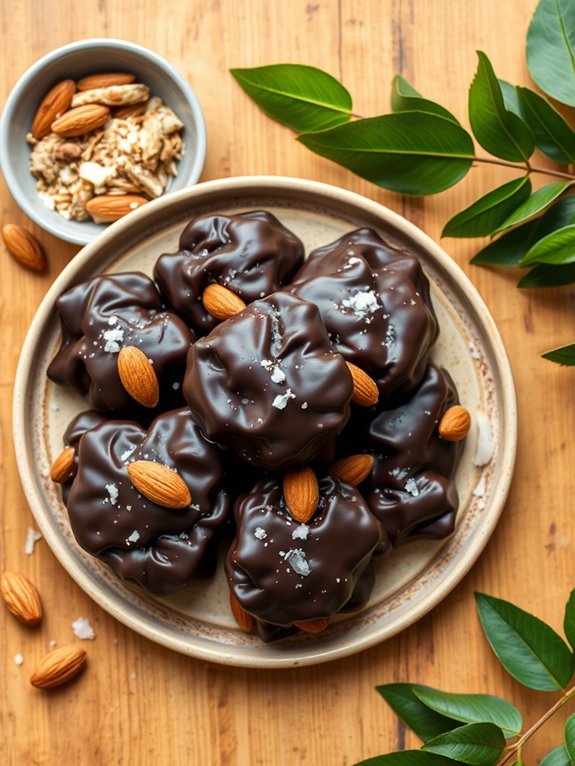
Dark Chocolate Almond Clusters are a delightful and indulgent treat that perfectly fits into a keto lifestyle. With their rich flavor and crunchy texture, these nutritious bites provide a satisfying snack that won’t compromise your dietary goals. Combining the health benefits of almonds with the decadence of dark chocolate, these clusters make for a perfect guilt-free dessert or on-the-go snack.
Making Dark Chocolate Almond Clusters is incredibly simple, requiring just a few ingredients and minimal time. The result is a deliciously sweet and savory combination that can be stored for later or enjoyed immediately. Ideal for satisfying your cravings without derailing your ketogenic diet, these clusters are sure to become a staple in your snack repertoire.
- 1 cup raw almonds
- 1 cup sugar-free dark chocolate chips
- Sea salt (to taste)
- Optional toppings: unsweetened coconut flakes, chopped nuts, or a sprinkle of cinnamon
Begin by melting the sugar-free dark chocolate chips in a heatproof bowl over a pot of simmering water (double boiler method) or in the microwave in 20-second intervals, stirring until smooth. Once the chocolate is melted, remove it from the heat and fold in the raw almonds until they’re well coated.
Using a spoon, drop small clusters of the chocolate-covered almonds onto a parchment-lined baking sheet. Sprinkle with sea salt or any optional toppings you prefer and allow them to cool and set at room temperature or in the fridge.
When preparing your Dark Chocolate Almond Clusters, make sure you use high-quality sugar-free dark chocolate to maximize both flavor and health benefits. For a fun twist, feel free to experiment with different nuts or add-ins, like hemp seeds or pumpkin seeds, which can elevate the texture and nutritional profile of your clusters.
Always be cautious of portion sizes, as it’s easy to overindulge on these tasty snacks!
Spiced Pumpkin Seeds
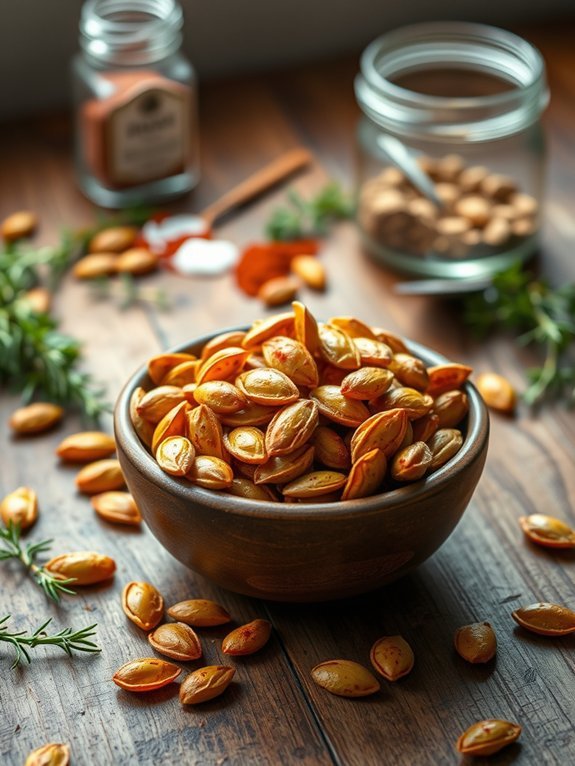
Spiced pumpkin seeds are a delightful and nutritious snack that perfectly fits into a keto lifestyle. Roasting and seasoning pumpkin seeds not only enhances their flavor but also gives them a satisfying crunch. This recipe will transform plain pumpkin seeds into a delicious, spiced treat brimming with healthy fats, dietary fiber, and protein, making them an excellent choice for anyone on a low-carb diet.
These spiced seeds are easy to prepare and can be customized to suit your taste preference. You can adjust the spices according to your liking—whether you prefer a sweet or savory version. Enjoy them on their own, sprinkle them on salads for added texture, or use them as a topping for soups. Whichever way you choose to relish these spiced pumpkin seeds, they’re sure to satisfy your cravings without compromising your keto goals.
- 1 cup raw pumpkin seeds (pepitas)
- 1 tablespoon olive oil
- 1 teaspoon smoked paprika
- 1 teaspoon garlic powder
- 1/2 teaspoon cumin
- 1/2 teaspoon salt
- 1/4 teaspoon black pepper
- 1/4 teaspoon cayenne pepper (optional for heat)
Preheat your oven to 350°F (175°C). In a mixing bowl, combine the raw pumpkin seeds with olive oil, smoked paprika, garlic powder, cumin, salt, black pepper, and cayenne pepper. Stir until the seeds are evenly coated with the spice mixture.
Spread the seasoned seeds in a single layer on a baking sheet lined with parchment paper. Bake for about 10-15 minutes, or until they’re golden brown and aromatic, stirring halfway through to ascertain even roasting.
When making spiced pumpkin seeds, keep an eye on them as they cook, as they can burn quickly. Allow the roasted seeds to cool before storing them in an airtight container, which will help maintain their crisp texture.
Feel free to experiment with different spice combinations, such as incorporating herbs like rosemary or thyme, or adding a touch of sweetener for a sweet and salty version. Enjoy your healthy, homemade snack!
Keto-Friendly Cheese Crisps

Keto-friendly cheese crisps are a fantastic snack to satisfy your cravings while adhering to a low-carb diet. These crunchy, savory delights are incredibly easy to prepare and can be made with a variety of cheeses, allowing you to customize the flavor to your liking. Perfectly crispy and rich in flavor, cheese crisps aren’t only a great standalone snack but also serve as an excellent accompaniment to dips and spreads.
The best part about keto cheese crisps is that they’re gluten-free and contain no added sugars or carbohydrates, making them an ideal choice for those looking to maintain a ketogenic lifestyle. With just a few ingredients and minimal prep time, you can whip up a batch of these delicious crisps at home.
Whether you enjoy them as a mid-day snack or as a crunchy topping on salads and soups, cheese crisps are bound to become a staple in your keto-friendly kitchen.
- 1 cup of shredded cheese (cheddar, Parmesan, or any cheese of your choice)
- 1 teaspoon of garlic powder (optional)
- 1 teaspoon of onion powder (optional)
- 1 teaspoon of paprika (optional)
- Parchment paper
Preheat your oven to 400°F (200°C) and line a baking sheet with parchment paper. In a mixing bowl, combine the shredded cheese with your choice of optional seasonings.
Drop small mounds of the cheese mixture onto the prepared baking sheet, spacing them about 2 inches apart. Bake for 5-7 minutes or until the edges are golden and crisp. Let them cool on the baking sheet for a few minutes before transferring to a wire rack to cool completely.
When baking cheese crisps, be mindful of the thickness of the mounds you create; thinner mounds will yield crispier bites, while thicker ones may result in a chewier texture.
Don’t be afraid to experiment with different types of cheese and spices to find the combination that suits your taste. Additionally, storage can be tricky, as cheese crisps tend to lose their crunch if left exposed to air; store them in an airtight container at room temperature to maintain their crispiness.
Coconut Flour Tortilla Chips
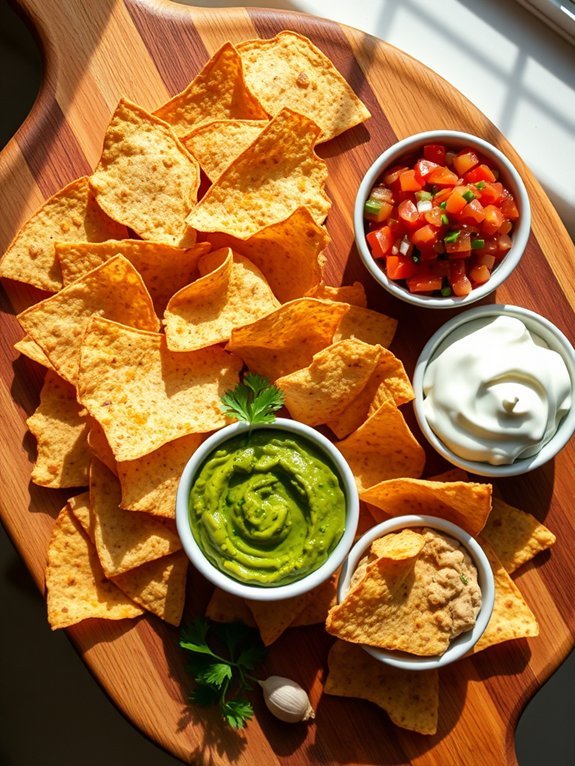
Coconut flour tortilla chips are a delicious and healthy alternative to traditional corn chips, perfect for snacking on a low-carb diet. These savory chips offer a satisfying crunch and can be enjoyed with various dips such as guacamole, salsa, or cream cheese.
Using coconut flour lends these tortilla chips a subtle sweetness while keeping the carbohydrate content low, making them ideal for anyone following a ketogenic lifestyle.
Making coconut flour tortilla chips isn’t only simple but also fun. You can customize your chips by adding different spices and seasonings depending on your taste preferences.
Whether you enjoy classic salty chips or prefer them with a hint of spice, these tortilla chips are sure to become a favorite in your keto snack repertoire. Let’s plunge into this easy recipe!
- 1 cup coconut flour
- 1/4 cup coconut oil, melted
- 1/2 teaspoon salt
- 1/2 teaspoon garlic powder
- 1/2 teaspoon onion powder
- 1/4 cup warm water
In a mixing bowl, combine the coconut flour, melted coconut oil, salt, garlic powder, and onion powder until well mixed. Gradually add the warm water, stirring until a dough forms.
Roll the dough out between two sheets of parchment paper until it’s about 1/8 inch thick. Cut the rolled-out dough into triangles or desired chip shapes, then place them on a baking sheet lined with parchment paper.
Bake in a preheated oven at 350°F (175°C) for 15-20 minutes or until crisp and golden brown, flipping the chips halfway through for even cooking.
When making coconut flour tortilla chips, it’s important to keep an eye on them as they bake, as they can go from perfectly crisp to burnt quickly. Additionally, letting the chips cool on the baking sheet for a few minutes after baking can help enhance their crunchiness.
Don’t hesitate to experiment with herbs and spices (like paprika or cumin) to add your own twist to the flavor profile, and make sure to store any leftovers in an airtight container to maintain crispness. Enjoy your crispy, homemade keto-friendly snack!
Herb-Infused Greek Yogurt Dip
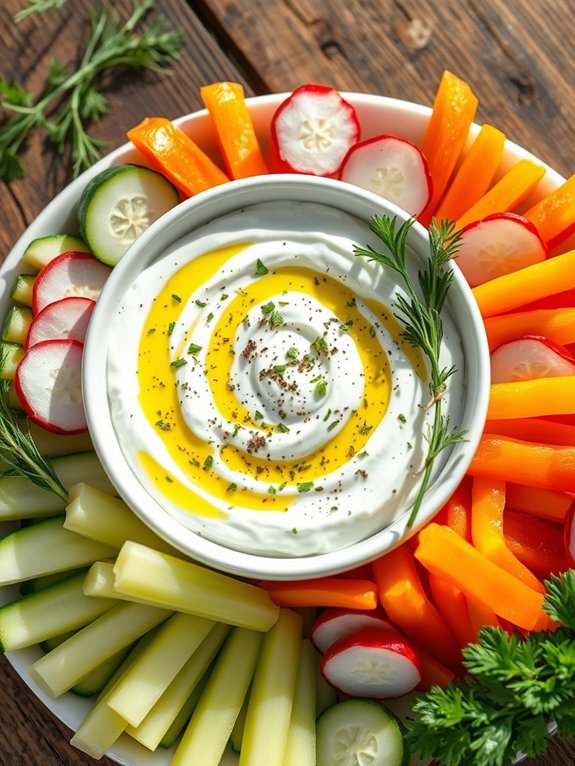
Herb-infused Greek yogurt dip is a delicious and healthy addition to any keto-friendly snack spread. This creamy dip pairs perfectly with fresh vegetables, pork rinds, or can even be used as a spread on keto-friendly wraps or sandwiches. The vibrance of the herbs combined with the tanginess of the Greek yogurt creates a burst of flavor that will elevate your snacking experience.
Plus, it’s incredibly easy to whip up, making it an ideal choice for quick bites or entertaining guests.
This versatile dip can be adjusted to suit your personal taste preferences. Whether you prefer robust flavors from fresh dill, chives, or parsley, you can mix and match to create the perfect blend. Not to mention, this Greek yogurt dip is high in protein and low in carbs, making it a fantastic choice for those following a ketogenic diet.
Enjoy it as a guilt-free indulgence when you’re craving something savory.
Ingredients:
- 1 cup plain Greek yogurt
- 2 tablespoons fresh dill, chopped
- 2 tablespoons fresh chives, chopped
- 1 tablespoon fresh parsley, chopped
- 1 teaspoon garlic powder
- 1 teaspoon lemon juice
- Salt and pepper to taste
In a mixing bowl, combine the Greek yogurt with the freshly chopped herbs, garlic powder, lemon juice, salt, and pepper. Stir everything together until well mixed, ensuring that the herbs are evenly distributed throughout the yogurt.
Adjust the seasoning according to your taste preference and chill the dip in the refrigerator for at least 30 minutes before serving to allow the flavors to meld.
A great tip for this herb-infused Greek yogurt dip is to experiment with different herb combinations to find your perfect flavor profile. You can also make this dip ahead of time, as the flavors only improve after a day in the fridge.
If you’d like a spicier kick, consider adding a pinch of cayenne pepper or crushed red pepper flakes. Serve with a variety of fresh, crunchy vegetables like cucumbers, bell peppers, and radishes for a invigorating and satisfying snack.

