This post may contain affiliate links. Please read our policy page.
You can whip up quick and easy on-the-go snacks that keep you fueled throughout your busy days. Try making energy-boosting nut butter bites or savory veggie and cheese wraps for a tasty treat. No-bake oatmeal energy balls and yogurt parfait jars offer convenience and nutrition. Chocolate-dipped banana bites and spicy roasted chickpeas satisfy your sweet and savory cravings. Homemade granola bars and quick avocado toasts are perfect for a light meal. Discover even more delicious ideas as you explore!
Energy-Boosting Nut Butter Bites
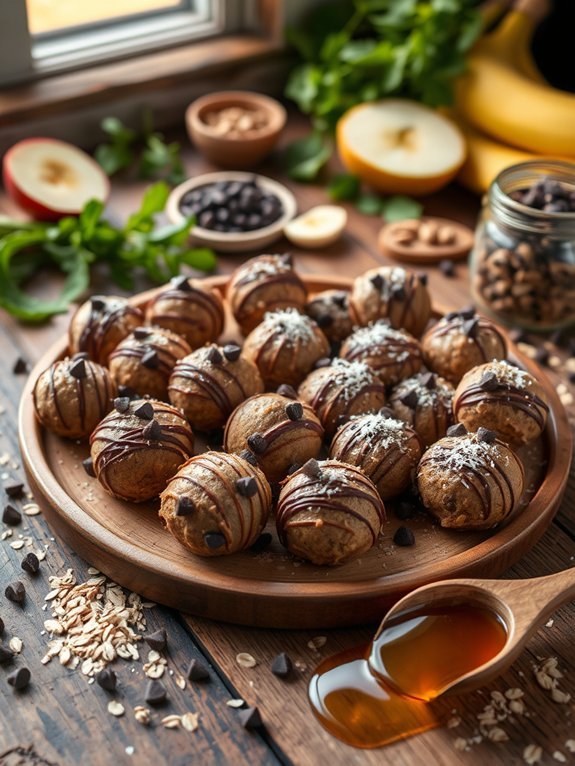
If you’re in need of a quick pick-me-up during a busy day, Energy-Boosting Nut Butter Bites are the perfect solution. Packed with wholesome ingredients, these bites combine the richness of nut butter with the goodness of oats and natural sweeteners to create a nutritious snack that will keep you fueled and satisfied.
They’re incredibly easy to make and require no baking, which makes them a fantastic option for those who are short on time but still want to maintain a healthy lifestyle.
These bites are versatile and can be customized to your liking by adding various mix-ins like seeds, dried fruit, or chocolate chips. Whether you’re hitting the gym, heading to the office, or simply need a healthy snack for the road, these energy bites are a delightful treat that can be prepared in just a few minutes.
Enjoy them on their own or pair them with your favorite fruit for a balanced snack.
Ingredients:
- 1 cup rolled oats
- 1/2 cup nut butter (almond, peanut, or cashew)
- 1/3 cup honey or maple syrup
- 1/4 cup ground flaxseeds
- 1/4 cup chocolate chips (optional)
- 1/4 cup shredded coconut (optional)
- 1/2 teaspoon vanilla extract
- A pinch of salt
In a large mixing bowl, combine the rolled oats, nut butter, honey (or maple syrup), ground flaxseeds, and vanilla extract. If you’re opting for chocolate chips, shredded coconut, or any other mix-ins, fold those in as well.
Once all ingredients are well combined, use your hands to shape the mixture into small, bite-sized balls (about 1 inch in diameter) and place them on a lined baking sheet.
Refrigerate for at least 30 minutes to allow them to firm up before enjoying.
For an even more delicious bite, consider rolling them in crushed nuts or seeds for added texture and flavor.
These nut butter bites can be stored in an airtight container in the refrigerator for up to a week, making them an excellent make-ahead snack. You can also try varying the nut butter or sweetener for different flavor profiles, and feel free to get creative with your mix-ins to suit your personal taste!
Savory Veggie and Cheese Wraps
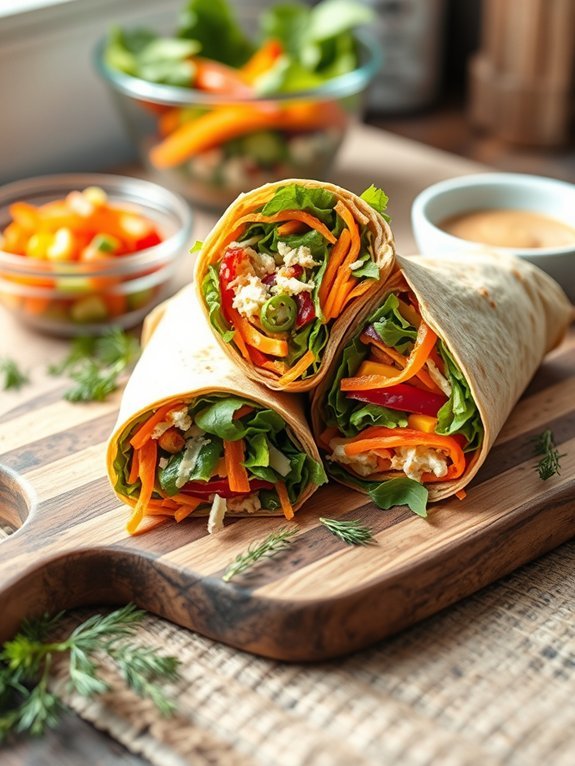
Savory Veggie and Cheese Wraps are the perfect on-the-go snack, combining the freshness of vegetables with the creaminess of cheese all wrapped up in a soft tortilla. These wraps aren’t only quick to prepare, but they’re also highly customizable to suit your taste preferences. Whether you need a nutritious lunch for work, a post-workout snack, or a light dinner, these wraps can be made ahead of time and enjoyed whenever you require a boost.
Using a variety of colorful veggies, you can add crunch and nutrients to your meal. Pair these vibrant vegetables with your favorite cheese—whether it’s sharp cheddar, creamy goat cheese, or even a dairy-free option—and you’ll have a delicious combination that’s bursting with flavor. Perfect for picnics, school lunches, or as a party appetizer, these wraps are sure to impress both kids and adults alike.
Ingredients:
- 4 large flour tortillas
- 1 cup mixed salad greens
- 1 cup shredded carrots
- 1 cup sliced bell peppers (various colors)
- 1 cup cucumber slices
- 1 cup shredded cheese (your choice)
- ¼ cup hummus (optional)
- Salt and pepper, to taste
- Optional herbs, such as dill or basil
Spread a thin layer of hummus over each tortilla, leaving a small border around the edges. Layer the salad greens, shredded carrots, sliced bell peppers, cucumber slices, and shredded cheese on top. Sprinkle with salt, pepper, and any fresh herbs you like. Roll the tortilla tightly from one end to the other, tucking in the sides as you go to make sure the filling stays sealed.
Slice the wraps in half and enjoy immediately, or wrap in parchment paper and refrigerate for later. For the best flavor and texture, it’s ideal to prepare the wraps just a few hours before you plan to eat them. If making ahead of time, be sure to store them in an airtight container in the fridge to keep the tortillas soft and the veggies fresh.
Feel free to experiment with different cheeses and veggies—avocado, spinach, or even roasted vegetables can add a delicious twist. Enjoy your wraps with your favorite dip or dressing for an extra burst of flavor!
No-Bake Oatmeal Energy Balls
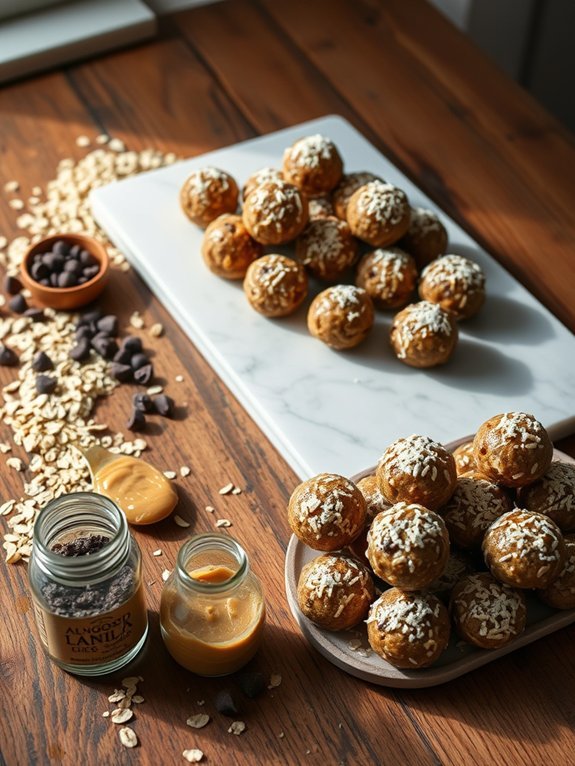
No-bake oatmeal energy balls are a perfect solution for anyone looking for a quick, nutritious snack without the hassle of turning on the oven. Packed with wholesome ingredients, these energy bites combine the goodness of oats, nut butter, and a hint of sweetness, making them an ideal pick-me-up before or after workouts, or even for a busy day on the go.
With a variety of flavors and options to customize based on personal preference, they’re also an excellent choice for kids and adults alike. Making these energy balls is a simple and fun process that doesn’t require any special cooking skills or equipment.
You can get creative by adding your favorite mix-ins like chocolate chips, dried fruits, or seeds, ensuring that each bite is satisfying and aligns with your taste. In just a few minutes, you’ll have a batch ready to fuel your day!
- 1 cup rolled oats
- 1/2 cup nut butter (such as almond or peanut butter)
- 1/3 cup honey or maple syrup
- 1/2 cup chocolate chips (optional)
- 1/4 cup ground flaxseed (optional)
- 1/2 teaspoon vanilla extract
- A pinch of salt
In a medium mixing bowl, combine the rolled oats, nut butter, honey (or maple syrup), chocolate chips, ground flaxseed, vanilla extract, and salt. Stir until all the ingredients are thoroughly mixed and form a sticky dough.
With clean hands, roll the mixture into small balls, about 1 inch in diameter, and place them on a baking sheet lined with parchment paper. Once all the mixture is rolled into balls, refrigerate for at least 30 minutes to firm up before enjoying.
For the best results, feel free to experiment with different nut butters or sweeteners based on your dietary needs. If you find the mixture too wet, add a sprinkle of oats or a dash of flaxseed; if it’s too dry, a bit more nut butter or honey will help.
These energy balls can be stored in an airtight container in the refrigerator for up to a week, making them perfect for meal prep and an easy grab-and-go snack option whenever you need a boost.
Yogurt Parfait Jars
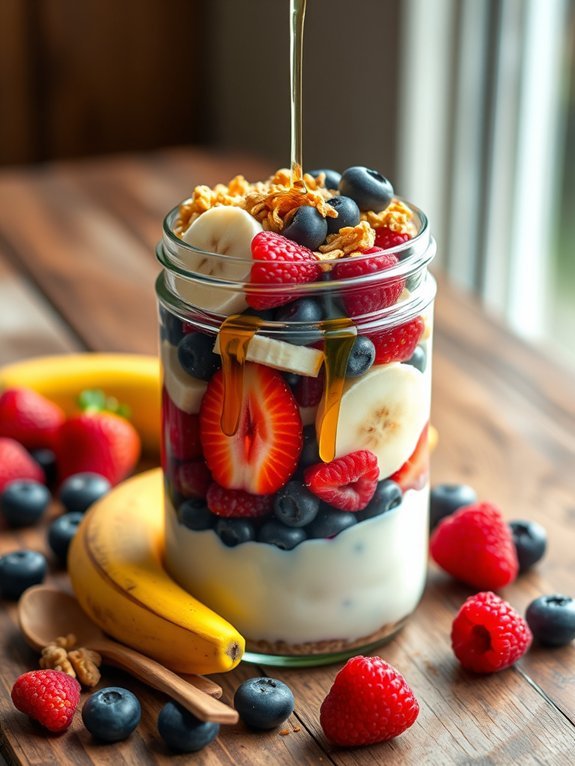
Yogurt parfait jars are a delightful and nutritious on-the-go snack that can be enjoyed at any time of the day. They offer a wonderful blend of creamy yogurt, fresh fruits, and crunchy granola, making them not only tasty but also visually appealing.
Designed for convenience, these parfaits can be prepared ahead of time and stored in the refrigerator, allowing you to grab them quickly when hunger strikes. With endless variations, you can personalize your parfait to suit your tastes or dietary preferences.
Creating your own yogurt parfait jars is simple and fun. You can mix and match different flavors of yogurt, seasonal fruits, and even add fun toppings like nuts or seeds for an extra crunch. These healthy snacks provide a balanced combination of protein, fiber, and antioxidants.
Whether you’re heading to work, school, or the gym, these grab-and-go treats will keep you satisfied and energized throughout the day.
Ingredients:
- 2 cups of Greek yogurt (plain or flavored)
- 1 cup of granola
- 1 cup of mixed berries (strawberries, blueberries, raspberries)
- 1 banana, sliced
- Honey or maple syrup (optional, for sweetness)
- Chopped nuts (optional, for additional crunch)
- A dash of cinnamon (optional, for flavor)
To make the yogurt parfait jars, begin by selecting a jar or container with a lid for easy transport. Start by layering a generous spoonful of Greek yogurt at the bottom of the jar.
Next, add a layer of granola, followed by a layer of mixed berries and sliced banana. Repeat the layers until you reach the top of the jar, finishing with a layer of yogurt and a sprinkle of granola. Drizzle honey or maple syrup on top if desired, and add chopped nuts or a sprinkle of cinnamon for extra flavor.
When making yogurt parfait jars, consider using seasonal fruits for the best flavor and freshness. You can also customize the parfait by choosing different types of yogurt, such as dairy-free options like almond or coconut yogurt.
If you’re preparing these jars in advance, keep the granola separate until you’re ready to eat, as this will prevent it from becoming soggy. Finally, feel free to experiment with other toppings like chia seeds, coconut flakes, or nut butters to make your parfait even more delicious and nutritious.
Recommended Items
Get ready to whip up some delicious snacks on the go with our handpicked recommendations!
Easy Fruit and Nut Trail Mix
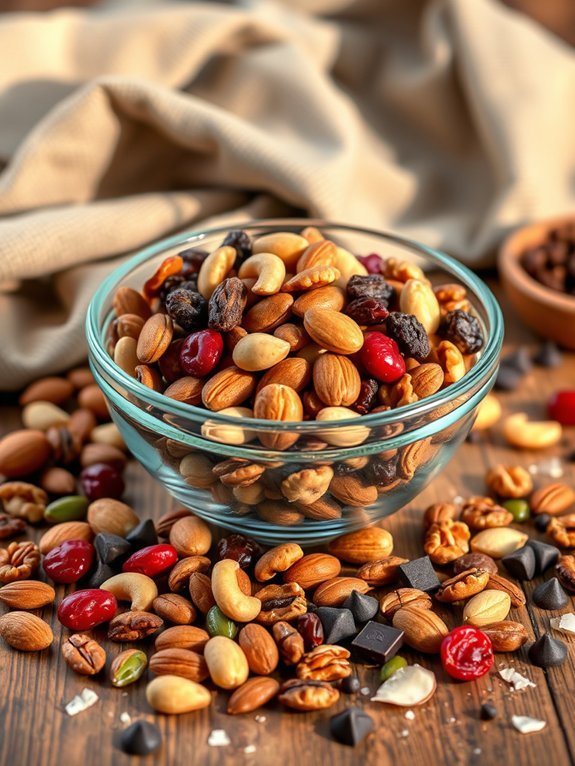
Creating your own Easy Fruit and Nut Trail Mix is a delightful and nutritious way to satisfy your snacking needs on the go. This simple recipe allows you to customize the mix according to your taste preferences and dietary requirements. Packed with energy-dense nuts and naturally sweet dried fruits, this trail mix serves as the perfect companion for road trips, outdoor adventures, or just a quick pick-me-up during your busy day.
Making trail mix at home not only offers a perfect blend of flavors but also guarantees that you avoid preservatives and added sugars commonly found in store-bought options. With only a few ingredients, you can whip up a batch of this delicious snack in no time. You can experiment with different combinations of nuts and dried fruits to create your unique mix, making it fun and personalized.
- 1 cup mixed nuts (almonds, walnuts, cashews, etc.)
- 1 cup dried fruits (raisins, cranberries, apricots, etc.)
- ½ cup seeds (pumpkin seeds, sunflower seeds)
- ¼ cup dark chocolate chips or cacao nibs (optional)
- ½ teaspoon cinnamon (optional)
- 1 teaspoon maple syrup or honey (optional)
In a large mixing bowl, combine all the ingredients: mixed nuts, dried fruits, seeds, and any optional ingredients like chocolate chips, cinnamon, or maple syrup. Stir everything together until evenly distributed. If you find the mix a bit too dry, drizzle a small amount of maple syrup or honey for a touch of sweetness and to help bind the ingredients.
Once mixed, transfer the trail mix into an airtight container for storage or portion it into small snack bags for easy grab-and-go servings.
When it comes to customizing your trail mix, feel free to switch up the ingredients based on what’s available or your preference. You can use roasted or raw nuts, add coconut flakes for a tropical twist, or incorporate protein-rich ingredients like granola or protein powder.
Don’t hesitate to experiment with flavors, such as adding a pinch of sea salt to enhance sweetness or even including spices like nutmeg for a different dimension. Just remember to keep your trail mix stored in a cool, dry place to maintain freshness.
Zucchini Chips With Hummus
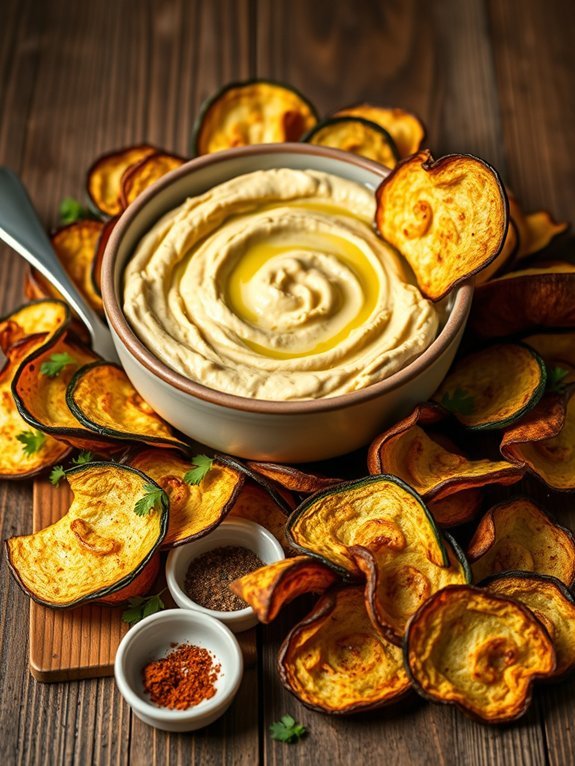
Zucchini chips with hummus make for a delicious and healthy on-the-go snack that’s perfect for any time of the day. By transforming fresh zucchini into crispy chips, you get a satisfying crunch without the guilt often associated with traditional chips. Paired with creamy hummus, this snack not only tantalizes the taste buds but also offers a dose of nutrition, with vitamins, fiber, and healthy fats that will keep you feeling energized.
The process of making zucchini chips is simple and can be customized with various seasonings to elevate the flavor profile. You can experiment with different spices, from garlic powder to paprika, making it a versatile treat. Once the chips are baked to perfection, they can be dunked into your favorite hummus for a delightful combination of flavors and textures that will leave you wanting more.
Ingredients:
- 2 medium-sized zucchinis
- 1 tablespoon olive oil
- 1 teaspoon salt
- 1/2 teaspoon garlic powder
- 1/2 teaspoon paprika
- 1 cup hummus (store-bought or homemade)
Preheat your oven to 225°F (110°C). Thinly slice the zucchinis into rounds, guaranteeing they’re as even as possible for consistent cooking. In a bowl, combine the zucchini slices with olive oil, salt, garlic powder, and paprika, tossing until they’re well coated.
Spread the slices out on a baking sheet lined with parchment paper in a single layer and bake for 1-2 hours, or until they’re crispy, flipping them halfway through to promote even cooking. Once done, let them cool before serving with hummus.
When making zucchini chips, it’s important to slice them evenly for uniform baking. If some are thicker than others, they may not crisp up properly. For extra crunch, consider sprinkling a bit of cornmeal or almond flour on them before baking for an additional texture.
Finally, store any leftover chips in an airtight container to maintain their crispness, and enjoy your healthy snack throughout the week!
Quick & Easy Snack Recipe Guide
Mini Smoothie Packs
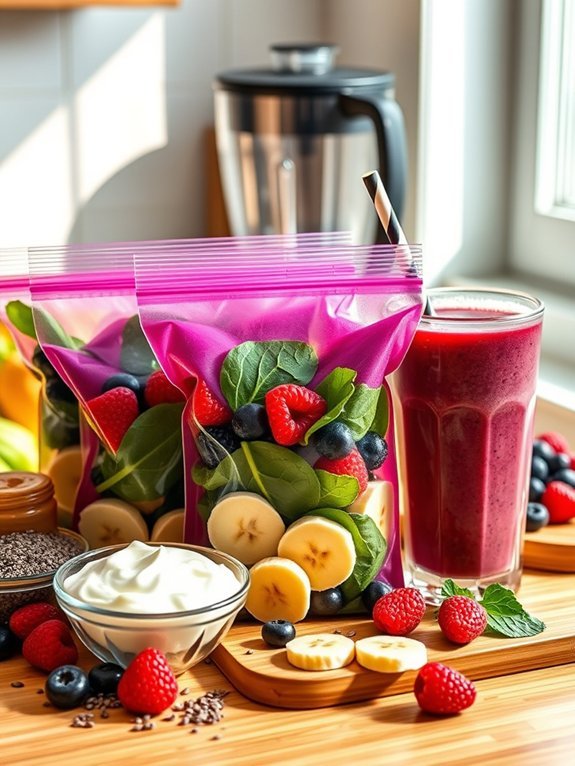
Mini smoothie packs are a fantastic way to enjoy a quick and nutritious snack on the go. They save you time in the mornings and help you maintain a healthy lifestyle, making them a great option for busy individuals or families.
By prepping your smoothie packs ahead of time, you can simply grab one from the freezer, blend it up with your favorite liquid, and be off to tackle your day. The versatility of these packs allows you to customize them based on your taste preferences and dietary needs.
To create the ideal mini smoothie packs, choose your favorite fruits, vegetables, and add-ins. These can include bananas, spinach, berries, yogurt, protein powder, and even nut butter. The key is to balance flavors and textures while making sure you incorporate nutrient-dense ingredients.
By tailoring your packs to your wellness goals, you’ll have a delicious, energy-boosting snack ready whenever you need it.
- 1 ripe banana, sliced
- 1 cup fresh spinach
- 1 cup frozen mixed berries
- ½ cup Greek yogurt
- 1 tablespoon chia seeds (optional)
- 1 tablespoon almond butter (optional)
To prepare your mini smoothie packs, start by portioning out your ingredients into freezer-safe bags or containers. Place the sliced banana, spinach, frozen berries, yogurt, chia seeds if using, and almond butter if desired, in each bag, and seal them tightly.
Label the bags with the contents and date, and place them in the freezer for later use. When you’re ready to enjoy a smoothie, simply pour the contents of one pack into your blender, add your preferred liquid (like almond milk or coconut water), and blend until smooth.
When making mini smoothie packs, consider freezing your fruits and vegetables the night before blending to guarantee freshness and top-notch flavor.
Also, feel free to mix and match your ingredients based on what you have on hand or your personal preferences. Experiment with different liquid bases—coconut water, almond milk, or regular milk—to find your favorite smoothie texture.
Finally, don’t be afraid to get creative with flavors by adding spices like cinnamon or ginger for an extra kick!
Rice Cake Sandwiches
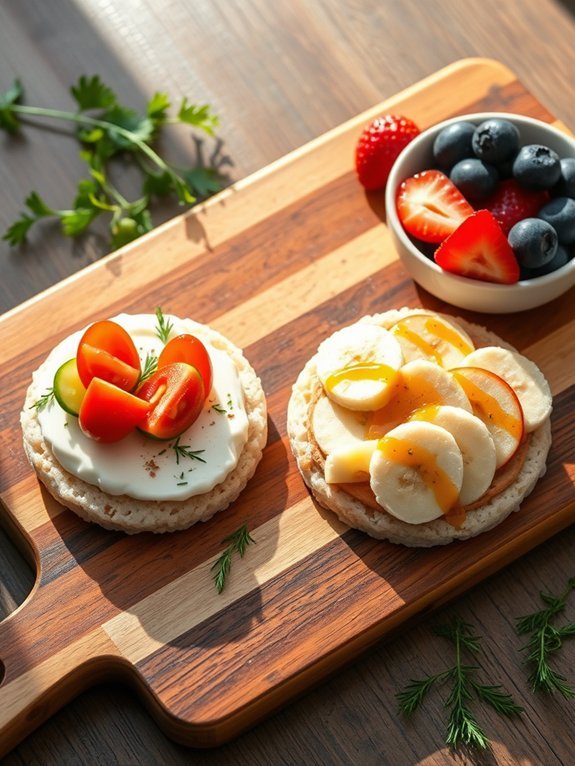
Rice cake sandwiches are a delightful and versatile option for on-the-go snacking. They can be personalized with various fillings, making them ideal for anyone craving something savory or sweet. The light and crispy nature of rice cakes provides a satisfying crunch, while the sandwich format makes them easy to hold and eat, whether at home, in the office, or during outdoor adventures. Plus, you can whip them up in just minutes!
These sandwiches can cater to multiple dietary preferences and restrictions, allowing for endless creativity. You can use classic spreads like peanut butter or cream cheese, or take a more adventurous route with hummus and vegetables. With their quick prep time and customizable nature, rice cake sandwiches are perfect for busy lifestyles, ensuring you always have a nutritious snack at hand.
Ingredients:
- Rice cakes (plain or flavored)
- Cream cheese (or hummus)
- Sliced vegetables (cucumbers, tomatoes, bell peppers)
- Sliced deli meats (turkey, ham, or chicken)
- Cheese slices (cheddar, Swiss, or vegan options)
- Nut butter (peanut, almond, or cashew)
- Fresh fruit slices (bananas, strawberries, or apples)
- Honey or agave syrup (for sweet options)
- Sprinkle of salt and pepper to taste
Spread your choice of cream cheese or hummus onto one rice cake. Layer with sliced vegetables and deli meats or cheese, if desired. Top with another rice cake to create a sandwich. For sweet versions, spread nut butter on one rice cake, layer with fruit slices, drizzle with honey, and top with another rice cake. Repeat until you have the desired number of sandwiches.
When making rice cake sandwiches, feel free to get creative with your ingredients. You can build a Mediterranean-inspired version with feta and olives, or a breakfast option with avocado and poached egg.
To keep your sandwiches fresh, wrap them tightly for transport and enjoy within a few hours. Experiment with different flavor combinations to discover your favorites!
Chocolate-Dipped Banana Bites
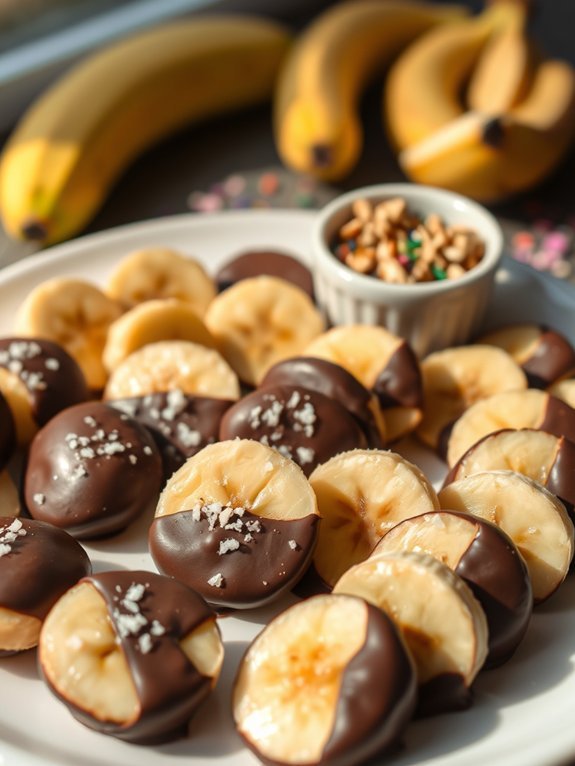
Chocolate-dipped banana bites are the perfect on-the-go snack that combines the sweetness of ripe bananas with the rich, indulgent flavor of chocolate.
These bites aren’t only delicious, but they’re also incredibly easy to make and require minimal ingredients. Whether you need a quick pick-me-up before heading out for the day or an energy boost during a busy afternoon, chocolate-dipped banana bites will satisfy your cravings without sacrificing nutritional value.
The best part about making chocolate-dipped banana bites is that you can customize them to your liking. Add a sprinkle of sea salt for a sweet and salty combination, dip them in white chocolate for a different flavor profile, or top them with chopped nuts for added crunch. This recipe can be adapted to suit various dietary preferences, making them a versatile treat for everyone to enjoy.
- 2 ripe bananas
- 1 cup dark chocolate chips (or any chocolate of your choice)
- 1 tablespoon coconut oil (optional, for smooth melting)
- Sea salt (optional, for sprinkling)
- Chopped nuts or sprinkles (optional, for topping)
Begin by slicing the ripe bananas into 1-inch thick rounds and placing them on a parchment-lined baking sheet.
In a microwave-safe bowl, combine the dark chocolate chips and coconut oil (if using). Heat in the microwave in 30-second intervals, stirring in between, until the chocolate is completely melted and smooth.
Dip each banana slice into the melted chocolate, coating it generously, and return it to the baking sheet. If desired, sprinkle a bit of sea salt or your favorite toppings over the chocolate-covered bites before placing the tray in the freezer for about 30 minutes to allow the chocolate to set.
For the best results, use ripe bananas that have a few brown spots, as they’re sweeter and easier to work with.
If you want to make these treats in advance, simply store them in an airtight container in the freezer. They can be enjoyed straight from the freezer for a revitalizing snack on warm days, or you can let them sit for a few minutes to soften slightly before indulging!
Experiment with different types of chocolate and toppings to find your perfect combination.
Spicy Roasted Chickpeas
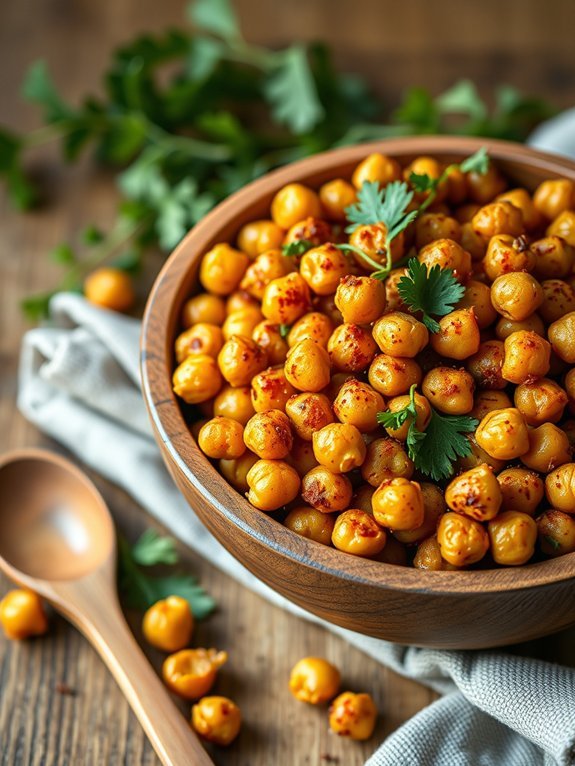
Spicy roasted chickpeas are the perfect on-the-go snack when you’re craving something crunchy and flavorful. These little legumes aren’t only packed with protein and fiber but also offer a delightful burst of spice that can satisfy your snack cravings without the guilt.
Whether you’re heading out for a busy day, hitting the gym, or just lounging at home, a jar of these roasted chickpeas is sure to keep you energized and satisfied.
The beauty of this recipe lies in its simplicity and versatility; you can easily adjust the spices to fit your palate. The cooking process transforms the chickpeas into crispy, crunchy bites that are excellent for munching anytime. Once you master this basic recipe, feel free to experiment with different seasonings and flavors to discover new favorite combinations!
- 1 can (15 oz) chickpeas, drained and rinsed
- 2 tablespoons olive oil
- 1 teaspoon smoked paprika
- 1 teaspoon ground cumin
- 1/2 teaspoon cayenne pepper (or to taste)
- 1/2 teaspoon garlic powder
- Salt to taste
Preheat your oven to 400°F (200°C). After drying the chickpeas thoroughly with a kitchen towel, toss them in a bowl with olive oil, smoked paprika, cumin, cayenne pepper, garlic powder, and salt until evenly coated.
Spread the chickpeas in a single layer on a baking sheet and roast them in the preheated oven for 20-30 minutes, shaking the pan halfway through, until they’re golden brown and crunchy.
For an extra touch, consider letting the baked chickpeas cool completely before storing them in an airtight container; this helps retain their crispness.
To boost the flavor, you might try adding a sprinkle of nutritional yeast for a cheesy taste or some lemon zest for a vibrant zing.
Don’t forget to check on them as they bake — the cooking time can vary slightly based on your oven and the size of the chickpeas, so keep an eye out to avoid over-roasting.
Homemade Granola Bars
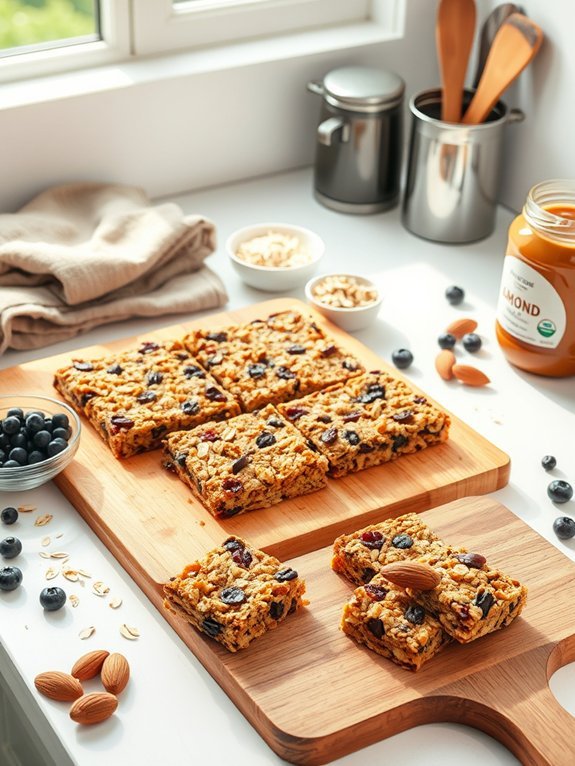
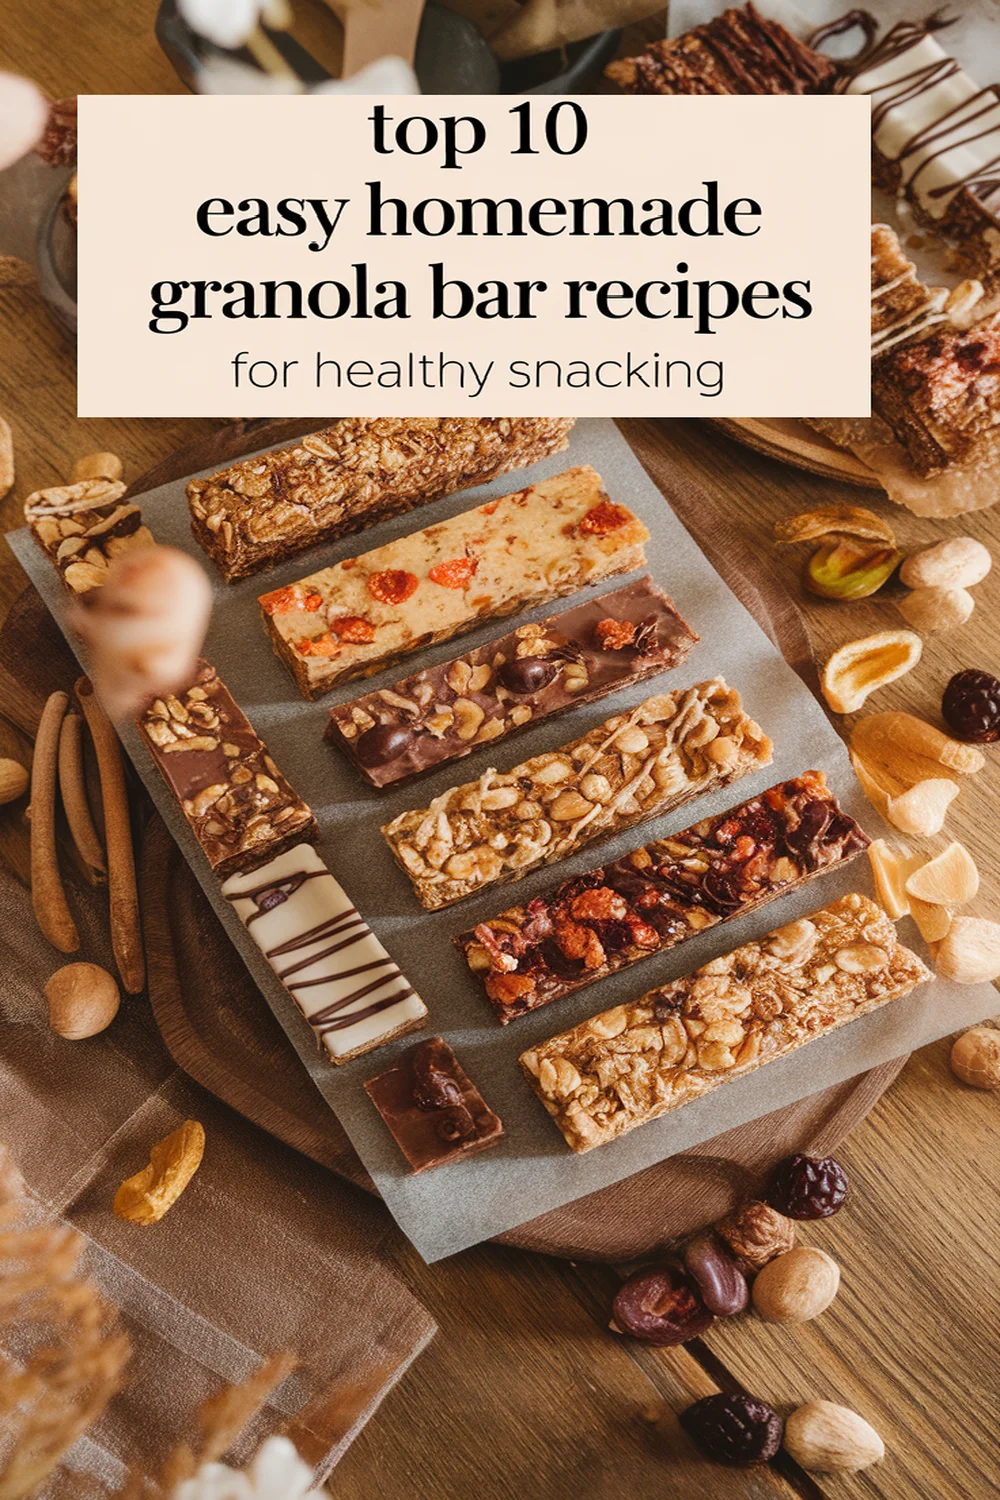
Homemade granola bars are a perfect on-the-go snack that combines nutrition and convenience. Not only are they easy to make, but they also allow you to customize flavors and ingredients to suit your taste preferences. When you prepare these bars at home, you can control the amount of sugars, the type of grains, and the mix-ins, making them a healthier alternative to many store-bought versions.
The process of making granola bars is relatively simple and can be done in just a few steps. Gather your ingredients, mix them, and press the mixture into a pan. Once they’re cooled, simply cut them into your desired shape. These bars are great for breakfast, an afternoon boost, or even as a post-workout snack. Plus, they’re easy to pack and take along wherever your busy life takes you.
- 2 cups rolled oats
- 1 cup nuts (e.g., almonds, walnuts, or pecans), chopped
- 1 cup nut butter (e.g., almond butter or peanut butter)
- 1/2 cup honey or maple syrup
- 1/2 cup dried fruit (e.g., cranberries, raisins, or apricots), chopped
- 1/4 cup chocolate chips (optional)
- 1/2 teaspoon vanilla extract
- 1/4 teaspoon salt
In a large mixing bowl, combine the rolled oats and chopped nuts. In a small saucepan over low heat, melt the nut butter and honey (or maple syrup) together until smooth.
Remove from heat and stir in vanilla extract and salt. Pour the nut butter mixture over the oats and nuts, then add the dried fruit and chocolate chips. Mix until everything is well-coated. Press the mixture into a greased 8×8 inch baking pan and refrigerate for at least 2 hours before slicing into bars.
For best results, allow the granola bars to cool completely in the refrigerator to guarantee they firm up properly. If you prefer chewier bars, reduce the baking time slightly.
You can also experiment with different nut butters, seeds, or spices to create your perfect flavor combination. Store the bars in an airtight container to keep them fresh, and consider individually wrapping them for easy grab-and-go snacks throughout the week.
Quick Avocado Toasts
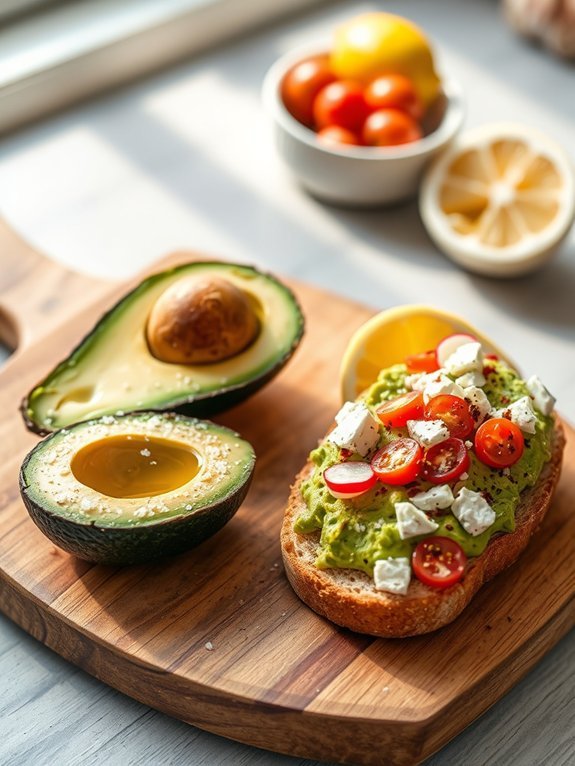
Avocado toasts are the perfect on-the-go snack that offers a delicious balance of flavors and nutrients. Whether enjoyed as a quick breakfast or a satisfying midday bite, these toasts aren’t only easy to prepare but also highly customizable. The creamy texture of ripe avocado pairs wonderfully with a crispy piece of bread, allowing you to create a base for endless toppings, from classic salt and pepper to bold spices and vibrant vegetables.
To make the most of your avocado toast, choose a good-quality bread, such as whole grain or sourdough, to guarantee a hearty texture. Ripe avocados are key; they should yield slightly to gentle pressure, indicating that they’re ready for mashing. This dish isn’t only quick and satisfying but can also be elevated with additional flavors and toppings depending on your mood and pantry staples.
- 1 ripe avocado
- 2 slices of bread (your choice)
- Salt
- Pepper
- Optional toppings (e.g., cherry tomatoes, radishes, feta cheese, red pepper flakes, lemon juice)
Toast your chosen bread slices until they’re golden brown and crispy. While the bread is toasting, cut the ripe avocado in half, remove the pit, and scoop the flesh into a bowl. Mash the avocado with a fork until you reach your desired level of creaminess.
Once the bread is toasted, spread the mashed avocado generously on each slice and season with salt and pepper. Add any additional toppings you desire and enjoy immediately.
For the best avocado toast experience, remember that the ripeness of the avocado is vital—look for avocados that feel soft but not mushy. If you’re not eating the toast right away, you can prevent the avocado from browning by sprinkling a little lemon juice on top.
Additionally, to make it even more filling, consider adding a protein source like a poached egg or some smoked salmon as a tasty and nutritious option.

