This post may contain affiliate links. Please read our policy page.
When you’re hit with last-minute cravings, don’t fret! You can whip up a delicious microwave mug cake, or cool down with no-bake cheesecake cups. Treat yourself to a quick fruit salad with honey lime dressing or indulge in classic Rice Krispie treats. For something fun, try s’mores dip or mini fruit pizzas. Don’t forget about rich blender brownies and crunchy apple nachos. Keep exploring, and you’ll uncover even more sweet solutions to satisfy your dessert desires!
Microwave Mug Cake
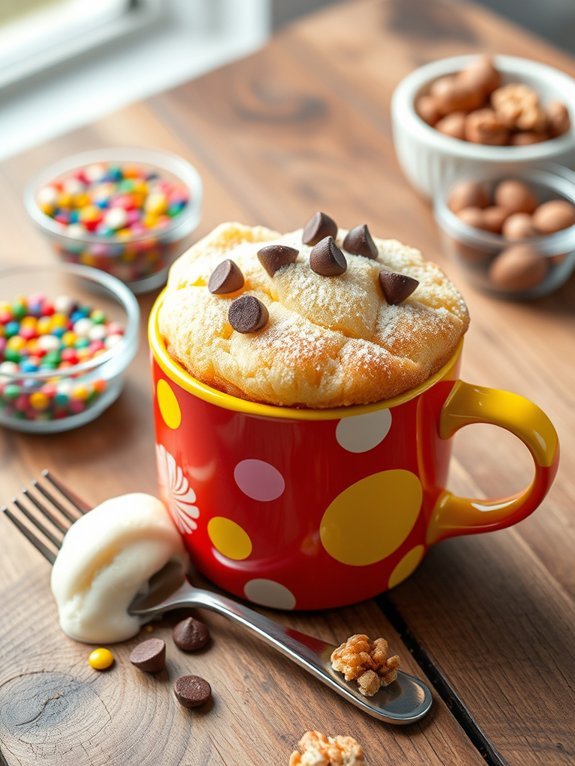
Microwave mug cakes are a fantastic solution for a quick dessert craving, providing a single-serving treat ready in just minutes. These cakes aren’t only simple to make but also require minimal ingredients and baking tools, making them perfect for those who want to indulge in something sweet without the fuss.
Whether you’re looking for a late-night snack or a quick dessert for unexpected guests, a microwave mug cake can satisfy your sweet tooth without the hassle of a full-scale baking session.
The best part about a mug cake is that you can customize it to your taste! Want to add a twist? Throw in some chocolate chips, nuts, or even a bit of fruit for an exciting flavor combination. The microwave mug cake recipe is versatile and can be adapted for any mood, allowing you to experiment with different flavors and ingredients while enjoying the simplicity of a quick dessert.
- 4 tablespoons all-purpose flour
- 4 tablespoons granulated sugar
- 2 tablespoons unsweetened cocoa powder (for a chocolate mug cake)
- 1/8 teaspoon baking powder
- Pinch of salt
- 3 tablespoons milk
- 2 tablespoons vegetable oil
- 1/4 teaspoon vanilla extract
- Optional: chocolate chips, nuts, or mini marshmallows
In a microwave-safe mug, combine the flour, sugar, cocoa powder (if using), baking powder, and salt, mixing well.
Next, add the milk, vegetable oil, and vanilla extract, stirring until smooth. If desired, fold in any optional ingredients like chocolate chips or nuts.
Place the mug in the microwave and cook on high for about 1-1.5 minutes, keeping an eye on it to prevent overflowing. Once the cake rises and appears set, carefully remove it from the microwave (the mug will be hot) and allow it to cool for a minute before digging in.
To enhance your mug cake experience, consider serving it with a scoop of ice cream or a dollop of whipped cream on top.
You can also experiment with different flavors by substituting the cocoa powder for other extracts like almond or coconut. Be mindful of the cooking time; microwaves vary in power, so start with a shorter cooking time and check for doneness to avoid overcooking.
Enjoy your quick and easy dessert creation!
No-Bake Cheesecake Cups
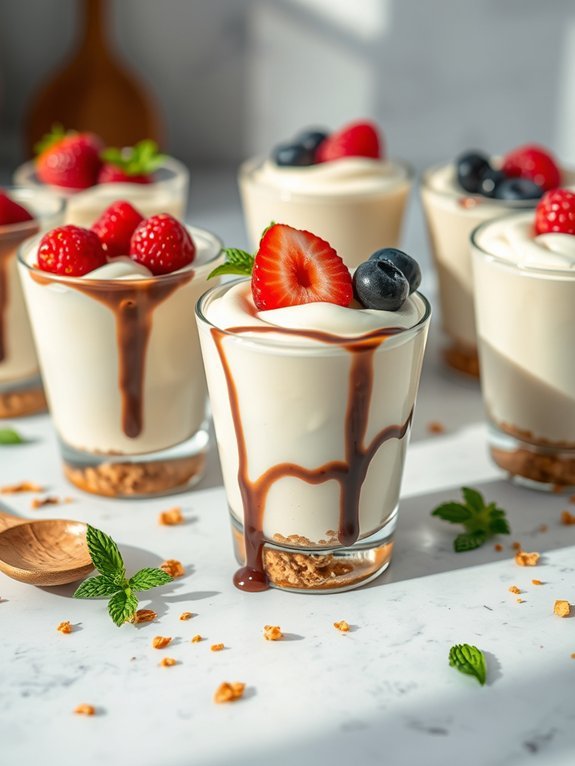
No-bake cheesecake cups are a delightful dessert that’s perfect for any occasion. They require minimal effort and yield a deliciously creamy treat that can be enjoyed in a matter of minutes. Whether you’re hosting a party, celebrating a special occasion, or simply indulging in a sweet craving, these cheesecake cups will impress your guests and satisfy your taste buds.
Plus, there’s no need to turn on the oven, making them an excellent option for warm weather gatherings.
The beauty of no-bake cheesecake cups lies in their versatility. You can easily customize the flavors, toppings, and even the crust to suit your preferences. From classic vanilla to rich chocolate or fruity options like strawberry or raspberry, the possibilities are endless.
Each cup is layered with a buttery graham cracker crust followed by a luscious cheesecake filling, making each bite a delightful experience. They’re also easy to portion out, ensuring everyone gets their fair share of this creamy delight.
Ingredients:
- 1 cup graham cracker crumbs
- 1/4 cup granulated sugar
- 1/2 cup unsalted butter, melted
- 8 oz cream cheese, softened
- 1/2 cup powdered sugar
- 1 tsp vanilla extract
- 1 cup heavy whipping cream
- Fresh fruit or chocolate sauce for topping (optional)
In a mixing bowl, combine graham cracker crumbs, granulated sugar, and melted butter, mixing until well blended. Press a few tablespoons of the mixture into the bottom of individual serving cups to form the crust.
In a separate bowl, beat the softened cream cheese, powdered sugar, and vanilla extract until smooth and creamy. In another bowl, beat the heavy whipping cream until stiff peaks form, then gently fold it into the cream cheese mixture.
Layer this cheesecake filling over the crust in each cup, and if desired, top with fresh fruit or chocolate sauce before refrigerating for at least 4 hours, or until set.
For the best results, make sure that your cream cheese is thoroughly softened to avoid lumps in your mixture. Additionally, refrigerating the cheesecake cups overnight can enhance the flavor and texture, making them even more delicious.
Be creative with your toppings; incorporating different fruits, chocolate chips, or a drizzle of caramel can elevate your dessert and impress your guests.
Recommended Items
Get ready to satisfy those sweet cravings with our handpicked products and tools—let’s dive in!
Products
Chocolate Covered Strawberries
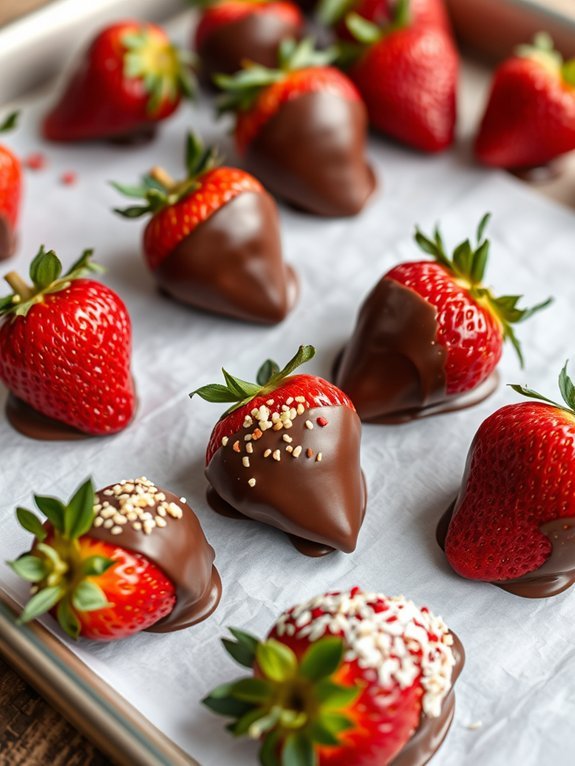
Chocolate covered strawberries are a delightful treat that combines the sweetness of strawberries with the rich, decadent flavor of chocolate. Perfect for special occasions or just to satisfy your sweet tooth, this simple recipe is sure to impress your family and friends.
The process is straightforward, making it an ideal dessert option for those who may not have extensive cooking experience. With only a few ingredients required, you can whip up a batch of these delicious bites in no time.
To achieve the best results, it’s important to start with fresh strawberries that are firm and ripe. The contrast of the juicy strawberry paired with smooth, melted chocolate creates an irresistible combination that will have everyone reaching for more.
You can customize your chocolate-covered strawberries with various toppings such as crushed nuts, sprinkles, or coconut to add an extra layer of flavor and visual appeal.
- Fresh strawberries
- Semisweet or dark chocolate chips
- Optional toppings: crushed nuts, sprinkles, shredded coconut
Begin by washing the strawberries and drying them completely with a paper towel to guarantee the chocolate adheres well. Melt the chocolate chips in a microwave-safe bowl, heating in 20-second intervals and stirring until smooth.
Dip each strawberry into the melted chocolate, allowing any excess chocolate to drip off, then place the dipped strawberries on a parchment-lined baking sheet. If desired, sprinkle any toppings on the strawberries before the chocolate sets, then refrigerate for about 30 minutes until the chocolate hardens.
For best results, use high-quality chocolate and make sure the strawberries are at room temperature before dipping. If you want smooth, glossy chocolate, consider tempering the chocolate beforehand.
Additionally, be creative with your toppings; experimenting with different combinations can yield unique and delicious variations that cater to your taste. Finally, store any leftovers in an airtight container in the refrigerator for up to 2 days, but keep in mind that they’re best enjoyed fresh!
Fruit Salad With Honey Lime Dressing
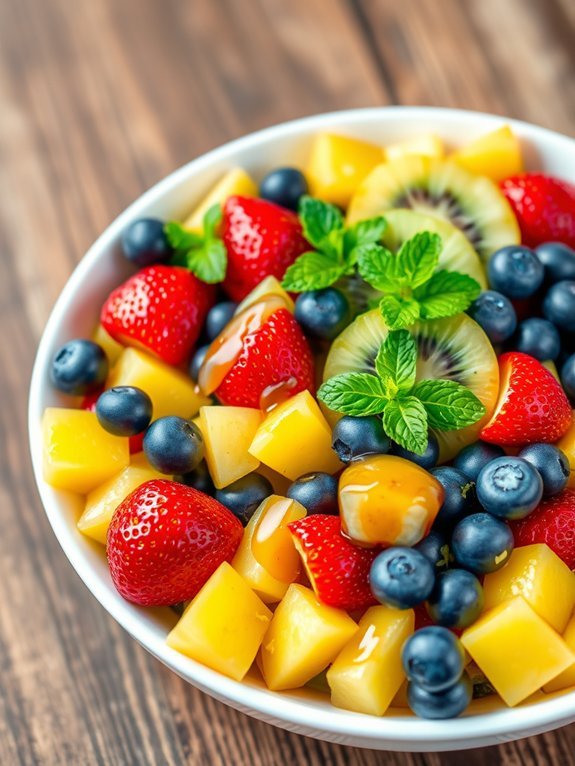
Fruit salad is a rejuvenating and versatile dessert that can be enjoyed year-round. The combination of seasonal fruits brings vibrant colors and flavors together to create a healthy indulgence.
Adding a honey lime dressing elevates the dish, giving it a zesty twist that complements the natural sweetness of the fruits. Whether you’re serving it at a summer barbecue, a holiday gathering, or simply as a family dessert, this fruit salad with honey lime dressing is sure to please everyone.
Preparing this fruit salad is a wonderful way to incorporate a variety of fruits into your diet while also satisfying a sweet craving. By choosing ripe and juicy fruits, you’ll create a colorful and nutritious dish that bursts with flavor.
The honey lime dressing adds a delightful tanginess that helps to enhance the flavors of each individual fruit. Not only is it quick to make, but it’s also a dish that can be customized according to your personal preferences or what fruits you have on hand.
Ingredients:
- 2 cups strawberries, hulled and sliced
- 1 cup blueberries
- 1 cup pineapple, diced
- 1 cup kiwi, peeled and sliced
- 1 cup grapes, halved
- 1/4 cup honey
- 2 tablespoons lime juice
- 1 tablespoon lime zest
- Fresh mint leaves for garnish (optional)
To prepare the fruit salad, start by washing all the fruits thoroughly and cutting them into bite-sized pieces as necessary. In a small bowl, whisk together the honey, lime juice, and lime zest until well combined.
In a large mixing bowl, combine the sliced strawberries, blueberries, pineapple, kiwi, and halved grapes. Drizzle the honey lime dressing over the fruit and gently toss everything together until the fruits are evenly coated. Serve immediately, or refrigerate for up to an hour for the flavors to meld.
When making this fruit salad, feel free to use any combination of fruits that you enjoy or that are in season. Additions like mango, orange segments, or banana slices can provide even more flavor variation.
For added texture and crunch, consider sprinkling some chopped nuts or granola on top just before serving. Enjoy experimenting with different fruits and dressings to cater it to your taste!
Rice Krispie Treats
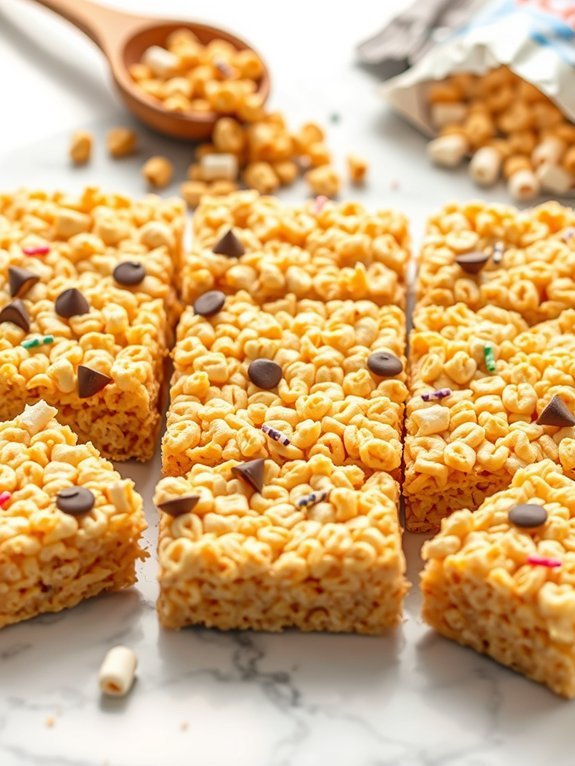
Rice Krispie Treats are a classic and beloved dessert that are quick to make and delicious to eat. This no-bake sweet treat is perfect for kids and adults alike, making it a staple at birthday parties, holidays, or just a fun snack at home. With only three simple ingredients, you can whip up a batch of these chewy, crispy squares in no time!
To enjoy a delicious Rice Krispie Treat, all you need is some marshmallows, butter, and Rice Krispies cereal. The gooey marshmallows melt perfectly with the buttery flavor, binding the cereal together to create a chewy and satisfying bite. Plus, they’re customizable—feel free to add chocolate chips, sprinkles, or even peanut butter for an extra kick!
- 3 tablespoons butter
- 1 package (10 oz) of regular marshmallows (or 4 cups mini marshmallows)
- 6 cups Rice Krispies cereal
In a large saucepan over low heat, melt the butter. Once melted, add the marshmallows and stir until completely smooth and melted. Remove from heat, then quickly add in the Rice Krispies cereal, stirring until well coated.
Press the mixture firmly into a greased 9×13 inch pan. Allow to cool, then cut into squares and enjoy!
When making Rice Krispie Treats, it’s important to work quickly once the marshmallow mixture is ready, as it can harden quickly. Be sure to grease your hands or use a spatula when pressing the mixture into the pan to prevent sticking.
For added flavor, you can experiment with different types of marshmallows, like flavored ones or add-ins such as chocolate or peanut butter. Enjoy your delightful treats!
Banana Ice Cream
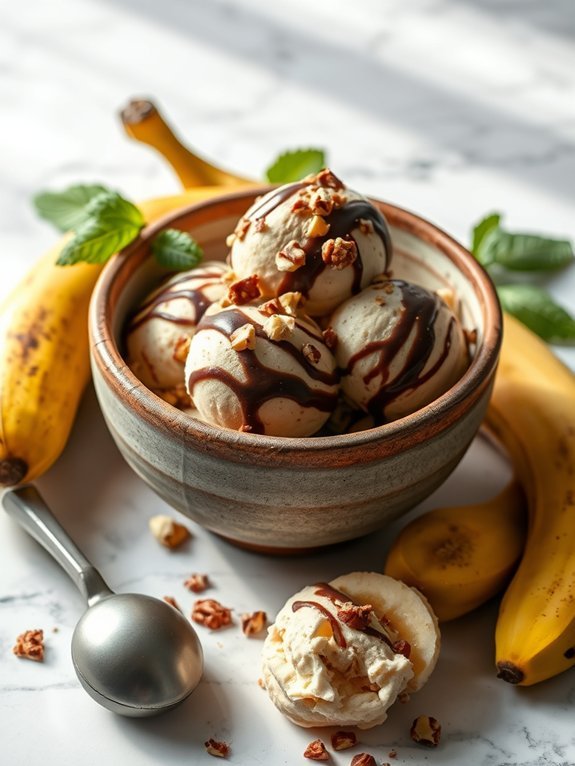
Banana ice cream is a delightful and healthy dessert option that’s incredibly easy to make at home. With just one main ingredient—ripe bananas—you can whip up a rich and creamy treat that’s perfect for satisfying your sweet tooth. This no-churn recipe isn’t only delicious but also a fantastic way to use up any overripe bananas lying around in your fruit bowl.
What makes banana ice cream so appealing is its simplicity and versatility. You can enjoy it plain or enhance its flavor with various add-ins, such as vanilla extract, cocoa powder, or chopped nuts.
Plus, this treat is dairy-free and can be enjoyed by those following vegan diets or those with lactose intolerances, making it an excellent option for everyone.
- 4 ripe bananas
- Optional: 1 tsp vanilla extract
- Optional: 1 tbsp cocoa powder or nut butter for flavor
- Optional: Toppings like chocolate chips, nuts, or fruit
To prepare the banana ice cream, start by peeling and slicing the ripe bananas into small pieces. Place the banana slices on a baking sheet and freeze them for at least 2 hours, or until they’re solid.
Once frozen, transfer the banana pieces to a food processor and blend until creamy, scraping down the sides as needed. If desired, add vanilla extract, cocoa powder, or nut butter to enhance the flavor before blending again until smooth and creamy.
For the best results, use very ripe bananas, as they’re naturally sweeter and yield a creamier texture when frozen. If you want to make the ice cream ahead of time, store it in an airtight container once blended for up to a week.
Remember to let it sit at room temperature for a few minutes before scooping, as banana ice cream can be quite firm when frozen. Enjoy experimenting with different flavors and toppings to create your perfect banana ice cream experience!
Chocolate Chip Cookie Dough Bites

Chocolate Chip Cookie Dough Bites are a delightful treat that satisfies your sweet cravings without the need for baking. These no-bake bites are incredibly simple to make and come together in no time, making them perfect for parties, quick snacks, or just a bit of indulgence after dinner. The combination of rich, buttery dough and sweet chocolate chips creates a flavor experience that’s hard to resist. Plus, they’re egg-free, so you can enjoy them safely!
The beauty of these cookie dough bites is their versatility. You can customize them to your liking by adding nuts, sprinkles, or even different types of chocolate. They hold up well in the fridge and can be made ahead of time, so you can have a delicious treat ready whenever the mood strikes. Whether you share them with friends or keep them all to yourself, these bites are a crowd-pleaser for all ages.
- 1 cup all-purpose flour
- ½ cup unsalted butter, softened
- ½ cup brown sugar, packed
- ¼ cup granulated sugar
- 1 teaspoon vanilla extract
- 2 tablespoons milk
- 1 cup semi-sweet chocolate chips
- Pinch of salt
In a large mixing bowl, cream together the softened butter, brown sugar, and granulated sugar until smooth and fluffy. Then, mix in the vanilla extract and milk. Gradually add the flour and salt to the mixture, stirring until combined. Fold in the chocolate chips until evenly distributed.
Once the dough is well mixed, use your hands to roll the dough into small bite-sized balls. Place them on a parchment-lined baking sheet and refrigerate for at least 30 minutes to firm up.
When making Chocolate Chip Cookie Dough Bites, it’s important to guarantee that the flour is heat-treated if you’re concerned about food safety. To do this, spread the flour on a baking sheet and bake it in a preheated oven at 350°F (175°C) for 5-7 minutes to kill any potential bacteria.
Additionally, feel free to experiment with different flavors or mix-ins; for instance, try adding a pinch of espresso powder for a rich mocha flavor or incorporating nuts for a crunchy texture. Enjoy your delicious and safe-to-eat cookie dough bites!
Pudding Parfaits
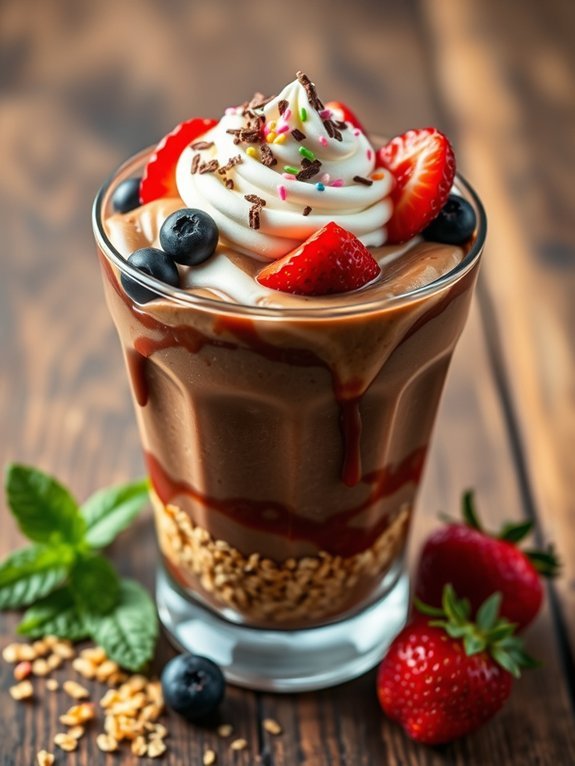
Pudding parfaits are a delightful and simple dessert that can be prepared in a variety of ways to suit your taste preferences. With layers of creamy pudding, fresh fruits, and crunchy toppings, these parfaits not only look impressive but are also incredibly easy to assemble. This dessert is perfect for any occasion, whether it’s a casual family gathering, a summer barbecue, or an elegant dinner party.
You can customize the flavors and layers according to your liking; chocolate lovers might opt for chocolate pudding, while those craving a fresh taste might enjoy vanilla or butterscotch. What’s more, assembling pudding parfaits is a fun activity that kids can join in on, making it a delightful way to spend time together in the kitchen.
You can prepare them ahead of time and store them in the refrigerator until you’re ready to serve—a convenient option for busy hosts.
- 2 cups of prepared pudding (chocolate, vanilla, or butterscotch)
- 1 ½ cups of granola or crushed cookies
- 2 cups of mixed fresh fruits (berries, bananas, or peaches)
- Whipped cream (optional)
- Chocolate shavings or sprinkles (optional)
In a clear glass or cup, layer 1/4 cup of pudding at the bottom, followed by 1/4 cup of your chosen mixed fruits, then add 1/4 cup of granola or crushed cookies.
Repeat the layering of pudding, fruits, and granola until the glass is filled, leaving some space at the top for whipped cream or decorations. Finish with a dollop of whipped cream and sprinkle some chocolate shavings or sprinkles on top for an added touch.
When making pudding parfaits, feel free to experiment with different textures and flavors; for instance, try incorporating layers of yogurt for creaminess or toasted nuts for extra crunch.
Additionally, consider chilling the parfaits in the refrigerator for at least 30 minutes before serving; this allows the flavors to meld beautifully. If you’re making them for an event, prepare some in advance and have a variety of toppings available for guests to choose from to create their own personalized parfaits!
Peanut Butter and Banana Toast
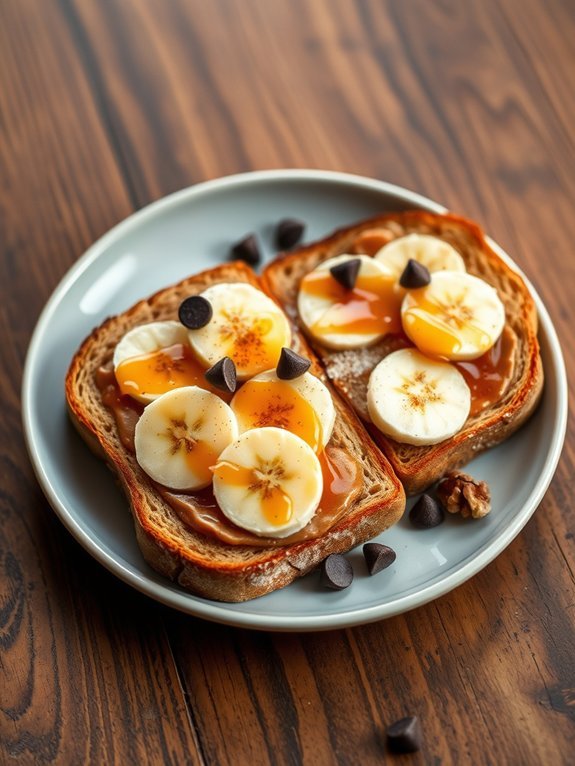
Peanut Butter and Banana Toast is a delightful and satisfying treat that comes together in just a few minutes. This simple dessert is perfect for any time of the day, whether you’re looking for a quick breakfast, a convenient snack, or a sweet after-dinner delight. With the combination of creamy peanut butter and sweet banana, each bite is a heavenly mix of flavors and textures that will leave you wanting more.
What makes Peanut Butter and Banana Toast so appealing is its versatility. You can use different types of bread, spreads, and toppings to customize your creation. Whole grain bread adds a healthy twist, while dark chocolate chips or a sprinkle of cinnamon can elevate the taste profile. Plus, it’s a great way to use up ripe bananas that you may have sitting on your countertop.
Ingredients:
- 2 slices of bread (whole grain, sourdough, or your choice)
- 2 tablespoons of peanut butter
- 1 ripe banana
- Honey or maple syrup (optional)
- Cinnamon (optional)
- Chocolate chips or nuts (optional)
Toast the slices of bread until golden brown and crispy. Spread a generous tablespoon of peanut butter onto each slice while still warm, allowing it to melt slightly. Slice the banana into thin rounds and arrange them on top of the peanut butter-covered toast. For added sweetness, drizzle with honey or maple syrup and sprinkle with cinnamon or any desired toppings like chocolate chips or chopped nuts.
For the best results, use fresh, ripe bananas as they’ve a natural sweetness that enhances the flavor of the dish. If you’d like to add a twist, consider trying different nut butters such as almond or cashew butter, or even a spread like Nutella for a chocolatey variation. Additionally, you can experiment with various breads to find your favorite combination—bagels, English muffins, or even gluten-free options can work beautifully!
Yogurt Parfait
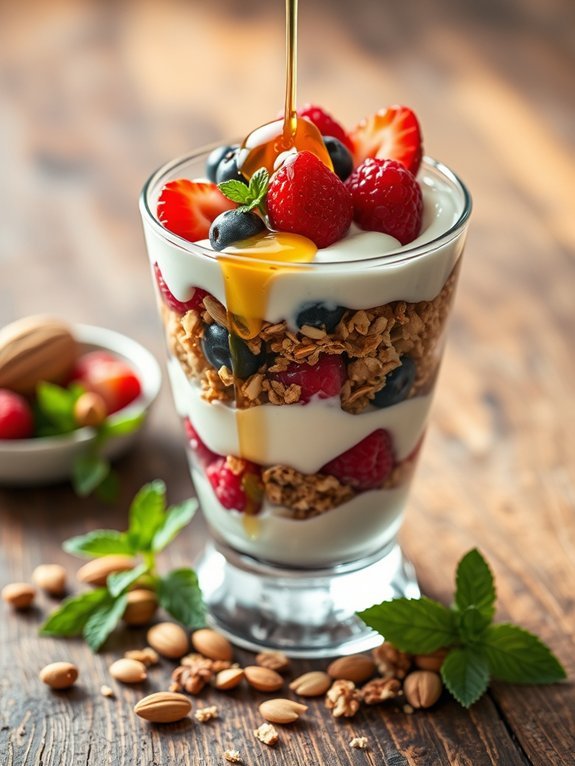
Yogurt parfaits are a delightful way to satisfy your sweet tooth while incorporating healthy elements into your diet. They aren’t only visually appealing but also incredibly easy to prepare, making them a perfect choice for breakfast, snack time, or even dessert. The great thing about yogurt parfaits is that you can customize them to your liking, choosing from a variety of fruits, nuts, and toppings to suit your taste preferences or dietary needs.
To make a yogurt parfait, you’ll typically need just a few simple ingredients, and the process is quite quick. Layering the yogurt with your chosen toppings in a clear glass helps to showcase the beautiful colors and textures, creating an enticing presentation. Whether you prefer creamy Greek yogurt or smooth regular yogurt, the base is just the beginning of this versatile dish.
- 2 cups of yogurt (Greek or regular)
- 1 cup granola
- 1 cup mixed berries (such as strawberries, blueberries, and raspberries)
- Honey or maple syrup (optional)
- Nuts (such as almonds or walnuts, optional)
- Fresh mint leaves (for garnish, optional)
In a clear glass or bowl, start by placing a layer of yogurt at the bottom. Then, add a layer of granola, followed by a layer of mixed berries. Repeat the layers until the glass is full, finishing with a dollop of yogurt and a few more berries on top. Drizzle with honey or maple syrup if desired, and sprinkle nuts for added crunch. Garnish with fresh mint leaves for an extra touch.
When making yogurt parfaits, you can experiment with different flavor combinations and textures. Take advantage of seasonal fruits for freshness and ideal flavor, and consider adding a sprinkle of cinnamon or a dash of vanilla extract to the yogurt for added taste.
Make it ahead of time and refrigerate it for a few hours, but keep in mind that granola can lose its crunch, so it’s best to add that just before serving if you prefer it crunchy.
Cinnamon Sugar Tortilla Chips
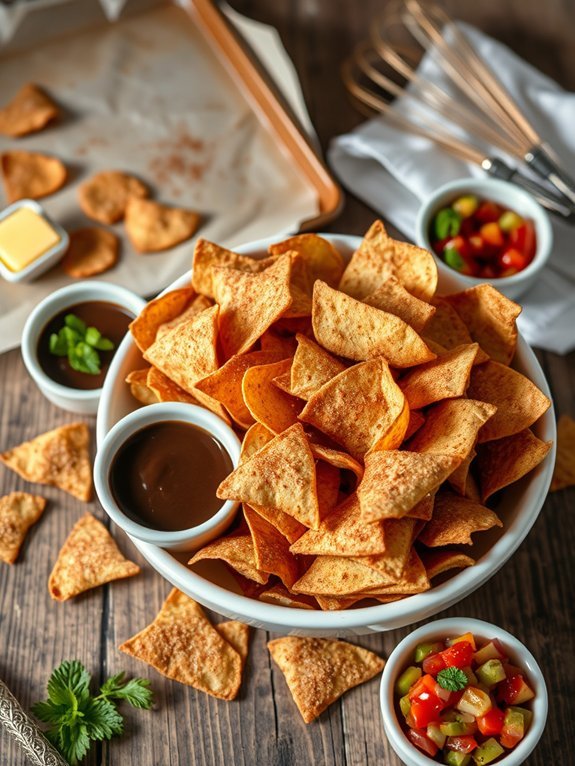
Cinnamon sugar tortilla chips are a delightful treat that perfectly combines the crispy crunch of tortilla chips with the warm sweetness of cinnamon and sugar. Ideal for dipping in chocolate, caramel, or fruit salsas, these chips are incredibly easy to make and can be whipped up in no time.
Whether you’re hosting a gathering, have unexpected guests, or simply want to indulge your sweet tooth, this recipe will satisfy your cravings without requiring extensive preparation. Using just a few pantry staples, cinnamon sugar tortilla chips can elevate your snacking experience.
These chips are perfect for both kids and adults, making them a versatile option for family movie nights or festive holiday gatherings. The beautiful golden color and irresistible aroma of freshly baked tortilla chips coated with cinnamon sugar will have everyone coming back for more!
- 6 large flour tortillas
- 1/2 cup granulated sugar
- 2 tablespoons ground cinnamon
- 1/2 cup melted butter
- Cooking spray (optional)
Preheat your oven to 350°F (175°C). Begin by cutting each tortilla into wedges or strips to form chip shapes. In a separate bowl, mix the granulated sugar and ground cinnamon together.
Brush each tortilla piece with melted butter and then sprinkle the cinnamon-sugar mixture generously over both sides. Arrange the coated tortilla pieces in a single layer on a baking sheet lined with parchment paper.
Bake for about 10-12 minutes or until the edges turn golden and crispy, being careful not to overcook them. For best results, allow the chips to cool completely on the baking sheet before serving, as they’ll continue to crisp up once removed from the oven.
If you like your chips extra sugary, feel free to add more cinnamon sugar after baking. Store any leftover chips in an airtight container to maintain their crispness. You can also experiment with different flavors by adding cocoa powder to the sugar mixture or using flavored tortillas for a unique twist!
S’mores Dip
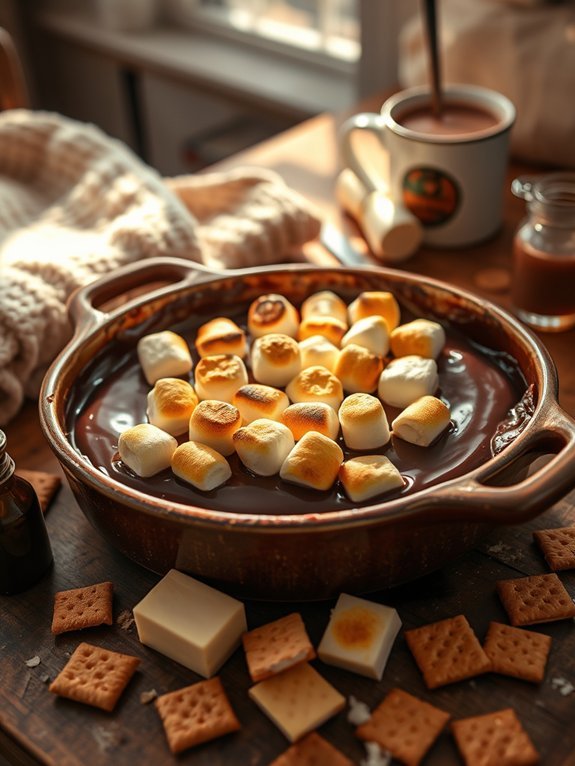
S’mores dip is a delightful twist on the classic campfire treat, making it perfect for an indoor dessert any time of year. With gooey melted chocolate, sweet marshmallows, and crispy graham cracker dippers, this treat captures the nostalgic flavors of traditional s’mores in a warm, shareable dish.
Whether it’s for a movie night, a party, or just a special family dessert, s’mores dip is sure to please everyone.
Making s’mores dip is a breeze, allowing you to whip up this indulgent dessert in under 15 minutes. It’s not only fun to prepare, but also incredibly versatile; you can customize the toppings and even the size of your dip to accommodate any gathering.
Gather your friends and family for a sweet experience that will have everyone reaching for more.
- 1 cup semi-sweet chocolate chips
- 1 cup mini marshmallows
- 1 tablespoon butter
- 1/2 teaspoon vanilla extract
- Graham crackers, for dipping
To make s’mores dip, preheat your oven to 450°F (230°C). In a small oven-safe dish, melt the butter and then add the chocolate chips, stirring until they start to melt. Once partially melted, remove from heat and stir in the vanilla extract.
Evenly spread the mini marshmallows on top of the chocolate mixture, then place the dish in the oven for about 5-7 minutes, or until the marshmallows are golden and toasted. Serve immediately with graham crackers for dipping.
For an extra twist, feel free to add toppings like peanut butter chips or crushed candy bars to elevate the flavor. Always keep an eye on the marshmallows while they’re in the oven, as they can quickly go from perfectly toasted to overly charred.
If you don’t have an oven-safe dish, you can also make this dip in a microwave using a heat-safe bowl, microwaving in short intervals until melted. Enjoy your s’mores dip warm for the best experience!
Quick and Easy Desserts Overview
Mini Fruit Pizzas
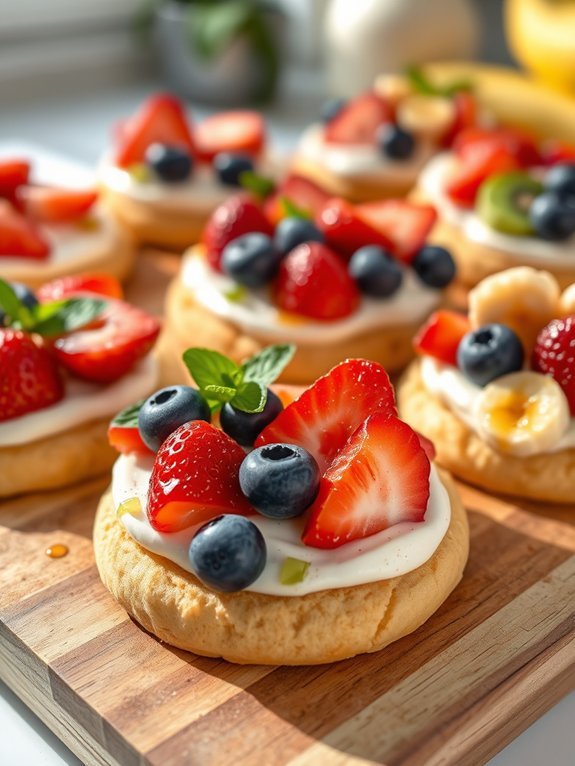
Mini fruit pizzas are a delightful and colorful dessert option that isn’t only visually appealing but also incredibly tasty. These bite-sized treats are perfect for any gathering, whether it’s a birthday party, summer barbecue, or casual get-together. The base features a sweet and soft sugar cookie or graham cracker, topped with a smooth cream cheese frosting, and adorned with a variety of fresh fruits. The result is a rejuvenating explosion of flavor that combines the creamy, sweet frosting with the juicy freshness of the fruits.
Preparing mini fruit pizzas is a fun and simple process that can involve kids and make for a great creative activity in the kitchen. They can customize their mini pizzas with their favorite fruits, allowing for diverse flavors and a personal touch. Not only do they satisfy a sweet craving, but they also provide an opportunity to indulge in some nutritious fruits, making them a fantastic dessert option for all ages.
Ingredients:
- 1 package of sugar cookie dough (or graham crackers)
- 1 (8 oz) package of cream cheese, softened
- 1/4 cup powdered sugar
- 1 teaspoon vanilla extract
- Fresh fruit (such as strawberries, blueberries, kiwi, and bananas)
- Optional: Mint leaves for garnish
Preheat your oven according to the sugar cookie dough instructions, usually around 350°F (177°C). Roll out the cookie dough and cut it into small circles or squares to form mini cookie bases. Bake for 8-10 minutes until lightly golden, then let them cool completely.
Meanwhile, in a medium bowl, blend the softened cream cheese, powdered sugar, and vanilla extract until smooth. Once the cookie bases are cooled, spread a generous layer of the cream cheese mixture on top, and then artfully arrange your fresh fruits on top of each mini pizza.
For an even more vibrant presentation, consider choosing a variety of colorful fruits and cutting them into different shapes. You can also add a drizzle of honey or a sprinkle of cinnamon for an extra touch of flavor. If you’re using softer fruits like bananas, add them right before serving to prevent browning.
Blender Brownies
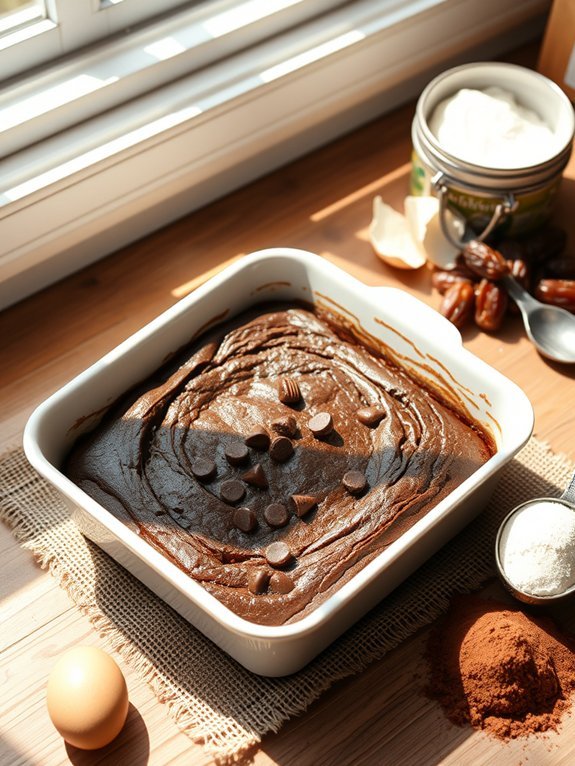
Blender brownies are a delightful treat that combines simplicity and indulgence into one easy-to-make dessert. Perfect for those who crave chocolatey goodness without the hassle of traditional baking methods, these brownies take just minutes to prepare using a blender. With a few pantry staples, you can create a fudgy, moist brownie that your friends and family will never guess was made in a blender.
What makes blender brownies a standout choice isn’t only their ease of preparation, but also their adaptability. You can incorporate various mix-ins like nuts, chocolate chips, or even swirls of peanut butter, making each batch uniquely yours. This recipe is perfect for anyone looking to whip up a sweet treat on short notice, ensuring no one will leave your home without a satisfying dessert in hand.
Ingredients:
- 1 cup of pitted dates
- 1/2 cup of nut butter (peanut, almond, or cashew)
- 2 large eggs
- 1/4 cup of unsweetened cocoa powder
- 1/2 teaspoon of baking soda
- 1/4 teaspoon of salt
- 1/2 cup of chocolate chips (optional)
Blend all the ingredients together in your blender until they form a smooth, thick batter. Pour the batter into a greased baking dish (an 8×8 inch works perfectly) and spread evenly. Bake in a preheated oven at 350°F (175°C) for 20–25 minutes, or until a toothpick inserted in the center comes out clean.
Allow the brownies to cool in the dish before cutting them into squares.
When making blender brownies, be sure not to overmix the batter, as this can lead to denser brownies. Additionally, for an extra level of richness, consider using bittersweet or dark chocolate chips in place of semi-sweet.
Don’t forget to check for doneness a couple of minutes before the suggested baking time, as oven temperatures can vary. Finally, letting the brownies cool completely before cutting makes for cleaner squares and enhances their fudgy texture!
Apple Nachos
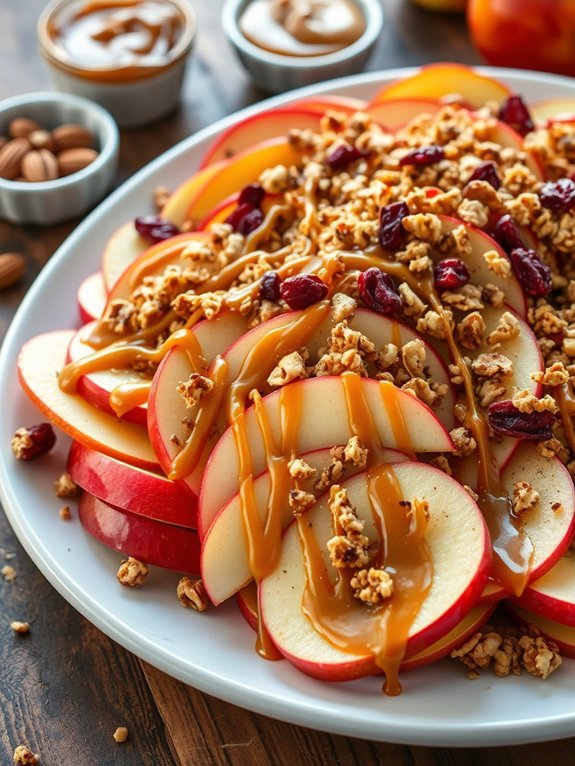
Apple nachos are a fun and delicious way to enjoy a healthy dessert that satisfies your sweet cravings. This quick treat starts with crisp, juicy apples that are sliced thin and layered with a variety of toppings. The beauty of apple nachos lies in their versatility; you can customize them with your favorite combinations of nut butter, chocolate, and other toppings, making them perfect for both kids and adults.
Preparing apple nachos isn’t only simple but also requires minimal cooking, making it an ideal snack to whip up in moments. It’s a great way to incorporate fresh fruit into your dessert routine while still indulging in delightful flavors. They’re perfect for get-togethers, movie nights, or as a nutritious snack when you need something sweet!
- 2 medium-sized apples (any variety)
- 2 tablespoons peanut butter or almond butter
- 2 tablespoons chocolate chips or melted dark chocolate
- 1 tablespoon caramel sauce (optional)
- 2 tablespoons granola or crushed nuts
- A pinch of cinnamon (optional)
- Fresh fruit or dried fruit (for added toppings, optional)
To make apple nachos, begin by washing and drying the apples before slicing them into thin rounds or wedges. Arrange the apple slices on a serving plate or platter. Drizzle the peanut or almond butter over the apple slices, followed by a drizzle of melted chocolate (if using).
Sprinkle granola, crushed nuts, and other desired toppings over the top for added texture and flavor. If you like, finish off with a light drizzle of caramel sauce and a sprinkle of cinnamon for extra sweetness.
When choosing apples, crisp varieties like Honeycrisp, Granny Smith, or Fuji work best to provide a satisfying crunch. To prevent the apples from browning too quickly after cutting, you may soak them in a mixture of water and lemon juice for a few minutes.
This not only keeps them looking fresh but also adds a zesty flavor to your dish. Experiment with different toppings and combinations to find your perfect apple nachos!

