This post may contain affiliate links. Please read our policy page.
If you’re enthusiastic to explore the vibrant world of Japanese cuisine, you can’t miss these 15 must-try dishes. Savor the warmth of ramen, delight in fresh sushi, and crunch on crispy tempura. Try okonomiyaki for a deliciously customizable pancake, or enjoy takoyaki, the tasty octopus balls. Don’t forget about comforting nabe or juicy gyoza! Each dish boasts unique flavors and textures that’ll leave you wanting more. Keep going to discover even more culinary treasures!
Ramen
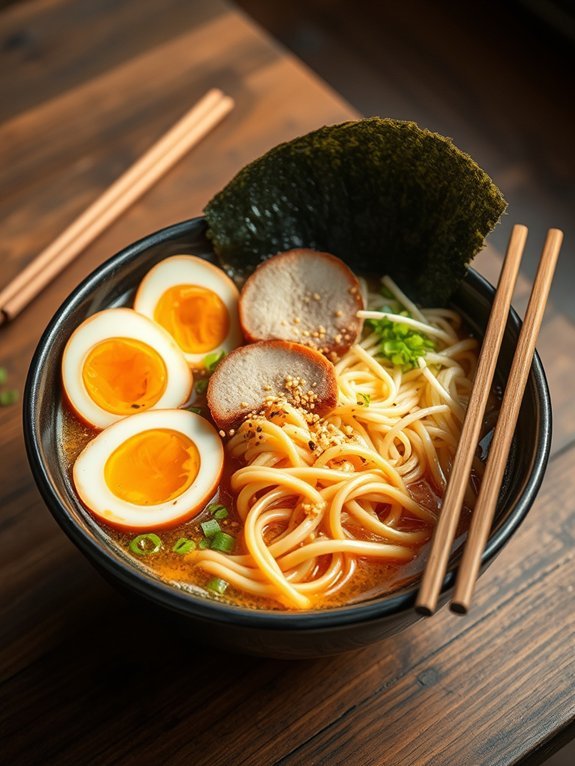
Ramen is a beloved traditional Japanese noodle soup dish that has captured the hearts of many around the world. With its rich, flavorful broth, tender noodles, and a variety of toppings, ramen isn’t only comforting but also customizable, allowing for endless variations.
Traditionally, ramen is made with wheat noodles served in a meat or fish-based broth, flavored with soy sauce or miso, and topped with ingredients such as sliced pork, green onions, and nori (seaweed).
Creating homemade ramen is easier than one might think. The key is to take your time and make sure that the broth is properly developed, as it’s the backbone of the dish. While the process requires some patience, the satisfaction of slurping up your own bowl of steaming hot ramen is unmatched.
Below is an uncomplicated recipe to help you start your ramen-making journey.
- 4 cups chicken or pork broth
- 1 cup water
- 2 servings of ramen noodles
- 2 tablespoons soy sauce
- 1 tablespoon miso paste
- 1 teaspoon sesame oil
- 2 garlic cloves, minced
- 1-inch piece of ginger, sliced
- 2 green onions, chopped
- Soft-boiled eggs (optional)
- Sliced cooked pork or chicken (chashu)
- Nori sheets
- Bean sprouts (optional)
- Corn kernels (optional)
In a large pot, combine the chicken or pork broth, water, garlic, ginger, and soy sauce, then bring to a simmer. Let the broth simmer for about 20 minutes to infuse the flavors, and then stir in the miso paste and sesame oil.
While the broth is simmering, cook the ramen noodles according to the package instructions. Once cooked, drain and set aside. After removing the ginger slices from the broth, divide the noodles into bowls, ladle the broth over, and top with sliced pork, soft-boiled eggs, green onions, nori, and any additional toppings of your choice.
To elevate your ramen experience, consider experimenting with different broth bases or toppings. You can utilize a variety of proteins, such as tofu for a vegetarian option, or add a splash of chili oil for a spicy kick.
Additionally, try to use freshly made toppings whenever possible, as they can greatly enhance the overall flavor of your ramen. Don’t hesitate to make it your own and let your taste buds guide the way!
Sushi
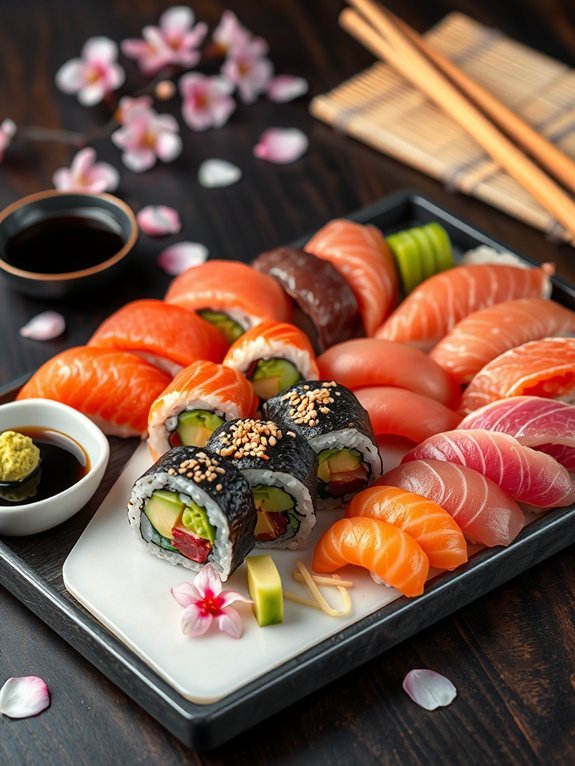
Sushi is one of Japan’s most celebrated culinary delights, renowned for its combination of vinegared rice, fresh fish, and a variety of other ingredients. Originating in the 8th century, sushi has evolved through the years, embracing numerous regional variations and different styles. The most common types include nigiri (sliced fish over rice), maki (rolled sushi), and sashimi (sliced raw fish).
Making sushi at home can be a fun and rewarding experience that allows you to customize flavors and presentations to your liking.
To prepare sushi, you’ll first need high-quality ingredients and a bit of patience. While it might seem intimidating at first, the steps to making sushi are quite achievable once you familiarize yourself with the technique. The key to great sushi lies in selecting the freshest ingredients, perfecting the fluffy sushi rice, and mastering the art of rolling.
Depending on your preference, you can create a simple vegetarian sushi, a classic tuna roll, or even a signature creation that reflects your unique taste.
- 2 cups sushi rice
- 2 ½ cups water
- ½ cup rice vinegar
- 2 tablespoons sugar
- 1 teaspoon salt
- Nori (seaweed sheets)
- Fresh fish (tuna, salmon, etc.)
- Vegetables (cucumber, avocado, etc.)
- Soy sauce (for serving)
- Wasabi (optional)
Rinse the sushi rice under cold water until the water runs clear, then soak it for 30 minutes before draining. In a rice cooker or pot, combine the rinsed rice and water, cook according to the equipment instruction, then let it sit covered for 10 minutes off the heat.
In a separate bowl, mix the rice vinegar, sugar, and salt until dissolved, then gently fold this mixture into the cooked rice using a wooden spatula. Once the rice is at room temperature, lay out a sheet of nori on a bamboo mat, spread a thin layer of sushi rice evenly on top, leaving a small border at the edges.
Add your choice of fish and vegetables on top of the rice, then roll the mat tightly away from you, using a gentle pressure to create a firm log. Slice the roll into bite-sized pieces using a sharp knife, and serve with soy sauce for dipping.
When making sushi, remember that using the freshest ingredients is essential for the best flavor and texture. Additionally, practice your rolling technique; it can take several tries to achieve perfect sushi rolls.
Always keep a bowl of water nearby to moisten your hands and knife when working with rice and fish to prevent sticking. Finally, feel free to experiment with fillings and toppings to discover your own sushi creations!
Recommended Items
Explore our curated selection of ingredients and tools to help you create these delightful Japanese dishes!
Products
Tempura
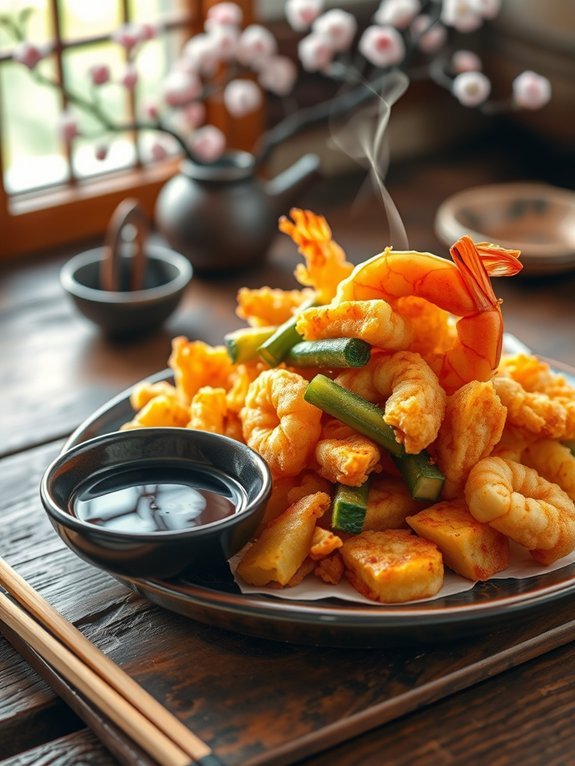
Tempura is a beloved Japanese dish that consists of battered and deep-fried vegetables and seafood, creating a delightful contrast of crunchy texture and tender filling. The origins of tempura can be traced back to the introduction of frying techniques by Portuguese missionaries in the 16th century, combined with traditional Japanese cooking.
Today, tempura is enjoyed worldwide, often served with a dipping sauce known as tentsuyu, which enhances the flavors of these crispy morsels.
Making tempura at home can be a fun and rewarding experience, allowing you to choose your favorite ingredients and create a dish that perfectly suits your taste. The key to achieving the finest tempura is in the batter, which should be light and airy. This is typically achieved by using ice-cold water and a gentle mixing technique to maintain the batter’s texture.
With a few simple ingredients and techniques, you can impress your family and friends with this classic Japanese treat.
- 1 cup all-purpose flour
- 1 cup ice-cold water
- 1 large egg
- 1 teaspoon baking powder
- A selection of vegetables (e.g., sweet potatoes, zucchini, bell peppers, mushrooms)
- A selection of seafood (e.g., shrimp, squid)
- Vegetable oil for frying
- Salt for seasoning
- Tentsuyu sauce for dipping
To make the tempura, start by preparing your vegetables and seafood by cutting them into bite-sized pieces. In a mixing bowl, combine the all-purpose flour and baking powder. In a separate bowl, whisk together the ice-cold water and egg.
Gently pour the wet ingredients into the dry ingredients and mix briefly; it’s fine if there are some lumps. Heat the vegetable oil in a deep pot over medium-high heat until it reaches around 350°F (175°C).
Dip the prepared ingredients into the batter and carefully place them into the hot oil. Fry until they turn golden brown and crispy, typically 2-4 minutes. Remove cooked tempura and drain on paper towels before seasoning with salt.
For the best results, make sure to use very cold water to help keep the batter light and crispy. You can also experiment with different types of flours; for instance, some recipes use rice flour for an even crunchier texture.
Fry in small batches to prevent overcrowding, which can lower the oil temperature and result in soggy tempura. Finally, serve the tempura as soon as it’s cooked for maximum crunchiness, alongside a small bowl of tentsuyu for dipping. Enjoy your homemade tempura experience!
Proposed Recipe for Japanese Dishes
Okonomiyaki
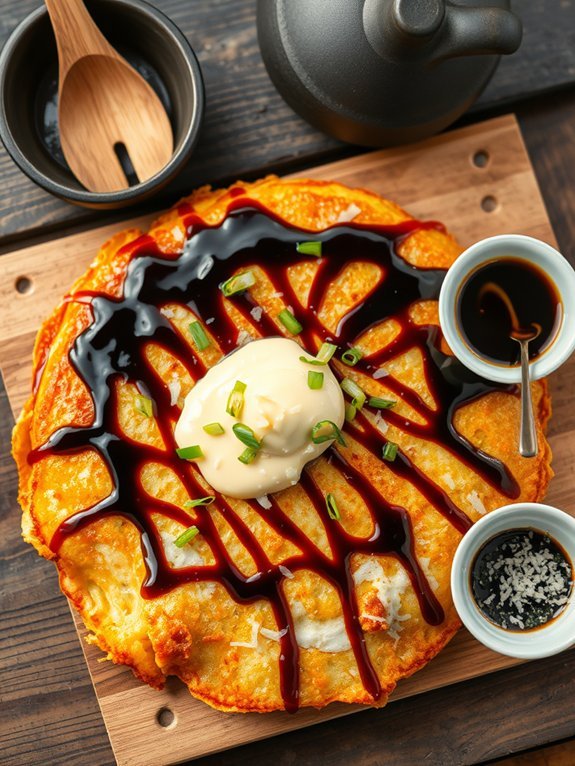
Okonomiyaki, often referred to as “Japanese savory pancakes,” is a beloved dish originating from the Hiroshima and Osaka regions. It effectively translates to “grilled as you like it,” indicating its versatility in both ingredients and preparation. Made primarily from a batter of flour, grated yam, eggs, shredded cabbage, and various fillings, this flavorful pancake can be customized with a wide array of toppings, which may include seafood, pork, or vegetables.
Traditionally cooked on a hot griddle, okonomiyaki serves not only as a hearty meal but also as a fun, interactive dining experience. Making okonomiyaki at home offers an opportunity to explore creative combinations. The batter’s foundation allows for a multitude of variations while guaranteeing the fundamental heartiness and umami flavor profile remains intact.
The final touch often comes from an application of savory sauce, mayonnaise, and a sprinkle of bonito flakes, giving it a perfect finish. This dish is especially popular in social gatherings and is often enjoyed as part of street food culture in Japan.
Ingredients:
- 1 cup all-purpose flour
- 1 cup dashi stock (or water)
- 1 medium-sized yam (or grated nagaimo)
- 2 large eggs
- 4 cups shredded cabbage
- 1/2 cup green onions, chopped
- 1 cup cooked and diced pork belly (or other preferred meat)
- 1/2 cup tempura scraps (tenkasu)
- 1/4 cup pickled ginger
- Okonomiyaki sauce (store-bought or homemade)
- Japanese mayonnaise
- Aonori (dried seaweed flakes)
- Katsuobushi (bonito flakes, optional)
To prepare the okonomiyaki, combine the flour, dashi stock, and grated yam in a large bowl, mixing until smooth. Then, add in the eggs and continue mixing. Fold in the shredded cabbage, green onions, pork belly, tempura scraps, and pickled ginger until well distributed.
Heat a non-stick griddle or frying pan over medium heat and lightly grease it. Pour a ladleful of the batter onto the hot surface, spreading it into a round pancake. Cook for about 3-4 minutes on one side until golden brown, then flip and cook the other side for another 3-4 minutes. Repeat with the remaining batter, adjusting the heat as needed.
When making okonomiyaki, feel free to experiment with toppings and fillings according to your taste preference. For instance, if you’re using seafood like shrimp or squid, confirm it’s cooked beforehand for best results. Additionally, cooking smaller pancakes can help them cook more evenly and achieve perfect browning without burning.
When serving, make certain to generously drizzle the okonomiyaki sauce and mayonnaise on top, as the sauce is vital for enhancing the flavors. Enjoy your customizable Japanese culinary creation!
Takoyaki

Takoyaki is a beloved Japanese street food that hails from Osaka, featuring savory round balls filled with diced octopus, green onions, and other delicious ingredients. Typically served with a drizzle of takoyaki sauce, mayonnaise, and garnished with bonito flakes and seaweed, it’s a delightful dish that’s both crispy on the outside and warm on the inside.
Making takoyaki at home requires a special takoyaki pan, which is crucial for achieving the perfect shape and texture of the balls.
The origins of takoyaki date back to the 1930s and have evolved into a popular snack in Japan and beyond. While you can enjoy this savory treat at food stalls and specialty restaurants, preparing it at home allows you to customize your filler ingredients and experiment with flavors. This recipe will guide you through the step-by-step process of making takoyaki from scratch, guaranteeing that you can recreate the authentic taste right in your own kitchen.
Ingredients:
- 1 cup all-purpose flour
- 1 1/2 cups dashi (Japanese soup stock)
- 1 large egg
- 1 cup cooked octopus, diced
- 1/4 cup green onions, finely chopped
- 1/4 cup tenkasu (tempura scraps)
- 1/4 cup pickled ginger, finely chopped
- Oil for greasing the pan
- Takoyaki sauce
- Mayonnaise
- Bonito flakes (katsuobushi)
- Aonori (dried seaweed flakes)
In a large mixing bowl, whisk together the flour, dashi, and egg until smooth to form the batter. Preheat your takoyaki pan on medium heat and lightly grease each compartment with oil. Pour in the batter, filling each hole to the brim, then add a piece of diced octopus, some green onions, tenkasu, and pickled ginger to each.
Allow the batter to cook for about 3 minutes, then use a skewer or chopsticks to flip the balls over, cooking them until golden brown and crispy all around, which typically takes another 3-4 minutes.
For best results, ascertain that your takoyaki batter isn’t too thick; it should have a pancake-like consistency to allow it to cook evenly. If you don’t have dashi or prefer a vegetarian version, you can substitute it with water or vegetable broth, though it may alter the flavor slightly.
Additionally, feel free to tweak the filling ingredients to your liking; seafood, shrimp, or a combination of vegetables can substitute traditional octopus. Don’t forget to generously drizzle takoyaki sauce and mayonnaise on top before serving for that authentic touch!
Sashimi
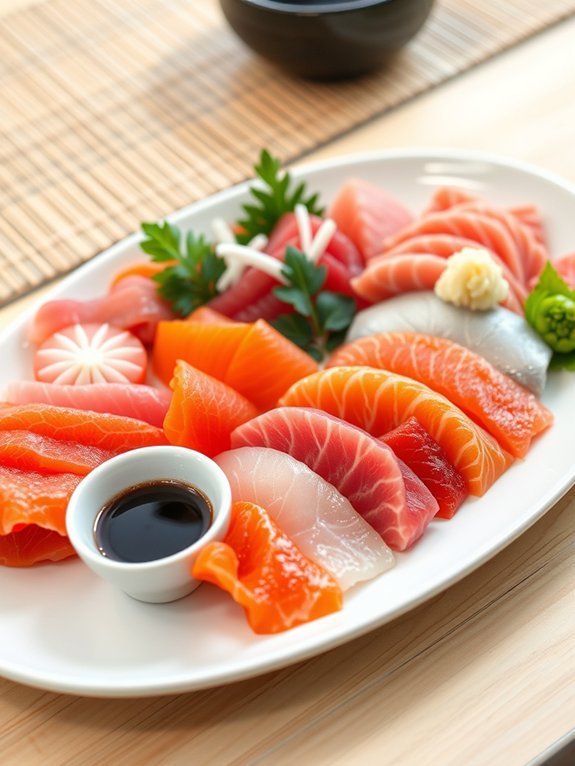
Sashimi, a traditional Japanese delicacy, highlights the exquisite flavors of fresh, raw fish or seafood. This dish isn’t only revered for its taste but also for its elegance, often served as an appetizer or main course in Japanese cuisine. Sashimi is typically presented with garnishes such as wasabi, pickled ginger, and thinly sliced vegetables, allowing diners to savor the freshness of the fish while enjoying complementary flavors.
To make authentic sashimi, the quality of the ingredients is vital. Freshness is the key, so it’s important to source sushi-grade fish from a reputable supplier. While commonly associated with fish such as tuna, salmon, and mackerel, sashimi can include a variety of seafood including octopus, shrimp, and even scallops. The vibrant colors and delicate textures of the ingredients play a significant role in elevating this dish to a culinary art form.
- Sushi-grade fish (such as tuna, salmon, or mackerel)
- Wasabi
- Soy sauce
- Pickled ginger
- Daikon radish (for garnish)
- Shiso leaves (for garnish, optional)
- Lemon slices (optional)
To prepare sashimi, start by confirming all utensils and surfaces are clean. Using a sharp knife, cut the sushi-grade fish into thin, even slices, typically about ¼ inch thick. Arrange the fish artfully on a plate, accompanying it with wasabi, pickled ginger, and garnishes like daikon radish slices or shiso leaves. Serve the sashimi cold alongside a small dish of soy sauce for dipping.
When making sashimi, it’s essential to handle the fish safely to maintain its freshness and flavor. Always slice the fish against the grain for a tender bite, and use a very sharp knife to guarantee clean cuts. If you’re unfamiliar with preparing sashimi, it’s beneficial to watch video tutorials or seek guidance from experienced chefs, especially when selecting and handling raw fish.
Udon
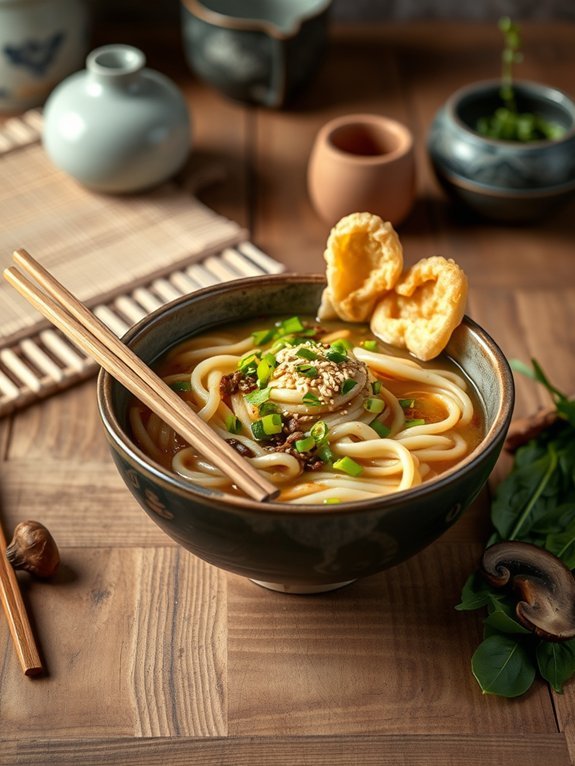
Udon is a popular Japanese noodle dish that features thick, chewy wheat noodles served in a savory broth. Often enjoyed in various ways, udon can be served hot or cold and paired with an array of ingredients, such as vegetables, meat, or seafood. The dish is renowned for its comforting and hearty nature, making it a favorite for many meals, whether it’s a quick lunch or a cozy dinner.
Making udon from scratch can be a rewarding experience, as it allows you to control the texture and flavor of the noodles and broth. While many choose to buy pre-made udon noodles, making your own offers that authentic touch that can elevate the dish to new heights. Invite family or friends over to enjoy this delicious and fulfilling dish together, as udon is meant to be savored.
Ingredients:
- 2 cups all-purpose flour
- 1/2 cup water
- 1/2 teaspoon salt
- 4 cups dashi broth
- 2 tablespoons soy sauce
- 1 tablespoon mirin
- Green onions, chopped (for garnish)
- Tempura (optional, for topping)
- Mushrooms (shiitake or enoki, optional)
- Spinach or other greens (optional)
To make udon, start by mixing the flour and salt in a bowl, gradually adding water while kneading until the dough becomes smooth and elastic. Cover the dough and let it rest for about 30 minutes.
After resting, roll out the dough until it reaches about a 1/4-inch thickness, then cut into thick noodles. Boil the noodles in a pot of water for about 8-10 minutes until they’re tender. In a separate pot, prepare the dashi broth by combining it with soy sauce and mirin, bringing it to a gentle simmer.
Once the noodles are cooked, drain them and place them in individual bowls, then pour the hot broth over the noodles. Top with your choice of garnishes.
When cooking udon, remember that the texture of the noodles is vital. If you prefer a firmer bite, be sure to undercook the noodles slightly before plunging them into cold water to halt cooking.
Also, don’t hesitate to customize your udon with seasonal vegetables or proteins that you love; this flexibility makes udon a truly versatile dish. Enjoy experimenting with different broths and toppings to discover your favorite combinations!
Miso Soup
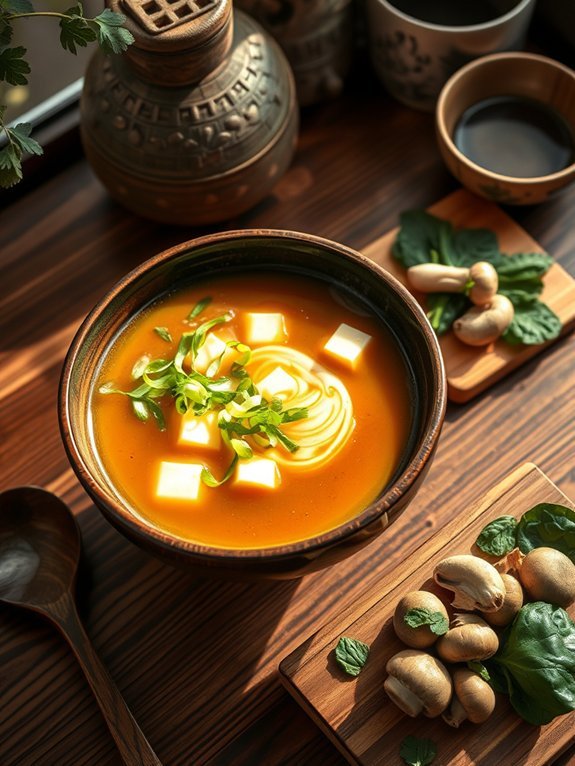
Miso soup is a quintessential dish in Japanese cuisine that’s loved for its comforting warmth and umami flavor. It serves as a staple in traditional Japanese meals, often consumed daily for breakfast, lunch, or dinner. The base of this delicious soup is dashi, a flavorful stock made from kombu (seaweed) and bonito flakes.
The addition of miso paste, a fermented soybean product, gives the soup its distinctive taste and a delightful aroma. This dish can be easily customized by incorporating various ingredients such as tofu, green onions, mushrooms, or seaweed, making it a versatile option for any occasion.
Making miso soup at home is quite simple and requires only a handful of ingredients. By preparing this soup, you not only embrace the essence of Japanese cuisine but also create a nourishing dish that’s perfect for the body and soul. Whether enjoyed alongside rice and other side dishes or as a light meal on its own, miso soup is sure to warm your heart and satisfy your palate.
- 4 cups dashi (Japanese soup stock)
- 3 tablespoons miso paste (white or red)
- 1/2 block of firm tofu, cubed
- 1/4 cup green onions, chopped
- 1/2 cup wakame seaweed (dried)
- Optional: mushrooms, spinach, or other vegetables as desired
In a medium saucepan, bring the dashi to a gentle simmer over medium heat. Once simmering, add the cubed tofu and wakame seaweed.
Stir in the miso paste by transferring some of the hot dashi into a small bowl, mixing it with the miso until smooth, and then returning the mixture to the pot. Allow the soup to heat through without boiling, then remove from heat. Finally, sprinkle in the chopped green onions and serve hot.
To elevate your miso soup experience, experiment with different types of miso paste to find the flavor that you love most, as white miso tends to be milder and sweeter while red miso has a stronger and saltier profile.
Additionally, be mindful not to boil the soup after adding the miso, as it can alter the flavor and nutritional benefits of the fermented paste. Ultimately, consider adding seasonal vegetables or proteins to enhance the nutritional value and flavor profile of your soup, making it a personalized dish every time you prepare it.
Yakitori
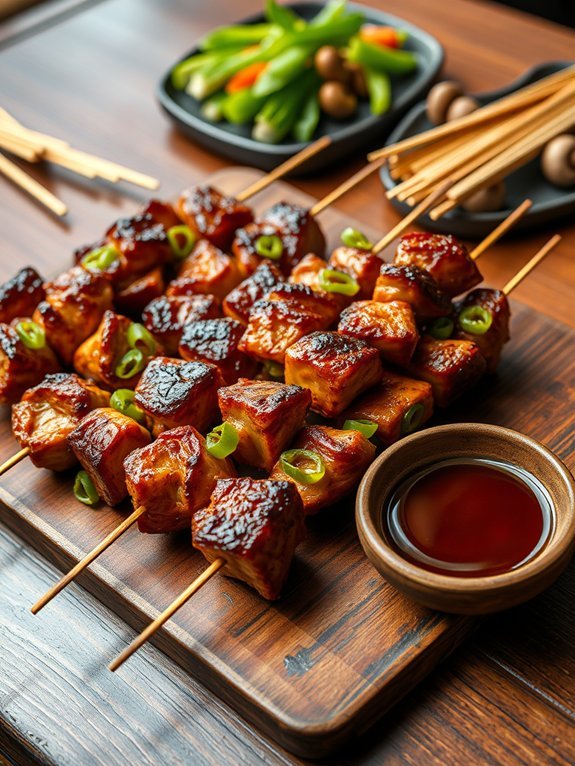
Yakitori, a beloved Japanese dish, consists of skewered and grilled chicken that showcases the delightful flavors of simple ingredients and traditional preparation techniques. The dish can be enjoyed as an appetizer or as part of a larger meal, often served with a side of rice and seasonal vegetables.
The secret to perfect yakitori lies in the marinating process, grilling technique, and choice of cuts, which can include various parts of the chicken, such as thighs, breast, or even liver.
The vibrant flavors of yakitori are enhanced by tare sauce, a sweet and savory glaze made from soy sauce, mirin, and sugar. The grilling process requires high heat, allowing the chicken to achieve a beautifully charred exterior while remaining juicy and tender on the inside.
Making yakitori at home is a rewarding experience that will bring the taste of Japanese izakayas right to your kitchen.
Ingredients:
- 500g chicken thighs or chicken breast, cut into bite-sized pieces
- 2 green onions, cut into 1-inch pieces
- Salt, to taste
- Bamboo skewers (soaked in water for 30 minutes)
- 1/4 cup soy sauce
- 1/4 cup mirin
- 2 tablespoons sugar
- 1 tablespoon sake (optional)
To make the yakitori, start by soaking bamboo skewers in water to prevent them from burning during grilling. Thread the chicken pieces onto the skewers, alternating with pieces of green onion. Season the skewers with a pinch of salt.
Preheat your grill or grill pan over high heat. For the tare sauce, combine soy sauce, mirin, sugar, and sake in a small saucepan. Bring to a simmer and cook until slightly thickened, stirring occasionally.
Grill the skewers for about 4-5 minutes on each side, brushing with tare sauce during the last minute of cooking, until the chicken is cooked through and has a nice char.
When grilling yakitori, it’s important to guarantee that your grill is hot enough before placing the skewers on it; this will help achieve that coveted char without drying out the chicken.
Additionally, feel free to experiment with different marinades or dipping sauces to find your preferred flavor. You can also mix in vegetables like bell peppers or mushrooms between the chicken pieces for added taste and variety.
Mochi
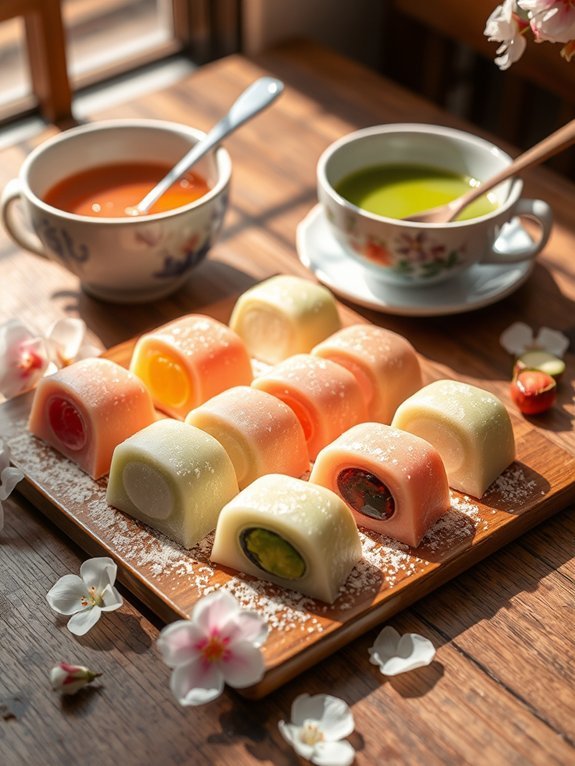
Mochi is a traditional Japanese rice cake made from glutinous rice, known for its unique chewy texture and versatility. Traditionally, it was made by soaking glutinous rice overnight and then pounding it until it became a smooth and stretchy dough. Today, there are various methods to prepare mochi, including using sweet rice flour for an easier approach that doesn’t require the labor-intensive pounding process.
Mochi is enjoyed in various forms, whether filled with sweet or savory fillings, or served alongside soups and desserts. This delightful treat can be enjoyed in numerous ways – as a snack, dessert, or even a main dish. Depending on your preference, you can experiment with fillings like red bean paste, ice cream, or fresh fruit, making mochi a versatile canvas for culinary creativity. Whether you’re preparing it as a festive treat for the Japanese New Year or just to satisfy your cravings, making mochi at home can be a rewarding experience.
- 2 cups glutinous rice (also known as sweet rice)
- 1 ½ cups water
- Cornstarch or potato starch (for dusting)
- Sugar (optional, for sweetened mochi)
- Fillings of your choice (such as red bean paste, ice cream, or fruit)
Begin by rinsing the glutinous rice under cold water until the water runs clear. Soak the rice in water for at least 8 hours or overnight. After soaking, drain the rice and place it in a steamer lined with cheesecloth or parchment paper. Steam the rice for about 30 minutes, until it becomes sticky and translucent.
Once cooked, transfer the rice to a large bowl and, while it’s still warm, begin to knead it with your hands until it reaches a smooth, stretchy consistency. Dust your hands and working surface with cornstarch to prevent sticking, then shape the mochi into small discs or squares. If you’re filling the mochi, flatten a piece, place a small amount of filling in the center, and fold the edges over to enclose it.
When making mochi, it’s crucial to keep your hands and working surface well-dusted with cornstarch or potato starch to prevent it from sticking. Remember that freshly made mochi can dry out quickly, so cover it with a damp cloth while working or store it in an airtight container if you’re not using it right away.
If using fillings that can melt, like ice cream, consider freezing the mochi for a short time after shaping to keep everything intact. Enjoy your homemade mochi fresh, but you can also freeze any extras for later use!
Inari-zushi
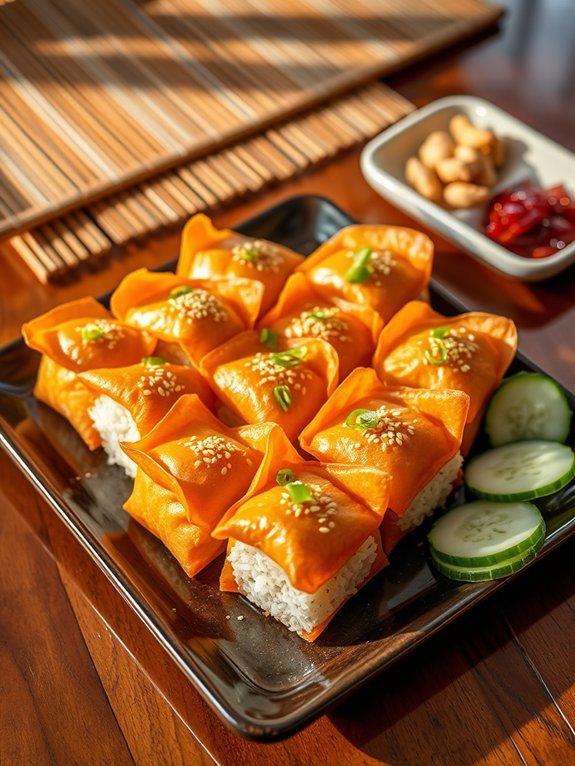
Inari-zushi is a delightful and unique variation of sushi that consists of vinegared rice packed into pockets of sweet and savory fried tofu pouches known as inari-age. This dish is often associated with festivals and picnics in Japan and is beloved for its slightly sweet flavor and chewy texture.
The simplicity of the ingredients allows for creative variations, making inari-zushi a versatile option for both traditional and modern sushi lovers. It’s easy to prepare, making it an excellent choice for those looking to explore Japanese cuisine at home.
To make inari-zushi, you’ll need sushi rice, which is seasoned with a mixture of rice vinegar, sugar, and salt. The inari-age or fried tofu pockets can be purchased pre-packaged at most Asian grocery stores or made from scratch by simmering fresh tofu pouches in a flavorful broth.
The finished product is visually appealing and can be garnished with various toppings such as sesame seeds, chopped scallions, or even thin slices of cucumber or egg omelet.
Ingredients:
- 2 cups sushi rice
- 2 cups water
- 1/4 cup rice vinegar
- 2 tablespoons sugar
- 1 teaspoon salt
- 8 pieces inari-age (fried tofu pouches)
- Optional toppings (sesame seeds, chopped scallions, or shredded nori)
Rinse the sushi rice under cold water until the water runs clear, then cook the rice with 2 cups of water in a rice cooker or on the stovetop. Once the rice is cooked, transfer it to a large bowl.
In a small saucepan, combine the rice vinegar, sugar, and salt over low heat until the sugar dissolves. Pour this mixture over the warm rice and gently fold it in, taking care not to mash the grains. Allow the rice to cool to room temperature.
Once cooled, fill each inari-age with a scoop of the seasoned rice, pressing gently to shape it, and arrange them on a serving plate.
When preparing inari-zushi, feel free to mix in additional ingredients into the rice, such as finely chopped vegetables like carrots or pickled ginger, to add flavor and texture. If you want to add a bit more umami, consider marinating the inari-age in a sweet soy sauce mixture before filling them with rice.
Finally, make certain you serve them fresh for the best taste, as the tofu pouches can soften over time if left filled for too long. Enjoy your homemade inari-zushi as a delightful snack or a charming part of a larger meal!
Nabe
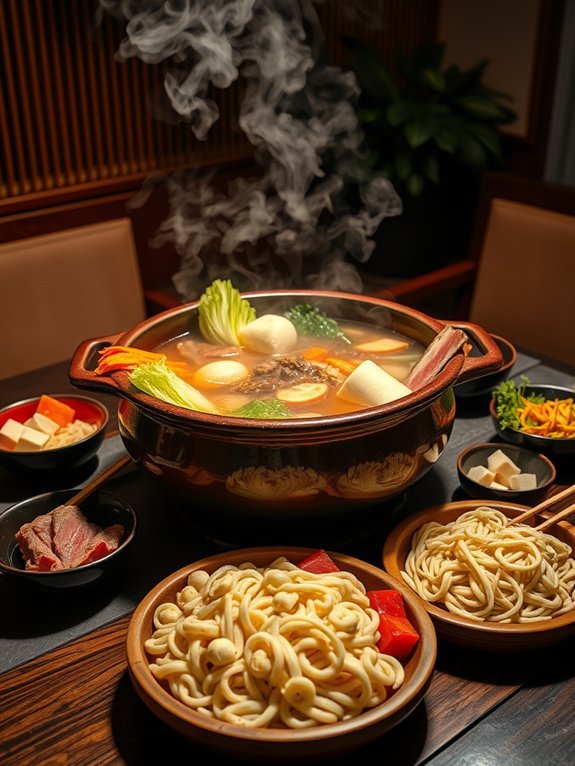
Nabe, or hot pot, is a beloved dish in Japan, particularly popular during the colder months. It represents more than just a meal; it’s a social dining experience where family and friends gather around a bubbling pot, cooking and enjoying a variety of ingredients together.
The essence of nabe lies in its simplicity and adaptability, as it can incorporate numerous ingredients based on personal preferences and regional specialties.
There are various styles of nabe, such as shabu-shabu, sukiyaki, and yosenabe, each with its distinctive flavors and ingredients.
Traditionally, nabe is cooked at the table in a ceramic or cast-iron pot, allowing diners to select their desired ingredients and cook them in a savory broth. This communal aspect makes nabe not only a delicious meal but also a cherished occasion for bonding over food.
- 1 lb (450g) thinly sliced beef, pork, or chicken
- 4 cups dashi broth or water
- 2 tablespoons soy sauce
- 2 tablespoons mirin
- 1 tablespoon sake
- 1 block of firm tofu, cubed
- 2 cups napa cabbage, chopped
- 1 cup shiitake mushrooms, sliced
- 1 cup enoki mushrooms, trimmed
- 1 cup sliced carrots
- 1 cup green onions, chopped
- 1 package udon noodles or rice, for serving
In a large pot, combine the dashi broth (or water), soy sauce, mirin, and sake, bringing it to a gentle boil.
Next, add the vegetables and tofu, allowing them to cook for about five minutes. Then, add the sliced meat and continue simmering until it’s cooked to your desired doneness.
Finally, add the udon noodles or rice during the last few minutes of cooking to warm them through, and serve the nabe directly at the table for a communal dining experience.
When cooking nabe, it’s important to prepare all the ingredients in advance and cut them into bite-sized pieces to facilitate even cooking.
Feel free to mix and match different vegetables, proteins, and noodles according to your tastes or to use seasonal ingredients.
Additionally, maintaining a gentle simmer, rather than a vigorous boil, helps preserve the tenderness of the ingredients and enhances the overall flavor of the broth.
Gyoza

Gyoza, or Japanese dumplings, are a delightful treat that originated from Chinese potstickers, but they’ve become a staple in Japanese cuisine. These bite-sized parcels are typically filled with a flavorful mixture of ground meat and vegetables, wrapped in thin dough, and can be cooked in various ways, including pan-frying, steaming, or boiling.
With their crispy bottoms and juicy fillings, gyoza can be enjoyed as a main dish or as a tasty appetizer at your next dinner party. Making gyoza at home is a fun and rewarding experience. While it may seem intimidating at first, the process becomes smoother with practice. Freshly made gyoza can be customized with different fillings and dipping sauces, making it a versatile dish that can please a variety of tastes.
Grab your apron and get ready to impress your family and friends with homemade gyoza!
Ingredients:
- 1 cup ground pork or chicken
- 1 cup finely chopped cabbage
- 1/2 cup chopped green onions
- 2 cloves garlic, minced
- 1 teaspoon ginger, grated
- 1 tablespoon soy sauce
- 1 tablespoon sesame oil
- 1 teaspoon mirin (optional)
- Salt and pepper to taste
- Gyoza wrappers
- Water (for sealing)
For cooking, heat a non-stick skillet over medium heat and add a tablespoon of oil. Once hot, place the gyoza in the skillet, flat side down, and cook for about 2-3 minutes until they’re golden brown.
Carefully pour in about a quarter cup of water, cover with a lid, and let them steam for 5-7 minutes until the water evaporates. Remove the lid and allow the gyoza to crisp for another minute before serving.
When preparing gyoza, it’s important to make certain that the filling is well-seasoned as the dumplings themselves are quite mild. If desired, you can experiment with different types of proteins or vegetables for the filling.
Additionally, for a delicious dipping sauce, mix soy sauce, rice vinegar, and a few drops of chili oil. Remember, the key to a great gyoza is in the sealing; make sure to expel any air and seal them tightly to avoid leakage while cooking. Happy cooking!
Chawanmushi
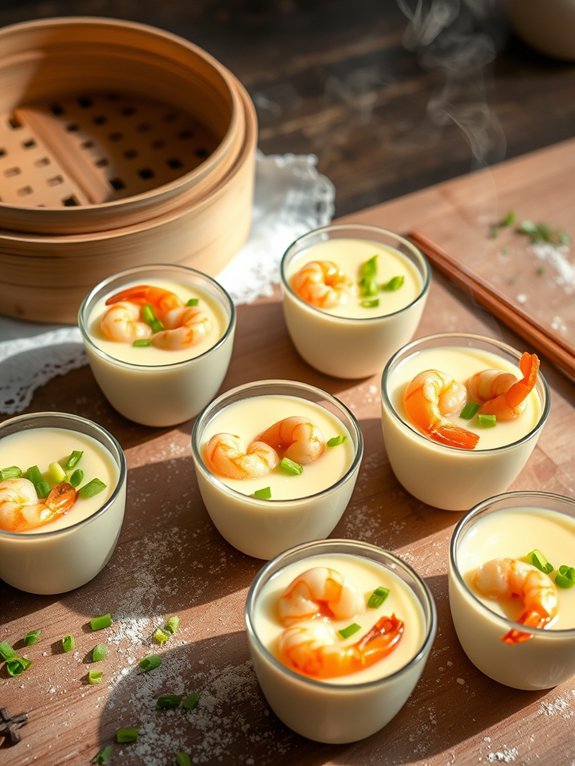
Chawanmushi is a traditional Japanese savory egg custard that’s both delicate and flavorful. This dish is often served in a small cup and steamed until creamy, making it a delightful appetizer or side dish. The texture is smooth, and its flavor is enhanced by a variety of ingredients, including dashi, soy sauce, and seasonal vegetables or seafood, allowing for numerous variations based on personal preference.
Recognized for its simplicity and elegance, chawanmushi is the perfect canvas for showcasing umami-rich ingredients. The dish has a unique preparation method that involves careful steaming to achieve the perfect custard consistency. Served warm, it can be enjoyed alone or paired with rice and pickles for a more complete meal.
Ingredients:
- 4 large eggs
- 2 cups dashi broth
- 2 tablespoons soy sauce
- 1 tablespoon mirin
- Salt, to taste
- 100 grams chicken thighs, cooked and diced
- 50 grams shiitake mushrooms, sliced
- 2 green onions, finely chopped
- 2-3 small shrimp, peeled and deveined
- Optional garnishes: ginkgo nuts, mitsuba leaves, or other vegetables
In a mixing bowl, whisk together the eggs, dashi, soy sauce, mirin, and a pinch of salt until smooth, taking care not to create bubbles. Strain the mixture through a fine sieve for an ultra-smooth texture.
Divide your chosen fillings, such as chicken, mushrooms, shrimp, and green onions, among small cups or ramekins. Pour the egg mixture over the fillings, leaving some space at the top for expansion.
Cover each cup with aluminum foil to prevent water from dripping in and steam them in a steamer pot or bamboo steamer for about 20-25 minutes, or until the custard is set.
When preparing chawanmushi, be mindful of the steaming time and temperature, as overcooking will cause the custard to curdle. You can also experiment with the fillings based on your tastes or seasonal ingredients you have available.
For an enhanced flavor, ascertain that the dashi is freshly made or of high quality. Finally, consider adjusting the seasoning to balance the flavors; it’s all about finding the right mix that suits your palate.
Tonkatsu
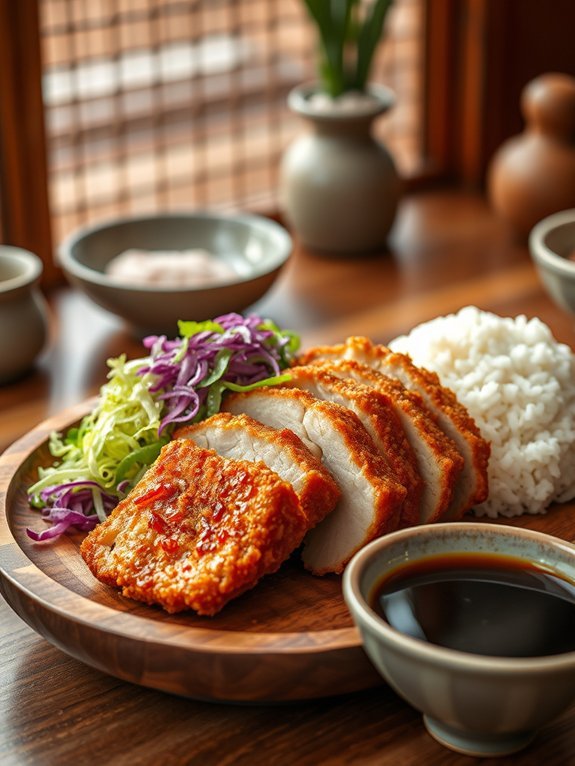
Tonkatsu is a beloved Japanese dish that has gained popularity around the world for its crispy texture and rich flavors. It consists of a breaded and deep-fried pork cutlet, traditionally served with shredded cabbage, rice, and a tangy tonkatsu sauce. The dish isn’t only a comfort food but also a quintessential representation of modern Japanese cuisine.
Invented in the late 19th century during Japan’s rapid modernization, tonkatsu combines Western culinary techniques with local ingredients, resulting in a unique and satisfying meal.
To create the perfect tonkatsu, selecting the right cut of meat is crucial. Pork loin or tenderloin are the most commonly used cuts, as they provide a good balance of flavor and tenderness. The key to achieving a crunchy exterior lies in the double-breading process, where the meat is first dredged in flour, then dipped in egg, and finally coated with panko breadcrumbs.
This method not only enhances the texture but also guarantees that the crust remains crispy even after cooking. Served hot and new, tonkatsu is often accompanied by tonkatsu sauce, providing a sweet and savory complement to the dish.
Ingredients:
- 2 boneless pork loin chops (about 1 inch thick)
- Salt and pepper
- 1/2 cup all-purpose flour
- 1 large egg, beaten
- 1 cup panko breadcrumbs
- Vegetable oil for frying
- Tonkatsu sauce (for serving)
- Shredded cabbage (for serving)
- Cooked white rice (for serving)
To prepare tonkatsu, start by seasoning the pork loin chops with salt and pepper on both sides. Dredge each chop in flour, shaking off any excess, then dip them into the beaten egg, allowing the excess to drip off.
Finally, coat the chops in panko breadcrumbs, pressing gently to guarantee they adhere well. In a deep frying pan, heat about 1/2 inch of vegetable oil over medium-high heat. Once hot, carefully add the breaded pork chops and fry for about 4-5 minutes per side, or until golden brown and cooked through. Remove from the pan and let them drain on paper towels before slicing.
When cooking tonkatsu, it’s important to maintain the oil temperature for frying; if the oil is too hot, the breadcrumbs may burn before the pork is fully cooked, and if too low, the tonkatsu may absorb excess oil and become greasy.
To check the oil temperature, you can drop a few breadcrumbs into the oil; they should sizzle immediately. Additionally, serving tonkatsu with a side of freshly shredded cabbage adds a rejuvenating crunch that balances the richness of the dish, making every bite a delight.


