This post may contain affiliate links. Please read our policy page.
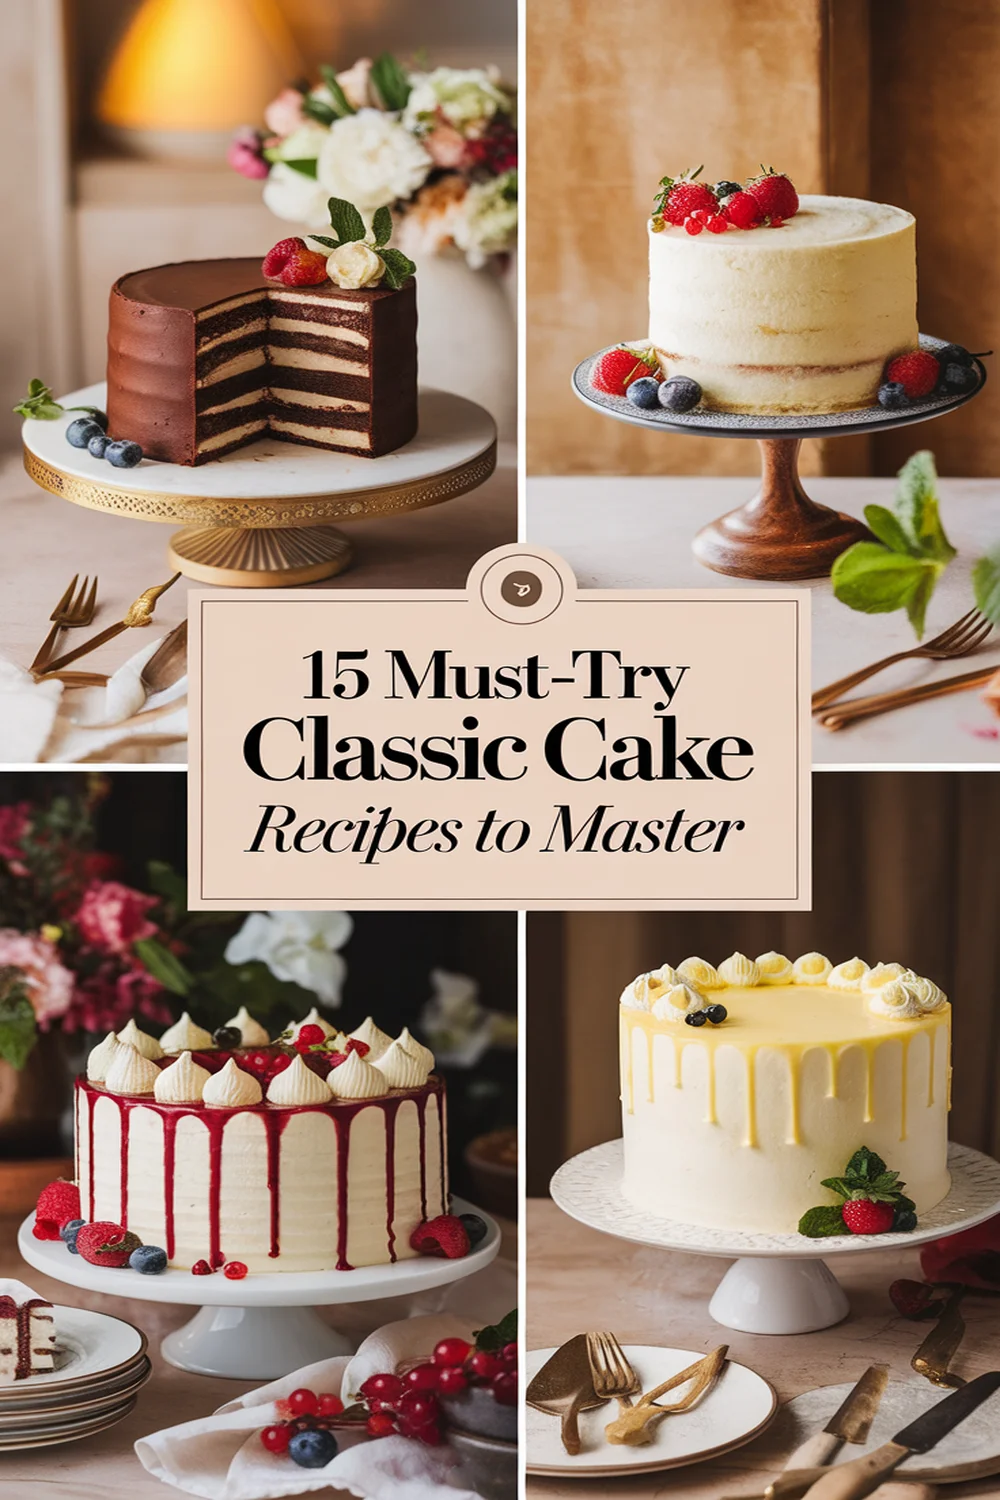
If you want to master classic cake recipes, you can’t go wrong with a few timeless favorites. Start with a soft and fluffy Vanilla Birthday Cake, or indulge in a Rich Chocolate Layer Cake. Don’t miss the distinctive flavor of Moist Red Velvet Cake or the comforting Old-Fashioned Carrot Cake. For a lighter option, try a Light and Fluffy Angel Food Cake. With these essentials, you’ll find yourself creating mouthwatering delights. There’s so much more to explore!
Classic Vanilla Birthday Cake
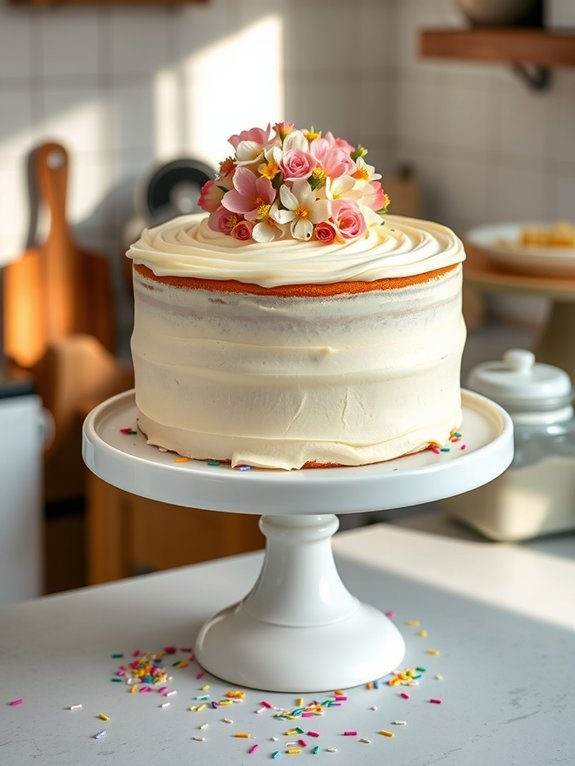
There’s something truly timeless about a classic vanilla birthday cake. It’s the centerpiece of celebrations, providing a canvas for your creativity whether you decorate it simply or lavishly.
The soft and fluffy texture, coupled with the rich vanilla flavor, makes this cake a favorite among both kids and adults alike. When you bring this cake to a party, it instantly brings a sense of joy and nostalgia, as everyone remembers blowing out the candles and making wishes.
Making a classic vanilla birthday cake isn’t only rewarding but also quite simple. It requires a few basic ingredients that you may already have in your pantry. With some careful mixing and baking, you’ll create a delicious cake that can be paired with your favorite frosting.
Whether you opt for a traditional buttercream or something more adventurous, this cake serves as the perfect foundation for any birthday celebration.
Ingredients:
- 2 ¾ cups all-purpose flour
- 2 ½ teaspoons baking powder
- ½ teaspoon salt
- 1 cup unsalted butter, softened
- 2 cups granulated sugar
- 4 large eggs
- 1 tablespoon pure vanilla extract
- 1 cup whole milk
Preheat your oven to 350°F (175°C) and grease and flour two 9-inch round cake pans. In a bowl, whisk together the flour, baking powder, and salt. In a separate mixing bowl, cream the softened butter and sugar until light and fluffy.
Add the eggs one at a time, mixing well after each addition, then stir in the vanilla. Gradually mix in the dry ingredients alternating with the milk, starting and ending with the flour mixture.
Divide the batter evenly between the prepared pans and bake for 25-30 minutes, or until a toothpick inserted into the center comes out clean. Allow the cakes to cool for 10 minutes before inverting onto wire racks to cool completely.
For a moist and flavorful cake, be sure not to overmix the batter, as this can lead to a dense cake. Additionally, using quality vanilla extract makes a significant difference in flavor.
Don’t hesitate to experiment with add-ins like chocolate chips or sprinkles for an extra fun touch. Finally, confirm that the cakes are completely cooled before frosting to prevent melting your icing. Enjoy creating this lovely cake for your next celebration!
Rich Chocolate Layer Cake
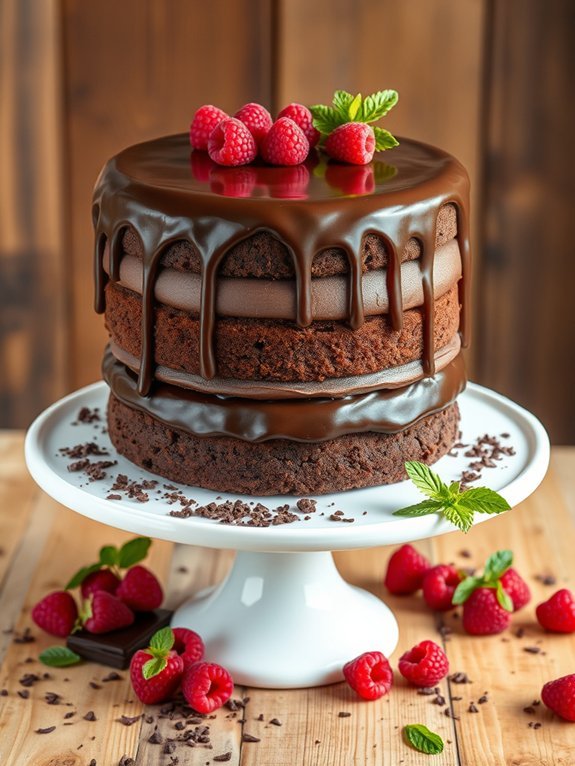
Rich Chocolate Layer Cake is the epitome of indulgence, perfect for any special occasion or simply as a delightful treat for chocolate lovers.
This cake features multiple layers of moist chocolate sponge cake sandwiched with velvety chocolate ganache, guaranteeing every bite is a rich experience.
Whether you’re celebrating a birthday, anniversary, or just craving something sweet, this cake promises to impress your guests and satisfy your sweet tooth.
To create the ultimate chocolate experience, you’ll use high-quality cocoa powder and chocolate for both the cake and the frosting.
The layers are easy to assemble, allowing you to personalize the cake with additional fillings or decorations if you choose.
Once the cake is baked and frosted, it can be stored in the refrigerator or at room temperature, making it a versatile dessert for various occasions.
Ingredients:
- 1 ¾ cups all-purpose flour
- 1 ½ cups granulated sugar
- ¾ cup unsweetened cocoa powder
- 2 teaspoons baking powder
- 1 ½ teaspoons baking soda
- 1 teaspoon salt
- 2 large eggs
- 1 cup whole milk
- ½ cup vegetable oil
- 2 teaspoons vanilla extract
- 1 cup boiling water
- 1 cup heavy cream (for ganache)
- 8 ounces semi-sweet chocolate, chopped (for ganache)
Preheat your oven to 350°F (175°C) and grease two 9-inch round cake pans.
In a large mixing bowl, combine the flour, sugar, cocoa powder, baking powder, baking soda, and salt.
In another bowl, whisk together the eggs, milk, vegetable oil, and vanilla extract.
Gradually mix the wet ingredients into the dry ingredients until well combined.
Slowly stir in boiling water until the batter is smooth.
Divide the batter evenly between the prepared pans and bake for 30-35 minutes or until a toothpick inserted in the center comes out clean.
Allow the cakes to cool in the pans for 10 minutes before transferring them to wire racks to cool completely.
For the ganache, heat the heavy cream in a saucepan until just simmering, then pour it over the chopped chocolate and let it sit for a few minutes.
Stir until smooth and glossy.
Once the cakes are completely cooled, place one layer on a serving plate, spread a generous amount of ganache on top, then add the second layer and frost the top and sides of the cake.
Allow the ganache to set before slicing and serving.
Make sure your ingredients are at room temperature before you start for better mixing and a uniform batter.
When baking the cakes, verify your oven is preheated correctly for even baking.
If you prefer even more chocolate flavor, you can fold in chocolate chips into the batter or layer in additional fillings such as chocolate mousse or whipped cream between the layers.
This cake can also be decorated with chocolate shavings or fresh berries for an elegant touch.
Recommended Items
Get ready to bake delicious cakes with our handpicked products and equipment—let’s dive in!
Products
Moist Red Velvet Cake
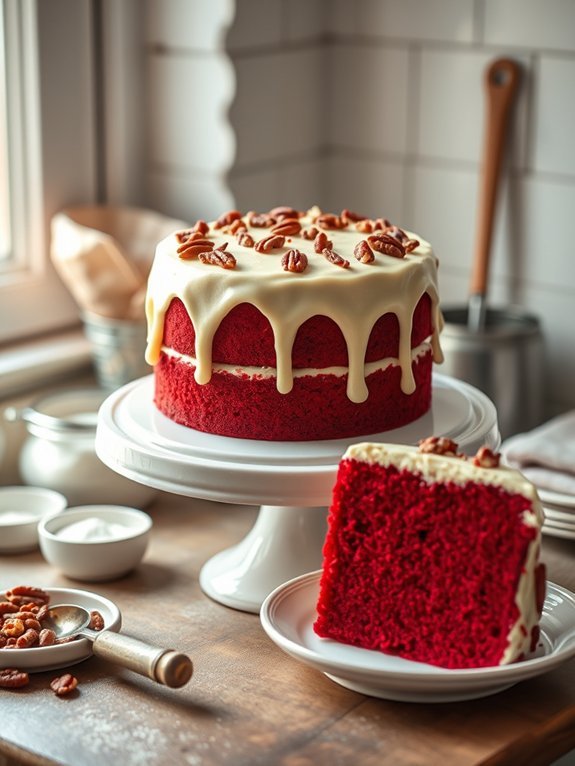
Moist red velvet cake is a timeless classic that stands out not only for its striking deep red color but also for its unique flavor profile that combines a hint of cocoa with a subtle tang. Originally hailing from the southern United States, this cake has become a staple for celebrations, especially during Valentine’s Day and Christmas, due to its festive look and delicious taste.
The signature cream cheese frosting pairs beautifully with the moist, crumbly texture of the cake, creating an irresistible combination that leaves everyone wanting more.
To make the perfect moist red velvet cake, it’s crucial to strike the right balance between ingredients to enhance the traditional flavors while guaranteeing a delightful texture. This recipe focuses on using high-quality ingredients, such as buttermilk and vegetable oil, to achieve that desired moistness.
Coupled with a touch of vinegar and baking soda, these components work together to create a cake that’s both light and tender. Join us in the kitchen to whip up this delectable treat!
Ingredients:
- 2 cups all-purpose flour
- 1 ½ cups granulated sugar
- 1 teaspoon baking soda
- 1 teaspoon fine salt
- 1 teaspoon cocoa powder
- 1 cup vegetable oil
- 1 cup buttermilk, room temperature
- 2 large eggs, room temperature
- 2 tablespoons red food coloring
- 1 teaspoon vanilla extract
- 1 teaspoon white vinegar
For the cream cheese frosting:
- 8 oz cream cheese, softened
- ½ cup unsalted butter, softened
- 4 cups powdered sugar
- 1 teaspoon vanilla extract
Preheat your oven to 350°F (175°C). Grease and flour two 9-inch round cake pans. In a large mixing bowl, combine the flour, sugar, baking soda, salt, and cocoa powder.
In another bowl, whisk together the vegetable oil, buttermilk, eggs, food coloring, vanilla extract, and vinegar until well combined. Gradually mix the wet ingredients into the dry ingredients until the batter is smooth.
Divide the batter evenly between the prepared pans and bake for 25-30 minutes or until a toothpick inserted into the center comes out clean. Allow the cakes to cool in the pans for 10 minutes before transferring them to a wire rack to cool completely.
For an extra touch of flavor and decoration, consider adding a layer of toasted pecans or walnuts in between the cake layers. This will enhance the texture and provide a delightful crunch.
Also, when preparing your cream cheese frosting, remember that both the butter and cream cheese are at room temperature for a smoother consistency.
Finally, don’t forget to chill the cake after frosting to help it set and make slicing easier, which will guarantee clean, beautiful pieces when serving.
Old-Fashioned Carrot Cake

There’s something uniquely comforting about an old-fashioned carrot cake. This classic dessert not only brings nostalgia but also a delightful blend of spices that warmth the soul.
What sets this carrot cake apart is the combination of finely grated carrots, which provide moisture, sweetness, and a vibrant color, along with the addition of warm spices. It’s the perfect cake to serve at family gatherings or to simply enjoy with a cup of tea on a cozy afternoon.
This recipe guarantees that the cake isn’t only delicious but also has the right texture, keeping it soft and fluffy while maintaining that distinct carrot flavor. The cake can be topped with cream cheese frosting for an extra layer of goodness. With its rich taste and beautiful presentation, an old-fashioned carrot cake is sure to impress anyone lucky enough to take a slice.
Ingredients:
- 2 cups all-purpose flour
- 2 cups granulated sugar
- 1 teaspoon baking powder
- 1 teaspoon baking soda
- 1 teaspoon ground cinnamon
- 1/2 teaspoon ground nutmeg
- 1/2 teaspoon salt
- 1 cup vegetable oil
- 4 large eggs
- 3 cups finely grated carrots
- 1 cup crushed pineapple, drained
- 1/2 cup chopped walnuts (optional)
- 1/2 cup raisins (optional)
To make the old-fashioned carrot cake, preheat your oven to 350°F (175°C) and grease two 9-inch round cake pans.
In a large mixing bowl, combine the flour, sugar, baking powder, baking soda, cinnamon, nutmeg, and salt. In a separate bowl, whisk together the oil and eggs until well combined. Gradually add the wet ingredients to the dry ones, stirring until just mixed.
Fold in the grated carrots, crushed pineapple, walnuts, and raisins if using. Divide the batter evenly between the prepared pans and bake for 25-30 minutes or until a toothpick inserted in the center comes out clean.
Allow the cakes to cool in the pans for 10 minutes before transferring them to wire racks to cool completely.
For an extra touch, consider toasting your walnuts before adding them to the batter; this enhances their flavor and adds a delightful crunch to the cake. Additionally, feel free to experiment with adding other spices such as ginger for a spicier flavor.
When frosting with cream cheese, let it sit at room temperature for a while before spreading it on your cooled cake for the best consistency. Finally, this cake can be made a day ahead; just make sure to store it in an airtight container to keep it moist!
Light and Fluffy Angel Food Cake
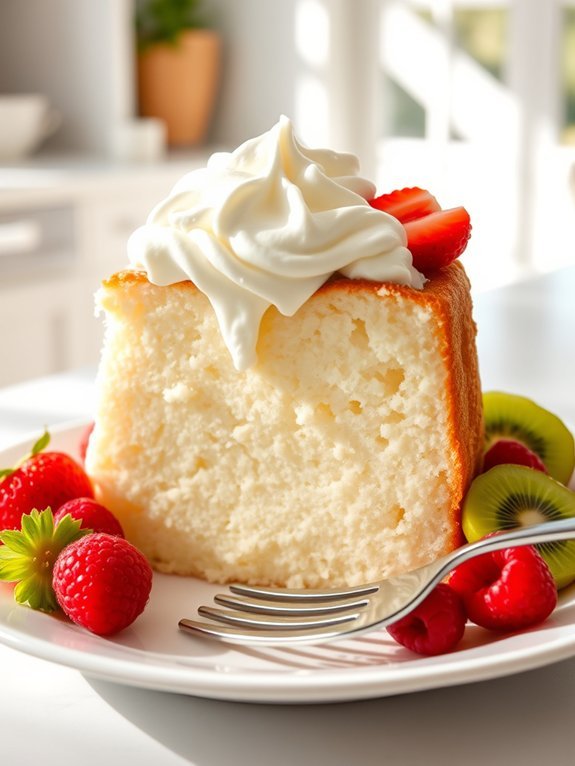
Angel food cake is a classic dessert that’s known for its light and airy texture. Made primarily from egg whites, sugar, flour, and flavorings, it rises beautifully to create a cake that feels almost ethereal in your mouth. It’s often served plain, but it can also be paired with fresh fruits, whipped cream, or a drizzle of syrup for added flavor and presentation. This cake is popular for its low fat content and is a delicious option for those who are mindful of their dietary intake but still want a delightful dessert.
The key to achieving the perfect angel food cake lies in properly whipping the egg whites to incorporate enough air and achieve that iconic fluffy structure. It’s important to make certain your mixing bowl and utensils are completely clean and free of any fat since even the slightest bit can hinder the whipping process. Once you master this simple technique, you’ll be able to indulge in a heavenly slice of angel food cake that boasts a beautifully soft crumb and subtle sweetness.
Ingredients:
- 1 cup cake flour
- 1 ½ cups granulated sugar
- 12 large egg whites (room temperature)
- 1 teaspoon cream of tartar
- 1 teaspoon vanilla extract
- ½ teaspoon almond extract
- ¼ teaspoon salt
Gently sift the cake flour and half a cup of sugar together, then set aside. In a mixing bowl, beat the egg whites with the cream of tartar and salt until foamy. Gradually add the remaining sugar while continuing to beat until stiff peaks form.
Carefully fold in the extracts and the sifted flour mixture in small batches, making sure to maintain the lightness of the batter. Pour the batter into an ungreased tube pan and smooth out the top. Bake at 350°F (175°C) for 30-35 minutes until the cake is golden brown and springs back when lightly pressed.
Invert the cake onto a cooling rack and allow it to cool completely in the pan. When baking angel food cake, it’s essential not to grease the pan, as this helps the cake to cling to the sides and rise properly. Also, make certain that the egg whites are whipped to stiff peaks for the best volume and texture.
To check for doneness, you can do the toothpick test; if it comes out clean with a bit of crumb, your cake is ready. Finally, run a knife around the edges before inverting the pan to help release the cake without any breakage. Enjoy your light and airy angel food cake plain or dressed up with seasonal fruits and a dollop of cream!
Luscious Lemon Pound Cake
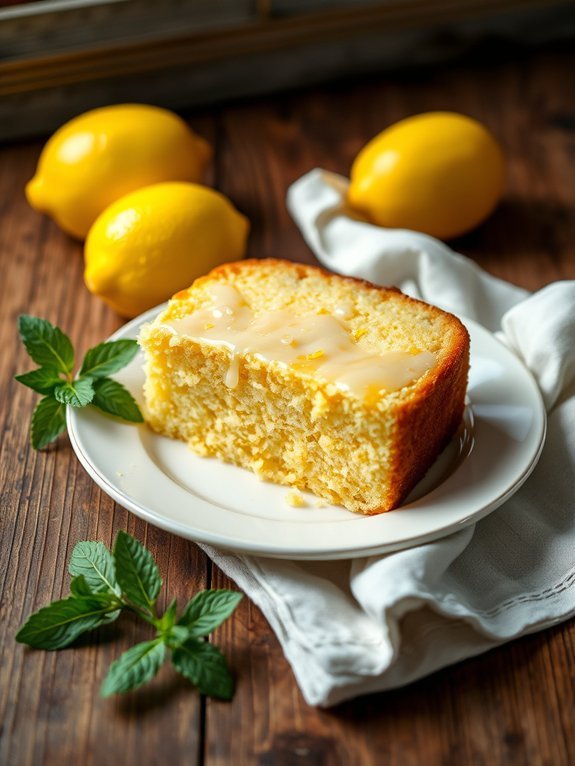
Luscious Lemon Pound Cake is a delightful dessert that perfectly balances zest and sweetness, making it a favorite for many. This classic recipe yields a moist and tender cake that’s ideal for any occasion, whether it’s a family gathering, a tea party, or simply an afternoon treat. The bright, invigorating flavor of lemon brings a burst of sunshine to your palate, as the rich buttery texture melts in your mouth. Pair it with a cup of tea or coffee for a delightful afternoon pick-me-up.
Making this cake from scratch may seem intimidating, but it’s actually quite simple and rewarding. With fresh lemon zest and juice, your cake will have an aromatic flair that elevates the humble pound cake to something truly special. The addition of sour cream or yogurt helps keep the cake moist, while a drizzle of lemon glaze on top adds an extra layer of sweetness and tanginess.
Let’s explore the ingredients and instructions to create this luscious lemon pound cake.
- 1 ½ cups unsalted butter, softened
- 3 cups granulated sugar
- 6 large eggs
- 3 cups all-purpose flour
- 1 teaspoon baking powder
- ½ teaspoon baking soda
- 1 teaspoon salt
- 1 cup sour cream or plain yogurt
- Zest of 2 lemons
- ½ cup fresh lemon juice
- 1 teaspoon vanilla extract
Preheat your oven to 325°F (163°C) and grease a bundt or loaf pan. In a large mixing bowl, cream together the softened butter and sugar until light and fluffy. Add the eggs one at a time, ensuring each is fully incorporated before adding the next.
In a separate bowl, whisk together the flour, baking powder, baking soda, and salt. Gradually add the dry ingredients to the wet mixture, alternating with the sour cream and incorporating the lemon zest, juice, and vanilla extract until just combined.
Pour the batter into the prepared pan and bake for 60-70 minutes or until a toothpick inserted into the center comes out clean. Allow the cake to cool in the pan for 10 minutes before turning it out onto a wire rack to cool completely.
When baking the Luscious Lemon Pound Cake, it’s important to use room temperature ingredients, especially the butter and eggs, as this helps achieve a lighter texture. Make sure to properly grease your pan to prevent sticking.
If you want to enhance the lemon flavor, consider adding a lemon glaze made from powdered sugar and lemon juice once the cake has cooled. For added flavor, you can also fold in poppy seeds before baking, creating a beautiful visual and a delicious nutty flavor that complements the lemon nicely.
Enjoy your homemade lemon pound cake!
Proposed Recipe for Classic Cakes
Decadent German Chocolate Cake
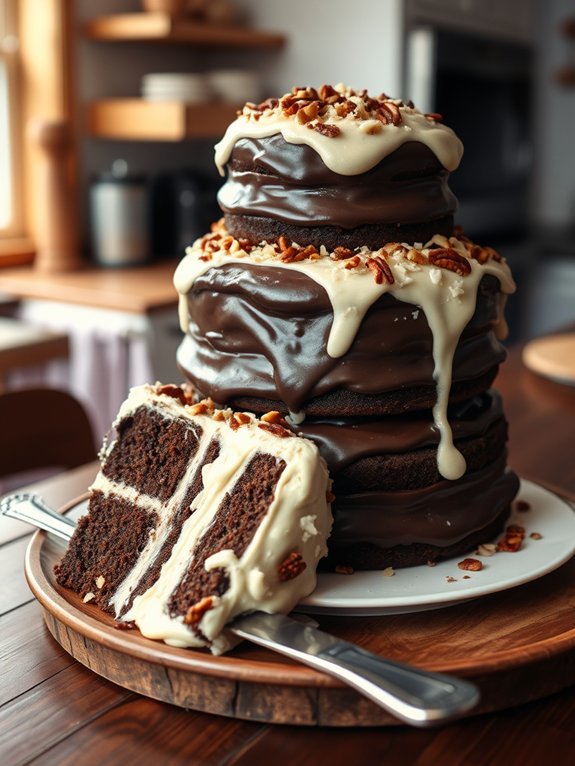
Decadent German Chocolate Cake is a luscious dessert that has captured the hearts of cake lovers around the world. This layered treat features rich chocolate cake, filled and topped with a sweet coconut and pecan frosting. Its origins can be traced back to Samuel German, who created a dark-baking chocolate for Baker’s Chocolate Company in 1852. The cake became popular after a recipe using his chocolate was published in a Texas newspaper in the mid-1900s, leading to its enduring legacy.
Making a classic German Chocolate Cake is a delightful experience that yields a visually stunning and palate-pleasing result. The combination of fluffy layers enveloped in a creamy frosting makes it perfect for birthday parties, celebrations, or any occasion that calls for something a little more special. Every bite offers a taste of bliss, highlighting the harmonious balance between chocolate, coconut, and pecans.
Ingredients:
- 2 cups all-purpose flour
- 1 teaspoon baking soda
- 1 teaspoon baking powder
- 1/2 teaspoon salt
- 1 cup unsweetened cocoa powder
- 1/2 cup vegetable oil
- 1 cup granulated sugar
- 1 cup brown sugar, packed
- 4 large eggs
- 2 teaspoons vanilla extract
- 1 cup buttermilk
- 1 cup boiling water
Frosting:
- 1 cup granulated sugar
- 1 cup heavy cream
- 1 cup shredded coconut
- 1 cup chopped pecans
- 1 teaspoon vanilla extract
Preheat the oven to 350°F (175°C). Grease and flour three 9-inch round cake pans. In a bowl, combine flour, baking powder, baking soda, salt, and cocoa powder.
In a separate mixing bowl, cream together the vegetable oil, granulated sugar, and brown sugar until light and fluffy. Add the eggs one at a time, mixing well after each addition, and then stir in the vanilla extract. Gradually blend the dry ingredients into the wet mixture, alternating with buttermilk.
Finally, mix in the boiling water until smooth. Pour the batter evenly into the prepared pans and bake for about 30 minutes or until a toothpick inserted in the center comes out clean. Let them cool completely before frosting.
To achieve the best results, make sure to let the cakes cool completely before frosting, as this will prevent the frosting from melting and sliding off. If the frosting seems too thick, you can add a splash of milk until the desired consistency is achieved.
For an extra layer of flavor, consider adding a pinch of salt to the coconut and pecan mixture, as it will enhance the sweetness. Finally, don’t rush the frosting process; take your time spreading it evenly between the layers and on the top and sides for a beautiful presentation.
Strawberry Shortcake

Strawberry shortcake is a delightful dessert that perfectly embodies the essence of summer with its light, fluffy texture and sweet strawberry flavor. This classic treat has long been a favorite in many households, evoking memories of picnics and family gatherings. The combination of homemade biscuits, ripe strawberries, and whipped cream creates a wonderful harmony of flavors that’s both indulgent and invigorating.
It’s easy to make and can even be prepared in advance, making it the perfect dessert for any occasion.
To achieve the best results, it’s important to use fresh, high-quality strawberries. This will enhance the natural sweetness of the dessert and provide that vibrant burst of flavor. Additionally, the texture of the biscuits is vital; they should be tender, flaky, and just a hint sweet, providing a perfect contrast to the luscious strawberries and cream.
Follow this simple recipe for a classic strawberry shortcake that’s sure to impress your family and friends.
Ingredients
- 2 cups all-purpose flour
- 1 tablespoon baking powder
- 2 tablespoons granulated sugar
- 1/2 teaspoon salt
- 1/2 cup unsalted butter, cold and cubed
- 3/4 cup heavy cream
- 4 cups fresh strawberries, hulled and sliced
- 1/4 cup granulated sugar (for strawberries)
- 1 cup heavy whipping cream (for topping)
- 1 tablespoon powdered sugar
- 1 teaspoon vanilla extract
To make the strawberry shortcake, begin by preheating your oven to 425°F (220°C). In a large mixing bowl, combine the flour, baking powder, sugar, and salt. Add the cold butter and mix until the mixture resembles coarse crumbs. Stir in the heavy cream until just combined.
Turn the dough onto a floured surface, knead it gently, and pat it into a 1-inch thick circle. Cut out biscuits using a round cutter and arrange them on a baking sheet. Bake for 12 to 15 minutes or until golden.
While the biscuits are baking, combine the sliced strawberries with sugar and let them sit to release their juices. For the whipped cream, beat together the heavy whipping cream, powdered sugar, and vanilla extract until soft peaks form.
To assemble, split the biscuits in half, layer with strawberries and cream, and top with the other half of the biscuit.
When preparing strawberry shortcake, the freshness of your ingredients is key. Always opt for seasonal strawberries for the best flavor, and feel free to adjust the sweetness of the strawberries based on your taste preferences.
If you’re feeling adventurous, consider adding a splash of liqueur, such as Grand Marnier, to the strawberries for an extra kick. Additionally, leftover strawberry shortcake can be stored in the fridge, but be mindful that the biscuits may become soggy if left for too long; it’s best enjoyed fresh.
Traditional Black Forest Cake
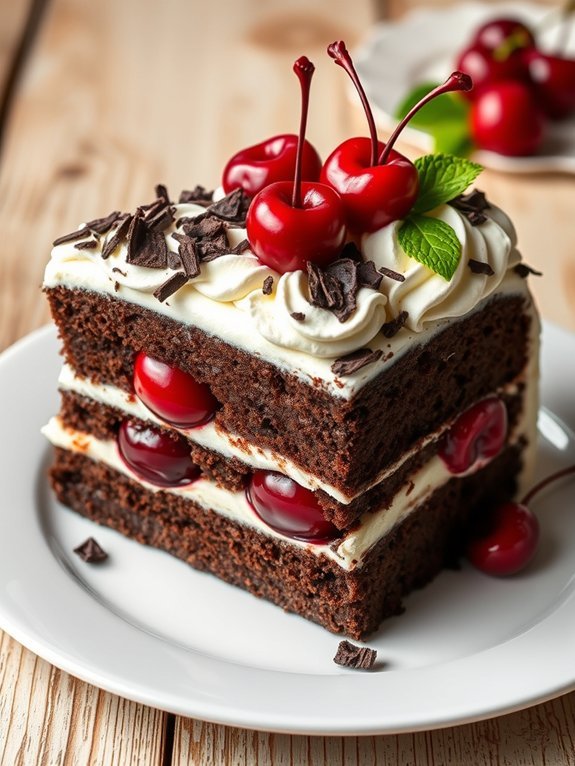
The Traditional Black Forest Cake, or Schwarzwälder Kirschtorte, originates from the Black Forest region of Germany and is a beloved dessert worldwide. This indulgent treat is characterized by its rich chocolate sponge layers, luscious whipped cream, and tart cherries, creating a perfect harmony of flavors and textures. Traditionally, it’s made using fresh cherries; however, you can also use jarred sour cherries for convenience, making it a versatile choice for home bakers.
Making a Black Forest Cake may seem intimidating at first, but the process is quite straightforward. The cake layers are made using a simple chocolate sponge recipe, which is then drenched in Kirschwasser, a clear cherry schnapps, to enhance its flavor. Layering the cake with whipped cream and cherries not only adds moisture but also balances the sweetness with a punch of tartness. Once assembled, it’s a feast for the eyes, and each slice promises a delightful explosion of taste.
Ingredients:
- 1 ¾ cups all-purpose flour
- 1 ¾ cups granulated sugar
- ¾ cup unsweetened cocoa powder
- 1 ½ teaspoons baking powder
- 1 ½ teaspoons baking soda
- 1 teaspoon salt
- 2 large eggs
- 1 cup whole milk
- ½ cup vegetable oil
- 2 teaspoons pure vanilla extract
- 1 cup boiling water
- 1 cup heavy cream (for whipping)
- 1 cup pitted cherries (fresh or jarred)
- ¼ cup Kirschwasser (cherry schnapps)
- Dark chocolate shavings (for garnish)
To prepare the Black Forest Cake, start by preheating your oven to 350°F (175°C). Grease and flour two 9-inch round cake pans. In a large mixing bowl, sift together the flour, sugar, cocoa powder, baking powder, baking soda, and salt.
In a separate bowl, whisk together the eggs, milk, vegetable oil, and vanilla until well combined. Gradually add the wet ingredients to the dry ingredients, mixing until smooth. Carefully incorporate the boiling water, which will create a runny batter.
Divide the batter evenly between the prepared pans and bake for 30 to 35 minutes, or until a toothpick inserted in the center comes out clean. Let the cakes cool completely before assembling.
When making a Black Forest Cake, consider chilling your heavy cream before whipping it, as colder cream whips better. Additionally, if you opt for jarred cherries, make sure you drain them well to avoid sogginess in the cake layers.
Finally, for a stunning presentation, spread whipped cream generously between the layers and on top of the cake, and decorate it with dark chocolate shavings and whole cherries. Enjoy your baking experience and the delight of sharing this classic dessert!
Irresistible Coconut Cake
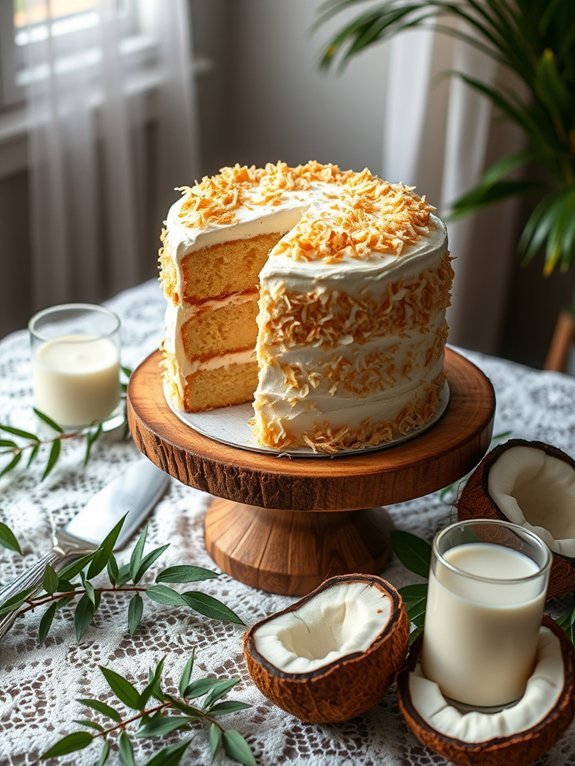
Coconut cake is a beloved dessert that brings a touch of tropical paradise to any gathering. Its moist, fluffy texture combined with the sweet, rich flavor of coconut creates a delightful experience for your taste buds.
This cake is usually layered with a creamy coconut frosting that complements its lightness perfectly. Perfect for birthdays, weddings, or any festive occasion, this irresistible treat is sure to impress friends and family.
Making a coconut cake from scratch might seem challenging, but with the right ingredients and a little bit of patience, you can bake a masterpiece that rivals those found in bakeries. This recipe focuses on using fresh coconut, which adds an authentic touch. Your effort will be rewarded when you cut into the beautifully layered cake, revealing its fluffy interior and the delightful aromas wafting from the kitchen.
Ingredients:
- 2 cups all-purpose flour
- 1 ½ cups granulated sugar
- ½ cup unsalted butter, softened
- 1 cup whole milk
- 4 large eggs
- 2 teaspoons baking powder
- ½ teaspoon salt
- 1 teaspoon vanilla extract
- 1 cup shredded coconut (sweetened or unsweetened, as preferred)
- 1 cup coconut cream (for frosting)
- 2 cups powdered sugar (for frosting)
- Extra shredded coconut (for garnish)
In a large mixing bowl, cream together the softened butter and granulated sugar until light and fluffy.
Add the eggs one at a time, mixing well after each addition. Gradually stir in the milk, vanilla, baking powder, and salt. Slowly incorporate the flour, mixing until just combined, and then fold in the shredded coconut. Evenly distribute the batter between two greased and floured cake pans.
Bake in a preheated oven at 350°F (175°C) for 25-30 minutes or until a toothpick inserted into the center comes out clean. Allow the cakes to cool for 10 minutes before transferring them to a wire rack to cool completely.
When preparing your coconut cake, consider using a combination of sweetened and unsweetened shredded coconut for a more complex flavor.
To make the frosting extra fluffy, beat the coconut cream well before adding the powdered sugar. For added texture and presentation, you can toast the extra shredded coconut for garnish, making the cake not only delicious but visually appealing as well.
Be sure to chill the cake before serving; the flavors meld beautifully when it sits for a few hours or overnight. Enjoy your baking adventure!
Classic Cheesecake
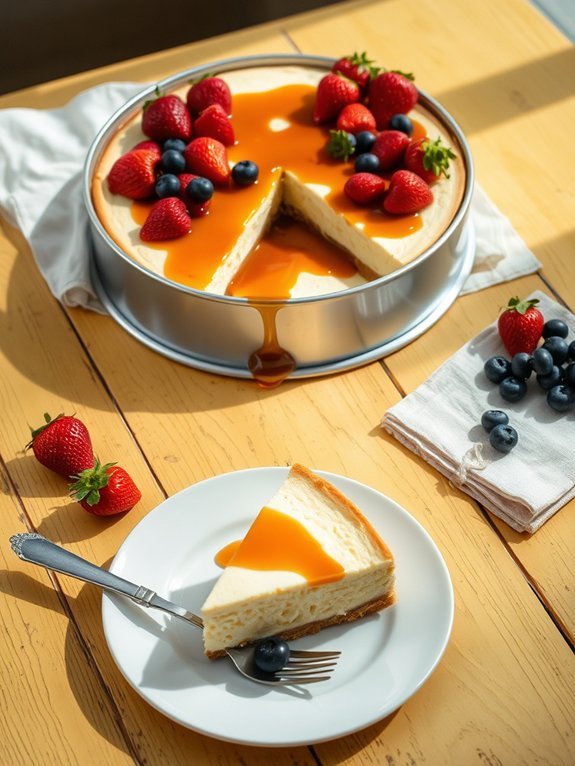
Classic cheesecake is a rich, creamy dessert that has been loved for generations. Its smooth texture and tangy flavor make it a perennial favorite for celebrations and special occasions.
Whether you prefer it plain or adorned with fruits and sauces, the classic cheesecake serves as a versatile base that invites creative garnishing options. This dessert is traditionally baked in a springform pan, allowing for easy removal and presentation.
The combination of cream cheese, sugar, and eggs creates a luscious filling that perfectly contrasts against a buttery graham cracker crust. With a few simple ingredients and careful attention to baking times, you can create a cheesecake that rivals those found in gourmet bakeries.
Ingredients:
- 1 ½ cups graham cracker crumbs
- ½ cup unsalted butter, melted
- 2 tablespoons granulated sugar
- 4 (8-ounce) packages cream cheese, softened
- 1 cup granulated sugar
- 1 teaspoon vanilla extract
- 4 large eggs
- 1 cup sour cream
- 2 tablespoons all-purpose flour (optional)
Preheat the oven to 325°F (160°C). In a medium bowl, combine the graham cracker crumbs, melted butter, and 2 tablespoons of sugar to create the crust. Press this mixture into the bottom of a greased 9-inch springform pan firmly and evenly.
In a large mixing bowl, beat together the softened cream cheese, sugar, and vanilla extract until smooth. Add eggs one at a time, mixing well after each addition. Once combined, fold in sour cream and optional flour.
Pour the cream cheese mixture over the crust and smooth the top. Bake for 55-65 minutes or until the center is set but slightly jiggly. Turn off the oven and leave the cheesecake inside, allowing it to cool for an hour, then refrigerate for at least 4 hours before serving.
For the best texture, make sure all of your ingredients are at room temperature before starting, as this helps to avoid lumps in the cream cheese mixture. Additionally, avoid overmixing the batter after adding the eggs; this can incorporate too much air, leading to cracks while baking.
Finally, consider topping your cheesecake with fresh fruit, chocolate ganache, or a drizzle of caramel for added flavor and visual appeal.
Boston Cream Pie
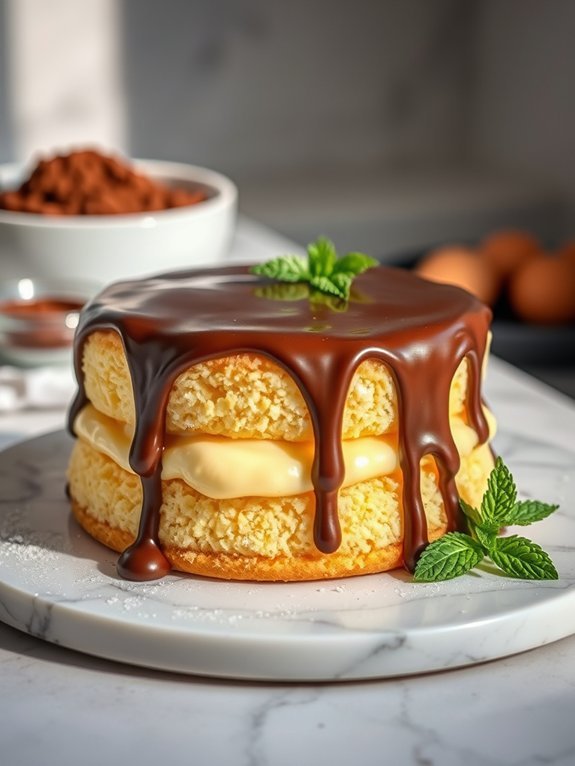
Boston Cream Pie is a delightful dessert that combines the richness of a buttery cake with the lusciousness of pastry cream and the glossy finish of chocolate ganache. Originating in Boston in the 19th century, this iconic confection isn’t actually a pie, but rather a cake made of two layers of sponge or butter cake filled with creamy custard and topped with a smooth chocolate glaze. The contrasting textures and flavors create a symphony that’s irresistible to cake lovers.
To make a classic Boston Cream Pie, you’ll need to prepare a tender yellow cake, a velvety pastry cream, and a ganache that crowns the dessert. This recipe is perfect for a special occasion, a family gathering, or just a sweet treat to enjoy after dinner. With a few basic ingredients and some patience, you can impress friends and family with this timeless dessert that celebrates the art of baking.
Ingredients:
- 1 ½ cups all-purpose flour
- 1 ½ teaspoons baking powder
- ½ teaspoon salt
- ½ cup unsalted butter, softened
- 1 cup granulated sugar
- 3 large eggs
- 1 teaspoon vanilla extract
- ½ cup milk
- 1 cup heavy cream
- 1 cup pastry cream (store-bought or homemade)
- 6 ounces semi-sweet chocolate, chopped
- ¾ cup heavy cream (for ganache)
To prepare the Boston Cream Pie, first, preheat your oven to 350°F (175°C) and grease two 9-inch round cake pans. In a bowl, sift together the flour, baking powder, and salt; set aside.
In a separate bowl, beat the softened butter and sugar until light and fluffy. Add the eggs one at a time, mixing well after each addition, then stir in the vanilla. Gradually incorporate the flour mixture and milk in alternating batches, beginning and ending with the flour mixture, until just combined.
Pour the batter evenly into the prepared pans and bake for 25-30 minutes, or until a toothpick comes out clean. Allow the cakes to cool completely before assembling. Spread the pastry cream between the two cake layers and top with the chocolate ganache made by heating the chopped chocolate with the heavy cream until smooth.
When making Boston Cream Pie, confirm that your cakes are completely cool before adding the pastry cream to prevent it from melting. You can also make the components ahead of time; just store the cakes and pastry cream separately in the refrigerator.
For added flavor, consider infusing the pastry cream with vanilla bean or adding a splash of vanilla extract to the cake batter. Finally, if you love a bit of crunch, sprinkle some chopped nuts between the layers for a delightful texture contrast.
Pineapple Upside-Down Cake
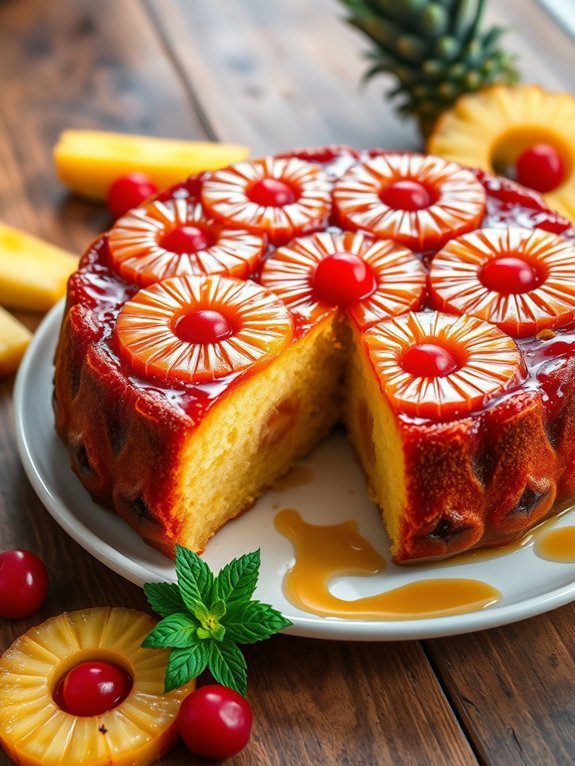
Pineapple Upside-Down Cake is a classic dessert that beautifully blends the sweetness of caramelized pineapple with the rich flavor of moist cake. Originating in the 1920s, this delightful treat has remained a favorite for many because of its eye-catching presentation and deliciously sweet taste. The combination of butter, brown sugar, and pineapple creates a luscious topping that contrasts perfectly with the airy cake base.
Making a Pineapple Upside-Down Cake isn’t only a fun activity but also a rewarding experience when you see the transformation as it bakes. When flipped, the caramelized pineapples and maraschino cherries create a stunning visual appeal that’s sure to impress family and friends, making it perfect for gatherings and celebrations. The moistness of the cake paired with the vibrant fruit topping is a flavor combination that will leave everyone asking for seconds.
Ingredients:
- 1/4 cup unsalted butter
- 3/4 cup packed brown sugar
- 1 can (20 oz) sliced pineapple in juice, drained (reserve juice)
- 10-12 maraschino cherries
- 1 cup all-purpose flour
- 1 cup granulated sugar
- 1/2 cup milk (or reserved pineapple juice)
- 1/2 cup vegetable oil
- 2 large eggs
- 2 tsp baking powder
- 1/2 tsp vanilla extract
- 1/4 tsp salt
Preheat your oven to 350°F (175°C). In a 9-inch round cake pan, melt the butter in the oven and then sprinkle brown sugar evenly over the melted butter. Arrange the pineapple slices on top, placing cherries in the centers and any gaps between the pineapple.
In a separate bowl, mix together the flour, sugar, baking powder, and salt. In another bowl, whisk the milk (or reserved pineapple juice), oil, eggs, and vanilla extract. Combine the wet and dry ingredients until just mixed together, then pour the batter over the pineapple and cherries evenly.
Bake for about 30-35 minutes or until a toothpick inserted in the center comes out clean. Let it cool for a few minutes before inverting it onto a serving plate.
For the best results, make certain that the butter is evenly melted and the sugar has completely dissolved to create a smooth caramel layer at the bottom. Keep an eye on the baking time, as ovens can vary and the cake can brown quickly. Test for doneness by inserting a toothpick, and if needed, allow it to cool slightly before flipping to make sure everything stays intact.
You can also experiment with different fruits or even add a touch of cinnamon to the batter for added flavor!
Marble Cake
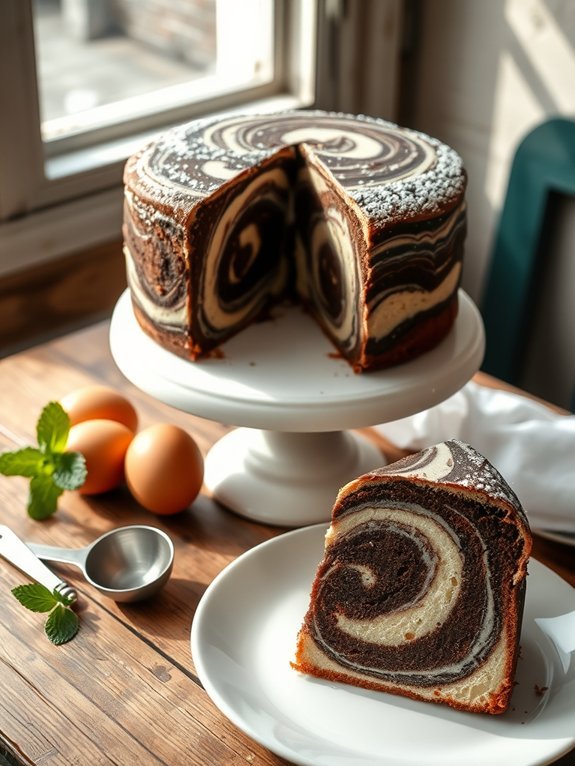
Marble cake is a delightful dessert that beautifully combines the rich flavors of chocolate and vanilla in a striking swirled pattern. The contrast of the two batters creates a visually stunning cake that’s perfect for any occasion, whether it be a family gathering, a birthday celebration, or simply a sweet treat to enjoy with a cup of tea or coffee.
The unique marbling effect not only pleases the eye but also offers a delicious mix of flavors in every bite. This classic recipe for marble cake is simple yet impressive. By starting with a basic vanilla cake batter and adding cocoa powder to create the chocolate batter, you can easily achieve the signature marbled effect.
The key is to alternate spoonfuls of each batter in the cake pan and swirl them together gently to create a marbled design. Once baked, this cake is sure to be a hit among family and friends.
Ingredients:
- 2 cups all-purpose flour
- 1 ½ cups granulated sugar
- ½ cup unsalted butter, softened
- 1 cup milk
- 3 ½ teaspoons baking powder
- 1 teaspoon vanilla extract
- 2 large eggs
- ½ cup unsweetened cocoa powder
- ¼ teaspoon salt
To make the marble cake, preheat your oven to 350°F (175°C) and grease a 9×5-inch loaf pan. In a large mixing bowl, cream together the softened butter and sugar until light and fluffy. Add the eggs one by one, mixing well after each addition, followed by the milk and vanilla.
In a separate bowl, whisk together the flour, baking powder, and salt. Gradually add the dry ingredients to the wet mixture until just combined. Divide the batter in half and stir the cocoa powder into one half. Pour alternating spoonfuls of both batters into the prepared loaf pan and use a knife to gently swirl the two together.
Bake for 50-60 minutes or until a toothpick inserted in the center comes out clean. Allow the cake to cool in the pan for about 10 minutes before transferring it to a wire rack to cool completely.
For the best flavor and texture, be certain to use room temperature ingredients, especially the eggs and butter. This guarantees that they incorporate smoothly into the batter.
When swirling the batters, avoid overmixing, as you want to maintain the marbled effect rather than combine the two colors completely. Additionally, you can experiment with flavor add-ins such as chocolate chips or nuts for added texture and taste.
Finally, should you want to elevate the presentation, consider dusting the cooled cake with powdered sugar or drizzling it with a simple chocolate glaze before serving.
Simple Fruitcake
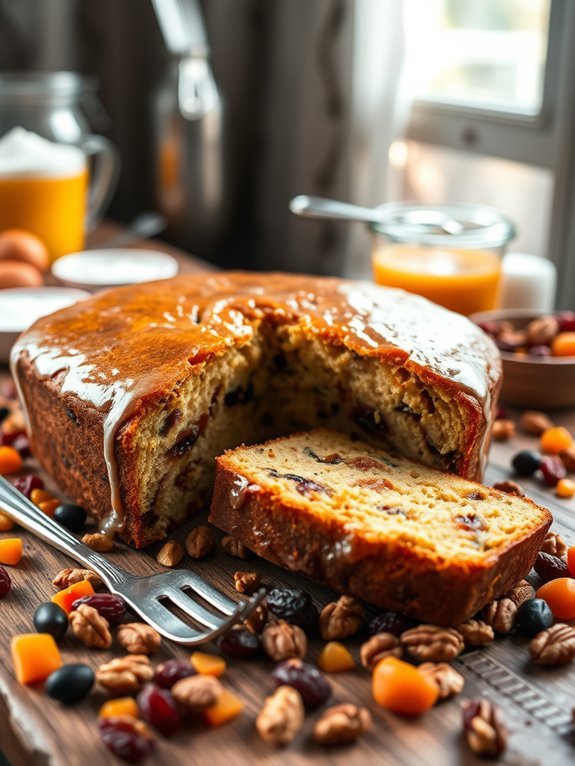
Fruitcake, often associated with holiday celebrations, is a delightful treat that can charm any palate with its colorful array of fruits and nuts. While some may fear the dense reputation of fruitcake, a simple fruitcake recipe can yield a tender and moist dessert that’s easy to prepare and perfect to share with loved ones.
This cake, infused with rich flavors and textures, offers a wonderful balance between sweetness and a hint of spiciness, making it a favorite throughout the year, not just during the festive season.
Preparing a simple fruitcake is straightforward, allowing even novice bakers to create a delicious version of this classic treat. With dried fruits soaking in a mixture of juices or spirits and a simple batter to hold everything together, this recipe celebrates the essence of classic cooking while providing room for personal adjustments. You can customize this fruitcake with your favorite dried fruits and nuts to make it uniquely yours.
Ingredients:
- 2 cups mixed dried fruits (such as raisins, currants, and chopped dried apricots)
- 1 cup chopped nuts (such as walnuts or pecans)
- 1 cup orange juice or apple juice
- 1 cup granulated sugar
- 3 cups all-purpose flour
- 1 teaspoon baking powder
- ½ teaspoon baking soda
- 1 teaspoon ground cinnamon
- ½ teaspoon ground nutmeg
- 1 teaspoon vanilla extract
- 1 cup unsalted butter, softened
- 4 large eggs
Combine the dried fruits and nuts in a bowl and soak them in the orange or apple juice for at least an hour, or overnight for best results.
Preheat your oven to 325°F (160°C) and grease a 9×5 inch loaf pan. In a large mixing bowl, cream together the softened butter and sugar until light and fluffy. Add the eggs one at a time, beating well after each addition.
In another bowl, whisk together the flour, baking powder, baking soda, cinnamon, and nutmeg. Gradually add the dry ingredients to the wet ingredients, mixing until just combined.
Gently fold in the soaked fruits and nuts along with the vanilla extract, ensuring they’re evenly distributed. Pour the batter into the prepared pan and bake for about 60-70 minutes, or until a toothpick inserted into the center comes out clean.
When baking a simple fruitcake, make sure to monitor the cake towards the end of the baking time, as ovens can vary. If the top of the cake starts to brown too quickly, you can tent it with aluminum foil to prevent it from burning.
For an extra touch, consider glazing the fruitcake with a light syrup made from equal parts sugar and water, bringing out the fruits’ natural sweetness. Ultimately, allowing the fruitcake to rest after baking enhances its flavor; some even enjoy it better after a day or two.

