This post may contain affiliate links. Please read our policy page.
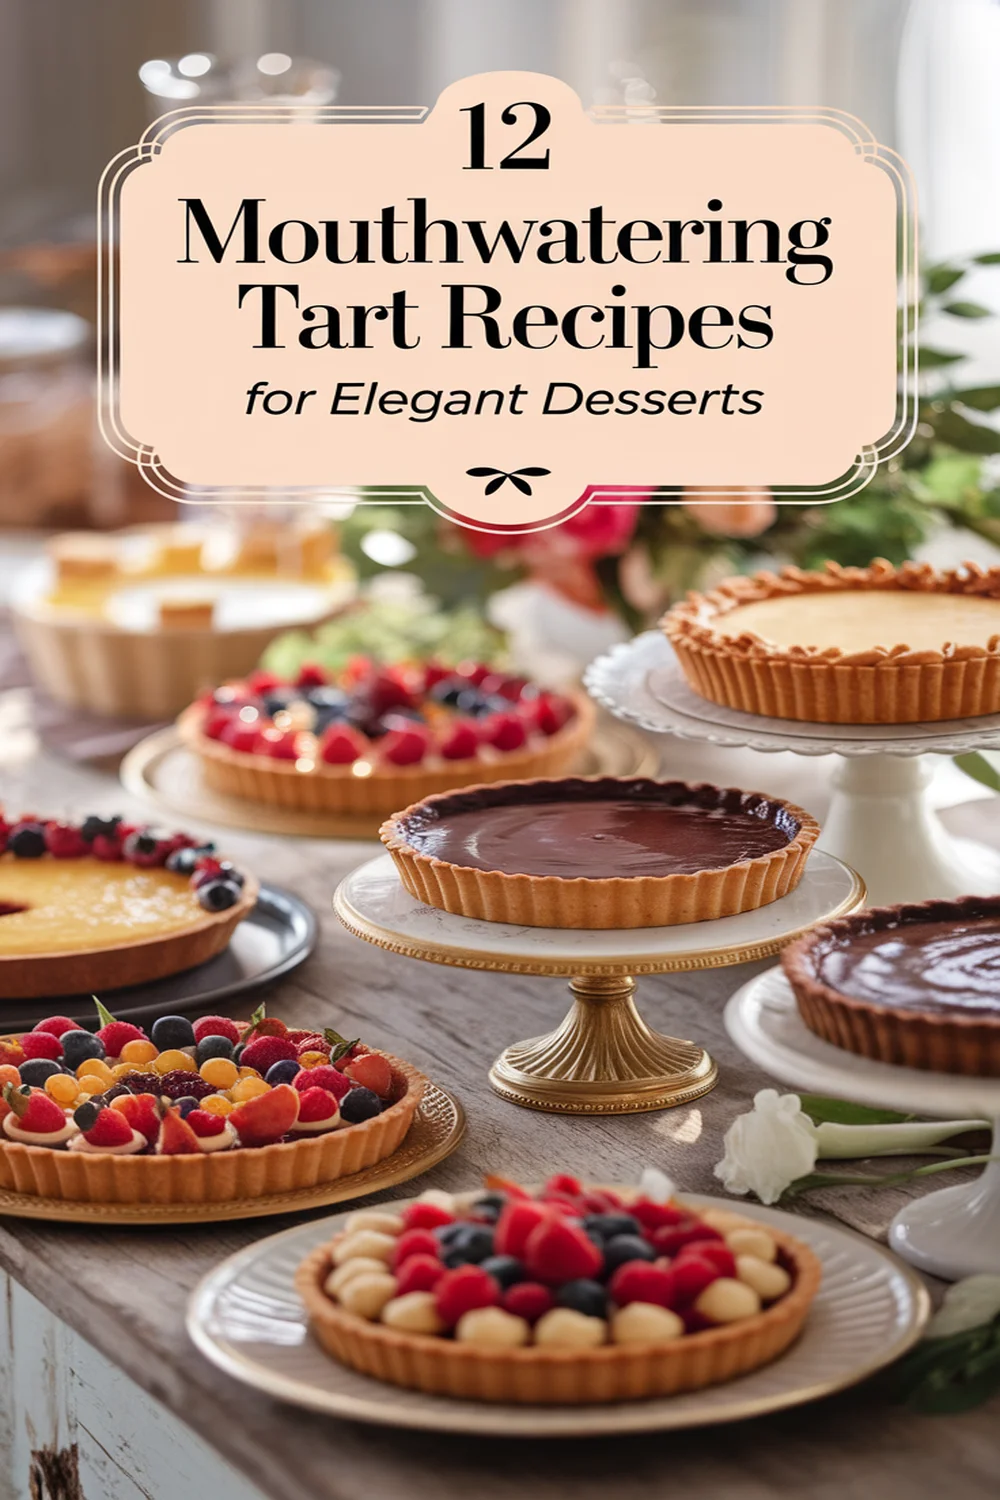
Tarts are a stunning way to elevate your dessert game. Imagine a classic French fruit tart, bursting with seasonal flavors, or a rich chocolate ganache tart that melts in your mouth. You can impress your guests with a tangy lemon tart or a delightful no-bake berry cheesecake tart. Each recipe brings something unique, whether it’s the nutty almond cream or the comforting pecan pie. Keep exploring these elegant combinations, and you’ll discover even more delicious options!
Classic French Fruit Tart
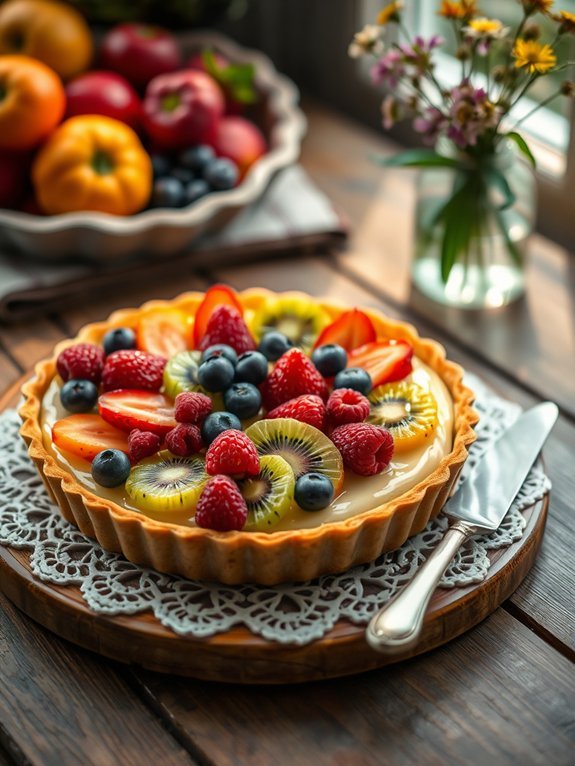
The Classic French Fruit Tart, known as “Tarte aux Fruits,” is an exquisite dessert that showcases a buttery tart shell filled with velvety pastry cream and topped with an array of colorful, fresh fruits. This elegant dish isn’t only a stunning centerpiece at any gathering, but it also allows for endless customization with seasonal fruits. Its delicate layers combine delectable flavors and textures that delight any palate.
To create this beautiful dessert, the success lies in the preparation of the tart shell and the pastry cream, both of which are vital components. The texture of the tart shell should be crisp yet tender, while the pastry cream offers a rich, creamy base that complements the natural sweetness of the fruit. Taking the time to craft each component with care will yield a result that’s truly impressive and satisfying.
Ingredients:
- 1 1/4 cups all-purpose flour
- 1/4 cup powdered sugar
- 1/2 cup unsalted butter, chilled and cubed
- 1 egg yolk
- 2 tablespoons ice water
- 2 cups whole milk
- 1/2 cup granulated sugar
- 1/4 cup cornstarch
- 4 large egg yolks
- 2 tablespoons unsalted butter
- 1 teaspoon vanilla extract
- Assorted fresh fruits (strawberries, kiwi, blueberries, raspberries, etc.)
- Apricot glaze (optional)
To prepare the tart, start by making the tart shell. In a mixing bowl, combine flour and powdered sugar. Add the chilled butter and mix until crumbly. Stir in the egg yolk and ice water, then form the dough into a ball and chill for 30 minutes.
Roll out the dough and fit it into a tart pan, pierce the bottom with a fork and refrigerate again. Preheat the oven to 350°F (175°C) and bake the shell for about 20 minutes or until golden.
Meanwhile, for the pastry cream, whisk together milk, sugar, cornstarch, and egg yolks in a saucepan over medium heat, stirring continuously until thickened. Remove from heat and stir in butter and vanilla.
Once both components are cool, pour the pastry cream into the tart shell and arrange the fresh fruit on top. Brush with apricot glaze if desired for a shiny finish.
When preparing your Classic French Fruit Tart, it’s crucial to work with fresh, colorful fruits to enhance both the appearance and flavor of the dessert. Additionally, verify that your pastry cream is at room temperature before filling the tart to prevent the crust from becoming soggy.
Experimenting with different fruits according to the season can also elevate your tart, providing a delightful and invigorating taste experience.
Finally, remember to serve it chilled for maximum freshness and flavor!
Recommended Items
Get ready to elevate your dessert game with these essential products and equipment for making tarts!
Products
Decadent Chocolate Ganache Tart
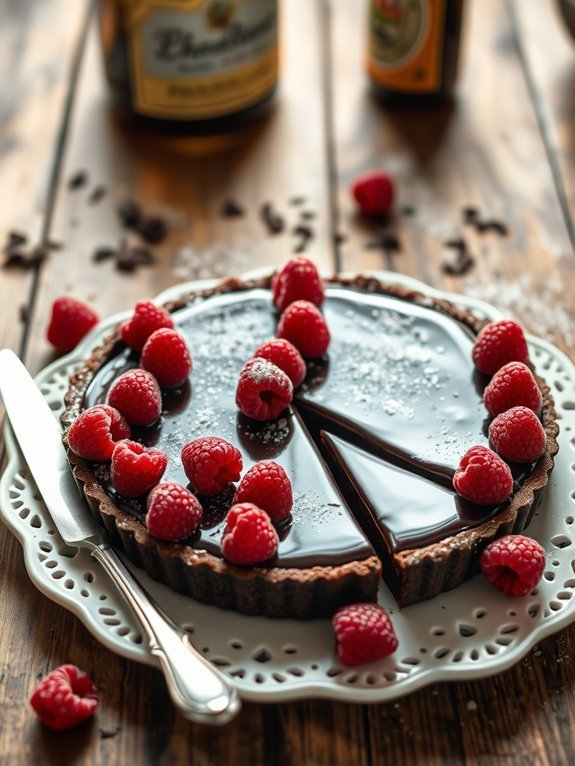
Indulging in a decadent chocolate ganache tart is a perfect way to elevate any occasion, whether it’s a dinner party or a quiet evening at home. This rich and velvety tart features a buttery crust filled with luscious chocolate ganache that melts in your mouth. With just a handful of ingredients, this elegant dessert can be made effortlessly, impressing your guests with both its presentation and flavor.
For the crust, the combination of buttery pastry with a hint of sweetness forms the ideal base for the chocolate filling. And when it comes to the ganache, high-quality chocolate is key to achieving a deep, rich flavor that will have everyone asking for seconds. Each bite of this tart offers a delightful contrast between the crisp crust and the silky smooth ganache, making it a luxurious treat for any chocolate lover.
Ingredients:
- 1 ½ cups all-purpose flour
- ½ cup unsweetened cocoa powder
- ½ cup powdered sugar
- ½ cup unsalted butter, chilled and diced
- 1 large egg yolk
- 1 cup heavy cream
- 8 ounces dark chocolate (70% cocoa), chopped
- 1 teaspoon vanilla extract
- A pinch of salt
To prepare the decadent chocolate ganache tart, start by making the crust. In a bowl, combine all-purpose flour, cocoa powder, and powdered sugar. Add the chilled diced butter and mix until the mixture resembles coarse crumbs.
Stir in the egg yolk, and press the dough into a tart pan. Bake at 350°F (175°C) for about 15 minutes until set and allow to cool.
For the ganache, heat the heavy cream in a saucepan until just boiling, then pour it over the chopped dark chocolate in a separate bowl. Let it sit for a minute, then whisk until smooth. Stir in the vanilla extract and a pinch of salt.
Pour the ganache into the cooled tart shell and refrigerate for at least 2 hours until set.
When preparing the chocolate ganache tart, it’s crucial to use high-quality chocolate for the best flavor. Be sure not to overbake the crust; it should be lightly golden and firm but not hard.
For an extra touch of elegance, consider garnishing the tart with fresh berries or a sprinkle of sea salt before serving. Also, if you want to enhance the flavor further, feel free to add a splash of your favorite liqueur, like Frangelico or Grand Marnier, to the ganache mixture.
Proposed Recipe
Tangy Lemon Tart With Whipped Cream
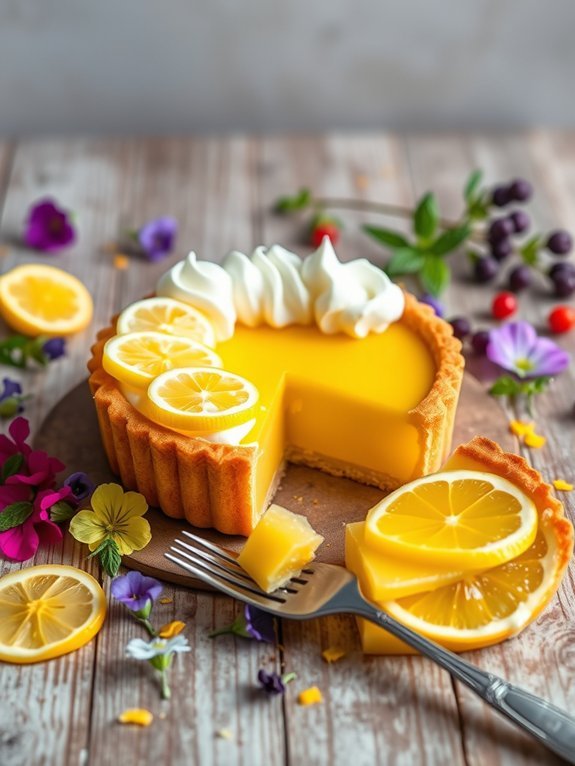
If you’re looking to impress your guests with a dessert that combines a delicate balance of tanginess and sweetness, then a Tangy Lemon Tart with Whipped Cream is the way to go. This elegant dessert features a buttery crust filled with a smooth, zesty lemon curd that will awaken your taste buds. Topped with a cloud of freshly whipped cream, it isn’t only a feast for the palate but also for the eyes, making it a show-stopping addition to any table.
The process of making this tart may seem intimidating, but it’s quite straightforward. The tart shell can be prepared in advance, allowing you to focus on the vibrant lemon filling. Once baked, the shell is filled with a luscious lemon mixture that sets perfectly, providing a creamy texture that contrasts beautifully with the crunchy crust.
Serve it chilled to enhance its revitalizing qualities, making it a perfect choice for sunny afternoons or special celebrations.
- 1 ½ cups all-purpose flour
- ½ cup powdered sugar
- ½ cup unsalted butter, chilled and diced
- 1 egg yolk
- 2 tablespoons cold water
- 4 large eggs
- 1 cup granulated sugar
- ⅔ cup freshly squeezed lemon juice
- Zest of 2 lemons
- ⅓ cup heavy cream
- 2 tablespoons granulated sugar
- 1 teaspoon vanilla extract
To prepare the tart shell, blend the flour and powdered sugar in a food processor, then add the chilled butter and pulse until the mixture resembles coarse crumbs. Add the egg yolk and enough cold water to form a dough. Press the dough into a tart pan and refrigerate for 30 minutes.
Preheat the oven to 375°F (190°C) and bake the shell for about 20 minutes or until lightly golden. For the filling, whisk together the eggs, granulated sugar, lemon juice, and zest in a bowl. Pour the mixture into the baked tart shell and bake for another 20-25 minutes until the filling is set. Let the tart cool before refrigerating.
Just before serving, whip the heavy cream with sugar and vanilla until soft peaks form and dollop it atop each slice of tart.
For the best results, verify your butter is very cold when making the crust, as this contributes to a flaky texture. Additionally, use freshly squeezed lemon juice and zest for the most vibrant flavor.
Take care not to overbake the filling; it should be set but still slightly jiggly in the center. Feel free to garnish with additional lemon zest or fresh berries for an extra touch of elegance!
Almond Cream Tart With Fresh Berries
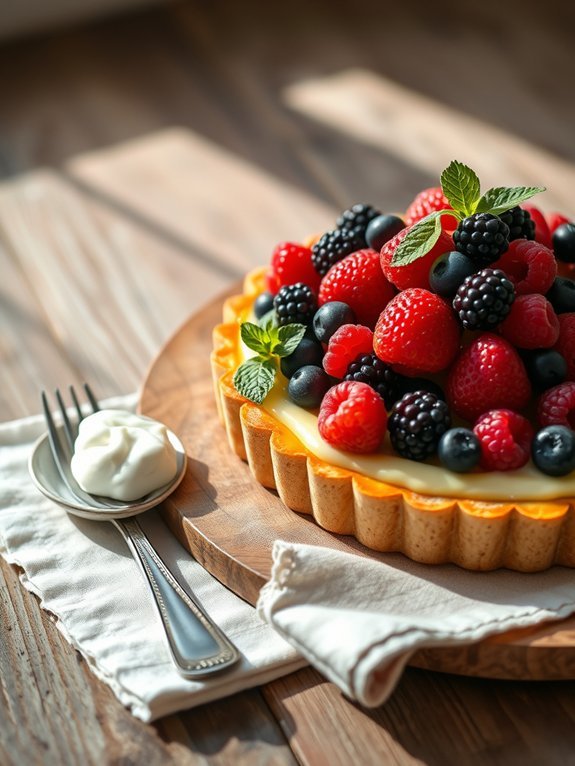
The Almond Cream Tart with Fresh Berries is a delectable dessert that combines the rich, nutty flavor of almond cream with the vibrant, juicy freshness of seasonal berries. This tart is perfect for special occasions or simply as a luxurious treat to brighten up any day. Its buttery crust provides a flaky base that complements the smooth, creamy almond filling. Topped with a colorful array of fresh berries, this dessert isn’t just a feast for the palate but also a visual delight.
Making this elegant tart is a wonderful way to embrace the flavors of different seasons. You can choose berries that are in season, whether they’re sweet strawberries in the summer or tangy raspberries in the spring. The contrast between the almond cream’s richness and the tartness of the berries creates a harmonious balance that will leave everyone asking for seconds.
Serve with a dollop of whipped cream or a scoop of vanilla ice cream for an extra touch of indulgence.
Ingredients:
- 1 pre-made tart crust (9-inch)
- 1 cup almond flour
- 1/2 cup granulated sugar
- 3 large eggs
- 1 teaspoon almond extract
- 1/4 cup unsalted butter, softened
- 1 cup heavy cream
- 1 tablespoon powdered sugar
- 2 cups mixed fresh berries (strawberries, blueberries, raspberries, blackberries)
To prepare the tart, first, preheat your oven to 350°F (175°C). In a mixing bowl, combine almond flour, granulated sugar, eggs, and almond extract, then beat in the softened butter until smooth.
Pour this almond cream filling into the pre-baked tart crust and bake for 25-30 minutes, or until the filling is set and lightly golden. Allow the tart to cool completely before topping it with an assortment of fresh berries. Whip the heavy cream with powdered sugar until soft peaks form, then serve alongside the tart.
When preparing the Almond Cream Tart, consider letting the tart cool completely before adding the fresh berries, as warmth can cause them to sweat and lose their vibrant appearance.
If desired, you can brush the finished tart with a light apricot glaze to add shine and a hint of sweetness. Always choose firm, ripe berries for the best flavor and texture.
Enjoying this dessert the same day it’s made guarantees the freshest taste and visual appeal.
Rustic Apple Galette Tart
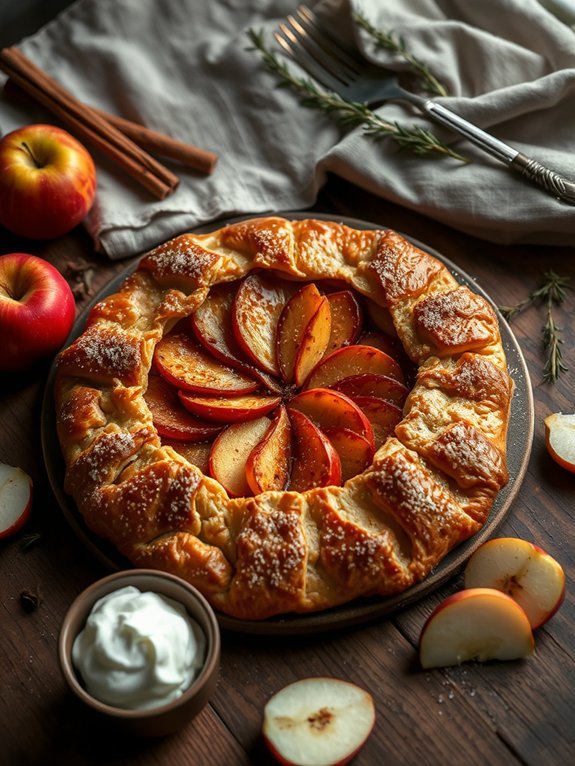
The Rustic Apple Galette is a delightful dessert that showcases the natural sweetness of apples paired with a flaky, buttery crust. This free-form tart has a rustic charm, making it perfect for any gathering or a cozy evening at home. With its simple ingredients and straightforward method, you’ll find it easy to create this elegant dessert without any fuss.
The beauty of a galette lies in its simplicity, allowing the star of the show—fresh apples—to shine. You can use a variety of apple types, such as Granny Smith for a tart flavor or Honeycrisp for sweetness. The result is a stunning tart that not only pleases the eye but warms the heart, especially when served with a scoop of vanilla ice cream or a dollop of whipped cream.
Ingredients:
- 1 1/4 cups all-purpose flour
- 1/2 teaspoon salt
- 1 tablespoon sugar
- 1/2 cup unsalted butter, chilled and diced
- 3 to 4 tablespoons ice water
- 3 to 4 medium apples, peeled, cored, and sliced
- 1 tablespoon lemon juice
- 1/4 cup sugar (adjust based on the sweetness of apples)
- 1 teaspoon cinnamon
- 1 egg (for egg wash)
- Optional: coarse sugar for sprinkling
To prepare the Rustic Apple Galette, start by making the dough. In a large bowl, mix the flour, salt, and sugar. Add the chilled butter and work it into the flour using a pastry cutter or your fingers until the mixture resembles coarse crumbs. Gradually add the ice water, mixing until the dough just comes together.
Form it into a disk, wrap it in plastic wrap, and refrigerate for at least 30 minutes. Meanwhile, in a separate bowl, combine the sliced apples with lemon juice, sugar, and cinnamon. Preheat your oven to 400°F (200°C).
Roll out the dough on a floured surface into a rough circle about 12 inches in diameter. Transfer the dough onto a parchment-lined baking sheet, then arrange the apple mixture in the center, leaving a 2-inch border. Fold the edges of the dough over the apples, brushing the crust with beaten egg and sprinkling with coarse sugar if desired.
Bake for 35-40 minutes until the apples are tender and the crust is golden brown. For the best results, allow the galette to cool slightly before slicing and serving. If you have time, making the dough a day in advance can enhance the flavor and texture.
Experiment with different spice combinations or add nuts for added crunch. Additionally, consider using a variety of apples for a more complex flavor profile. Don’t forget to serve with your favorite ice cream or whipped cream—it’s the perfect finishing touch!
Silky Pineapple-Coconut Tart
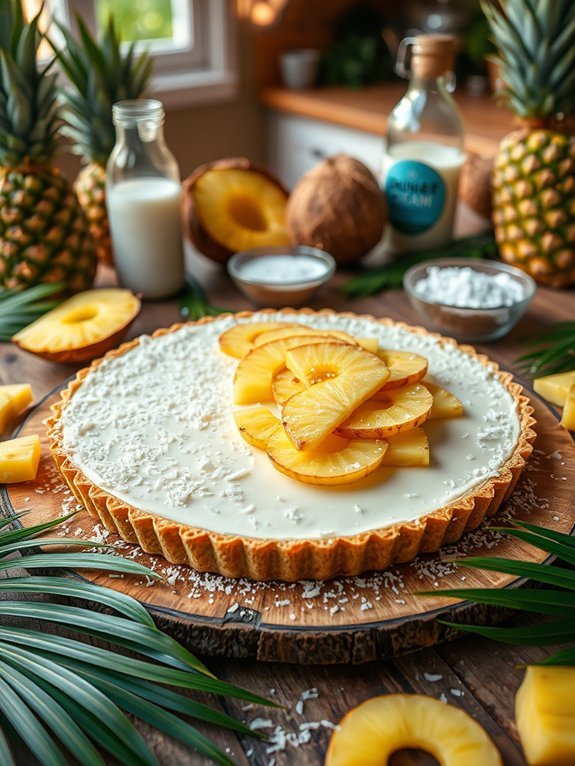
Indulge in the tropical flavors of a Silky Pineapple-Coconut Tart, an elegant dessert that combines the sweet tang of fresh pineapples with the creamy richness of coconut. This delightful tart captures the essence of a tropical getaway, making it the perfect showcase for summer gatherings or special occasions. The combination of a buttery crust and velvety filling will leave your guests asking for seconds.
Creating this tart isn’t just about the flavors; it’s also about the experience of making something beautiful and delicious. As you prepare the components, take your time to enjoy each step, from juicing the crispy pineapple to whipping the coconut cream.
Whether enjoyed chilled on a warm day or savored as a sweet finale to a dinner party, this Silky Pineapple-Coconut Tart will surely impress.
Ingredients:
- 1 cup all-purpose flour
- 1/2 cup unsweetened shredded coconut
- 1/4 cup powdered sugar
- 1/2 cup unsalted butter, softened
- 1 large egg yolk
- 1 tablespoon cold water
- 1 can (14 ounces) coconut cream
- 1/2 cup sugar
- 1/4 cup fresh pineapple juice
- 1 teaspoon vanilla extract
- 2 eggs
- Fresh pineapple slices for garnish
To begin, prepare the tart shell by combining the flour, shredded coconut, and powdered sugar in a mixing bowl. Cut in the softened butter until the mixture resembles coarse crumbs, then add the egg yolk and cold water.
Mix until a dough forms. Press the dough into a tart pan and prick the bottom with a fork. Pre-bake the crust at 350°F (175°C) for about 15 minutes or until lightly golden.
In a separate bowl, whisk together the coconut cream, sugar, pineapple juice, vanilla, and eggs until smooth. Pour the filling into the pre-baked tart shell and bake for an additional 25-30 minutes, or until the filling is set.
Let it cool before adding fresh pineapple slices on top for garnish. For best results, make certain your ingredients are at room temperature before mixing to guarantee a smooth filling.
If you prefer a more intense pineapple flavor, consider adding finely chopped fresh pineapple to the filling or a layer of pineapple jam underneath the coconut filling. Serve chilled or at room temperature for the best texture and flavor.
Enjoy the beautiful presentation by dusting the tart with more shredded coconut or placing it on a vibrant plate.
Rich Pecan Pie Tart
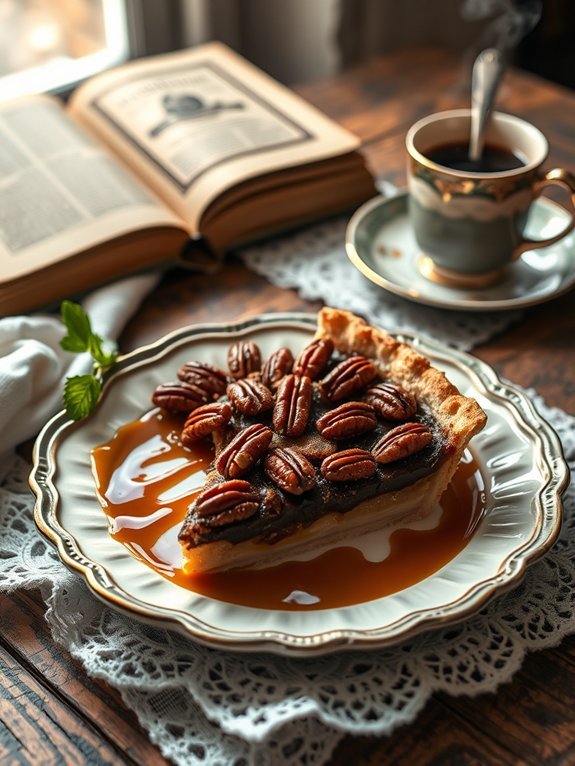
Pecan pie tart is a delightful twist on the classic pecan pie, offering an elegant presentation and a buttery, flaky crust that perfectly complements the rich, gooey filling. This dessert is an excellent choice for special occasions, holidays, or whenever you’re in the mood for something sweet and indulgent. With the combination of toasted pecans, brown sugar, and a hint of vanilla, every bite of this tart is filled with a warm, comforting flavor that’s sure to impress your guests.
To achieve the perfect texture and flavor, it’s crucial to use high-quality ingredients, especially in the crust. A homemade tart crust isn’t only simple to make but adds a wonderful freshness to the dish. Baking the tart shell until golden ensures it stays crisp and buttery, providing the ideal base for the luscious pecan filling that follows.
Ingredients:
- 1 ½ cups all-purpose flour
- ½ cup unsalted butter, chilled and cubed
- ¼ cup granulated sugar
- 1/4 teaspoon salt
- 1 large egg yolk
- 3 tablespoons ice water
- 1 cup pecans, chopped and toasted
- 1 cup corn syrup
- 3/4 cup brown sugar, packed
- 1 teaspoon vanilla extract
- 3 large eggs
To make the tart, preheat your oven to 350°F (175°C). In a mixing bowl, combine the flour, sugar, and salt. Cut in the chilled butter until the mixture resembles coarse crumbs, then stir in the egg yolk and ice water until the dough forms. Roll out the dough on a lightly floured surface and fit it into a tart pan. Pre-bake the crust for 10-12 minutes until lightly golden.
Meanwhile, whisk together the corn syrup, brown sugar, vanilla, and eggs in a separate bowl. Once the crust is ready, sprinkle the toasted pecans evenly in the crust, pour the filling over them, and bake for an additional 35-40 minutes until the filling is set and slightly puffed. Allow the tart to cool before slicing.
When making your pecan pie tart, be mindful of over-baking, as this can lead to a dry filling. It’s vital to keep an eye on the tart as it bakes, and let it cool completely before serving to allow the filling to firm up properly.
For added elegance, consider drizzling melted chocolate or caramel on top right before serving, or offering a scoop of vanilla ice cream on the side for that delightful contrast in temperature and flavor. Enjoy your baking!
Vanilla Bean Custard Tart
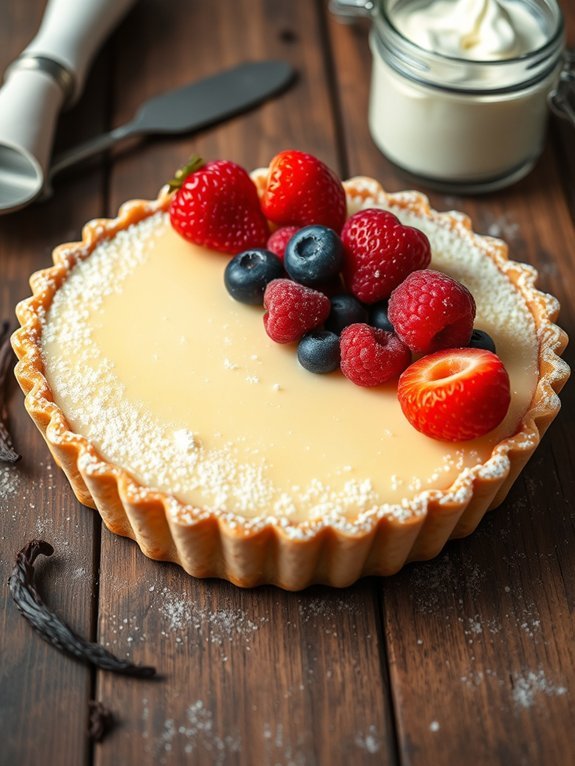
Indulge in the rich and creamy delight of a Vanilla Bean Custard Tart, a dessert that epitomizes elegance and sophistication. The combination of a buttery tart shell with a smooth vanilla bean custard filling creates a beautiful contrast in texture and taste. This delightful dessert is perfect for special occasions or when you’re looking to impress your guests with a homemade treat that feels indulgent yet surprisingly simple to prepare.
The allure of vanilla bean adds a touch of luxury, making this tart not only delicious but visually stunning as well. With its delicate balance of flavors, the Vanilla Bean Custard Tart is sure to be a showstopper at your next dinner party or family gathering. Plus, it’s incredibly versatile; you can serve it with fresh berries, a drizzle of caramel, or a dollop of whipped cream to elevate it even further.
Ingredients:
- 1 pre-made pie crust (or homemade tart shell)
- 2 cups heavy cream
- 1 cup whole milk
- 1 cup sugar
- 4 large egg yolks
- 1 whole vanilla bean (split and seeds scraped)
- 2 tablespoons cornstarch
- A pinch of salt
- Fresh berries or whipped cream (optional, for serving)
Preheat your oven to 350°F (175°C). Begin by baking the pie crust according to the package instructions or your favorite homemade tart shell recipe until golden brown. Allow it to cool completely.
In a saucepan, combine the heavy cream, milk, sugar, and the vanilla bean (both seeds and pod). Heat over medium heat until it’s hot but not boiling.
In a separate bowl, whisk together the egg yolks, cornstarch, and salt until smooth. Gradually pour the hot cream mixture into the egg yolk mixture, whisking constantly to temper the eggs.
Return the mixture to the saucepan and cook over low heat, stirring continuously until thickened. Pour the custard filling into the cooled tart shell and refrigerate until set, about 4-6 hours or overnight.
For the best experience, make certain to let the tart chill sufficiently in the refrigerator, as this allows the flavors to meld beautifully and the custard to achieve the perfect texture.
If using fresh berries for garnish, consider macerating them in a little bit of sugar to enhance their natural sweetness and create a lovely contrast against the creamy custard. Additionally, for an attractive presentation, run a knife along the edge of the tart shell before slicing to confirm clean, beautiful portions.
Strawberry Shortcake Tart
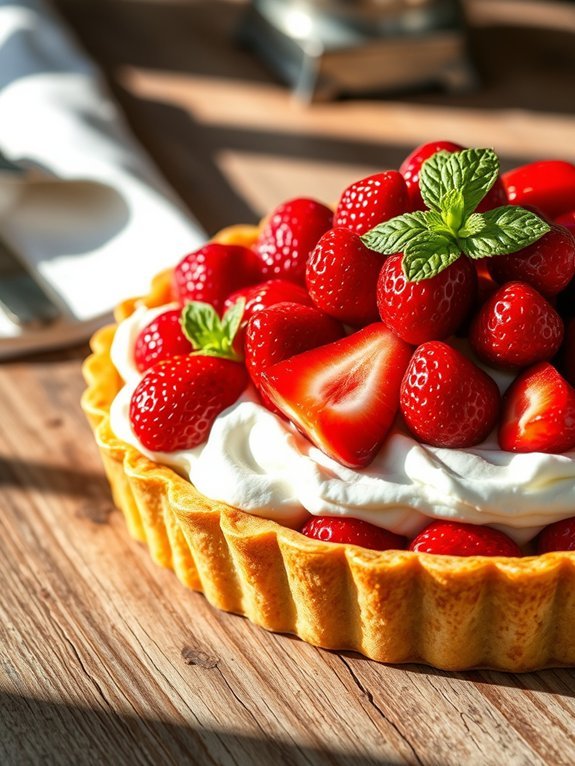
Strawberry Shortcake Tart is an elegant dessert that combines the lightness of whipped cream and the sweetness of fresh strawberries atop a luscious shortcake crust. This delightful treat serves as the perfect centerpiece for spring and summer gatherings, bringing a touch of sophistication to your dessert table. With the crispy tart shell providing a delightful crunch and the fluffy cream and juicy strawberries offering a rejuvenating contrast, this recipe is bound to impress your guests and leave them craving for more.
Making this tart is a fun and rewarding experience that allows you to showcase your baking skills. The preparation involves creating a buttery tart shell, allowing it to cool, and then filling it with freshly whipped cream and marinated strawberries. It’s simple enough for beginner bakers yet elegant enough for seasoned pastry chefs, making it a versatile choice for any occasion.
Ingredients:
- 1 ½ cups all-purpose flour
- ½ cup unsalted butter, chilled and cubed
- ¼ cup granulated sugar
- 1 large egg yolk
- 3 tablespoons cold water
- 1 pint of fresh strawberries, hulled and sliced
- 2 tablespoons granulated sugar (for strawberries)
- 1 cup heavy whipping cream
- 2 tablespoons powdered sugar
- 1 teaspoon vanilla extract
- Mint leaves for garnish (optional)
To start, preheat your oven to 350°F (175°C). In a mixing bowl, combine the flour and granulated sugar, then add the chilled butter cubes. Using a pastry cutter or your fingers, mix until the mixture resembles coarse crumbs.
Add the egg yolk and cold water, stirring until the dough comes together. Press the dough into a tart pan evenly across the bottom and up the sides, then prick the bottom with a fork. Bake for 20-25 minutes until golden brown, then let cool.
Meanwhile, mix the sliced strawberries with 2 tablespoons of sugar and set aside to macerate. In a separate bowl, whip the heavy cream with powdered sugar and vanilla until soft peaks form. Once the crust has cooled, fill it with whipped cream and top with the macerated strawberries.
For the best results, verify that your butter is cold when making the crust to achieve a tender texture. Allow the strawberries to macerate for at least 30 minutes to enhance their flavors before topping the tart.
Consider drizzling a bit of balsamic reduction over the strawberries for an added layer of complexity. If you want to make it ahead of time, prepare the crust and whipped cream separately, assembling the tart just before serving to maintain crispness.
Enjoy your Strawberry Shortcake Tart!
Mocha Espresso Tart
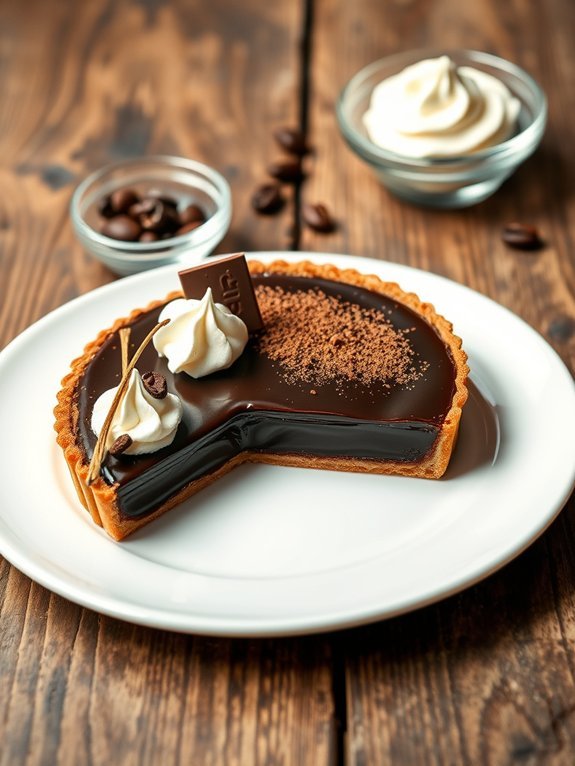
Indulge your senses with a Mocha Espresso Tart, a dessert that elegantly merges the rich flavors of chocolate and coffee. This tart not only boasts a striking appearance but also brings together textures that delight on the palate. Perfect for dinner parties or special occasions, it’s an ideal way to end a meal with sophistication and flair.
The harmony of the velvety chocolate filling and the deep notes of espresso makes this tart an exquisite choice for coffee lovers and chocolate aficionados alike. Creating a Mocha Espresso Tart requires a bit of effort but is well worth the result. The buttery tart crust pairs wonderfully with the smooth, creamy filling, while a dusting of cocoa powder and chocolate shavings on top adds a touch of elegance.
This decadent dessert is sure to impress your guests and leave them asking for seconds. Prepare to elevate your dessert game with this delightful recipe that highlights the perfect marriage of two beloved ingredients: coffee and chocolate.
Ingredients:
- 1 1/4 cups all-purpose flour
- 1/4 cup unsweetened cocoa powder
- 1/2 cup unsalted butter, softened
- 1/4 cup powdered sugar
- 1/4 teaspoon salt
- 1 egg yolk
- 1/4 cup heavy cream
- 1 1/4 cups dark chocolate, chopped
- 1 tablespoon instant espresso powder
- 1 teaspoon vanilla extract
- Cocoa powder, for dusting
- Chocolate shavings, for garnish
Preheat your oven to 350°F (175°C). In a food processor, combine the flour, cocoa powder, and salt. Add in the butter and sugar, and pulse until the mixture resembles coarse crumbs.
Mix in the egg yolk until the dough comes together. Press the dough into a tart pan and prick the bottom with a fork. Bake for about 15 minutes, then allow to cool.
Meanwhile, in a saucepan over medium heat, combine the heavy cream, espresso powder, and chopped chocolate, stirring until smooth. Remove from heat, stir in vanilla, and pour the mixture into the cooled tart shell. Chill for at least 2 hours before serving, dust with cocoa powder, and garnish with chocolate shavings.
Be sure to allow the tart to chill adequately for the filling to set up perfectly. If you’d like a stronger coffee flavor, you can increase the amount of espresso powder slightly, but be cautious not to overpower the chocolate.
Pair your dessert with a dollop of whipped cream or an espresso shot for a delightful contrast. Finally, this tart can be made a day in advance, making it a perfect choice for hassle-free entertaining. Enjoy this creamy masterpiece at your next gathering!
Spiced Pear and Ginger Tart
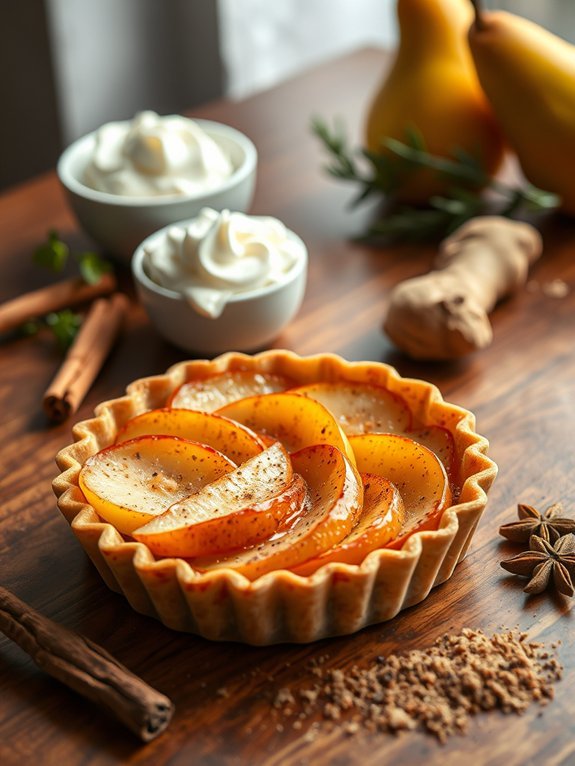
Spiced Pear and Ginger Tart is a delightful dessert that combines the rich flavors of ripe pears with the warmth of spices and the subtle kick of ginger. This tart is perfect for autumn or winter gatherings, bringing a taste of the season to your table. The buttery, flaky crust provides the ideal foundation for the warm, spiced filling. Each bite of this tart will invoke cozy memories, making it a favorite among family and friends.
This dessert not only satisfies the sweet tooth but also impresses with its elegant presentation. Pair it with a dollop of freshly whipped cream or a scoop of vanilla ice cream to elevate its indulgence further. The freshness of the pears combined with the spices warms the palate, making this tart a perfect centerpiece for any dessert table.
Ingredients:
- 1 pre-made tart shell (9-inch)
- 4 ripe pears, peeled, cored, and sliced
- 1 teaspoon ground ginger
- 1 teaspoon ground cinnamon
- 1/4 teaspoon ground nutmeg
- 1/4 cup brown sugar
- 2 tablespoons lemon juice
- 2 tablespoons cornstarch
- 1 tablespoon unsalted butter, diced
- 1 egg (for egg wash)
- 1 tablespoon milk (for egg wash)
Arrange the sliced pears in the tart shell, tossing them with ginger, cinnamon, nutmeg, brown sugar, lemon juice, and cornstarch to coat evenly. Place the diced butter evenly over the pear mixture, then fold down the edges of the crust slightly over the filling if desired.
In a small bowl, whisk together the egg and milk to create an egg wash, and brush this mixture over the crust to give it a golden finish. Bake the tart in a preheated oven at 375°F (190°C) for about 45-50 minutes, or until the pears are tender, and the crust is golden brown.
When preparing this tart, consider using a mix of different pear varieties for added texture and flavor complexity. Additionally, allow the tart to cool slightly before serving, as this will help the filling set and make slicing easier.
Serving it warm enhances the spices’ aromas, while chilled leftovers can be enjoyed later, still delightful in taste. For an extra touch, sprinkle some chopped crystallized ginger over the top before serving for added sweetness and a bit of crunch.
No-Bake Berry Cheesecake Tart
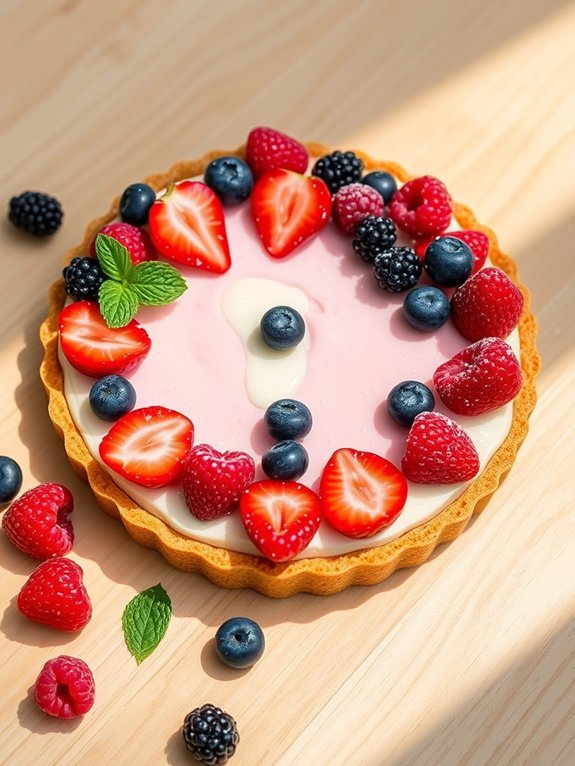
Indulge in the creamy, tangy delight of a No-Bake Berry Cheesecake Tart that requires no oven time but packs all the flavors of a traditional cheesecake. This dessert is perfect for warm weather gatherings or when you simply want a light and invigorating treat. With its vibrant berry topping and luscious cream cheese filling, it’s an elegant addition to any dessert table that will leave your guests raving.
Plus, the simplicity of the no-bake process makes it accessible for bakers of all skill levels.
The combination of a buttery graham cracker crust with a smooth, rich filling is what makes this tart irresistible. The delightful burst of fresh berries on top not only adds a pop of color but also balances the richness of the cheesecake. You can use a mix of your favorite berries or stick to one variety – either way, it’s sure to impress with its beauty and deliciousness.
Ingredients:
- 1 ½ cups graham cracker crumbs
- ½ cup unsalted butter, melted
- 2 cups cream cheese, softened
- ½ cup powdered sugar
- 1 teaspoon vanilla extract
- 1 cup heavy whipping cream
- 2 cups mixed fresh berries (strawberries, blueberries, raspberries)
- 2 tablespoons lemon juice
- Additional powdered sugar for dusting (optional)
In a large bowl, combine the graham cracker crumbs with melted butter and mix until well combined. Press the mixture firmly into the bottom and up the sides of a tart pan to form the crust.
For the filling, beat the softened cream cheese, powdered sugar, and vanilla extract in another bowl until smooth and creamy. In a separate bowl, whip the heavy cream until stiff peaks form, then gently fold it into the cream cheese mixture.
Pour the filling into the prepared crust and smooth out the top. Chill in the refrigerator for at least 4 hours or until set. Once set, top with fresh berries and drizzle with lemon juice before serving.
For an extra touch, consider adding a glaze to your berries for extra shine. You can make the glaze by heating equal parts of jam and water until smooth, then brush it over the berries just before serving.
Additionally, make sure to keep the tart refrigerated until ready to serve to maintain its texture. If you want to make it ahead of time, prepare the crust and filling the day before, and add the berries just before serving for the best presentation.

