This post may contain affiliate links. Please read our policy page.
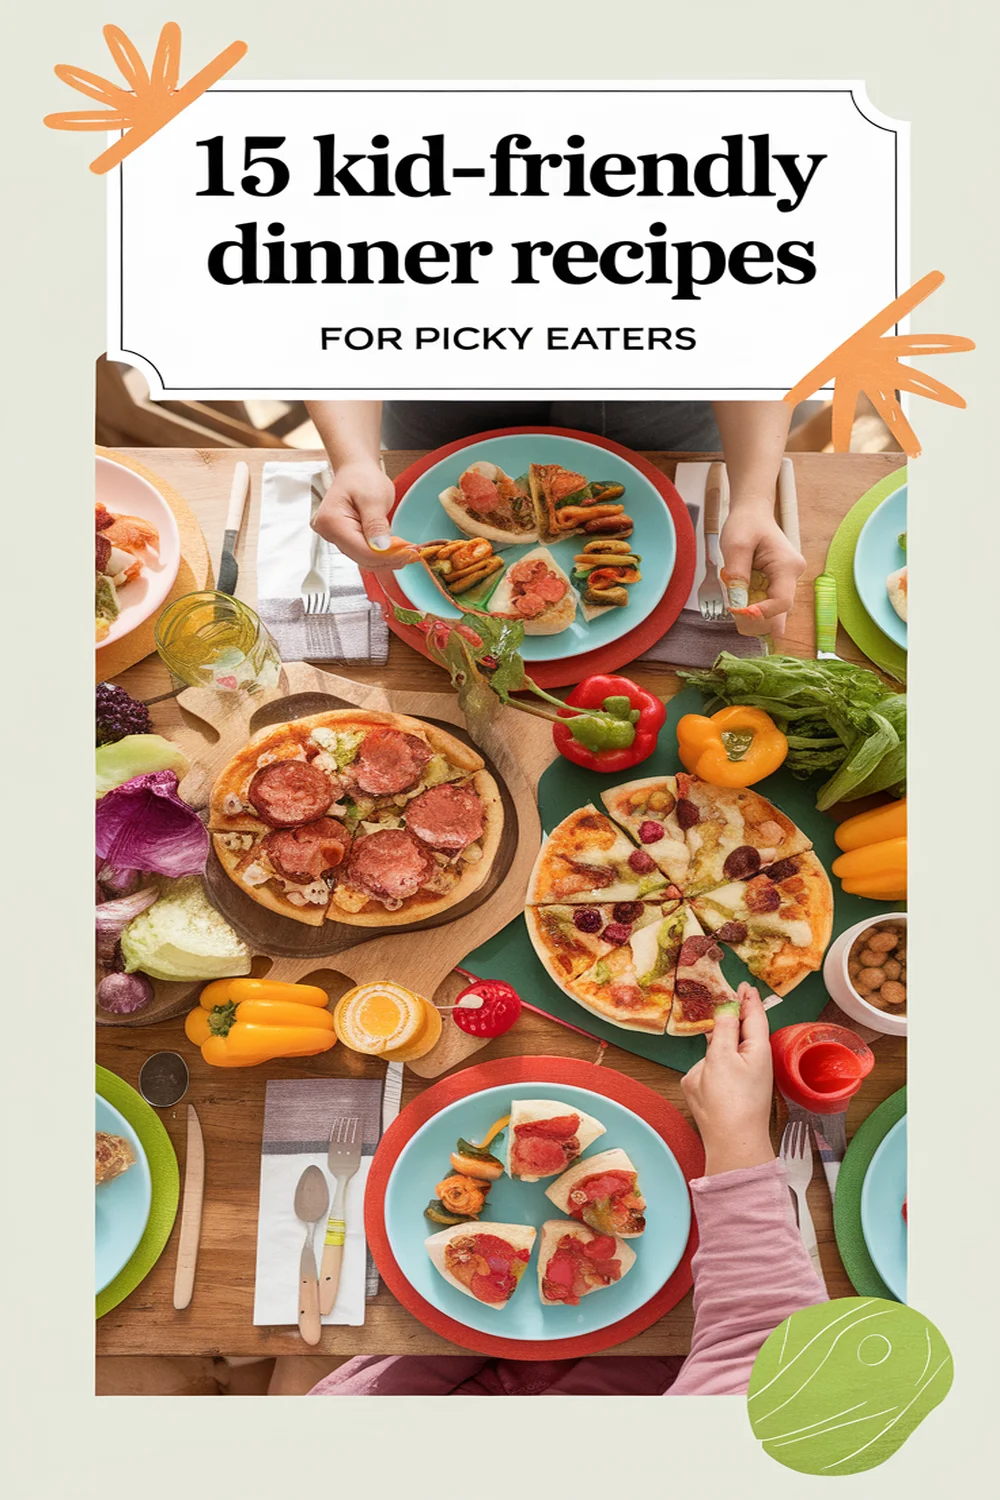
Finding kid-friendly dinner recipes for picky eaters can be a challenge, but I’ve got you covered! Try cheesy chicken quesadillas, mini meatball subs, or veggie-packed mac and cheese for delicious, appealing meals. Homemade chicken nuggets and taco night let kids customize their plates, while stuffed bell peppers and pasta primavera sneak in nutrition without fuss. Turkey and cheese roll-ups or crispy fish sticks serve up fun options too. You’ll uncover even more ideas that kids will love!
Cheesy Chicken Quesadillas
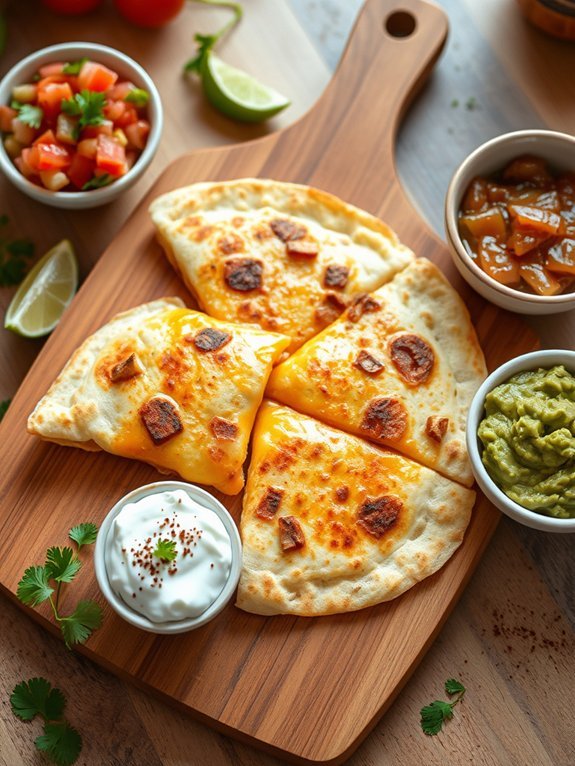
Cheesy Chicken Quesadillas are a delightful dish enjoyed by both kids and adults alike. They’re not only quick to make but also versatile, allowing you to customize them based on your family’s preferences or whatever ingredients you have on hand.
With golden tortillas stuffed with gooey cheese and savory chicken, these quesadillas make for a perfect weeknight dinner or a fun weekend treat. The best part? They can be prepared in under 30 minutes, making them ideal for busy parents on the go.
To make this recipe even more appealing, serve the cheesy quesadillas with a range of delicious dipping options like salsa, guacamole, or sour cream. Kids can get involved too, helping to assemble the quesadillas, making it a fun cooking experience. Not only do these quesadillas provide a great source of protein, but they also introduce children to new textures and flavors.
So gather your ingredients, and let’s get cooking!
Ingredients:
- 2 cups cooked chicken, shredded
- 1 cup shredded cheese (cheddar, Monterey Jack, or a blend)
- 4 large flour tortillas
- 1 tablespoon olive oil
- 1 teaspoon taco seasoning (optional)
- Salsa (for serving)
- Sour cream (for serving)
- Guacamole (for serving)
Heat a large skillet over medium heat. Add the olive oil and place one tortilla in the skillet. Layer one-fourth of the shredded chicken and one-fourth of the cheese on one half of the tortilla. If using taco seasoning, sprinkle it on top of the fillings.
Fold the tortilla in half and cook until the bottom is golden and the cheese is melted, about 2-3 minutes. Flip and cook the other side until golden brown, about another 2-3 minutes. Repeat for remaining tortillas, then cut into wedges and serve with your favorite dipping sauces.
When preparing cheesy chicken quesadillas, feel free to customize the recipe by adding in veggies like bell peppers or spinach for extra nutrients. You can also experiment with different types of cheese for varied flavor profiles.
To keep the quesadillas crispy, make sure not to overload them with too much filling; a little goes a long way. Finally, consider pre-cooking the chicken ahead of time or using rotisserie chicken for convenience, making this a stress-free, family-friendly meal!
Recommended Items
Discover our top picks for ingredients and tools to make mealtime a breeze for picky eaters!
Products
Mini Meatball Subs

Mini meatball subs are a fantastic option for a kid-friendly dinner that’s not only delicious but also fun to eat. These delightful sandwiches are packed with flavor and can be customized easily to fit your child’s taste. The combination of seasoned meatballs, marinara sauce, and gooey melted cheese all tucked inside small rolls creates a delightful meal that kids love. Plus, they require minimal prep and cooking time, making them perfect for busy weeknights.
To prepare the mini meatball subs, you can either make your own meatballs or use pre-made ones for convenience. With their bite-sized nature, these meatballs are just the right portion for little hands. Pairing them with a tangy marinara sauce and cheese enriches the flavor while keeping the meal exciting. Serve them warm with a side of veggie sticks or a salad, and you’ll have a meal that will leave the entire family satisfied.
Ingredients:
- 1 pound ground beef or turkey
- 1/2 cup breadcrumbs
- 1/4 cup grated Parmesan cheese
- 1/4 cup chopped fresh parsley
- 1 egg
- 1 teaspoon garlic powder
- 1 teaspoon onion powder
- Salt and pepper to taste
- 1 jar (about 24 ounces) marinara sauce
- 8 small sub rolls or slider buns
- 1 cup shredded mozzarella cheese
Mix the ground meat, breadcrumbs, Parmesan cheese, parsley, egg, garlic powder, onion powder, salt, and pepper in a large bowl until well combined. Roll the mixture into small meatballs, about one inch in size.
Place the meatballs on a baking sheet and bake in a preheated oven at 375°F (190°C) for about 20 minutes or until cooked through. While the meatballs are baking, warm the marinara sauce in a saucepan. Once the meatballs are done, place them inside the sub rolls, pour marinara sauce over the top, and sprinkle with mozzarella cheese. Return them to the oven for 5-7 minutes until the cheese is melted and bubbly.
For added flavor and excitement, consider adding some diced bell peppers or mushrooms to the marinara sauce while it simmers. You can even allow your kids to build their own subs, letting them pick their own toppings such as sliced olives or additional cheese for an interactive dinner experience.
Feel free to substitute different types of bread or rolls based on what you have on hand, and don’t forget to serve the subs with a side of your favorite dipping sauce for extra fun!
Veggie-Packed Mac and Cheese
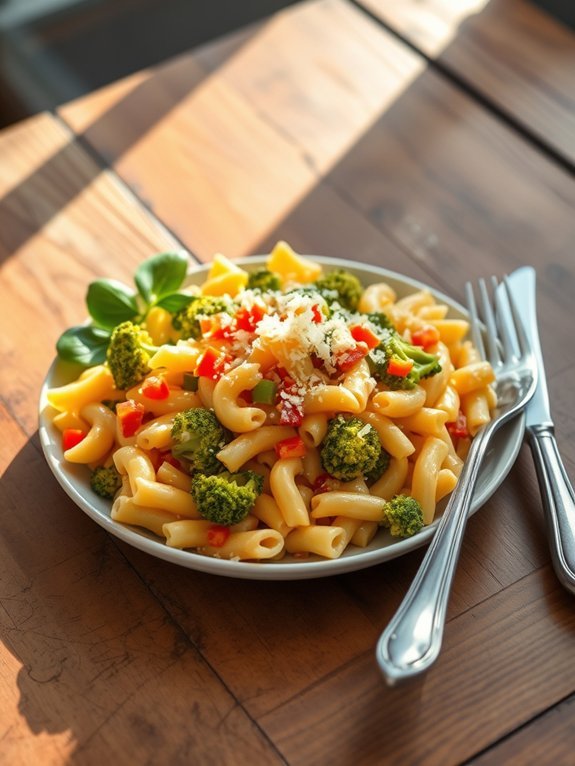
Veggie-Packed Mac and Cheese is a delightful twist on the classic comfort food that combines gooey cheese with a colorful medley of vegetables. It’s a perfect way to sneak in some nutrition while satisfying even the pickiest of eaters. The creamy cheese sauce pairs beautifully with the pasta, and the added veggies not only enhance the flavor but also boost the dish’s nutritional value, making it a hearty meal for kids and adults alike.
This recipe isn’t only easy to prepare but also adaptable based on what you have on hand. You can mix and match your favorite vegetables, such as spinach, broccoli, or carrots, ensuring every bite is packed with flavor and vitamins. With just a bit of prep, you’ll have a delicious meal ready for the whole family in no time.
Ingredients:
- 2 cups elbow macaroni
- 2 cups shredded sharp cheddar cheese
- 1 cup milk
- 1 tablespoon butter
- 1 cup broccoli florets
- 1 cup diced bell peppers (any color)
- 1 cup fresh spinach (optional)
- 1/2 teaspoon garlic powder
- Salt and pepper to taste
- 1/4 cup grated Parmesan cheese (for topping)
Cook the macaroni according to package instructions until al dente, then drain and set aside. In a large pot, melt the butter over medium heat and add the broccoli and bell peppers, sautéing for about 3-4 minutes.
Stir in the cooked macaroni, milk, garlic powder, and shredded cheddar cheese, mixing until the cheese is melted and creamy. If using spinach, fold it in just before serving to keep it bright and fresh. Season with salt and pepper to taste, and sprinkle Parmesan on top before serving.
For an extra cheesy experience, consider adding a bit more cheese to the sauce or baking the dish in the oven for a few minutes to achieve a crispy topping. Feel free to customize the vegetables based on your family’s preferences, and don’t hesitate to add a sprinkle of herbs for added flavor.
This dish can also be made ahead of time and stored in the fridge, making it perfect for meal-prepping or after a long day!
Homemade Chicken Nuggets

Homemade Chicken Nuggets are a fantastic way to combine convenience with healthiness when it comes to feeding kids. Unlike store-bought options filled with preservatives and additives, making your own nuggets means you can choose quality chicken and flavorful coatings. Plus, they can be baked or fried depending on your preference, making them a versatile choice for any family dinner.
Kids will love the crunch and the deliciousness of these nuggets, and they’re perfect for dipping in their favorite sauces. Preparing Homemade Chicken Nuggets is also a great opportunity to involve your kids in the kitchen. They can help with tasks like mixing the breading, shaping the nuggets, or even selecting the seasonings. This not only makes the cooking process more fun but also teaches them valuable cooking skills.
With every bite, they’ll enjoy the satisfaction of knowing they helped make their dinner!
Ingredients:
- 1 lb boneless, skinless chicken breasts
- 1 cup breadcrumbs (whole wheat or regular)
- 1/2 cup grated Parmesan cheese
- 1 teaspoon garlic powder
- 1 teaspoon onion powder
- 1 teaspoon paprika
- Salt and pepper to taste
- 2 eggs
- 1/4 cup flour (for dredging)
- Cooking oil (if frying)
Cut the chicken breasts into bite-sized pieces. Set up a dredging station with three bowls: one with flour, one with beaten eggs, and the third with a mixture of breadcrumbs, Parmesan cheese, garlic powder, onion powder, paprika, salt, and pepper.
First, coat each chicken piece in flour, then dip into the egg, and finally coat with the breadcrumb mixture. Place the nuggets on a baking sheet lined with parchment paper and bake at 400°F for about 15-20 minutes, flipping halfway through, until golden brown and cooked through.
If frying, heat oil in a pan over medium heat and cook nuggets until golden and crispy. For extra crunch, you can double-coat the chicken nuggets by repeating the egg and breadcrumb steps for an even thicker crust.
If your kids enjoy a bit of flavor, feel free to experiment with different herbs and spices or even add a pinch of cayenne pepper for a slight kick (if they can handle it!). Serve with a variety of dipping sauces like honey mustard, ketchup, or barbecue sauce for a fun mealtime experience.
Taco Night With All the Fixings
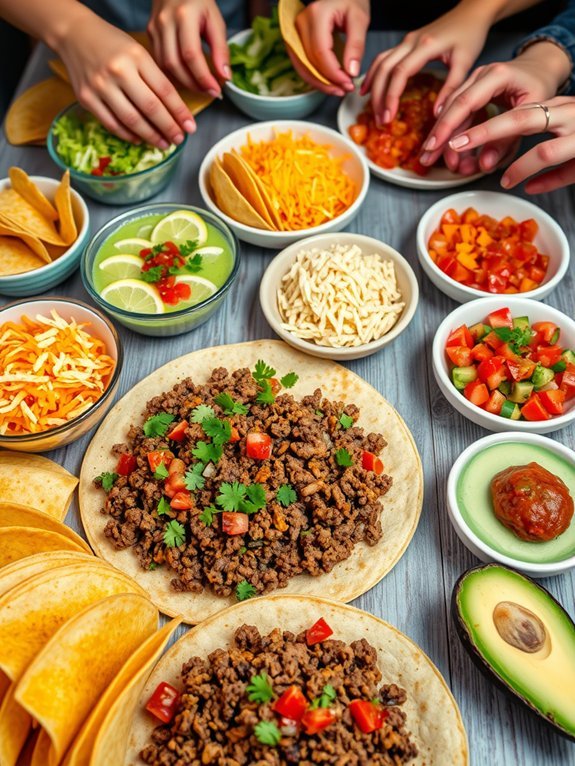
Taco night is a beloved tradition in many households, combining the excitement of a build-your-own meal with vibrant flavors and textures that kids adore.
The beauty of taco night lies in its versatility, allowing everyone to customize their tacos with their favorite toppings and fillings. Whether you prefer classic ground beef, zesty chicken, or a plant-based option, taco night is an opportunity for family interaction and creativity.
Prepare to commence on a culinary adventure that encourages kids to experiment with flavors and ingredients. Not only is it fun, but it’s also a chance to introduce them to cooking and the joy of enjoying a meal together.
Gather your ingredients and get ready to whip up a delicious spread that will keep everyone satisfied and coming back for more.
- 1 lb ground beef (or chicken, turkey, or beans for a vegetarian option)
- 1 packet taco seasoning
- 1 cup water
- 8-10 taco shells (soft or hard)
- 1 cup shredded lettuce
- 1 cup diced tomatoes
- 1 cup shredded cheese (cheddar or Mexican blend)
- 1 cup sour cream
- 1/2 cup salsa
- 1 avocado, sliced (optional)
- 1/4 cup chopped cilantro (optional)
In a skillet over medium heat, cook the ground beef (or your chosen protein) until browned, breaking it apart as it cooks.
Drain any excess fat if using meat, then add the taco seasoning and water. Stir until well combined and let it simmer for about 5-7 minutes or until the mixture thickens slightly.
While the meat is cooking, prepare your taco shells and set out the toppings so everyone can assemble their tacos just how they like them.
For the best taco experience, consider preheating your taco shells in the oven for a few minutes to guarantee they’re warm and crispy when ready to serve.
Encourage kids to get hands-on with assembly by selecting their desired toppings. You can also mix it up by providing a range of proteins and toppings each week, making sure that taco night remains a fresh and exciting meal option!
Step-by-Step Cooking Guide
Pizza Muffins

Pizza muffins are a fun, delicious, and easy dinner option that kids and adults alike will love. Packed with flavor and customizable to suit individual tastes, these muffins combine the classic elements of pizza in a portable, muffin form.
They’re perfect for busy weeknights or as a creative meal that your kids can help make. Plus, you can sneak in some veggies without them even noticing!
These pizza muffins lend themselves well to experimentation. You can add various toppings like pepperoni, bell peppers, olives, or even different cheeses to fit the palate of your little ones.
This recipe isn’t just about satisfying cravings; it also fosters creativity in the kitchen and allows kids to get involved in the cooking process. So grab your aprons and get ready to bake up some deliciousness!
Ingredients:
- 2 cups all-purpose flour
- 1 tablespoon baking powder
- 1/2 teaspoon salt
- 1 teaspoon Italian seasoning
- 1 cup shredded mozzarella cheese
- 1/2 cup diced pepperoni (or any other toppings)
- 1 cup pizza sauce
- 1/2 cup milk
- 1 large egg
- 1/4 cup olive oil
Preheat your oven to 400°F (200°C) and line a muffin tin with paper liners or grease it well.
In a large mixing bowl, combine the flour, baking powder, salt, and Italian seasoning. Stir in the mozzarella cheese and pepperoni.
In a separate bowl, whisk together the pizza sauce, milk, egg, and olive oil.
Pour the wet ingredients into the dry mixture and stir until just combined.
Scoop the batter into the muffin tin, filling each cup about 2/3 full. Bake for 15-20 minutes or until the muffins are golden brown and a toothpick inserted in the center comes out clean.
For added fun, let the kids choose their favorite toppings and help mix the ingredients together.
You can also experiment with different sauces like BBQ or pesto for a twist on flavor.
If you’re making these in bulk, they freeze well and can be reheated in the microwave for a quick meal on a busy day.
Finally, consider serving with a side of fresh veggies or a simple salad to round out the meal and encourage healthy eating habits!
Sweet and Sour Chicken Stir-Fry
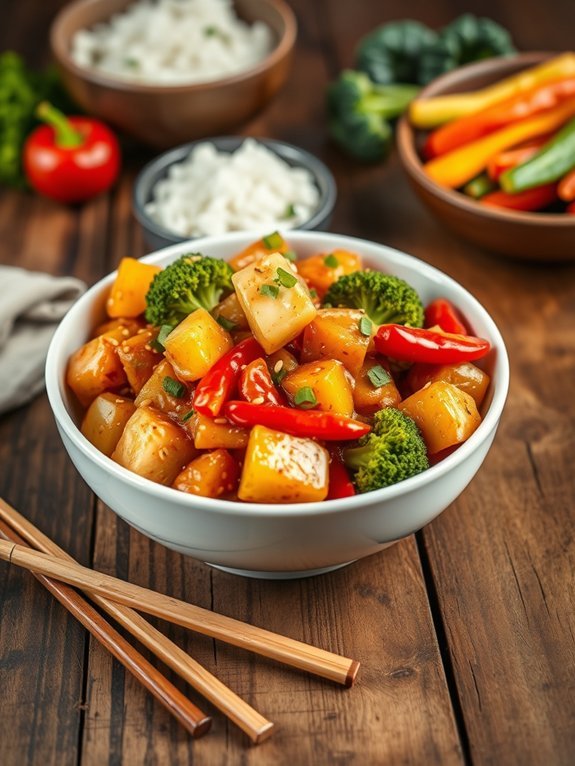
Sweet and Sour Chicken Stir-Fry is a delightful dish that combines the perfect balance of tangy and savory flavors with vibrant colors, making it an appealing meal for children and parents alike. With tender chicken pieces coated in a luscious sweet and sour sauce, this recipe isn’t only easy to make but is also packed with nutrition, thanks to the incorporation of fresh vegetables.
Whether you’re looking for a quick weeknight dinner or a fun meal to prepare together with your kids, this stir-fry is an excellent choice. Preparing Sweet and Sour Chicken Stir-Fry is a great way to introduce children to the joys of cooking. It allows them to engage in simple tasks like chopping vegetables and stirring the sauce, while still being involved in creating a delicious meal.
Plus, the vibrant colors of the bell peppers, broccoli, and pineapple make this dish visually appealing and a fun eating experience for kids who might be picky eaters.
Ingredients:
- 1 lb boneless, skinless chicken breasts, cut into bite-sized pieces
- 1 cup bell peppers (red, green, or yellow), sliced
- 1 cup broccoli florets
- 1 cup pineapple chunks (fresh or canned)
- 2 tablespoons vegetable oil
- 1/4 cup soy sauce
- 1/4 cup sugar
- 1/4 cup vinegar (rice or white)
- 1 tablespoon cornstarch mixed with 2 tablespoons water
- 2 cloves garlic, minced
- Cooked rice for serving
In a large skillet or wok, heat the vegetable oil over medium-high heat. Add the chicken pieces and sauté until they’re browned and cooked through. Next, add in the garlic and stir for about a minute before adding the bell peppers and broccoli.
Stir-fry the vegetables for 3-4 minutes until they begin to soften. Pour in the soy sauce, sugar, vinegar, and pineapple, allowing the mixture to come to a gentle boil. Then, add the cornstarch mixture to thicken the sauce and stir until glossy and smooth. Serve the stir-fry over cooked rice.
When making Sweet and Sour Chicken Stir-Fry, feel free to customize the vegetables based on your child’s preferences; snap peas, carrots, and zucchini are great alternatives. Always confirm that the chicken is cooked thoroughly before adding the sauce.
To make the dish even healthier, consider using less sugar or adding more vegetables. For extra flavor, a sprinkle of sesame seeds or green onions on top before serving can be a lovely touch!
Sloppy Joe Sliders

Sloppy Joe Sliders are a fun and delicious way to serve a meal that’s sure to delight children and adults alike. These mini sandwiches pack all the flavors of a classic Sloppy Joe into a bite-sized format, making them perfect for little hands to hold.
They aren’t only easy to make but can also be a great interactive dish for family gatherings or parties, where kids can assemble their own sliders with their favorite toppings.
This recipe brings together ground beef, tangy sauce, and soft slider buns for a satisfying dinner option. To guarantee that it caters to the tastes of varying age groups, feel free to tweak the level of spice and sweetness in the sauce or provide optional toppings like cheese, pickles, or coleslaw.
Mastering this dish will add a new go-to meal to your family’s dinner rotation that everyone will enjoy.
Ingredients:
- 1 pound ground beef
- 1/2 cup onion, finely chopped
- 1/2 cup bell pepper, finely chopped (optional)
- 1 cup ketchup
- 1 tablespoon Worcestershire sauce
- 1 tablespoon apple cider vinegar
- 1 tablespoon brown sugar
- 1 teaspoon garlic powder
- Salt and pepper to taste
- 12 slider buns
- Optional toppings (cheese, pickles, coleslaw)
In a large skillet, cook the ground beef over medium heat until browned, breaking it apart with a spoon as it cooks.
Add the chopped onion and bell pepper (if using) and sauté until softened.
Drain excess fat, then stir in the ketchup, Worcestershire sauce, vinegar, brown sugar, and garlic powder.
Let the mixture simmer for about 5-10 minutes until heated through and thickened.
While the filling is simmering, toast the slider buns if desired.
Fill each bun with the sloppy joe mix, add optional toppings, and serve warm.
For an extra layer of flavor, consider adding a splash of hot sauce or some diced jalapeños for those who enjoy a spicy kick.
If you’re serving a large crowd, this recipe can easily be doubled or even tripled.
Additionally, leftovers can be stored in the refrigerator and reheated for quick lunches, making it a convenient option for busy days.
Creamy Tomato Soup With Grilled Cheese
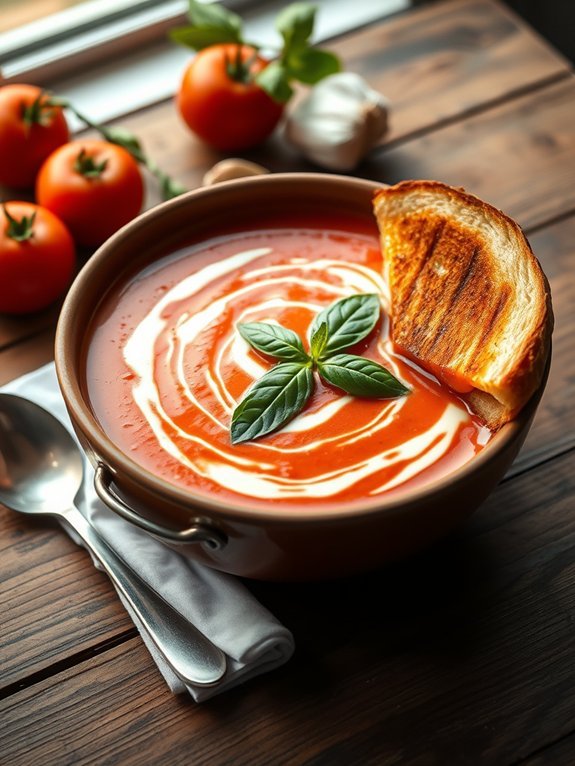
Creamy tomato soup with grilled cheese is a classic combination that warms the soul and pleases the palate. It’s a nostalgic dish that many grew up enjoying, and it remains a favorite among kids and adults alike. The velvety texture of the soup, paired with the crispy, gooey goodness of a grilled cheese sandwich, makes for a perfect meal any day of the week.
This dish isn’t only comforting but also incredibly easy to prepare, making it ideal for busy weeknight dinners. To elevate the simple flavors of tomato soup, you can add herbs, spices, or even a touch of cream for extra richness.
The grilled cheese can be customized with various types of bread and cheese, depending on personal preferences. Whether you choose classic cheddar or experiment with mozzarella or gouda, the combination of creamy soup and melty cheese is sure to delight even the pickiest eaters. Here’s how to whip up this delightful dish that’s perfect for the whole family.
Ingredients:
- 2 tablespoons olive oil
- 1 onion, chopped
- 2 cloves garlic, minced
- 2 cans (14.5 ounces each) diced tomatoes
- 2 cups vegetable broth
- 1 cup heavy cream
- 1 teaspoon dried basil
- Salt and pepper, to taste
- 4 slices of bread (your choice)
- 4 slices of cheese (cheddar, American, or your favorite)
In a large pot, heat olive oil over medium heat. Add chopped onion and garlic, cooking until the onion is translucent. Then, stir in the diced tomatoes (with juice), vegetable broth, and dried basil. Bring to a simmer and let it cook for about 20 minutes.
Using an immersion blender, puree the soup until smooth. Stir in the heavy cream, and season with salt and pepper to taste. Meanwhile, prepare the grilled cheese by placing cheese between two slices of bread and grilling in a pan over medium heat until golden brown and the cheese is melted.
For a little extra flavor, consider adding a pinch of red pepper flakes or a splash of balsamic vinegar to the soup before blending. If opting for fresh herbs, basil or thyme can be a revitalizing addition at the end of cooking.
Don’t forget to slice the grilled cheese diagonally for that perfect presentation and increased dipping surface area! Enjoy the fun of dipping your sandwich into the warm, creamy soup, making every bite a delight.
Breakfast for Dinner: Pancakes and Eggs

Breakfast for Dinner can be a delightful way to mix up the usual routine and delight the entire family, especially on a busy weeknight. Pancakes and eggs are classic breakfast items that are easy to prepare and can be customized to suit everyone’s preferences. Fluffy pancakes, served warm with syrup alongside perfectly scrambled or fried eggs, can be both satisfying and comforting, making it a hit among kids and adults alike.
Creating the perfect pancakes and eggs is all about simplicity and using fresh ingredients. The beauty of this dish lies in its versatility; you can add chocolate chips, blueberries, or even a sprinkle of cinnamon to the pancake batter, while the eggs can be prepared in a variety of ways – scrambled, fried, or even as an omelet filled with veggies. It’s a great, nutritious way to wrap up the day while indulging in the familiar and cozy tastes that kids adore.
- 1 cup all-purpose flour
- 2 tablespoons sugar
- 1 tablespoon baking powder
- 1/2 teaspoon salt
- 1 cup milk
- 1 large egg
- 2 tablespoons butter, melted
- 4 large eggs (for cooking)
- Salt and pepper (to taste)
- Cooking oil or additional butter (for frying)
In a mixing bowl, whisk together the flour, sugar, baking powder, and salt. In another bowl, combine milk, egg, and melted butter, stirring until smooth. Pour the wet ingredients into the dry ingredients and mix until just combined.
Heat a non-stick skillet or griddle over medium heat, and lightly grease it with cooking oil or butter. Pour about 1/4 cup of batter onto the skillet for each pancake, cooking until bubbles form on the surface, then flip and cook until golden brown.
Meanwhile, in another pan, heat some oil or butter and scramble or fry the eggs as desired, seasoning with salt and pepper.
For perfect pancakes, avoid overmixing the batter, as this can make them tough; a few lumps are okay. Additionally, keep your pancakes warm in a low oven while you finish cooking the eggs. If you’re feeling adventurous, try adding different toppings, like fresh fruit, yogurt, or nuts, to elevate the dish even more.
Enjoy your breakfast-for-dinner adventure with your loved ones!
Baked Ziti With Hidden Veggies
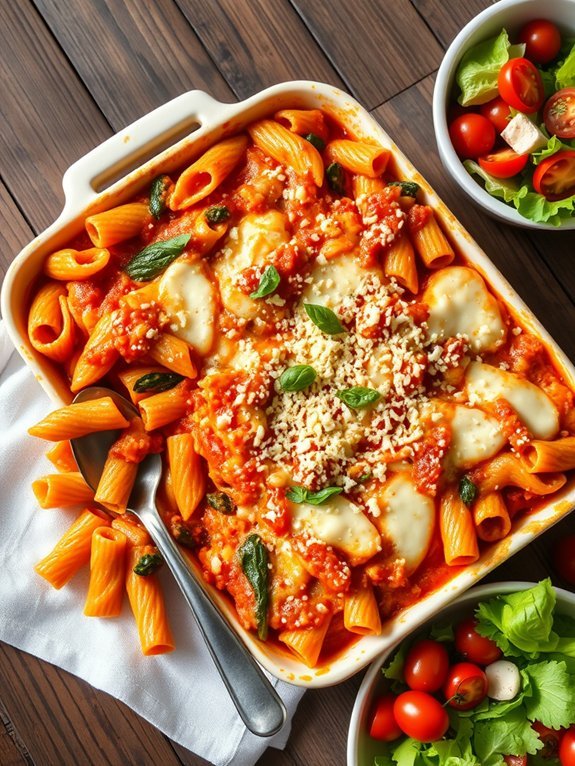
Baked Ziti with Hidden Veggies is the perfect family-friendly dish that delights both children and parents alike. This cheesy, comforting pasta bake isn’t only simple to make but can also be nutritious thanks to the secret added vegetables that blend in seamlessly with the sauce. Ideal for using up leftover veggies in your fridge, this recipe allows you to sneak in some extra nutrients without anyone being the wiser. Serve it with a side salad or bread for a complete meal that will have your little ones asking for seconds!
This dish can be customized to include whatever vegetables your family enjoys or whatever you have on hand. Carrots, spinach, bell peppers, or zucchini can easily be incorporated into the sauce, providing both flavor and texture while ensuring your kids are getting their daily servings of vegetables.
Baked Ziti with Hidden Veggies is perfect for busy weeknights and can even be made ahead and frozen for a later meal, allowing you to save time and effort when it’s needed most.
Ingredients:
- 12 oz ziti pasta
- 1 tablespoon olive oil
- 1 small onion, diced
- 2 cloves garlic, minced
- 1 carrot, grated
- 1 cup spinach, finely chopped
- 1 bell pepper, diced
- 24 oz marinara sauce
- 1 teaspoon dried oregano
- 1 teaspoon dried basil
- 2 cups ricotta cheese
- 2 cups shredded mozzarella cheese
- 1/2 cup grated Parmesan cheese
- Salt and pepper to taste
Cook the ziti according to the package instructions until al dente, then drain and set aside. In a large skillet, heat olive oil over medium heat and sauté the onion and garlic until softened. Add the grated carrot, chopped spinach, and diced bell pepper, cooking until the vegetables are tender.
Mix in the marinara sauce, oregano, basil, salt, and pepper. In a large mixing bowl, combine the cooked ziti with the ricotta cheese and half of the mozzarella cheese. Pour the vegetable sauce over the pasta mixture and toss to combine. Transfer the mixture to a greased baking dish, top with the remaining mozzarella and Parmesan cheese, and bake at 375°F (190°C) for 25-30 minutes, or until bubbly and golden.
To enhance the flavor of your Baked Ziti, consider adding some Italian seasoning or red pepper flakes for a subtle kick. For a creamier texture, you can mix in an egg with the ricotta cheese before combining it with the pasta.
If your family enjoys different types of cheese, feel free to substitute with provolone, fontina, or any other blend of cheeses you love. Leftovers can be stored in an airtight container in the refrigerator for up to three days, making it a convenient option for meal prep or quick lunches!
Fish Sticks With Homemade Tartar Sauce
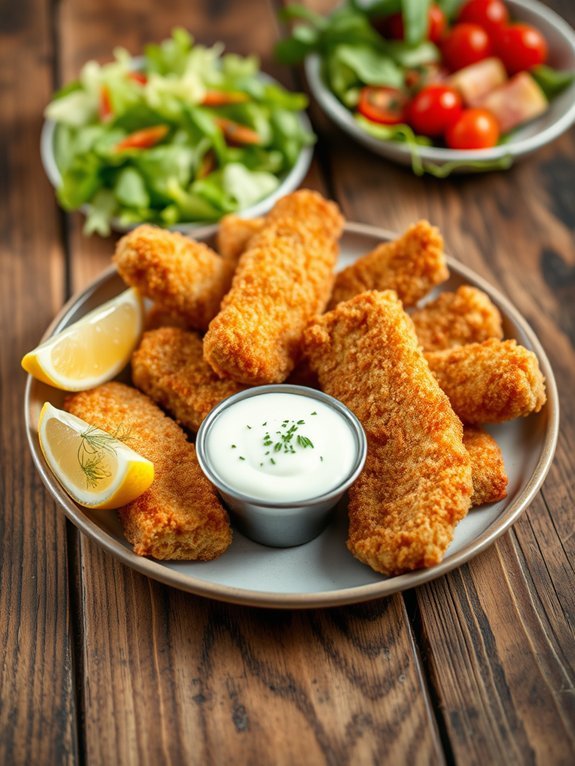
Fish sticks are a beloved classic in many households, particularly for kids who enjoy their crunchy texture and mild flavor. While store-bought fish sticks can be convenient, making them from scratch isn’t only healthier but also a fun activity to do with your children. This easy recipe for fish sticks paired with homemade tartar sauce is sure to become a family favorite, providing a satisfying crunch on the outside and a tender, flaky fish on the inside.
With this recipe, you’ll get to introduce your kids to the joys of cooking while guaranteeing they eat something nutritious. The homemade tartar sauce adds a fresh and zesty kick that will elevate the dish, making it even more appealing to young palates. Plus, preparing it together allows for some quality family time, all while serving a meal that everyone enjoys.
Ingredients:
- 1 pound white fish fillets (such as cod, haddock, or tilapia)
- 1 cup panko breadcrumbs
- 1/2 cup all-purpose flour
- 2 large eggs
- 1 teaspoon garlic powder
- 1 teaspoon paprika
- Salt and pepper to taste
- Vegetable oil for frying
For Tartar Sauce:
- 1/2 cup mayonnaise
- 1 tablespoon dill pickles, chopped
- 1 teaspoon capers, chopped (optional)
- 1 teaspoon lemon juice
- Salt and pepper to taste
Cut the fish fillets into finger-sized sticks and season with salt and pepper. Set up a breading station by placing the flour in one bowl, beaten eggs in a second bowl, and panko breadcrumbs mixed with garlic powder and paprika in a third bowl. Dredge each fish stick first in flour, then dip in the egg, followed by coating in panko breadcrumbs.
Heat a sufficient amount of vegetable oil in a large skillet over medium heat and fry the fish sticks until golden brown on all sides, about 3-4 minutes per side. For the tartar sauce, mix all sauce ingredients in a small bowl until well combined.
When preparing fish sticks, guarantee that the oil is hot enough to fry the fish properly without becoming greasy. You can test the temperature by dropping a small piece of bread into the oil; if it sizzles right away, it’s ready.
Additionally, feel free to experiment with different seasonings in the breadcrumb mix to tailor the flavors to your family’s preferences. Serve with a side of veggies or a light salad for a balanced meal that kids will love!
Stuffed Bell Peppers
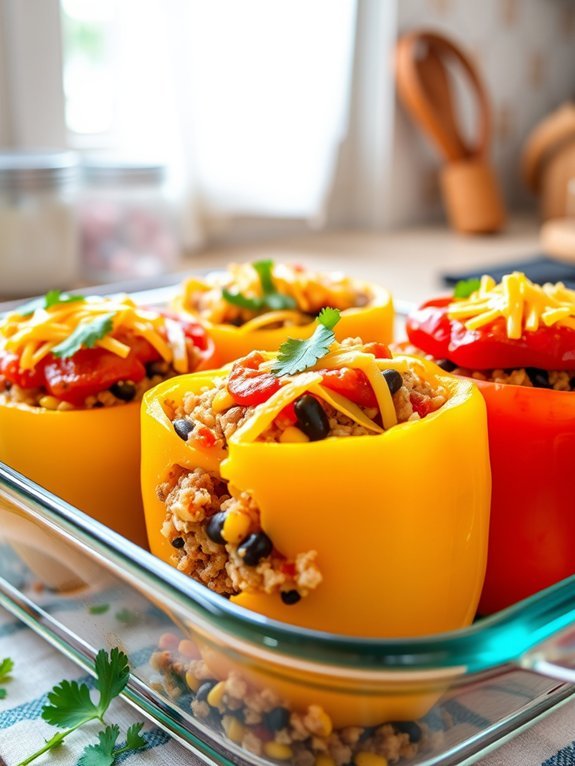
Stuffed bell peppers are a delightful and nutritious meal that kids will love. These vibrant, colorful vegetables can be filled with a variety of ingredients, making them versatile and fun to prepare. By incorporating protein, grains, and vegetables, they provide a well-rounded dinner option that’s also visually appealing.
Plus, allowing kids to help with the stuffing process can make them more excited about eating their creations!
Preparing stuffed bell peppers can also be an excellent opportunity to introduce children to different flavors and textures. Not only can they choose their favorite fillings, but they can also learn about the different ways to customize this dish based on personal taste.
Whether you opt for a classic ground beef mixture, a vegetarian quinoa blend, or something entirely new, these peppers are a fantastic way to enjoy dinner together as a family.
Ingredients:
- 4 large bell peppers (any color)
- 1 pound ground beef (or turkey)
- 1 cup cooked rice (white or brown)
- 1 can (15 oz) black beans, drained and rinsed
- 1 cup corn (frozen or canned)
- 1 cup salsa
- 1 teaspoon chili powder
- 1 teaspoon cumin
- 1 cup shredded cheese (such as cheddar or mozzarella)
- Salt and pepper to taste
- Fresh cilantro (optional, for garnish)
Preheat your oven to 375°F (190°C). Begin by cutting the tops off the bell peppers and removing the seeds and membranes.
In a large skillet over medium heat, brown the ground beef, seasoning it with salt, pepper, chili powder, and cumin. Once the meat is cooked through, stir in the cooked rice, black beans, corn, and salsa until well combined.
Remove from heat and stir in half of the shredded cheese. Pack the mixture into each of the hollowed bell peppers, then place them upright in a baking dish. Cover the dish with foil and bake for about 30 minutes.
Remove the foil, sprinkle the remaining cheese on top of the peppers, and bake for an additional 10-15 minutes, or until the cheese is melted and bubbly.
For an extra touch, you can customize your stuffed peppers by adding different ingredients like diced tomatoes, chopped onions, or even chopped spinach for added nutrition.
If your kids are adventurous, encourage them to experiment with different spices to find their favorite flavors. Additionally, stuffed bell peppers can be made ahead of time and stored in the fridge for an easy weeknight dinner option.
Just reheat in the oven until warmed through before serving!
Pasta Primavera
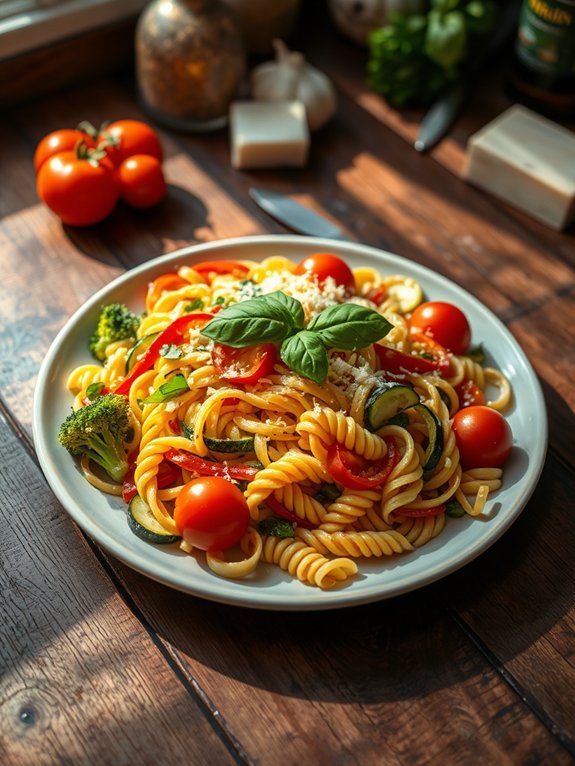
Pasta Primavera is a vibrant and nutritious dish that showcases the freshness of vegetables, making it a hit with children and adults alike. This colorful pasta dish isn’t only visually appealing but also packed with flavors, thanks to a variety of seasonal vegetables.
It’s a simple recipe that can be customized according to the vegetables in your fridge or what’s currently in season, allowing for creativity in the kitchen.
This recipe for Pasta Primavera is easy to prepare, making it a perfect choice for busy weeknights or family dinners. By using wholesome ingredients and a light sauce, you’ll create a meal that everyone will enjoy. Serve it with a sprinkle of Parmesan cheese or a side of garlic bread, and watch your kids dig in!
- 8 oz. of your favorite pasta (such as penne or fusilli)
- 1 cup of broccoli florets
- 1 cup of bell peppers, sliced (any color)
- 1 cup of zucchini, sliced
- 1 cup of cherry tomatoes, halved
- 2 cloves of garlic, minced
- 3 tablespoons of olive oil
- Salt and pepper, to taste
- Grated Parmesan cheese (optional)
- Fresh basil, for garnish (optional)
Cook the pasta according to package instructions in a large pot of salted boiling water. In the meantime, heat olive oil in a large skillet over medium heat. Add the minced garlic and sauté for about 30 seconds until fragrant.
Then, add the broccoli, bell peppers, and zucchini, cooking for 5-7 minutes, until slightly tender. Add the cherry tomatoes and cooked pasta, tossing to combine. Season with salt and pepper, and finish with a sprinkle of Parmesan cheese if desired.
For the best results, feel free to experiment with different vegetables according to your family’s preferences. You can also add protein such as grilled chicken or shrimp to make it more filling.
Cooking the vegetables until they’re just tender will help maintain their vibrant colors and nutrients, making the dish even more inviting for kids. Finally, inviting your children to help with the cooking process can make them more interested in trying new foods!
Turkey and Cheese Roll-Ups
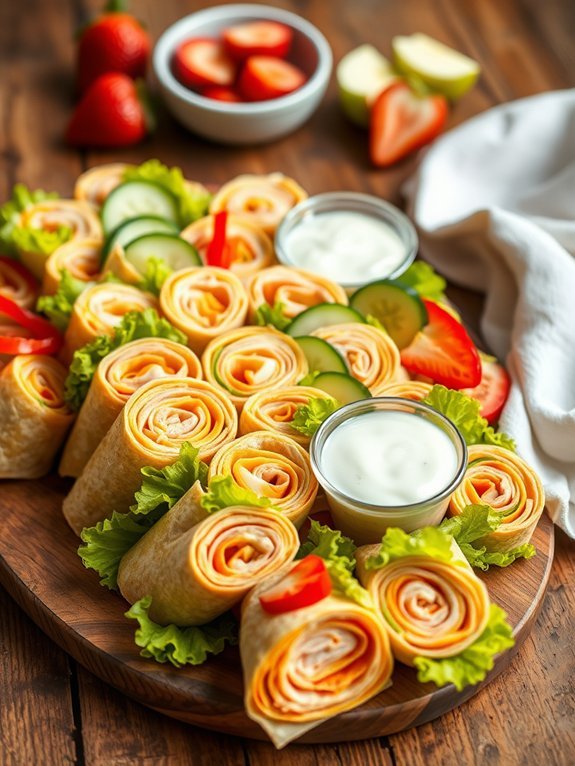
Turkey and cheese roll-ups are a delightful and easy dinner option that kids will love. Not only are they quick to prepare, but they can also be customized to suit your child’s preferences. These bite-sized treats are perfect for a busy weeknight and can even double as a fun weekend lunch option. Pair them with a side of fruit or vegetables, and you’ve got a wholesome meal that the whole family can enjoy.
Creating these roll-ups isn’t just about flavor; it’s also an opportunity for kids to get involved in the kitchen. They can help choose the ingredients, assemble their own roll-ups, and even experiment with different dips. With endless possibilities for customization, including condiments and veggie fillings, turkey and cheese roll-ups are sure to become a family favorite.
Ingredients:
- Sliced turkey breast
- Sliced cheese (cheddar, mozzarella, or your choice)
- Whole wheat tortillas or wraps
- Lettuce leaves
- Mustard or mayonnaise (optional)
- Sliced cucumbers or bell peppers (optional)
Lay a tortilla flat on a clean surface. Start by placing a few slices of turkey followed by a slice of cheese on the tortilla, and add lettuce and any optional veggies you desire. If you like, spread a thin layer of mustard or mayonnaise for extra flavor. Roll the tortilla tightly, starting from one edge to the other, and secure it with a toothpick or cut it into bite-sized pieces for easier handling.
When making turkey and cheese roll-ups, consider letting your little chefs get creative. They can add their favorite ingredients for a personal touch or even try different proteins like ham or chicken. To keep things interesting, serve the roll-ups with an assortment of dips such as ranch dressing, hummus, or salsa.
Additionally, you can prepare these roll-ups ahead of time and store them in the fridge for a quick meal solution on busy days.

