This post may contain affiliate links. Please read our policy page.
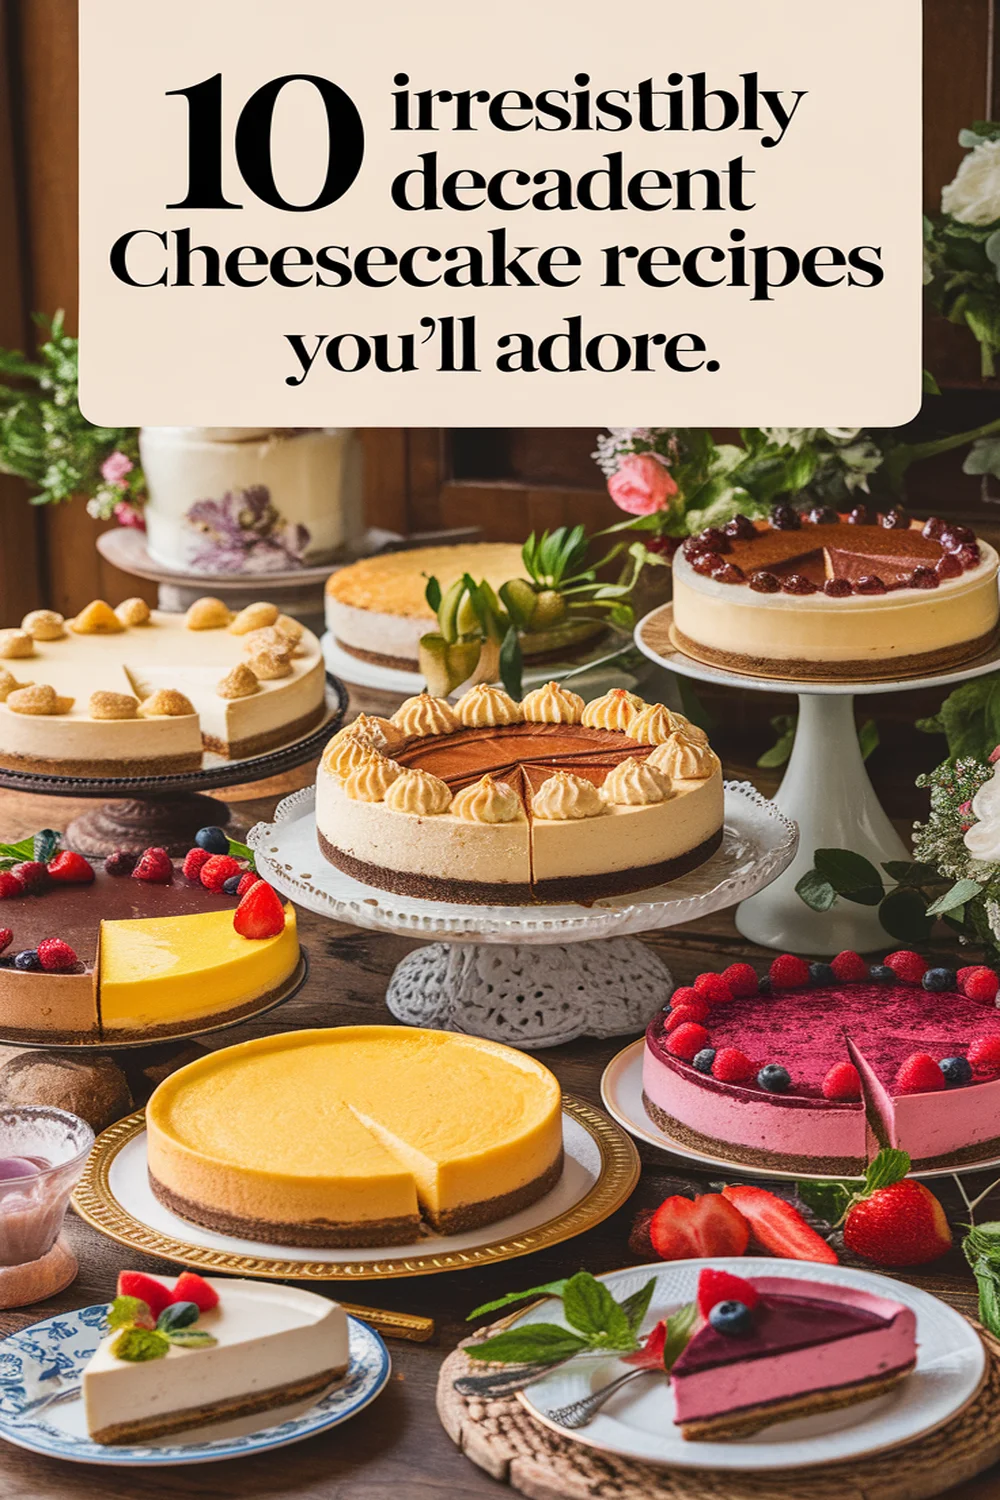
Get ready to indulge in 10 irresistibly decadent cheesecake recipes that’ll leave you craving more! From the rich and creamy Classic New York Style to the luscious Chocolate Hazelnut, each dessert brings unique flavors to the table. Savor the fruity notes of Strawberry Swirl and Lemon Blueberry or the sweet, salty bliss of Salted Caramel. Don’t forget the delightful Oreo Cheesecake, Raspberry White Chocolate, and the unique Matcha Green Tea. There’s so much more to explore!
Classic New York Style Cheesecake
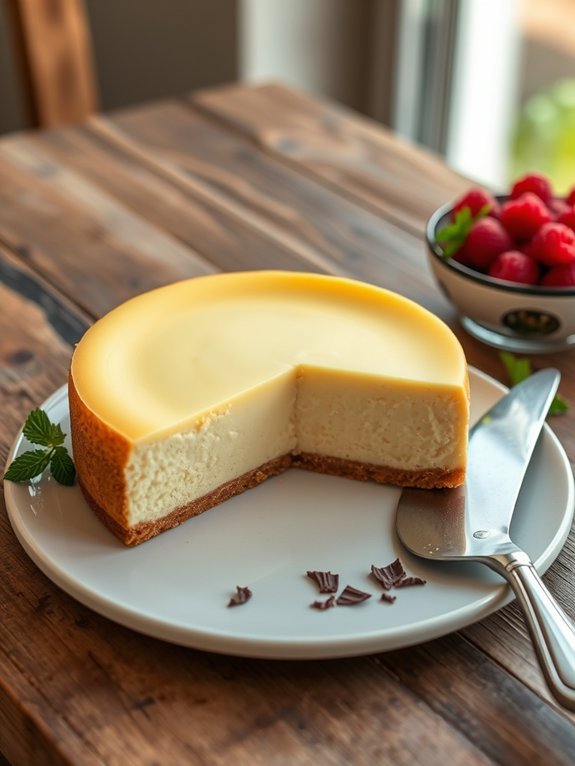
Classic New York Style Cheesecake is a rich and creamy dessert that has earned its place as a classic in the world of sweets. Known for its smooth texture and delightful tanginess, this cheesecake is baked with a simple graham cracker crust that beautifully complements the velvety filling. With its dense yet airy structure, the New York style cheesecake is perfect for special occasions or a luxurious ending to a meal.
Making this decadent cheesecake isn’t as complicated as it may seem. The key is to use high-quality cream cheese and take your time while mixing to achieve that perfect creamy consistency. A well-prepared cheesecake is a crowd-pleaser, and once you master the basics, you can play around with different flavors or toppings to make it your own. So gather your ingredients and get ready to indulge!
- 2 cups graham cracker crumbs
- ½ cup unsalted butter, melted
- 1 cup granulated sugar
- 4 (8-ounce) packages cream cheese, softened
- 4 large eggs
- 1 teaspoon vanilla extract
- 1 teaspoon lemon juice
- ½ cup sour cream
In a mixing bowl, combine the graham cracker crumbs and melted butter, then press the mixture into the bottom of a 9-inch springform pan to form the crust.
In a large bowl, beat the softened cream cheese with an electric mixer until smooth. Gradually add the sugar, mixing until well combined. Add the eggs one at a time, mixing well after each addition. Stir in vanilla extract, lemon juice, and sour cream until fully incorporated.
Pour the cream cheese mixture over the prepared crust and smooth the top. Bake in a preheated oven at 325°F (160°C) for about 60-70 minutes, or until the center is set but still slightly jiggly.
Turn off the oven and let the cheesecake cool inside for 1 hour before refrigerating for at least 4 hours, or overnight.
For an extra rich flavor, consider using a combination of cream cheese and mascarpone in your filling. Remember not to overmix the batter once the eggs are added; this helps prevent cracks on the surface while baking.
Additionally, for a smooth finish, allow the cheesecake to cool gradually in the oven before refrigerating. To slice, use a hot knife for clean cuts, and feel free to experiment with various toppings such as fresh fruit or a drizzle of chocolate sauce for a finishing touch.
Enjoy your culinary masterpiece!
Chocolate Hazelnut Cheesecake
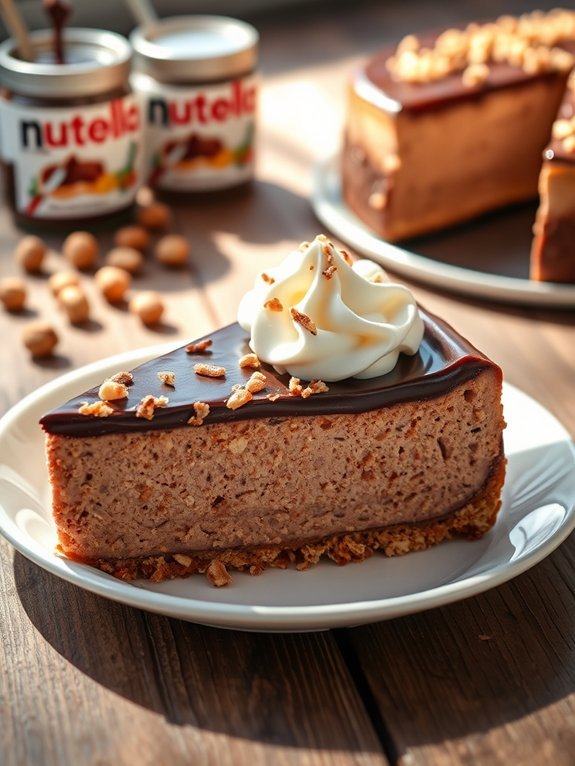
Indulge in the rich and creamy delight of a Chocolate Hazelnut Cheesecake, a dessert that combines the classic flavors of cheesecake with the luxurious taste of chocolate and the crunchy texture of hazelnuts. This decadent dessert is perfect for special occasions or simply to satisfy your sweet cravings. The blend of cream cheese, chocolate, and toasted hazelnuts creates an irresistible treat that will impress your family and friends alike.
To achieve the perfect balance of flavors, take your time and verify that the ingredients are at room temperature before mixing. This will help create a smooth and velvety texture for your cheesecake. By incorporating a delicious hazelnut crust and a rich chocolate filling, this recipe will have you coming back for seconds—guaranteed!
Ingredients:
- 1 cup crushed hazelnuts (or hazelnut flour)
- 1 cup chocolate wafer cookies, crushed
- 1/4 cup unsalted butter, melted
- 16 oz cream cheese, softened
- 1 cup granulated sugar
- 1 tsp vanilla extract
- 3 large eggs
- 1 cup Nutella (or other chocolate hazelnut spread)
- 1/2 cup heavy cream
- 1/4 cup chopped toasted hazelnuts (for garnish)
Preheat your oven to 325°F (160°C). In a mixing bowl, combine the crushed hazelnuts and chocolate wafer cookies with the melted butter until well mixed. Press the mixture into the bottom of a springform pan to create a crust.
In a large mixing bowl, beat the softened cream cheese until smooth. Add the sugar and vanilla extract, mixing until combined. Beat in the eggs one at a time, and then mix in the Nutella and heavy cream. Pour the filling over the crust and bake for about 50-60 minutes, or until the edges are set, but the center is still slightly jiggly.
Turn off the oven and leave the cheesecake inside for an additional hour. Remove from the oven and let it cool to room temperature before refrigerating for at least 4 hours, or overnight.
For the best flavor and texture, make sure to chill your cheesecake overnight for at least 6-8 hours, as this allows the flavors to meld beautifully. Serving the cheesecake at room temperature will enhance its creamy goodness.
Consider topping it with whipped cream, additional chocolate ganache, or even more chopped hazelnuts for added texture and flair. Enjoy your luxurious dessert experience!
Recommended Items
Get ready to elevate your cheesecake game with these must-have ingredients and tools!
Strawberry Swirl Cheesecake
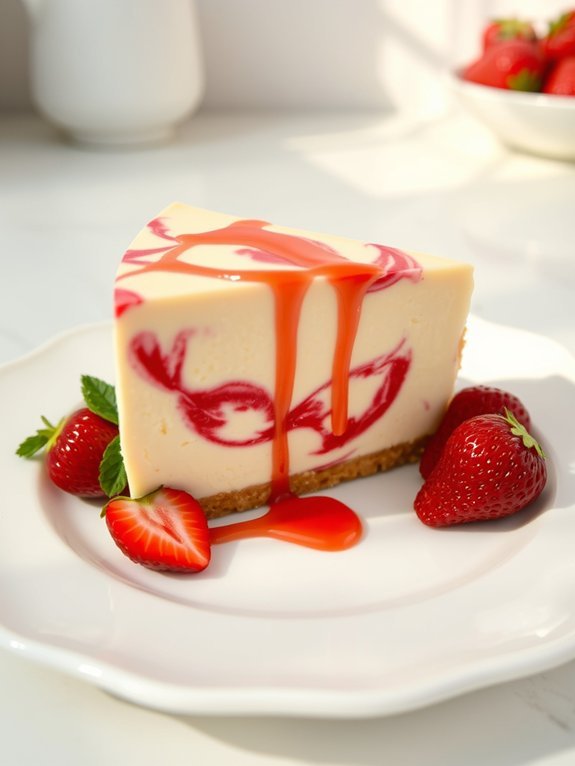
Indulge your senses with a luscious Strawberry Swirl Cheesecake, a delightful dessert that beautifully combines the creamy richness of cheesecake with the vibrant flavor of fresh strawberries. This dessert is perfect for special occasions or a sweet treat to enjoy on any day. The striking red strawberry swirl not only adds a burst of color but also infuses the cheesecake with a rejuvenating fruitiness that will leave your taste buds dancing.
To make this cheesecake, you’ll start by preparing a buttery graham cracker crust that serves as a delicious foundation for your creamy filling. The star of the show, the cream cheese mixture, is whipped to perfection and combined with sugar, eggs, and vanilla extract, creating the ideal base. Finally, fresh strawberries are puréed and swirled into the mixture, providing not just a visual treat but a sweet contrast to the richness of the cheesecake.
Ingredients:
- 1 ½ cups graham cracker crumbs
- ½ cup unsalted butter, melted
- 2 cups cream cheese, softened
- 1 cup granulated sugar
- 3 large eggs
- 1 teaspoon vanilla extract
- 1 cup fresh strawberries, hulled and puréed
- 2 tablespoons sugar (for strawberry mixture)
Preheat your oven to 325°F (163°C). In a mixing bowl, combine the graham cracker crumbs and melted butter, then press the mixture firmly into the bottom of a 9-inch springform pan to create your crust.
In another bowl, beat the cream cheese until smooth, then add the sugar and mix until combined. Add the eggs one at a time, mixing well after each addition, and finally incorporate the vanilla extract. Pour the cream cheese filling over the crust.
In a third bowl, mix the puréed strawberries with the additional sugar, and drop spoonfuls of this mixture on top of the cheesecake batter. Using a knife or a toothpick, gently swirl the strawberry mix into the cheesecake batter to create a marbled effect.
Bake in the preheated oven for about 50-60 minutes or until the center is set but still slightly jiggly. Once done, turn off the oven and leave the cheesecake inside with the door ajar for an hour. Chill in the refrigerator for at least 4 hours before serving.
When making your Strawberry Swirl Cheesecake, it’s vital to use room-temperature cream cheese to guarantee a smooth and lump-free batter. For an even more pronounced strawberry flavor, consider adding fresh strawberry slices on top of the cheesecake before serving, or drizzle a homemade strawberry sauce over each slice.
Be mindful not to overmix the cheesecake filling once you’ve added the eggs, as this can incorporate air, leading to cracking during baking. Finally, letting the cheesecake cool slowly in the oven helps prevent cracks and contributes to an ultra-creamy texture. Enjoy every decadent slice!
Step-by-Step Cooking Guide
Lemon Blueberry Cheesecake
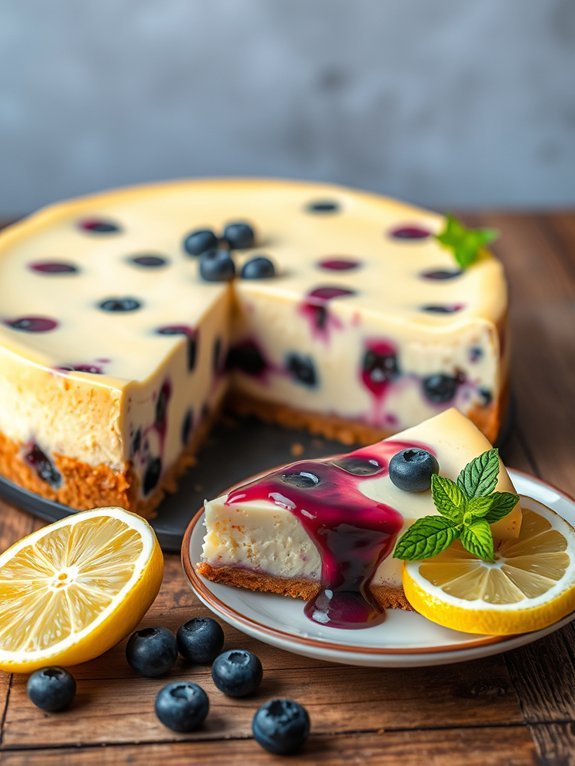
Lemon Blueberry Cheesecake is a delightful twist on the classic cheesecake, infusing bright citrus notes and sweet, juicy blueberries into a creamy, rich filling. This dessert not only captivates the eye with its beautiful layers but also tantalizes the palate with every bite, combining tangy lemon and luscious berries. Perfect for spring and summer gatherings, this cheesecake is sure to impress family and friends alike.
The combination of lemon zest and juice in this recipe adds a rejuvenating zing, while the blueberries provide a burst of flavor that contrasts perfectly with the smooth texture of the cream cheese. Whether you’re celebrating a special occasion or simply treating yourself, this dessert is decadent and satisfying—a true showstopper that will become a favorite in your dessert repertoire.
- 1 ½ cups graham cracker crumbs
- ½ cup unsalted butter, melted
- 2 cups cream cheese, softened
- ¾ cup granulated sugar
- 3 large eggs
- 1 cup sour cream
- 1 lemon, zested and juiced
- 1 cup fresh blueberries
- 1 teaspoon vanilla extract
- ¼ teaspoon salt
Preheat your oven to 325°F (160°C). In a mixing bowl, combine the graham cracker crumbs and melted butter, then press the mixture firmly into the bottom of a 9-inch springform pan to form the crust.
In another large mixing bowl, beat the cream cheese and sugar together until smooth. Add the eggs one at a time, mixing well after each addition. Next, fold in the sour cream, lemon zest, lemon juice, vanilla extract, and salt until fully incorporated.
Gently fold in the blueberries, then pour the filling over the graham cracker crust. Bake for about 55-60 minutes, or until the center is set but still slightly jiggly. Remove from the oven and let cool before refrigerating for at least 4 hours or overnight for best results.
For a more intense blueberry flavor, consider making a simple blueberry sauce to drizzle over your cheesecake before serving. This can be done by simmering fresh blueberries with a bit of sugar and lemon juice until they break down and thicken.
Additionally, make sure your cream cheese is at room temperature for easier blending and a silkier texture. Finally, when baking your cheesecake, consider placing a shallow pan of water in the oven to add humidity, which helps prevent cracking on the cheesecake’s surface.
Salted Caramel Cheesecake
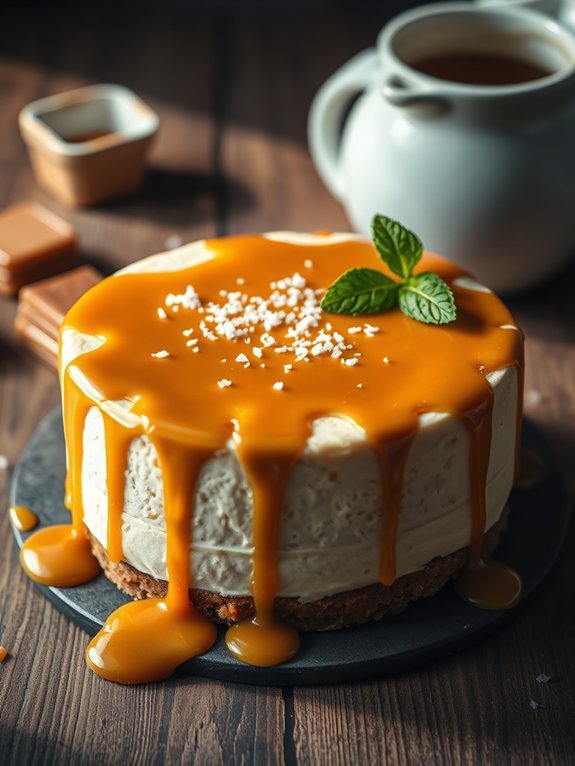
Indulge your sweet tooth with a rich and luxurious Salted Caramel Cheesecake that’s both creamy and decadent. This dessert combines the velvety texture of traditional cheesecake with the delightful sweetness of caramel, finished with a touch of sea salt to enhance the flavors. Perfect for special occasions or as a treat for yourself, this cheesecake is sure to impress family and friends alike.
The process of making this cheesecake is as rewarding as the finished product, allowing you to showcase your baking skills while also satisfying a craving for something truly special. The crust is buttery and crumbly, setting the stage for the smooth filling that harmonizes sweet and salty elements. Once baked and cooled, it gets a lavish drizzle of homemade salted caramel sauce, promising a bite that’s absolutely irresistible.
Ingredients:
- 1 ½ cups graham cracker crumbs
- ½ cup unsalted butter, melted
- 1 cup granulated sugar
- 3 (8 oz) packages cream cheese, softened
- 1 teaspoon vanilla extract
- 4 large eggs
- 1 cup heavy cream
- 1 cup salted caramel sauce
- Flaky sea salt for topping
For cooking, preheat your oven to 325°F (160°C). In a mixing bowl, combine graham cracker crumbs and melted butter, then press this mixture firmly into the bottom of a 9-inch springform pan to create the crust.
In another bowl, beat together the cream cheese, sugar, and vanilla extract until smooth. Add eggs one at a time, mixing gently after each addition. Pour in the heavy cream and continue mixing until completely smooth.
Pour the cheesecake filling over the crust and bake in the preheated oven for 55-60 minutes or until the edges are set but the center is slightly jiggly.
Turn off the oven, crack the door, and let the cheesecake cool in the oven for an hour before transferring it to the refrigerator to chill for at least 4 hours or overnight. Ultimately, drizzle with salted caramel sauce and sprinkle with flaky sea salt before serving.
When preparing your cheesecake, verify all your ingredients are at room temperature to guarantee a smooth mixture. Avoid overmixing the batter, as this can introduce air and cause the cheesecake to crack during baking.
For easier removal from the springform pan, wrap the outside with aluminum foil before baking; this helps prevent any water from seeping in if you use a water bath. Additionally, allowing the cheesecake to chill overnight improves its texture and flavor for an even more delicious result!
Pumpkin Spice Cheesecake
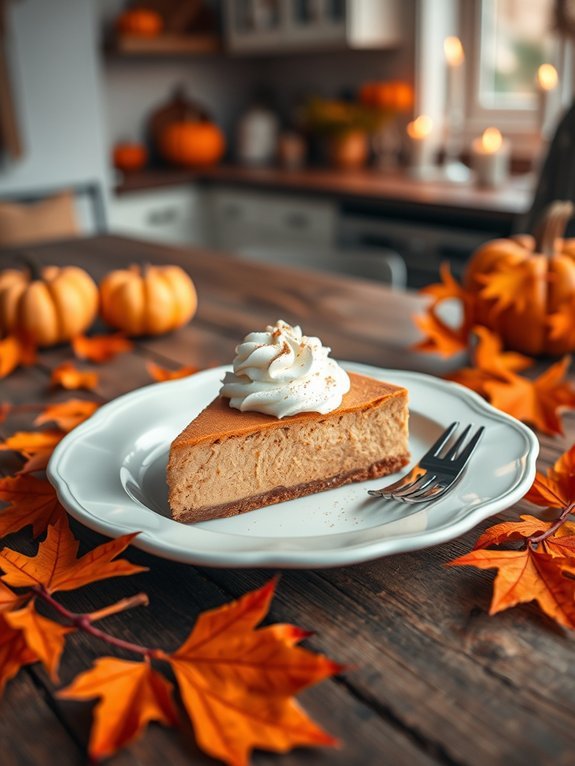
Indulge in autumnal bliss with this delightful Pumpkin Spice Cheesecake, perfect for celebrations or cozy family gatherings. The rich, creamy texture of the cheesecake pairs beautifully with the warm spices of cinnamon, nutmeg, and ginger, evoking the essence of the season in every bite. The ginger snap crust adds an extra layer of flavor, enhancing the overall experience and offering a balance between creamy and crunchy.
This cheesecake not only satisfies your sweet tooth but also captures the nostalgia of pumpkin pie with a twist. It’s an impressive dessert that’s sure to wow your guests, making them think you’ve spent hours in the kitchen when in reality, it’s deceptively easy to prepare. So, gather your ingredients and get ready to create a sensational dessert that combines the best flavors of fall.
- 1 1/2 cups ginger snap cookie crumbs
- 1/4 cup granulated sugar
- 1/2 cup unsalted butter, melted
- 2 (8 oz) packages cream cheese, softened
- 1 cup canned pumpkin puree
- 1 cup granulated sugar
- 3 large eggs
- 1 teaspoon vanilla extract
- 1 teaspoon ground cinnamon
- 1/2 teaspoon ground nutmeg
- 1/4 teaspoon ground ginger
- 1/4 teaspoon salt
- Whipped cream, for serving (optional)
Preheat your oven to 325°F (160°C). In a mixing bowl, combine ginger snap crumbs, sugar, and melted butter; press this mixture firmly into the bottom of a 9-inch springform pan to form the crust.
In another bowl, beat together the softened cream cheese and pumpkin puree until smooth. Gradually add in the sugar, then add the eggs one by one, mixing thoroughly after each addition. Finally, add the vanilla, spices, and salt, mixing until combined. Pour the cheesecake mixture over the crust and bake for about 50-60 minutes or until the edges are set and the center has a slight jiggle.
Allow it to cool at room temperature before refrigerating for at least 4 hours or overnight. For a flawless cheesecake, make sure your ingredients are at room temperature before mixing, as this promotes better blending and a creamier texture.
Don’t overmix the batter once the eggs are added; this can incorporate too much air, leading to cracking. Allow the cheesecake to cool gradually, and consider placing a shallow pan of water in the oven during baking to create steam, which can help prevent cracks.
For a festive touch, top your cheesecake with dollops of whipped cream and a sprinkle of cinnamon before serving!
Oreo Cookies and Cream Cheesecake
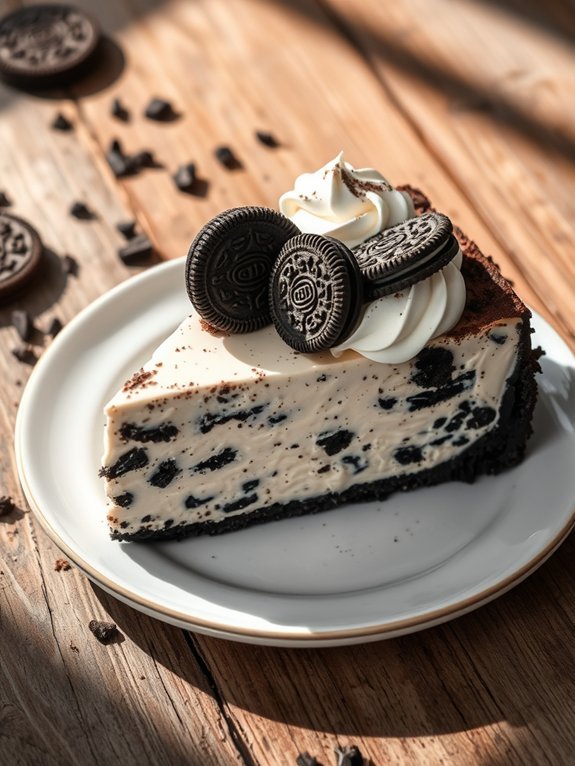
Indulge your sweet tooth with a rich and creamy Oreo Cookies and Cream Cheesecake that’s sure to impress friends and family alike. This delectable dessert combines the classic flavors of Oreos with the smooth texture of cheesecake, creating a delightful treat that’s perfect for any occasion. Whether it’s a birthday celebration, a holiday gathering, or simply a cozy night in, this cheesecake is guaranteed to steal the show with its divine taste and striking appearance.
The crust is made up of crushed Oreo cookies that provides not just a sweet foundation but also an extra layer of flavor. The filling features a luscious cream cheese mixture, complemented by more chopped Oreos, resulting in a delightful crunch and burst of chocolatey goodness with every bite. The best part? This cheesecake is simple to make, requiring just a few steps and readily available ingredients, making it an accessible choice for bakers of all levels!
Ingredients:
- 24 Oreo cookies (plus extra for garnish)
- 1/4 cup unsalted butter, melted
- 2 (8-ounce) packages cream cheese, softened
- 1 cup granulated sugar
- 1 teaspoon vanilla extract
- 2 large eggs
- 1 cup heavy whipping cream
- 1/2 cup powdered sugar
To make the cheesecake, start by preheating your oven to 325°F (160°C). In a food processor, crush the Oreo cookies into fine crumbs and combine with melted butter. Press this mixture firmly into the bottom of a 9-inch springform pan.
In a large mixing bowl, beat the softened cream cheese until smooth, then add granulated sugar and vanilla extract, mixing until combined. Gradually add the eggs, one at a time, blending well after each addition. Gently fold in chopped Oreo cookies. Pour the filling over the crust in the pan.
Bake for about 45-50 minutes, until the edges are set but the center is still slightly jiggly. Let the cheesecake cool at room temperature, then refrigerate for at least 4 hours or overnight to fully set. Before serving, whip the heavy cream with powdered sugar until stiff peaks form, and spread it over the cheesecake. Garnish with extra Oreo cookies if desired.
For the best results, make sure your cream cheese is at room temperature for easy blending. Allow the cheesecake to cool completely before refrigerating it, as this helps avoid cracks. If you want to add an even more decadent touch, try melting additional chocolate and drizzling it over the whipped cream topping.
Enjoy this dessert chilled, and don’t hesitate to customize it by folding in other crushed candies or nuts to fit the taste of your guests!
Raspberry White Chocolate Cheesecake
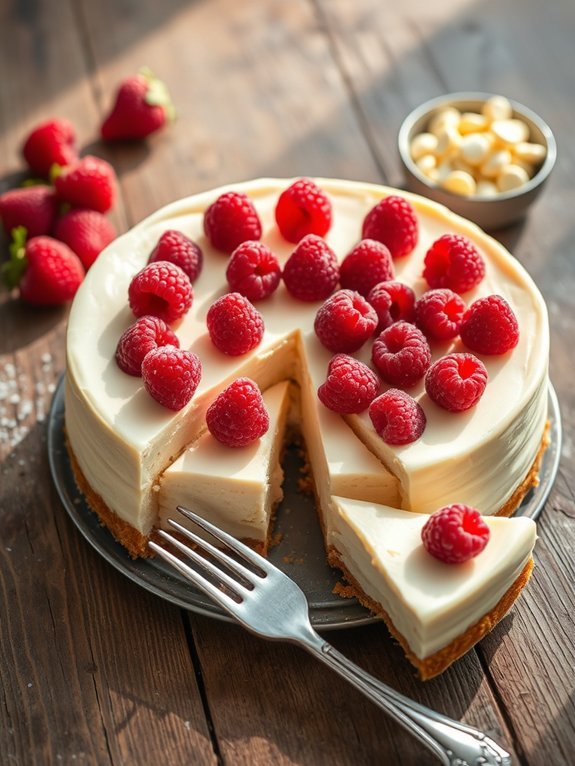
Indulge your sweet tooth with this luxurious Raspberry White Chocolate Cheesecake, a perfect dessert for any special occasion or a delightful treat to enjoy at home. The combination of creamy, rich white chocolate and tart raspberry creates a perfect balance of flavors that are sure to impress family and friends alike.
This cheesecake not only looks stunning with its vibrant berry topping, but it also features a luscious filling that melts in your mouth, tempting you to go for a second slice.
When preparing this cheesecake, it’s crucial to use high-quality ingredients, especially the white chocolate and fresh raspberries, as they play a significant role in the flavor profile. Allow yourself sufficient time to chill the cheesecake, as this allows the flavors to meld beautifully and guarantees a firm, sliceable texture.
Let’s explore the ingredients you’ll need to create this decadent dessert!
- 1 ½ cups graham cracker crumbs
- ½ cup unsalted butter, melted
- 1 cup white chocolate chips
- 3 (8 oz) packages cream cheese, softened
- 1 cup granulated sugar
- 3 large eggs
- 1 teaspoon vanilla extract
- 1 cup sour cream
- 1 ½ cups fresh raspberries
- 2 tablespoons powdered sugar (for topping)
Preheat your oven to 325°F (163°C). In a medium bowl, combine the graham cracker crumbs and melted butter, then press the mixture firmly into the bottom of a 9-inch springform pan to create a crust.
In a saucepan over low heat, melt the white chocolate chips, stirring until smooth. In a large mixing bowl, beat together the softened cream cheese and granulated sugar until smooth and creamy. Add the melted white chocolate, eggs, and vanilla extract, continuing to mix until fully combined.
Gently fold in the sour cream and raspberries, then pour the mixture onto the prepared crust. Bake for 55-65 minutes or until the center is set but still slightly jiggly.
Turn off the oven, crack the door open, and let the cheesecake cool in the oven for 1 hour before transferring it to the refrigerator to chill for at least 4 hours or overnight.
When making this cheesecake, confirm that the cream cheese is at room temperature to achieve a smooth texture without lumps. If you prefer a more pronounced raspberry flavor, you can add a layer of raspberry sauce on top or blend some raspberries into the cheesecake mix.
Additionally, using a water bath while baking can help maintain moisture and prevent cracking on the surface of the cheesecake. Finally, garnish with extra raspberries and a dusting of powdered sugar just before serving for an elegant touch!
Matcha Green Tea Cheesecake
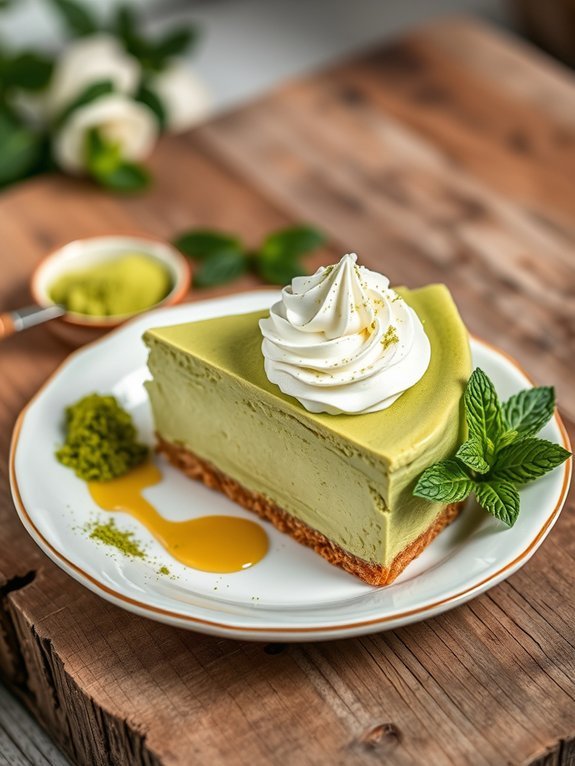
Matcha green tea cheesecake is a delightful twist on the classic cheesecake, offering a unique blend of earthiness and sweetness that’s sure to impress anyone who takes a bite. The vibrant green hue of matcha not only gives this dessert a stunning visual appeal but also infuses it with the health benefits of green tea, making it a guilt-free indulgence.
The creaminess of the cheesecake pairs beautifully with the subtle bitterness of matcha, creating a harmonious balance that will leave your taste buds dancing. To begin your culinary journey with matcha green tea cheesecake, it’s crucial to use high-quality matcha powder, as this will greatly influence the flavor and color of your dessert.
A buttery graham cracker crust provides the perfect foundation for the smooth, velvety filling that’s both rich and satisfying. Whether you’re making this for a special occasion or simply to satisfy your cravings, this cheesecake is a showstopper that exudes elegance and a touch of creativity in the kitchen.
Ingredients:
- 1 ½ cups graham cracker crumbs
- ½ cup unsalted butter, melted
- 2 tablespoons sugar
- 16 oz cream cheese, softened
- 1 cup granulated sugar
- 1 teaspoon vanilla extract
- 3 large eggs
- 2 tablespoons matcha green tea powder
- 1 cup sour cream
- 2 tablespoons all-purpose flour
To prepare the cheesecake, preheat your oven to 325°F (160°C) and grease a 9-inch springform pan. In a medium bowl, combine the graham cracker crumbs, melted butter, and sugar. Press the mixture firmly into the bottom of the prepared pan, creating an even layer.
In a large mixing bowl, beat the softened cream cheese and granulated sugar until smooth and creamy. Add the vanilla extract and eggs one at a time, ensuring each is fully incorporated. Gently fold in the matcha powder, sour cream, and flour until just combined. Pour the cheesecake batter over the crust and smooth the top.
Bake for approximately 45-50 minutes or until the edges are set but the center still jiggles slightly. Let it cool, then refrigerate for at least 4 hours before serving. For the best results, allow your cream cheese to reach room temperature before mixing, as this helps to achieve a smoother texture in the cheesecake.
Additionally, be cautious with baking times; every oven is different, so keep an eye on the cheesecake to avoid overbaking. Once chilled, consider garnishing it with whipped cream and a dusting of matcha powder or a drizzle of honey for a finishing touch that enhances its flavor and presentation. Enjoy your luxurious matcha green tea cheesecake!
Peanut Butter Cup Cheesecake
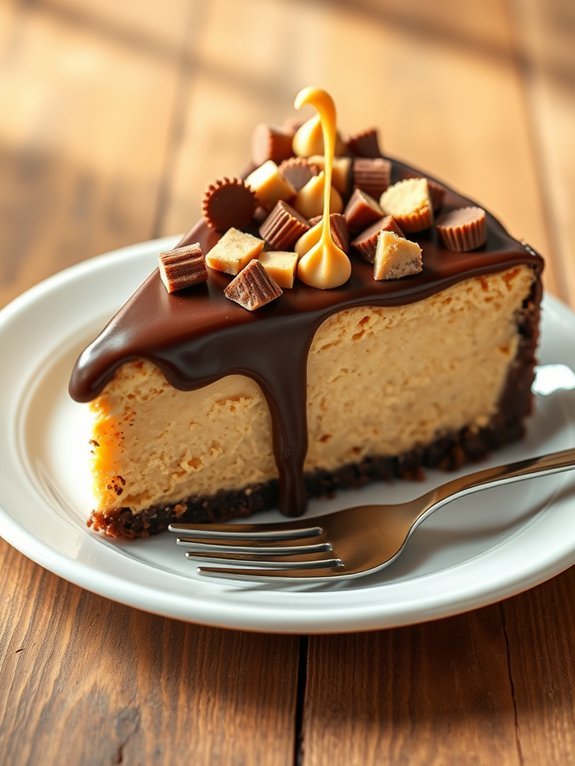
Indulging in a rich, creamy cheesecake is a treat, and when you combine it with the beloved flavors of peanut butter cups, you create a dessert that’s truly irresistible.
This Peanut Butter Cup Cheesecake is a heavenly blend of smooth peanut butter filling layered with a chocolate cookie crust and topped with luscious ganache and crushed peanut butter cups. Perfect for parties, potlucks, or just a cozy night in, this cheesecake is bound to satisfy any sweet tooth.
Preparing this delightful dessert might take a little time, but the results are worth every minute in the kitchen. You’ll enjoy a deliciously decadent experience as you create a cheesecake that’s not only flavorful but visually stunning.
Whether you’re a seasoned baker or a novice, this recipe will guide you through each step to create a masterpiece that will leave everyone asking for seconds.
Ingredients:
- 1 ½ cups chocolate cookie crumbs
- ½ cup unsalted butter, melted
- 1 cup creamy peanut butter
- 1 cup cream cheese, softened
- ¾ cup granulated sugar
- 2 large eggs
- 1 tsp vanilla extract
- 1 cup heavy cream
- 8 oz semi-sweet chocolate, chopped
- ½ cup mini peanut butter cups, chopped (for garnish)
Preheat your oven to 325°F (160°C). Begin by mixing the chocolate cookie crumbs with the melted butter until well combined, then press this mixture into the bottom of a 9-inch springform pan.
In a large mixing bowl, beat together the peanut butter, softened cream cheese, granulated sugar, eggs, and vanilla extract until smooth. Pour this mixture over the crust and bake for 45-50 minutes until the cheesecake is set around the edges but still slightly wobbly in the middle.
Allow the cheesecake to cool completely before preparing the ganache. In a saucepan over low heat, warm the heavy cream until it simmers, then pour it over the chopped chocolate. Stir until smooth and shiny, then pour it over the cooled cheesecake.
Chill in the refrigerator for at least 4 hours. Before serving, decorate the top with chopped mini peanut butter cups.
When making this cheesecake, it’s important to verify all your ingredients, especially the cream cheese and eggs, are at room temperature to achieve a smooth texture without lumps.
Additionally, for a more intense flavor, you can experiment with different types of chocolate or even drizzle some melted peanut butter over the top before serving. If you want to prepare it ahead of time, this cheesecake can be made a day in advance; just keep it covered in the refrigerator until you’re ready to serve!

