This post may contain affiliate links. Please read our policy page.
Impress your guests with an array of delectable appetizers that will leave them wanting more. Start with vibrant Caprese skewers drizzled in balsamic glaze, and serve creamy spinach and artichoke dip alongside crispy mini stuffed peppers. For a sweet-savory surprise, try bacon-wrapped dates or classic shrimp cocktail. Assemble a bruschetta platter bursting with fresh flavors, and don’t forget the twist on deviled eggs to wow everyone. There’s plenty more delicious inspiration waiting for you!
Caprese Skewers With Balsamic Glaze
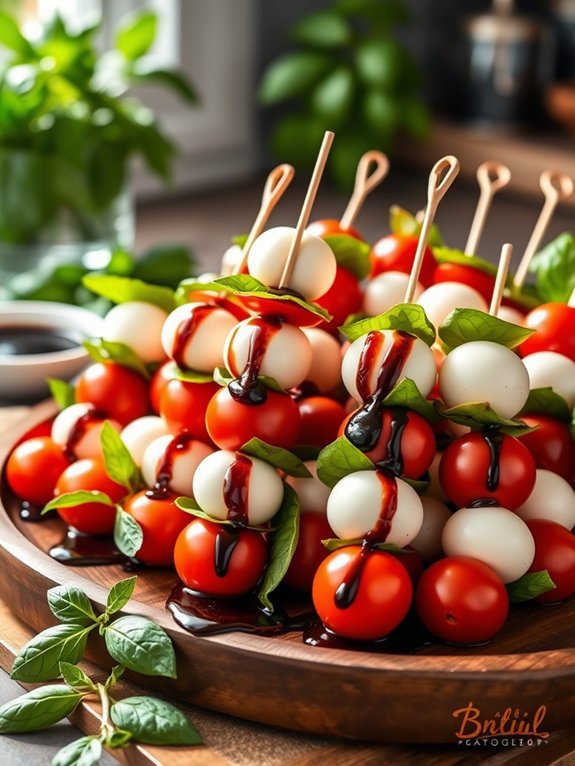
Caprese skewers with balsamic glaze are a fresh and vibrant appetizer that beautifully captures the essence of Italian cuisine. This dish isn’t only visually appealing but also simple to prepare, making it perfect for parties or gatherings.
The combination of juicy cherry tomatoes, creamy mozzarella balls, and fragrant basil makes for a delightful bite that bursts with flavor, especially when drizzled with a rich balsamic glaze.
These skewers are both elegant and versatile, allowing for easy customization depending on your taste preferences. You can use larger mozzarella balls or even add a slice of prosciutto for a heartier option. Serve them at room temperature for maximum enjoyment, or make them ahead of time and chill until ready to serve.
Ingredients:
- 1 pint cherry tomatoes
- 1 pound fresh mozzarella balls (bocconcini)
- Fresh basil leaves
- Balsamic glaze
- Salt and pepper to taste
- Skewers (6-8 inches)
To prepare the Caprese skewers, begin by threading a cherry tomato onto the skewer, followed by a basil leaf, and then a mozzarella ball. Continue this pattern until the skewer is filled, leaving a little space at both ends for easy handling.
Once all the skewers are assembled, drizzle them generously with balsamic glaze and sprinkle with a pinch of salt and pepper to enhance their flavor.
When making Caprese skewers, using high-quality ingredients is key. Opt for fresh mozzarella and ripe tomatoes for the best taste. If you want to elevate the dish further, try marinating the basil leaves in olive oil and a hint of garlic before assembling the skewers.
Additionally, if balsamic glaze isn’t available, you can reduce balsamic vinegar over low heat until it thickens, creating your own glaze. Enjoy your colorful appetizer!
Recommended Items
Get ready to impress your guests with these essential ingredients and tools for unforgettable appetizers!
Products
Spinach and Artichoke Dip
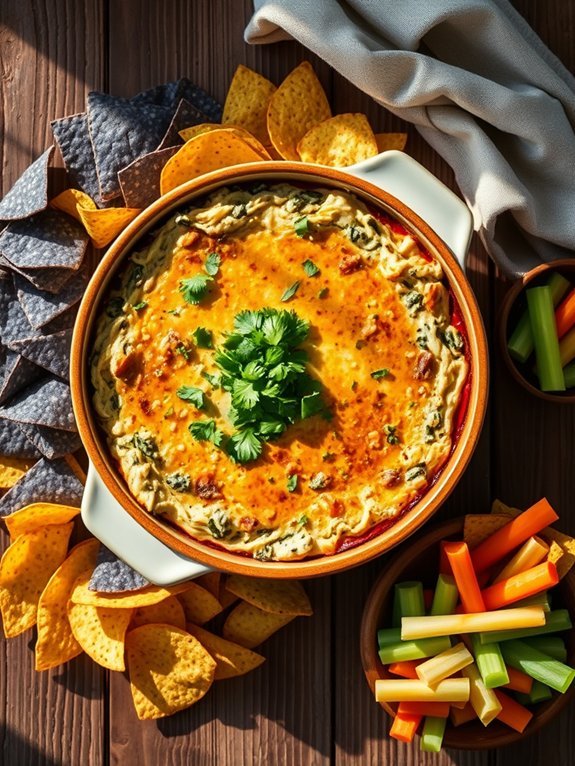
Spinach and Artichoke Dip is a delicious and creamy appetizer that’s perfect for gatherings, parties, or game day celebrations. This crowd-pleaser combines the earthy flavor of spinach with the distinct taste of artichokes, all blended with rich cheeses. The warm and gooey texture makes it ideal for dipping with crispy tortilla chips, bread, or fresh veggies. Plus, it’s incredibly easy to make and can be prepared ahead of time, allowing you to spend more time enjoying your event.
The beauty of Spinach and Artichoke Dip lies in its versatility. You can serve it hot or cold, but serving it warm, fresh from the oven, is the most delightful way to enjoy this dish. Whether you’re hosting a casual get-together or an elegant dinner party, this dip will impress your guests and keep them coming back for more. It can also easily be customized to suit your tastes—add more spices, swap in different cheeses, or throw in some extra vegetables to make it your own.
- 1 cup frozen spinach, thawed and drained
- 1 cup canned artichoke hearts, drained and chopped
- 1 cup cream cheese, softened
- ½ cup sour cream
- ½ cup mayonnaise
- 1 cup shredded mozzarella cheese
- ½ cup grated Parmesan cheese
- 1 clove garlic, minced
- Salt and pepper to taste
- Tortilla chips, bread, or fresh vegetables for serving
Preheat your oven to 350°F (175°C). In a large mixing bowl, combine the thawed spinach, chopped artichoke hearts, cream cheese, sour cream, mayonnaise, mozzarella cheese, Parmesan cheese, and minced garlic. Mix until all ingredients are well-combined and smooth. Season with salt and pepper to taste.
Transfer the mixture into a baking dish and spread it evenly. Bake for 25-30 minutes, or until the dip is heated through and bubbly. Serve warm with your choice of tortilla chips, bread, or fresh vegetables.
For the best results, confirm your spinach is thoroughly draining to prevent the dip from being watery; you can use cheesecloth or a clean kitchen towel to wring out excess moisture.
Feel free to experiment with additional spices or ingredients, such as red pepper flakes for heat, or a sprinkle of Italian seasoning for extra flavor. This dip can be made a day ahead; just store it in the refrigerator and bake it right before serving. Enjoy your creamy creation!
Mini Stuffed Peppers
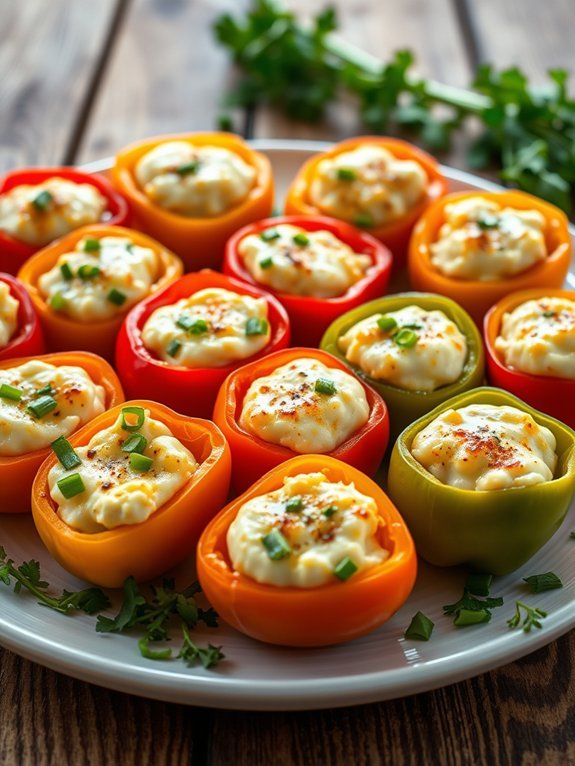
Mini stuffed peppers are a vibrant and tasty party appetizer that will steal the show at any gathering. These bite-sized delights aren’t only visually appealing with their bright colors but also packed with flavor, combining savory fillings and fresh vegetables.
Whether you’re hosting a holiday party, a summer barbecue, or a casual get-together with friends, mini stuffed peppers are sure to impress your guests and keep them coming back for more.
Making mini stuffed peppers is a fun and creative process that allows you to tailor the filling to your taste. Start with a mix of ingredients that can include grains, protein, and spices, depending on your preference. You can opt for a classic combination of cream cheese and herbs or try something more adventurous like quinoa mixed with black beans and corn.
The options are endless, and the final result isn’t only delicious but also healthy, making these little gems a great choice for parties.
- 15 mini sweet peppers
- 1 cup cream cheese, softened
- 1 cup shredded cheddar cheese
- 1/2 cup cooked sausage or ground turkey (optional)
- 1/4 cup green onions, chopped
- 1 teaspoon garlic powder
- 1 teaspoon chili powder
- Salt and pepper, to taste
- Olive oil (for drizzling)
Preheat your oven to 375°F (190°C). Slice the mini peppers in half lengthwise and remove the seeds. In a mixing bowl, combine the cream cheese, cheddar cheese, cooked sausage or turkey (if using), green onions, garlic powder, chili powder, salt, and pepper.
Fill each pepper half with the cheese mixture and place them on a baking sheet. Lightly drizzle with olive oil and bake for 20-25 minutes or until the peppers are tender and the filling is golden and bubbly.
When preparing mini stuffed peppers, feel free to get creative with the filling based on your preferences or what you have available. You can switch out the cheeses, add vegetables, or use different types of meats or beans.
Additionally, for a spicier kick, consider adding jalapeños or a dash of hot sauce to the filling. For presentation, finish off with a sprinkle of fresh herbs or a dash of paprika before serving. Enjoy your flavorful and colorful appetizer!
Bacon-Wrapped Dates

Bacon-wrapped dates are a delightful appetizer that perfectly balances savory and sweet flavors, making them a crowd-pleaser for any gathering. The combination of crispy, salty bacon and creamy, luscious dates creates a harmony that’s hard to resist. This recipe is simple to prepare yet delivers a touch of elegance, ensuring your guests will be coming back for more.
These delicious bites can be prepared in advance, allowing you to spend time with your guests rather than in the kitchen during the party. The bacon crisps up beautifully in the oven or air fryer, while the dates become perfectly caramelized. Serve them warm, and you’ll be sure to impress everyone with this delectable finger food.
- 16 dates, pitted
- 8 slices of bacon, cut in half
- 1 tablespoon of balsamic glaze (optional)
- Toothpicks (for securing)
Preheat your oven to 400°F (200°C). Stuff each date with a little piece of cheese, if desired, then wrap each date with a half slice of bacon, securing it with a toothpick. Place the bacon-wrapped dates on a baking sheet lined with parchment paper and bake for about 20-25 minutes, or until the bacon is crispy and the dates are heated through. For added flavor, drizzle with balsamic glaze before serving.
When making bacon-wrapped dates, you can get creative with your filling. Cheese, like goat or blue cheese, adds a creamy texture that complements the sweet dates, while nuts like almonds or pecans can add a delightful crunch.
Additionally, for a spicy kick, consider adding a slice of jalapeño or a sprinkle of red pepper flakes to your filling. Enjoy experimenting and finding the perfect combination to please your palate!
Shrimp Cocktail
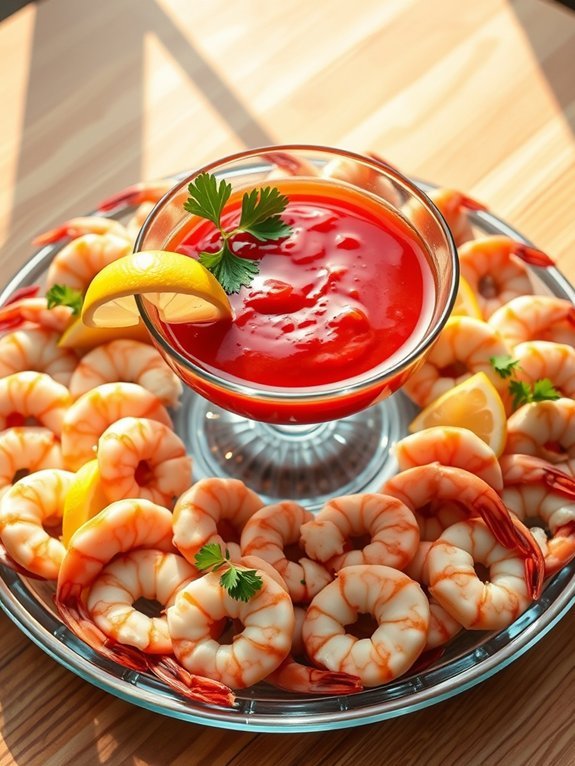
Shrimp cocktail is a classic appetizer that has long graced party tables with its elegant presentation and invigorating taste. This dish features juicy shrimp paired with a tangy cocktail sauce, making it a crowd-pleaser for any gathering. Not only is it simple to prepare, but the vibrant colors and delightful flavors present a visually appealing treat that can stand out on any appetizer table.
To prepare shrimp cocktail, you’ll need a variety of fresh ingredients and a little bit of time. Boiling the shrimp perfectly while preserving their delicate flavor is key. The cocktail sauce, typically made with ketchup and horseradish, delivers a zesty kick that complements the shrimp beautifully. With just a short cooking time, you can whip up this delightful starter in no time, ensuring your guests have something delicious to enjoy before the main course.
- 1 pound large shrimp (peeled and deveined, tails on)
- 4 cups water
- 1 lemon (halved)
- 2 tablespoons Old Bay seasoning
- Ice (for chilling)
- 1 cup ketchup
- 2 tablespoons prepared horseradish
- 1 teaspoon Worcestershire sauce
- Salt to taste
In a large pot, combine the water, lemon halves, and Old Bay seasoning, then bring it to a boil over high heat. Once boiling, add the shrimp and cook for about 2-3 minutes, or until they turn pink and opaque.
Immediately remove the pot from the heat and transfer the shrimp to a bowl of ice water to stop the cooking process. While the shrimp cool, mix together the ketchup, horseradish, Worcestershire sauce, and a pinch of salt in a separate bowl to create your cocktail sauce.
When preparing shrimp cocktail, remember to use high-quality, fresh shrimp for the best flavor. Adjust the spiciness of the cocktail sauce to your preference by varying the amount of horseradish. For an appealing presentation, serve the shrimp arranged on a platter with the cocktail sauce in the center, garnished with lemon slices.
If you’re not serving immediately, keep the shrimp and sauce chilled until ready to enjoy.
Hummus and Veggie Platter
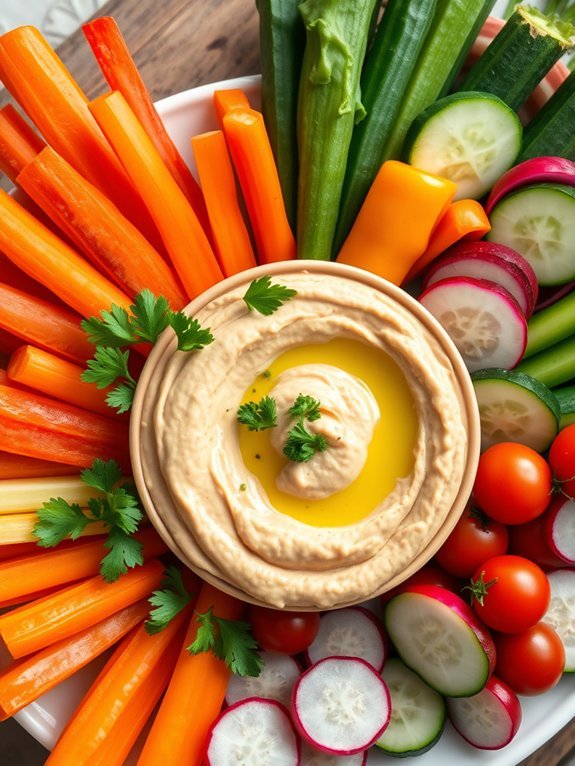
Hummus and veggie platter is a vibrant and healthy addition to any party or gathering. Not only does it offer a beautiful array of colors, but it’s also a crowd-pleaser for guests of all ages. This dish is simple to make, and the creamy, luscious hummus pairs perfectly with fresh, crunchy vegetables. With an assortment of tastes and textures, it’s a great way to kick off any meal.
Creating a hummus and veggie platter also allows for some creativity in presentation. You can arrange the veggies in a rainbow formation or create a fun design that suits the theme of your gathering. The combination of homemade chickpea hummus and freshly cut veggies guarantees that your guests will have a healthy option, making it ideal for parties where you want to encourage lighter snacking.
- 1 can (15 oz) of chickpeas, drained and rinsed
- 1/4 cup tahini
- 2 tablespoons olive oil
- 2 tablespoons lemon juice
- 1 garlic clove, minced
- 1/2 teaspoon ground cumin
- Salt to taste
- Water (as needed for consistency)
- Assorted fresh vegetables (such as carrots, bell peppers, cucumber, cherry tomatoes, and radishes)
- Fresh parsley (for garnish)
In a food processor, combine the drained chickpeas, tahini, olive oil, lemon juice, minced garlic, ground cumin, and a pinch of salt. Blend until smooth, adding water gradually to achieve your desired consistency. Taste and adjust seasoning if necessary.
Transfer the hummus to a serving bowl and drizzle with a little more olive oil. Surround the hummus with an assortment of freshly cut vegetables arranged on a platter.
For a delightful and visually enticing platter, cut your vegetables into various shapes and sizes—think sticks, rounds, and flowers. This not only makes the platter more appealing but will also make it easier for guests to grab and munch.
Feel free to experiment with different flavored hummus, such as roasted red pepper or garlic, to keep things interesting. Additionally, you can serve pita bread or crackers alongside the veggies for more variety.
Mini Meatballs in Marinara
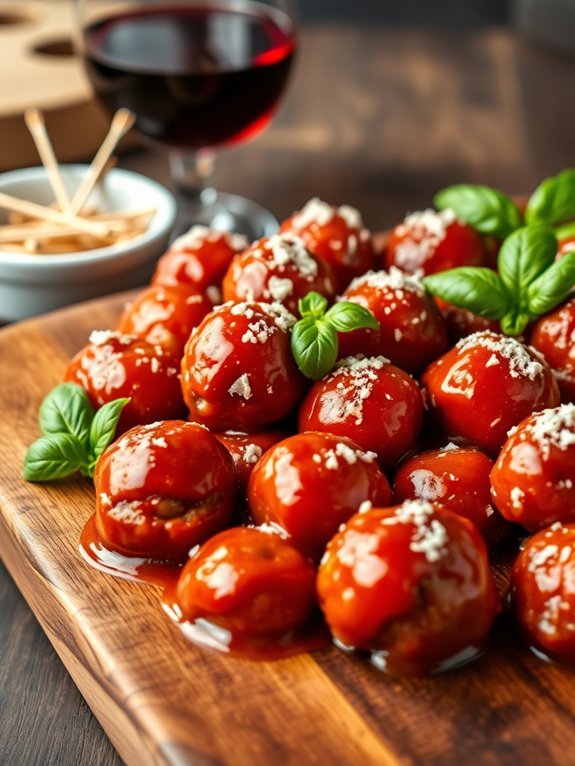
Mini meatballs in marinara are a delightful addition to any party spread, offering a perfect bite-sized option that’s both hearty and flavorful. These tender meatballs are coated in a rich marinara sauce, making them an ideal finger food for gatherings, whether it’s a casual get-together or an elegant soirée.
They’re incredibly easy to prepare and can be made ahead of time, allowing you to enjoy the party just as much as your guests. To make the mini meatballs even more enjoyable, pair them with toothpicks for easy serving. They can be served warm, at room temperature, or even refrigerated for later snacking. With their savory taste and vibrant appearance, these mini meatballs will surely impress your guests and keep them coming back for more.
- 1 pound ground beef
- 1/2 pound ground pork
- 1/2 cup breadcrumbs
- 1/4 cup grated Parmesan cheese
- 1/4 cup finely chopped parsley
- 1 large egg
- 2 cloves garlic, minced
- 1 teaspoon Italian seasoning
- Salt and pepper to taste
- 2 cups marinara sauce
- Fresh basil leaves for garnish (optional)
In a large bowl, combine the ground beef, ground pork, breadcrumbs, Parmesan cheese, parsley, egg, garlic, Italian seasoning, salt, and pepper. Mix until all ingredients are well incorporated.
Form the mixture into small meatballs, about 1 inch in diameter. In a large skillet over medium heat, add the marinara sauce and bring to a simmer. Carefully add the meatballs to the skillet, ensuring they’re covered with sauce. Allow them to cook for about 20 minutes, turning occasionally, until they’re cooked through and have absorbed the flavor of the marinara.
For the best results, consider using freshly grated cheese and homemade marinara if time allows; this will enhance the overall flavor of the dish. You can also customize the meatball mixture by adding your favorite herbs or spices to suit your taste.
To keep the meatballs juicy, avoid overmixing the meat when forming the balls. If you need to prepare in advance, cook the meatballs and refrigerate them in the sauce; then, gently reheat before serving to maintain their tenderness.
Proposed Recipe
Cheese and Charcuterie Board
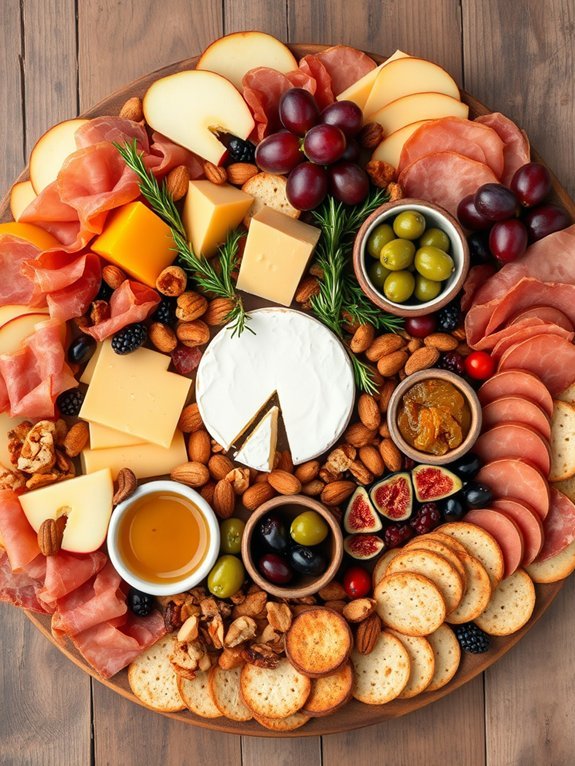
A cheese and charcuterie board is the perfect appetizer for any gathering, offering a delightful mix of flavors and textures that guests can enjoy at their own pace. This culinary masterpiece features a selection of cheeses, cured meats, fruits, nuts, and accompaniments, allowing you to customize it according to your preferences or what you have on hand.
The beauty of a charcuterie board lies in its versatility; you can mix and match a variety of items to create a visually stunning and delicious spread.
To create an appealing cheese and charcuterie board, start with a solid base on a large platter or wooden board. Next, arrange the selected ingredients in an aesthetically pleasing manner, varying heights and textures to make the display more inviting.
This board isn’t just about tantalizing taste buds, but also about bringing people together and encouraging them to share and indulge in a delightful array of flavors.
- Assorted cheeses (cheddar, brie, gouda, etc.)
- Cured meats (salami, prosciutto, chorizo, etc.)
- Fresh fruits (grapes, figs, apple slices, etc.)
- Dried fruits (apricots, cranberries, etc.)
- Nuts (almonds, walnuts, pecans, etc.)
- Bread or crackers (baguette slices, water crackers, etc.)
- Olives or pickles
- Honey or fig jam
- Fresh herbs (rosemary, thyme, etc.)
- Small bowls for dips or spreads
Begin by selecting your cheeses and meats, placing them on the board with enough space in between for easy picking. Next, fill in the gaps with fresh and dried fruits, nuts, and your choice of bread or crackers.
Don’t forget to include small bowls of honey or jams for added flavor, as well as olives or pickles to add a briny contrast. Finally, garnish the board with fresh herbs to make it visually appealing.
When assembling your cheese and charcuterie board, remember that presentation is key. Use a variety of shapes, colors, and heights to create an inviting display.
Prioritize a good balance between soft and hard cheeses, as well as a mix of savory and sweet items to cater to different palates. Feel free to get creative and swap ingredients based on seasonal availability or personal preference; the best boards are those that reflect your individual taste and style.
Bruschetta With Tomato and Basil
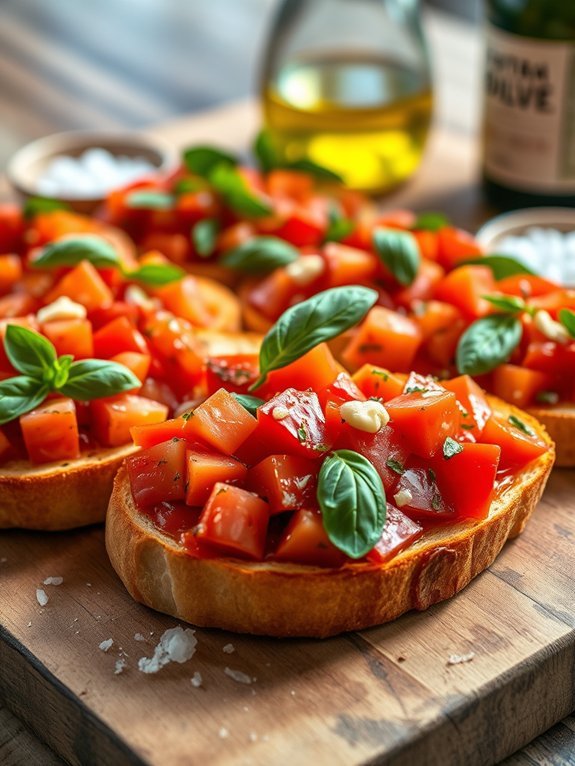
Bruschetta with tomato and basil is a classic Italian appetizer that has become a favorite in many homes and gatherings. Its combination of fresh ingredients and simple preparation makes it a delightful addition to any party spread. The crispy bread acts as a perfect base, topped with juicy tomatoes and aromatic basil, creating a bursting sensation of flavors that’s both invigorating and satisfying.
The beauty of bruschetta lies in its versatility; you can modify the toppings or add various ingredients based on your personal preference. Whether served at an informal gathering or a sophisticated soirée, this dish is sure to please your guests and keep them coming back for more.
Let’s explore this simple yet delicious recipe that can elevate your appetizer game effortlessly!
Ingredients:
- 1 French baguette or Italian bread
- 4 large ripe tomatoes
- 1 clove garlic
- Fresh basil leaves
- Extra virgin olive oil
- Salt
- Pepper
To prepare bruschetta, start by preheating your oven to 400°F (200°C).
Slice the baguette into ½ inch thick pieces and place them on a baking sheet. Toast the bread in the oven for about 5-7 minutes until it’s golden and crispy.
While the bread is toasting, dice the tomatoes and finely chop the garlic and basil. In a bowl, combine the diced tomatoes, garlic, chopped basil, a drizzle of olive oil, salt, and pepper to taste.
Once the bread is ready, remove it from the oven and spoon the tomato mixture generously on top.
When making bruschetta, using the freshest ingredients can make a significant difference in flavor. Opt for ripe, in-season tomatoes for the best taste, and consider using a high-quality extra virgin olive oil to enhance the overall dish.
If desired, you can also experiment by adding ingredients like mozzarella, balsamic reduction, or even a sprinkle of grated Parmesan cheese for extra depth.
Enjoy your bruschetta as soon as they’re prepared to savor the perfect crunch of the bread and freshness of the toppings!
Deviled Eggs With a Twist

Deviled eggs are a classic party appetizer that never fails to please, but why not elevate this timeless dish with a few creative twists? By incorporating unique flavors and textures, you can transform the traditional deviled egg into a gourmet treat that will impress your guests. This recipe includes unexpected ingredients like smoked paprika, crispy bacon, and avocado, giving a modern update to the beloved classic. Perfect for gatherings, these deviled eggs aren’t only delicious but also visually appealing, making them a highlight of your appetizer spread.
Making deviled eggs is easier than you might think! Start with hard-boiled eggs, and with just a few additional ingredients, you’ll be on your way to serving a dish that stands out. Whether you’re hosting a casual get-together or a more formal event, these Deviled Eggs With a Twist are sure to be a hit.
Let’s plunge into the recipe and see how simple it’s to create this delightful dish that will have everyone coming back for seconds.
- 6 large eggs
- 1 ripe avocado
- 3 tablespoons mayonnaise
- 1 teaspoon Dijon mustard
- 1 teaspoon smoked paprika
- 2 slices of crispy bacon, crumbled
- 1 tablespoon chopped fresh chives
- Salt and pepper, to taste
- Extra chives or bacon for garnish (optional)
Start by placing the eggs in a saucepan and covering them with cold water. Bring the water to a boil, then cover the pan and remove it from heat, letting the eggs sit for 12 minutes.
Once cooled, peel the eggs and slice them in half lengthwise. Scoop out the yolks into a bowl and mash them with the avocado, mayonnaise, Dijon mustard, smoked paprika, crumbled bacon, and chives. Season with salt and pepper to taste before spooning or piping the mixture back into the egg whites. Garnish with additional chives or bacon, if desired.
For the best results, guarantee your eggs are very fresh for easier peeling, and don’t skip the cooling process post-boiling, as it helps in removing the shell smoothly.
Additionally, if you’re making these ahead of time, consider keeping the filling separate and filling the egg whites just before serving to maintain freshness.
Feel free to experiment with the toppings as well; ingredients like pickled jalapeños or sriracha can add a spicy kick, while feta cheese can offer a briny contrast that complements the creaminess of the avocado.
Enjoy your creative cooking!
Pigs in a Blanket

Pigs in a Blanket is a classic party appetizer that never fails to impress guests. These bite-sized snacks feature tiny sausages wrapped in flaky pastry, creating a deliciously satisfying combination. Perfect for a casual gathering or festive celebration, they’re incredibly easy to prepare and can be customized with a variety of dipping sauces to cater to your guests’ preferences.
One of the best aspects of Pigs in a Blanket is their versatility; you can use different types of sausages such as mini hot dogs, cocktail sausages, or even vegetarian options for a varied spread. They’re also quick to make, requiring minimal prep time, so you can have these tasty morsels ready in no time.
Serve them warm, alongside mustard or ketchup, for a delightful treat that will have everyone coming back for seconds.
Ingredients:
- 1 package of mini hot dogs or cocktail sausages
- 1 package of crescent roll dough
- Cooking spray or flour for dusting
- 1 egg (for egg wash)
- Optional: poppy seeds or sesame seeds for topping
Roll out the crescent dough, and cut it into small triangles. Wrap each mini hot dog with a triangle of dough, ensuring the sausage is fully covered. Place the wrapped sausages on a baking sheet lined with parchment paper.
Whisk the egg in a bowl and brush the mixture over the dough for a golden finish. Optional: sprinkle with poppy or sesame seeds before baking. Bake in a preheated oven at 375°F (190°C) for 12-15 minutes, or until the dough is golden brown.
For the best results, make sure to not overfill the dough and keep the edges well-sealed to prevent the filling from leaking out while baking.
Additionally, you can experiment with seasoning the dough or adding cheese to the filling for extra flavor. Remember to serve these treats hot out of the oven for an unforgettable appetizer experience!
Sweet and Spicy Meatballs

Sweet and spicy meatballs are a delightful fusion of flavors that can elevate any gathering or party. These flavorful bites aren’t only easy to prepare but also perfect for serving as finger food, making them a crowd-pleaser. The balance of sweetness from ingredients like brown sugar or honey, combined with the heat from chili sauce or Sriracha, creates a unique taste that will have your guests reaching for more.
To make these meatballs, you can use ground beef, turkey, or even a meat substitute for a vegetarian option. The beauty of this dish lies in its versatility; you can adjust the spice level according to your preference by varying the amount of spicy sauce used. These meatballs can be served on their own, with toothpicks, or over a bed of rice for a more substantial treat.
- 1 pound ground beef or turkey
- 1/2 cup breadcrumbs
- 1/4 cup onion, finely chopped
- 1 egg
- 1 teaspoon garlic powder
- 1 teaspoon salt
- 1/2 teaspoon black pepper
- 1/2 cup sweet chili sauce
- 1/4 cup soy sauce
- 1 tablespoon brown sugar (or honey)
- 1/2 teaspoon red pepper flakes (optional)
- Fresh cilantro or green onions for garnish (optional)
In a large mixing bowl, combine the ground meat, breadcrumbs, onion, egg, garlic powder, salt, and pepper. Mix until well incorporated, then form the mixture into small meatballs, about 1 inch in diameter.
In a separate bowl, combine the sweet chili sauce, soy sauce, brown sugar, and red pepper flakes, if using. Preheat your oven to 400°F (200°C) and place the meatballs on a baking sheet lined with parchment paper or lightly greased. Bake for about 20-25 minutes or until the meatballs are cooked through.
Once cooked, drizzle the sweet and spicy sauce over the meatballs and toss to coat evenly before serving. For an extra layer of flavor, consider marinating the meatballs in the sweet and spicy sauce for at least 30 minutes before baking.
You can also experiment with different types of sauces or add-ins, such as crushed pineapple for a tropical twist or different spices to dial up the heat. If you have any leftovers, they can be easily reheated and enjoyed the next day, making them perfect for meal prep or as a quick snack!


