This post may contain affiliate links. Please read our policy page.
If you’re craving something sweet, you’ve got to try these 10 irresistible fruit desserts! From the classic apple pie bursting with spiced apples to the invigorating tropical fruit sorbet, there’s a flavor for everyone. Delight in the creamy lemon meringue tart or the crisp, berry-filled berry crisp. Don’t forget the golden peach cobbler or vibrant mixed berry pavlova! Each dessert brings unique textures and tantalizing tastes that’ll make any occasion special. Discover the mouthwatering details next!
Classic Apple Pie
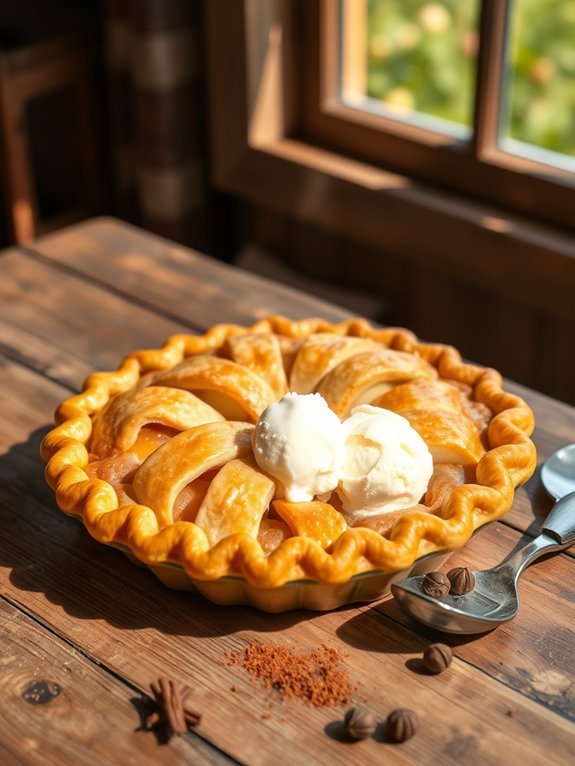
Classic apple pie is a beloved dessert that has stood the test of time, drawing on traditions from various cultures. The juicy, spiced apples encased in a buttery, flaky crust make for a comforting addition to any meal. Often served warm with a scoop of vanilla ice cream or a dollop of whipped cream, it’s perfect for holidays, family gatherings, or cozy weeknights at home.
This recipe offers a straightforward approach to making a classic apple pie from scratch, ensuring you enjoy the delightful flavors that come with this cherished dish.
To create the perfect apple pie, selecting the right apples is essential. A combination of sweet and tart apples, such as Granny Smith and Honeycrisp, provides a balance that enhances the overall flavor.
Additionally, you can personalize the spice blend to your preference, whether you like a traditional approach with cinnamon and nutmeg or want to add a hint of ginger or cardamom for a unique twist. Whipping up this classic dessert not only fills your home with irresistible aromas but also brings joy to those who partake in it.
Ingredients:
- 2 ½ cups all-purpose flour
- 1 teaspoon salt
- 1 tablespoon granulated sugar
- 1 cup unsalted butter, chilled and diced
- 6-8 tablespoons ice water
- 6-8 cups apples, peeled, cored, and sliced
- ¾ cup granulated sugar
- 1 teaspoon ground cinnamon
- ¼ teaspoon ground nutmeg
- 2 tablespoons lemon juice
- 2 tablespoons all-purpose flour (for filling)
- 1 egg (for egg wash)
To make the pie crust, mix the flour, salt, and sugar in a bowl. Cut in the butter until the mixture resembles coarse crumbs. Stir in the ice water, a tablespoon at a time, until the dough comes together.
Divide into two discs, wrap in plastic wrap, and chill for at least 1 hour. Preheat your oven to 425°F (220°C). In a large bowl, combine the sliced apples with sugar, spices, lemon juice, and flour.
Roll out one dough disc and fit it into a pie dish. Fill with the apple mixture and cover with the second rolled-out disc. Cut slits in the top for ventilation and brush the crust with the beaten egg.
Bake for 15 minutes, then reduce the temperature to 350°F (175°C) and bake for an additional 35-45 minutes until the apples are tender and the crust is golden brown.
For the best results, let the pie cool for at least 2 hours before slicing. This cooling period allows the juices to thicken, preventing a soggy bottom crust.
Additionally, feel free to experiment with different apple varieties, and try adding raisins or cranberries for an extra layer of flavor. Serving the pie warm with a scoop of ice cream is a classic choice, but for a rustic touch, you can also dust the top with powdered sugar before serving.
Enjoy the process and the delightful outcome!
Berry Crisp
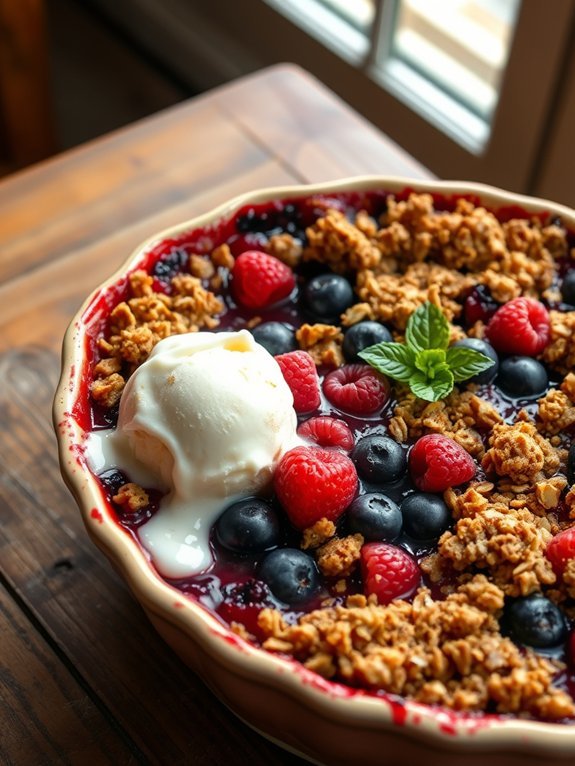
Berry crisp is a delicious and comforting dessert that celebrates the natural sweetness of fresh berries. It’s a perfect way to enjoy seasonal fruits, with a delightful crunch that contrasts beautifully with the juicy filling. The warm, bubbly berry mixture paired with a crisp topping makes for a wonderful treat that can be enjoyed warm or cold, and it’s incredibly easy to put together, making it a favorite for gatherings and family dinners.
To make your berry crisp, you can use a combination of your favorite berries such as blueberries, raspberries, strawberries, or blackberries. Fresh or frozen berries work wonderfully, and a bit of sugar enhances their natural flavors. A crumbly topping made of oats, brown sugar, and butter gives the dish its characteristic crispness and adds a delightful texture that complements the softness of the berries. Enjoy it as is, or serve it with a scoop of vanilla ice cream or a dollop of whipped cream for an extra treat.
Ingredients:
- 2 cups mixed fresh or frozen berries (e.g., blueberries, raspberries, strawberries)
- 1/4 cup granulated sugar
- 1 tablespoon lemon juice
- 1 teaspoon cornstarch
- 1 cup rolled oats
- 1/2 cup all-purpose flour
- 1/2 cup brown sugar
- 1 teaspoon ground cinnamon
- 1/2 cup unsalted butter, melted
Preheat your oven to 350°F (175°C). In a mixing bowl, combine the berries, granulated sugar, lemon juice, and cornstarch, and stir until well mixed. Pour the berry mixture into a greased baking dish.
In another bowl, mix together the rolled oats, flour, brown sugar, and cinnamon. Pour the melted butter into the oat mixture and stir until well combined. Sprinkle the oat topping evenly over the berry mixture.
Bake for about 30-35 minutes, or until the topping is golden brown and the berries are bubbling. For the best results, be sure not to overmix the topping; it should remain slightly crumbly for that perfect crisp texture.
If using frozen berries, there’s no need to thaw them before baking, but you might want to add an extra tablespoon of cornstarch to help absorb the additional moisture. Enjoy your berry crisp warm for the greatest flavor, and consider experimenting with different types of nuts or spices to personalize your dish further!
Recommended Items
Get ready to indulge in some delightful fruit desserts with these must-have products and tools!
Products
Tropical Fruit Sorbet

Tropical fruit sorbet is a revitalizing and vibrant dessert that lets you enjoy the bright flavors of exotic fruits. Perfect for hot summer days, this treat can be made with a variety of tropical fruits such as mango, pineapple, and coconut, allowing you to customize it to suit your taste preferences. Not only is it delicious, but it’s also a healthier alternative to ice cream, as it’s often made without dairy and has a lower calorie count.
Making tropical fruit sorbet at home is surprisingly easy and requires minimal ingredients. You’ll be amazed at how quickly you can whip up this frozen delight, and it’s an excellent way to use up ripe fruit that you might’ve on hand. Plus, it’s a fun activity to engage the kids in, as they can help with the blending and pouring. Enjoying homemade sorbet won’t only provide a fantastic flavor but will also allow you to control the sweetness and texture to your liking.
- 2 ripe mangos, peeled and diced
- 1 ripe pineapple, peeled and diced
- 1 cup coconut milk
- 1/2 cup sugar (adjust to taste)
- 2 tablespoons lime juice
- Pinch of salt
In a blender or food processor, combine the diced mango, pineapple, coconut milk, sugar, lime juice, and a pinch of salt. Blend the mixture until smooth and creamy.
Pour the blended fruit mixture into a shallow dish and freeze for about 4 hours, stirring every 30 minutes to guarantee a smooth texture. Once fully frozen, let it sit at room temperature for a few minutes before scooping and serving.
For the best results, make certain your fruits are perfectly ripe as this will enhance the natural sweetness and flavor of your sorbet. You can also experiment with adding other tropical fruits, like passion fruit or banana, to create your unique flavor combinations.
If you prefer a smoother texture, you can place the sorbet in a food processor after freezing and blend it again before serving. Additionally, serving it with fresh fruit or a sprinkle of shredded coconut can elevate your dessert!
Lemon Meringue Tart

Lemon Meringue Tart is a classic dessert that beautifully balances the tartness of fresh lemons with the sweetness of fluffy meringue, all encased in a buttery, flaky crust. The bright, zesty filling is invigorating, making it a perfect treat for any occasion, whether you’re celebrating a special milestone or simply enjoying a sunny afternoon.
This tart not only pleases the palate but also dazzles the eye with its golden meringue topping, making it a showstopper at any gathering.
Creating this lemon meringue tart may seem intimidating, but with a little patience and attention, you’ll be able to master it. The process involves preparing the tart crust, making the lemon curd filling, and whipping up the meringue to achieve that perfect texture.
Each layer serves to enhance the flavors and textures, resulting in a delightful dessert that’s worth the effort. Soon enough, you’ll have a slice of this delicious tart that’s sure to impress your family and friends.
Ingredients:
- 1 ½ cups all-purpose flour
- ½ cup unsalted butter, chilled and diced
- ¼ cup granulated sugar
- 1 egg yolk
- 2-4 tablespoons cold water
- 1 cup granulated sugar (for filling)
- 3 tablespoons cornstarch
- 1 cup water
- 4 large egg yolks
- ½ cup fresh lemon juice
- Zest of 2 lemons
- 2 tablespoons butter (for filling)
- 4 large egg whites
- ¼ teaspoon cream of tartar
- ½ cup granulated sugar (for meringue)
Preheat your oven to 350°F (175°C). Start by making the crust: In a bowl, combine flour and sugar. Add the diced butter and mix until the mixture resembles coarse crumbs.
Stir in the egg yolk and enough cold water to form a dough. Roll out the dough and fit it into a tart pan. Prick the bottom with a fork and bake for 15-20 minutes or until lightly golden.
Meanwhile, prepare the lemon filling by whisking together sugar and cornstarch in a saucepan, then gradually add water while stirring. Bring it to a boil until thick.
Remove from the heat, whisk in egg yolks, lemon juice, zest, and butter. Pour this mixture into the baked tart shell.
To make the meringue, beat egg whites and cream of tartar until soft peaks form, then gradually add sugar, beating until stiff peaks form. Spread the meringue over the lemon filling and create peaks with the back of a spoon.
Bake the tart for an additional 10-15 minutes or until meringue is golden.
When making a Lemon Meringue Tart, it’s important to avoid any moisture in the crust to prevent it from becoming soggy. Make sure your meringue is whipped to stiff peaks and spread it quickly over the filling before it cools to maintain the right texture.
If you’re preparing the tart in advance, store it in the refrigerator, but be aware that the meringue may weep if left too long.
Enjoy the process and don’t hesitate to get creative with garnishes like fresh berries or mint leaves for a touch of elegance!
Step-by-Step Cooking Guide
Peach Cobbler
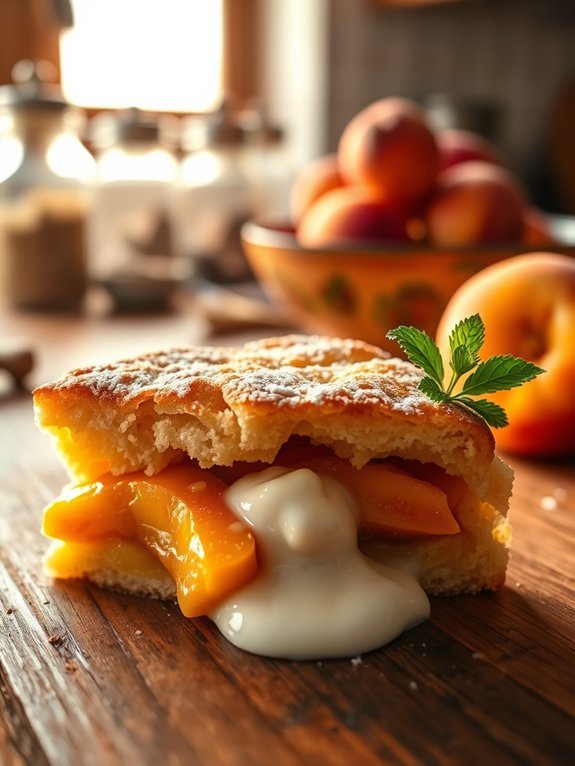
Peach cobbler is a beloved dessert that beautifully showcases the luscious sweetness of peaches, making it a staple of summer gatherings and family dinners. With a golden-brown, flaky crust topped with succulent peach filling, this dish is a crowd-pleaser that combines simplicity with delightful flavors. The contrast of the warm cobbler with a scoop of vanilla ice cream makes it irresistible.
Whether you use fresh peaches from the market or canned ones for convenience, this recipe guarantees a delicious result every time.
This cobbler not only captures the essence of ripe peaches but also wraps it in a warm, comforting embrace of buttery batter. Perfectly balanced with a touch of sugar and spices, the filling bubbles away enticingly during baking, filling your kitchen with a sweet aroma that will bring everyone to the table.
Gather your ingredients and get ready to create a dessert that will make your summer memories even sweeter.
Ingredients:
- 6 cups fresh peaches (peeled, pitted, and sliced)
- 1 cup granulated sugar (divided)
- 1 tablespoon lemon juice
- 1 teaspoon ground cinnamon
- 1 teaspoon vanilla extract
- 1 cup all-purpose flour
- 2 teaspoons baking powder
- 1/2 teaspoon salt
- 1 cup milk
- 1/2 cup unsalted butter (melted)
Preheat your oven to 350°F (175°C).
In a large bowl, combine the sliced peaches, 3/4 cup of the sugar, lemon juice, cinnamon, and vanilla extract. Mix until the peaches are well-coated, then transfer this mixture to a greased 9×13 inch baking dish.
In another bowl, whisk together the flour, baking powder, salt, and the remaining 1/4 cup of sugar. Pour in the milk and melted butter, stirring until just combined.
Pour this batter over the peach filling—do not stir. Bake for 35-40 minutes, or until the batter is golden brown and a toothpick inserted into the cobbler comes out clean.
To enhance your peach cobbler experience, consider using a mix of fresh and frozen peaches for a deeper flavor. If you prefer a more pronounced spice, add a pinch of nutmeg or allspice to the filling.
Serve it warm and pair it with a generous scoop of vanilla ice cream or whipped cream. For an added twist, try incorporating a splash of bourbon or rum into the peach mixture for a subtle kick.
Enjoy this delightful dessert with family and friends, and savor the flavors of summer!
Chocolate Covered Strawberries

Chocolate-covered strawberries are a delightful dessert that beautifully combines the rich flavor of chocolate with the invigorating taste of fresh strawberries. Perfect for special occasions, romantic evenings, or even a simple treat, this dessert requires minimal effort but yields impressive results.
The creamy chocolate coating enhances the natural sweetness of the strawberries, creating a decadent treat that feels indulgent yet remains light.
To achieve the best results, it’s important to choose the right strawberries – look for fresh, ripe, and unblemished fruit. You can use various types of chocolate, including milk, dark, or white chocolate, depending on your personal preference. By melting the chocolate and dipping the strawberries, you can create an elegant and delicious dessert that’s sure to impress family and friends.
- Fresh strawberries
- Chocolate (milk, dark, or white)
- Optional toppings (sprinkles, crushed nuts, or coconut)
Start by washing the strawberries under cool water, then pat them dry with a paper towel to remove any excess moisture. In a microwave-safe bowl, melt the chocolate in the microwave in 30-second intervals, stirring in between until smooth.
Holding the strawberry by the stem, dip it into the melted chocolate, allowing any excess to drip off before placing it on a parchment-lined baking sheet. If you’d like, immediately sprinkle your desired toppings over the chocolate before it sets. Repeat for the remaining strawberries and refrigerate until the chocolate hardens.
For the best results, it’s essential to confirm that the strawberries are completely dry before dipping, as moisture can cause the chocolate to seize. Additionally, you can add a touch of vegetable shortening or coconut oil to the melted chocolate to give it a smoother texture and a more glossy finish.
If desired, experiment by using a drizzle of melted white chocolate over dark chocolate for a beautiful contrast, or try adding flavor extracts like peppermint or orange to the melted chocolate for an interesting twist.
Banana Foster
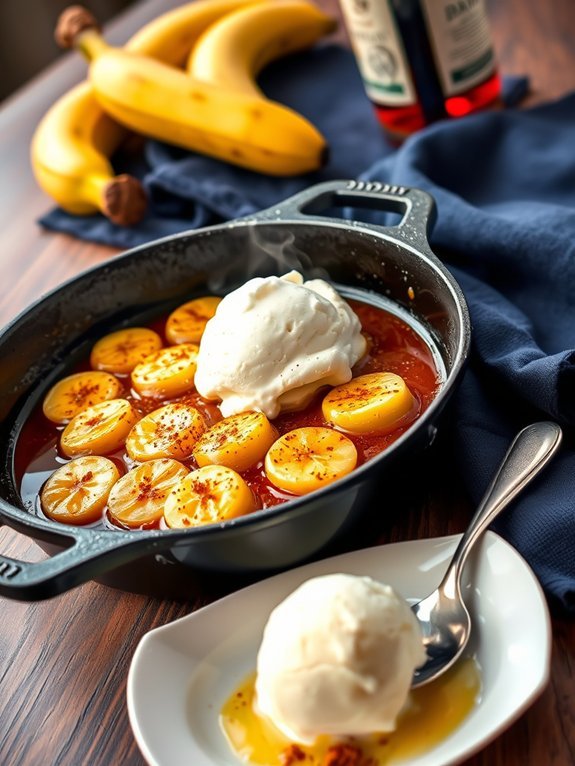
Banana Foster is a classic dessert that originated in New Orleans, providing a delicious and flamboyant way to enjoy ripe bananas. This delightful treat combines the rich flavors of butter, brown sugar, cinnamon, and rum, creating a warm sauce that’s served over sliced bananas and often accompanied by vanilla ice cream.
The dramatic presentation of this dish, often prepared tableside, adds to its charm and makes it perfect for special occasions or impressing guests. This easy-to-follow recipe allows you to recreate the magic of Banana Foster in your own kitchen. With just a few simple ingredients, you can transform ripe bananas into an indulgent dessert that’s both comforting and sophisticated.
Whether you’re seeking a sweet ending to dinner or a tasty treat for a gathering, Banana Foster is sure to please everyone at the table.
Ingredients:
- 4 ripe bananas
- 1/2 cup unsalted butter
- 1 cup brown sugar
- 1 teaspoon ground cinnamon
- 1/4 cup dark rum
- 1/4 cup banana liqueur (optional)
- Vanilla ice cream (for serving)
To prepare Banana Foster, begin by slicing the bananas in half lengthwise, and set them aside. In a large skillet over medium heat, melt the butter. Once melted, stir in the brown sugar and cinnamon until the mixture is bubbling.
Add the sliced bananas to the skillet and cook for 1 to 2 minutes, spooning the sauce over the bananas gently. If using, carefully add the rum and banana liqueur, allowing it to warm for a moment before igniting with a long lighter. Let the flames dance for a few seconds before extinguishing them by stirring. Serve immediately over scoops of vanilla ice cream.
When preparing Banana Foster, it’s important to guarantee the rum is warm before igniting it for flambéing. This will enhance the overall flavor and create a more impressive flame.
If you’re not comfortable with flambéing, you can skip this step and simply let the sauce simmer a bit longer to enhance the flavors. Always be cautious when working with fire and ensure you have adult supervision if necessary. Enjoy this delectable dessert fresh, as it’s best served immediately after preparation!
Mixed Berry Pavlova
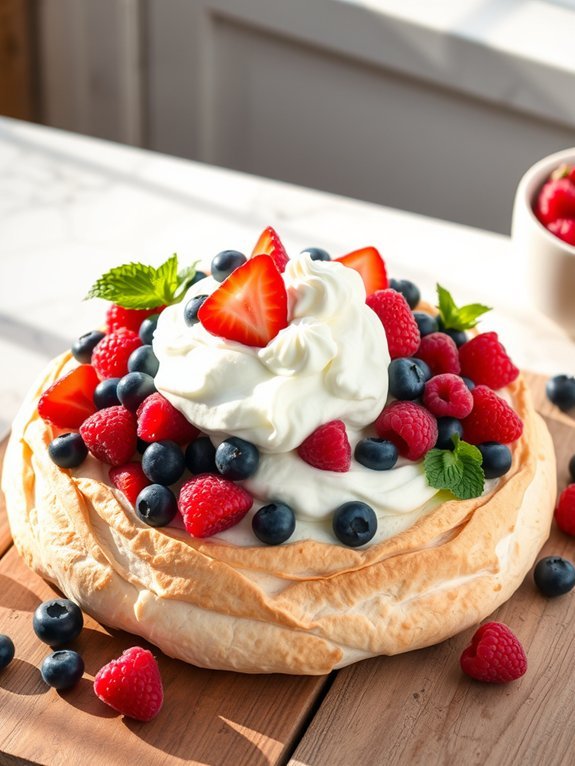
The Mixed Berry Pavlova is a delightful dessert that showcases a stunning contrast between the crunchy meringue base and the luscious toppings. Originating from Australia and New Zealand, this dessert is named after the famous Russian ballerina Anna Pavlova. Its airy texture and lightness make it a perfect treat for warm weather gatherings or festive occasions.
The beautiful combination of fresh mixed berries, whipped cream, and the delicate meringue creates a visually striking dish that’s just as pleasing to eat as it’s to behold.
To achieve the perfect pavlova, it’s vital to get the meringue just right. The outer layer should be crispy and crunchy, while the inside remains soft and marshmallow-like. This balance is what makes the pavlova so unique and enjoyable. Topped with a colorful array of berries, such as strawberries, blueberries, and raspberries, each bite bursts with flavor, while the whipped cream adds a rich creaminess to each mouthful.
Whether serving at a dinner party or family gathering, this Mixed Berry Pavlova is sure to impress.
Ingredients:
- 4 large egg whites
- 1 cup granulated sugar
- 1 teaspoon cornstarch
- 1 teaspoon white vinegar
- 1 teaspoon vanilla extract
- 1 cup heavy whipping cream
- 2 tablespoons powdered sugar
- 1 cup strawberries, halved
- 1 cup blueberries
- 1 cup raspberries
- Fresh mint leaves (for garnish, optional)
To make the Mixed Berry Pavlova, preheat your oven to 225°F (110°C) and line a baking sheet with parchment paper. In a large mixing bowl, beat the egg whites with an electric mixer on medium-high until soft peaks form. Gradually add the granulated sugar, one tablespoon at a time, continuing to beat until the mixture is glossy and stiff peaks form.
Gently fold in the cornstarch, vinegar, and vanilla extract. Spoon the meringue mixture onto the prepared baking sheet to form a round disk, creating a slight well in the center. Bake for 1.5 hours, then turn off the oven and let the pavlova cool completely inside.
Once cooled, whip the heavy cream with the powdered sugar until soft peaks form. Spread the whipped cream over the meringue and top with the mixed berries. Garnish with fresh mint leaves if desired.
When making pavlova, it’s vital to confirm that your mixing bowl and beaters are completely clean and free from grease, as any fat can prevent the egg whites from whipping properly. Additionally, for the best texture, avoid humid conditions as humidity can affect the meringue’s ability to crisp up.
You can prepare the meringue ahead of time and store it in an airtight container to maintain its crispness until you’re ready to assemble the dessert. Enjoy this beautiful and delicious pavlova as your show-stopping dessert!
Pineapple Upside-Down Cake
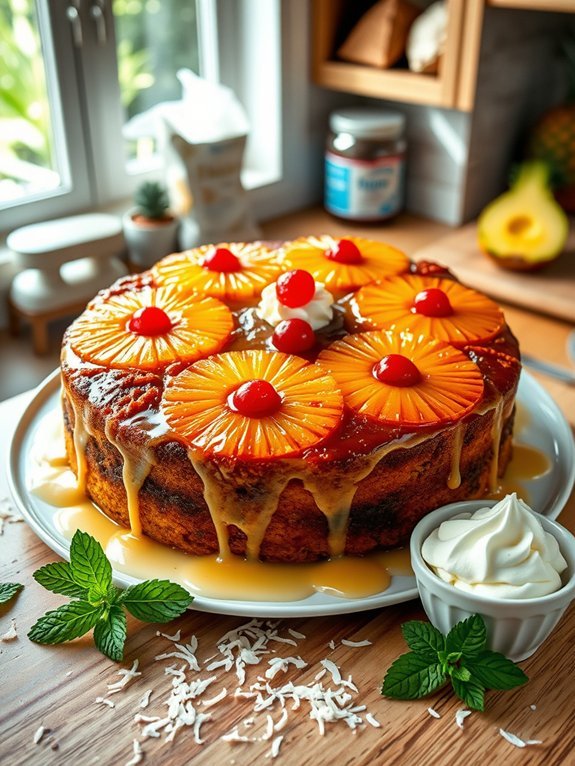
Pineapple Upside-Down Cake is a classic dessert that beautifully combines the sweetness of caramelized pineapple with the moistness of a rich cake. Its unique presentation, with the pineapples on top, gives it a stunning look that’s certain to impress at any gathering or family dinner. This dessert is also incredibly versatile, allowing you to experiment with different fruits and flavors while keeping the traditional technique intact.
Preparing Pineapple Upside-Down Cake is an enjoyable process, especially as you watch the transformation from a simple batter into a golden, glistening masterpiece. The caramelized fruit base not only adds a delightful flavor but also acts as a stunning topping once the cake is flipped over. This cake pairs well with whipped cream or a scoop of vanilla ice cream, making it an ideal dessert for any occasion.
Ingredients:
- 1 can (20 oz) sliced pineapple, drained
- 1/2 cup packed brown sugar
- 1/4 cup unsalted butter
- 1 maraschino cherry for each pineapple slice
- 1 cup all-purpose flour
- 1 cup granulated sugar
- 1/2 cup milk
- 1/4 cup vegetable oil
- 2 large eggs
- 2 tsp baking powder
- 1 tsp vanilla extract
- 1/2 tsp salt
Preheat your oven to 350°F (175°C). In a 9-inch round cake pan, melt the butter over low heat and then add the brown sugar, stirring until dissolved to create a caramel-like mixture.
Arrange the pineapple slices in the pan, placing a maraschino cherry in the center of each slice. In a mixing bowl, combine the flour, granulated sugar, baking powder, salt, milk, vegetable oil, eggs, and vanilla extract until smooth.
Pour the batter over the arranged pineapple and bake for 35-40 minutes or until a toothpick comes out clean. Allow the cake to cool for a few minutes before inverting onto a serving plate.
When making Pineapple Upside-Down Cake, verify that your ingredients are at room temperature for better mixing and texture. If you’d like a more intense flavor, consider adding a splash of rum or coconut extract to the batter.
For a deeper caramelization of the fruit, you can pre-cook the pineapple slices in a little butter and brown sugar before adding them to the cake. Just be cautious not to overbake, as it can dry out the cake and reduce its delightful moistness.
Citrus Salad With Honey Dressing
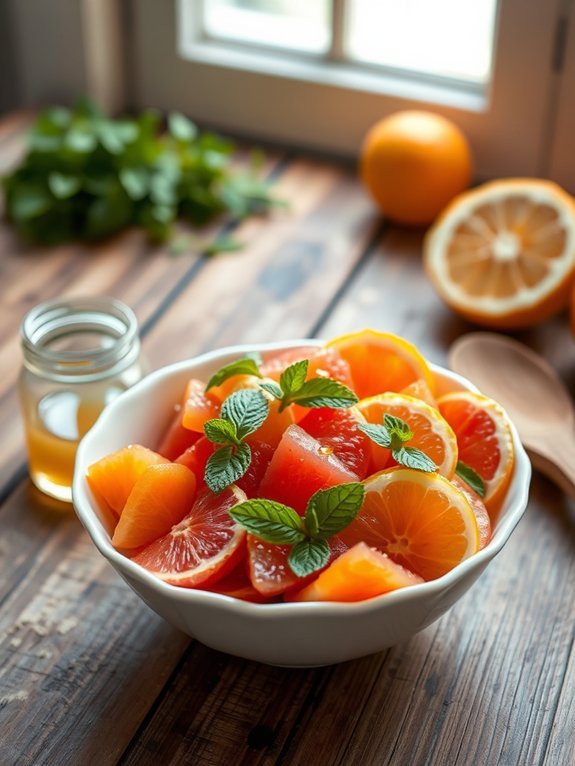
Citrus salad with honey dressing is a vibrant and invigorating dish perfect for any occasion, whether as a light dessert or a delightful addition to a brunch spread. This colorful medley of citrus fruits not only pleases the eyes but also tantalizes the taste buds, as the natural sweetness of the fruits balances beautifully with the zesty honey dressing. The combination of tangy oranges, juicy grapefruits, and succulent mandarins creates a fruit salad that’s bursting with flavor and nutrients.
Preparing a citrus salad is a simple yet rewarding experience. Using fresh, seasonal fruits enhances the taste, and the honey dressing adds a touch of sweetness while complementing the tartness of the citrus. This salad can be made in just a few minutes and is sure to impress your guests or satisfy your cravings for something light and tasty.
- 2 oranges
- 1 grapefruit
- 3 mandarins
- 1 teaspoon honey
- 1 tablespoon olive oil
- 1 tablespoon fresh lemon juice
- Fresh mint leaves (for garnish)
Begin by peeling all the citrus fruits and removing any seeds. Slice the oranges, grapefruit, and mandarins into bite-sized segments and combine them in a mixing bowl.
In a small bowl, whisk together the honey, olive oil, and lemon juice until smooth. Drizzle the honey dressing over the fruit salad and gently toss to coat all the pieces evenly.
For the best flavor, let the salad sit for about 10–15 minutes before serving, allowing the fruits to soak up the dressing. Additionally, feel free to personalize the salad by adding other fruits such as berries or kiwi for more variety.
If you want to prepare it in advance, consider storing the dressing separately to keep the citrus fresh and avoid sogginess. Enjoy your citrus salad chilled for an invigorating treat!


