This post may contain affiliate links. Please read our policy page.
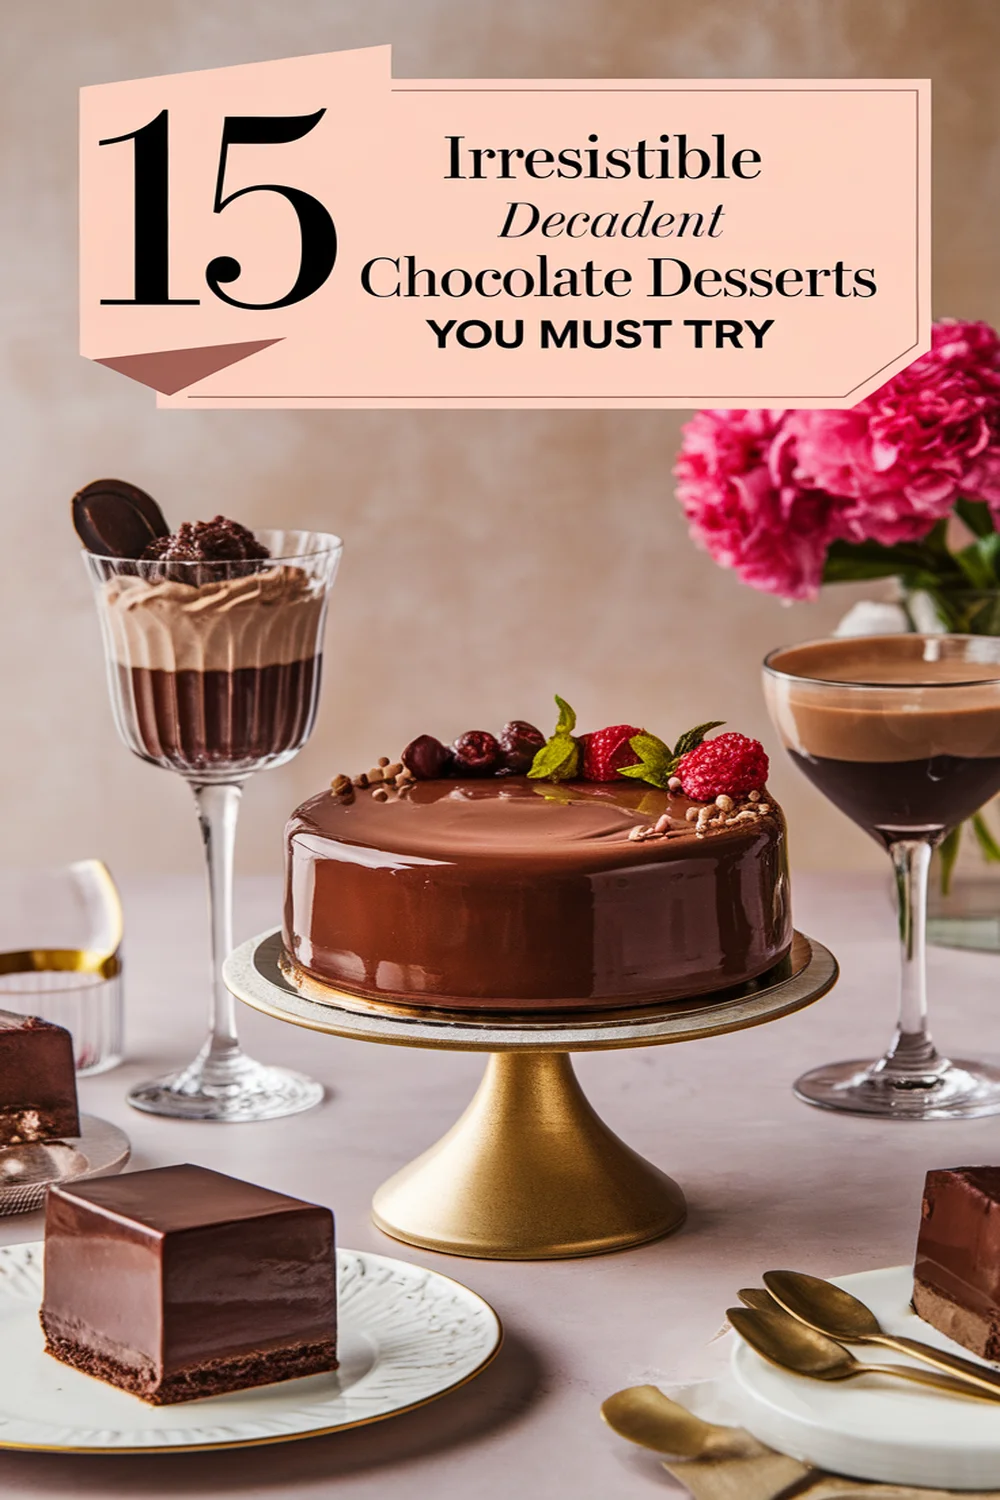
Indulging in decadent chocolate desserts is a must for any chocolate lover. You can’t go wrong with a rich chocolate lava cake, creamy chocolate mousse, or classic brownies that melt in your mouth. Don’t forget the elegance of chocolate éclairs or the luxurious flourless chocolate cake. For a playful touch, try chocolate-dipped strawberries or even a vegan avocado pudding that surprises with its creaminess. Keep exploring, and you’ll discover even more delightful chocolate treats to satisfy your cravings!
Rich Chocolate Lava Cake
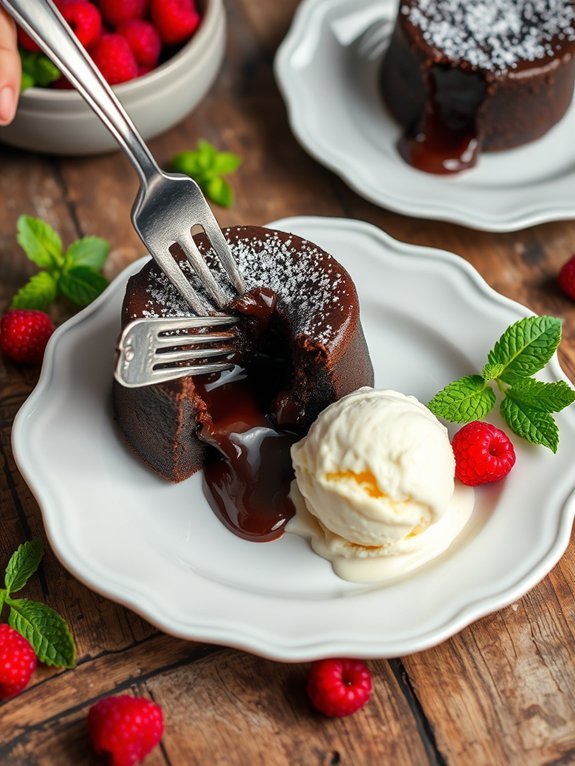
For chocolate lovers, a rich chocolate lava cake is the ultimate indulgence. This decadent dessert features a warm, gooey center that oozes with molten chocolate, creating a delightful contrast with the soft, cake-like exterior. Perfect for special occasions or a luxurious treat at home, this recipe guarantees you achieve that perfect lava effect to impress your guests or treat yourself.
The preparation is surprisingly simple, but the results are nothing short of spectacular. With just a few key ingredients, you can create a restaurant-quality dessert right in your kitchen. This luscious cake is best enjoyed fresh out of the oven, so be certain to savor it warm, alongside a scoop of vanilla ice cream or a dollop of whipped cream for an extra touch of sweetness.
Ingredients:
- 1/2 cup unsalted butter
- 1 cup semi-sweet chocolate chips
- 2 large eggs
- 2 large egg yolks
- 1/4 cup granulated sugar
- 2 tablespoons all-purpose flour
- 1/2 teaspoon vanilla extract
- Pinch of salt
- Cocoa powder (for greasing ramekins)
Preheat your oven to 425°F (220°C). Grease four ramekins with cocoa powder and place them on a baking sheet.
In a microwave-safe bowl, melt the unsalted butter and chocolate chips together in 30-second intervals, stirring until smooth. In a separate bowl, whisk together the eggs, egg yolks, and granulated sugar until pale and fluffy.
Fold the melted chocolate mixture into the egg mixture, then gently stir in the flour, vanilla extract, and salt until just combined.
Divide the batter evenly among the prepared ramekins and bake for 12-14 minutes, until the edges are firm but the center remains soft. Let cool for 1 minute, then invert onto plates and serve immediately.
For an even more luxurious twist, consider adding a piece of caramel or a chocolate truffle in the center before baking for an extra surprise. It’s crucial to keep a close eye on the baking time; a couple of minutes too long can turn your molten center into a fully-cooked cake.
Serve with fresh berries or a sprinkle of powdered sugar for added decoration, and enjoy the heavenly experience of a gooey, rich chocolate lava cake!
Decadent Chocolate Mousse
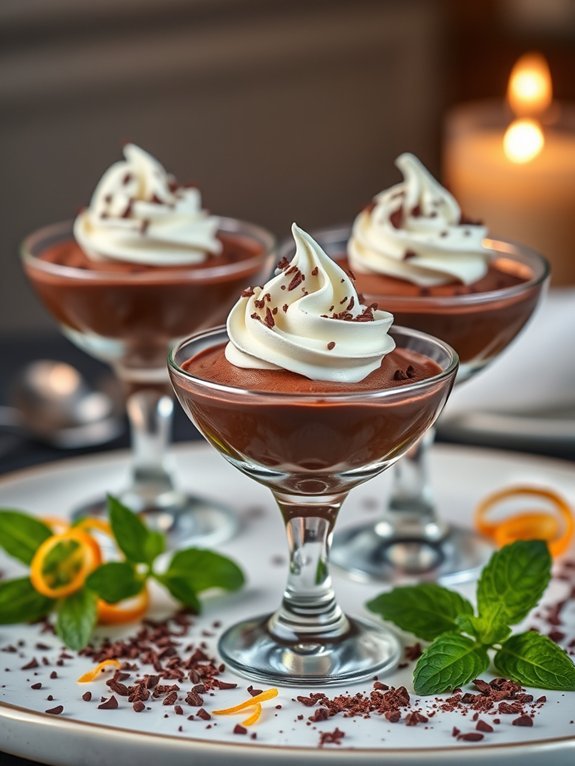
Decadent chocolate mousse is the epitome of indulgence, combining rich chocolate flavor with a light, airy texture that melts in your mouth. This luxurious dessert is perfect for any special occasion, or simply to treat yourself after a long day.
Whether you’re a seasoned home cook or a novice baker, making a chocolate mousse from scratch will impress anyone who’s the chance to enjoy it.
The beauty of chocolate mousse lies in its simplicity and the quality of ingredients used. To achieve the best results, opt for high-quality dark chocolate, as this will enrich the flavor of your mousse and elevate the overall experience.
This fluffy treat can be prepared ahead of time, allowing the flavors to develop and setting in the refrigerator, making it an ideal dessert to serve at dinner parties or gatherings.
Ingredients:
- 8 ounces dark chocolate (70% cocoa or higher)
- 4 large eggs, separated
- 1/4 cup granulated sugar
- 1/2 teaspoon vanilla extract
- 1 cup heavy cream
- Pinch of salt
- Optional: whipped cream and chocolate shavings for garnish
Begin by melting the dark chocolate in a double boiler or microwave, being careful not to burn it. Once melted, let it cool slightly.
In a separate bowl, whisk the egg yolks with the sugar and vanilla extract until light and frothy. Gradually fold the melted chocolate into the egg mixture.
In another bowl, beat the heavy cream until soft peaks form. In a clean bowl, whisk the egg whites with a pinch of salt until stiff peaks form.
Gently fold the whipped cream into the chocolate mixture, followed by the egg whites. Be careful not to deflate the mixture; fold until just combined.
Spoon the mousse into serving dishes and refrigerate for at least two hours, or until set.
When preparing chocolate mousse, using the freshest ingredients is key to achieving the best flavor and texture. If you’re looking to make it a bit lighter, consider using a lighter chocolate or mixing in some pure vanilla extract for added depth.
For a unique twist, experiment with flavorings such as coffee, orange zest, or mint. Finally, for an extra layer of indulgence, serve your mousse with a dollop of freshly whipped cream and sprinkle some chocolate shavings on top right before serving.
Enjoy your delectable chocolate creation!
Recommended Items
Get ready to indulge your sweet tooth with these must-have items for making delectable chocolate desserts!
Classic Chocolate Brownies
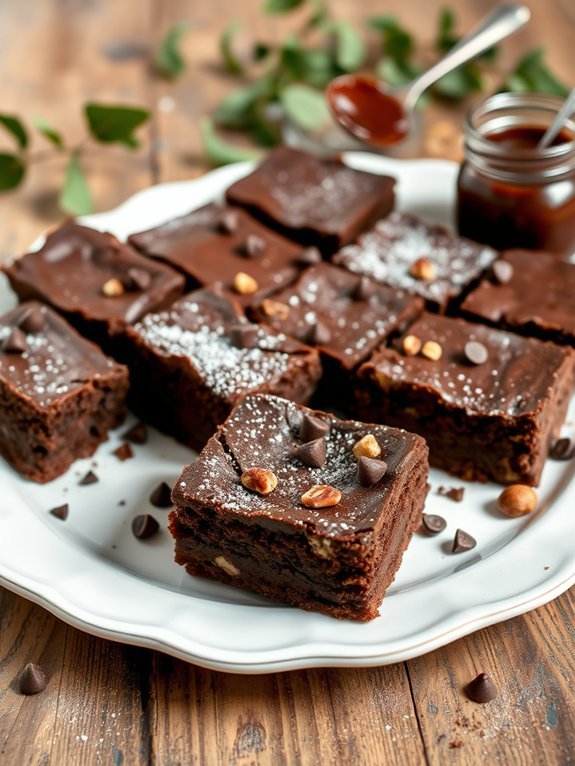
When it comes to decadent chocolate desserts, few things can rival the classic chocolate brownie. Rich, fudgy, and utterly irresistible, these brownies are a beloved staple that can be enjoyed on any occasion. Whether you’re baking for a special celebration or simply indulging your sweet tooth, this recipe is sure to delight chocolate lovers of all ages. The balance of crispy edges and a gooey center is what makes these brownies so special, and with just a few simple ingredients, you can master this treat in no time.
The beauty of brownies lies in their versatility. You can serve them plain, sprinkle with powdered sugar, or dress them up with nuts, chocolate chips, or a swirl of caramel for an extra decadent touch. This recipe provides the perfect foundation for classic brownies, but feel free to experiment with your favorite add-ins. With a rich chocolate flavor that comes from real cocoa powder and melted chocolate, these brownies are sure to become a go-to recipe in your dessert repertoire.
Ingredients
- 1/2 cup unsalted butter
- 1 cup granulated sugar
- 2 large eggs
- 1 teaspoon vanilla extract
- 1/3 cup unsweetened cocoa powder
- 1/2 cup all-purpose flour
- 1/4 teaspoon salt
- 1/4 teaspoon baking powder
- 1/2 cup semi-sweet chocolate chips (optional)
- 1/2 cup chopped walnuts or pecans (optional)
Preheat your oven to 350°F (175°C) and grease a 9×9-inch baking dish or line it with parchment paper for easy removal. In a medium-sized saucepan, melt the butter over low heat, then remove from heat and stir in the sugar, eggs, and vanilla until combined.
Next, mix in the cocoa powder, flour, salt, and baking powder until just blended. If desired, fold in the chocolate chips and nuts. Pour the batter into the prepared baking dish and spread it evenly. Bake for 20-25 minutes or until the edges start to pull away from the sides and a toothpick inserted in the center comes out with a few moist crumbs. Allow to cool before cutting into squares.
For even more indulgence, consider serving these brownies warm with a scoop of vanilla ice cream or a drizzle of chocolate ganache on top. Make sure to not overbake; the brownies should look slightly undercooked in the center when you take them out of the oven, as they’ll continue to set while cooling.
Store any leftovers in an airtight container at room temperature for a few days or in the refrigerator for a week to preserve their fudgy texture. Enjoy!
Chocolate Éclairs
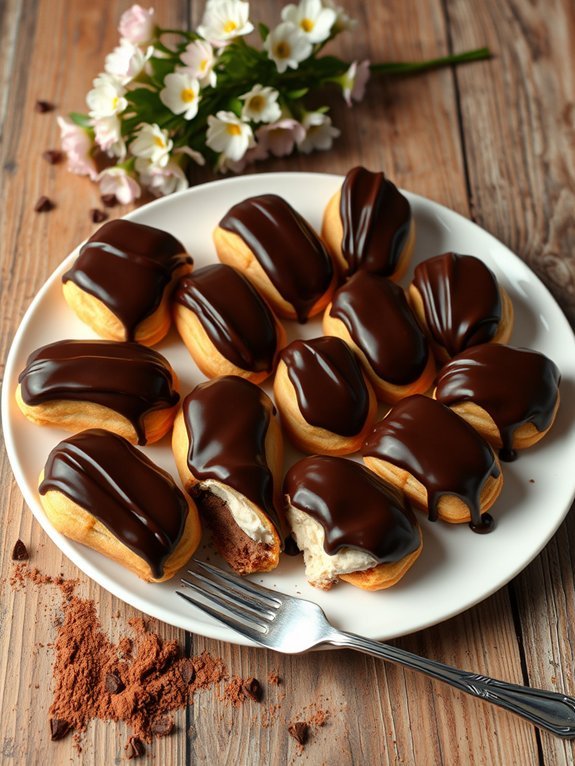
Chocolate éclairs are a classic French pastry that brings a luxurious touch to any dessert table. These delightful treats consist of a light and airy choux pastry filled with silky chocolate cream and topped with a rich chocolate glaze. The contrast between the crispy pastry and the smooth filling creates an irresistible combination that’s bound to impress friends and family.
Whether you’re celebrating a special occasion or simply indulging in a sweet treat, homemade chocolate éclairs are a delightful way to satisfy your chocolate cravings.
Preparing éclairs may seem intimidating, but with a little patience and practice, you’ll be able to create these delectable desserts with ease. The key to achieving the perfect éclairs lies in the choux pastry, which must be cooked properly to allow for the right amount of puffing.
Once filled and glazed, these elegant pastries become a showstopper for any gathering, and they’re certain to be devoured in no time.
Ingredients:
- 1 cup water
- 1/2 cup unsalted butter
- 1 cup all-purpose flour
- 1/4 teaspoon salt
- 4 large eggs
- 1 cup heavy cream
- 1/2 cup powdered sugar
- 1 teaspoon vanilla extract
- 8 ounces semisweet chocolate, chopped
- 1/2 cup heavy cream (for ganache)
- 1 tablespoon butter (for ganache)
To make the éclairs, start by preheating your oven to 425°F (220°C). In a medium saucepan, combine the water and butter, bringing it to a boil.
Once boiling, remove from heat and quickly stir in the flour and salt until the mixture forms a smooth ball. Allow it to cool slightly before adding the eggs one at a time, mixing well after each addition.
Pipe the dough onto a parchment-lined baking sheet into 4-inch lengths, leaving space between each one. Bake for about 20 minutes until they’re golden brown and puffed.
Once cooled, whip the heavy cream with powdered sugar and vanilla extract until soft peaks form. Carefully slice each éclair in half lengthwise and fill with the whipped cream.
For the chocolate glaze, heat the cream and butter in a saucepan until simmering, then pour over the chopped chocolate, stirring until melted and smooth. Dip the tops of the filled éclairs into the ganache and allow them to set before serving.
For the best results when making chocolate éclairs, verify that the eggs are at room temperature, as this will help create a smooth choux pastry. Additionally, don’t open the oven door while the éclairs are baking, as this could cause them to deflate.
Keep in mind that the éclairs can be filled and glazed just before serving for maximum freshness, or they can be made ahead and stored in an airtight container in the refrigerator.
Enjoy experimenting with different fillings and toppings to personalize your éclairs!
Flourless Chocolate Cake
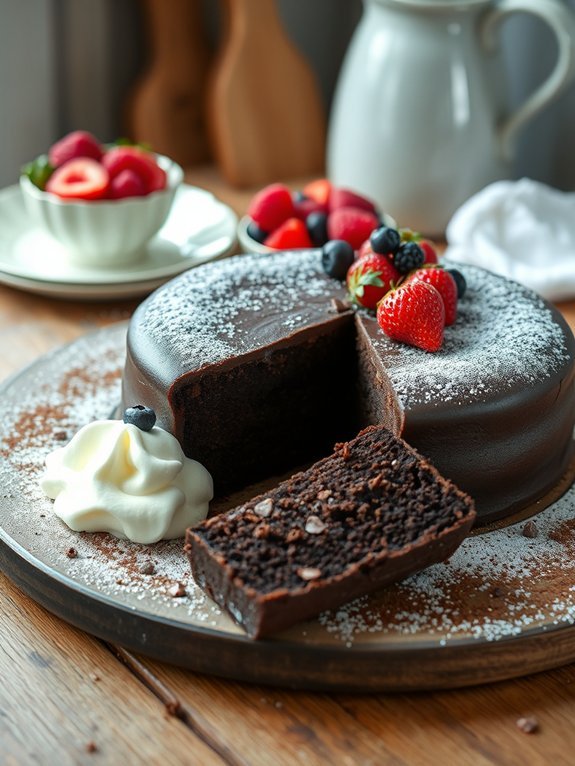
Flourless chocolate cake is a rich and indulgent dessert that’s the perfect choice for chocolate lovers. This cake features a dense and fudgy texture that’s both satisfying and decadent. The absence of flour allows the chocolate flavor to shine through, making it a great option not only for those following a gluten-free diet but also for anyone who appreciates deep chocolate desserts.
This cake is surprisingly simple to make, utilizing just a few high-quality ingredients to create a luxurious result. It can be served plain, dusted with powdered sugar, or adorned with fresh berries and a dollop of whipped cream.
Whether you serve it at a dinner party or enjoy a slice on a cozy evening at home, flourless chocolate cake is sure to impress and satisfy your sweet tooth.
Ingredients:
- 1 cup high-quality dark chocolate chips (or chopped chocolate)
- 1/2 cup unsalted butter
- 3/4 cup granulated sugar
- 1/4 teaspoon salt
- 1 teaspoon vanilla extract
- 3 large eggs
- 1/2 cup unsweetened cocoa powder
Carefully melt the chocolate and butter together in a microwave-safe bowl or over a double boiler, stirring until smooth. Once melted, remove from heat and stir in the sugar, salt, and vanilla extract.
Allow the mixture to cool slightly before whisking in the eggs one at a time, making sure each egg is fully incorporated before adding the next. Finally, sift in the cocoa powder and gently fold it into the batter until just combined.
Pour the batter into a greased 8-inch round cake pan and bake at 350°F (175°C) for 25-30 minutes, until the edges are set yet the center remains slightly soft. Let cool before serving.
When making flourless chocolate cake, it’s crucial to use high-quality chocolate to guarantee the best flavor. Additionally, be certain not to overbake the cake; it should still have a slight jiggle in the center when taken out of the oven since it will continue to set as it cools.
For an added touch, consider serving the cake warm with a scoop of vanilla ice cream or alongside a fruit coulis for a delightful contrast.
Creamy Chocolate Cheesecake
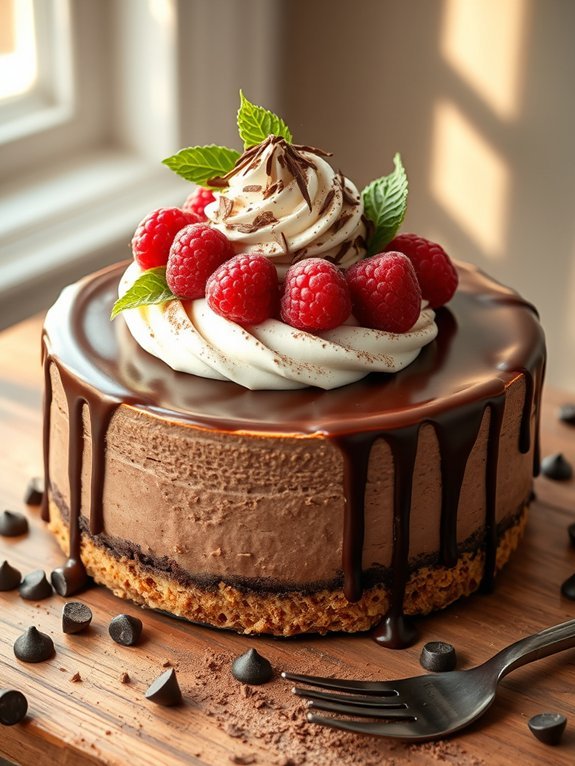
Chocolate lovers rejoice! This creamy chocolate cheesecake is the ultimate indulgence, combining rich chocolate flavor with the smooth, velvety texture of cheesecake. Perfect for any occasion, this dessert will leave your guests asking for seconds and thirds.
With a simple graham cracker crust and a luscious filling, it’s surprisingly easy to prepare, making it an ideal choice for both seasoned bakers and novices alike.
To elevate this dessert, consider topping the cheesecake with a drizzle of chocolate ganache or a sprinkle of cocoa powder. You can even add fresh berries for a pop of color and a hint of freshness that perfectly balances the richness of the chocolate. This dessert not only looks impressive but also delivers a decadent flavor that will satisfy even the most discerning sweet tooth.
Ingredients:
- 1 ½ cups graham cracker crumbs
- ½ cup unsalted butter, melted
- 2 cups cream cheese, softened
- 1 cup granulated sugar
- 1 cup sour cream
- 1 teaspoon vanilla extract
- 4 large eggs
- 8 ounces semi-sweet chocolate, melted and slightly cooled
To prepare the cheesecake, start by preheating your oven to 325°F (160°C). In a mixing bowl, blend the graham cracker crumbs and melted butter until well combined, then press the mixture into the bottom of a 9-inch springform pan to form the crust.
In a separate bowl, beat the cream cheese until smooth and creamy. Gradually add the sugar, then mix in the sour cream and vanilla extract. Add the eggs, one at a time, mixing just until incorporated. Ultimately, fold in the melted chocolate until fully combined.
Pour the filling over the crust in the springform pan and bake for 55-60 minutes or until set. Allow the cheesecake to cool in the oven with the door slightly ajar, then refrigerate for at least 4 hours (preferably overnight) before removing from the pan and serving.
When preparing your creamy chocolate cheesecake, remember that the quality of your ingredients makes a big difference in flavor. Always use high-quality chocolate for the best results, and make sure your cream cheese is softened to room temperature to avoid lumps in your mixture.
If you want a smoother texture, you can blend the filling using a food processor. For best results, allow the cheesecake to chill overnight; this enhances the flavors and gives it a firmer texture. In conclusion, garnish it with whipped cream or chocolate shavings for an extra touch of elegance!
Chocolate Truffles
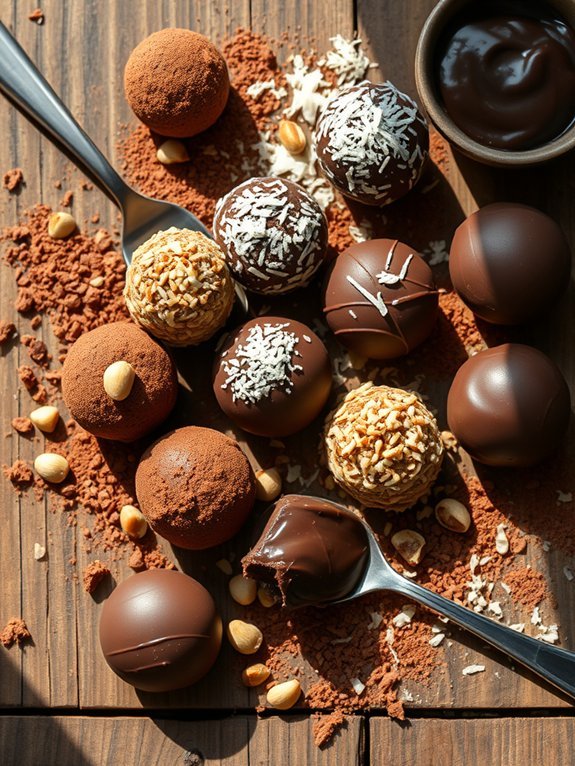
Chocolate truffles are a luxurious and indulgent treat that can elevate any dessert occasion. These small, rich bites are made using simple ingredients, yet they yield a result that feels gourmet and elegant. The beautiful thing about chocolate truffles is their versatility; you can infuse them with flavors such as coffee, vanilla, or even liqueurs, and roll them in various coatings like cocoa powder, crushed nuts, or shredded coconut for added texture and visual appeal.
Making chocolate truffles is an enjoyable process, perfect for sharing with family or friends. Whether you’re planning a special occasion or just looking to satisfy a chocolate craving, these delightful morsels are sure to please. Plus, they make for a thoughtful homemade gift. Just be prepared to keep some for yourself, as their melt-in-your-mouth richness is hard to resist!
- 8 oz. high-quality dark chocolate (70% cocoa or higher)
- 1/2 cup heavy cream
- 2 tablespoons unsalted butter
- 1 teaspoon vanilla extract
- Cocoa powder, crushed nuts, or shredded coconut for coating
Begin by finely chopping the dark chocolate and placing it in a medium heatproof bowl. In a small saucepan, heat the heavy cream and butter over medium heat until it just begins to simmer.
Pour the hot cream mixture over the chopped chocolate and let it sit for about 2 minutes to soften. Add the vanilla extract and gently stir the mixture until smooth and glossy. Refrigerate the mixture for about 1-2 hours or until firm enough to handle.
Once set, scoop the chocolate using a melon baller or small spoon and roll into balls. Roll each truffle in your desired coating and place them on a tray to set.
When making chocolate truffles, using good-quality chocolate is fundamental, as it greatly affects the flavor and texture of the final product. Additionally, verify your hands are clean and dry when rolling the truffles to prevent them from melting too quickly.
If your mixture is too soft to handle, pop it back in the fridge for a few more minutes. Finally, consider experimenting with different flavors and coatings to create a variety of truffles that satisfy an array of taste preferences.
Chocolate Fondue
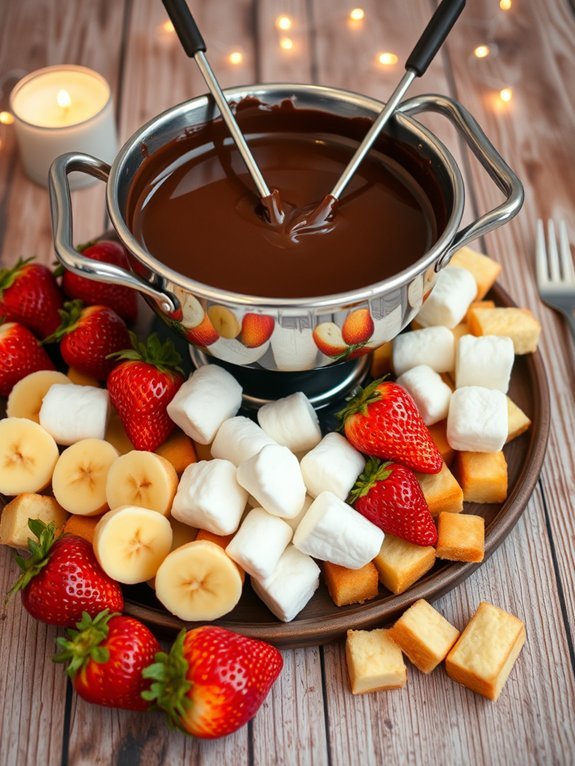
Chocolate fondue is a delightful dessert that invites indulgence and creativity. This luxurious treat is perfect for gatherings, whether a cozy night in or a festive celebration with friends and family. The simplicity of a warm pot of melted chocolate paired with a variety of dippable treats makes it an interactive dessert that encourages sharing and enjoying every bite.
Creating your own chocolate fondue is also a great way to customize the experience; you can choose different types of chocolate or mix flavors to suit your palate. The possibilities are endless with fruits, marshmallows, pretzels, and even slices of cake as dippers. Easy to prepare yet sophisticated in presentation, chocolate fondue is a sweet escape that everyone will love.
Ingredients:
- 8 ounces semi-sweet chocolate (or dark chocolate)
- 1 cup heavy cream
- 1 teaspoon vanilla extract
- Pinch of salt
- Fresh strawberries
- Sliced bananas
- Marshmallows
- Pretzel sticks
- Cubed pound cake or brownies
Heat the heavy cream in a saucepan over medium heat until it starts to steam but not boil. Remove it from the heat and add in the chopped chocolate, stirring until it melts smoothly. Add the vanilla extract and a pinch of salt, and stir until everything is fully combined and glossy. Transfer the chocolate mixture to a fondue pot or a heat-safe bowl, keeping it warm over a candle or low setting.
When making chocolate fondue, consider using high-quality chocolate for the best flavor. You can also experiment with flavor add-ins like flavored extracts, liqueurs, or spices to personalize your fondue.
For a fun twist, consider serving your dippers on a rotating platter to make sharing easier. Finally, don’t overload the fondue pot, as this can affect how smoothly the chocolate melts; keep it to a manageable amount for a seamless dipping experience.
Proposed Recipe for Chocolate Lovers
Chocolate Chip Cookie Skillet
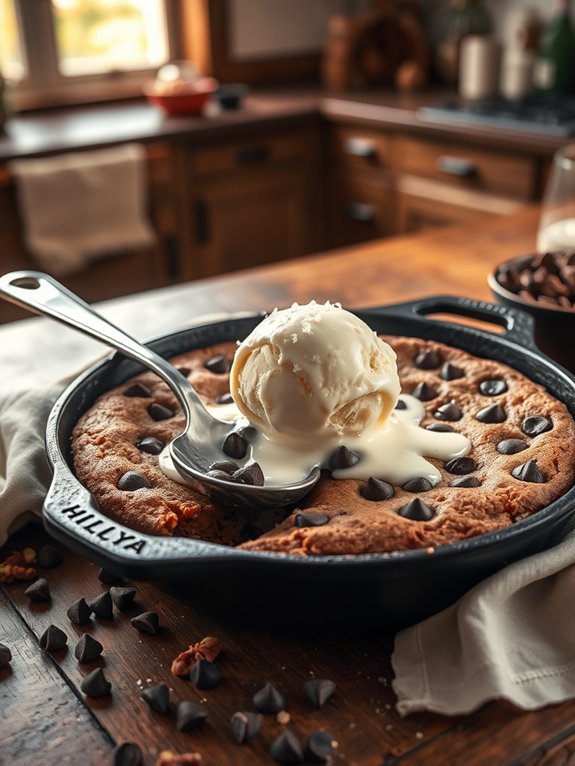
Indulge in the ultimate comfort food with this decadent Chocolate Chip Cookie Skillet recipe. Imagine a warm, gooey chocolate chip cookie coming straight from the oven, bubbling hot and just waiting to be devoured. Perfect for desserts or even as an indulgent snack, this dish is a crowd-pleaser, sure to satisfy any sweet tooth.
The simplicity of tossing everything together in a single skillet makes it an easy go-to for both novice and experienced bakers alike. This chocolate chip cookie skillet isn’t only delicious but customizable to suit your preferences. You can add your favorite nuts, swap out chocolate chips for chunks, or even incorporate a swirl of peanut butter for an extra layer of flavor.
Serve it warm with a scoop of your favorite ice cream on top, and you’ll have a truly heavenly treat that’s perfect for sharing – or enjoying all by yourself.
- 1 cup unsalted butter, melted
- 1 cup brown sugar, packed
- ½ cup granulated sugar
- 2 large eggs
- 2 teaspoons vanilla extract
- 3 cups all-purpose flour
- 1 teaspoon baking soda
- ½ teaspoon salt
- 2 cups semi-sweet chocolate chips
Preheat your oven to 350°F (175°C). In a large skillet, combine the melted butter, brown sugar, and granulated sugar, mixing until well combined. Then, stir in the eggs and vanilla extract.
Gradually add the flour, baking soda, and salt, mixing until just combined. Fold in the chocolate chips and spread the mixture evenly throughout the skillet. Bake for about 25-30 minutes or until the edges are lightly golden and the center is just set. Allow to cool slightly before serving.
When making your Chocolate Chip Cookie Skillet, keep in mind that the cooking time may vary based on the skillet’s size and thickness of the cookie layer. For an extra indulgent touch, consider adding a sprinkle of sea salt on top before baking to enhance the chocolate flavor.
Midnight Chocolate Torte
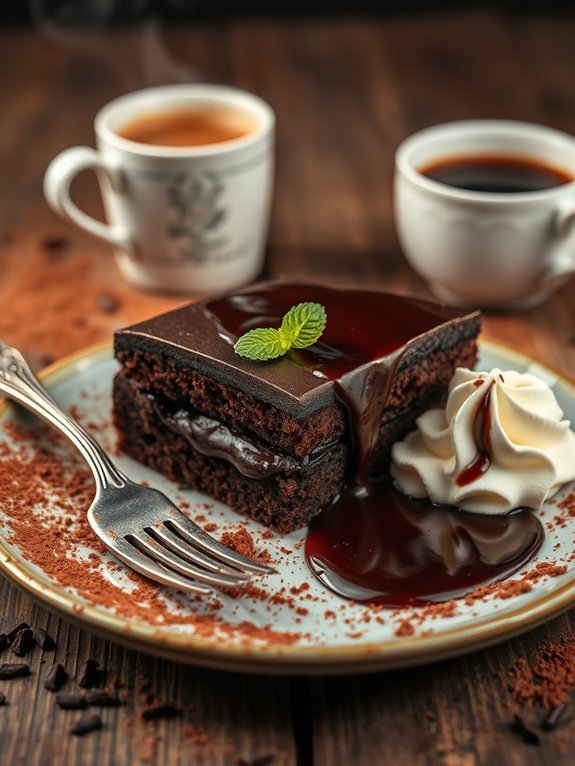
Indulging in a Midnight Chocolate Torte is like stepping into a world filled with rich, velvety chocolate that warms the soul. This dessert is a perfect blend of deep, dark chocolate and a hint of espresso, elevating the classic chocolate flavor to new heights. Its dense and fudgy texture melts in your mouth, making it an ideal treat for chocolate lovers seeking a truly timeless experience.
Whether you’re celebrating a special occasion or simply treating yourself, this torte will leave a lasting impression.
To create this decadent delight, you’ll want to start with the finest quality of chocolate, as the flavor is paramount. The Midnight Chocolate Torte is deceptively simple in its preparations, but the end result is utterly luxurious. Once you’ve mastered this recipe, you’ll be tempted to make it a staple in your dessert repertoire, perfect for impressing guests or enjoying a quiet night in with a slice of heaven.
- 8 ounces dark chocolate (70% cocoa)
- ½ cup unsalted butter
- 1 cup granulated sugar
- 3 large eggs
- 1 teaspoon vanilla extract
- ¼ cup espresso or strong coffee
- ½ cup all-purpose flour
- ¼ teaspoon salt
- Powdered sugar, for dusting
Preheat your oven to 350°F (175°C) and grease an 8-inch round cake pan. In a heatproof bowl, melt the dark chocolate and butter together over a pot of simmering water, stirring until smooth. Remove from heat and whisk in the sugar, followed by the eggs one at a time, then vanilla and espresso.
Gently fold in the flour and salt until just combined. Pour the batter into the prepared pan and bake for 25-30 minutes, or until the top looks set but the center is still slightly soft. Allow to cool in the pan before inverting onto a serving plate.
For the best flavor and texture, let the torte cool completely before serving. Consider pairing it with a dollop of freshly whipped cream or a scoop of vanilla ice cream to balance out the richness of the chocolate.
Additionally, you can elevate the presentation with a drizzle of chocolate sauce or a sprinkle of sea salt. This dessert is best enjoyed at room temperature after being allowed to sit for a few hours, as it allows the flavors to develop further.
Double Chocolate Cupcakes
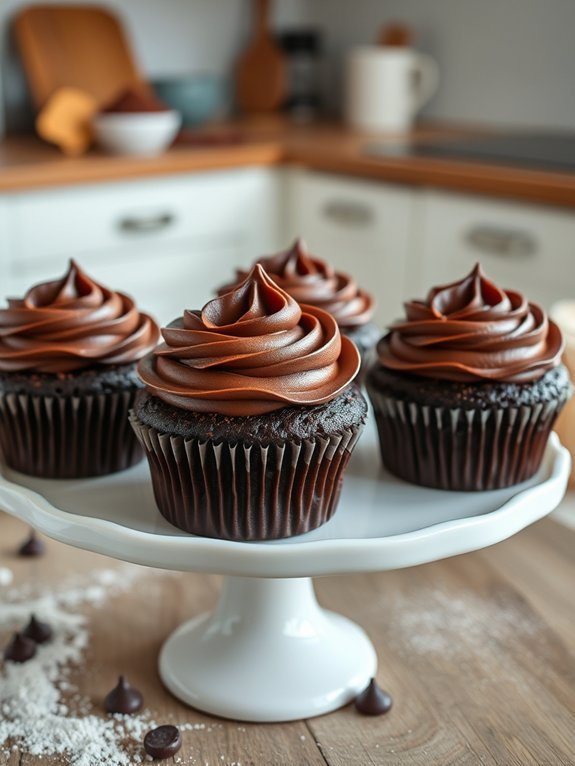
Double chocolate cupcakes are a chocoholic’s dream come true. These indulgent treats combine rich chocolate cake with luscious chocolate ganache, delivering a double dose of flavor that will satisfy any sweet tooth. Perfect for birthday parties, celebrations, or simply as a decadent dessert to enjoy at home, these cupcakes are both easy to make and impossible to resist.
With moist, fluffy texture and topped with creamy chocolate frosting, double chocolate cupcakes are sure to become a favorite in your baking repertoire.
The key to achieving the best double chocolate cupcakes lies in using high-quality cocoa powder and chocolate. This not only guarantees a deep, rich chocolate flavor but also results in a moist and tender crumb. You can customize these cupcakes with your favorite mix-ins, such as chocolate chips or chunks, for an added surprise in every bite.
Serve them fresh out of the oven or let them cool and pile on the chocolate frosting for an unforgettable dessert.
- 1 and 1/2 cups all-purpose flour
- 1 cup granulated sugar
- 1/2 cup unsweetened cocoa powder
- 1 teaspoon baking powder
- 1/2 teaspoon baking soda
- 1/4 teaspoon salt
- 1/2 cup unsalted butter, melted
- 2 large eggs
- 1 teaspoon vanilla extract
- 1 cup buttermilk
- 1 cup semi-sweet chocolate chips
Preheat your oven to 350°F (175°C) and line a cupcake tin with paper liners. In a large bowl, whisk together the flour, sugar, cocoa powder, baking powder, baking soda, and salt.
In a separate bowl, combine the melted butter, eggs, vanilla extract, and buttermilk. Gradually mix the wet ingredients into the dry ingredients until just combined. Then, gently fold in the chocolate chips.
Divide the batter evenly among the cupcake liners, filling each about two-thirds full. Bake for 18-20 minutes, or until a toothpick inserted comes out clean. Allow to cool completely before frosting with your favorite chocolate frosting.
For best results, use high-quality ingredients and verify your butter is melted but not hot to avoid cooking the eggs when combined. Letting the cupcakes cool completely before frosting will help the icing set perfectly and prevent it from melting.
Consider experimenting with different types of chocolate for the frosting, such as dark or white chocolate, to create a unique flavor profile. Finally, these cupcakes can be stored in an airtight container for 3-4 days, but they’re best enjoyed fresh!
Chocolate Peanut Butter Pie
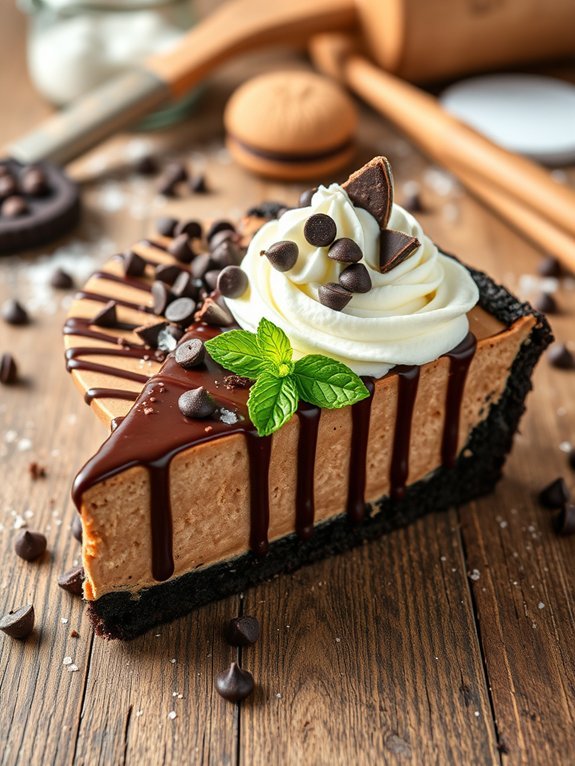
The Chocolate Peanut Butter Pie is a delightful fusion of rich chocolate and creamy peanut butter, making it an indulgent treat that satisfies the sweet tooth of both chocolate lovers and peanut butter aficionados. This no-bake dessert isn’t only easy to make but also perfect for any occasion, whether it’s a festive gathering, a birthday celebration, or simply a treat for yourself.
With its luscious filling and buttery crust, each bite is a combination of creamy, nutty flavors that will keep you coming back for more. Crafting this pie requires minimal effort and can be prepared ahead of time, giving the flavors a chance to meld beautifully in the refrigerator. The crust can be made from crushed chocolate cookies or graham crackers, giving you the freedom to choose your preferred flavor profile.
Topped with whipped cream or additional chocolate ganache, this pie is sure to impress your guests and leave them craving another slice.
- 1 ½ cups chocolate cookie crumbs
- ½ cup unsalted butter, melted
- 1 cup creamy peanut butter
- 1 cup powdered sugar
- 1 cup heavy cream
- 8 ounces cream cheese, softened
- 1 teaspoon vanilla extract
- ½ cup semi-sweet chocolate chips (for garnish)
- Whipped cream (for topping)
In a mixing bowl, combine the chocolate cookie crumbs and melted butter, then press the mixture into the bottom of a pie dish to form the crust. In another bowl, beat together the peanut butter, powdered sugar, cream cheese, and vanilla extract until smooth and creamy.
In a separate bowl, whip the heavy cream until stiff peaks form and then gently fold it into the peanut butter mixture. Spread the filling into the prepared crust and refrigerate the pie for at least 4 hours or until set. Before serving, garnish with chocolate chips and whipped cream.
For an extra touch of flavor, consider adding a pinch of sea salt on top of the peanut butter filling for a salted caramel effect. To guarantee a clean slice when serving, run a hot knife through warm water and dry it before cutting into the pie.
If you want to make the dessert even more decadent, you can drizzle melted chocolate or caramel sauce on top before serving. This pie can also be frozen for longer storage—just remember to let it thaw in the refrigerator before serving!
Chocolate-dipped Strawberries
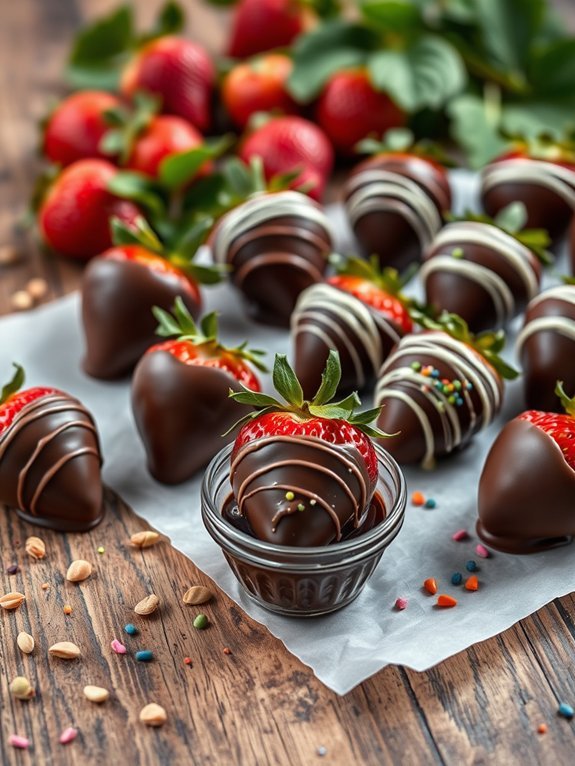
Chocolate-dipped strawberries are a classic dessert that brings together the delightful sweetness of ripe strawberries and the rich indulgence of melted chocolate.
These treats are perfect for romantic occasions, celebrations, or simply as a sweet snack. With their vibrant colors and appealing presentation, they can even serve as an elegant centerpiece for any dessert table.
Making chocolate-dipped strawberries is a straightforward process that requires just a few ingredients and little preparation time.
The combination of fresh strawberries and smooth chocolate creates a harmonious balance of flavors and textures that will leave you craving more.
Once you master this simple technique, you can experiment with different types of chocolate and toppings to create your signature version of this beloved treat.
Ingredients:
- Fresh strawberries (1 pound)
- Semi-sweet or dark chocolate chips (8 ounces)
- White chocolate chips (optional, for drizzling)
- Parchment paper (for cooling)
To prepare chocolate-dipped strawberries, start by washing the strawberries gently under cool water and patting them dry completely with a paper towel.
In a microwave-safe bowl or using a double boiler, melt the semi-sweet or dark chocolate chips in short intervals, stirring frequently until smooth and glossy.
Holding the strawberries by the stem, dip each berry into the melted chocolate, allowing any excess chocolate to drip off before placing them on a sheet of parchment paper to cool and set.
If desired, melt white chocolate separately and drizzle it over the cooled chocolate-dipped strawberries for an added touch of elegance.
For the best results, choose strawberries that are ripe and firm, with vibrant color and a fresh green leaf stem.
Make sure they’re completely dry before dipping, as any moisture can cause the chocolate to seize up.
If you’re looking to add extra flair, consider rolling the dipped strawberries in crushed nuts, sprinkles, or coconut before they set.
Remember to work quickly, as the chocolate can start to harden as it cools, so have all your ingredients and toppings ready before you begin the dipping process.
Enjoy your delightful creation!
Vegan Chocolate Avocado Pudding
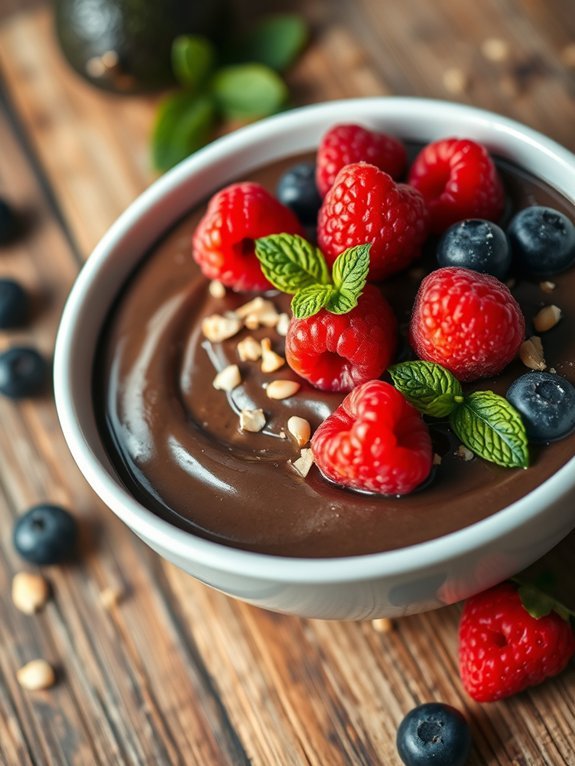
Indulging in a rich and creamy dessert doesn’t have to come at the cost of your dietary choices, and vegan chocolate avocado pudding is the perfect example. Made primarily from ripe avocados and cocoa powder, this dessert isn’t only guilt-free but also packed with healthy fats, fiber, and essential nutrients. The creamy texture of the avocados creates a luscious base that mimics traditional puddings while the cocoa powder contributes a deep chocolate flavor that satisfies even the most intense cravings.
This vegan chocolate pudding is incredibly easy to make and sweetened naturally with maple syrup or agave nectar. It takes just a few minutes to whip up in a blender or food processor, making it a quick go-to dessert for any occasion. Serve it chilled and topped with your favorite fruits or nuts for an elegant finish that will impress your guests while keeping everyone happy with its plant-based ingredients.
Ingredients:
- 2 ripe avocados
- 1/2 cup unsweetened cocoa powder
- 1/3 cup maple syrup or agave nectar
- 1/4 cup almond milk (or any plant-based milk)
- 1 teaspoon vanilla extract
- A pinch of salt
Blend the ripe avocados in a food processor until smooth. Add the cocoa powder, maple syrup, almond milk, vanilla extract, and salt, then blend again until the mixture is creamy and well combined. Taste and adjust sweetness as needed, blending again to incorporate any additional sweetener. Once your pudding is silky smooth, scoop it into individual serving dishes and refrigerate for at least 30 minutes to chill and thicken.
One important tip to keep in mind is to use perfectly ripe avocados; they should yield slightly to pressure when gently squeezed. If the avocados are too hard, the pudding will lack creaminess.
Additionally, feel free to experiment with flavors, such as adding a dash of cinnamon or a scoop of nut butter for added depth. This pudding also stores well in the fridge, allowing you to enjoy it over a few days—just be sure to cover it with plastic wrap to prevent it from browning.
S’mores Chocolate Bars
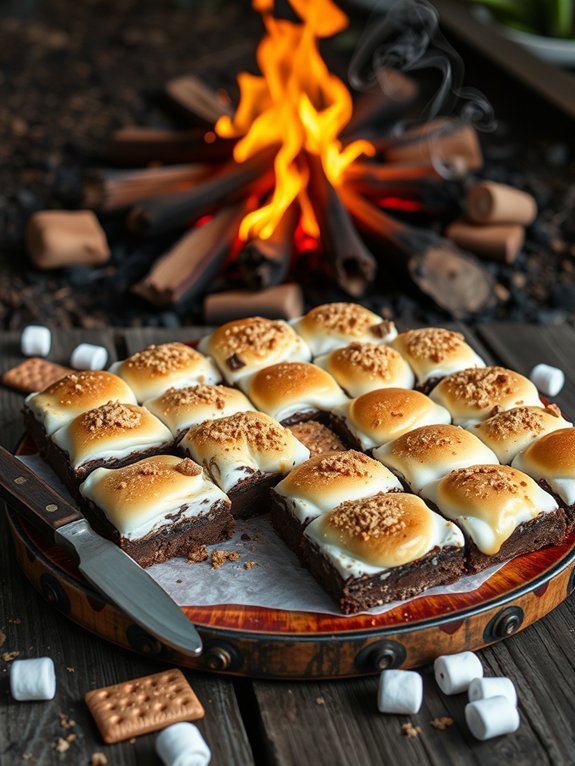
S’mores Chocolate Bars are a delightful twist on the classic campfire treat, combining the rich flavors of chocolate, gooey marshmallows, and crispy graham crackers in a single, scrumptious dessert bar. Perfect for gatherings, these bars maintain all the nostalgic flavors of traditional s’mores while being easy to prepare and serve. The combination of textures—from the crunch of the graham cracker base to the soft marshmallow topping—makes each bite a heavenly experience.
Creating these bars at home not only allows you to indulge in a sweet treat but also gives you the flexibility to customize the recipe to suit your taste. You can add nuts, vary the types of chocolate used, or even sprinkle some sea salt on top to elevate the flavor. Whether enjoyed at a picnic, cozy night in, or festive celebration, S’mores Chocolate Bars promise to please everyone, young and old alike.
Ingredients:
- 1 ½ cups graham cracker crumbs
- ½ cup unsalted butter, melted
- 1/3 cup granulated sugar
- 1 ½ cups chocolate chips (milk or dark)
- 2 cups mini marshmallows
- 1/2 teaspoon vanilla extract
- Pinch of salt
- Extra graham cracker crumbs for topping (optional)
In a medium bowl, combine the graham cracker crumbs, melted butter, and granulated sugar to create a crumbly mixture. Press this mixture firmly into the bottom of a greased 9×9-inch baking pan to form the base. Evenly sprinkle the chocolate chips across the top of the crust and then layer the mini marshmallows on top, ensuring good coverage. Bake in a preheated oven at 350°F (175°C) for about 10-12 minutes, or until the marshmallows are golden brown.
Allow the bars to cool completely before slicing them into squares.
When making S’mores Chocolate Bars, it’s vital to watch the marshmallows closely while baking to prevent them from burning. If you prefer an extra toasted flavor, you can briefly broil them in the oven for a minute or two after baking. Additionally, let the bars cool in the refrigerator for a firmer texture, making them easier to cut cleanly.
Enjoy experimenting with different types of chocolate and add-ins to make this recipe your own!

