This post may contain affiliate links. Please read our policy page.
If you’re looking to satisfy your sweet cravings guilt-free, try these nutritious snacks: Greek yogurt with honey and berries, dark chocolate-covered almonds, or frozen banana bites with nut butter. Apple slices with almond butter, chia seed pudding, and avocado chocolate mousse are great options too. For something warm, consider baked sweet potato with cinnamon or rice cakes topped with peanut butter and banana. With homemade fruit sorbet, you’ve got a delicious mix—check out more ideas to fuel your snacking enjoyment!
Greek Yogurt With Honey and Berries

Greek yogurt with honey and berries is a simple and nutritious snack that’s ideal for any time of the day. This dish not only satisfies your sweet tooth but also packs a punch of protein, probiotics, and antioxidants.
The creaminess of Greek yogurt combined with the natural sweetness of honey and the vibrant flavors of fresh berries makes it both a delicious treat and an excellent source of energy.
Making Greek yogurt with honey and berries is incredibly easy and requires minimal preparation. You can customize it to fit your taste preferences by selecting your favorite berries and adjusting the amount of honey to suit your sweetness level.
Whether you’re gearing up for a workout, need a quick breakfast, or looking for a light dessert, this dish is a fantastic option that brings together health and flavor in just a few minutes.
- 1 cup of Greek yogurt (plain or flavored)
- 1 tablespoon of honey (adjust to taste)
- 1/2 cup of mixed fresh berries (such as strawberries, blueberries, raspberries, and blackberries)
In a bowl, scoop out the Greek yogurt and drizzle the honey over the top. Gently fold the two together until well combined.
Then, layer your desired mixture of fresh berries on top of the yogurt and honey mixture. You can also mix in the berries if you prefer an even distribution.
For an added twist, consider topping your Greek yogurt with a sprinkle of granola, a handful of nuts, or a dash of cinnamon for extra flavor and texture.
Using seasonal berries can enhance the freshness of the dish, and feel free to experiment with different honey varieties, such as wildflower or clover, to find the perfect flavor profile.
This dish can be prepared in advance and stored in the refrigerator for a quick grab-and-go snack, making it as convenient as it’s healthy.
Recommended Items
Check out these delightful products and equipment to satisfy your sweet tooth healthily!
Dark Chocolate-Covered Almonds
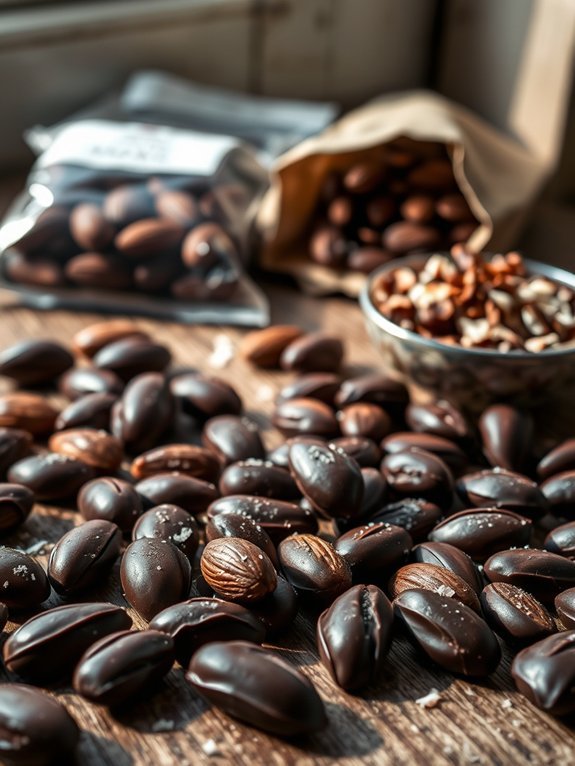
Dark chocolate-covered almonds are a delicious and nutritious snack that brings together the rich flavor of dark chocolate and the crunchiness of almonds. This simple yet satisfying treat can satisfy your sweet tooth while providing health benefits.
Almonds are packed with protein, fiber, and healthy fats, while dark chocolate offers antioxidants, making this snack a guilt-free indulgence.
Making dark chocolate-covered almonds at home is easy, allowing you to control the quality and amount of chocolate used. By choosing high-quality dark chocolate, you can guarantee that your snack not only tastes great but also remains as healthy as possible. Whether you’re looking for a midday snack at work or a quick dessert at home, these dark chocolate-covered almonds are sure to please.
- 1 cup raw almonds
- 1 cup dark chocolate chips (70% cocoa or higher)
- 1 teaspoon coconut oil (optional)
- Sea salt (optional, for topping)
Begin by preheating your oven to 350°F (175°C) and spread the raw almonds evenly on a baking sheet. Roast them for about 10-12 minutes, stirring occasionally, until they’re lightly golden and fragrant.
Remove from the oven and let them cool. Meanwhile, in a microwave-safe bowl, combine the dark chocolate chips and the coconut oil. Melt the chocolate in the microwave in 30-second intervals, stirring in between, until smooth.
Once the almonds are cool, dip each almond into the melted chocolate, ensuring they’re fully coated, and place them on a parchment-lined baking sheet. If desired, sprinkle a little sea salt on top before letting them cool and harden completely.
For the best results, make certain to use quality chocolate with a high cocoa content for a rich flavor. Feel free to experiment with different toppings such as crushed nuts, or coconut flakes, and adjust the amount of sea salt to your preference.
Storing them in an airtight container in the refrigerator can help maintain their freshness and prevent the chocolate from melting. Enjoy your homemade dark chocolate-covered almonds as a nutritious treat that you can feel good about!
Frozen Banana Bites With Nut Butter
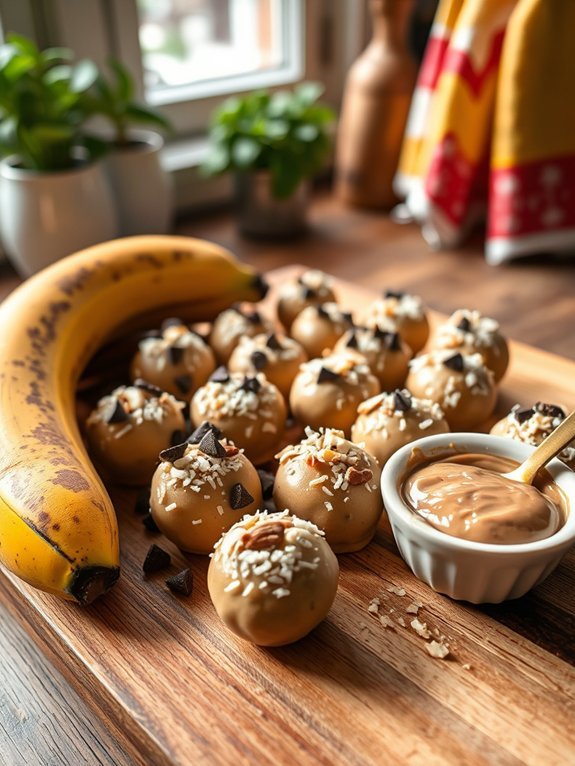
Frozen banana bites with nut butter are a delicious and nutritious snack option that’s perfect for satisfying your cravings while keeping it healthy. These bite-sized treats are incredibly easy to make and require no baking, making them a great choice for both kids and adults. The combination of sweet, creamy banana with rich, nutty flavor creates a fulfilling snack that will keep you energized throughout the day.
To elevate the flavor and texture, you can customize these banana bites by using different types of nut butter, such as almond, peanut, or cashew butter. You can also add toppings like dark chocolate chips, shredded coconut, or chopped nuts for an extra crunch. These frozen snacks are perfect for meal prep; make a batch ahead of time and keep them stocked in your freezer for a healthy treat whenever the craving strikes.
- Ripe bananas
- Nut butter (peanut, almond, or your choice)
- Dark chocolate chips (optional)
- Shredded coconut (optional)
- Chopped nuts (optional)
- Parchment paper
Start by peeling the ripe bananas and slicing them into thick rounds, about half an inch thick. On a baking sheet lined with parchment paper, place half of the banana slices. Spread a generous layer of nut butter on each slice, then top with another banana slice to create a sandwich. Once all the bites are assembled, place the baking sheet in the freezer for about 1-2 hours, allowing the banana bites to firm up.
Once frozen, you can store them in a zip-top bag or an airtight container for later enjoyment. When preparing your frozen banana bites, make certain to use ripe bananas, as they’re naturally sweeter and creamier, providing the best flavor and texture. Additionally, make sure the nut butter is room temperature, as this will make spreading it on the banana slices much easier.
Feel free to get creative with toppings, as adding additional flavors can enhance this simple snack.
Apple Slices With Almond Butter
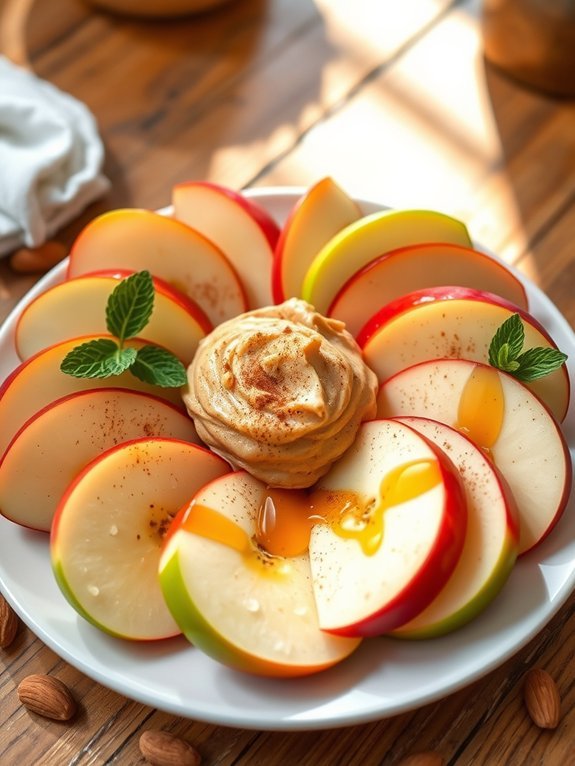
Apple slices with almond butter make for a delightful and nutritious snack that’s perfect for any time of the day. The crispness of fresh apples paired with the creamy, nutty flavor of almond butter creates a satisfying balance of textures and tastes. This snack not only satisfies your cravings but also provides a healthy dose of vitamins, minerals, and healthy fats, making it an excellent choice for those looking to maintain a balanced diet.
To prepare this simple yet delicious snack, you only need a few fresh ingredients and minimal effort. Whether you’re grabbing a quick bite before a workout or looking for a wholesome addition to your lunchbox, apple slices with almond butter can easily be customized to suit your preferences. You can experiment with different varieties of apples and almond butters to find the perfect combination for your taste buds.
- 1 medium apple (your choice of variety)
- 2 tablespoons almond butter
- A pinch of cinnamon (optional)
- Honey or maple syrup (optional, for drizzling)
To prepare the snack, begin by washing the apple thoroughly under running water. Once clean, slice the apple into thin wedges, removing the core as you go. Arrange the apple slices on a plate and dollop the almond butter in the center. If desired, sprinkle a pinch of cinnamon over the slices or drizzle honey or maple syrup on top for added sweetness.
When choosing apples, opt for varieties that are crisp and slightly tart for a delicious contrast to the nutty almond butter. Additionally, feel free to experiment with toppings; for example, you can add a sprinkle of chia seeds, granola, or dark chocolate chips for an extra crunch or flavor boost. Enjoy your healthy snack!
Proposed Recipe
Chia Seed Pudding
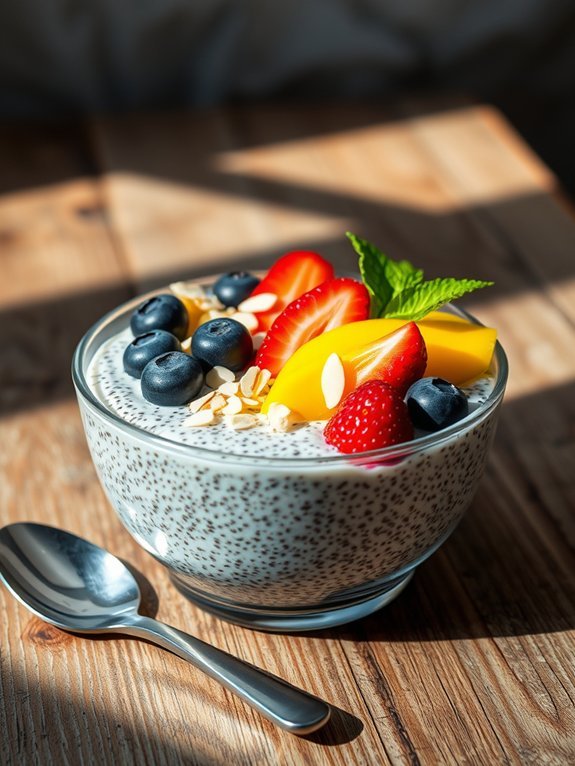
Chia seed pudding is a delectable and nutritious option for a healthy snack or breakfast. Packed with omega-3 fatty acids, fiber, and antioxidants, chia seeds swell into a gel-like consistency when combined with liquid, creating a delightful pudding that’s both creamy and satisfying. This simple recipe offers versatility, allowing you to customize flavors and toppings based on your preferences.
Making chia seed pudding is incredibly easy and requires minimal effort. You can prepare it in advance and store it in the refrigerator, making it a perfect grab-and-go option for busy days. By experimenting with various plant-based milks, sweeteners, and toppings, you can craft a variety of delectable flavor profiles that will keep your taste buds satisfied.
- 1/4 cup chia seeds
- 1 cup almond milk (or any milk of your choice)
- 1 tablespoon maple syrup (or honey)
- 1/2 teaspoon vanilla extract
- A pinch of salt
- Fresh fruit for topping (e.g., berries, banana, mango)
- Nuts or seeds for garnish (optional)
In a mixing bowl, combine chia seeds, almond milk, maple syrup, vanilla extract, and a pinch of salt. Whisk the mixture well until the chia seeds are evenly distributed, then let it sit for about 5 minutes. Afterward, whisk it again to break up any clumps, and transfer it to individual serving containers. Cover and chill in the refrigerator for at least 2 hours or overnight until it thickens to your desired consistency.
For the best flavor and texture, make sure to allow the chia pudding to sit long enough for the seeds to absorb the liquid fully. You can customize the pudding according to the season or your taste preferences by adding ingredients like cocoa powder for a chocolate version, or spices like cinnamon for additional warmth.
Feel free to get creative with toppings; a mix of crunchy nuts, seeds, or fresh fruits can elevate your pudding and provide extra nutrients.
Energy Bites With Oats and Dates
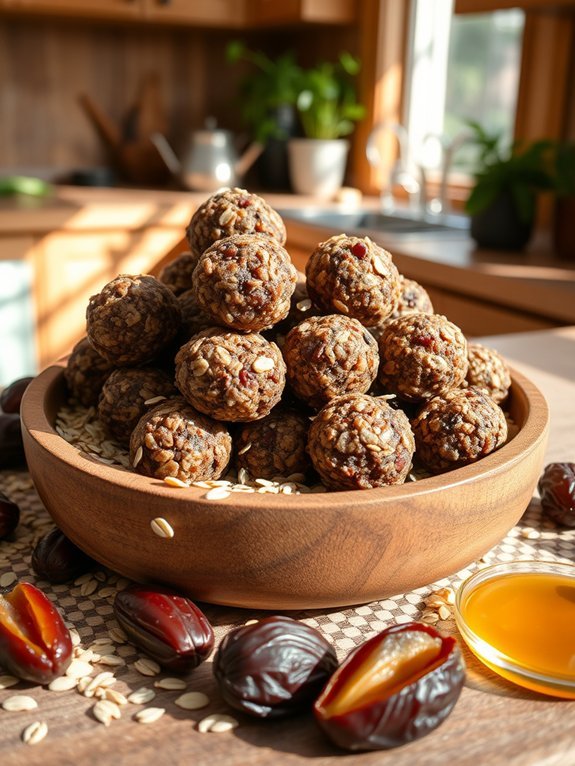
Energy Bites with Oats and Dates are the perfect solution for a quick, nutritious snack that provides a boost of energy.
These little bites aren’t only easy to make but also packed with wholesome ingredients that are sure to satisfy your hunger. With the natural sweetness of dates and the heartiness of oats, you’ll find yourself reaching for these throughout the day, whether it’s as a pre-workout snack or a healthy treat to enjoy with your afternoon coffee.
The beauty of this recipe lies in its simplicity and versatility. You can customize these energy bites by adding other ingredients, such as nuts, seeds, or your favorite nut butter. Plus, they require no baking, making them an excellent choice for quick meal prep. All you need is a food processor and a little time, and you’ll have a batch of energy bites ready to fuel your day!
- 1 cup rolled oats
- 1 cup pitted dates
- 1/2 cup nut butter (such as almond or peanut butter)
- 1/4 cup honey or maple syrup
- 1/4 cup chia seeds or flaxseeds (optional)
- 1/2 teaspoon vanilla extract
- Pinch of salt
- Optional: 1/4 cup mini chocolate chips or dried fruit
In a food processor, combine the rolled oats, pitted dates, nut butter, honey or maple syrup, chia seeds or flaxseeds (if using), vanilla extract, and a pinch of salt. Pulse until the mixture becomes sticky and holds together.
If you find the mixture too crumbly, you can add a bit more nut butter or sweetener. Once mixed, scoop out tablespoon-sized portions and roll them into balls. Place the energy bites on a lined baking sheet and refrigerate for about 30 minutes to firm up.
For ideal flavor and texture, consider rolling the energy bites in shredded coconut or chopped nuts before refrigerating.
Experiment with different combinations of nut butters or add-ins like cocoa powder or protein powder to suit your dietary preferences. These energy bites can be stored in an airtight container in the refrigerator for up to a week, making them a great make-ahead option for busy days. Enjoy your nutritious and delightful snacks!
Coconut Macaroons
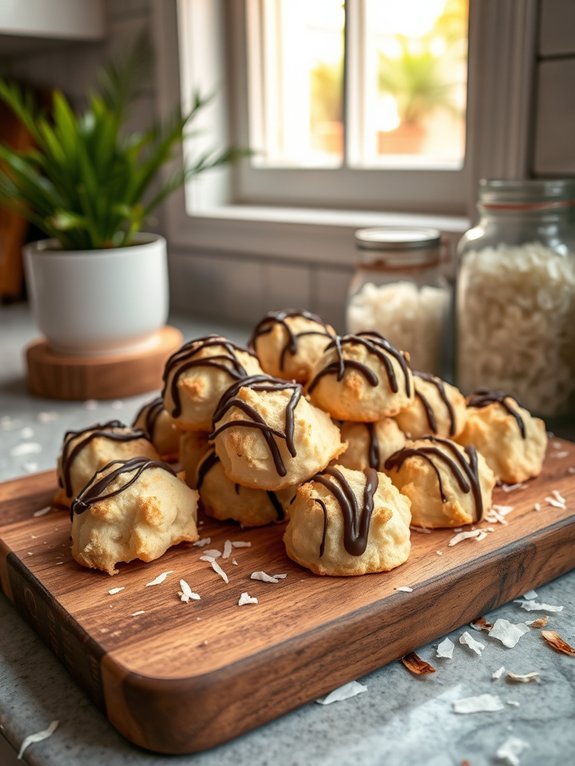
Coconut macaroons are a delightful treat that combines the sweet, tropical flavor of coconut with a chewy texture that’s sure to satisfy any sweet tooth. These bite-sized delights can be a perfect addition to any occasion, whether you’re hosting a party, looking for an afternoon snack, or simply wanting to enjoy a homemade dessert.
Plus, they’re naturally gluten-free, making them a great option for a wider range of dietary preferences.
Making coconut macaroons is surprisingly simple and requires just a few ingredients. You can customize them according to your taste, adding chocolate drizzles or keeping them plain and simple.
This recipe will help you create delicious coconut macaroons that are crunchy on the outside while remaining soft and chewy on the inside, allowing you to enjoy a delightful balance of textures in every bite.
- 3 cups sweetened shredded coconut
- 2/3 cup sweetened condensed milk
- 1 teaspoon vanilla extract
- 2 large egg whites
- 1/4 teaspoon salt
- Optional: 1 cup chocolate chips (for drizzling)
Preheat your oven to 325°F (165°C) and line a baking sheet with parchment paper. In a large mixing bowl, combine the shredded coconut, sweetened condensed milk, and vanilla extract.
In a separate bowl, beat the egg whites and salt until stiff peaks form. Gently fold the egg whites into the coconut mixture until fully combined.
Using a spoon or cookie scoop, drop tablespoons of the mixture onto the prepared baking sheet, spacing them about an inch apart. Bake for about 20-25 minutes, or until the tops are golden brown.
Allow them to cool before enjoying.
When making coconut macaroons, one important tip is to make sure not to overmix the egg whites with the coconut mixture. The airy texture from the beaten egg whites is what gives the macaroons their light and chewy consistency.
Additionally, for added flavor, consider toasting the shredded coconut before mixing it with the other ingredients, as this will enhance the overall coconut flavor in your macaroons. Enjoy your homemade treat!
Trail Mix With Dried Fruit and Nuts
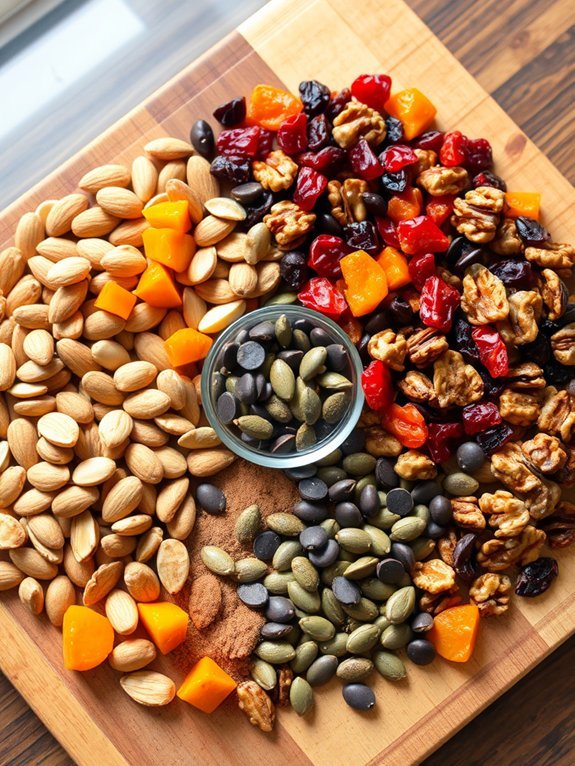
Trail mix is a versatile snack that combines a variety of textures and flavors, making it a satisfying option for any time of day. The perfect trail mix features a delightful balance of sweet and savory ingredients, while offering a boost of energy with wholesome nutrients. By adding dried fruits and nuts, you guarantee a mixture that’s both nutritious and delicious. This can be easily tailored to suit your personal taste preferences and dietary needs, making it a fitting choice for everyone from hikers to desk dwellers.
Creating your own trail mix allows you to control what goes in and avoid preservatives or added sugars found in many store-bought options. Plus, it’s super simple to prepare and can be made in large batches that last for weeks, perfect for a grab-and-go snack throughout your busy days. Whether you’re looking for a mid-afternoon pick-me-up or a post-workout recovery option, this homemade trail mix will quickly become a staple in your pantry.
- 1 cup raw almonds
- 1 cup raw walnuts
- 1 cup dried cranberries
- 1 cup dried apricots, chopped
- 1/2 cup dark chocolate chips (optional)
- 1/2 cup sunflower seeds
- 1 tsp cinnamon (optional)
- 1/2 cup pumpkin seeds
In a large mixing bowl, combine all the ingredients until well mixed. If you like, you can also sprinkle in cinnamon to add an extra layer of flavor. Once everything is combined, spread the mixture evenly on a baking sheet for easy scooping. Store the trail mix in an airtight container or resealable bags to keep it fresh.
To enhance your trail mix, consider experimenting with different combinations of nuts and dried fruits to find your favorite blend. You can also add toasted coconut flakes, chia seeds, or even protein powder for an added nutritional boost.
For an extra crunchy texture, try roasting your nuts lightly before mixing them into your trail mix. Adjust the sweetness by adding more or less dried fruit, and don’t hesitate to scale up or down the quantities based on your snack needs.
Enjoy your custom trail mix as a wholesome snack on its own or including it on yogurt or oatmeal for a sustaining breakfast!
Avocado Chocolate Mousse
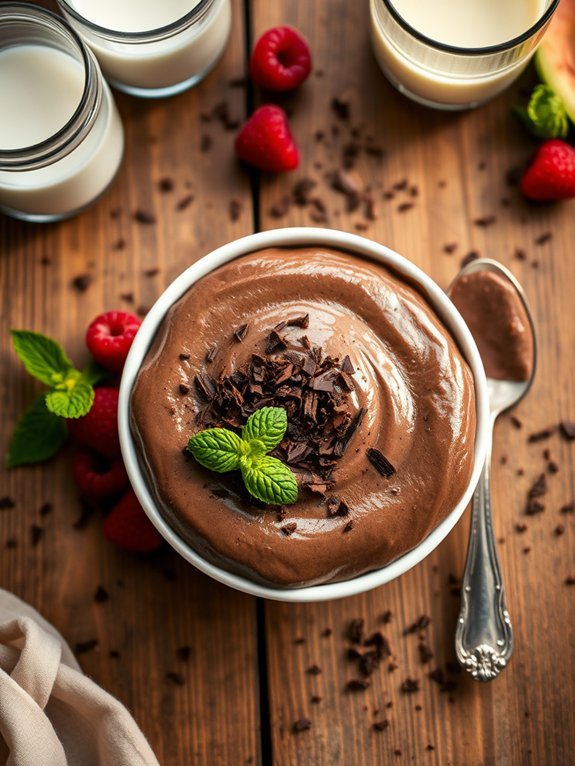
Avocado chocolate mousse is a decadent yet healthful dessert that combines the creamy richness of avocados with the indulgent flavor of chocolate. This delightful treat isn’t only dairy-free and gluten-free but also loaded with nutrients and healthy fats.
It’s a perfect choice for those who want to satisfy their sweet tooth without compromising on health. Plus, it’s incredibly simple to make, taking just a few minutes to whip up, making it ideal for last-minute cravings or serving guests at a dinner party.
The best part about this recipe is that you won’t even taste the avocado; it simply serves as a creamy base that pairs beautifully with the rich chocolate flavor. You can customize the mousse by adding your favorite toppings, such as berries, nuts, or a sprinkle of sea salt.
This avocado chocolate mousse can be enjoyed right away or chilled for a more velvety texture, giving you the option to prepare it in advance for busy days.
- 2 ripe avocados
- 1/2 cup unsweetened cocoa powder
- 1/4 cup maple syrup (or honey)
- 1/4 cup almond milk (or any milk of choice)
- 1 teaspoon vanilla extract
- A pinch of sea salt
To make the mousse, start by scooping out the flesh of the avocados and placing it in a blender or food processor. Add the cocoa powder, maple syrup, almond milk, vanilla extract, and sea salt.
Blend everything together until you achieve a smooth and creamy consistency, scraping down the sides as needed. Taste and adjust sweetness or chocolate intensity by adding more syrup or cocoa powder if desired.
Once fully blended, transfer the mousse to serving bowls or glasses and chill in the refrigerator for at least 30 minutes to allow flavors to meld and the mousse to set slightly.
When making avocado chocolate mousse, verify your avocados are perfectly ripe, as this will give the best creamy texture and flavor.
If you want to take it up a notch, consider adding a tablespoon of nut butter for added richness or a pinch of espresso powder to enhance the chocolate flavor. You can also experiment with toppings, such as shredded coconut or fresh mint, for an extra touch.
Enjoy this healthy treat guilt-free!
Baked Sweet Potato With Cinnamon
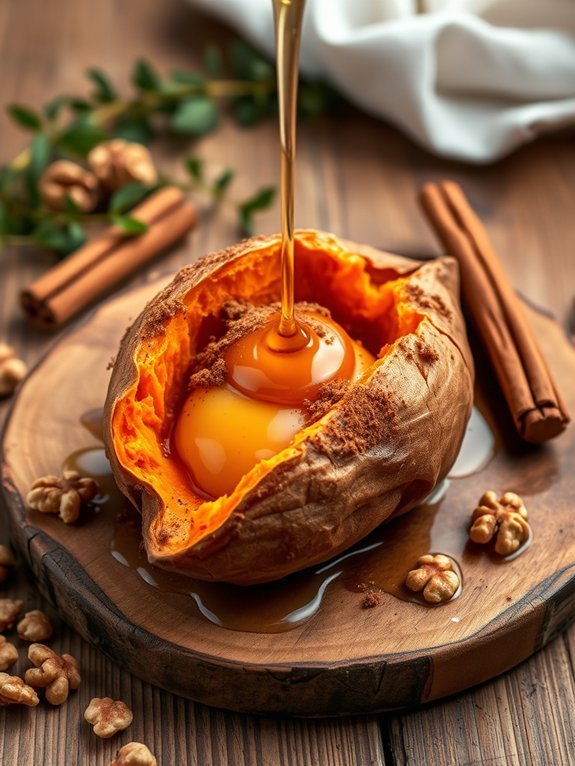
Baked sweet potatoes with cinnamon are a delightful and nutritious snack that can easily satisfy your sweet tooth while providing a host of health benefits. Sweet potatoes are packed with vitamins A and C, fiber, and potassium, making them a powerhouse of nutrients.
When baked to perfection and combined with the warm, comforting flavor of cinnamon, they transform into a warm, velvety treat that can be enjoyed at any time of the day. This simple yet delicious recipe isn’t only easy to prepare but also promotes healthy eating habits.
Enjoy them as a snack, or serve them alongside your favorite meal as a wholesome side dish. They’re versatile enough to accommodate various dietary preferences and are naturally gluten-free, making them an excellent choice for everyone. So, let’s get started on this healthy culinary journey!
- 2 medium-sized sweet potatoes
- 1 tablespoon olive oil
- 1 teaspoon ground cinnamon
- 1 tablespoon honey or maple syrup (optional)
- Pinch of salt
Preheat your oven to 400°F (200°C). Wash and scrub the sweet potatoes thoroughly under running water, then pat them dry. Poke several holes in each potato using a fork, brush them lightly with olive oil, and sprinkle a pinch of salt over them.
Place the sweet potatoes on a baking sheet and bake in the preheated oven for about 45 minutes to an hour, or until they’re tender and easily pierced with a fork.
Once done, remove them from the oven, let them cool slightly, and then slice open and drizzle with honey or maple syrup and sprinkle with cinnamon.
To guarantee that your baked sweet potatoes turn out perfectly every time, select sweet potatoes that are firm and free of blemishes. For an added depth of flavor, consider experimenting with different spices, such as nutmeg or cacao powder, alongside the cinnamon.
You can also try topping them with nuts or seeds for an extra crunch and a boost of protein. If you’re preparing them ahead of time, baked sweet potatoes can be stored in the refrigerator for up to five days—just reheat them in the oven or the microwave before enjoying!
Rice Cakes With Peanut Butter and Banana
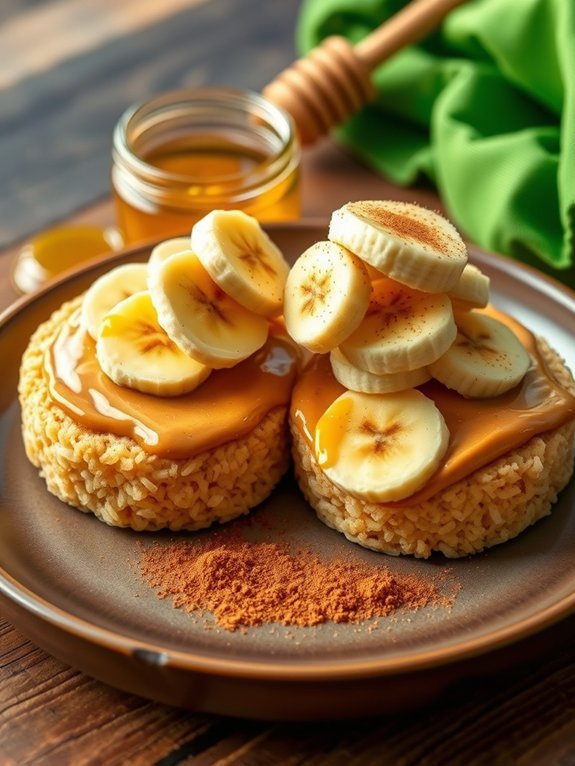
Rice cakes topped with peanut butter and banana make for an easy and nutritious snack that’s both satisfying and delicious. This combination provides a great balance of healthy fats, carbohydrates, and protein, making it ideal for a mid-afternoon pick-me-up or a post-workout boost.
Rice cakes serve as a light and crunchy base, while the creamy peanut butter adds richness, and the banana contributes natural sweetness and essential nutrients.
Making this snack is as simple as can be. All you need are fresh ingredients and about five minutes of your time. It’s perfect not only for individuals looking for a quick bite but also as a fun, healthy treat for kids.
With endless variations, you can easily customize it to suit your tastes by experimenting with different toppings or nut butters.
- Rice cakes (2)
- Peanut butter (2 tablespoons)
- Banana (1, sliced)
- Honey (optional, for drizzling)
- Cinnamon (optional, for sprinkling)
Start by taking two rice cakes and placing them on a plate. Spread about one tablespoon of peanut butter onto each rice cake, ensuring they’re evenly coated.
Next, slice your banana and arrange the slices on top of the peanut butter. If you’d like, drizzle honey over the bananas for added sweetness and sprinkle a dash of cinnamon for extra flavor.
For a twist on this classic snack, consider using different nut butters such as almond or cashew for a change in flavor.
When selecting bananas, opt for ones that are ripe but still firm to avoid mushiness. If you’re prepping for later, store the rice cakes separately from the banana to keep them crisp, and assemble just before eating to enjoy the best texture.
Homemade Fruit Sorbet

Homemade fruit sorbet is a delightful and invigorating treat that can be enjoyed all year round. This frozen dessert isn’t only easy to make but also allows you to utilize fresh, ripe fruits to create a burst of flavors. Sorbet is a great healthy alternative to ice cream, as it’s typically lower in calories and contains no dairy, making it ideal for those seeking a lighter dessert option.
Plus, the vibrant colors and natural sweetness of the fruits make every scoop a visual and tasty delight.
Making your own fruit sorbet at home is an excellent way to control the ingredients while experimenting with different flavor combinations. You can choose your favorite fruits, from classic options like strawberries and mangoes to more unique selections like kiwi or passion fruit.
Preparation is a breeze—simply blend your fruit of choice with a bit of sweetener and lemon juice, freeze it, and voilà, you have a homemade sorbet ready to tantalize your taste buds.
- 4 cups of fresh fruit (such as strawberries, peaches, or mangoes)
- 1/2 cup of granulated sugar (adjust to taste)
- 1 tablespoon of lemon juice
- 1/2 cup of water (if necessary for blending)
Begin by washing and peeling (if necessary) your chosen fruit, then chop it into smaller pieces. Combine the fruit, sugar, and lemon juice in a blender or food processor, and blend until smooth.
If the mixture is too thick, add a little water to help it blend. Once blended, pour the mixture into a shallow baking dish and place it in the freezer for about 2-3 hours, stirring every 30 minutes to guarantee a uniform texture.
Once the sorbet is fully frozen, scoop it into bowls and serve immediately. For an even smoother texture, allow the sorbet to sit at room temperature for about 5-10 minutes before serving to soften slightly.
You can also mix in your favorite herbs, such as mint or basil, for an extra flavor twist or combine different fruits for a unique taste profile.
Store any leftovers in an airtight container in the freezer, but consume within a few weeks for the best taste and texture.


