This post may contain affiliate links. Please read our policy page.
If you’re looking for healthy light lunch ideas to help with weight loss, consider these options: quinoa salad with grilled vegetables, turkey and avocado wrap, or zucchini noodles with pesto. You can also try chickpea and spinach stew, Greek yogurt parfait with berries, or egg salad lettuce wraps. Each dish offers nutritious ingredients that don’t skimp on flavor. There are more options that combine taste and health, which you might find interesting.
Quinoa Salad With Grilled Vegetables
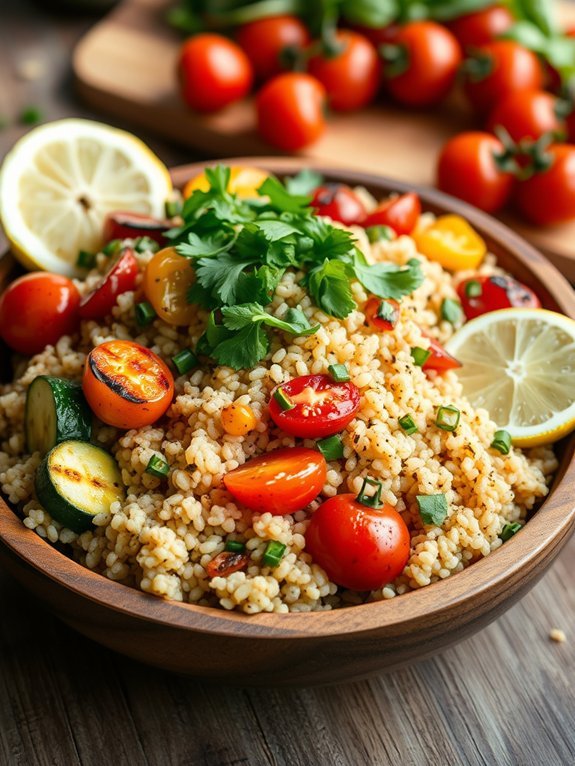
Quinoa salad with grilled vegetables is a nutritious and satisfying dish that makes for an excellent lunch option for those looking to maintain or achieve weight loss goals. Quinoa is a complete protein, containing all nine essential amino acids, and is rich in fiber, making it a fantastic base for a meal. Coupled with an array of grilled vegetables, this colorful salad not only packs a nutrient punch but also offers a variety of textures and flavors that keep lunchtime interesting.
Preparing this salad is simple and allows for customization based on the vegetables that are in season or your personal preferences. Grilled vegetables add a smoky flavor and a satisfying char, making this salad not just healthy, but also delicious. With a light dressing made from olive oil and lemon juice, the quinoa and veggies come together beautifully, providing a revitalizing and filling dish that can be enjoyed at home or on-the-go.
Ingredients:
- 1 cup quinoa
- 2 cups vegetable broth or water
- 1 zucchini, sliced
- 1 bell pepper, sliced (any color)
- 1 red onion, sliced
- 1 cup cherry tomatoes, halved
- 2 tablespoons olive oil
- Salt and pepper to taste
- Juice of 1 lemon
- Fresh parsley or basil, chopped (for garnish)
Cook the quinoa according to package instructions using vegetable broth or water, then set aside to cool. While the quinoa is cooking, preheat your grill or grill pan. Toss the sliced zucchini, bell pepper, red onion, and cherry tomatoes in olive oil and season with salt and pepper.
Grill the vegetables until tender and nicely charred, about 5-7 minutes for each side. Once the vegetables are cooked, combine the quinoa with the grilled veggies in a large bowl, add lemon juice, and mix well. Serve warm or refrigerate for a cold salad option.
When preparing quinoa salad with grilled vegetables, consider using a variety of vegetables to enhance flavor and nutrition. Seasonal vegetables not only taste better but are usually fresher and more affordable.
You can also add protein, such as grilled chicken or chickpeas, if you’re looking for additional satiety. This salad can be made ahead of time and stored in the refrigerator, making it a convenient meal prep option for the week. Enjoy it as a stand-alone dish or as a side to complement your meals.
Turkey and Avocado Wrap
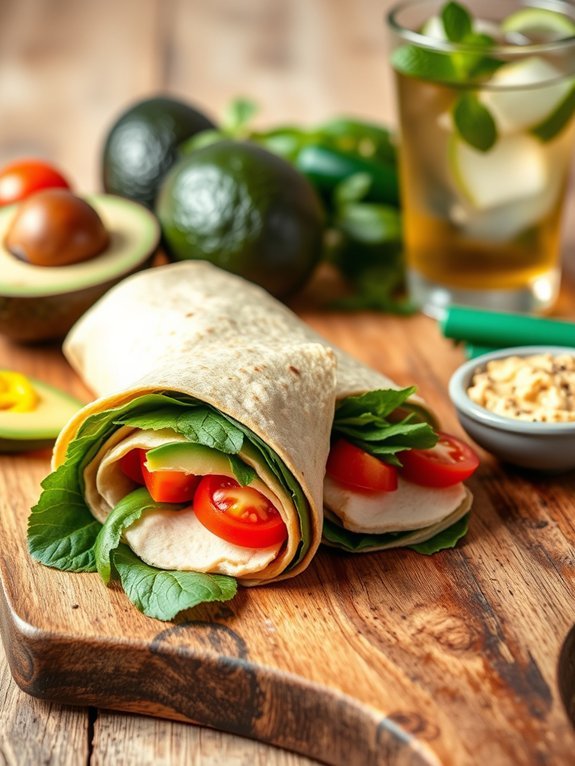
When it comes to weight loss, finding healthy lunch options that are both satisfying and nutritious can be a challenge. The Turkey and Avocado Wrap is a fantastic choice that combines lean protein, healthy fats, and lots of flavor. This wrap isn’t only easy to prepare but also perfect for on-the-go meals or a quick lunch at home. Packed with essential nutrients, it’s a delicious way to stay on track with your wellness goals.
In this recipe, you can customize your wrap by adding your favorite veggies or using different types of wraps. Whole grain or low-carb tortillas work well, ensuring that your meal is both fulfilling and aligned with your dietary preferences. The creamy avocado, combined with the turkey’s savory taste, creates a delightful contrast in texture, making for a lunch that you’ll look forward to indulging in every week.
Ingredients:
- Sliced turkey breast (lean)
- Whole grain or low-carb tortilla
- Ripe avocado
- Fresh spinach or mixed greens
- Sliced tomatoes
- Sliced cucumbers
- Mustard or hummus (optional)
- Salt and pepper to taste
To prepare your Turkey and Avocado Wrap, start by laying your tortilla flat on a plate. Spread a thin layer of mustard or hummus (if using) on the tortilla. Next, layer the sliced turkey, spinach or mixed greens, sliced tomatoes, and cucumbers evenly across the tortilla.
Finally, scoop out the avocado, mash it slightly with a fork, and spread it over the turkey and veggies. Season with salt and pepper before rolling the tortilla tightly from one end to the other, ensuring all the fillings are secure inside.
For the best flavor and texture, it’s ideal to use a ripe avocado that’s slightly soft but not overripe. Additionally, to prevent the wrap from getting soggy, you can prepare the ingredients in advance and assemble the wrap just before you’re ready to eat.
Feel free to experiment by adding your favorite herbs or spices to elevate the taste—fresh cilantro or a sprinkle of chili flakes can enhance the overall experience!
Zucchini Noodles With Pesto

Zucchini noodles, often referred to as “zoodles,” are a delightful and low-carb alternative to traditional pasta, making them an excellent choice for anyone seeking to maintain or lose weight while enjoying their meals.
This fresh, green veggie isn’t only packed with nutrients but also provides a satisfying crunch that can elevate any dish. Pairing zoodles with a vibrant and aromatic pesto sauce brings together a symphony of flavors that’s both pleasing to the palate and visually appealing.
Making zucchini noodles is simple, and with homemade pesto, you’ll guarantee that your dish is as healthy as it’s delicious. Whether you’re meal prepping for the week, looking for a quick lunch, or simply experimenting in the kitchen, this zucchini noodles with pesto recipe is versatile enough to fit your needs. Plus, it’s quick to whip up, making it perfect for busy weekdays without sacrificing health.
- 2 medium zucchinis
- 1 cup fresh basil leaves
- ¼ cup pine nuts (or walnuts)
- 2 cloves garlic, minced
- ½ cup grated Parmesan cheese
- ½ cup olive oil
- Salt and pepper to taste
- Optional: cherry tomatoes, halved for garnish
Using a spiralizer or a vegetable peeler, create the zucchini noodles by cutting the zucchinis into long strands.
For the pesto, combine the basil, pine nuts, minced garlic, and Parmesan cheese in a food processor. While blending, slowly add the olive oil until the mixture reaches a desired consistency. Season the pesto with salt and pepper to taste.
In a skillet over medium heat, lightly sauté the zucchini noodles for 2-3 minutes, then remove from heat and toss with the pesto sauce until evenly coated.
When preparing zucchini noodles, it’s essential not to overcook them, as they can become mushy and lose their appealing texture. If you want to dehydrate them slightly before cooking, you can sprinkle the zoodles with salt and let them sit for 10-15 minutes to draw out excess moisture.
Additionally, consider adding in your favorite protein, such as grilled chicken or shrimp, for a more filling meal, or incorporate some sautéed vegetables for extra nutrients and flavor. Enjoy your healthy and flavorful dish!
Recommended Items
Get ready to elevate your lunch game with these fantastic product and equipment recommendations!
Products
Chickpea and Spinach Stew
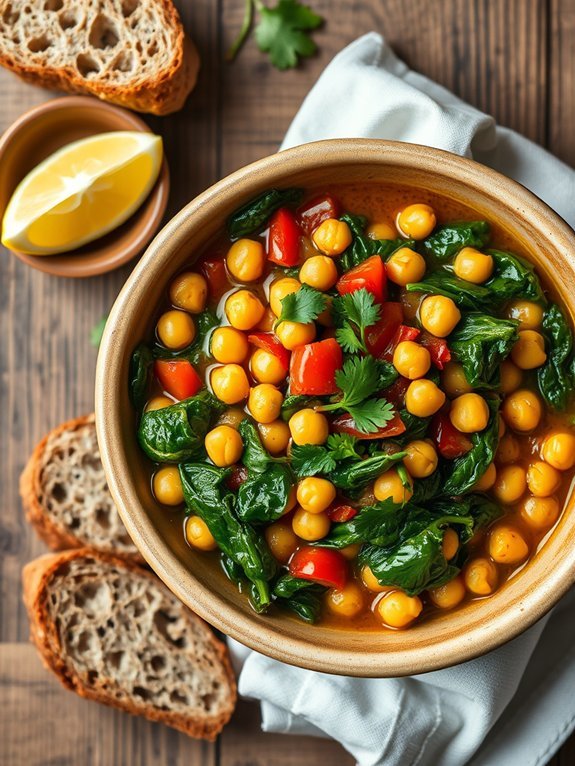
Chickpea and spinach stew is a hearty and nutritious dish that combines the earthy flavors of chickpeas with the vibrant freshness of spinach. This stew is perfect for lunch or dinner, offering a satisfying and filling meal that’s low in calories yet high in essential nutrients.
Rich in protein and fiber, chickpeas are an excellent ingredient for those looking to lose weight without sacrificing flavor or satisfaction. The addition of spinach not only enhances the nutritional profile but also adds a beautiful pop of green color.
Cooking this stew is simple, making it an ideal choice for busy individuals or anyone who may be new to cooking. The combination of spices and herbs gives the dish depth and warmth, while the chickpeas provide a creamy texture that tantalizes the taste buds.
Whether enjoyed solo or paired with whole grain bread, this dish is versatile enough to be adjusted to your preferences. Prepare to warm up your kitchen with this deliciously healthy option!
- 1 can (15 oz) chickpeas, drained and rinsed
- 4 cups fresh spinach, chopped
- 1 medium onion, diced
- 2 cloves garlic, minced
- 1 can (14 oz) diced tomatoes
- 1 teaspoon cumin
- 1 teaspoon smoked paprika
- 1 tablespoon olive oil
- Salt and pepper to taste
- Fresh lemon juice for serving (optional)
In a large pot, heat the olive oil over medium heat. Add the diced onion and minced garlic, and sauté until the onion is translucent and fragrant, around 5 minutes. Stir in the cumin and paprika, allowing the spices to toast for a minute.
Then, add the diced tomatoes and chickpeas, engaging them in the sauté. Let it cook for about 5 minutes, stirring occasionally. Finally, stir in the chopped spinach and cook until it’s wilted, seasoning with salt and pepper to taste. Serve with a drizzle of fresh lemon juice if desired.
For added flavor, consider including some fresh herbs like parsley or cilantro as a garnish before serving. You can also adjust the level of spice by adding a pinch of red pepper flakes if you prefer some heat.
This stew can be made in advance and stored in the refrigerator for leftovers; the flavors will deepen as it sits. Additionally, feel free to bulk up the stew by throwing in other veggies like carrots or zucchini to increase the fiber content even more.
Greek Yogurt Parfait With Berries
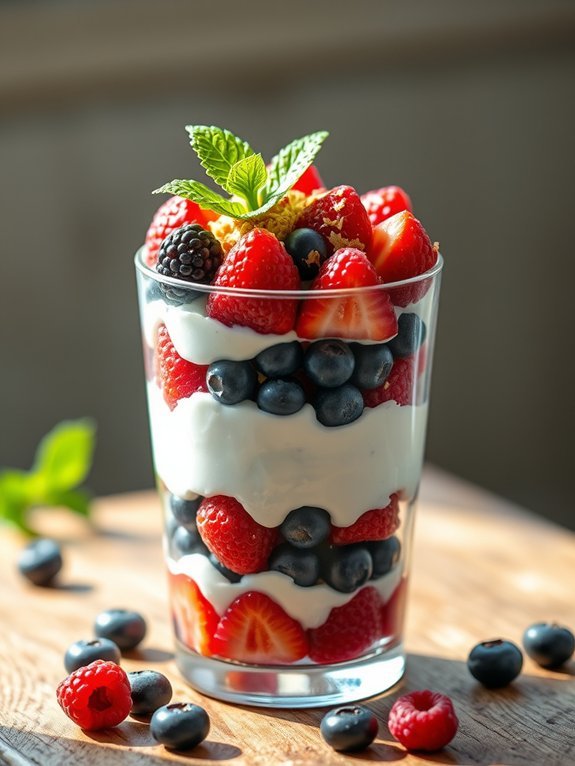
A Greek yogurt parfait with berries is a delightful and nutritious option for lunch that can aid in your weight loss journey. Rich in protein and packed with antioxidants, this dish isn’t only filling but also provides essential nutrients that your body craves. The vibrant colors of the various berries make this parfait visually appealing, while the creamy texture of Greek yogurt complements the natural sweetness of the fruits, creating a perfect balance in flavor.
Preparing a Greek yogurt parfait is incredibly simple and can be customized based on your preferences. It’s an excellent choice for those busy days when you need a quick yet healthy meal. You can easily make this dish ahead of time, and it also travels well, making it a great option for lunch at work or school. With just a few ingredients, you can create a delicious and satisfying meal that keeps you energized throughout the day.
- 1 cup Greek yogurt (plain or flavored)
- 1 cup mixed berries (strawberries, blueberries, raspberries, blackberries)
- 1/4 cup granola (optional)
- 1 tablespoon honey or maple syrup (optional)
- Fresh mint leaves for garnish (optional)
In a serving glass or bowl, layer half of the Greek yogurt at the bottom. Next, add a layer of mixed berries, followed by a sprinkle of granola if using. Repeat the layers with the remaining yogurt, more berries, and additional granola if desired. Drizzle honey or maple syrup on top for added sweetness, and garnish with fresh mint leaves.
When preparing your Greek yogurt parfait, feel free to experiment with different types of fruits or toppings. If you prefer a lower-calorie option, opt for plain Greek yogurt without added sugars and use fresh fruits for natural sweetness.
You can also batch-make these parfaits in jars for a grab-and-go meal throughout the week, ensuring you always have a healthy lunch ready without the hassle of daily preparation.
Cauliflower Rice Stir-Fry
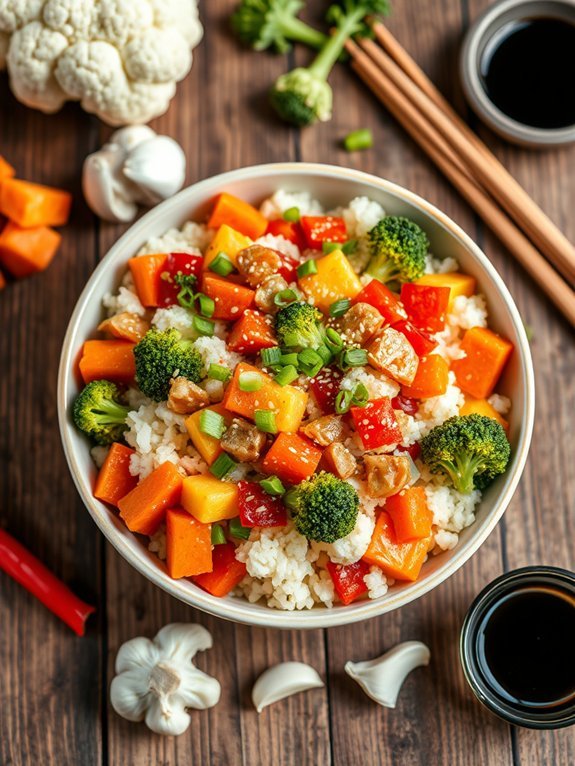
Cauliflower rice stir-fry is a nutritious and satisfying meal that’s perfect for those looking to maintain or lose weight. This dish isn’t only low in calories but also abundant in vitamins and minerals. Replacing traditional rice with cauliflower rice means you cut down on carbohydrates while still enjoying a hearty bowl of stir-fry, packed with vibrant vegetables and protein of your choice.
The great thing about cauliflower rice is its versatility; it absorbs flavors beautifully while adding just the right amount of texture to keep every bite interesting.
Making cauliflower rice is simple: just pulse fresh or frozen cauliflower florets in a food processor until they resemble rice grains. This stir-fry can easily be customized by incorporating your favorite vegetables, sauces, and proteins, whether it be chicken, shrimp, or tofu.
In addition to the delicious flavors, this dish is ready in under 30 minutes, making it an ideal choice for a quick and healthy lunch option.
Ingredients:
- 1 medium head of cauliflower or 4 cups pre-riced cauliflower
- 1 tablespoon vegetable oil or coconut oil
- 2 cloves garlic, minced
- 1 small onion, diced
- 1 bell pepper, diced
- 1 cup broccoli florets
- 1 carrot, diced
- 2 eggs (optional for protein)
- 3 tablespoons soy sauce or tamari
- Salt and pepper, to taste
- Green onions, chopped (for garnish)
- Sesame seeds (for garnish)
Heat the vegetable oil in a large skillet or wok over medium-high heat. Add the minced garlic and diced onion, sautéing until they become aromatic and slightly translucent.
Introduce the diced bell pepper, broccoli florets, and carrots, stirring frequently until the vegetables are tender-crisp. Push the vegetables to one side, crack in the eggs if using, and scramble until fully cooked.
Then, add the cauliflower rice and pour in the soy sauce. Stir everything together, cooking for another 5-7 minutes, until the cauliflower is tender and the flavors meld together beautifully.
Season with salt and pepper, and garnish with chopped green onions and sesame seeds before serving.
When making cauliflower rice stir-fry, feel free to experiment with various vegetables based on your preference or what you have on hand. You can also add additional spices like ginger for an extra kick or swap the soy sauce for a low-sodium alternative to cut down on sodium.
Make sure not to overcrowd the pan to allow the ingredients to cook evenly, ensuring a deliciously textured and flavorful dish. Enjoy your delicious and healthy meal!
Proposed Recipe for Light Lunches
Lentil Soup With Fresh Herbs
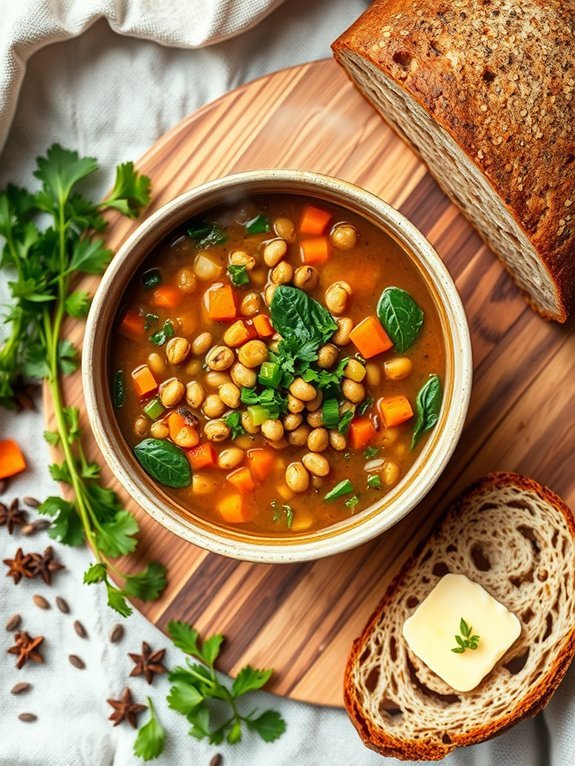
Lentil soup is a hearty and nutritious meal that isn’t only satisfying but also packed with fiber and protein, making it an ideal choice for weight loss. This dish is cherished for its simplicity and the way it allows fresh herbs to shine in a warm, comforting broth. With the addition of vibrant vegetables and seasonings, each bowl is alive with flavor, and you can easily customize it to suit your taste preferences.
Cooking lentil soup isn’t just about nourishment; it’s also a wonderful opportunity to connect with the ingredients and the process. The vibrant colors of the vegetables and the fragrant herbs make for a visually appealing dish that warms the soul. Perfect for a cozy lunch or dinner, this soup can also be made in bigger batches for meal prep, allowing you to enjoy servings throughout the week.
Ingredients:
- 1 cup green or brown lentils, rinsed
- 1 onion, diced
- 2 carrots, diced
- 2 celery stalks, diced
- 3 cloves garlic, minced
- 1 can (14 oz) diced tomatoes
- 6 cups vegetable broth or water
- 1 teaspoon cumin
- 1 teaspoon smoked paprika
- Salt and pepper to taste
- 1 cup fresh spinach or kale, chopped
- 1/4 cup fresh parsley, chopped
- Juice of 1 lemon
In a large pot, heat a splash of olive oil over medium heat. Add the diced onion, carrots, and celery, and sauté for about 5-7 minutes until they start to soften. Stir in the garlic, cumin, and smoked paprika, cooking for another minute until fragrant.
Then add the rinsed lentils, diced tomatoes (with their juices), vegetable broth, salt, and pepper. Bring to a boil, reduce to a simmer, and let it cook uncovered for about 25-30 minutes until the lentils are tender. Just before serving, stir in the fresh spinach or kale, parsley, and lemon juice.
For an even richer flavor, consider letting your soup sit for a while after cooking; the flavors will meld beautifully. You can also experiment with different herbs such as thyme or cilantro for distinct taste variations.
Additionally, if you want a creamier texture, blend a portion of the soup before adding the greens; this will give you a lovely consistency while still keeping some whole lentils for texture. Enjoy it on its own or serve it with a slice of whole-grain bread for a complete meal!
Baked Sweet Potato With Black Beans
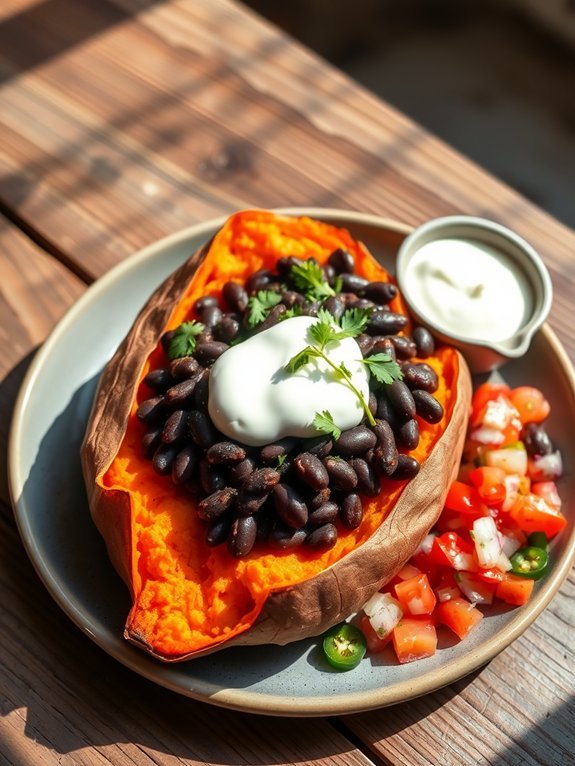
Baked sweet potatoes with black beans make a nutritious and delicious lunch option perfect for weight loss. Sweet potatoes are rich in essential vitamins and minerals, including vitamin A and potassium, while black beans are an excellent source of protein and fiber, helping to keep you feeling full longer. This dish isn’t only satisfying but also easy to prepare, making it a great choice for busy weekdays.
To prepare this dish, you only need a few simple ingredients that combine to create a meal bursting with flavor. The sweetness of the baked sweet potatoes pairs beautifully with the earthy taste of black beans. You can customize this dish with your favorite toppings, such as avocado, salsa, or Greek yogurt, to enhance the flavors while keeping it healthy.
- 2 medium sweet potatoes
- 1 can of black beans (15 oz), rinsed and drained
- 1 teaspoon olive oil
- 1 teaspoon cumin
- Salt and pepper to taste
- Optional toppings: diced avocado, salsa, Greek yogurt, fresh cilantro
Preheat your oven to 400°F (200°C). Wash the sweet potatoes thoroughly, poke a few holes in them with a fork, and place them directly on the oven rack or on a baking sheet. Bake for about 45 to 60 minutes, or until tender.
While the sweet potatoes are baking, heat olive oil in a skillet over medium heat. Add the black beans, cumin, salt, and pepper; sauté for about 5 minutes until warmed through. Once the sweet potatoes are done, slice them open and fluff the insides with a fork before adding the seasoned black beans on top.
For an extra touch of flavor and nutrition, experiment with different toppings and spices. Adding fresh herbs like cilantro can brighten up the dish, while a squeeze of lime juice can enhance the sweetness of the potatoes and complement the black beans.
Remember to adjust cooking times for larger sweet potatoes, and feel free to make this dish ahead of time for a quick and healthy meal option throughout the week.
Spinach and Feta Stuffed Peppers
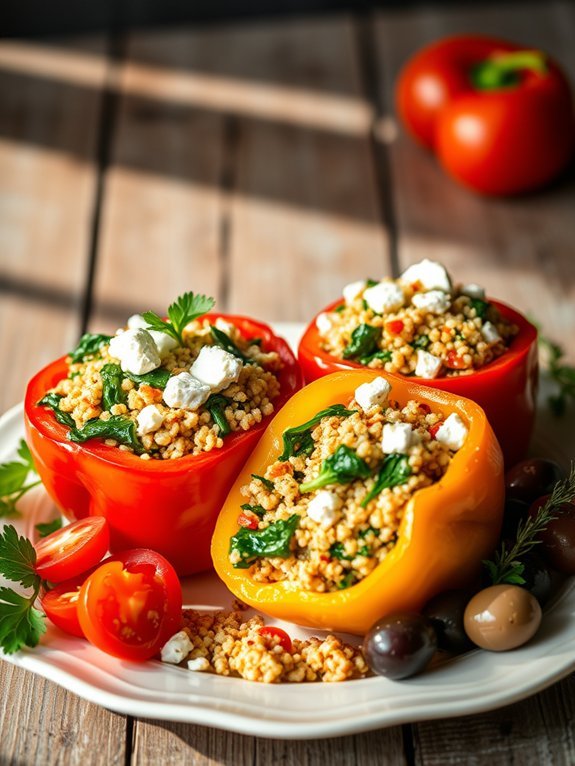
If you’re looking for a healthy and delicious lunch option that supports your weight loss goals, Spinach and Feta Stuffed Peppers are an excellent choice. These colorful bell peppers aren’t only visually appealing but also packed with nutrients. The combination of savory feta cheese and nutritious spinach creates a satisfying and flavorful filling that’s both light and fulfilling.
Furthermore, the vibrant peppers provide an array of vitamins and minerals, making this dish a wholesome addition to your balanced diet.
Preparing Spinach and Feta Stuffed Peppers is simple and quick, allowing you to enjoy a nutritious lunch without spending hours in the kitchen. This recipe is versatile, as you can easily swap out ingredients based on your preferences or whatever you have on hand. Make these stuffed peppers on a Sunday for meal prep, or whip them up for a quick weekday lunch that will fuel your day without derailing your healthy eating habits.
- 4 large bell peppers (any color)
- 2 cups fresh spinach, chopped
- 1 cup feta cheese, crumbled
- 1 cup cooked quinoa or brown rice
- 1 clove garlic, minced
- 1 teaspoon olive oil
- 1 teaspoon dried oregano
- Salt and pepper to taste
- Optional: chopped tomatoes or olives for added flavor
Preheat the oven to 375°F (190°C). Slice the tops off the bell peppers and remove the seeds and membranes. In a skillet, heat the olive oil over medium heat and sauté the garlic until fragrant. Add the chopped spinach and cook until wilted.
In a mixing bowl, combine the sautéed spinach, feta cheese, cooked quinoa or rice, dried oregano, salt, and pepper. Stuff each bell pepper with the filling, place them upright in a baking dish, and cover with foil. Bake for 30 minutes, then remove the foil and bake for an additional 10-15 minutes until the peppers are tender.
When making Spinach and Feta Stuffed Peppers, feel free to get creative with your ingredients. Consider adding other vegetables, such as zucchini or mushrooms, or incorporating spices like red pepper flakes for extra heat.
You can also use different types of cheese if feta isn’t available. For an even heartier meal, consider adding lean ground turkey or chickpeas for protein. Finally, these stuffed peppers can be easily refrigerated and reheated, making them an ideal meal prep option for busy weeks ahead.
Shrimp and Mango Salad
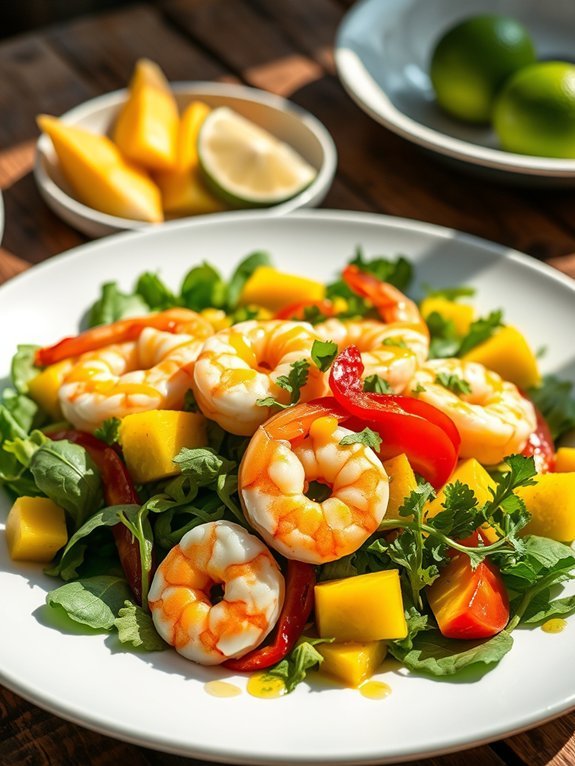
Shrimp and mango salad is a vibrant and nutritious dish that’s perfect for a healthy lunch. The combination of succulent shrimp with the sweet, juicy mango creates a delightful contrast that’s both satisfying and revitalizing. This salad isn’t only low in calories but also packed with protein and vital nutrients, making it an excellent choice for those looking to lose weight while enjoying delicious food.
Additionally, this recipe is quick to prepare, taking just about 30 minutes from start to finish. It’s ideal for meal prep or a quick midweek dinner, and you can make it even more exciting by adding a zesty lime dressing. Pairing the sweet mango with the savory shrimp alongside fresh greens makes for a colorful and appetizing dish that will leave you feeling full without weighing you down.
Ingredients:
- 1 pound of shrimp, peeled and deveined
- 1 ripe mango, diced
- 4 cups mixed salad greens (such as spinach, arugula, and lettuce)
- 1 red bell pepper, thinly sliced
- 1 avocado, diced
- 1/4 cup red onion, thinly sliced
- 2 tablespoons olive oil
- 1 tablespoon lime juice
- Salt and pepper to taste
- Fresh cilantro for garnish (optional)
In a large skillet, heat the olive oil over medium-high heat. Add the shrimp and cook for about 2-3 minutes on each side or until they’re pink and opaque. Season with salt and pepper while cooking. Once cooked, remove the shrimp from the heat.
In a large bowl, combine the salad greens, diced mango, red bell pepper, avocado, and red onion. Add the cooked shrimp and drizzle with lime juice before tossing gently to coat.
When preparing shrimp and mango salad, it’s important to choose the best quality shrimp—fresh, wild-caught shrimp will provide the best flavor and texture. If using frozen shrimp, remember to thaw them completely before cooking to guarantee even cooking.
For additional flavor, consider marinating the shrimp in a mixture of lime juice, garlic, or your favorite spices before cooking. This dish can be served immediately or stored in the fridge for a few hours, making it an excellent option for meal prep or picnic lunches.
Cucumber and Hummus Sandwich
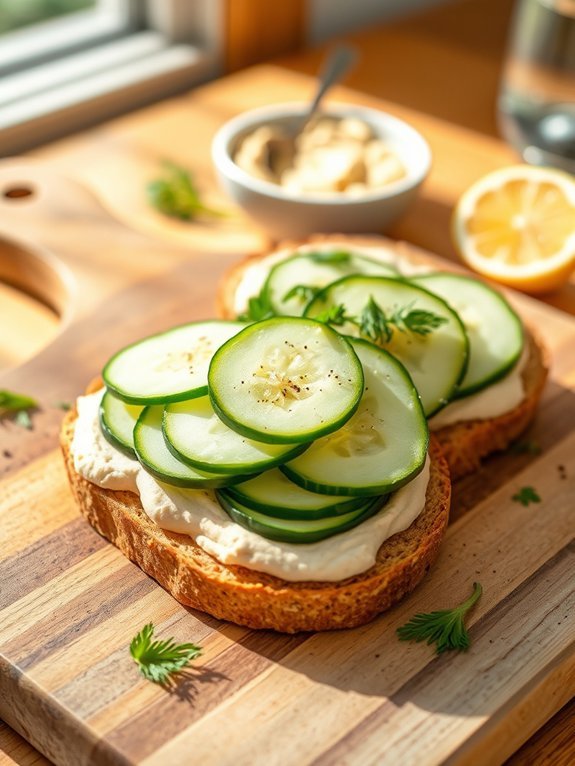
Cucumber and hummus sandwiches are a rejuvenating and nutritious option for a light lunch, especially for those looking to maintain or lose weight. The combination of crunchy cucumber with creamy hummus not only makes for a satisfying bite but also packs in essential nutrients.
This sandwich is perfect for warm days when you want a cool meal that won’t weigh you down, and it’s incredibly easy to prepare, making it a great option for busy days.
To elevate this simple sandwich, you can experiment with different types of bread, such as whole grain, rye, or even a gluten-free option if needed. Adding ingredients like fresh herbs or a sprinkle of lemon juice can also enhance the flavor profile while keeping it healthy.
The best part about this recipe is its adaptability; feel free to modify it to suit your taste preferences or dietary needs.
Ingredients:
- 2 slices of whole grain bread
- 1/2 cup hummus
- 1 medium cucumber, thinly sliced
- Salt and pepper to taste
- Optional: fresh herbs (like dill or parsley) for garnish
- Optional: a splash of lemon juice
Spread a generous layer of hummus on one side of each slice of bread. Evenly distribute the thin cucumber slices over the hummus on one slice, then sprinkle with a little salt and pepper.
If using, add fresh herbs and a splash of lemon juice for an extra zing. Place the other slice of bread on top, hummus-side down, and gently press together. Slice the sandwich in half and serve immediately.
For an added touch, consider toasting the bread lightly before assembling your sandwich; this can provide a satisfying crunch.
If you’re preparing these sandwiches in advance, store the cucumber slices separately to prevent the bread from becoming soggy. You can also add other vegetables, such as shredded carrots or bell peppers, for additional flavor and nutrition.
Egg Salad Lettuce Wraps
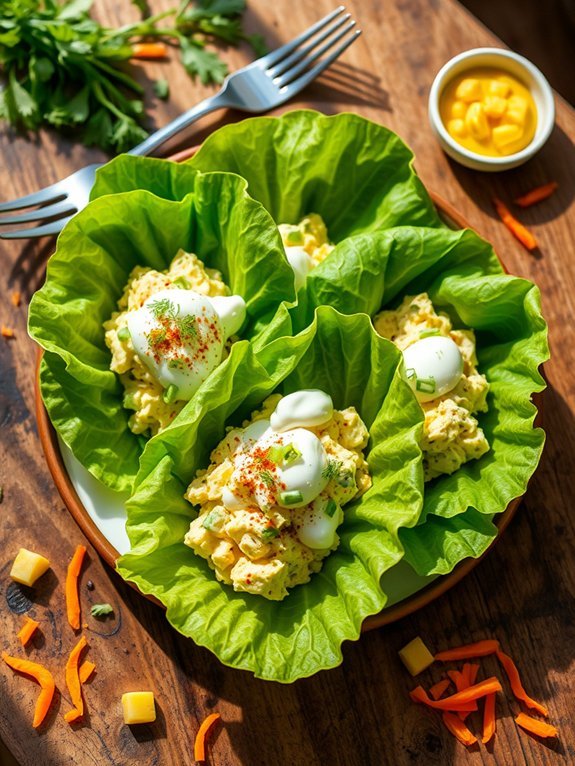
Egg salad lettuce wraps are a delicious and nutritious alternative to traditional sandwiches, making them an excellent choice for a healthy lunch. Packed with protein from eggs and fresh vegetables, these wraps are light yet satisfying. Using crisp lettuce leaves as a wrap adds a revitalizing crunch while keeping the dish low in carbs, ideal for those looking to lose weight.
Plus, the simplicity of preparing this meal means you can have it ready in no time.
To enhance the flavor and nutrition of your egg salad, consider incorporating a variety of herbs and spices. Fresh dill, chives, or a pinch of paprika can elevate the taste, while a dollop of Greek yogurt instead of mayonnaise can provide creaminess without all the calories. Whether you prefer your egg salad classic or with a twist, these lettuce wraps offer versatility to suit your palate.
- 4 hard-boiled eggs
- 2 tablespoons Greek yogurt
- 1 tablespoon Dijon mustard
- 1/4 cup celery, finely chopped
- 2 tablespoons green onion, chopped
- Salt and pepper, to taste
- 8 large lettuce leaves (such as romaine or butter lettuce)
- Optional: fresh dill or chives for garnish
Start by peeling and chopping the hard-boiled eggs into small pieces. In a mixing bowl, combine the chopped eggs with Greek yogurt, Dijon mustard, celery, green onion, and season with salt and pepper. Mix everything gently until it’s well combined.
To serve, spoon a generous amount of the egg salad onto each lettuce leaf, then fold or wrap it up as desired. Enjoy immediately or refrigerate for a short time before serving.
When making egg salad lettuce wraps, it’s important to use fresh lettuce leaves to maintain their crunch and prevent wilting. You can prepare the egg salad ahead of time for convenience, but assemble the wraps just before eating to guarantee the lettuce stays crisp.
Feel free to get creative by adding shredded carrots or diced pickles for additional flavor and texture.
Grilled Chicken Salad With Citrus Dressing
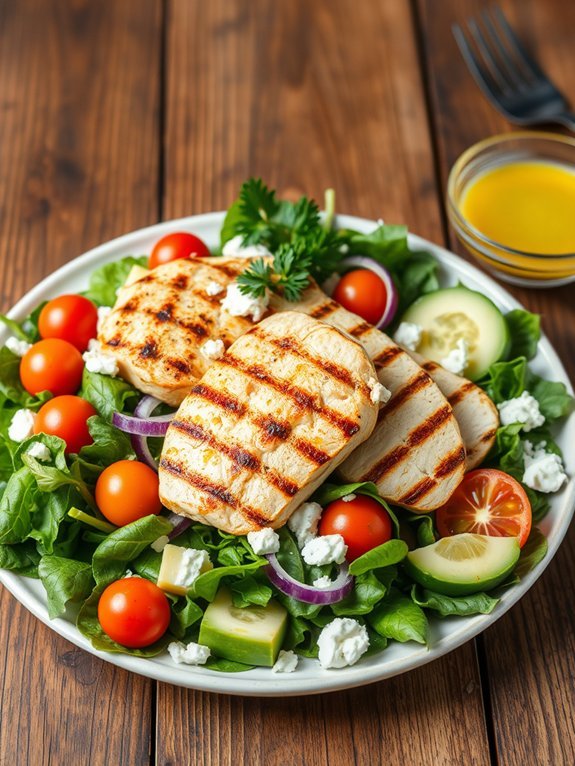
Grilled chicken salad with citrus dressing isn’t only an invigorating dish but also a nutritious option for anyone looking to maintain or lose weight.
The combination of lean protein from the grilled chicken and the vibrant flavors from fresh vegetables and a tangy citrus dressing makes this salad satisfying and delicious. It’s perfect for lunch or dinner and can be customized with your favorite ingredients.
To make this salad even more appealing, you can experiment with various seasonal vegetables and add-ins such as nuts, seeds, or even avocados for healthy fats. The citrus dressing brightens the entire dish, tying the flavors together while adding a burst of vitality.
Whether you’re meal prepping for the week or are looking for a quick option to whip up, this salad is sure to please your taste buds and keep you on track with your weight loss goals.
Ingredients:
- 2 boneless, skinless chicken breasts
- 4 cups mixed salad greens (spinach, arugula, romaine)
- 1 cup cherry tomatoes, halved
- 1 cucumber, sliced
- 1/4 red onion, thinly sliced
- 1 avocado, diced
- 1/4 cup feta cheese, crumbled (optional)
- 1/4 cup olive oil
- Juice of 1 orange
- Juice of 1 lemon
- Salt and pepper, to taste
- 1 teaspoon honey (optional)
- Fresh herbs (like parsley or cilantro) for garnish
To prepare, start by marinating the chicken breasts in olive oil, orange juice, lemon juice, salt, pepper, and honey for at least 30 minutes.
Preheat the grill to medium-high heat and cook the chicken for 6-7 minutes on each side, or until fully cooked.
Once done, let the chicken rest for a few minutes before slicing it into strips.
In a large bowl, combine the mixed greens, cherry tomatoes, cucumber, red onion, and avocado.
Top the salad with the grilled chicken and sprinkle with feta cheese. Dress with the remaining olive oil and citrus juice mixture before serving.
For best results, allow the chicken to marinate longer if possible, as this enhances the flavor.
You can also grill extra chicken to use in other meals throughout the week.
Serve the salad immediately for the best texture, but if you need to prepare it ahead of time, keep the dressing separate until you’re ready to eat to avoid soggy greens.
Enjoy your healthy, delicious meal!
Veggie Sushi Rolls
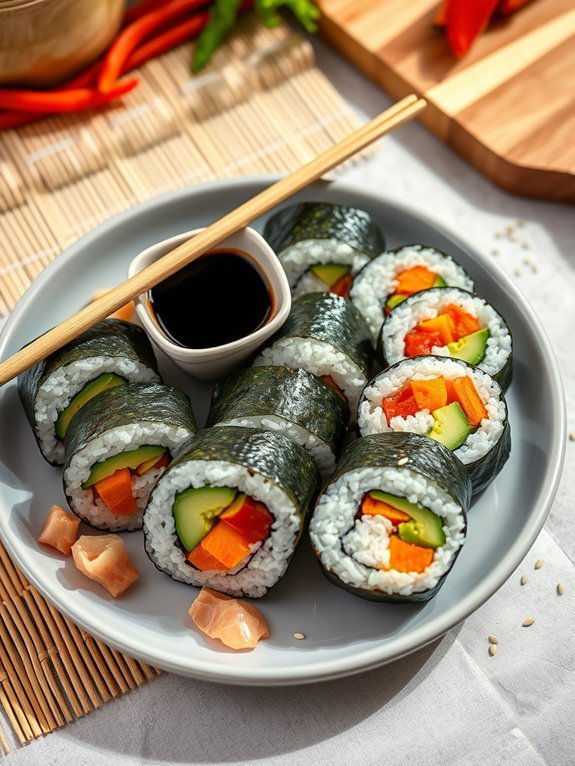
Veggie sushi rolls are a fun and healthy option for lunch that can help you stay on track with your weight loss goals. Not only are they low in calories, but they’re also packed with nutrients, thanks to the fresh vegetables and seaweed. Making sushi at home is easier than you might think and can be a great way to utilize the vegetables you have on hand. Plus, they’re a delish dish that you can customize according to your personal preferences!
To create veggie sushi rolls, you’ll need a few specific ingredients and a bamboo mat to help you roll them tightly. Sushi rice, which needs to be sticky for easy rolling, is essential for giving your rolls that authentic sushi texture. Fresh ingredients like cucumbers, avocados, and bell peppers not only provide flavor but also deliver essential vitamins and minerals.
Whether you’re looking for a quick lunch or a light dinner, these sushi rolls are versatile, satisfying, and incredibly delicious.
- 1 cup sushi rice
- 1 ¼ cups water
- 4 sheets nori (seaweed)
- 1 avocado, sliced
- 1 cucumber, julienned
- 1 carrot, shredded
- 1 bell pepper, sliced thinly
- Soy sauce or tamari for dipping
- Optional: pickled ginger and wasabi
Rinse the sushi rice under cold water until the water runs clear, then combine it with water in a pot, bringing it to a boil. Reduce heat to low, cover, and simmer for 20 minutes. Once cooked, let it stand for 10 minutes before fluffing with a fork.
Lay a sheet of nori onto a bamboo mat, spread a thin layer of sushi rice over the nori (about ½ inch), leaving some space at the top. Arrange your sliced vegetables in a line across the rice, and carefully roll the mat away from you, pressing slightly to keep the roll tight. Seal the edge of the nori with a little water and repeat for the remaining sheets.
When making veggie sushi rolls, feel free to experiment with different fillings and flavors! You can add sprouts, cilantro, or even tofu for extra protein. If you’re using ingredients that are prone to browning, like avocado, consider adding a splash of lemon juice to keep them fresh.
Finally, serve your sushi rolls with various dipping sauces and garnishes to enhance the flavor and presentation. Enjoy the colorful, healthy meal!
Roasted Chickpeas and Veggie Bowl
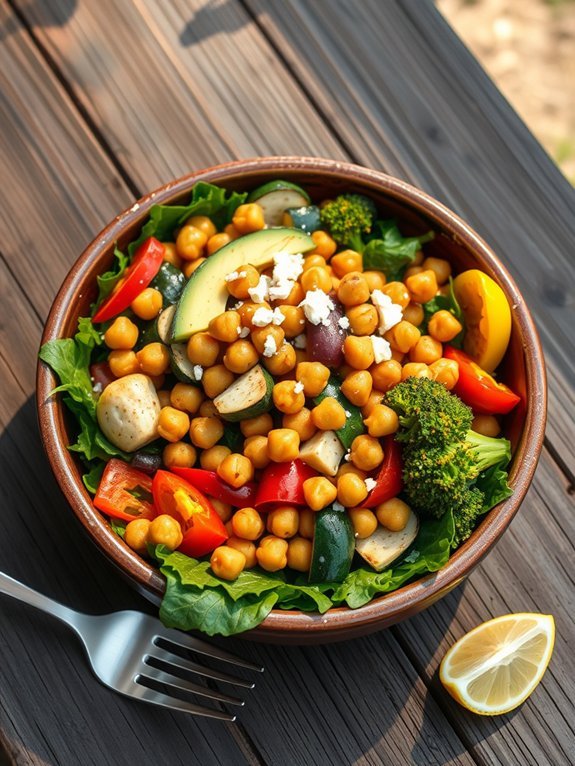
If you’re looking for a healthy lunch idea that’s both satisfying and nutritious, a Roasted Chickpeas and Veggie Bowl is an excellent option. This dish combines the crunchiness of roasted chickpeas with a variety of fresh vegetables, offering a rich mix of flavors and textures. Chickpeas are packed with protein and fiber, making them a fantastic base for this bowl, while the veggies provide essential vitamins and minerals.
To make this meal even more appealing, you can customize it with your favorite seasonal vegetables and dressings. This versatility guarantees that you can enjoy it again and again without getting bored. Additionally, the roasted chickpeas add a delightful crunch that contrasts beautifully with the fresh veggies, creating a lunch that’s not only healthy but utterly delicious.
Ingredients:
- 1 can of chickpeas (15 oz), drained and rinsed
- 2 tablespoons olive oil
- 1 teaspoon cumin
- 1 teaspoon paprika
- Salt and pepper to taste
- 2 cups mixed vegetables (such as bell peppers, zucchini, and broccoli)
- 2 cups leafy greens (like spinach or kale)
- 1 tablespoon lemon juice
- Optional: avocado slices, feta cheese, or tahini dressing for serving
Preheat your oven to 400°F (200°C). In a bowl, toss the drained chickpeas with olive oil, cumin, paprika, salt, and pepper until well coated. Spread them out on a baking sheet in a single layer and roast for about 25-30 minutes, or until golden brown and crispy.
Meanwhile, prepare your mixed vegetables by chopping them into bite-sized pieces. Sauté the veggies in a pan over medium heat until they’re tender but still crisp.
Once the chickpeas are done roasting, assemble your bowl by layering the leafy greens, sautéed veggies, and roasted chickpeas. Drizzle with lemon juice and top with any optional ingredients you desire.
When making your Roasted Chickpeas and Veggie Bowl, feel free to experiment with different spices and toppings to suit your taste preferences.
You can also roast the vegetables alongside the chickpeas for added flavor and convenience. If you prefer a heartier bowl, consider incorporating cooked quinoa or brown rice as a base, which will add extra fiber and make the dish even more filling.


