This post may contain affiliate links. Please read our policy page.
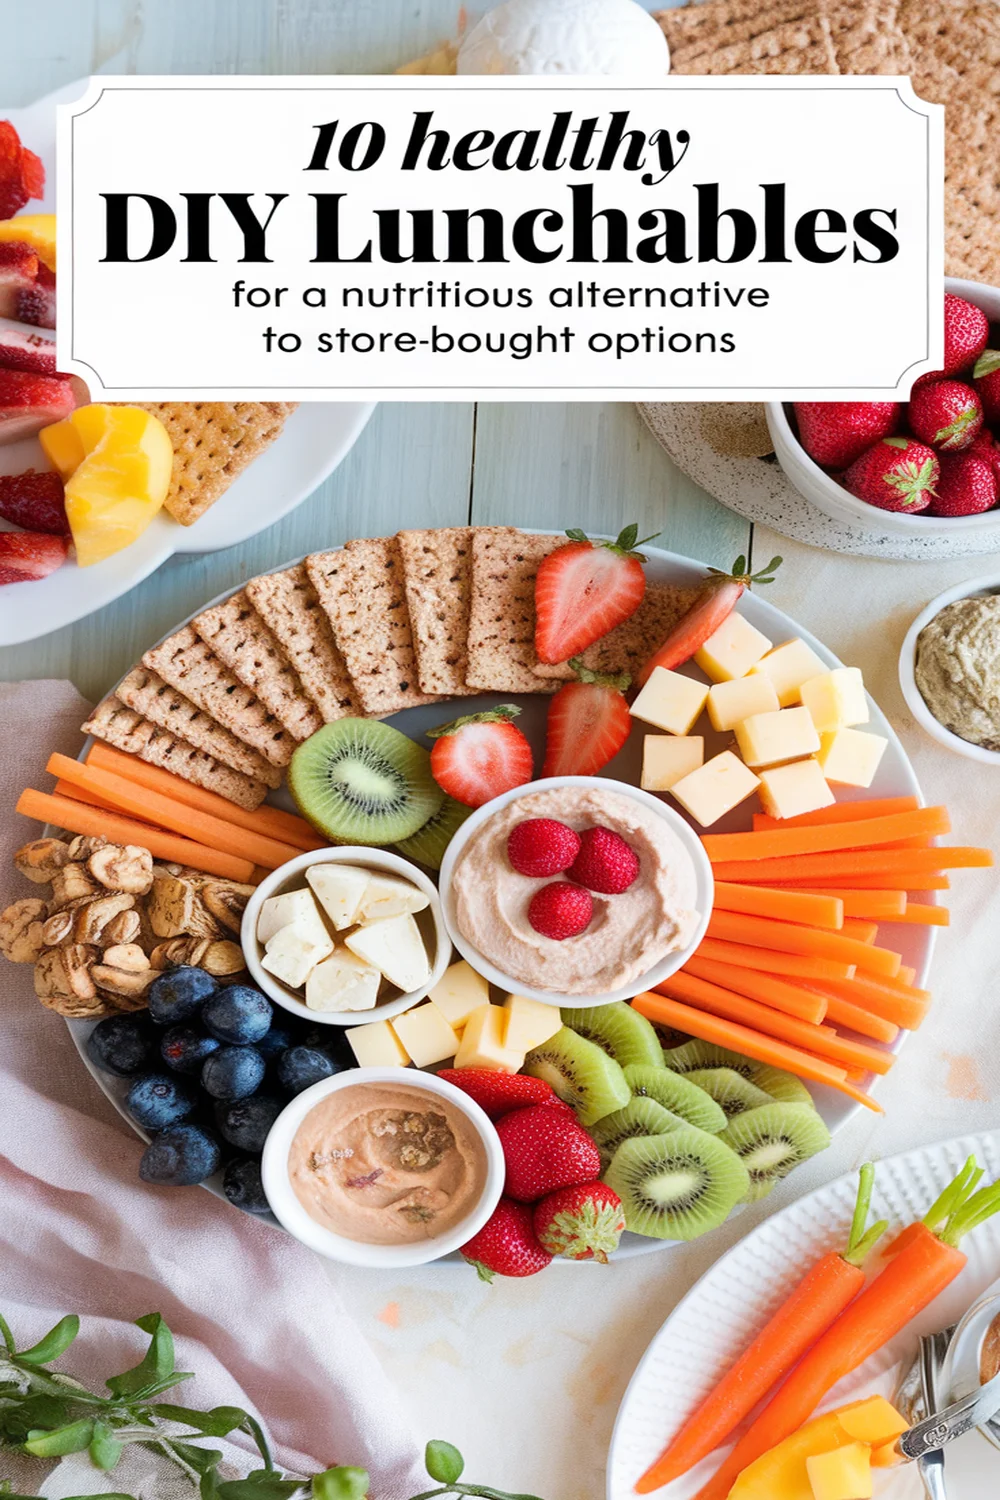
You can whip up delicious and nutritious DIY lunchables at home that rival store-bought options. Try turkey and cheese roll-ups with veggie dippers, or pair hummus with pita and fresh fruit. DIY pizza with whole wheat crackers is a fun option, while yogurt parfaits with granola and berries offer a sweet treat. Don’t forget about mini tacos, quinoa salad cups, and caprese skewers. Discover more easy recipes that make lunchtime both enjoyable and healthy.
Turkey and Cheese Roll-Ups With Veggie Dippers
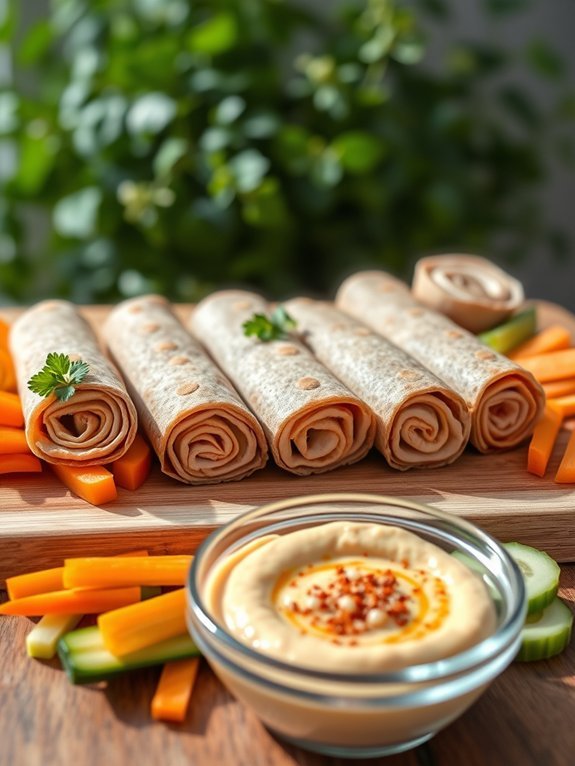
Turkey and cheese roll-ups make for a delightful and healthy option that’s quick to prepare and easy to pack. This fun lunch is perfect for both kids and adults alike, offering a protein-packed meal that can be enjoyed at home or on the go.
With their vibrant colors and delicious flavors, the roll-ups are appealing, and the crunchy veggie dippers add a nutritious twist that’ll keep hunger at bay.
To prepare this dish, you’ll need some fresh ingredients that aren’t only tasty but also provide a good balance of nutrition. These roll-ups can be customized with your choice of turkey and cheese, and the accompanying veggie dippers can be tailored to suit your taste preferences or whatever you have on hand.
Pair these savory bites with a dipping sauce for an extra layer of flavor, and you’ll have a delicious DIY Lunchable that everyone will love!
- Sliced turkey breast
- Sliced cheese (cheddar, Swiss, or your choice)
- Whole wheat or spinach tortillas
- Carrot sticks
- Cucumber slices
- Bell pepper strips
- Hummus or ranch dressing (for dipping)
Begin by laying a tortilla flat on a clean surface. Place sliced turkey and cheese in a single layer on top of the tortilla.
Roll it tightly from one end to the other and then slice into bite-sized pieces. Arrange the roll-ups on a plate alongside a selection of prepared veggie dippers. Serve with a small container of your choice of hummus or ranch dressing for dipping.
For added fun and nutrition, consider incorporating different veggies like cherry tomatoes or snap peas into your dippers. You can also experiment with different types of cheeses or even add a layer of cream cheese before rolling for extra creaminess.
Keep the roll-ups fresh and prevent them from drying out by wrapping them securely or storing them in an airtight container. Enjoy being creative with flavors and colors to make lunchtime exciting!
Recommended Items
Get ready to create delicious and healthy lunchables with these recommended products and equipment!
Products
Hummus and Pita Bread With Fresh Fruits

Hummus and pita bread make for a delicious and nutritious combination that can easily be prepared at home, providing all the savory flavors and health benefits you crave. This dish not only satisfies your appetite but also offers a good balance of protein, fiber, and healthy fats. Pairing it with fresh fruits adds a burst of sweetness and extra nutrients, making it an ideal option for a quick lunch or snack.
Making your own hummus allows you to control the ingredients, giving you a fresher and healthier alternative to store-bought versions, which may contain preservatives and excess sodium. Pita bread is a versatile base for the creamy hummus, while fresh fruits can be customized to your taste, providing a revitalizing contrast to the savory notes. Together, they make a fantastic DIY lunchable that’s simple and fun to prepare.
Ingredients:
- 1 cup canned chickpeas (drained and rinsed)
- 2 tablespoons tahini
- 2 tablespoons olive oil
- 1 garlic clove (minced)
- Juice of 1 lemon
- Salt and pepper to taste
- 4 whole wheat pita bread pockets
- 1 cup assorted fresh fruits (such as grapes, strawberries, apple slices, or melon)
To make the hummus, combine the drained chickpeas, tahini, olive oil, minced garlic, and lemon juice in a food processor. Blend until smooth, adding a little water if necessary to reach your desired consistency. Season with salt and pepper.
Slice the whole wheat pita bread pockets in half, fill them with the hummus, and serve with an assortment of fresh fruits on the side.
When preparing this dish, feel free to get creative with your hummus by adding ingredients like roasted red peppers, sun-dried tomatoes, or fresh herbs for extra flavor.
Make sure your fruits are thoroughly washed and cut appropriately to make them easy to eat. Finally, pack everything in a sealing container to keep your lunchables fresh if you’re on the go!
DIY Pizza Lunchables With Whole Wheat Crackers
DIY Pizza Lunchables are a fun and healthy twist on the classic lunchbox favorite. By using whole wheat crackers as the base, you can create a nutritious and satisfying meal that kids (and adults!) will love. These mini pizzas aren’t only easy to assemble but also allow for personalization with various toppings, ensuring everyone gets exactly what they like. Plus, making your own lunchables means you control the ingredients, making it a great option for those seeking healthier alternatives.
Gathering your ingredients and prepping your toppings is the key to a successful DIY Pizza Lunchable experience. You can set up a “build-your-own-pizza” station, where everyone can choose their own toppings, promoting creativity and engagement during lunchtime. This interactive approach also encourages children to explore different flavors while making healthier eating choices—an important lesson that can be learned through enjoyable experiences like this one.
Ingredients:
- Whole wheat crackers
- Tomato sauce (pizza sauce or marinara)
- Shredded mozzarella cheese
- Sliced pepperoni or any preferred deli meat
- Bell peppers, diced
- Olives, sliced
- Spinach or other leafy greens
- Italian seasoning (optional)
To prepare your DIY Pizza Lunchables, start by laying out your whole wheat crackers on a clean surface or lunchbox. Next, spoon a small amount of tomato sauce onto each cracker, spreading it evenly. Top with a generous sprinkle of shredded mozzarella cheese followed by your choice of toppings such as sliced pepperoni, diced bell peppers, or olives. For an extra layer of flavor, sprinkle some Italian seasoning on top. Pack the assembled crackers into a container for a delicious and nutritious lunch.
When making DIY Pizza Lunchables, feel free to experiment with different toppings and sauces to suit your taste preferences. Consider adding some fresh veggies for added crunch and nutrients.
Also, if you’re packing these for a school lunch, make sure to keep them chilled so the cheese stays fresh and delicious. Creating a balanced meal is easy with this customizable approach, and you can always involve your children in the preparation process for a fun bonding experience!
Yogurt Parfait Cups With Granola and Berries

Yogurt parfait cups with granola and berries are a delightful and nutritious option for anyone looking to enjoy a healthy yet satisfying lunch. These parfaits combine creamy yogurt with layers of crunchy granola and vibrant berries, creating a beautiful presentation and a burst of flavors in each bite.
They’re not only easy to prepare but also customizable to your taste preferences, making them a perfect fit for both kids and adults alike.
Preparing these parfaits is a fun activity, especially when involving children in the kitchen. They can help with layering the ingredients, which makes it an interactive meal prep. You can also experiment with different types of yogurt or swap in various fruits based on what you have at home or what’s in season.
Whether you’re packing these for a lunchbox, enjoying them as a snack, or serving them at brunch, these yogurt parfait cups are sure to please everyone.
- 2 cups of Greek yogurt (plain or flavored)
- 1 cup of granola
- 1 cup of mixed berries (strawberries, blueberries, raspberries, etc.)
- Honey or maple syrup (optional for sweetness)
- Mint leaves (optional for garnish)
In a cup or small jar, start by layering approximately half a cup of Greek yogurt at the bottom. Then add a layer of granola followed by a layer of mixed berries. Repeat this process until you reach the top of the container, finishing with a layer of berries.
Drizzle with honey or maple syrup if desired, and garnish with mint leaves for an extra touch of freshness.
When making yogurt parfaits, feel free to get creative with your ingredients. You can add other fruits such as bananas or peaches, or incorporate nuts for additional crunch.
To keep the granola crunchy, assemble the parfaits just before serving or store the granola separately and layer it right before eating. This guarantees that each bite maintains the perfect texture.
Store any leftover parfaits in the fridge for up to 2 days, but be mindful that the granola may soften over time.
Chicken Salad With Veggie Sticks and Whole Grain Chips

Chicken salad with veggie sticks and whole grain chips is a perfect option for a nutritious and satisfying meal. It’s packed with protein and fiber, making it an excellent choice for kids and adults alike.
This recipe isn’t only easy to prepare but also customizable, so you can add your favorite vegetables or adjust the seasonings according to your taste preferences. Plus, serving it alongside crunchy veggie sticks and wholesome chips makes for a fun and interactive lunch experience that everyone can enjoy.
To start, you’ll need to gather some cooked chicken, which can be shredded or diced, along with a medley of vibrant vegetables to enhance both the taste and nutrition of your salad. A creamy dressing can bring everything together, giving the salad a delightful texture.
Once prepared, this dish can be packed in a lunchbox for school or work or served as a quick meal at home.
- 2 cups cooked chicken, shredded or diced
- 1/2 cup Greek yogurt (or mayonnaise)
- 1 tablespoon Dijon mustard
- 1/4 cup celery, diced
- 1/4 cup bell pepper, diced
- 1/4 cup red onion, diced
- Salt and pepper, to taste
- 1 teaspoon fresh lemon juice (optional)
- Assorted veggie sticks (carrots, cucumbers, bell peppers)
- Whole grain chips
In a large bowl, combine the shredded or diced chicken with Greek yogurt (or mayonnaise), Dijon mustard, diced celery, bell pepper, red onion, salt, pepper, and lemon juice. Mix well until all ingredients are evenly coated.
Adjust seasoning as necessary, and then serve the chicken salad with a side of colorful veggie sticks and a handful of whole grain chips for a satisfying crunch.
When preparing this chicken salad, remember that you can easily switch up the ingredients based on what you have on hand. You can add ingredients like diced apples, grapes, or nuts for extra flavor and texture.
Additionally, feel free to use pre-cooked rotisserie chicken for a quicker meal prep, and store any leftovers in an airtight container in the fridge for up to three days.
Recipe Overview
Egg Salad Sandwiches With Cucumber Slices
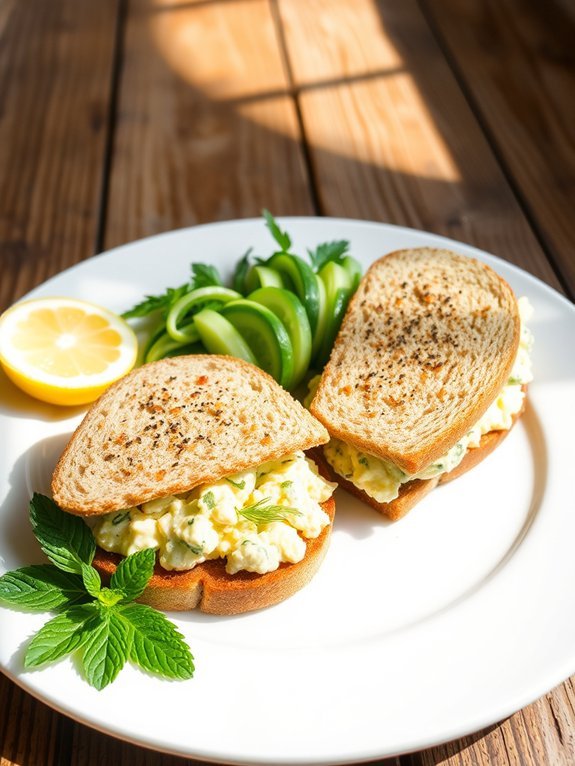
Egg salad sandwiches with cucumber slices are a delightful and nutritious option for a healthy DIY lunch. They offer a protein-packed filling that can be easily customized to suit your taste preferences. The creamy texture of the egg salad pairs perfectly with the fresh crunch of cucumber, creating a satisfying meal that’s both delicious and filling.
Plus, these sandwiches are quick to prepare, making them ideal for busy weekdays or as a fun cooking project with kids.
To make your egg salad sandwiches even more appealing, consider using whole grain bread or a gluten-free alternative, and garnish the dish with fresh herbs such as dill or chives for added flavor. Combining the fresh ingredients with the classic egg salad recipe results in a balanced, colorful meal that not only looks great on the plate but also provides your body with the nutrients it needs. Serve it with some fresh fruit or veggie sticks for a complete lunchbox treat.
- 4 large eggs
- 2 tablespoons mayonnaise
- 1 teaspoon Dijon mustard
- Salt and pepper to taste
- 4 slices whole grain bread (or preferred bread)
- 1 medium cucumber, thinly sliced
- Optional: Fresh dill or chives for garnish
Start by hard boiling the eggs; place them in a pot of cold water, bring to a boil, then cover and remove from heat, letting them sit for 12 minutes. After cooling them in an ice bath, peel the eggs and chop them into small pieces.
In a mixing bowl, combine the chopped eggs with mayonnaise, Dijon mustard, salt, and pepper. Mix until well combined, then assemble the egg salad onto slices of bread, adding cucumber slices on top before closing the sandwiches.
For an extra burst of taste, try experimenting with different add-ins for your egg salad, such as chopped celery, pickles, or a squeeze of lemon juice. You can also vary the type of bread you use; whole grain wraps or lettuce leaves can create a lighter option.
If you prepare the egg salad in advance, keep it refrigerated and serve it within a couple of days to maintain freshness. Enjoy your creative and healthy lunch!
Mini Tacos With Black Beans and Avocado
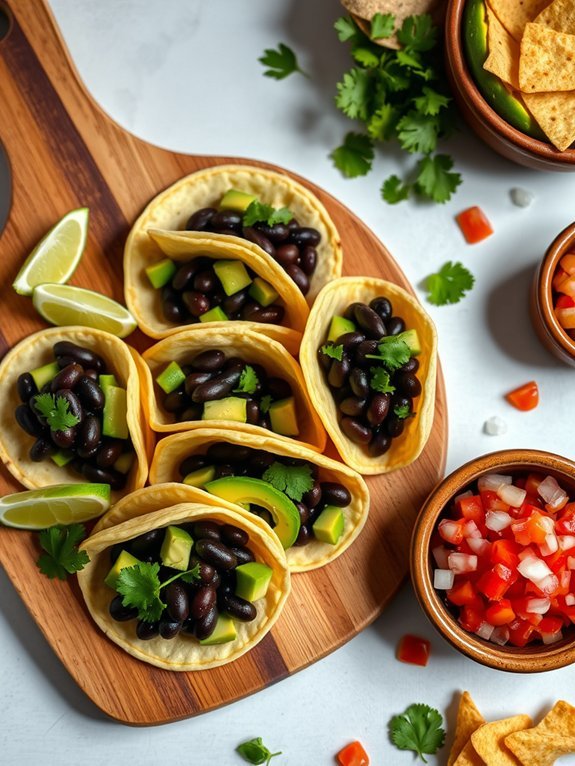
Mini tacos filled with black beans and avocado offer a fun and nutritious twist on traditional lunchables. This simple yet delightful recipe combines the richness of black beans with the creamy texture of avocado, all wrapped in a soft tortilla. Perfect for kids and adults alike, they’re easy to assemble, making them an ideal choice for a quick lunch or snack on the go.
You can also customize these mini tacos with additional toppings, ensuring everyone gets exactly what they love. To elevate the flavor, consider adding fresh herbs like cilantro or a squeeze of lime juice. Not only do these tiny tacos pack a satisfying taste, but they’re also loaded with plant-based protein, healthy fats, and fiber, making them not just delicious but also good for your health.
Get ready to enjoy a wholesome meal that feels like a treat!
- Small corn or flour tortillas (mini size)
- 1 can black beans, rinsed and drained
- 1 ripe avocado, diced
- 1 small onion, finely chopped
- 1 small tomato, diced
- Fresh cilantro leaves (optional)
- Lime wedges (for serving)
- Salt and pepper to taste
In a mixing bowl, combine the rinsed and drained black beans with the diced avocado, chopped onion, and diced tomato. Season the mixture with salt and pepper to taste.
Take a mini tortilla and spoon a portion of the black bean and avocado mixture onto it. If desired, top it with fresh cilantro and a squeeze of lime juice before folding it in half or rolling it up.
For extra flavor, consider toasting your tortillas slightly in a dry skillet for added warmth and a bit of crunch. This will enhance the texture and taste of your mini tacos.
Also, you can swap out or add in other ingredients based on your preferences, such as shredded cheese or a dollop of Greek yogurt for creaminess.
These mini tacos can be made ahead of time; however, it’s best to assemble them just before serving to keep the tortillas soft and fresh.
Caprese Skewers With Cherry Tomatoes and Mozzarella
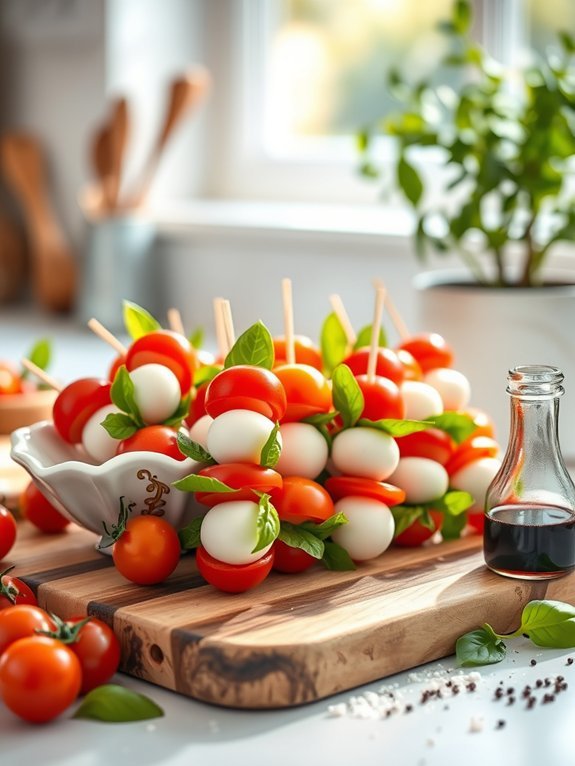
Caprese skewers are a delightful and visually appealing addition to any lunchbox, combining the freshness of tomatoes and the creaminess of mozzarella. This simple yet elegant dish showcases the classic Italian flavors found in a traditional Caprese salad, making it a perfect choice for a healthy DIY Lunchable. Not only are they easy to assemble, but they’re also versatile and can be enjoyed on their own or paired with a variety of dips or sauces.
To create these colorful skewers, you’ll need just a few essential ingredients that come together to deliver a vibrant burst of flavor. Fresh cherry tomatoes offer a juicy sweetness, while mozzarella balls provide a creamy texture that balances perfectly with the tangy bite of fresh basil leaves. Drizzle them with balsamic glaze and a sprinkle of salt and pepper for added depth, transforming this simple dish into a gourmet treat that both kids and adults will love.
- Fresh cherry tomatoes
- Mini mozzarella balls (bocconcini)
- Fresh basil leaves
- Balsamic glaze
- Salt
- Pepper
- Skewers (wooden or reusable)
To assemble the Caprese skewers, take a skewer and thread a cherry tomato, followed by a basil leaf, then a mozzarella ball, and repeat until the skewer is filled (usually two or three rounds).
Once you’ve assembled your skewers, arrange them on a plate and drizzle with balsamic glaze while sprinkling a little salt and pepper on top to enhance the flavors.
When preparing these skewers, consider using different colors of cherry tomatoes for a more visually stimulating presentation. You can also marinate the mozzarella balls in olive oil and herbs beforehand for an extra layer of flavor.
These skewers can be made ahead of time and stored in the refrigerator, making them a convenient and healthy option for lunch or snacks.
Quinoa Salad Cups With Roasted Veggies

Quinoa salad cups with roasted veggies are a colorful and nutritious option that brings excitement to your lunch routine. This vibrant dish not only focuses on healthy ingredients but also presents them in a fun, portable way. The combination of fluffy quinoa and a medley of roasted vegetables guarantees you’ll get a dose of protein, fiber, and essential vitamins in every bite.
Plus, the individual cups make them perfect for meal prep, allowing you to whip up several servings in one go. To elevate the flavor, you can add your favorite herbs and a squeeze of citrus for brightness. These salad cups are versatile, so feel free to customize them with seasonal veggies or any additional toppings you enjoy, such as feta cheese, olives, or avocado.
Prepare them ahead of time and you’ll have a satisfying lunch option ready at your fingertips!
Ingredients:
- 1 cup quinoa
- 2 cups vegetable broth or water
- 1 bell pepper, diced
- 1 zucchini, diced
- 1 yellow squash, diced
- 1 red onion, diced
- 2 tablespoons olive oil
- 1 teaspoon garlic powder
- 1 teaspoon dried oregano
- Salt and pepper to taste
- Fresh parsley or cilantro for garnish (optional)
To make the quinoa salad cups, preheat your oven to 400°F (200°C). Cook the quinoa according to package instructions, using vegetable broth for added flavor.
Meanwhile, toss the diced bell pepper, zucchini, yellow squash, and red onion with olive oil, garlic powder, oregano, salt, and pepper. Spread the veggies on a baking sheet and roast for about 20 minutes, or until nicely caramelized.
Once the quinoa is cooked and the veggies are roasted, combine them in a large bowl, mix well, and spoon the mixture into individual cups or serving bowls. Garnish with fresh herbs if desired.
For the best flavor, don’t hesitate to experiment with additional spices or herbs in the veggie mix. Remember to let the roasted vegetables cool slightly before mixing them with the quinoa to maintain the perfect texture.
These salad cups can be stored in the refrigerator for up to four days, making them a convenient meal option for busy weeks. Enjoy them cold or warm for a delightful lunch experience!
Peanut Butter and Banana Wraps With Apple Slices
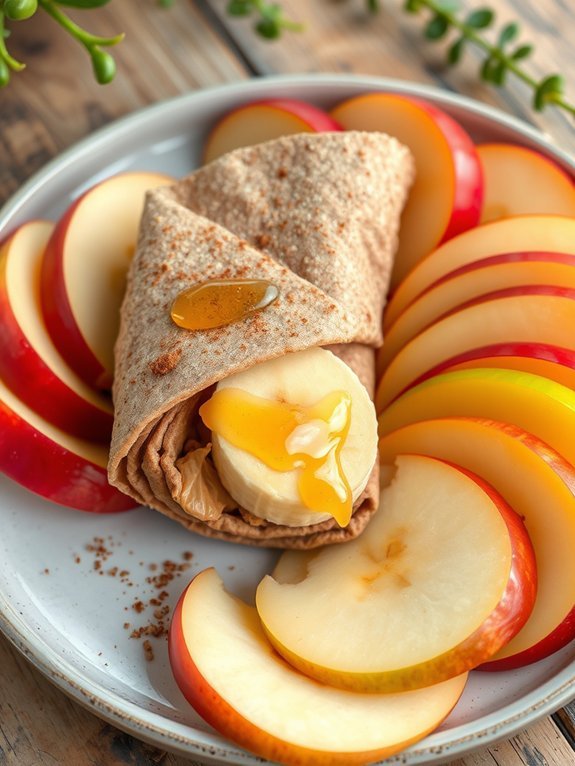
Peanut Butter and Banana Wraps with Apple Slices are a delicious and nutritious lunch option that combines protein, fiber, and healthy fats. This simple recipe is perfect for both kids and adults, making it a versatile choice for lunchboxes or a quick snack at home. The sweet and creamy filling of peanut butter and banana wrapped in a soft tortilla pairs beautifully with crunchy apple slices to create a satisfying meal that also balances flavors and textures.
Not only is this dish easy to prepare, but it’s also a fun way to get creative in the kitchen. You can personalize your wraps by adding other ingredients such as honey, cinnamon, or granola for an extra texture.
Plus, this recipe is perfect for meal prep; simply assemble a few wraps in advance and pack them for later, ensuring you always have a Healthy DIY Lunchable ready to go.
- Whole wheat tortillas
- Natural peanut butter (or alternative nut butter)
- Ripe bananas
- Fresh apples (any variety)
- Honey (optional)
- Cinnamon (optional)
Spread a generous layer of peanut butter onto the whole wheat tortilla, leaving a small border around the edges. Place a peeled banana in the center and, if desired, drizzle with honey and sprinkle with cinnamon.
Roll the tortilla tightly around the banana, then slice it into bite-sized pieces. Serve alongside freshly sliced apples for a rejuvenating crunch.
When preparing this dish, feel free to make adjustments according to personal preferences or dietary restrictions. For a vegan option, opt for almond or sunflower seed butter instead of peanut butter. Additionally, consider using whole grain or gluten-free tortillas to meet your needs.
For an added nutritional boost, sprinkle some chia seeds or flaxseeds into the wrap before rolling. Enjoy the versatility of this recipe by experimenting with different fruit combinations or wraps!

