This post may contain affiliate links. Please read our policy page.
You can make serving vegetables fun for kids with creative ideas like colorful veggie dippers and veggie face pizzas. Try sneaky smoothies that mix fruits with veggies or fun shape sandwiches using cookie cutters. Rainbow veggie skewers add a playful touch, while homemade veggie chips and garden veggie muffins offer tasty snacks. For a crafty twist, engage kids in DIY vegetable stamps and creative platter art. There’s plenty more to explore to make veggies exciting and enjoyable!
Colorful Veggie Dippers
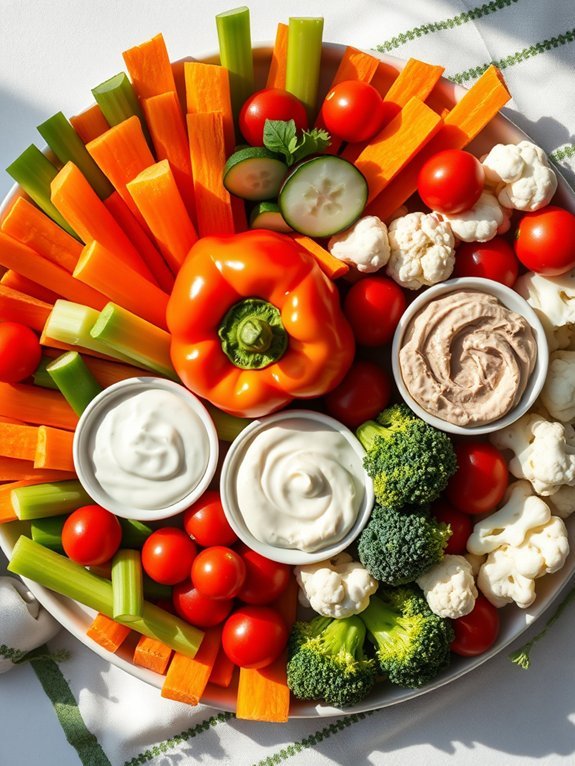
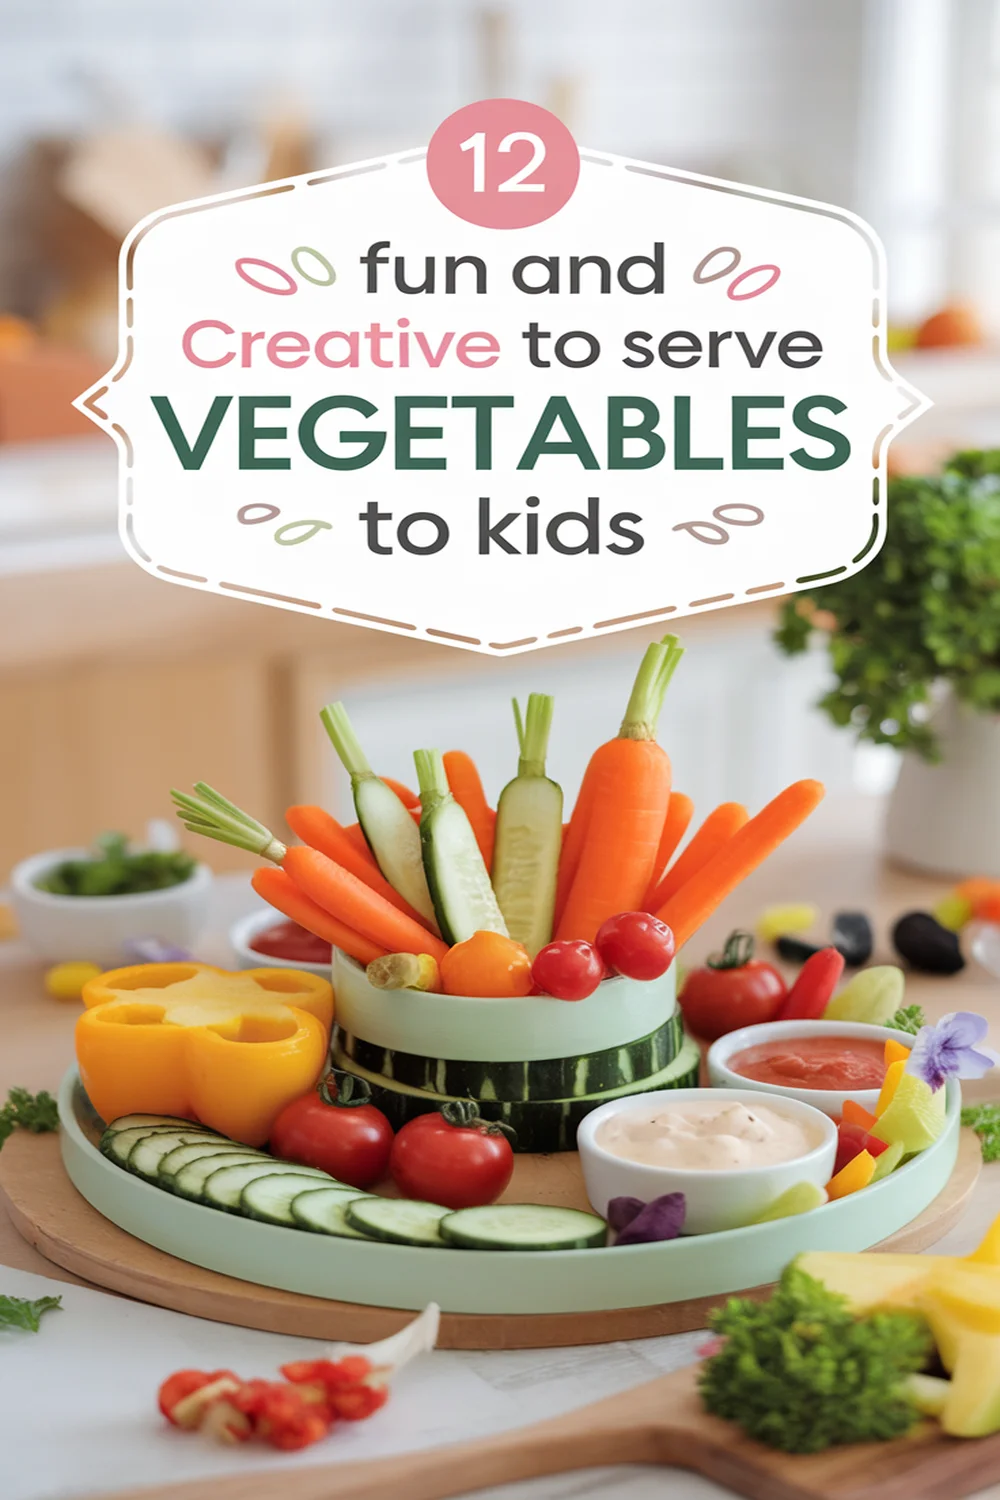
Colorful Veggie Dippers are a fantastic way to introduce kids to the world of vegetables in a fun and engaging manner. You can create a vibrant platter using a variety of colorful vegetables that not only look appealing but also offer diverse flavors and textures. This dish is perfect for snack time, parties, or as a side option during meals, making it versatile and easy to prepare.
To accompany these delightful dippers, a simple and delicious dipping sauce can make all the difference. With a combination of yogurt, herbs, and spices or a zesty tahini dressing, you can enhance the eating experience and encourage kids to munch on their greens. The best part? You can involve the kids in the preparation process, allowing them to select their favorite veggies and help chop them up (with supervision, of course).
- Bell peppers (red, yellow, and green)
- Carrot sticks
- Celery sticks
- Cucumber slices
- Cherry tomatoes
- Broccoli florets
- Cauliflower florets
- Hummus or ranch dressing for dipping
Start by washing and preparing the vegetables. Cut the bell peppers into strips, slice the cucumbers, and chop the carrots, celery, broccoli, and cauliflower into bite-sized pieces.
Arrange the colorful veggies artistically on a large platter, making sure to separate the different types for a visually appealing display. Serve with your choice of dipping sauce in small bowls positioned around the platter.
When creating your Colorful Veggie Dippers, consider the tastes and preferences of your kids. You can also involve them in experimenting with different dipping sauces, allowing for creativity in flavor combinations.
Additionally, add extra fun by using cookie cutters to create fun shapes from the veggies, or introduce themes for special occasions (like festive colors for holidays). Remember, the more fun it looks, the more likely kids will be excited to eat their vegetables!
Recommended Items
Get ready to transform mealtime into a fun adventure with these must-have products and equipment!
Veggie Face Pizzas
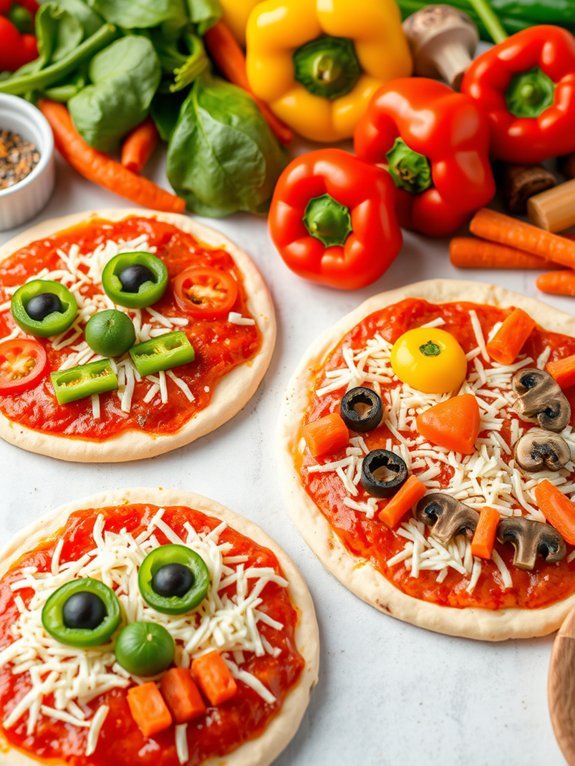
Veggie Face Pizzas are a delightful and imaginative way to encourage kids to eat their vegetables. Not only do they incorporate the fun of creating faces with various toppings, but they also allow children to engage with their food, making meal times more enjoyable.
This recipe is perfect for a weekend cooking activity or as a part of a family dinner where everyone can customize their own pizza.
The beauty of Veggie Face Pizzas lies in their versatility. You can use anything from personal-sized pizza crusts to pita bread or even whole wheat tortillas as the base. The kids can shape their pizzas into silly faces using an assortment of colorful vegetables, all while learning about the nutritional benefits of each ingredient.
Let their creativity run wild as they assemble unique veggie art ready to be devoured!
- Personal-sized pizza crusts or pita bread
- Tomato sauce
- Shredded mozzarella cheese
- Bell peppers (various colors)
- Cherry tomatoes
- Black olives
- Spinach leaves
- Carrots
- Mushrooms
- Any other favorite vegetables
Preheat your oven to 375°F (190°C). Spread a thin layer of tomato sauce on each pizza crust or pita bread, then sprinkle a generous amount of shredded mozzarella cheese over the sauce.
Allow your kids to create fun faces using the vegetables, placing them strategically to form eyes, mouths, and noses. Bake in the preheated oven for about 10-12 minutes, or until the cheese is melted and bubbly, and the crust is golden brown.
When making Veggie Face Pizzas, encourage your kids to experiment with different vegetable combinations and toppings. You can also add a dash of herbs or spices for additional flavor.
For extra fun, consider incorporating proteins like pepperoni or cooked chicken to give the pizzas more substance. Don’t forget to involve the kids in both the preparation and eating process to make it a memorable and enjoyable mealtime experience!
Sneaky Smoothies
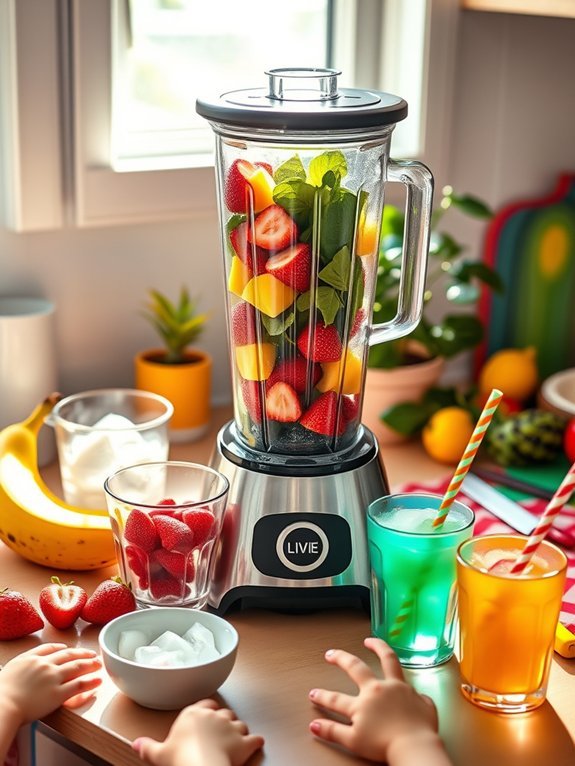
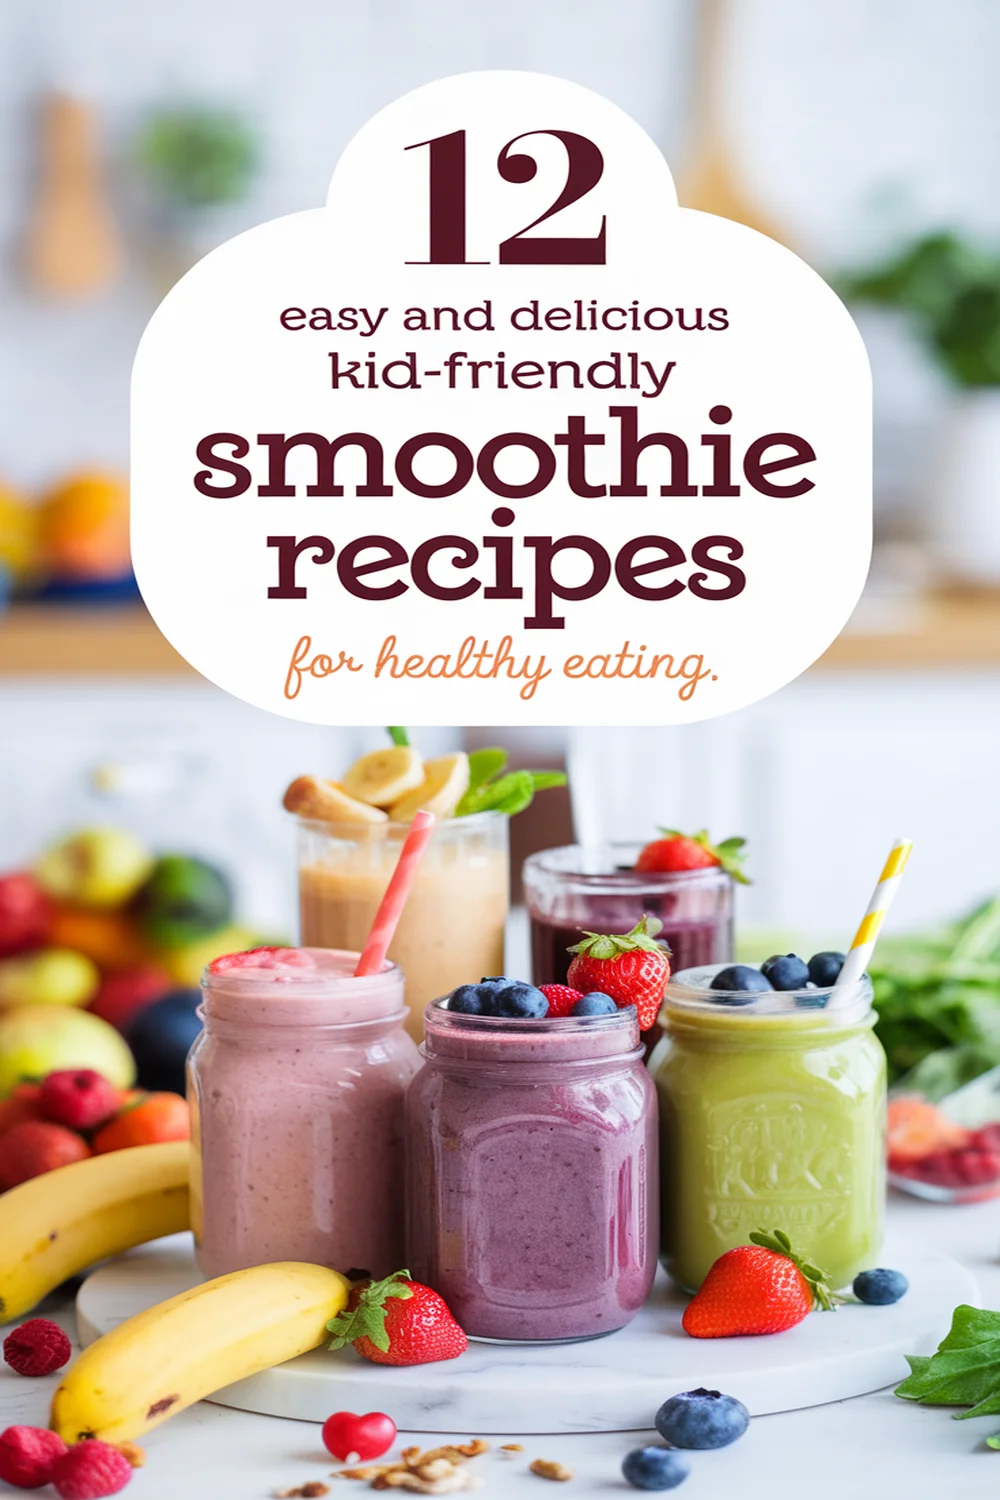
Sneaky smoothies are a fantastic way to get kids to consume more vegetables without them even realizing it. By blending a variety of fruits and veggies, you can create a delicious and nutritious drink that not only tastes great but is also packed with vitamins and minerals.
Kids love colorful and sweet treats, and with the right ingredients, you can turn what may seem like a chore into a fun and exciting experience. This recipe allows for a lot of flexibility, so you can mix and match ingredients based on what you have on hand.
To make the sneaky smoothie a hit with kids, use sweet fruits that mask the taste of the vegetables. Bananas, strawberries, and mangoes provide natural sweetness and bright colors that appeal to young palates. You can also sneak in leafy greens like spinach or kale – when blended with the right fruits, they become virtually undetectable.
Serve this smoothie in a fun cup or with a colorful straw to make it visually appealing, and watch your little ones enjoy their veggies like never before.
- 1 banana
- 1 cup strawberries, fresh or frozen
- 1/2 cup mango chunks, fresh or frozen
- 1 cup fresh spinach or kale
- 1 cup yogurt (any flavor)
- 1/2 cup apple juice or coconut water
- Ice cubes (optional)
In a blender, combine the banana, strawberries, mango, spinach or kale, yogurt, and apple juice or coconut water. Blend until smooth, adding ice cubes if desired for a colder smoothie. Taste the mixture and adjust the sweetness with a bit of honey or maple syrup if necessary. Pour the smoothie into fun cups or glasses and serve immediately.
When making sneaky smoothies, consider prepping ingredients ahead of time. You can freeze fruits and pre-wash leafy greens, making it quick and easy to whip up a smoothie on busy mornings or after school.
Experiment with different combinations of fruits and vegetables to find the perfect blend that appeals to your children. Don’t forget to involve them in the process; letting them choose their favorite ingredients or toppings can make them more excited to try what they’ve helped create!
Fun Shape Sandwiches
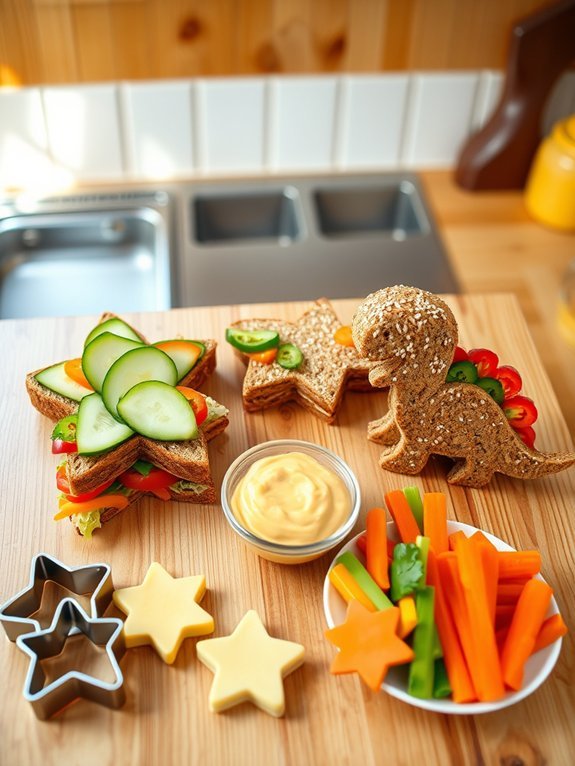
Fun shape sandwiches are an excellent way to make lunchtime a delightful experience for kids while sneakily incorporating vegetables into their diet. By blending wholesome ingredients with playful presentations, parents can spark excitement about eating veggies. The whimsical shapes of these sandwiches can turn an ordinary meal into a creative culinary adventure, stimulating children’s imaginations and encouraging them to try new flavors.
To add even more fun, consider letting the kids participate in the sandwich-making process. Involving them in the kitchen can empower them to take ownership of their meals, potentially leading to a more adventurous palate. Choose your children’s favorite veggie-based spreads and toppings, which can be paired with their preferred types of bread.
The key to a successful fun shape sandwich is to keep it colorful, tasty, and visually appealing.
Ingredients:
- 4 slices of whole grain bread
- 2 tablespoons of hummus or cream cheese
- 1 small cucumber, sliced
- 1 small bell pepper, sliced into thin strips
- 1 small carrot, grated
- 2-3 slices of cheese (optional)
- Cookie cutters (various fun shapes)
- Lettuce leaves
- Olive oil or butter (optional, for toasting)
With a rolling pin, flatten the slices of bread gently, then spread hummus or cream cheese on one side of each slice. Layer with fresh veggies like cucumber, bell pepper, and grated carrot. If using cheese, add a slice on top of the veggies. Place another slice of bread on top and press gently.
Use cookie cutters to cut the sandwiches into fun shapes. If desired, lightly toast the sandwiches in a pan with a bit of olive oil or butter until golden brown on each side.
For an extra crunch, try adding nuts or seeds as toppings, or mix in different spreads to create unique flavor combinations.
Encourage kids to pick their favorite shapes and fillings, making mealtime an interactive and enjoyable experience. Present the sandwiches alongside colorful fruit or veggie sticks, and don’t hesitate to try different types of bread, like rye or pita, for added variety.
Rainbow Veggie Skewers
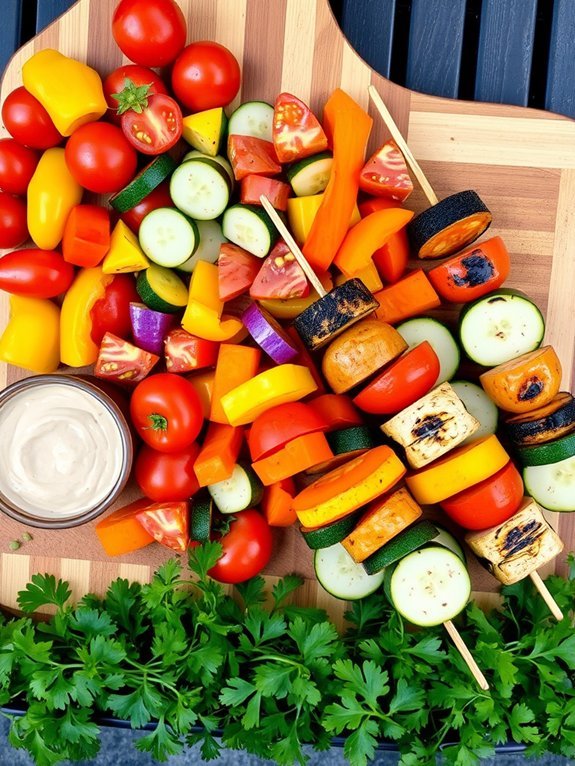
Rainbow Veggie Skewers are an exciting and colorful way to introduce vegetables to kids, making healthy eating fun. By combining a variety of vibrant vegetables, these skewers not only provide a visual feast but also offer a range of nutrients essential for growing bodies.
Kids will love getting involved in assembling their own skewers, allowing them to explore different textures and flavors.
These skewers can be enjoyed grilled, roasted, or even raw. Best of all, they can be customized according to your child’s favorite vegetables, making meal preparation a stress-free task.
Pair the skewers with a tasty dip or serve them alongside a protein of choice to create a balanced meal that satisfies both taste and nutrition.
Ingredients:
- Cherry tomatoes
- Bell peppers (red, yellow, green)
- Cucumbers
- Zucchini
- Carrots
- Red onion
- Olive oil
- Salt
- Pepper
- Skewers
Start by preparing your vegetables; wash and cut them into bite-sized pieces.
Preheat your grill or oven, and if using wooden skewers, soak them in water for about 30 minutes to prevent burning.
Thread the vegetables onto the skewers in a colorful pattern, alternating each one to create a rainbow effect. Lightly brush the assembled skewers with olive oil and sprinkle with salt and pepper.
Grill or roast the skewers for about 10-15 minutes, turning halfway until they’re tender and slightly charred.
When preparing Rainbow Veggie Skewers, involve your children in the process to make it more engaging.
Allow them to choose which vegetables to use, encouraging them to try new ones.
If you’re making these skewers ahead of time, store them in an airtight container in the fridge.
For added fun, you can serve them with a variety of dips, such as hummus or ranch dressing, to enhance the flavor and make the vegetables more appealing.
Cheesy Veggie Quesadillas
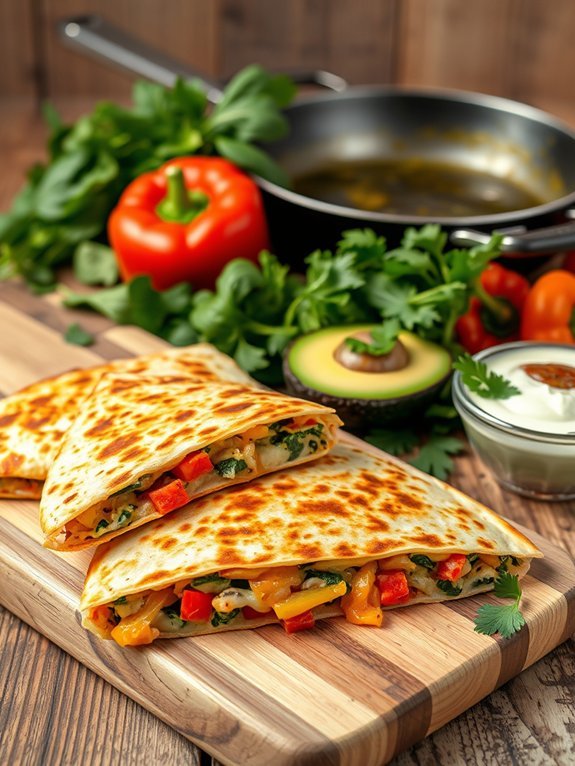
Cheesy veggie quesadillas are a fantastic way to sneak in some nutritious vegetables while also making a meal that kids will enjoy. This dish combines the cheesy goodness of melted cheese with the vibrant colors and flavors of assorted vegetables, making it a visually appealing and tasty option.
Whether it’s for lunch, dinner, or a quick snack, these quesadillas are quick to put together and can be customized with your children’s favorite vegetables.
To prepare cheesy veggie quesadillas, you can use a variety of vegetables like bell peppers, spinach, and mushrooms, but feel free to experiment with whatever is in your pantry or refrigerator. The key is to finely chop the vegetables so that they blend well with the cheese, creating a harmonious filling that’s both delicious and nutritious.
With a crispy tortilla on the outside and a cheesy filling on the inside, these quesadillas are sure to be a hit at the dinner table.
- 4 large flour tortillas
- 1 cup shredded cheese (cheddar, mozzarella, or a blend)
- 1 cup assorted chopped vegetables (bell peppers, spinach, mushrooms, zucchini)
- 1 tablespoon olive oil
- 1 teaspoon garlic powder
- 1 teaspoon onion powder
- Salt and pepper to taste
- Optional: sour cream or guacamole for serving
In a skillet over medium heat, add the olive oil, then sauté the chopped vegetables for 3-5 minutes until they’re tender. Add the garlic powder, onion powder, salt, and pepper to the veggies, mixing well.
Remove the skillet from the heat and set aside. Place one tortilla in the skillet, sprinkle half of it with cheese, then add a layer of the sautéed vegetable mixture, and top with more cheese before folding the tortilla over. Cook for about 2-3 minutes on each side until the tortilla is golden and the cheese melts.
Repeat for the remaining tortillas.
When making cheesy veggie quesadillas, consider letting your kids help with the preparation. They can choose their favorite vegetables and assist with assembling the quesadillas, making it a fun family activity.
If you want to up the nutrition factor, you can also add cooked chicken, beans, or other protein sources to the filling. Serve with fresh salsa, sour cream, or guacamole for added flavor and fun!
Veggie Sushi Rolls
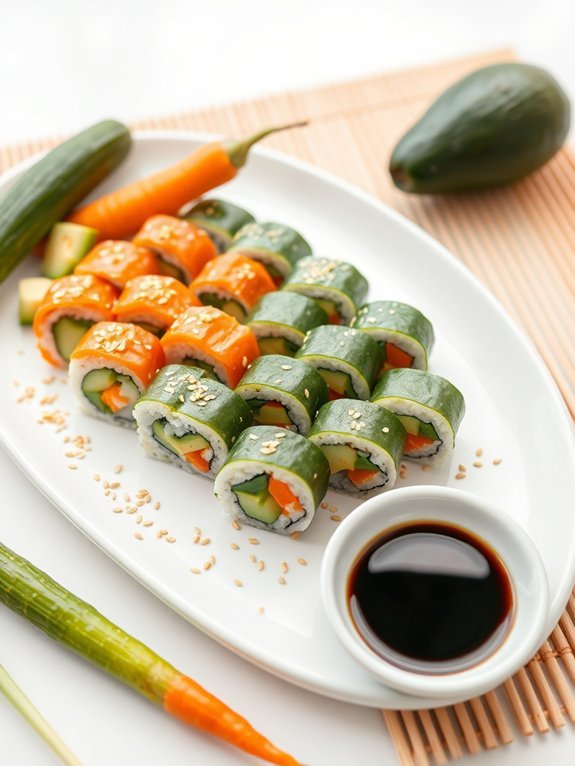
Veggie sushi rolls are a fun and nutritious way to incorporate more vegetables into your children’s diets while also engaging them in the cooking process. Not only are they colorful and visually appealing, but they also allow for creativity, letting kids choose their favorite fillings. These sushi rolls can be customized to suit different tastes, making them a delightful meal or snack that everyone can enjoy.
Preparing veggie sushi rolls is also a great opportunity to discuss different vegetables and their health benefits with your kids. Using a variety of textures and flavors can make this healthy dish more enticing to little ones who might be hesitant to eat their greens.
Plus, the act of rolling sushi can be a fun activity that promotes fine motor skills, all while creating a meal that’s both satisfying and delicious.
Ingredients:
- 2 cups sushi rice
- 2 ½ cups water
- 1/3 cup rice vinegar
- 2 tablespoons sugar
- 1 teaspoon salt
- 4 sheets nori (seaweed)
- 1 cucumber, julienned
- 1 carrot, julienned
- 1 avocado, sliced
- 1 bell pepper, thinly sliced
- 1 small zucchini, julienned
- Soy sauce (for dipping)
- Sesame seeds (optional)
Cook the sushi rice according to package instructions, typically by rinsing it until the water runs clear, then combining it with water and bringing it to a boil. Once it boils, reduce the heat to low, cover, and simmer for about 20 minutes until the rice is tender and water is absorbed.
Meanwhile, in a small saucepan, heat the rice vinegar, sugar, and salt over low heat, stirring until dissolved. Once the rice has finished cooking, transfer it to a large bowl and gently fold in the vinegar mixture. Allow the rice to cool slightly.
To assemble the sushi rolls, place a sheet of nori on a bamboo mat or a clean surface. Spread a thin layer of sushi rice over the nori, leaving about an inch at the top. Arrange your choice of vegetables in a line across the rice, then roll tightly from the bottom, using the mat to help compress the roll as you go. Once rolled, cut the sushi into bite-sized pieces and serve with soy sauce and sesame seeds if desired.
When making veggie sushi rolls, feel free to get creative with the fillings—anything from radishes to spinach can be used. Involve your kids in selecting and preparing the vegetables to increase their interest in the dish.
If making sushi for younger kids, consider rolling the sushi more tightly for easier handling and eating. Additionally, you can prepare some fun dipping sauces to enhance the experience, such as a spicy mayo or teriyaki sauce. Enjoy the process and have fun!
Spiralized Veggie Pasta
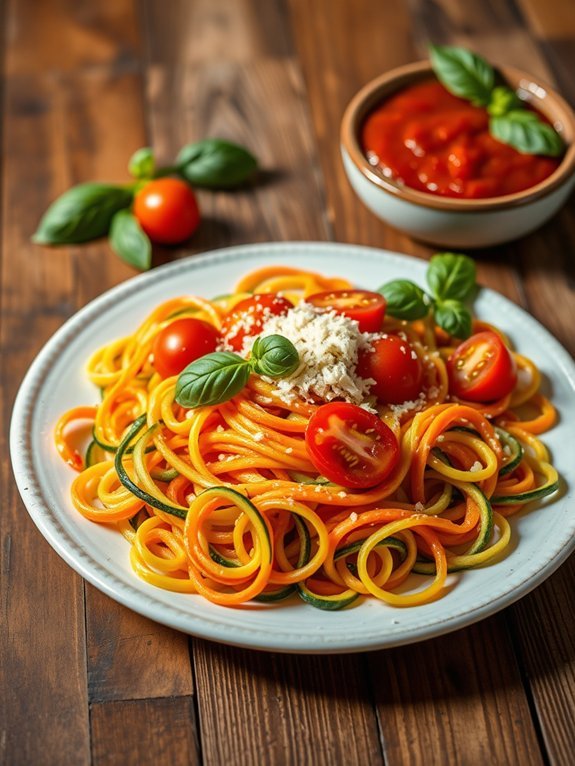
Spiralized veggie pasta is a fun and nutritious way to get kids excited about eating their vegetables. By transforming zucchini, carrots, and other veggies into noodle-like shapes, you create a visually appealing and enticing dish that makes vegetables the star. This recipe is simple to make and can serve as a delightful main course or as a side alongside your family’s favorite protein.
This dish is also highly versatile, allowing for various combinations of vegetables and sauces based on your family’s preferences. It’s an opportunity to let kids participate in the kitchen and become little chefs by choosing their favorite veggies to spiralize.
Whether you pair it with marinara, pesto, or a light olive oil dressing, spiralized veggie pasta can be a hit at the dinner table while sneaking in all the health benefits of fresh produce.
Ingredients:
- 2 medium zucchinis
- 1 large carrot
- 1 bell pepper (any color)
- 1 cup cherry tomatoes, halved
- 2 tablespoons olive oil
- 2 cloves garlic, minced
- Salt and pepper to taste
- Grated Parmesan cheese (optional)
- Fresh basil, chopped (for garnish)
Using a spiralizer, spiralize the zucchini and carrot into noodles, and set aside. In a large skillet, heat the olive oil over medium heat. Add the minced garlic and cook for about 1 minute until fragrant.
Next, add the spiralized veggies, bell pepper, and cherry tomatoes to the skillet. Toss everything together, seasoning with salt and pepper, and sauté the mixture for 4-5 minutes or until the vegetables are tender but still slightly crisp. Serve with a sprinkle of Parmesan cheese and fresh basil if desired.
For a more flavorful dish, consider roasting the vegetables in the oven with a drizzle of olive oil and your choice of seasonings before mixing them into the pasta. This will enhance their natural sweetness and add a delicious depth of flavor.
Additionally, keep in mind that cooking times for the veggies may vary based on thickness, so adjust accordingly to achieve your desired tenderness. Feel free to experiment with different types of sauces and toppings to make this dish your own!
Homemade Veggie Chips
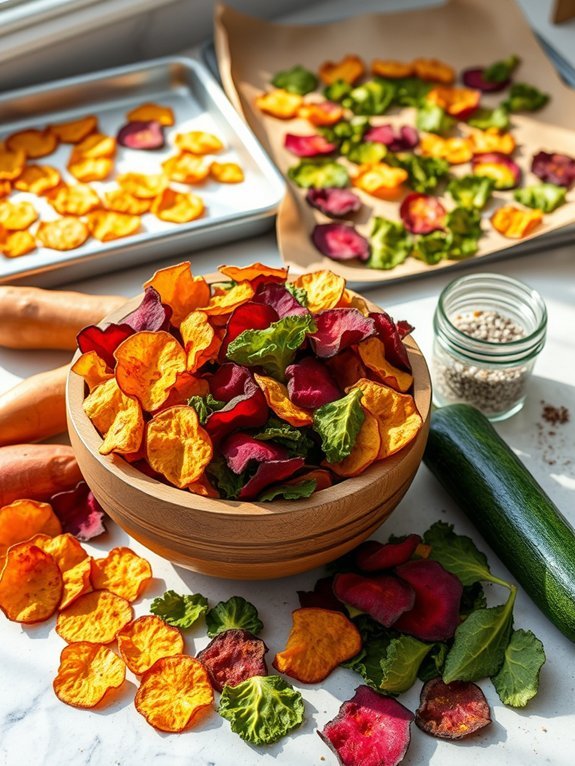
Making homemade veggie chips is a fantastic way to provide your kids with a nutritious and delicious snack. Not only are these chips easy to make, but they also allow for a variety of vegetables to be used, giving you the freedom to experiment with different flavors. Kids often have a love for crunchy snacks, and by replacing store-bought chips with homemade veggie chips, you’re introducing a healthier option without sacrificing taste or texture.
To get started, choose vegetables that you think your kids would enjoy, such as sweet potatoes, zucchini, beets, or kale. These vegetables can be sliced thinly and transformed into crispy chips that are full of vitamins and minerals. The best part is that you can season them to match your child’s favorite flavors, making this a customizable and engaging cooking activity that brings the family together.
Ingredients:
- 2 medium sweet potatoes
- 1 medium zucchini
- 2 medium beets
- 1 bunch of kale
- 2 tablespoons olive oil
- 1 teaspoon sea salt
- Optional: garlic powder, paprika, or any preferred seasoning
Preheat your oven to 400°F (200°C). Begin by washing and thoroughly drying the vegetables. For the sweet potatoes and beets, peel them if desired and slice them thinly using a mandoline or sharp knife. For zucchini, slice them into 1/8-inch rounds, and for the kale, remove the stems and tear the leaves into bite-sized pieces.
In a large bowl, toss the vegetable slices with olive oil and your chosen seasonings. Spread them out in a single layer on baking sheets lined with parchment paper. Bake in the preheated oven for 20-25 minutes, flipping halfway through, until crispy but not burnt.
When making veggie chips, feel free to experiment with different vegetables and seasonings to find a combination that your kids love. Keep an eye on the chips in the oven, as cooking times might vary depending on the vegetable thickness. If the chips start to darken too much but aren’t crispy yet, consider lowering the oven temperature slightly.
Additionally, let the chips cool for a few minutes after taking them out of the oven; they’ll continue to crisp up as they cool. Store any leftovers in an airtight container to keep them crunchy for longer!
Garden Veggie Muffins
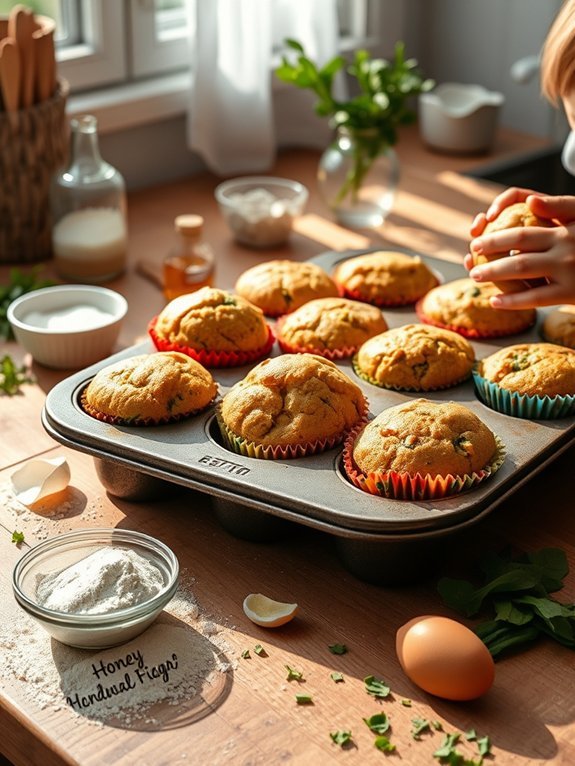
Garden Veggie Muffins are a delightful way to sneak in nutritious vegetables while providing a delicious snack for your kids. These muffins are moist, flavorful, and loaded with a variety of veggies that not only enhance their taste but also contribute essential vitamins and minerals. They’re perfect for breakfast, a midday snack, or even as a lunchbox treat.
Kids will love the fun, muffin shape while parents will appreciate the wholesome ingredients. Making Garden Veggie Muffins is a fantastic opportunity to involve your kids in the kitchen. Get them excited about cooking by letting them help with washing, mixing, and even choosing their favorite vegetables to add to the recipe.
Plus, these muffins can be made ahead of time and stored for later, making them a convenient option for busy days.
- 1 cup all-purpose flour
- 1 cup whole wheat flour
- 1 teaspoon baking powder
- 1/2 teaspoon baking soda
- 1/2 teaspoon salt
- 1 teaspoon ground cinnamon
- 1/4 cup honey or maple syrup
- 1/2 cup vegetable oil
- 2 large eggs
- 1 cup grated zucchini
- 1/2 cup grated carrot
- 1/2 cup finely chopped spinach or kale
- 1/2 cup shredded cheese (optional)
Preheat your oven to 350°F (175°C) and line a muffin tin with paper liners or grease it lightly. In a large bowl, combine the all-purpose flour, whole wheat flour, baking powder, baking soda, salt, and cinnamon.
In a separate bowl, whisk together the honey (or maple syrup), vegetable oil, and eggs until well combined. Slowly add the wet ingredients to the dry ingredients and mix until just combined.
Gently fold in the grated zucchini, carrot, and spinach (or kale) along with the cheese if using. Fill each muffin cup about two-thirds full with the batter and bake for 18-20 minutes, or until a toothpick inserted into the center comes out clean.
For added flavor and nutrition, feel free to experiment with different vegetables or spices in this recipe. You can substitute grated beetroot for an extra pop of color, or add spices like garlic powder or dried oregano for a savory twist.
These muffins also freeze well, so you can double the batch and store them for easy access later on. Just reheat them in the microwave when you’re ready to enjoy!
Creative Vegetable Serving Ideas
DIY Vegetable Stamps
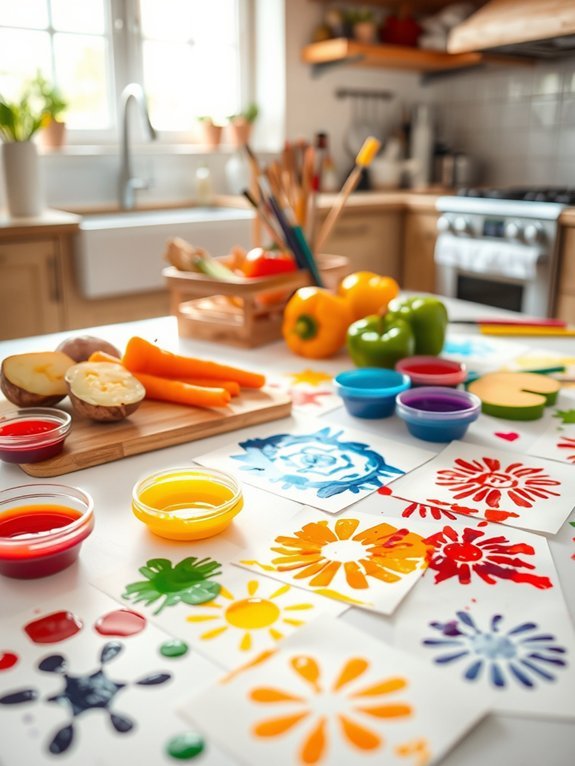
DIY vegetable stamps are a fun and creative way to introduce kids to various vegetables while encouraging their creativity. This activity not only allows children to explore the textures and shapes of different vegetables but also immerses them in the joys of art. By turning ordinary vegetables into stamps, kids can create beautiful artwork and learn about the importance of incorporating veggies into their diet.
To prepare for this fun activity, you’ll need a selection of fresh vegetables that can be easily cut and shaped into stamps. Common choices include potatoes, carrots, bell peppers, and celery. Get the kids involved in choosing their favorite veggies from the market or garden, making the process more engaging!
Once you have your vegetables, you can transform them into unique printing tools that will allow kids to create colorful designs on paper or fabric while having a great time.
- Fresh vegetables (potatoes, carrots, bell peppers, celery, etc.)
- Sharp knife (adult supervision required)
- Cutting board
- Paper (plain or fabric)
- Non-toxic paint (washable for easy clean-up)
- Paintbrush or sponge (for applying paint to the stamps)
- Paper plates (for the paint)
Begin by preparing your vegetables for stamping. Adults should cut the vegetables in half or shape them into fun designs, ensuring that they’ve a flat surface to stamp with.
Then, pour some non-toxic paint onto paper plates and use a paintbrush or sponge to apply paint to the cut side of the vegetable. Press the painted vegetable onto the paper or fabric and lift it gently to reveal your artistic creation.
When engaging kids in this activity, it’s important to supervise them closely, especially when using sharp knives to cut vegetables. Set up the stamping station with plenty of paper and an easy way to clean up afterward, such as newspaper or plastic tablecloths.
Encourage your little ones to experiment with different colors and designs, and remind them that there are no mistakes in art! Most importantly, have fun together and enjoy the creative process.
Creative Veggie Platter Art
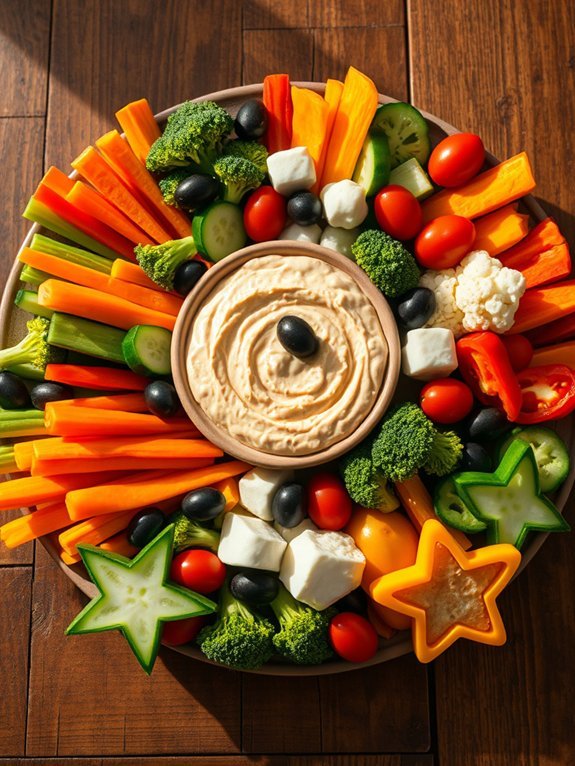
Creating a creative veggie platter art is a fun and interactive way to inspire kids to eat their vegetables. This dish turns healthy eating into an imaginative experience, allowing kids to see their favorite veggies transformed into whimsical shapes and characters. Using a variety of colorful vegetables not only appeals to their sense of wonder but also provides essential nutrients for their growing bodies.
To make the veggie platter even more delightful, you can incorporate dips such as hummus or ranch dressing, serving as “glues” for their creations. Providing cookie cutters in fun shapes, and letting children express their creativity by designing their veggie masterpieces, will turn snack time into an enjoyable activity. It’s a perfect solution for parents looking to encourage healthier eating habits while spending quality time with their kids.
Ingredients:
- Carrots
- Cucumbers
- Bell peppers (various colors)
- Cherry tomatoes
- Celery sticks
- Broccoli florets
- Cauliflower florets
- Black olives
- Hummus or ranch dressing for dipping
Cut the vegetables into various shapes and sizes. Use cookie cutters to create fun designs from the bell peppers, cucumbers, and cheese if desired. Arrange the veggies on a large platter, grouping colors together or creating a pattern. Add a small bowl of hummus or ranch dressing in the center of the platter for dipping, ensuring to give the platter an inviting and visually appealing look.
When preparing the veggie platter, don’t be afraid to experiment with different shapes and textures. Encourage kids to participate in assembling their own vegetables, and let them take the lead in choosing their favorite items.
You can also swap out vegetables based on seasonal availability or preferences, ensuring that the platter remains fresh and exciting. Remember that colorful and engaging presentations can greatly impact kids’ desire to eat healthy foods!

