This post may contain affiliate links. Please read our policy page.
Elevate your next gathering with ten exquisite Michelin-star inspired appetizers. Delight your guests with crispy Truffle and Parmesan Arancini, or treat them to Lobster Corn Fritters with zesty Citrus Aioli. Bite-sized Smoked Salmon Blinis topped with dill cream offer a touch of sophistication, while Wild Mushroom Tartlets showcase earthy flavors. From Mini Beef Wellington Bites to Deviled Eggs garnished with caviar, these elegant dishes promise to impress. Continue on to discover even more culinary delights that will wow everyone!
Truffle and Parmesan Arancini
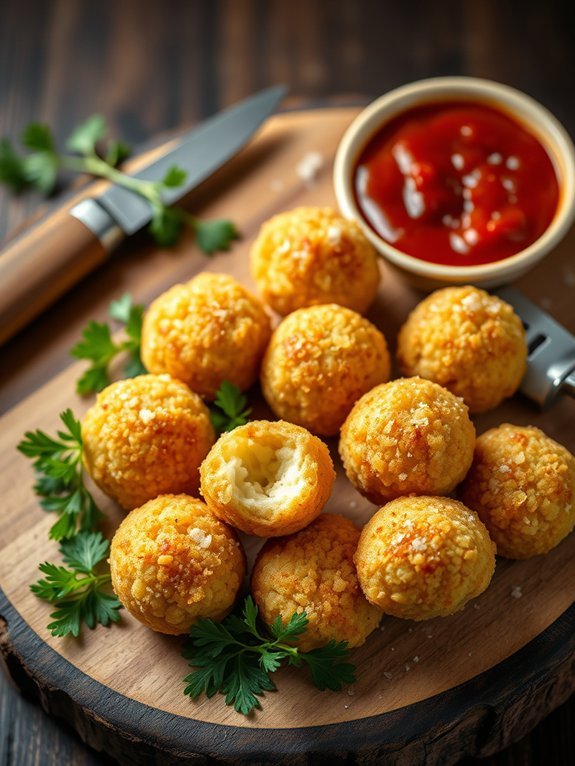
Truffle and Parmesan Arancini are a delightful Italian appetizer that brings together the creamy richness of risotto with the luxurious flavors of truffle oil and Parmesan cheese. These golden, crispy rice balls are plump and flavorful, making them an ideal companion for any meal or a sophisticated snack on their own.
With a gooey cheese center and a crunchy breadcrumb exterior, they provide a satisfying textural experience and an explosion of flavors with every bite.
To make arancini, you’ll first need to prepare risotto, allowing it to cool and firm up before shaping it into balls. The addition of truffle oil elevates the dish, imparting a warm earthiness that complements the nutty flavor of the Parmigiano-Reggiano cheese.
These little bites of luxury are perfect for impressing guests at dinner parties or serving as finger foods during celebratory events.
- 1 cup Arborio rice
- 4 cups chicken or vegetable broth
- 1 small onion, finely chopped
- 2 tablespoons olive oil
- 1 cup grated Parmesan cheese
- 1 tablespoon truffle oil
- 1/2 cup flour
- 2 large eggs, beaten
- 1 1/2 cups breadcrumbs
- Salt and pepper to taste
- Oil for frying
In a medium pot over medium heat, sauté the chopped onion in olive oil until translucent, then add the Arborio rice, stirring to coat for about 2 minutes. Gradually add the broth, one ladle at a time, stirring frequently until absorbed before adding the next.
Continue cooking until the rice is al dente and creamy, roughly 18-20 minutes. Remove from heat, stir in Parmesan cheese and truffle oil, season with salt and pepper, then spread the mixture onto a baking sheet to cool.
Once cool, shape the risotto into balls, inserting a small piece of cheese into the center of each ball. Dredge in flour, dip in beaten egg, then coat with breadcrumbs. Fry in hot oil until golden brown and crispy.
When making arancini, it’s important that your risotto is cold and firm enough to hold its shape; if it’s too soft, you might’ve difficulty forming the balls.
You can also personalize your arancini by experimenting with other fillings like mozzarella or sautéed mushrooms. To achieve that extra crunch, make certain your oil is at the right temperature for frying — if it’s too cool, the arancini will absorb too much oil and become greasy.
Enjoy your truffle and Parmesan arancini fresh out of the oil, ideally served with a light marinara or aioli for dipping!
Lobster Corn Fritters With Citrus Aioli

Lobster corn fritters are a delightful combination of sweet corn, tender lobster, and aromatic herbs, making them the perfect appetizer for a refined gathering or a casual dinner at home. These crispy fritters aren’t only visually appealing but also burst with flavor in every bite. Paired with a bright and zesty citrus aioli, this dish elevates the usual corn fritter into a gourmet experience reminiscent of Michelin-star restaurants.
Preparing lobster corn fritters requires several components, but the process is straightforward and the result is well worth the effort. You can easily make the fritters ahead of time and keep them warm in the oven, allowing you to focus on preparing the aioli when it’s time to serve. The fusion of sweet, savory, and tangy notes makes these fritters a standout choice for any occasion.
Ingredients:
- 1 cup cooked lobster meat, chopped
- 1 cup fresh corn kernels (or frozen, thawed)
- 1/2 cup all-purpose flour
- 2 large eggs
- 1/4 cup milk
- 1/4 cup green onions, chopped
- 1/4 cup red bell pepper, finely diced
- 1 teaspoon baking powder
- Salt and pepper to taste
- Oil for frying (canola or vegetable)
For Citrus Aioli:
- 1/2 cup mayonnaise
- 1 tablespoon lemon juice
- 1 tablespoon lime juice
- 1 garlic clove, minced
- Salt and pepper to taste
In a large bowl, combine the lobster, corn, flour, eggs, milk, green onions, red bell pepper, baking powder, salt, and pepper. Stir until just mixed together, making sure not to overwork the batter.
Heat a generous amount of oil in a large skillet over medium heat. Once hot, drop spoonfuls of the mixture into the pan, flattening them slightly with the back of a spatula. Cook until golden brown on each side, about 3-4 minutes per side. Drain on paper towels while you continue with the remaining batter.
For the aioli, simply whisk together the mayonnaise, lemon juice, lime juice, minced garlic, salt, and pepper until smooth.
When preparing lobster corn fritters, using fresh lobster will yield the best flavor, but if fresh isn’t available, high-quality frozen lobster meat works well too. Make sure to drain any excess moisture from the corn if using frozen, as this can make the fritters soggy.
Additionally, adjusting the seasoning in the batter allows you to customize the flavor profile, so don’t hesitate to experiment with fresh herbs or spices according to your taste preferences.
Smoked Salmon Blinis With Dill Cream
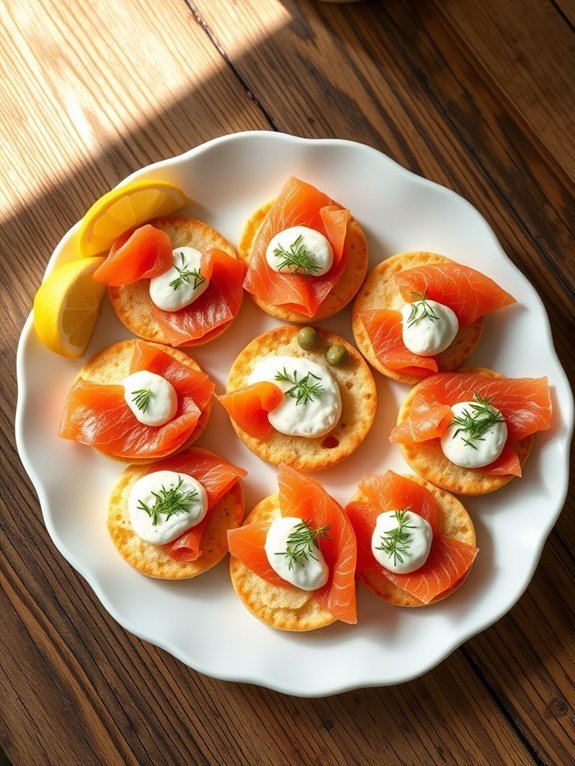
Smoked salmon blinis with dill cream is a refined appetizer that combines the delicate flavors of smoked salmon and the freshness of dill, making it perfect for any sophisticated gathering.
These bite-sized pancakes, known as blinis, offer a delightful texture that complements the silky smoothness of the dill cream, creating a tantalizing experience on the palate. With a few high-quality ingredients and simple techniques, you can impress your guests with this elegant dish.
To achieve the best results, it’s important to use fresh ingredients, particularly when it comes to the smoked salmon and herbs.
The blinis can be made ahead of time and reheated gently, allowing you to enjoy the festivities without being stuck in the kitchen. The dill cream adds a light and aromatic touch, elevating the overall flavor profile of this sophisticated appetizer.
Ingredients:
- 1 cup buckwheat flour
- 1 cup milk
- 2 large eggs
- 1 tsp baking powder
- ½ tsp salt
- 2 tbsp unsalted butter, melted
- 4 oz smoked salmon, thinly sliced
- ½ cup sour cream
- 2 tbsp fresh dill, chopped
- Lemon wedges, for serving
Whisk together the buckwheat flour, milk, eggs, baking powder, and salt in a bowl until smooth. Stir in the melted butter, then let the batter rest for about 30 minutes.
In the meantime, combine the sour cream and chopped dill in a small bowl and set aside. Heat a nonstick skillet over medium heat, and pour small amounts of batter onto the skillet to form mini pancakes.
Cook for about 2-3 minutes until bubbles form on the surface, then flip and cook until golden brown. Remove from the skillet and keep warm. Once all the blinis are cooked, top each with a slice of smoked salmon, a dollop of dill cream, and serve with lemon wedges.
When preparing smoked salmon blinis, consider experimenting with different toppings beyond traditional dill cream.
A sprinkle of capers, a touch of crème fraîche, or even a hint of horseradish can add unique flavor dimensions. Additionally, make sure your blinis are served warm for peak taste and texture.
A delicate presentation will further enhance your dish, so arrange the blinis on a platter with garnishes and fresh herbs for a visually stunning appetizer.
Recommended Items
Get ready to impress your guests with these must-have ingredients and tools for your Michelin-star inspired appetizers!
Wild Mushroom Tartlets With Thyme
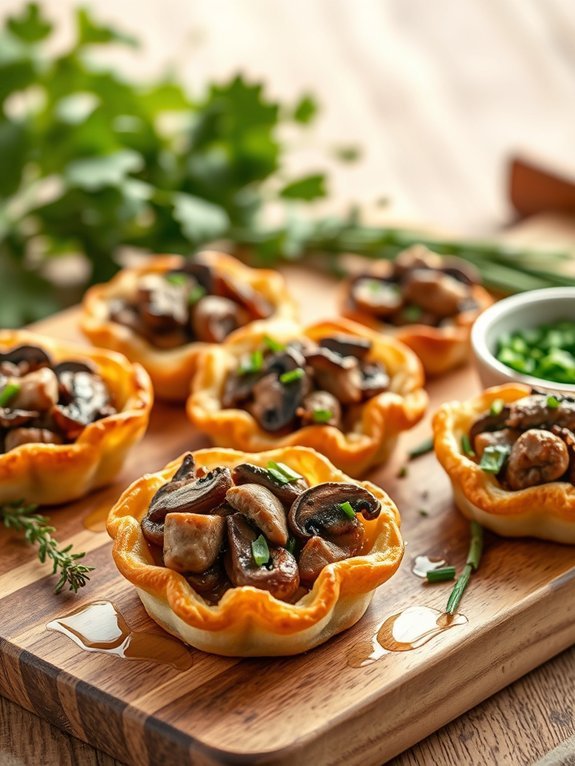
Wild mushroom tartlets with thyme are a delightful appetizer that captures the essence of earthy flavors complemented by fresh herbs. The flaky pastry serves as a perfect vessel for the rich filling, offering a luxurious bite that’s sure to impress your guests. This dish not only showcases the versatility of mushrooms but also elevates the dining experience, making it reminiscent of dishes served in Michelin-starred restaurants.
The fragrant aroma of sautéed mushrooms combined with the subtle hint of thyme blends beautifully to create a tantalizing starter. These tartlets can be prepared in advance and baked just before serving, allowing for a stress-free presentation during your gathering. With a golden-brown crust and a savory filling, they promise to be a hit on any occasion.
Ingredients:
- 1 sheet of puff pastry, thawed
- 2 cups assorted wild mushrooms, cleaned and chopped (e.g., chanterelles, shiitake, oyster)
- 1 small shallot, finely chopped
- 2 cloves garlic, minced
- 1 tablespoon fresh thyme leaves, plus extra for garnish
- 1/4 cup heavy cream
- 1/4 cup grated Parmesan cheese
- Salt and pepper to taste
- Olive oil for sautéing
- Egg wash (1 egg whisked with 1 tablespoon water)
In a skillet, heat a drizzle of olive oil over medium heat. Add the chopped shallot and cook until translucent, then add the garlic and cook for an additional minute. Stir in the wild mushrooms and sauté until they’re tender and any released moisture has evaporated.
Season with salt, pepper, and fresh thyme. Remove from heat, and mix in the heavy cream and Parmesan cheese until well combined.
Roll out the puff pastry and cut it into desired shapes for tartlet bases. Arrange these on a baking sheet, spoon the mushroom filling into each pastry, and brush the edges with egg wash. Bake at 400°F (200°C) for 18-20 minutes until the pastry is golden and puffed.
When preparing wild mushroom tartlets, it’s important to ascertain the mushrooms are dry before cooking to avoid excess moisture. You can use any combination of wild mushrooms, as each brings its unique flavor profile to the dish.
Feel free to experiment with adding a splash of white wine to the sauté for an additional layer of taste. For a beautiful presentation, consider adding a sprinkle of finely chopped chives or microgreens on top just before serving. Enjoy your culinary creation!
Mini Beef Wellington Bites
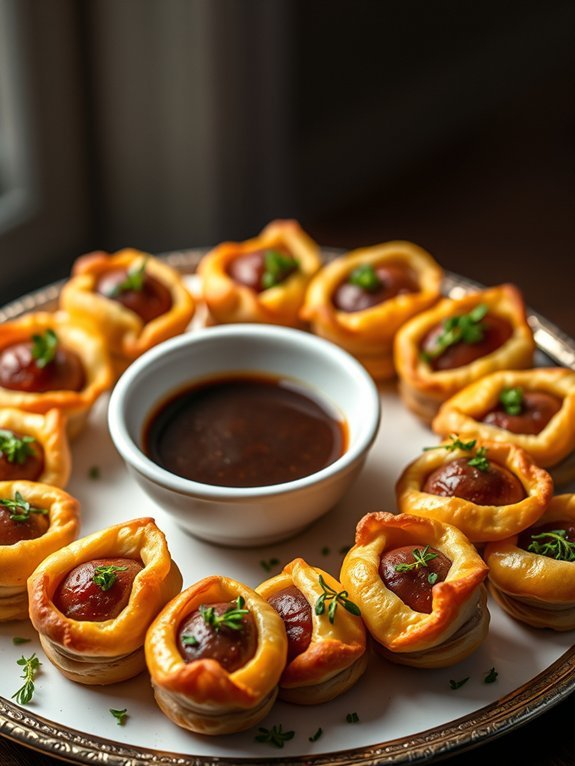
Mini Beef Wellington Bites are a sophisticated twist on the classic Beef Wellington, perfect for cocktail parties or as an elegant appetizer at a fine dining event. These bite-sized treats encapsulate all the flavors of the original dish but are made to be enjoyed in a few delicious bites. The combination of tender beef, earthy mushrooms, and flaky pastry creates a delightful experience that’s sure to impress your guests.
To create these delectable bites, it’s important to start with quality ingredients. The highlight of this recipe is the beef tenderloin, which must be seared to perfection for peak flavor. Coupled with a rich mushroom duxelles, wrapped in a blanket of puff pastry, these mini Wellingtons encapsulate luxury in every mouthful. They aren’t only visually appealing but also a smart choice for any gathering, making them memorable culinary delights.
Ingredients:
- 1 pound beef tenderloin, cut into 1-inch cubes
- 1 cup cremini or button mushrooms, finely chopped
- 2 tablespoons olive oil
- 2 cloves garlic, minced
- 2 tablespoons fresh thyme leaves, chopped
- 1/4 cup Dijon mustard
- 1 large egg, beaten (for egg wash)
- 1 package (1 pound) of puff pastry, thawed
- Salt and pepper to taste
- Flour for dusting
Sear the beef cubes in olive oil over high heat until browned on all sides, about 2-3 minutes. Remove them from the pan and set aside. In the same pan, add the mushrooms, garlic, thyme, and cook until the moisture has evaporated and the mixture is dry, about 5-7 minutes.
Season the mushroom mixture with salt and pepper, then let it cool. Roll out the puff pastry on a floured surface, cut it into squares, and spread a thin layer of Dijon mustard on each square. Place a spoonful of the mushroom mixture and a cube of beef in the center of each square, fold the pastry over, seal the edges, and brush the tops with beaten egg.
Bake at 400°F (200°C) for 15-20 minutes or until golden brown.
When preparing Mini Beef Wellington Bites, make sure not to overload the pastry with filling; too much can cause them to burst while baking. For added flavor, you can include a layer of prosciutto in each bite or enhance your mushroom mixture with a splash of brandy for depth.
Finally, allow the baked bites to cool for a few minutes before serving, making them easier to handle while still warm and inviting.
Goat Cheese and Fig Crostini
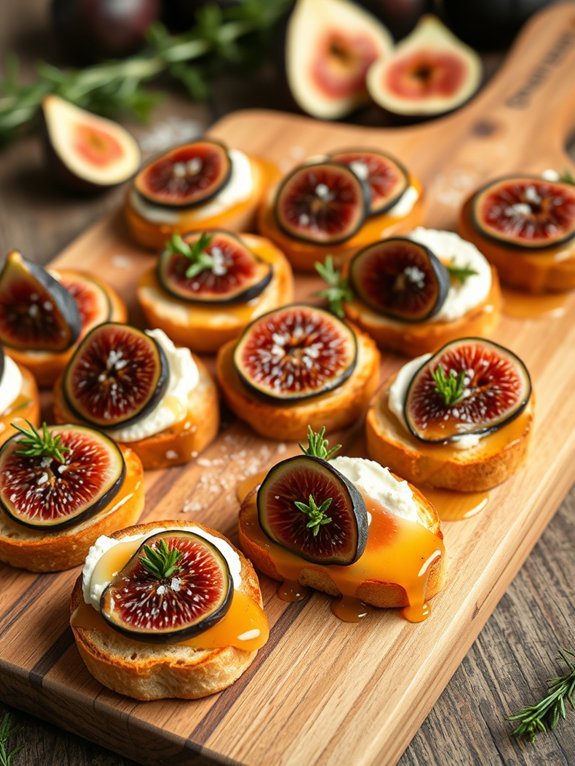
Goat Cheese and Fig Crostini is an elegant appetizer that pairs beautifully with wine and is perfect for any gathering. The creamy richness of the goat cheese, combined with the sweet and earthy notes of figs, creates a sophisticated flavor profile that’s sure to impress your guests.
This dish isn’t only visually stunning but also incredibly easy to prepare, making it a go-to choice for an upscale yet uncomplicated starter.
To make these delightful crostini, you’ll first toast slices of baguette to achieve a crispy texture that provides a perfect contrast to the creamy cheese and juicy figs. The addition of a drizzle of honey and a sprinkle of fresh herbs elevates the dish even further, providing a burst of flavor that will make your taste buds dance.
With each bite, your guests will savor the harmony of flavors, making them feel as if they’ve dined at a Michelin-starred restaurant.
- 1 baguette, sliced into 1/2-inch rounds
- 8 oz goat cheese, softened
- 1 cup fresh figs, sliced
- 2-3 tablespoons honey
- Salt and pepper to taste
- Fresh thyme or rosemary for garnish
- Olive oil for brushing
Preheat your oven to 400°F (200°C). Arrange the baguette slices on a baking sheet and brush them lightly with olive oil. Bake for about 5-7 minutes, or until golden and crisp.
Once toasted, spread a generous layer of softened goat cheese on each slice, top with a slice of fresh fig, and drizzle with honey. Finish with a sprinkle of salt and pepper, and garnish with fresh herbs.
For an extra touch, consider using a mix of fresh and dried figs or experiment with different types of honey for additional depth of flavor.
If you’re preparing these crostini ahead of time, keep the goat cheese and figs separate from the toasted bread until just before serving to maintain crispness. Enjoy exploring various toppings and garnishes to create your own signature twist on this delightful classic!
Crab Cakes With Spicy Remoulade
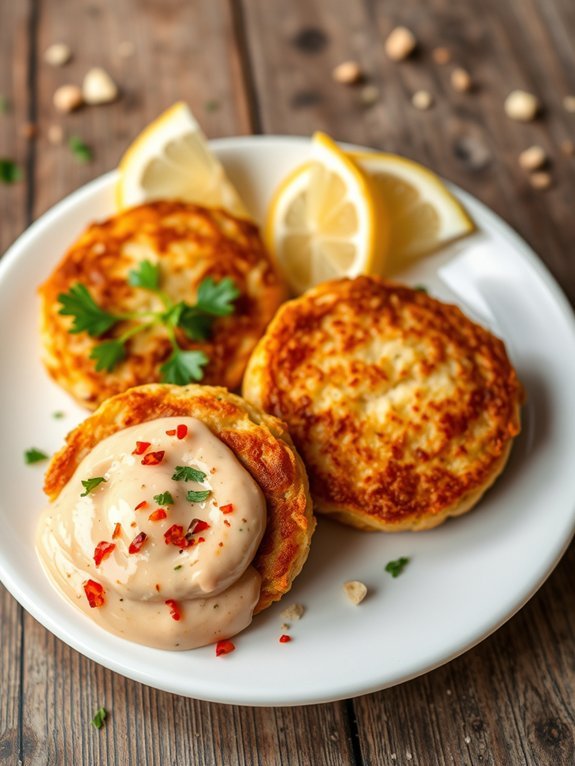
Crab cakes are a quintessential appetizer that epitomizes elegance and flavor, making them a favorite in fine dining establishments. Combining sweet, succulent crab meat with a blend of spices and aromatics, these cakes are both delightful and sophisticated.
The addition of a spicy remoulade elevates the dish further, introducing a creamy tang and an irresistible kick that complements the sweetness of the crab. Whether served at a dinner party or as a special treat for yourself, these crab cakes are sure to impress.
Crafting the perfect crab cake requires a careful balance of ingredients to guarantee they hold together while still being rich in flavor. Choosing the right type of crab meat—preferably lump crab—will enhance the overall taste and texture.
The key is to mix the ingredients just enough to combine them without overworking them, which could lead to a dense cake. Paired with the zesty remoulade, this dish brings a touch of restaurant-quality cooking right to your kitchen.
Ingredients:
- 1 pound lump crab meat, picked over for shells
- 1/2 cup breadcrumbs (preferably panko)
- 1/4 cup mayonnaise
- 1 large egg
- 1 tablespoon Dijon mustard
- 1 tablespoon Worcestershire sauce
- 1 teaspoon Old Bay seasoning
- 1/2 teaspoon salt
- 1/4 teaspoon black pepper
- 2 tablespoons chopped fresh parsley
- 1 tablespoon lemon juice
- Vegetable oil for frying
In a large mixing bowl, combine the crab meat, breadcrumbs, mayonnaise, egg, Dijon mustard, Worcestershire sauce, Old Bay seasoning, salt, pepper, parsley, and lemon juice. Gently fold the mixture together until all ingredients are evenly incorporated, being careful not to break up the crab meat too much.
Form the mixture into patties, about 2-3 inches in diameter. Heat vegetable oil in a large skillet over medium heat, and once hot, carefully add the crab cakes, cooking for about 3-4 minutes on each side or until golden brown and heated through.
For extra tips, it’s crucial to refrigerate the formed crab cakes for at least 30 minutes before frying to help them set properly. This will prevent them from falling apart in the skillet.
Additionally, consider doubling the batch and freezing half for later use, as crab cakes freeze beautifully. Serve the cakes with a wedge of lemon and an extra dollop of spicy remoulade for an impressive presentation that your guests will love.
Proposed Recipes for Exquisite Appetizers
Asparagus Wrapped in Prosciutto
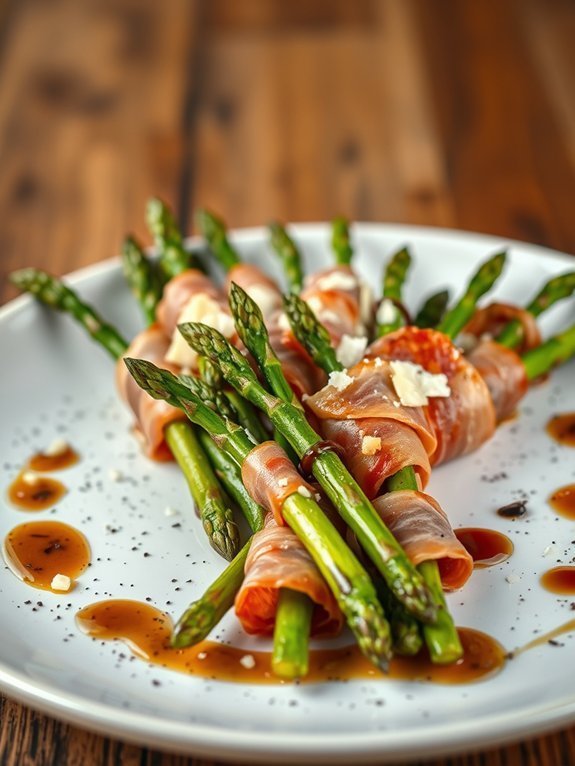
Asparagus wrapped in prosciutto is the perfect appetizer to impress your guests. This sophisticated dish combines the fresh, crisp flavor of asparagus with the savory, salty notes of prosciutto, creating a delightful balance of textures and tastes. Its elegant presentation and simple preparation make it a go-to choice for dinner parties or special occasions, elevating any gathering into a gourmet experience.
To prepare this elegant appetizer, select fresh asparagus spears that are vibrant green and firm to the touch. The prosciutto adds a rich flavor and crispy texture when baked, making each bite a delightful experience. Wrapping the asparagus with prosciutto not only enhances the dish but also helps to keep the asparagus moist while roasting, creating the ideal harmony of flavors in each mouthful.
- Fresh asparagus spears (about 12-15)
- Prosciutto slices (6-8 slices, cut in half lengthwise)
- Olive oil
- Freshly cracked black pepper (to taste)
- Optional: Parmesan cheese for garnish
Preheat your oven to 400°F (200°C). Begin by trimming the woody ends off the asparagus spears and patting them dry. Take a half slice of prosciutto and wrap it around each asparagus spear, starting from the bottom and spiraling upward, making sure to cover the asparagus mostly but allowing a bit of the green to peek through.
Place the wrapped asparagus on a baking sheet lined with parchment paper, drizzle with a touch of olive oil, and season with freshly cracked black pepper. Bake in the preheated oven for 12-15 minutes, or until the prosciutto is crispy and the asparagus is tender yet still slightly firm.
For best results, choose high-quality prosciutto, as this will greatly enhance the flavor of your dish. You can also experiment with different toppings, such as a sprinkle of grated Parmesan cheese just before serving for an added layer of flavor.
Additionally, if you’d like a touch of sweetness, consider drizzling a balsamic reduction over the finished appetizers to complement the savory elements. These wraps can be prepared ahead of time and stored in the refrigerator before baking, allowing for convenient pre-event preparation.
Caprese Skewers With Balsamic Glaze
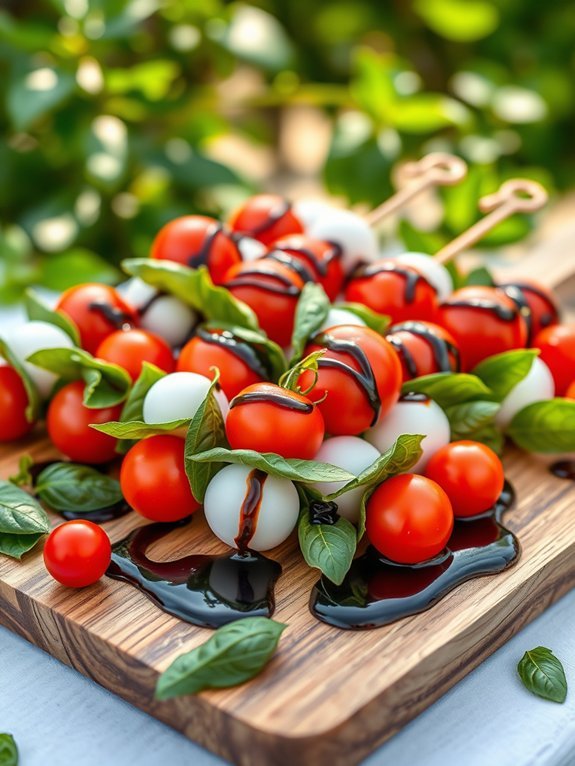
Caprese skewers are a delightful and elegant appetizer that brings the classic Italian flavors of caprese salad into a handheld form. With fresh mozzarella, ripe tomatoes, and fragrant basil, these skewers aren’t only visually impressive but also incredibly tasty. Drizzled with a tangy balsamic glaze, they’re sure to impress your guests at any gathering or celebration.
In just a few easy steps, you can create a dish that embodies the essence of Mediterranean cuisine while providing a light bite that satisfies the palate. This recipe is perfect for those who appreciate simplicity without compromising flavor.
The combination of creamy mozzarella, juicy tomatoes, and aromatic basil creates a balance that’s satisfyingly delicious. Ideal for summer parties, picnics, or even formal dining occasions, caprese skewers can be prepared in advance, making them a versatile choice for your menu.
- Fresh mozzarella balls
- Cherry tomatoes
- Fresh basil leaves
- Balsamic glaze
- Wooden skewers
- Salt and pepper (optional)
To prepare your caprese skewers, start by threading a cherry tomato onto a wooden skewer, followed by a fresh basil leaf, and then a mozzarella ball. Repeat this process until all ingredients are used, ensuring that each skewer has at least one of each component.
Once assembled, drizzle the skewers with balsamic glaze and season lightly with salt and pepper if desired. When making this dish, it’s vital to use the freshest ingredients you can find, as the quality of the tomatoes, mozzarella, and basil will greatly affect the overall flavor.
Additionally, let the skewers sit for a few minutes after drizzling with balsamic glaze to allow the flavors to meld together. Experiment with different types of balsamic glaze, such as white or aged, to customize the taste to your liking. Serve chilled or at room temperature for the best experience.
Deviled Eggs With Caviar and Chives
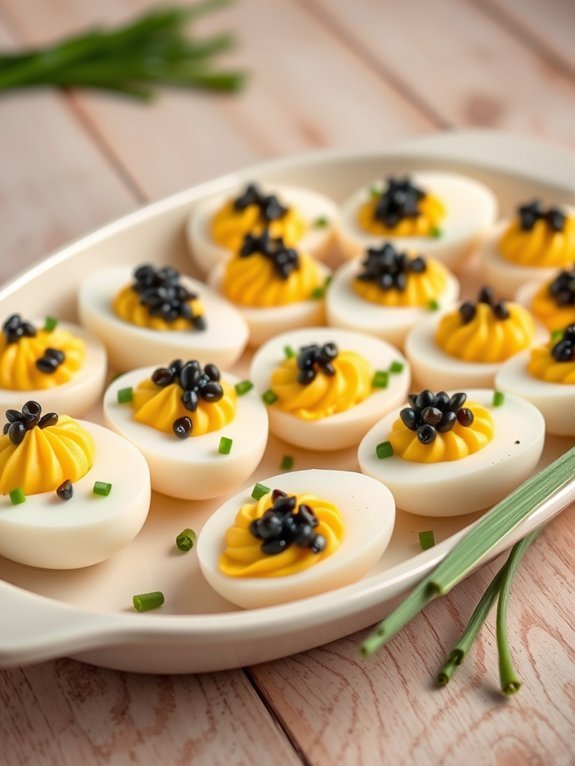
Deviled eggs are a classic appetizer that brings a touch of elegance to any gathering. With their creamy filling and versatile flavor profiles, they can easily be elevated to gourmet status by adding special ingredients. This recipe takes traditional deviled eggs and elevates them with the luxurious flavors of caviar and the freshness of chives, creating a dish that’s both sophisticated and indulgent.
To make these deviled eggs truly stand out, it’s important to pay attention to the quality of the ingredients. Fresh eggs, high-quality caviar, and vibrant chives all contribute to the overall flavor and presentation. Whether you’re hosting a dinner party or simply treating yourself to a fancy snack, these deviled eggs with caviar and chives are sure to impress.
- 6 large eggs
- 3 tablespoons mayonnaise
- 1 teaspoon Dijon mustard
- Salt and black pepper, to taste
- 2 tablespoons finely chopped fresh chives
- 2 tablespoons caviar (of your choice)
- Additional chives for garnish
Start by placing the eggs in a pot and covering them with cold water. Bring the water to a rolling boil over medium heat, then remove the pot from the heat and cover it. Let the eggs sit in the hot water for about 12 minutes, then transfer them to an ice bath to cool.
Once cooled, peel the eggs and slice them in half lengthwise. Remove the yolks and place them in a bowl. Mash the yolks with mayonnaise, Dijon mustard, salt, and black pepper until smooth. Fold in the chopped chives, then spoon or pipe the mixture back into the egg white halves. Top each egg with a small dollop of caviar and garnish with additional chives before serving.
To guarantee the best flavor and texture, be careful not to overcook the eggs as this can lead to a rubbery texture. Using liquid-filled measuring spoons and a piping bag for the yolk mixture can enhance the presentation, giving your deviled eggs a chic, restaurant-quality look.
Finally, for an extra touch, consider chilling the assembled deviled eggs for about 30 minutes before serving; this allows the flavors to meld beautifully.

