This post may contain affiliate links. Please read our policy page.
To elevate your meals, you should master essential cooking techniques like sautéing, braising, roasting, and grilling. Each method has its unique benefits, from enhancing flavors through marinating to preserving nutrients with steaming. Don’t overlook the importance of seasoning and fermenting to amplify dish appeal. Practice these techniques, and you’ll transform everyday ingredients into extraordinary dishes. Stick around to discover more tips and tricks that can take your culinary skills to the next level.
Sautéing
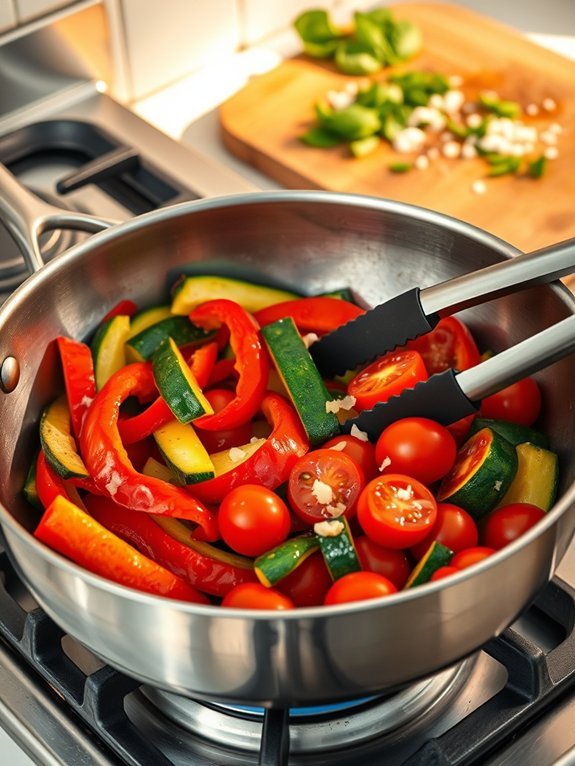
Sautéing is a cooking technique that involves cooking food quickly in a small amount of fat over relatively high heat. This method is perfect for preparing a variety of ingredients, including vegetables, meats, and seafood, while maintaining their texture and flavor. The high heat allows for browning, which contributes a rich taste and appealing color to your dishes.
With sautéing, the key is in the timing and technique, enabling you to create delicious meals in just minutes. A classic sautéed vegetable dish can be customized with your favorite vegetables, herbs, or spices to match your palate. This technique is particularly excellent for seasonal produce, allowing the freshness and natural flavors to shine through.
With just a few ingredients and straightforward steps, you can elevate your everyday cooking and enjoy vibrant, healthy meals. Perfect for a quick weeknight dinner or as a side for a more elaborate feast, sautéing is an invaluable technique to have in your culinary repertoire.
Ingredients:
- 2 tablespoons olive oil
- 1 bell pepper, sliced
- 1 zucchini, sliced
- 1 cup cherry tomatoes, halved
- 2 cloves garlic, minced
- Salt and pepper, to taste
- Fresh basil or parsley, chopped (for garnish)
Heat the olive oil in a large skillet over medium-high heat. Once hot, add the sliced bell pepper and zucchini, stirring frequently for about 3-4 minutes. Add the halved cherry tomatoes and minced garlic to the pan, seasoning with salt and pepper.
Continue to sauté for another 2-3 minutes, or until the vegetables are tender yet still crisp. Remove from heat and garnish with fresh herbs before serving.
When sautéing, it’s vital to verify your pan is hot enough before adding the ingredients, as this will help the food brown nicely and prevent it from steaming.
Avoid overcrowding the pan—cooking in batches if necessary—so that the vegetables have space to cook evenly. You can also experiment with different types of oils, spices, and herbs to create variations that suit your taste preferences.
Sautéing can be a quick and healthy way to prepare meals while maintaining the integrity of the ingredients you use.
Recommended Items
Discover our top picks for ingredients and tools that will take your cooking skills to the next level!
Braising
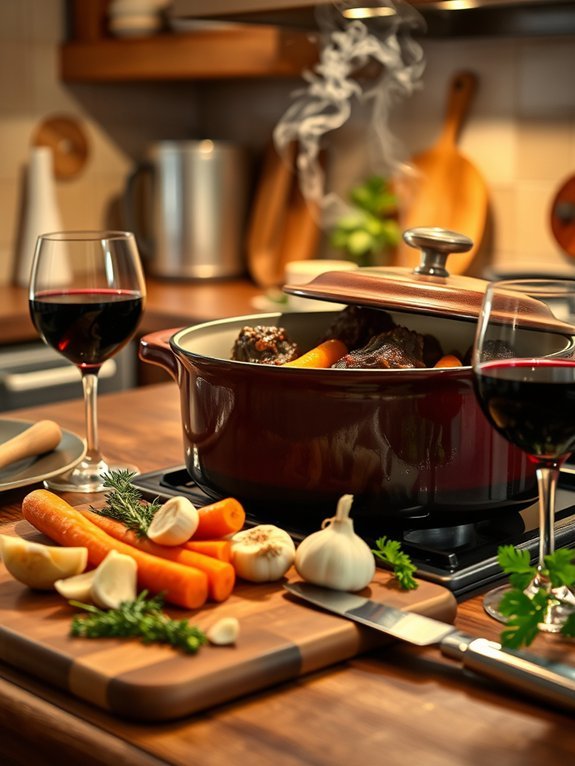
Braising is a cooking technique that involves slow-cooking food in a small amount of liquid in a covered pot to enhance flavors and achieve tender, melt-in-your-mouth results. This method is particularly suitable for tougher cuts of meat, as the low and slow cooking process allows the connective tissues to break down, resulting in a deliciously rich dish.
The combination of both moist and dry heat creates a balanced flavor profile, while also keeping the meat juicy and tender.
One of the classic examples of braising is Braised Short Ribs. These succulent pieces of meat are seared to develop a deep color and flavor and then cooked slowly in a seasoned braising liquid, often enriched with vegetables, herbs, and wine. This dish not only makes for an impressive centerpiece on any dining table but also fills the kitchen with an irresistible aroma that will leave guests anticipating the first bite.
- 4 bone-in beef short ribs
- Salt and pepper
- 2 tablespoons olive oil
- 1 onion, diced
- 2 carrots, diced
- 2 celery stalks, diced
- 4 cloves garlic, minced
- 1 cup red wine
- 2 cups beef broth
- 2 tablespoons tomato paste
- 1 teaspoon fresh thyme, leaves only
- 2 bay leaves
Season the short ribs generously with salt and pepper. In a large, heavy pot or Dutch oven, heat the olive oil over medium-high heat. Sear the short ribs on all sides until browned, about 2-3 minutes per side. Remove the ribs and set aside.
In the same pot, add the onion, carrots, and celery, cooking until softened (about 5 minutes). Stir in the garlic and cook for an additional minute. Pour in the red wine to deglaze the pot, scraping up any browned bits.
Add the beef broth, tomato paste, thyme, and bay leaves, then return the short ribs to the pot. Bring to a simmer, cover, and reduce the heat to low. Cook for 2.5 to 3 hours, or until the ribs are tender and the meat easily pulls away from the bone.
When braising, remember to check the liquid levels periodically to prevent the pot from drying out. If the liquid is reducing too fast, simply add a bit more broth or water.
It’s also beneficial to braise your dish a day in advance; allowing the flavors to meld overnight will enhance the overall taste. Finally, don’t hesitate to experiment with different vegetables, herbs, or types of wine to customize the flavor profile to your liking.
Roasting
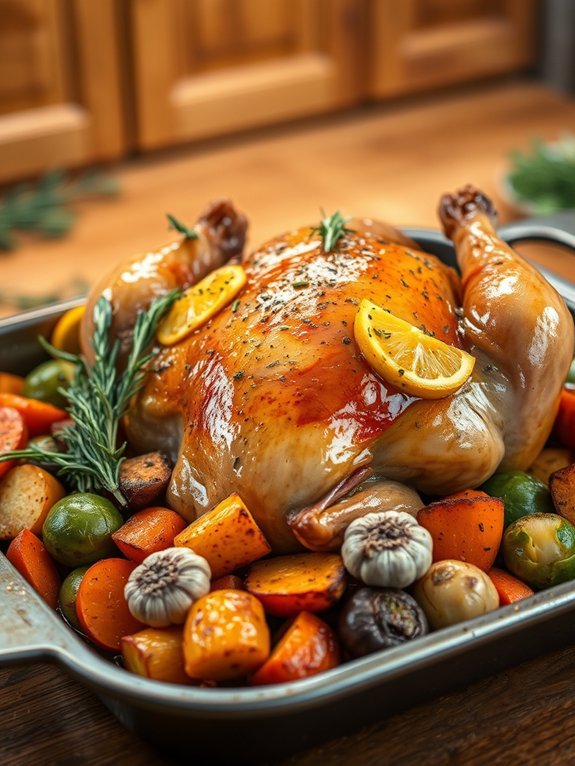
Roasting is a versatile cooking technique that results in rich flavors and delightful textures. Whether you’re preparing a whole chicken, root vegetables, or a succulent piece of beef, roasting allows the natural sugars in the ingredients to caramelize, creating a beautiful brown crust while keeping the insides tender and juicy. A well-roasted dish serves not only as a comforting meal but also as an impressive centerpiece for gatherings and celebrations.
To begin, the key to perfect roasting lies in selecting high-quality ingredients, allowing them to shine with minimal interference from strong spices or sauces. A simple mix of herbs, a drizzle of olive oil, and the right seasoning can elevate your roasted creations.
Prepare your ingredients thoughtfully, giving special attention to their size, as uniform pieces will cook evenly and at the same rate.
- 1 whole chicken (about 4-5 pounds)
- 2 tablespoons olive oil
- 1 tablespoon kosher salt
- 1 teaspoon black pepper
- 1 tablespoon fresh rosemary, chopped
- 1 tablespoon fresh thyme, chopped
- 1 lemon, quartered
- 4 cloves garlic, smashed
- 1 onion, quartered
- Fresh vegetables (like carrots, potatoes, or Brussels sprouts) for roasting alongside the chicken
Preheat your oven to 425°F (220°C). Pat the chicken dry with paper towels, then rub the olive oil all over the bird, followed by the salt, pepper, rosemary, and thyme, ensuring an even coating. Stuff the cavity with lemon wedges, smashed garlic cloves, and onion. Arrange your choice of fresh vegetables around the chicken in a roasting pan.
Roast for about 1 hour and 15 minutes, or until the chicken reaches an internal temperature of 165°F (75°C), basting occasionally with the pan juices.
When roasting, remember that every oven behaves differently, so it’s crucial to use a meat thermometer to accurately check the chicken’s internal temperature. You can add more flavor by marinating the chicken a few hours in advance or even overnight.
Additionally, allowing the chicken to rest for at least 10-15 minutes after roasting will help retain its juices, resulting in a more flavorful and moist meal. Don’t forget to save the pan drippings for a delectable gravy!
Grilling

Grilling is an age-old cooking technique that brings a unique flavor to meals that can’t be replicated by other methods. The high heat of the grill creates a delightful char that seals in juices while infusing food with a smoky taste.
Whether you’re firing up a charcoal grill to entertain friends at a weekend barbecue or using a gas grill for a weeknight dinner, mastering this method reveals endless culinary possibilities. From meats to vegetables, grilling can elevate your meals to new heights, providing a wonderful combination of taste and texture.
One of the simplest and most versatile grilling recipes you can try is grilled chicken with a zesty marinade. Perfect for summer nights or any time of the year, this dish can be served on its own with a side of fresh salad or as part of a hearty sandwich. The marinade not only adds flavor but also tenderizes the chicken, resulting in juicy and succulent bites that are hard to resist.
Once you try this, you’ll likely want to experiment with different marinades and vegetables to grill alongside your chicken.
- 4 boneless, skinless chicken breasts
- 1/4 cup olive oil
- 3 tablespoons lemon juice
- 2 tablespoons soy sauce
- 2 cloves garlic, minced
- 1 teaspoon dried oregano
- 1 teaspoon black pepper
- 1 teaspoon salt
In a bowl, whisk together the olive oil, lemon juice, soy sauce, minced garlic, oregano, black pepper, and salt to create the marinade.
Add the chicken breasts and verify they’re fully coated with the mixture. Cover and refrigerate for at least 30 minutes, or up to overnight for maximum flavor. Preheat your grill to medium-high heat and lightly oil the grates.
Grill the chicken for 6-7 minutes on each side or until they reach an internal temperature of 165°F, confirming they’re cooked through and juicy.
For the best results, let the chicken rest for a few minutes after grilling to allow the juices to redistribute throughout the meat.
If you want to experiment further, consider adding vegetables such as bell peppers, zucchini, or asparagus to the grill during the last 5 minutes of the chicken’s cooking time. Remember, soaking wooden skewers in water before using them for kebabs can prevent burning, and always keep a close eye on your grill to avoid flare-ups.
Enjoy your delicious grilled chicken alongside your favorite dipping sauces or fresh herbs for added flavor!
Steaming
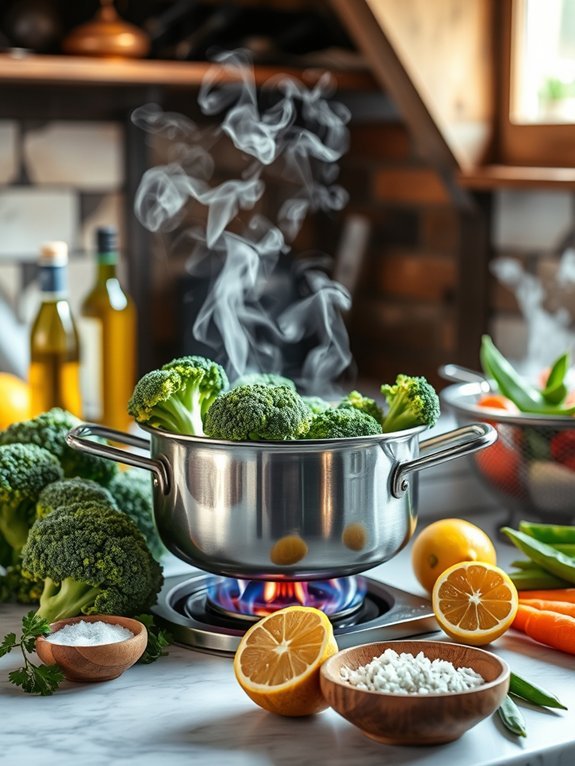
Steaming is an excellent cooking technique that preserves the nutrients in food while enhancing its natural flavors. This method is particularly effective for cooking vegetables, as it allows them to maintain their vibrant color and crunchy texture.
By using steam to cook, you can create delicious and healthy meals without the need for excessive oils or fats, making it a perfect option for those looking to maintain a balanced diet.
One of the best dishes to showcase this technique is steamed broccoli, which isn’t only simple to prepare but also incredibly versatile. Steamed broccoli pairs well with a variety of proteins and grains, making it an excellent side dish for any meal. With minimal effort, you can enjoy this nutritious green vegetable that’s loaded with vitamins and antioxidants.
- Fresh broccoli florets
- Salt
- Pepper
- Olive oil (optional)
- Lemon juice (optional)
- Garlic powder (optional)
To steam broccoli, fill a pot with about an inch of water and bring it to a boil. Place a steamer basket or a colander over the pot, ensuring that it doesn’t touch the water.
Add the fresh broccoli florets to the steamer basket, cover with a lid, and steam for about 4-6 minutes, or until the broccoli is tender yet still bright green.
When steaming broccoli, it’s essential not to overcook it, as this can lead to a mushy texture and loss of nutrients. To prevent overcooking, keep an eye on the color and doneness, and be sure to remove the broccoli from the steamer promptly.
For added flavor, consider seasoning your steamed broccoli with a drizzle of olive oil, a sprinkle of salt, pepper, or some garlic powder, and a splash of fresh lemon juice right before serving. This will enhance its taste while maintaining the health benefits of this cooking technique.
Poaching
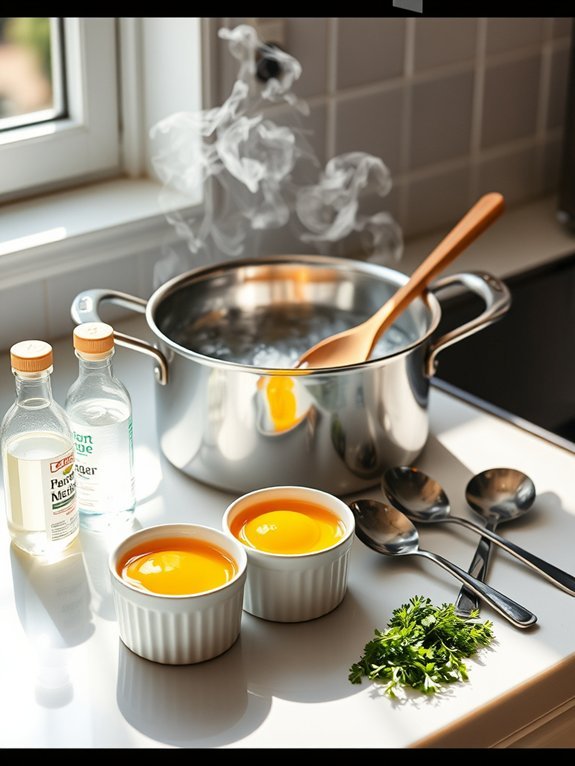
Poaching is a gentle cooking technique that involves immersing food in simmering liquid, making it an ideal method for preparing delicate ingredients such as eggs, fish, and fruit. This technique retains moisture and flavor while allowing the natural tastes of the ingredients to shine through. When poached correctly, the food emerges tender and flavorful, making it an excellent choice for light and healthy meals.
One of the great advantages of poaching is its versatility; you can use various liquids, such as water, broth, or wine, infused with herbs and spices to enhance the flavors of the main ingredient. This method isn’t only simple but also forgiving, making it suitable for home cooks of all skill levels to master.
Whether you’re preparing a poached egg for breakfast, a light fish dish for dinner, or poached pears for dessert, the possibilities are endless.
Ingredients:
- 2 large eggs
- Salt
- 1 tablespoon white vinegar (optional)
- Water (enough to fill a saucepan)
- Fresh herbs (optional, for garnish)
Carefully bring a saucepan filled with water to a gentle simmer over medium heat. If desired, add a splash of white vinegar to the water, which helps the egg whites to coagulate.
Crack each egg into a small ramekin or cup, then create a gentle whirlpool in the simmering water using a spoon. Slide the eggs one at a time into the center of the whirlpool. Allow the eggs to poach for about 3-4 minutes, or until the whites are set and the yolks are still soft.
Use a slotted spoon to carefully remove the eggs and drain on a paper towel before serving. When poaching, it’s important to maintain a gentle simmer rather than a rolling boil, as this can break the eggs apart.
Additionally, for best results, use fresh eggs, as they hold their shape better during cooking. Experiment with different poaching liquids and seasonings to find your perfect combination, and consider serving your poached dish with a sprinkle of fresh herbs for added flavor and presentation.
Blanching
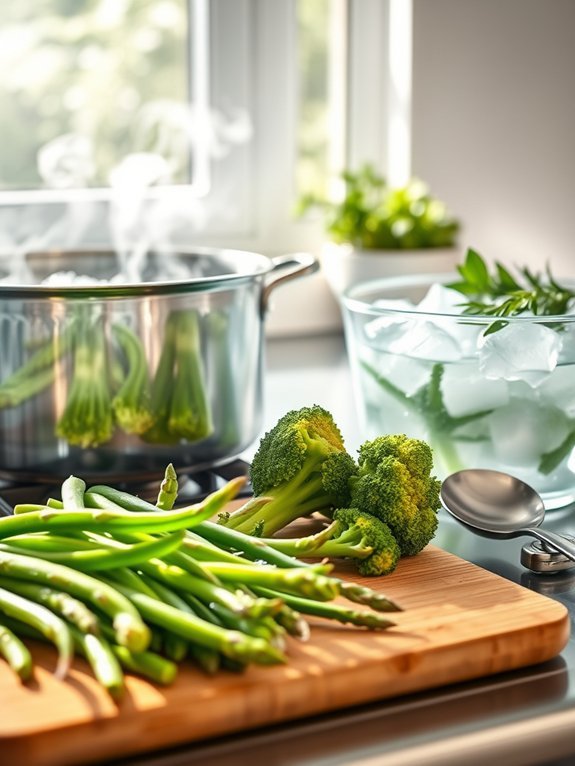
Blanching is a simple yet effective cooking technique that involves briefly boiling vegetables and then plunging them into an ice bath to halt the cooking process. This method helps to lock in vibrant colors, crisp textures, and important nutrients, making it an excellent choice for preparing vegetables for salads, stir-fries, or freezing. Blanched vegetables take on a delightful tender-crisp quality, making them versatile components in many dishes.
To master blanching, start by selecting fresh, seasonal vegetables such as green beans, broccoli, or asparagus. The great thing about blanching is that it’s quick, often taking just a few minutes. This technique not only helps enhance the flavor and appearance of your vegetables but also makes peeling easier for certain produce, like tomatoes and peaches. By mastering blanching, you’ll elevate your meals and enjoy the freshest taste of your chosen vegetables.
Ingredients:
- Fresh vegetables (e.g., green beans, broccoli, asparagus)
- Water
- Ice cubes
- Salt (optional, for seasoning)
Fill a large pot with water and bring it to a rolling boil over high heat. Meanwhile, prepare a bowl with ice water and set it aside. Once the water is boiling, add a generous pinch of salt (if using) and the fresh vegetables.
Blanch them for 2-3 minutes—just long enough for them to turn vibrant in color and tender in texture. Immediately remove the vegetables with a slotted spoon, and transfer them to the bowl of ice water. Allow them to cool for another 2-3 minutes before draining and patting them dry.
When blanching, the key is to keep a close eye on the timing. Overcooking the vegetables can lead to a mushy texture, which defeats the purpose of blanching. Additionally, if you want to bulk prep vegetables for the week ahead, blanching is a great way to prepare them for quick cooking later while maintaining their color and nutrients.
Always remember to adjust the blanching time based on the type and size of the vegetables for best results.
Baking

Baking is one of the most versatile cooking techniques, allowing home cooks to create everything from sumptuous desserts to savory dishes. At its core, baking uses dry heat, often in an oven, making it perfect for achieving a beautifully crisp crust or a tender crumb.
Whether you’re whipping up an indulgent chocolate cake or a flaky pastry, the world of baking opens up a wide array of delicious possibilities.
One of the joys of baking is the precise science behind it. Ingredients such as flour, sugar, eggs, and fats all play a crucial role in the final outcome. Baking can be both an art form and a straightforward affair, depending on the recipe you choose. Mastering a few basic baking techniques can elevate your meals from everyday fare to culinary masterpieces that will impress your family and friends.
Ingredients:
- 2 cups all-purpose flour
- 1 cup granulated sugar
- 1/2 cup unsalted butter, softened
- 1 cup milk
- 2 large eggs
- 1 tablespoon baking powder
- 1 teaspoon vanilla extract
- 1/2 teaspoon salt
Preheat your oven to 350°F (175°C) and grease a 9×5 inch loaf pan.
In a large mixing bowl, cream together the softened butter and granulated sugar until light and fluffy. Add in the eggs one at a time, mixing well after each addition. Stir in the vanilla extract.
In a separate bowl, whisk together the flour, baking powder, and salt. Gradually add the dry ingredients to the butter mixture, alternating with the milk. Mix until just combined, then pour the batter into the prepared loaf pan.
Bake for 45-50 minutes or until a toothpick inserted into the center comes out clean.
When baking, be sure to measure your ingredients accurately for the best results. Room temperature ingredients, especially eggs and butter, integrate more smoothly, leading to a better texture in your final product.
If you’re experimenting with flavors, keep in mind that a little goes a long way – start with small amounts of spices or extracts and adjust to taste. Don’t rush the cooling process; letting your baked goods rest on a wire rack will help maintain the perfect texture and allow them to set properly.
Happy baking!
Broiling
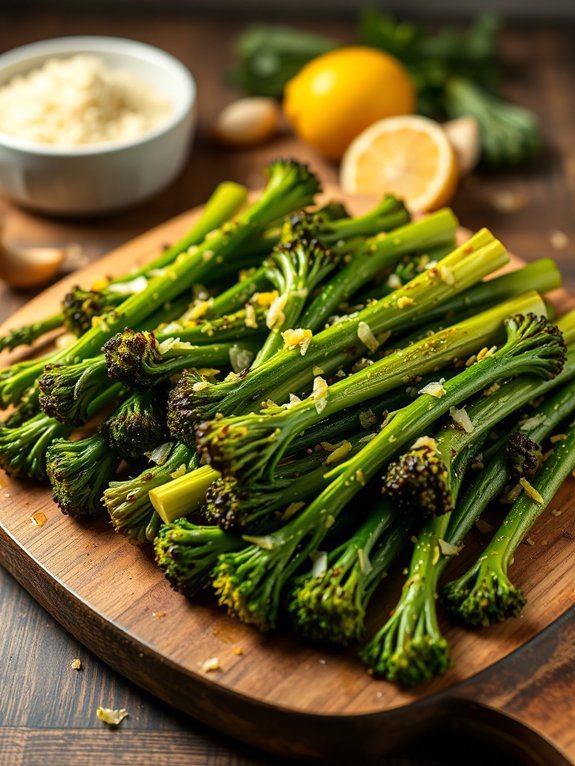
Broiling is a fantastic cooking technique that can elevate your meals, giving them a deliciously charred finish while cooking them quickly at high heat. The method involves cooking food with high-intensity direct heat from above, typically in an oven broiler. It not only enhances flavor but also retains moisture in proteins, making it perfect for items like meats and vegetables.
In this recipe, we’ll broil lemon garlic broccolini as a quick and healthy side dish. The bright citrus combined with aromatic garlic enhances the natural flavor of the broccolini, offering a simple yet gourmet touch to your dinner table. Perfectly cooked, your broccolini will be tender with crisp edges, ready to complement any main course.
- 1 lb broccolini
- 3 tablespoons olive oil
- 3 cloves garlic, minced
- Juice and zest of 1 lemon
- Salt and pepper to taste
- Grated Parmesan cheese (optional)
Preheat your broiler on high and place the rack about 5-6 inches from the heat source. In a bowl, toss the broccolini with olive oil, minced garlic, lemon juice, lemon zest, salt, and pepper until evenly coated. Spread the broccolini in a single layer on a broiler-safe baking sheet. Broil for 5-7 minutes, or until the broccolini is tender and the tips are slightly charred, turning once halfway through.
When broiling, keep a close eye on your food to prevent burning, as it can cook quickly. For added flavor, you can sprinkle some red pepper flakes for a kick or experiment by adding other herbs and spices of your choice.
If using Parmesan cheese, add it during the final 2 minutes of broiling so it melts beautifully without burning. Finally, serving the broccolini immediately after cooking will maintain its ideal texture and flavor.
Stir-frying

Stir-frying is a fast and versatile cooking technique that originated in China but has since become a popular method in kitchens around the world. It involves cooking food quickly over high heat in a small amount of oil while constantly stirring. This method not only retains the vibrant colors and crisp textures of vegetables but also enhances the flavors of the ingredients used.
Whether you’re preparing a simple weeknight dinner or impressing guests with a gourmet dish, mastering stir-frying can elevate your culinary skills considerably. The beauty of stir-frying lies in its adaptability; you can incorporate an array of proteins, vegetables, and sauces to create a dish that suits your tastes.
Stir-frying allows for maximum flavor with minimal effort, making it a go-to technique for busy home cooks. With just a few fresh ingredients and a hot wok or skillet, you can whip up a delicious and nutritious meal in minutes. Let’s explore a simple stir-fry recipe that showcases this exciting cooking method.
- 1 pound chicken breast, thinly sliced
- 2 cups broccoli florets
- 1 bell pepper, sliced
- 1 carrot, julienned
- 3 green onions, chopped
- 2 tablespoons soy sauce
- 1 tablespoon oyster sauce (optional)
- 2 tablespoons vegetable oil
- 2 cloves garlic, minced
- 1 teaspoon ginger, grated
- Cooked rice or noodles for serving
In a large wok or a non-stick skillet, heat the vegetable oil over high heat. Once the oil is hot, add the minced garlic and ginger, sautéing for about 30 seconds until fragrant. Next, add the chicken slices and stir-fry for about 5-7 minutes or until they turn golden brown and are cooked through.
Remove the chicken from the wok, and in the same wok, add the broccoli, bell pepper, and carrot, stir-frying for 3-4 minutes until the vegetables are crisp-tender. Return the chicken to the wok, add the soy sauce and oyster sauce, and toss everything together for another minute. Finally, stir in the green onions just before serving over a bed of rice or noodles.
When stir-frying, it’s important to keep your ingredients prepped and ready to go before you start cooking since the high heat requires quick movements. Cut all your vegetables and proteins into similar-sized pieces to guarantee even cooking.
If your ingredients start to stick to the pan, it might be necessary to adjust the heat or add a splash of water instead of more oil. Remember, the secret to great stir-frying is speed and constant movement, so keep that spatula moving to achieve a perfectly cooked dish.
Sous Vide
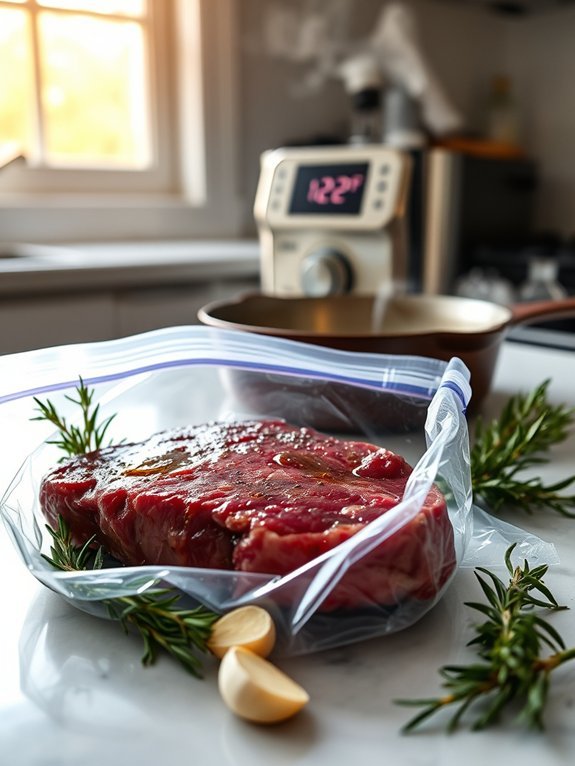
Sous Vide is a remarkable cooking technique that allows you to prepare food with precision and consistency, resulting in perfectly cooked dishes every time. This method involves sealing your ingredients in vacuum-sealed bags and then cooking them in a water bath at a precisely controlled temperature. Because the temperature of the water is closely monitored, it guarantees that the inside of the food reaches the desired doneness without the risk of overcooking.
This technique can be applied to a wide variety of foods, but one of the standout dishes you can create with sous vide is a tender, juicy steak. Cooking steak sous vide not only enhances its flavor but also transforms its texture, making it irresistibly tender. The prolonged cooking time allows the collagen in the meat to break down while retaining moisture, resulting in a steak that’s evenly cooked from edge to edge.
Once removed from the water bath, a quick sear in a hot pan will create a beautiful crust, locking in all those juicy flavors. Whether you’re preparing a meal for a special occasion or want to elevate your weeknight dinner, sous vide steak is a surefire crowd-pleaser.
- 1 ribeye steak (1-1.5 inches thick)
- Salt
- Freshly ground black pepper
- 2 cloves garlic, crushed
- Fresh rosemary or thyme sprigs
- Olive oil or butter (for finishing)
Season the ribeye steak generously with salt and pepper on both sides, then place it into a vacuum-sealed bag along with the crushed garlic and herbs. Seal the bag using a vacuum sealer or the water displacement method for zip-top bags, making certain all air is removed.
Preheat your sous vide water bath to 129°F (54°C) for medium-rare. Submerge the bagged steak and cook for 1 to 3 hours, depending on your desired tenderness. Once the time is up, remove the steak from the bag and pat it dry with paper towels. Finally, heat olive oil or butter in a skillet over high heat and sear the steak for 1-2 minutes per side until a crust forms.
When working with sous vide, remember that the cooking time is quite flexible; the longer you leave the steak in the water bath (up to a point), the more tender it will become without the risk of overcooking. However, avoid cooking for more than four hours, as this can affect the texture.
Additionally, always make certain your sous vide water bath maintains a consistent temperature. Use a good-quality vacuum sealer for best results, and feel free to experiment with different herbs and spices to personalize your flavor profile. Enjoy the perfect steak that can impress any guest!
Step-by-Step Cooking Guide
Braising

Braising is a versatile cooking technique that combines both dry and wet heat to create deeply flavorful and tender dishes. This slow-cooking method involves first searing the food (often meats or hearty vegetables) to develop a rich color and depth of flavor before simmering it slowly in a bit of liquid. The result is a dish that’s meltingly tender and infused with the nuances of the braising liquid, which is often a combination of broth, wine, or even beer, enhanced by aromatic vegetables and herbs.
This technique is perfect for tougher cuts of meat, which break down wonderfully during the long cooking process. Think of succulent short ribs, hearty chuck roast, or even root vegetables. As the food simmers, the flavors meld beautifully, resulting in a comforting, hearty dish that feels luxurious despite often being made with budget-friendly ingredients. Braised dishes are ideal for meal prep, as they can be made ahead of time and even taste better after a day in the refrigerator.
- 2 lbs of beef short ribs
- Salt and pepper, to taste
- 2 tablespoons olive oil
- 1 medium onion, chopped
- 2 carrots, chopped
- 2 celery stalks, chopped
- 4 cloves garlic, minced
- 2 cups beef broth
- 1 cup red wine
- 2 sprigs fresh thyme
- 1 bay leaf
To braise the beef short ribs, start by preheating your oven to 325°F (165°C). Season the ribs generously with salt and pepper. In a large, oven-safe pot or Dutch oven, heat the olive oil over medium-high heat. Add the short ribs and sear on all sides until deeply browned, about 3-4 minutes per side. Remove the ribs and set aside.
In the same pot, add the onion, carrots, celery, and garlic, sautéing until the vegetables are softened, about 5 minutes. Pour in the red wine, scraping up any brown bits from the pot, and let it reduce for 2-3 minutes. Return the short ribs to the pot, add the beef broth, thyme, and bay leaf, then bring to a simmer. Cover the pot and transfer it to the oven, braising for 2.5 to 3 hours, or until the meat is fork-tender.
When braising, it’s important to maintain that the liquid doesn’t completely cover the ingredients, allowing for enhanced flavor development during the cooking process. Additionally, consider making this dish a day in advance; the richness of flavors often improves overnight as they meld together.
Serve your braised short ribs with their sauce over creamy polenta or mashed potatoes to soak up all the delicious juices, and don’t forget to garnish with fresh herbs for a touch of brightness.
Fermenting
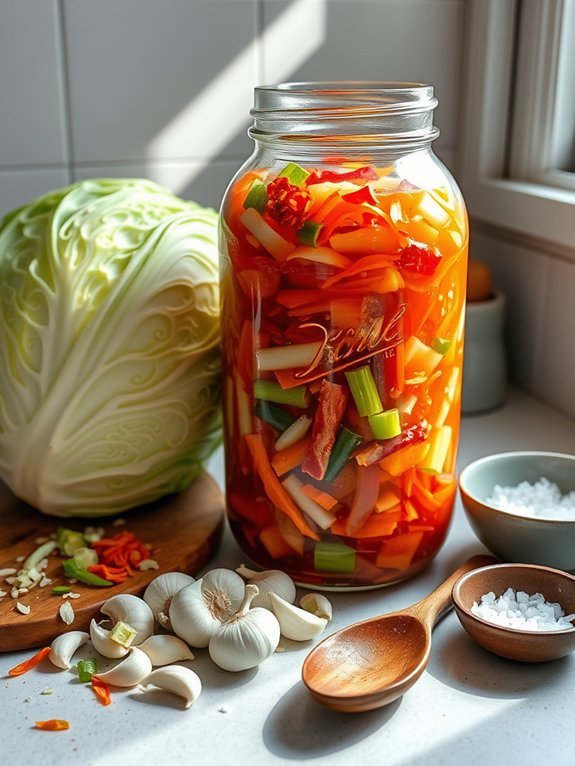
Fermenting is a culinary technique that has been utilized for centuries, not just as a method of preservation, but also to enhance the flavors and nutritional value of food. One of the most popular fermented dishes is kimchi, a traditional Korean staple that combines the tanginess of fermented vegetables with a punch of spice. By making your own kimchi at home, you not only get to enjoy this unique flavor profile but also benefit from the probiotics that are essential for gut health.
The beauty of kimchi lies in its versatility; while napa cabbage is commonly used, you can ferment a variety of vegetables such as radishes, cucumbers, or even carrots. The fermentation process allows the vegetables to absorb a complex blend of spices and create a robust flavor that pairs excellently with rice, meats, or even as a topping for sandwiches.
Ready to try your hand at fermenting? Let’s plunge into this delicious kimchi recipe!
- 1 medium napa cabbage, cut into quarters and cored
- 1/2 cup sea salt
- 4 cups water
- 1 tablespoon grated ginger
- 3 cloves garlic, minced
- 2 tablespoons sugar
- 2 tablespoons Korean red pepper flakes (gochugaru)
- 2 green onions, chopped
- 1 medium carrot, julienned (optional)
- 1 radish, julienned (optional)
- 1 tablespoon fish sauce (optional for depth of flavor)
Dissolve the sea salt in the water to create a brine, then submerge the cabbage quarters in the brine for about 2 hours, turning occasionally. After soaking, rinse the cabbage under cold water to remove excess salt and drain well.
In a large mixing bowl, combine the ginger, garlic, sugar, gochugaru, and any optional ingredients like fish sauce, green onions, and other vegetables. Toss the drained cabbage with the spice mixture until evenly coated.
Pack the mixture into a clean jar, pressing firmly to eliminate air pockets, and leave some headspace at the top. Seal the jar, and let it sit at room temperature for 1 to 5 days, depending on your taste preference, until fermented to your liking.
When fermenting kimchi, it’s important to taste it daily to monitor the flavor development. If you prefer a tangier and more complex taste, let it ferment for a longer period. Once it’s reached your desired flavor, store it in the refrigerator to slow down the fermentation process.
Be mindful of any bubbling or overflow; if using a jar with a tight seal, you might want to open it periodically to release built-up gases.
Enjoy your homemade kimchi as a flavorful accompaniment to meals or simply as a tasty snack.
Marinating

Marinating is a fantastic technique to infuse meats, vegetables, and even fruits with deep flavors and tenderize them, making your dishes truly stand out. The process involves soaking your chosen ingredient in a mixture known as a marinade, which can include acids, oils, herbs, spices, and flavorings. The acid, often from citrus juice or vinegar, breaks down the protein structure, leading to a succulent and flavorful meal.
For this recipe, we’ll marinate chicken breasts, resulting in a deliciously tender and flavorful dish that can be grilled, baked, or sautéed. The marinade combines the zesty brightness of lemon, aromatic garlic, and fragrant herbs to create a balanced flavor profile that beautifully complements the chicken. This dish can be enjoyed on its own or served atop a salad, in a sandwich, or alongside your favorite sides.
Ingredients:
- 4 boneless, skinless chicken breasts
- 1/4 cup olive oil
- Juice of 2 lemons
- 4 garlic cloves, minced
- 1 tablespoon fresh rosemary, minced (or 1 teaspoon dried)
- 1 tablespoon fresh thyme, minced (or 1 teaspoon dried)
- 1 teaspoon salt
- 1/2 teaspoon black pepper
- 1 tablespoon honey (optional)
In a bowl, whisk together olive oil, lemon juice, minced garlic, rosemary, thyme, salt, pepper, and honey (if using) until well combined. Place the chicken breasts in a resealable plastic bag or shallow dish, then pour the marinade over them, ensuring they’re fully coated.
Seal the bag or cover the dish and refrigerate for at least 1 hour, preferably up to 4 hours, to allow the flavors to penetrate the chicken. After marinating, remove the chicken from the marinade and discard any excess liquid before grilling, baking, or sautéing until fully cooked.
When marinating, remember that the duration can greatly affect the outcome. For delicate proteins like chicken, avoid marinating for more than 6 hours as this can result in an overly soft texture. Conversely, tougher cuts of meat can benefit from longer marinating times.
Always refrigerate your marinating ingredients to prevent bacterial growth, and for added flavor, you can reserve some marinade (without raw meat) to brush on during cooking or use as a sauce—just be sure to boil it before serving to eliminate any possible bacteria from the raw meat.
Seasoning
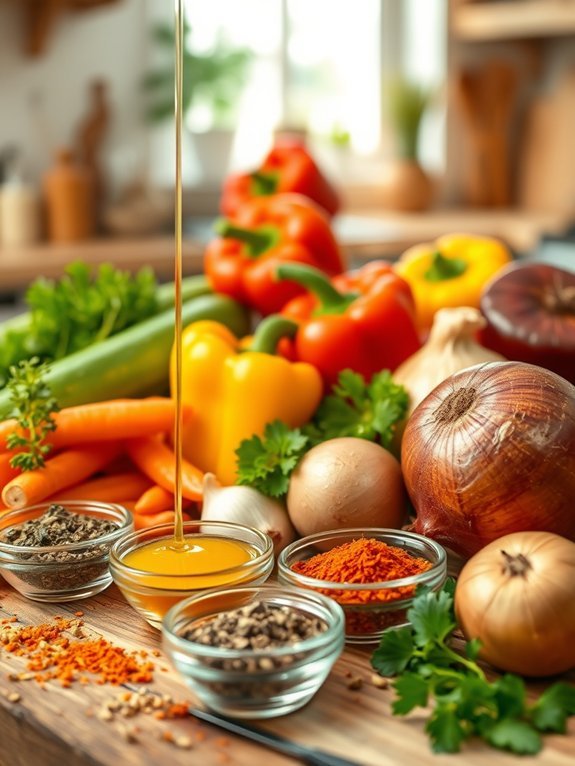
When it comes to elevating your meals, seasoning is one of the most pivotal aspects of cooking. A well-seasoned dish can transform simple ingredients into a culinary masterpiece, enhancing flavors and bringing out the inherent qualities of each component. Understanding how to properly season can turn a good recipe into a great one, as it allows you to create depth and balance in your meals.
Today, we’ll explore a seasoning technique through a mouth-watering recipe for roasted vegetables infused with a delightful herb and spice blend. This dish can serve as a side or a main, adding vibrancy and flavor to any meal. With a variety of colors and textures, these seasoned roasted vegetables won’t only taste exquisite but also look appealing on your plate.
- 2 cups of mixed seasonal vegetables (carrots, bell peppers, zucchini, and red onion)
- 3 tablespoons olive oil
- 1 teaspoon garlic powder
- 1 teaspoon onion powder
- 1 teaspoon dried thyme
- 1 teaspoon smoked paprika
- Salt and pepper to taste
- Fresh parsley for garnish (optional)
Preheat your oven to 425°F (220°C). In a large mixing bowl, combine the mixed seasonal vegetables with olive oil, garlic powder, onion powder, thyme, smoked paprika, salt, and pepper. Toss until the vegetables are well coated with the seasoning mixture.
Spread the seasoned vegetables in a single layer on a baking sheet and roast them in the preheated oven for 25-30 minutes or until they’re tender and slightly caramelized, stirring halfway through for even cooking.
When seasoning your vegetables, don’t be afraid to experiment with different herbs and spices to find your preferred flavor profile. Fresh herbs can also elevate the taste even further, so consider adding some to the mix before roasting.
Additionally, remember to not overcrowd the baking sheet, as this can lead to steaming instead of roasting, which will affect the texture and flavor of your vegetables. Enjoy the vibrant flavors and the health benefits of this beautifully seasoned dish!

