This post may contain affiliate links. Please read our policy page.
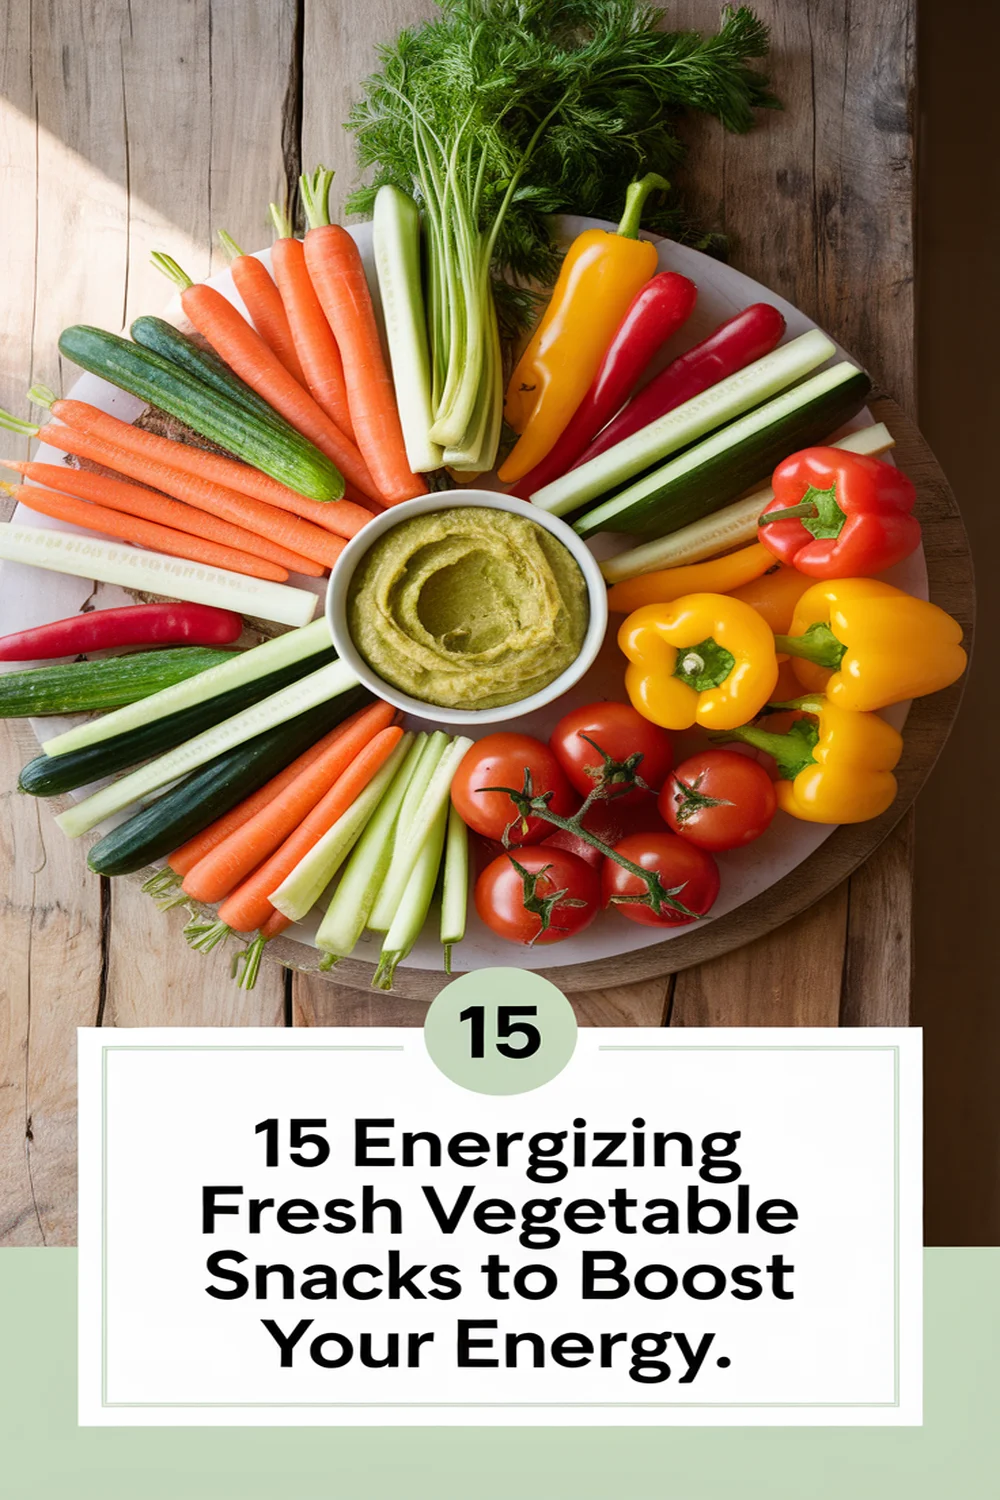
If you’re looking for energizing fresh vegetable snacks, try carrot sticks with hummus and cucumber slices with tzatziki for a nutritious boost. Bell pepper strips with guacamole and cherry tomatoes with feta cheese add variety. Don’t forget celery sticks with peanut butter or baby spinach leaves drizzled with olive oil. For a satisfying bite, enjoy avocado toast topped with sliced cucumbers and asparagus spears with balsamic vinegar. Explore even more delicious options to keep your energy up!
Carrot Sticks With Hummus
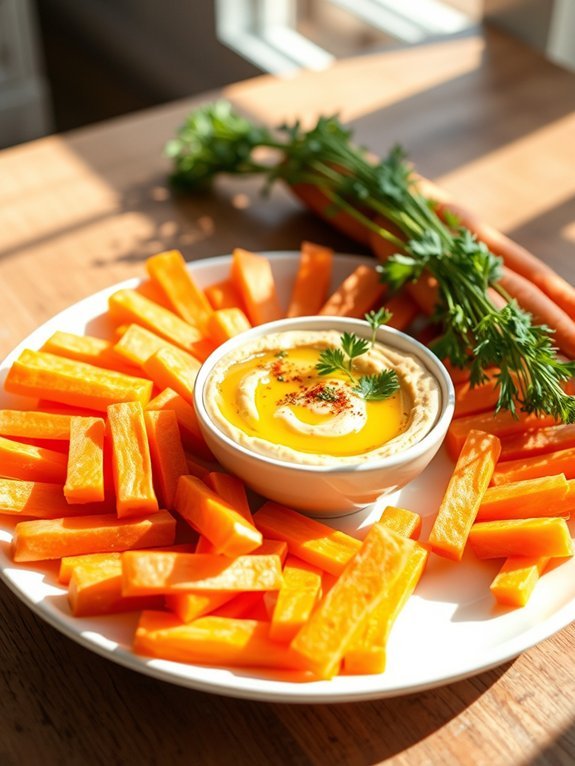
Carrot sticks with hummus make for a vibrant and nutritious snack that balances crunchiness with creaminess in every bite. Carrots are naturally sweet and packed with vitamins, while hummus, typically made from chickpeas, tahini, olive oil, and lemon juice, offers a savory dip that complements the natural flavors of the carrots. This simple and healthy snack isn’t only delightful for kids but also provides a satisfying crunch for adults seeking a wholesome treat.
Preparing carrot sticks with hummus isn’t only easy but also allows for customization based on personal taste preferences. You can experiment with different hummus flavors, such as roasted red pepper, garlic, or even spicy variations, to keep your snacking experience exciting. Whether serving for a party, a picnic, or a quick midday snack, this combination is sure to please while offering a nutritious boost.
- 4 large carrots
- 1 cup plain hummus
- 1 tablespoon olive oil (optional)
- Pinch of salt (optional)
- Freshly ground black pepper (optional)
Start by washing and peeling the carrots to remove any dirt and outer skin. Cut the carrots into stick shapes, approximately 3 to 4 inches in length and about half an inch wide. Place the carrot sticks on a serving platter alongside a bowl of your favorite hummus for dipping.
If desired, drizzle olive oil over the hummus and sprinkle with a pinch of salt and freshly ground black pepper for added flavor. For an even more flavorful dip experience, consider adding olive oil or garnishing your hummus with freshly chopped herbs, such as parsley or cilantro, before serving.
Additionally, you can try roasting or grilling the carrot sticks for a slightly caramelized texture and taste. This technique not only adds a unique flavor but also enhances the overall presentation. To keep your snack fresh, store any leftover carrot sticks and hummus in airtight containers in the refrigerator for up to three days.
Cucumber Slices With Tzatziki
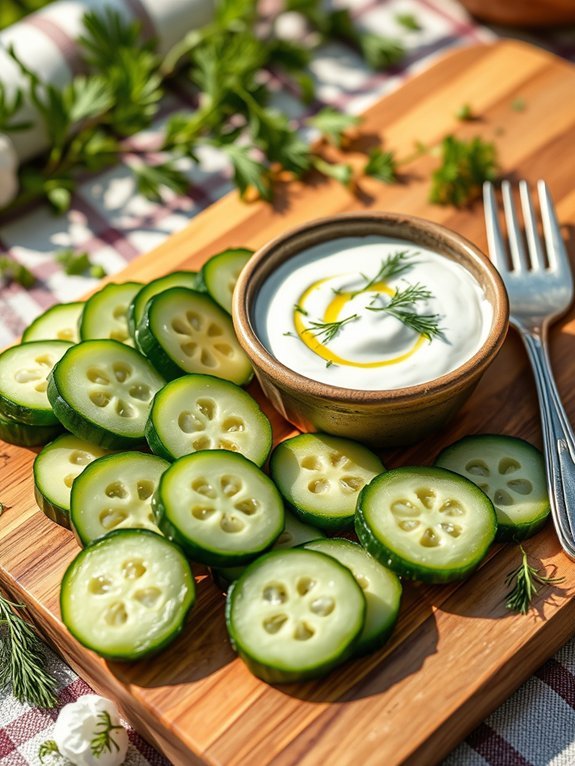
Cucumber slices with tzatziki is a revitalizing snack that showcases the delightful crunch of fresh cucumbers paired with a creamy, tangy yogurt dip. This Mediterranean-inspired dish isn’t only easy to make but also packed with nutrients, making it a perfect choice for a light snack or an appetizer at gatherings.
The homemade tzatziki combines Greek yogurt, cucumber, garlic, lemon juice, and fresh herbs, resulting in a cooling sensation that complements the crispness of the cucumber slices beautifully.
To prepare this simple dish, start with quality ingredients that will enhance the overall flavor. The cucumbers can be sliced thinly or in rounds, depending on your preference, while the tzatziki sauce can be whipped up ahead of time, allowing the flavors to meld together.
Perfect for summer barbecues, picnics, or as a healthy snack option at home, cucumber slices with tzatziki will surely satisfy your cravings!
- 1 large cucumber
- 1 cup Greek yogurt
- 1 clove garlic, minced
- 1 tablespoon lemon juice
- 1 tablespoon fresh dill, chopped (or mint, as preferred)
- Salt and pepper to taste
Slice the cucumber into rounds or thin strips and set aside. In a mixing bowl, combine the Greek yogurt, minced garlic, lemon juice, chopped dill, and a pinch of salt and pepper. Stir until the ingredients are fully incorporated.
Serve the cucumber slices on a platter alongside the tzatziki dip for immediate enjoyment.
For an added twist, consider mixing in other fresh herbs such as parsley or mint into the tzatziki for a unique flavor combination. You can also experiment with different types of cucumbers—English cucumbers are particularly crisp, while Persian cucumbers provide a sweet flavor.
Additionally, chill the tzatziki in the refrigerator for at least 30 minutes before serving to let the flavors develop further.
Bell Pepper Strips With Guacamole
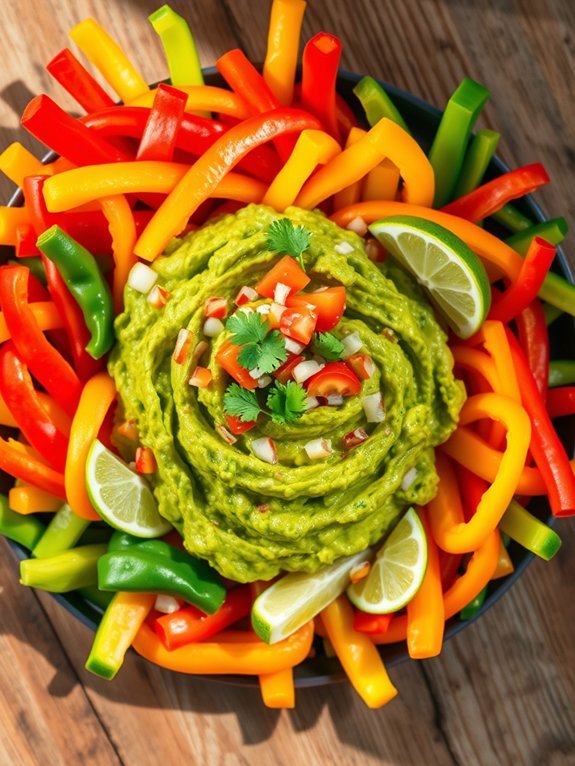
Bell pepper strips with guacamole are a bright, colorful snack that not only tantalizes your taste buds but also packs a nutritious punch. Bell peppers come in a variety of colors—including red, yellow, and green—each offering a unique sweetness and crunch that make them an ideal vessel for creamy guacamole. This revitalizing duo is perfect for a midday snack, a party platter, or a healthy appetizer to kick off any meal.
Making bell pepper strips with guacamole is incredibly simple, requiring only a few fresh ingredients. The guacamole adds a rich and creamy texture that pairs wonderfully with the crispness of the bell peppers, making it a satisfying option for those looking for a healthier alternative to chips and dips.
Furthermore, this recipe is easy to customize with your favorite spices and additional ingredients, allowing you to create a personalized dip that suits your palate.
Ingredients:
- 2 large bell peppers (any color)
- 2 ripe avocados
- 1 small onion, finely chopped
- 1 ripe tomato, diced
- 1 lime, juiced
- 1 clove garlic, minced
- Salt and pepper to taste
- Fresh cilantro, chopped (optional)
Cut the bell peppers in half lengthwise, and remove the seeds and membranes. Slice each half into thin strips for dipping.
For the guacamole, scoop the ripe avocados into a bowl, mash them with a fork, and mix in the chopped onion, diced tomato, lime juice, minced garlic, salt, and pepper. Stir until well combined, then taste and adjust the seasoning if necessary. Serve the bell pepper strips alongside the freshly made guacamole for a nutritious and satisfying snack.
For an extra kick, you can add diced jalapeños or a pinch of cayenne pepper to the guacamole for some heat. Remember to choose ripe avocados for the creamiest texture, and you can also prepare the guacamole just before serving to keep it looking vibrant.
If you’re making this for a gathering, feel free to elevate it by presenting the guacamole in an attractive bowl garnished with chopped cilantro, which adds both flavor and visual appeal.
Cherry Tomatoes With Feta Cheese
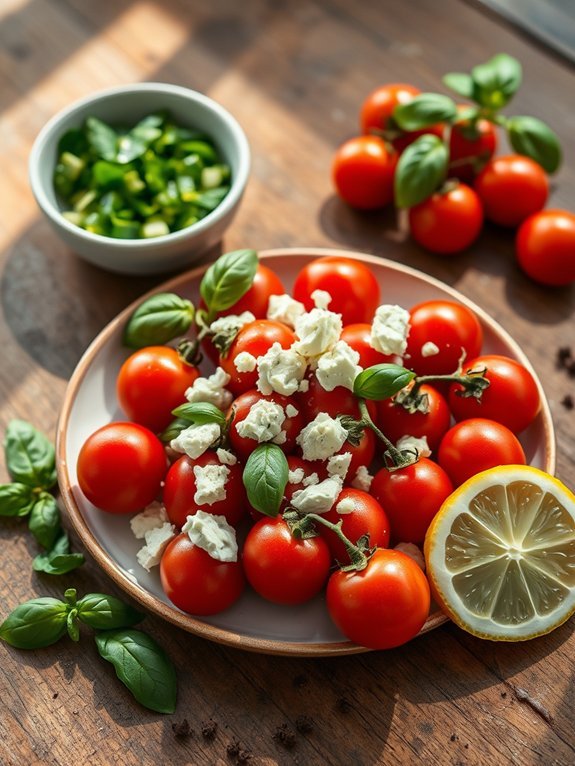
Cherry tomatoes with feta cheese is a simple yet delightful dish that can serve as an invigorating snack or appetizer. The sweetness of the cherry tomatoes combined with the creaminess and tang of the feta creates a perfect balance of flavors. This recipe isn’t only easy to prepare but also visually appealing, making it a great addition to any gathering or a tasty treat for yourself at home.
To elevate the dish, you can incorporate fresh herbs, a drizzle of olive oil, and a squeeze of lemon juice to enhance the flavors even further. The combination of fresh ingredients makes this snack not only delicious but also nutritious. Perfect for warm weather or as a light appetizer, cherry tomatoes with feta cheese is a must-try for anyone looking for a quick and healthy option.
- 1 pint cherry tomatoes
- ½ cup feta cheese, crumbled
- 2 tablespoons olive oil
- 1 tablespoon fresh basil, chopped (or other herbs like oregano or parsley)
- 1 tablespoon lemon juice
- Salt and pepper, to taste
Begin by rinsing the cherry tomatoes under cold water and patting them dry. Then, in a medium bowl, combine the cherry tomatoes with crumbled feta cheese, olive oil, lemon juice, fresh herbs, salt, and pepper. Gently toss the ingredients together until the tomatoes are well-coated with the feta and dressing. Allow the mixture to sit for a few minutes to let the flavors meld, and serve immediately.
When preparing cherry tomatoes with feta cheese, opt for ripe and flavorful tomatoes to ascertain the best taste. If you’re looking for a bit of a crunch, you can add chopped nuts or seeds for some texture.
This dish can also be made ahead of time; just keep the tomatoes and feta mixture refrigerated until you’re ready to serve, but be cautious to add herbs just before serving to maintain their freshness and vibrancy.
Recommended Items
Check out our top picks for snacks and tools that will keep you energized and ready to go!
Products
Celery Sticks With Peanut Butter
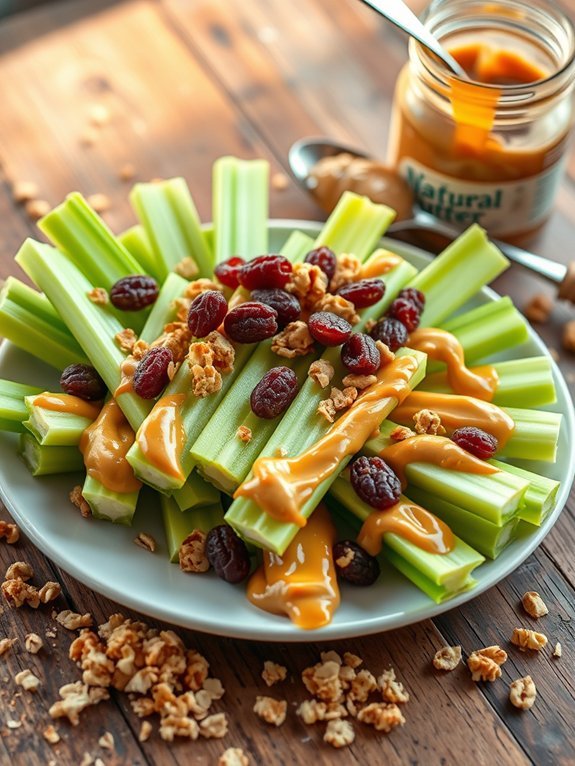
Celery sticks with peanut butter make for a delicious and nutritious snack that isn’t only easy to prepare but also packed with vitamins and healthy fats. Combining the crisp crunch of fresh celery with the rich creaminess of peanut butter creates a satisfying and energizing treat that can be enjoyed at any time of the day. This snack is perfect for both children and adults, providing a quick option that keeps hunger at bay while also fueling your body with wholesome ingredients.
This combination offers various health benefits, as celery is low in calories and high in fiber, while peanut butter provides protein and healthy fats. Whether you’re preparing a snack for an afternoon pick-me-up or a quick breakfast on the go, celery sticks with peanut butter are a versatile option that can easily be customized. You can enhance the flavor with additional toppings or pair them with fruits for an extra burst of sweetness.
- Fresh celery stalks
- Peanut butter (smooth or crunchy)
- Optional toppings: raisins, honey, or granola
Begin by washing the celery stalks under cool running water to remove any dirt, then slice each stalk into sticks of your desired length. Spread a generous amount of peanut butter into the groove of the celery stick, making sure to cover it evenly. If desired, sprinkle optional toppings such as raisins, honey, or granola to add texture and sweetness. Arrange the finished celery sticks on a plate and enjoy!
When preparing celery sticks with peanut butter, selecting the right peanut butter is important—choose one that’s natural and has minimal additives for a healthier option.
If you’re feeling adventurous, try incorporating different nut butters like almond or cashew for a unique flavor twist. Don’t hesitate to get creative with your toppings—adding a sprinkle of cinnamon, a few mini chocolate chips, or even a dash of sea salt can elevate this snack even further!
Proposed Recipe
Radishes With Sea Salt
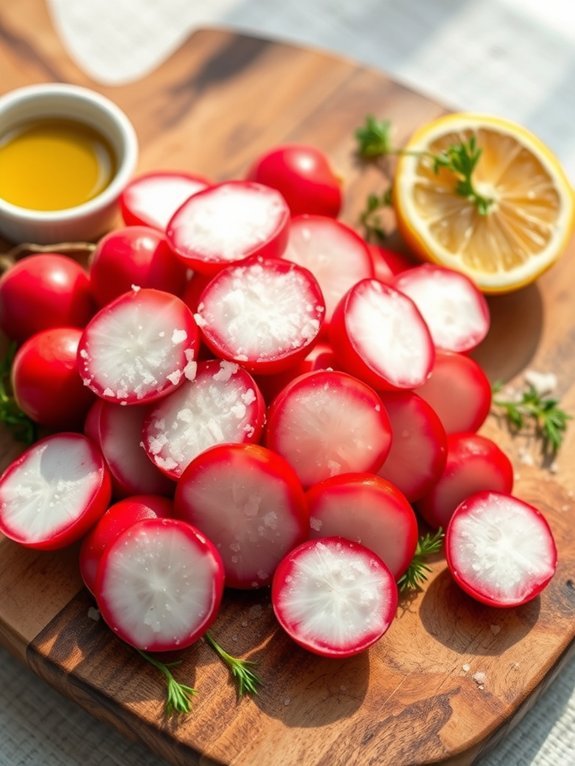
Radishes with sea salt are a simple yet invigorating snack that brings a burst of flavor and crunch to your palate. These vibrant root vegetables have a peppery taste that pairs wonderfully with the light salinity of sea salt, enhancing their natural sweetness. Not only are they delicious, but radishes are also packed with vitamins and antioxidants, making this dish a nutritious option for any time of the day.
This quick recipe can be enjoyed as a standalone snack, a colorful addition to your charcuterie board, or a vibrant topping on salads and sandwiches. Preparing radishes with sea salt requires minimal effort but delivers big on taste and texture. Whether you’re hosting a casual gathering or just want a wholesome snack for yourself, this dish is sure to impress with its simplicity and flavor.
- Fresh radishes
- Sea salt
- Optional: olive oil, lemon juice, or fresh herbs (for added flavor)
Begin by washing the radishes thoroughly under cool running water to remove any dirt or debris. Pat them dry with a clean kitchen towel. Trim off the tops and tails, then slice the radishes in half or quarters, depending on your preference for size.
Place the radish pieces on a serving platter and sprinkle generously with sea salt. If desired, drizzle with a bit of olive oil or a squeeze of lemon juice for extra flavor. Toss gently, and serve immediately.
For an added twist, consider experimenting with various types of sea salt, such as smoked or flavored salt, to enhance the taste profile of your radishes. You can also try pairing them with fresh herbs like dill or parsley for a fragrant touch.
Serve them chilled for the crispest experience, and enjoy them the same day for the best texture.
Broccoli Florets With Ranch Dip
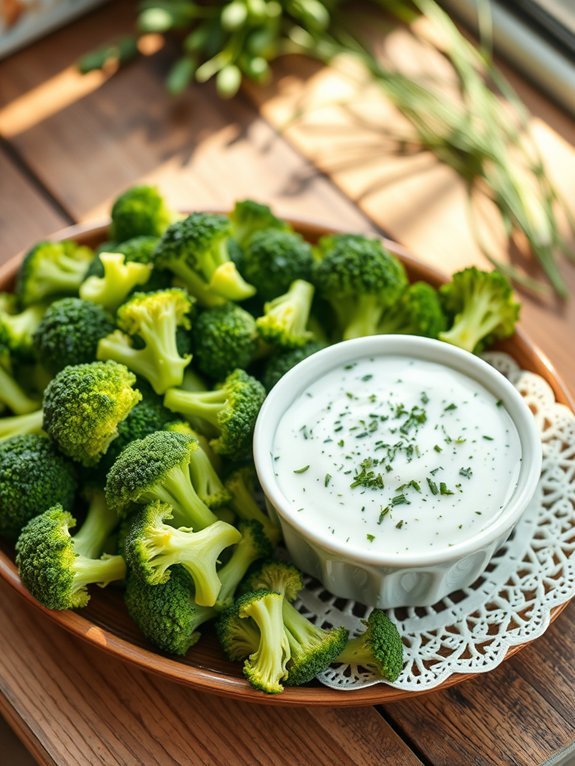
Broccoli florets with ranch dip make for a delightful and nutritious snack that’s perfect for any time of the day. The vibrant green of the broccoli not only enhances the aesthetic appeal of your dish but also delivers essential vitamins and minerals.
Paired with a creamy ranch dip, these crisp florets provide a satisfying crunch that’s both invigorating and indulgent, ensuring that you enjoy your veggie snacks without feeling deprived.
Preparing broccoli florets with ranch dip is straightforward and quick, making it an ideal choice for busy individuals who still want to eat healthily. The dip can either be store-bought or homemade, allowing you the flexibility to customize the flavor profile to your liking.
Whether you’re serving it at a gathering or just enjoying it at home, this snack is sure to impress and satisfy your cravings while contributing to your overall wellness.
- Fresh broccoli florets
- 1 cup sour cream
- 1/2 cup mayonnaise
- 1 tablespoon dried dill
- 1 tablespoon garlic powder
- 1 tablespoon onion powder
- 1 teaspoon salt
- 1 teaspoon black pepper
- 1 tablespoon lemon juice (optional)
To prepare the dish, wash the broccoli florets thoroughly and trim them into bite-sized pieces.
Then, in a mixing bowl, combine the sour cream, mayonnaise, dried dill, garlic powder, onion powder, salt, black pepper, and lemon juice (if using). Mix well until all ingredients are thoroughly incorporated.
Serve the broccoli florets alongside the ranch dip for a healthy and tasty snack.
For the best flavor, allow the ranch dip to chill in the refrigerator for at least 30 minutes before serving to let the spices meld together.
If you’re feeling adventurous, experiment by adding other herbs or spices to the dip, such as chives or smoked paprika, to create your own unique variation.
Additionally, you can use fresh, organic broccoli for a brighter taste and better texture, or try steaming the broccoli lightly if you prefer a softer bite.
Snap Peas With Lemon Zest
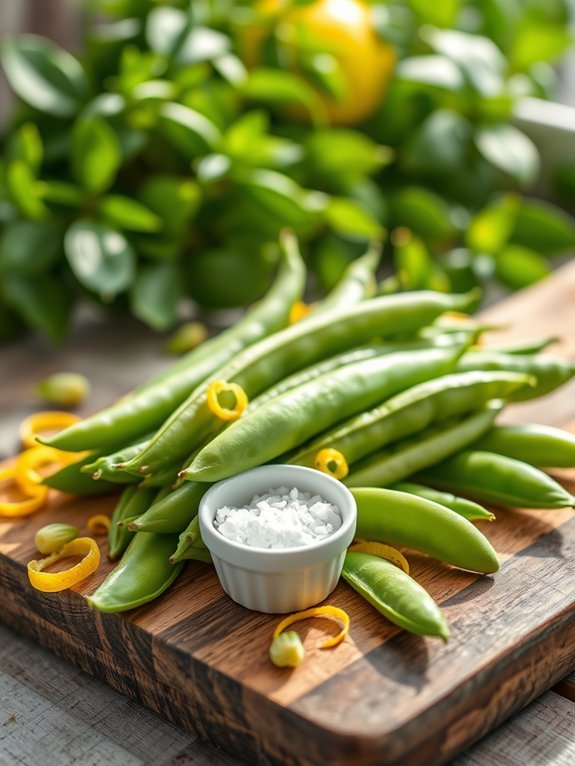
Snap peas are a delightful and nutritious snack that can be enjoyed raw or cooked. For a quick and invigorating treat, cooking snap peas with lemon zest elevates their natural sweetness while adding a zesty punch. This simple recipe captures the essence of fresh ingredients and is perfect as a standalone snack or as a vibrant addition to salads and main dishes. The bright flavor of lemon zest complements the crispness of snap peas beautifully, making for a light and energizing option.
When choosing snap peas, opt for those that appear plump and vibrant in color. Fresh snap peas should snap easily when bent, which indicates their tenderness and freshness. This recipe is incredibly easy to follow and requires minimal cooking time, allowing you to enjoy a healthy and satisfying snack without much effort. Let’s get started on making this energizing fresh vegetable snack!
- 1 pound snap peas
- Zest of 1 lemon
- 1 tablespoon olive oil
- Salt and pepper to taste
- Optional: red pepper flakes for a spicy kick
In a skillet, heat the olive oil over medium heat. Add the snap peas and sauté them for 3-4 minutes, or until they’re bright green and tender-crisp. Remove from heat and toss the cooked snap peas with lemon zest, salt, and pepper to taste. If you like an extra kick, sprinkle some red pepper flakes over the top before serving.
For the best flavor, be sure to use fresh lemon zest rather than bottled lemon juice, as this will provide a more vibrant and aromatic taste. You can also experiment with other seasonings, such as garlic or herbs like basil and mint, to further enhance the flavor profile.
Serve these snap peas warm or at room temperature for a delightful snack that’s sure to impress!
Zucchini Rounds With Pesto
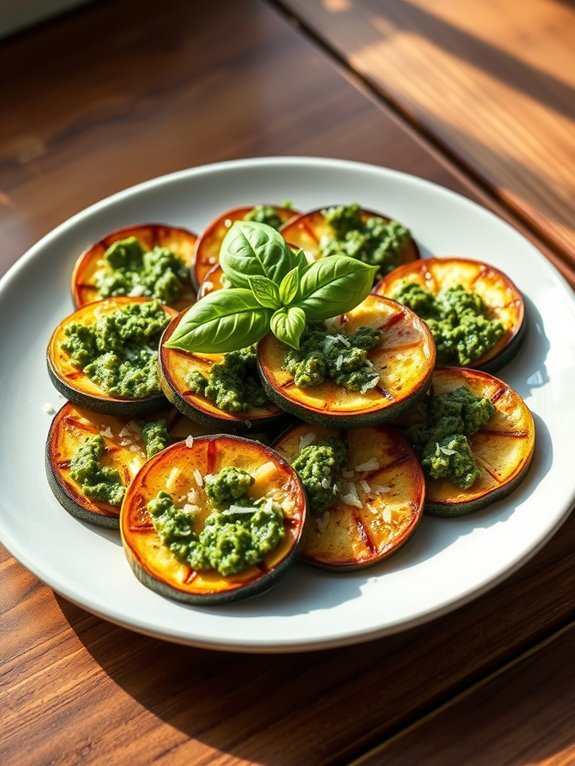
Zucchini rounds with pesto are a delightful and nutritious snack that effortlessly combine fresh vegetables with a rich, herby flavor. This dish is perfect for those looking to incorporate more greens into their diet while still enjoying a burst of taste. The natural sweetness of the zucchini balances beautifully with the vibrant and savory pesto, making it an irresistible treat that you can enjoy at any time of the day.
Making these zucchini rounds is quick and easy, allowing for a last-minute snack or a perfect appetizer for gatherings. You can use store-bought pesto to save time or whip up your own homemade version for an extra personal touch. These bite-sized delights aren’t only delicious but also packed with essential nutrients, making them a guilt-free indulgence.
Ingredients:
- 2 medium zucchinis
- 1 cup pesto (store-bought or homemade)
- 1 cup grated Parmesan cheese
- Olive oil
- Salt and pepper to taste
- Fresh basil leaves for garnish (optional)
Preheat your oven to 400°F (200°C). Wash the zucchinis and slice them into rounds about half an inch thick. Arrange the rounds on a baking sheet lined with parchment paper. Drizzle with olive oil, and season with salt and pepper. Bake for 10 minutes, then remove from the oven, spread a teaspoon of pesto on each round, sprinkle with grated Parmesan, and return to the oven for an additional 5-7 minutes or until the cheese is melted and bubbly. Serve warm, garnished with fresh basil if desired.
For the best results, choose firm zucchinis that are free from blemishes and soft spots. If you prefer, you can grill the zucchini rounds for a smoky flavor instead of baking. Additionally, feel free to experiment with different toppings such as cherry tomatoes or a sprinkle of crushed red pepper for an extra kick.
This dish can easily be adjusted to fit your taste preferences, making it a versatile staple in your healthy snack repertoire.
Cauliflower Bites With Hot Sauce

Cauliflower bites with hot sauce are a delicious and healthy way to satisfy your snack cravings. These bite-sized treats aren’t only simple to prepare but also offer a vibrant taste that can be enjoyed at any time of the day. Cauliflower itself is packed with nutrients and is a low-calorie alternative to traditional snack options. When paired with a spicy hot sauce, these cauliflower bites become an addictive snack that’s sure to please a crowd.
Preparing these bites is easy and can be done in under 30 minutes. They make for a perfect appetizer for gatherings or a great addition to a lunchbox. The combination of roasting cauliflower florets until they’re golden brown and tossing them in a spicy sauce creates a satisfying crunch and flavor explosion.
Whether you prefer mild heat or an extra kick, you can adjust the hot sauce to suit your taste, making this recipe versatile for everyone.
Ingredients:
- 1 head of cauliflower, cut into bite-sized florets
- 1 cup of all-purpose flour (or gluten-free flour)
- 1 teaspoon garlic powder
- 1 teaspoon onion powder
- 1 teaspoon paprika
- 1/2 teaspoon salt
- 1/2 teaspoon black pepper
- 1 cup water
- 1 cup hot sauce (your choice)
- 2 tablespoons melted butter (optional)
- Cooking oil spray
Preheat your oven to 425°F (220°C) and line a baking sheet with parchment paper. In a mixing bowl, combine the flour, garlic powder, onion powder, paprika, salt, and black pepper. Gradually whisk in the water until you have a smooth batter.
Dip each cauliflower floret into the batter, letting the excess drip off, and place them on the prepared baking sheet. Lightly spray the florets with cooking oil and bake for approximately 20 minutes or until golden brown.
In a separate bowl, combine the hot sauce and melted butter (if using). Toss the baked cauliflower bites in the hot sauce mixture until evenly coated before serving.
For extra flavor, consider marinating the cauliflower florets in the batter for a short time before cooking, allowing them to absorb more of the spices. To achieve an even crispier texture, you can broil the cauliflower bites for a couple of minutes after baking.
Additionally, feel free to experiment with different sauces or seasonings, such as buffalo sauce or barbecue sauce, to customize the flavor profile to your liking. Enjoy your cauliflower bites as a standalone snack or paired with your favorite dipping sauce!
Jicama Sticks With Lime and Chili
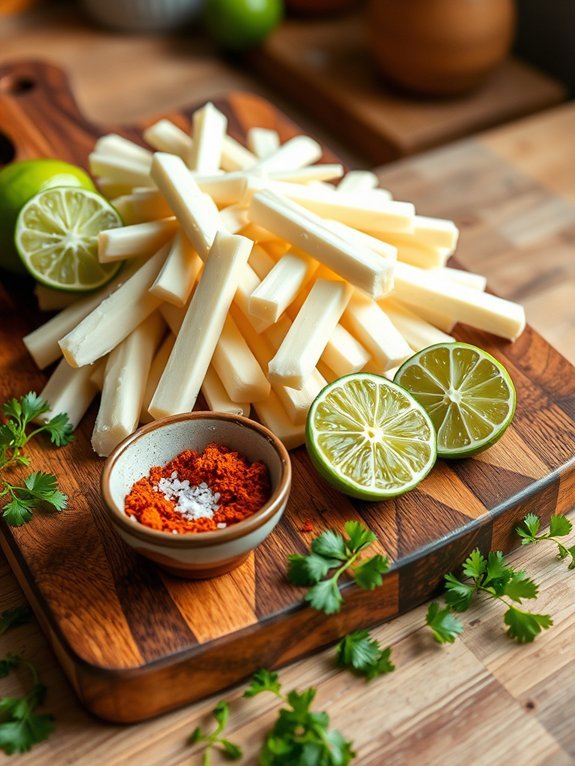
Jicama sticks with lime and chili are a revitalizing and zesty snack that’s perfect for those warm days when you want something light and healthy.
Jicama, a crispy root vegetable, isn’t only hydrating but also loaded with nutrients, making it an excellent choice for guilt-free snacking. When paired with the tang of fresh lime juice and the kick of chili powder, Jicama transforms into a tantalizing treat that will satisfy your cravings without weighing you down.
This snack isn’t only easy to prepare but also incredibly versatile. You can serve it at parties, pack it in your lunch, or enjoy it as an afternoon pick-me-up.
Its bright flavors are sure to please anyone who takes a bite, while the crunch of the Jicama offers a satisfying texture. With such simple ingredients, you’ll be able to whip up this delightful appetizer in no time.
Ingredients
- 1 medium-sized Jicama
- 1 lime, juiced
- 1 teaspoon chili powder (adjust to taste)
- ½ teaspoon salt (adjust to taste)
- Optional: Fresh cilantro for garnish
Peel the Jicama and cut it into thin sticks. In a mixing bowl, combine the lime juice, chili powder, and salt.
Toss the Jicama sticks in this mixture until they’re evenly coated. Allow them to marinate for about 10-15 minutes for the flavors to meld, then serve chilled. If desired, garnish with fresh cilantro for added flavor and visual appeal.
For best results, choose a firm, fresh Jicama with smooth skin, as older Jicama can become woody and less crunchy.
After cutting the Jicama, store any leftovers in an airtight container in the refrigerator to maintain its crispiness. Feel free to experiment with different spices, such as cayenne pepper for increased heat or even a sprinkle of garlic powder for a different flavor profile.
Enjoy your vibrant and healthy snack!
Baby Spinach Leaves With Olive Oil
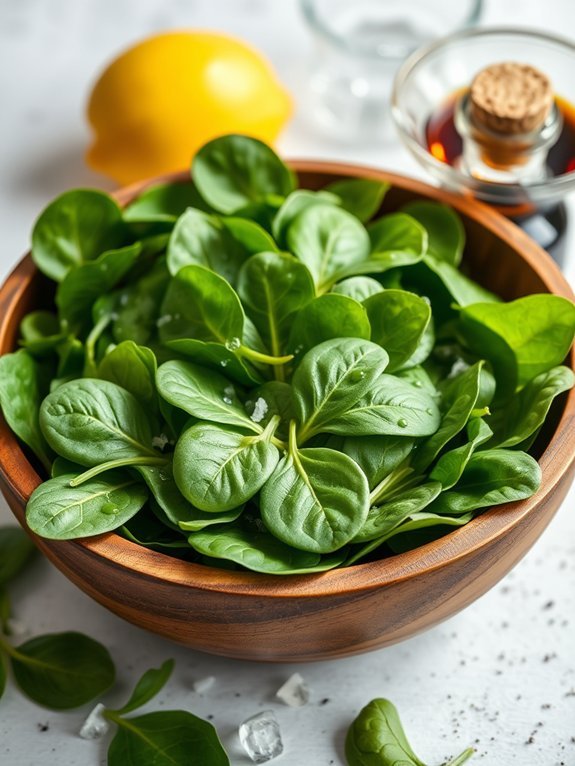
Baby spinach leaves are a nutritious and versatile ingredient that brings a new pop of color and flavor to any dish. This leafy green isn’t only rich in vitamins A and C, but it can also provide a significant amount of iron and calcium. The gentle, mild flavor of baby spinach makes it an excellent choice for a variety of preparations, but when simply dressed with olive oil, it transforms into a delightful new snack. Pairing it with high-quality olive oil enhances its natural taste, creating a light yet satisfying dish that captures the essence of healthy eating.
To prepare baby spinach leaves with olive oil, you only need a few ingredients, making it an accessible option even for novice cooks. The process is quick and straightforward, allowing you to enjoy a crisp snack without the fuss of extensive cooking or preparation.
Whether served on its own or as a complement to a main dish, this simple recipe showcases the beauty of fresh vegetables and brings a burst of energy to your snacking routine.
- Fresh baby spinach leaves
- Extra virgin olive oil
- Sea salt (to taste)
- Freshly cracked black pepper (optional)
- Lemon juice or balsamic vinegar (optional)
Gently wash the baby spinach leaves to remove any dirt, then spin them dry in a salad spinner or pat them with a clean kitchen towel.
In a large mixing bowl, combine the fresh baby spinach with a drizzle of extra virgin olive oil, tossing gently to guarantee even coating. Season with sea salt, and if desired, add freshly cracked black pepper and a splash of lemon juice or balsamic vinegar for some added tang. Serve immediately as a rejuvenating snack!
When cooking with baby spinach, it’s important to remember that this leafy green should be handled delicately to avoid bruising. To enhance the flavor, allow the olive oil to come to room temperature before using it, as this will maximize its aroma and taste.
For additional variations, consider adding toppings such as toasted nuts or seeds for extra crunch, or mix in other fresh herbs to elevate the flavor profile of the spinach.
Avocado Toast With Sliced Cucumbers
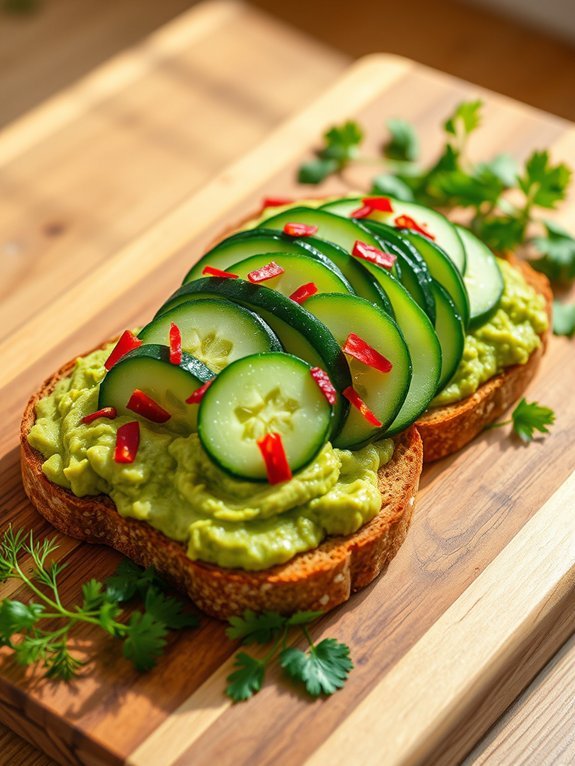
Avocado toast with sliced cucumbers is a delightful and nutritious snack that combines creamy, rich avocado with the mild crunch of fresh cucumbers. This dish is perfect for a quick breakfast, a light lunch, or even an afternoon snack. Avocados are a great source of healthy fats, vitamins, and minerals, while cucumbers provide hydration and freshness, making this combination not only delicious but also wholesome.
To prepare avocado toast with sliced cucumbers, you’ll want to choose a ripe avocado to guarantee maximum creaminess and flavor. The best avocados will give slightly when gently pressed. Pairing this dish with whole grain or sourdough bread adds an additional layer of texture and flavor, making each bite satisfying.
This recipe isn’t only simple but also versatile; you can easily add your favorite toppings or spices to customize it to your liking.
- 1 ripe avocado
- 2 slices of whole grain or sourdough bread
- 1 small cucumber
- Salt, to taste
- Pepper, to taste
- Red pepper flakes or chili powder (optional)
- Olive oil (optional)
- Fresh herbs for garnish (optional, such as dill or cilantro)
To make avocado toast with sliced cucumbers, start by toasting the bread until golden brown. While the bread is toasting, cut the ripe avocado in half, remove the pit, and scoop the flesh into a bowl. Mash the avocado with a fork, adding salt and pepper to taste.
Slice the cucumber thinly. Once the toast is ready, spread a generous layer of mashed avocado on each slice of bread, and top with the cucumber slices. Drizzle with olive oil if desired and sprinkle with red pepper flakes for extra flavor.
When preparing this dish, it’s a good idea to serve it immediately to enjoy the fresh textures and flavors at their best. If you have extra avocado or cucumber, consider adding them to a salad for later or using them in another dish.
Fresh herbs like dill or cilantro can add a delightful aroma and elevate the taste, so don’t hesitate to experiment with any toppings you enjoy!
Asparagus Spears With Balsamic Vinegar
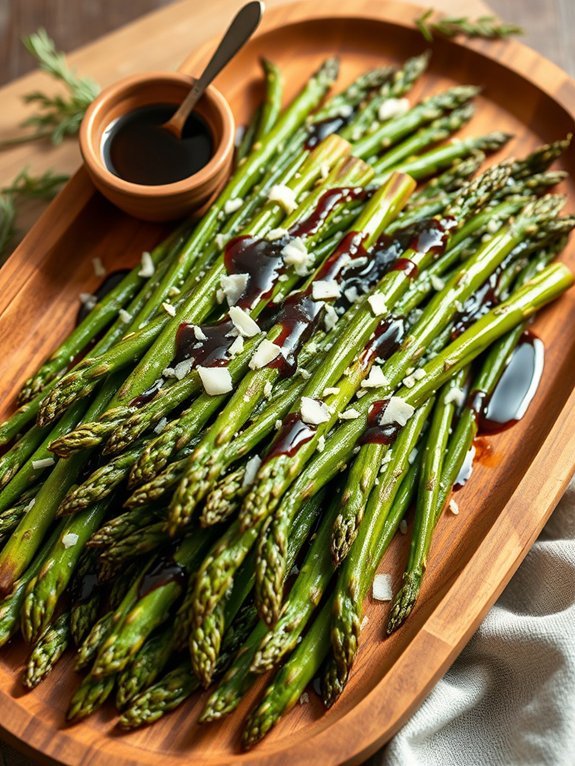
Asparagus spears with balsamic vinegar is a simple yet elegant dish that showcases the vibrant flavors and crisp texture of fresh asparagus. Perfect as a snack or appetizer, this recipe highlights the natural sweetness of the vegetable, enhanced by the tangy richness of balsamic vinegar. With its beautiful green color and refined taste, it’s sure to impress guests or add a touch of sophistication to your everyday meals.
The preparation is quick and straightforward, making it an ideal choice for those evenings when you want a healthy option without spending a lot of time in the kitchen. The combination of roasting the asparagus to bring out its flavor while finishing it off with a drizzle of balsamic vinegar creates a delightful contrast that elevates this humble vegetable into a gourmet treat.
- Fresh asparagus (about 1 lb)
- Extra virgin olive oil (2 tablespoons)
- Balsamic vinegar (2 tablespoons)
- Salt (to taste)
- Freshly ground black pepper (to taste)
- Grated Parmesan cheese (optional, for serving)
Preheat your oven to 400°F (200°C). While it’s heating, wash and trim the asparagus, removing the tough ends. Spread the asparagus spears out on a baking sheet, drizzle with olive oil, and sprinkle with salt and pepper. Toss to coat evenly, then place in the oven.
Roast for about 12-15 minutes, or until the asparagus is tender yet still crisp. Once done, remove from the oven and drizzle with balsamic vinegar, tossing gently to combine before serving.
When preparing asparagus, look for firm, bright green spears without blemishes. If you want to add even more depth of flavor, consider adding crushed garlic cloves or herbs like thyme or rosemary to the roasting process.
Serving the asparagus with freshly grated Parmesan cheese can provide a rich, savory note that pairs beautifully with the acidity of the balsamic vinegar. Enjoy this dish warm or at room temperature for a versatile and nutritious snack!
Mixed Veggie Cups With Salsa
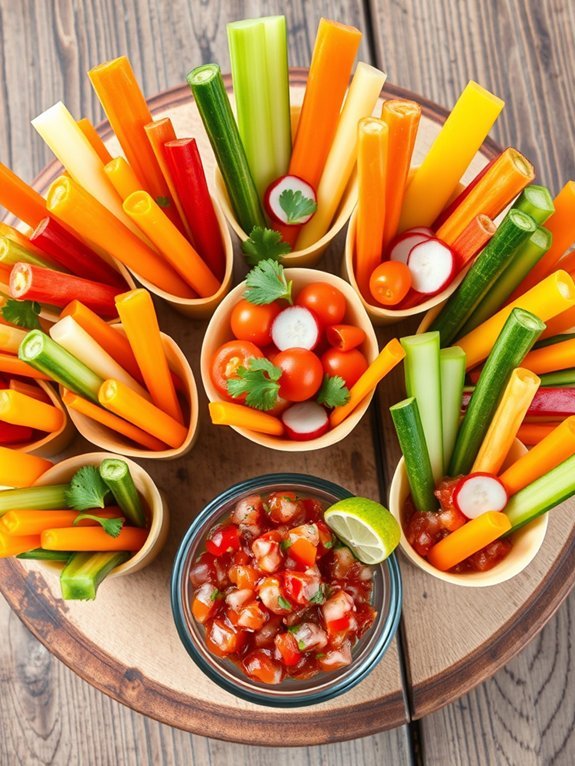
Mixed veggie cups with salsa are a delightful and healthy way to enjoy a variety of fresh vegetables. Perfect for parties, picnics, or even quick snacks at home, these veggie cups aren’t only visually appealing but also pack a flavorful punch with a zesty salsa dip.
The beauty of this dish lies in its versatility – you can use seasonal vegetables and store-bought or homemade salsa, ensuring that it caters to all tastes and preferences.
To make mixed veggie cups even more appealing, consider customizing the vegetables to suit your personal likes or the theme of your event. You can potently mix and match colors and textures, creating a vibrant, healthful snack that’ll have everyone reaching for more.
These cups can also be assembled in advance, making them a convenient option for busy days or last-minute gatherings.
Ingredients:
- Carrot sticks
- Celery sticks
- Cucumber slices
- Bell pepper strips (red, yellow, and green)
- Cherry tomatoes
- Radish slices
- Fresh herbs (like parsley or cilantro for garnish)
- Your choice of salsa (mild, medium, or hot)
Arrange the assorted vegetables in individual cups or a large serving platter, standing upright for an appealing display. Fill the bottom of each cup or bowl with salsa, ensuring that it’s enough for dipping. Garnish with fresh herbs on top to enhance the presentation and flavor.
When preparing mixed veggie cups, remember to select the freshest vegetables for the best taste and crunch. If you choose to make your own salsa, consider using ingredients such as diced tomatoes, onions, jalapeños, lime juice, and cilantro to create a fresh, vibrant flavor.
Additionally, for a more varied texture, try lightly seasoning the veggies with salt and pepper or a sprinkle of lemon juice before serving.

