This post may contain affiliate links. Please read our policy page.
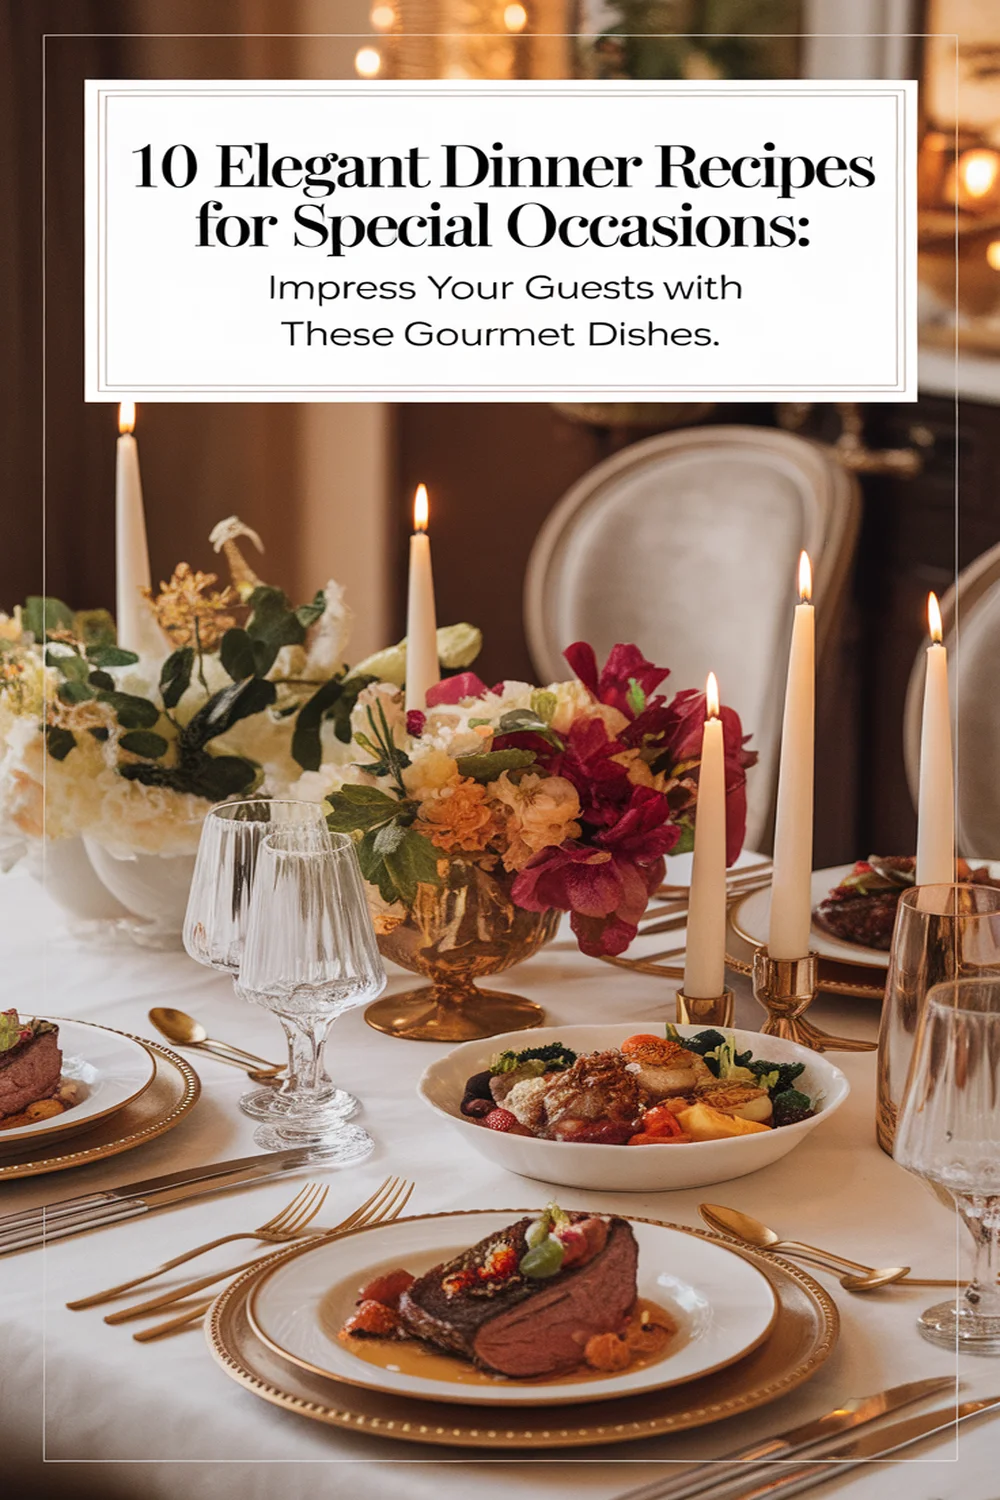
If you want to impress your guests with elegant dinner recipes for special occasions, consider dishes like Herb-Crusted Rack of Lamb, Pan-Seared Scallops with Lemon Butter Sauce, or the sumptuous Beef Wellington with Red Wine Reduction. Each recipe showcases gourmet flavors and beautiful presentations, making your meal truly memorable. Don’t forget to finish off with a decadent Chocolate Fondant with Vanilla Ice Cream for dessert. Discover more exquisite dishes that will elevate your dining experience further.
Truffle Risotto With Wild Mushrooms
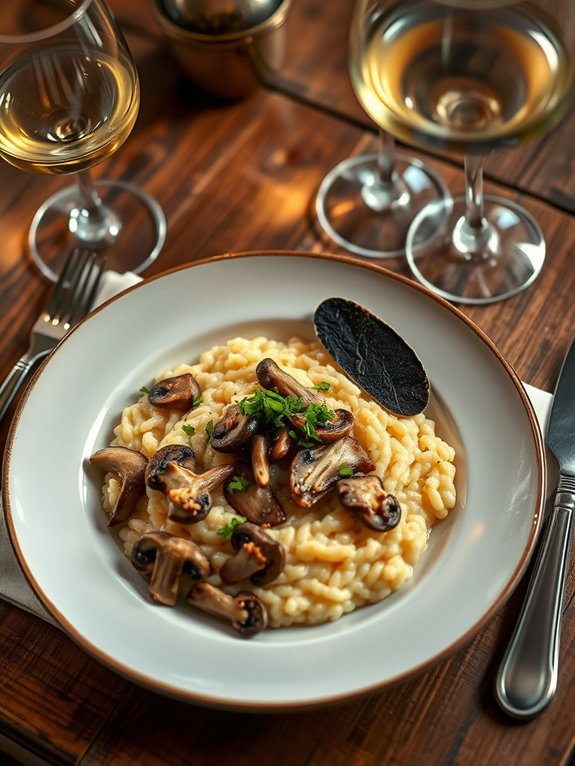
Truffle risotto with wild mushrooms is a luxurious dish that brings an earthy depth and creamy texture to the dining table, making it a perfect choice for special occasions. Risotto, an Italian staple, is made by cooking short-grain rice slowly, allowing it to absorb flavors and release starch, which creates a creamy consistency. The addition of wild mushrooms adds a rich umami flavor, while truffle oil or truffle shavings elevate the dish into the domain of gourmet dining.
This dish isn’t only satisfying but also impressively elegant, making it ideal for dinner parties or celebratory gatherings. The slow method of cooking risotto requires a little patience, but the rewarding result is a sumptuous dish that showcases the rich flavors of the ingredients. Whether you choose to serve it as a main course or an accompaniment to meat, truffle risotto with wild mushrooms is sure to leave a lasting impression on your guests.
Ingredients:
- 1 cup Arborio rice
- 4 cups chicken or vegetable broth
- 1 cup wild mushrooms (such as porcini, chanterelles, or shiitakes), cleaned and chopped
- 1 small onion, finely chopped
- 2 cloves garlic, minced
- ½ cup white wine
- 2 tablespoons truffle oil (or more to taste)
- ½ cup grated Parmesan cheese
- 2 tablespoons unsalted butter
- Fresh parsley, chopped (for garnish)
- Salt and pepper, to taste
Heat a large, heavy-bottomed pan over medium heat and add butter. Once melted, sauté the onions and garlic until translucent and fragrant, about 2-3 minutes.
Add the chopped wild mushrooms and cook for another 4-5 minutes until they’re tender. Stir in the Arborio rice, allowing it to toast slightly before adding the white wine. Once the wine is absorbed, gradually add the warm broth, one ladle at a time, stirring frequently until the rice is creamy and al dente.
Remove from heat and stir in Parmesan cheese and truffle oil. Season with salt and pepper to taste.
When preparing this risotto, it’s crucial to keep your broth warm on a separate burner, as adding cold broth can disrupt the cooking process and affect the final texture.
Also, be sure to stir the risotto regularly; this not only helps the rice to cook evenly but also releases the starches, contributing to the creaminess. Finally, feel free to use a variety of wild mushrooms based on your preference, and don’t hesitate to experiment with the amount of truffle oil to suit your taste.
Herb-Crusted Rack of Lamb
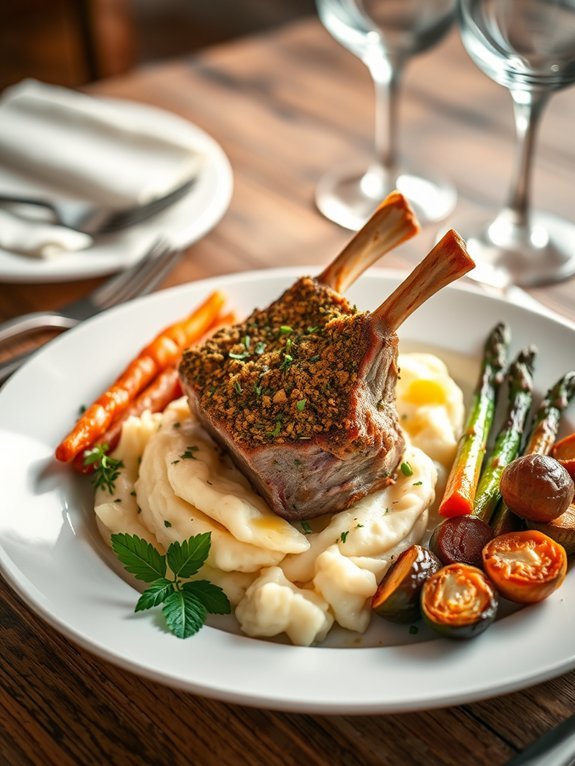
The Herb-Crusted Rack of Lamb is a sumptuous dish that embodies elegance and sophistication, making it a perfect centerpiece for special occasions. With its tender meat and a fragrant crust of fresh herbs, this recipe showcases the luxurious flavor of lamb while being surprisingly simple to prepare. When roasted to perfection, the meat becomes wonderfully juicy and pairs beautifully with a variety of sides, from creamy mashed potatoes to vibrant roasted vegetables.
The secret to a successful herb-crusted rack of lamb lies not only in the marinade but also in the quality of the meat. Opt for a fresh rack of lamb with a good layer of fat to help enhance the flavor and maintain moisture during the cooking process.
Marinating the lamb ahead of time allows the herbs to infuse into the meat, resulting in a dish that isn’t only visually stunning but also a feast for the senses.
- 1 rack of lamb (8 ribs, frenched)
- 2 tablespoons olive oil
- 2 cloves garlic, minced
- 1 tablespoon Dijon mustard
- 1 tablespoon fresh rosemary, chopped
- 1 tablespoon fresh thyme, chopped
- 1 cup breadcrumbs
- Salt and pepper to taste
- Optional: lemon zest for garnish
Preheat your oven to 400°F (200°C). In a small bowl, mix together olive oil, minced garlic, Dijon mustard, rosemary, thyme, salt, and pepper to create a marinade. Rub this mixture evenly all over the rack of lamb.
Then, press the breadcrumbs onto the meat to form a crust. Place the lamb on a roasting rack in a baking dish and roast in the preheated oven for about 20-25 minutes for medium-rare, or until it reaches your preferred level of doneness.
Allow the lamb to rest for 10 minutes before slicing and serving. When cooking this dish, make certain that you let the lamb rest after roasting to allow the juices to redistribute, resulting in more tender slices.
For an added touch of flavor, consider serving the lamb with a red wine reduction or a mint sauce. Additionally, timing is key; while the lamb is resting, you can use that time to prep your sides and make sure everything is plated beautifully for your guests.
Recommended Items
Discover our favorite products and equipment to elevate your dinner experience—happy cooking!
Pan-Seared Scallops With Lemon Butter Sauce
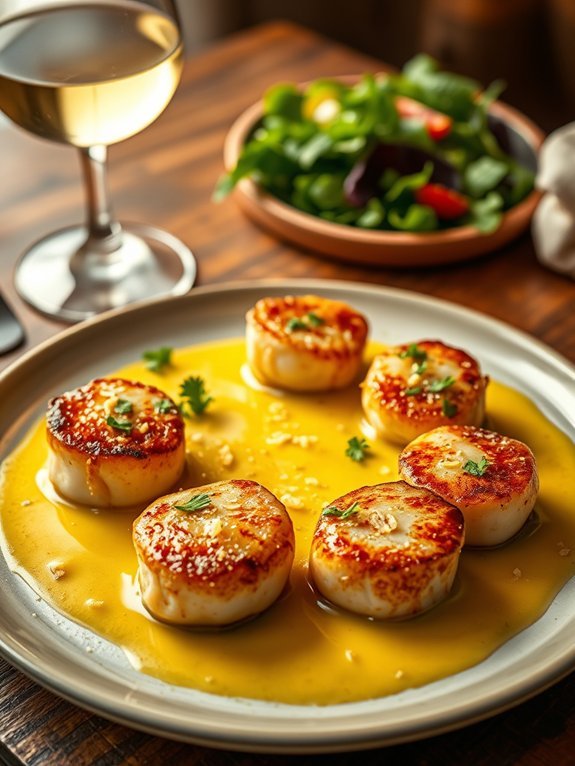
Pan-seared scallops are a luxurious and elegant dish that can elevate any special occasion. With a beautiful golden crust on the outside and a tender, buttery texture on the inside, scallops provide a memorable culinary experience.
When paired with a zesty lemon butter sauce, they become a symphony of flavors that tantalizes the taste buds, making this dish a perfect choice for dinner parties, anniversaries, or any gathering where you want to impress your guests.
The key to perfect pan-seared scallops lies in the technique. It’s vital to choose high-quality scallops, preferably dry-packed, to guarantee they sear beautifully without releasing too much moisture. The simple yet flavorful lemon butter sauce complements the natural sweetness of the scallops, creating a delightful balance that wraps up this dish in elegance.
Serve it with a light salad or over a bed of risotto for a complete and sumptuous meal.
Ingredients:
- 1 pound large sea scallops, cleaned and patted dry
- Salt and pepper, to taste
- 2 tablespoons olive oil
- 4 tablespoons unsalted butter
- 2 cloves garlic, minced
- Juice of 1 lemon
- Zest of 1 lemon
- Fresh parsley, chopped, for garnish
In a large skillet over medium-high heat, add the olive oil and allow it to heat until shimmering. Season the scallops lightly with salt and pepper on both sides, then place them in the skillet in a single layer, making sure not to overcrowd the pan.
Sear the scallops for about 2-3 minutes on each side until they develop a golden crust. Remove the scallops from the skillet and set them aside. In the same pan, lower the heat to medium and add the butter. Once melted, stir in the minced garlic and cook for about 30 seconds until fragrant.
Add the lemon juice and zest, and whisk to combine. Return the scallops to the pan to warm them, then plate and drizzle with the lemon butter sauce. Garnish with fresh parsley before serving.
To achieve the perfect sear on your scallops, confirm they’re completely dry before hitting the pan – excess moisture can prevent them from browning properly. It’s also vital to let the scallops rest for a few minutes after cooking to allow the juices to redistribute.
Finally, serve the dish immediately for the best flavor and texture, as scallops can become rubbery if left to sit too long after cooking. Enjoy this elegant meal with your favorite side dishes to create a well-rounded dining experience.
Stuffed Portobello Mushrooms

Stuffed Portobello Mushrooms are a delightful dish that combines rich flavors and earthy textures, making them perfect for a special occasion or elegant dinner. These larger-than-life mushrooms can be filled with a variety of ingredients, from creamy cheeses to savory vegetables, ensuring that they can cater to both vegetarian and meat-loving guests alike. The result is a beautifully presented dish that’s as delicious as it’s visually appealing.
Preparing Stuffed Portobello Mushrooms isn’t only simple but also allows you to showcase your culinary skills in a sophisticated way. The mushrooms serve as both the vessel and the star of the dish, capturing all the flavors of the filling while their natural umami complements the other ingredients. This recipe is perfect for impressing your guests and can easily be adapted to suit different dietary preferences.
- 4 large Portobello mushrooms
- 1 cup cooked quinoa
- 1/2 cup crumbled feta cheese
- 1/2 cup spinach, chopped
- 1/4 cup sun-dried tomatoes, chopped
- 1/4 cup diced red onion
- 2 cloves garlic, minced
- 2 tablespoons olive oil
- Salt and pepper to taste
- Fresh parsley for garnish
Preheat your oven to 375°F (190°C). Clean the Portobello mushrooms by gently wiping them with a damp cloth, then remove the stems and gills.
In a mixing bowl, combine the cooked quinoa, feta cheese, spinach, sun-dried tomatoes, red onion, garlic, and olive oil. Season with salt and pepper.
Stuff each mushroom cap generously with the filling mixture and place them on a baking sheet. Bake for 20-25 minutes until the mushrooms are tender and the tops are golden.
For best results, select Portobello mushrooms that are firm and free from blemishes. When cleaning the mushrooms, avoid soaking them in water, as they can become too wet and lose their texture.
Additionally, feel free to experiment with the stuffing ingredients; adding ingredients such as cooked sausage or other vegetables can provide even more depth to the flavor.
Always keep an eye on the mushrooms while baking to prevent overcooking, leading to a chewy texture.
Proposed Recipe for Elegant Dinner
Duck Breast With Cherry Port Sauce
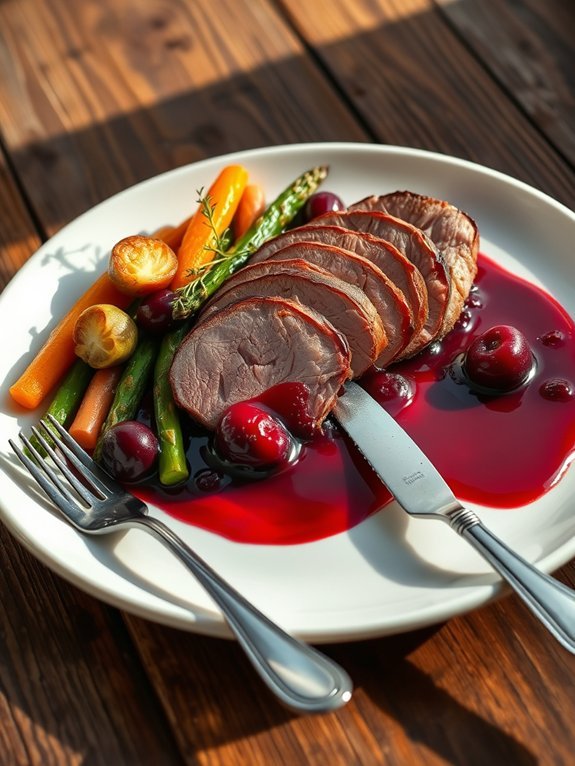
Duck breast with cherry port sauce is a decadent dish that elevates any dinner gathering into a memorable event. The rich flavor of the duck, paired with the sweet and slightly tart notes of cherry and the depth of port wine, creates a harmonious balance that tantalizes the taste buds. Perfect for special occasions, this recipe is sure to impress your guests and leave a lasting impression.
To achieve the perfect crispy skin while guaranteeing the duck breast remains tender and juicy, it’s vital to cook it at the right temperature. Allowing the duck to rest after cooking enhances its flavor and juiciness. The cherry port sauce adds an exquisite touch, with its vibrant color and complex flavor profile that pairs beautifully with the savory richness of the duck.
Ingredients:
- 2 duck breasts
- Salt
- Pepper
- 1 cup fresh or frozen cherries, pitted
- 1/2 cup port wine
- 1 tablespoon balsamic vinegar
- 2 tablespoons honey
- 2 sprigs fresh thyme
- 1 tablespoon unsalted butter
Score the skin of the duck breasts in a crosshatch pattern, being careful not to cut into the meat. Season both sides with salt and pepper.
In a cold skillet, place the duck breasts skin-side down and cook over medium heat for about 6-8 minutes, allowing the fat to render and the skin to become crispy. Once the skin is golden brown, flip the duck breasts and cook for another 5-7 minutes, or until they reach your desired doneness.
Remove the duck from the skillet and let it rest. In the same skillet, pour off excess fat, add cherries, port wine, balsamic vinegar, honey, and thyme, and simmer until reduced to a sauce consistency. Finish with a tablespoon of butter, then serve the sliced duck breasts drizzled with the cherry port sauce.
For best results, consider using a meat thermometer to confirm the duck reaches an internal temperature of 135°F for medium-rare. Resting the duck for at least 5 minutes before slicing is significant, as it allows the juices to redistribute throughout the meat.
Pair this dish with a side of roasted vegetables or creamy mashed potatoes to complement the richness of the duck and the sweetness of the sauce.
Lobster Tail With Garlic Herb Butter
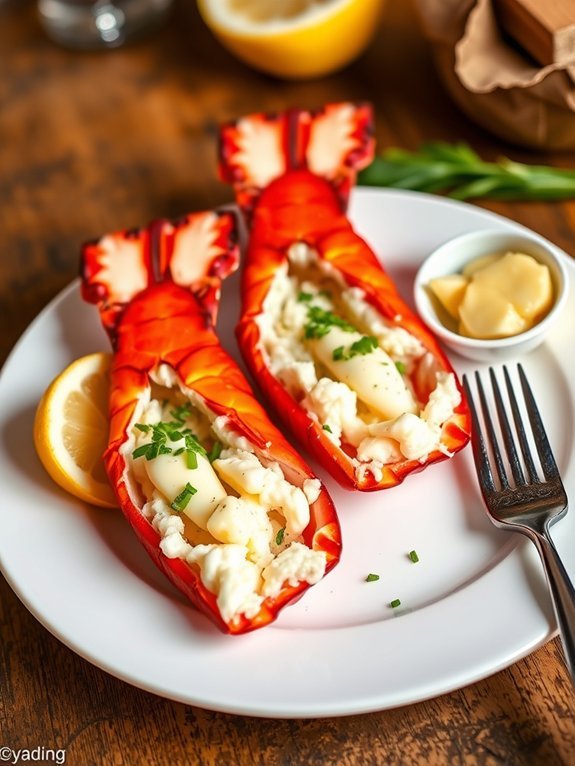
Lobster Tail with Garlic Herb Butter is a sophisticated dish that can elevate any special occasion into a remarkable culinary experience. This dish isn’t only visually stunning but also exudes rich flavors that harmoniously meld together to create a memorable dining experience. The buttery, garlic-infused sauce enhances the natural sweetness of the lobster, making each bite a delicious treat that your guests will rave about.
Cooking lobster tails may seem intimidating, but it can be surprisingly simple with this recipe. Using fresh ingredients and some basic culinary techniques, you’ll be able to impress your friends and family with a restaurant-quality dish right in your home kitchen. Whether it’s a romantic dinner or a festive gathering, Lobster Tail with Garlic Herb Butter will be the perfect centerpiece for your elegant meal.
Ingredients:
- 2 lobster tails
- 1/2 cup unsalted butter
- 4 cloves garlic, minced
- 1 tablespoon fresh parsley, chopped
- 1 tablespoon fresh chives, chopped
- 1 teaspoon lemon juice
- Salt and pepper, to taste
- Lemon wedges, for serving
Preheat your oven to 425°F (220°C). Using kitchen scissors, carefully cut the top of the lobster shell lengthwise, stopping just before the tail fin. Gently pull apart the shell to expose the meat, then season it with salt and pepper.
In a saucepan over medium heat, melt the unsalted butter and add the minced garlic, cooking until fragrant. Stir in the chopped parsley, chives, and lemon juice. Pour half of the butter mixture over the exposed lobster meat, reserving the rest for basting later.
Place the lobster tails on a baking sheet and bake in the preheated oven for about 12-15 minutes, or until the meat is opaque and cooked through. Baste the lobster with the remaining garlic herb butter halfway through cooking.
When preparing lobster tails, it’s crucial to avoid overcooking, as this can result in tough and rubbery meat. To achieve the best texture, look for lobster meat that’s firm and opaque but still moist.
Using fresh herbs not only enhances the dish visually but also adds depth of flavor, so consider experimenting with different herb combinations if desired. Finally, remember to serve with lemon wedges for a delightful citrusy brightness that complements the rich butter sauce beautifully.
Grilled Vegetable and Quinoa Salad
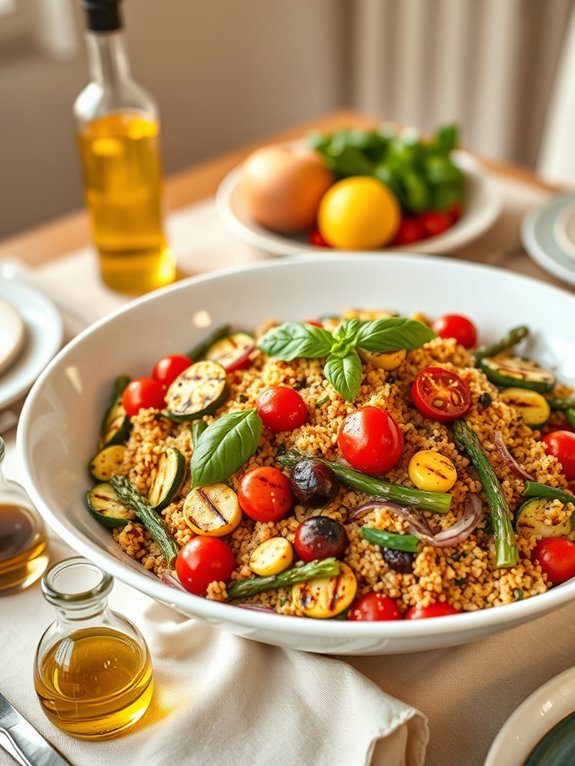
Grilled Vegetable and Quinoa Salad is a delightful dish that showcases the vibrant flavors of fresh vegetables paired with protein-rich quinoa. Perfect for light yet satisfying meals, it adds a touch of elegance to any special occasion.
With grilled seasonal vegetables and a zesty dressing, this salad isn’t only nutritious but also visually stunning, making it a perfect centerpiece for your dinner table.
This recipe is versatile and can be customized based on your personal preferences or the vegetables in season. Whether you’re hosting a dinner party, celebrating a special occasion, or simply looking to prepare a wholesome meal for your family, this Grilled Vegetable and Quinoa Salad is bound to impress. The combination of textures, colors, and flavors will leave your guests raving about your culinary skills.
Ingredients:
- 1 cup quinoa
- 2 cups vegetable broth or water
- 1 zucchini, sliced
- 1 bell pepper (any color), sliced
- 1 red onion, sliced
- 1 cup cherry tomatoes, halved
- 1 cup asparagus, trimmed and cut into 2-inch pieces
- 2 tablespoons olive oil
- Salt and pepper to taste
- 1 tablespoon balsamic vinegar
- 1 tablespoon lemon juice
- Fresh basil or parsley for garnish
Cook the quinoa according to package instructions, using vegetable broth or water, and set aside. Preheat a grill or grill pan over medium-high heat. Toss the sliced zucchini, bell pepper, onion, cherry tomatoes, and asparagus in a bowl with olive oil, salt, and pepper. Grill the vegetables for about 5-7 minutes or until tender and slightly charred.
In a large mixing bowl, combine the cooked quinoa, grilled vegetables, balsamic vinegar, and lemon juice. Gently toss to combine, and serve warm or at room temperature, garnishing with fresh herbs.
When preparing this salad, feel free to mix and match your favorite vegetables, or even add in ingredients like feta cheese or chickpeas for additional flavor and nutrition.
Make sure to grill the vegetables until they’ve nice grill marks but avoid overcooking them to maintain a satisfying crunch. Additionally, allowing the salad to rest for a few minutes before serving will enable the flavors to meld beautifully.
Baked Salmon With Dill and Asparagus
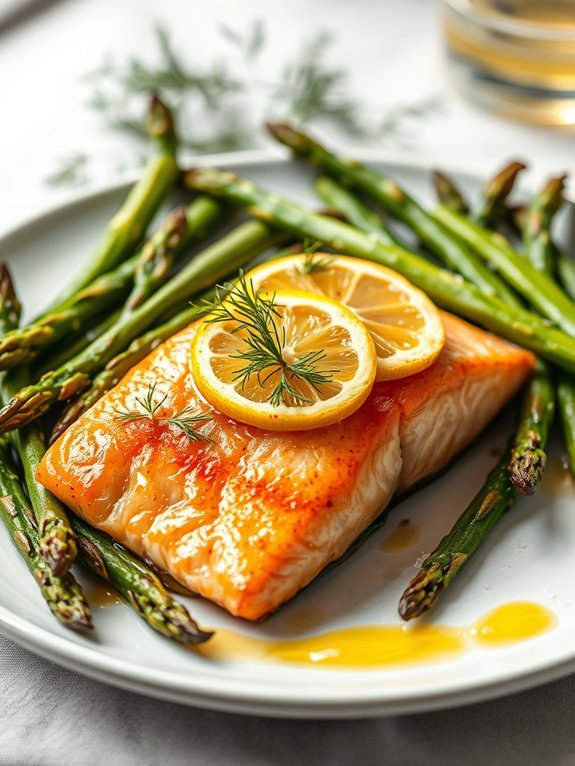
Baked salmon with dill and asparagus is a delectable dish that combines the rich flavors of fish with the fresh, earthy tones of herbs and vegetables. Perfect for a special occasion, this meal not only looks stunning when plated but also satisfies the palate with its delicate balance of flavors.
The natural oils in the salmon keep it moist during cooking, while dill adds a fragrant touch, enhancing the overall experience. Asparagus complements the salmon beautifully, providing a tender yet crisp texture that makes every bite enjoyable.
The addition of lemon provides a zesty brightness that elevates the dish, balancing the richness of the fish. This recipe isn’t just simple to prepare but also offers a sophisticated presentation, making it ideal for gatherings, anniversaries, or any event where impressing guests is a priority.
Ingredients:
- 2 salmon fillets
- 1 bunch of fresh asparagus
- 2 tablespoons olive oil
- 1 tablespoon fresh dill, chopped
- 1 lemon, sliced
- Salt and pepper to taste
- 2 cloves garlic, minced (optional)
Place the salmon fillets on a baking sheet lined with parchment paper. Arrange the asparagus around the salmon, then drizzle everything with olive oil.
Sprinkle fresh dill over the salmon and asparagus, add minced garlic if desired, and season with salt and pepper. Top the salmon with lemon slices and bake in a preheated oven at 375°F (190°C) for about 15-20 minutes or until the salmon flakes easily with a fork.
When cooking this dish, it’s vital to monitor the baking time to avoid overcooking the salmon, which can make it dry. For an extra layer of flavor, consider marinating the salmon in olive oil, lemon juice, and dill for 30 minutes before baking.
If you prefer, you can also substitute the asparagus with other vegetables such as green beans or broccoli. Always opt for fresh ingredients for the best taste and presentation.
Beef Wellington With Red Wine Reduction
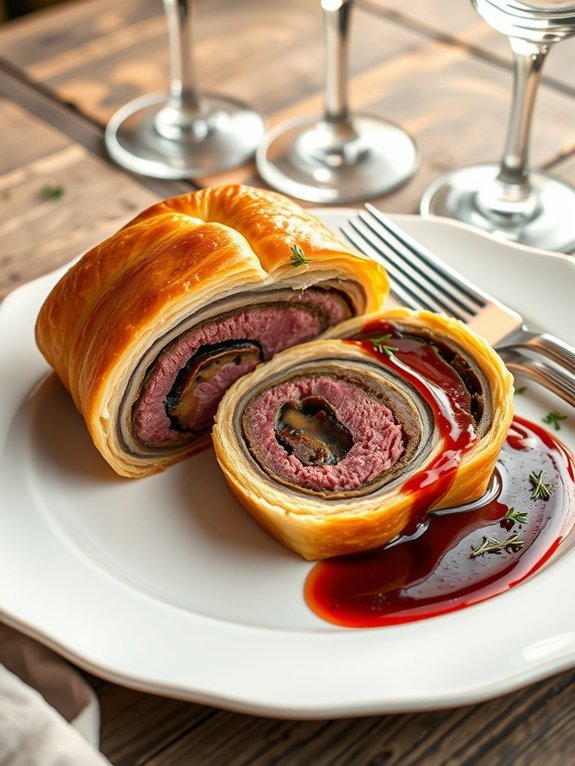
Beef Wellington is a quintessential dish that embodies elegance and sophistication, making it a perfect centerpiece for any special occasion. The combination of a tender beef fillet, aromatic duxelles, and rich prosciutto, all encased in golden, flaky pastry, creates a stunning dish that not only impresses the eyes but also tantalizes the palate. By adding a red wine reduction, the flavors deepen, enhancing the overall experience and creating a luxurious atmosphere for any celebration.
Preparation for Beef Wellington requires careful attention to detail, ensuring that each component melds harmoniously when baked. The key to a perfect Wellington is to start with high-quality ingredients, particularly the beef, and to control the moisture content in the filling to avoid a soggy pastry. The end result is a dish that’s as flavorful as it’s beautiful – sure to be a memorable highlight of your dinner.
Ingredients:
- 2 lb beef tenderloin, trimmed
- Salt and freshly ground black pepper
- 2 tablespoons olive oil
- 1 cup finely chopped mushrooms (button or cremini)
- 2 tablespoons Dijon mustard
- 8 slices prosciutto
- 1 sheet of puff pastry (thawed if frozen)
- 1 egg (beaten, for egg wash)
- 1 cup red wine
- 1 cup beef stock
- 1 tablespoon unsalted butter
- Fresh thyme leaves (for garnish)
Sear the beef tenderloin in olive oil over high heat for about 2-3 minutes on all sides until browned, then season it with salt and pepper. Let it cool before spreading a layer of Dijon mustard on all sides.
In a skillet, sauté the chopped mushrooms until their moisture evaporates and they become a paste. Lay out the prosciutto slices on a sheet of cling film, overlapping them slightly. Spread the mushroom mixture over the prosciutto, place the beef on top, and roll it tightly, using the cling film to help. After chilling in the refrigerator for 30 minutes, wrap the beef in puff pastry, seal the edges, and brush with egg wash.
Bake in a preheated oven at 400°F (200°C) for about 25-30 minutes until golden brown and cooked to your desired doneness.
For best results, allow the beef to rest after baking before slicing, as this helps to retain the juices and maintains the tenderness of the meat. When making the red wine reduction, be sure to let it simmer until it thickens to capture the deep flavors, which will beautifully complement the richness of the Wellington.
Also, consider using a meat thermometer to check your beef’s internal temperature, aiming for 130°F (54°C) for medium-rare. Remember, practice makes perfect, so don’t hesitate to attempt this glorious dish for guests or even for a special family dinner.
Chocolate Fondant With Vanilla Ice Cream

Chocolate Fondant With Vanilla Ice Cream is a classic and decadent dessert that never fails to impress. With its gooey, molten center surrounded by a rich chocolate exterior, this indulgent treat pairs beautifully with the creamy sweetness of vanilla ice cream. The elegant presentation and delightful combination of flavors make it perfect for special occasions, ensuring that your guests will remember the meal long after they’ve left the table.
Preparation for Chocolate Fondant is relatively simple, requiring just a few quality ingredients. The secret to achieving that luscious, molten center lies in precise baking times, so it’s important to keep an eye on them while they’re in the oven. This dessert is best served warm, straight from the oven, allowing the chocolate to flow out when you take your first bite. Pair it with a scoop of vanilla ice cream for a delightful contrast in temperature and flavor.
Ingredients:
- 200g dark chocolate (70% cocoa)
- 175g unsalted butter
- 150g sugar
- 4 large eggs
- 4 large egg yolks
- 100g all-purpose flour
- A pinch of salt
- Vanilla ice cream (to serve)
To make the chocolate fondant, preheat your oven to 200°C (390°F) and grease four ramekins with butter, then dust them with flour. Melt the dark chocolate and butter together in a heatproof bowl over simmering water, stirring until smooth.
In another bowl, whisk together the eggs, egg yolks, and sugar until light and frothy. Carefully fold the melted chocolate mixture into the egg mixture, and then sift in the flour and salt, mixing until just combined. Divide the batter among the prepared ramekins and bake for 10-12 minutes, or until the edges are set but the center is still soft. Allow them to cool for a minute, then invert onto plates and serve immediately with a scoop of vanilla ice cream.
When making chocolate fondant, it’s vital to use high-quality chocolate, as this will greatly impact the flavor and overall experience. Also, consider preparing the batter in advance; you can refrigerate the filled ramekins for up to a day before baking. Just remember to add a minute or two to the baking time if baking from the fridge.
Experiment with serving garnishes like fresh berries or a drizzle of chocolate sauce for an even more luxurious presentation!

