This post may contain affiliate links. Please read our policy page.
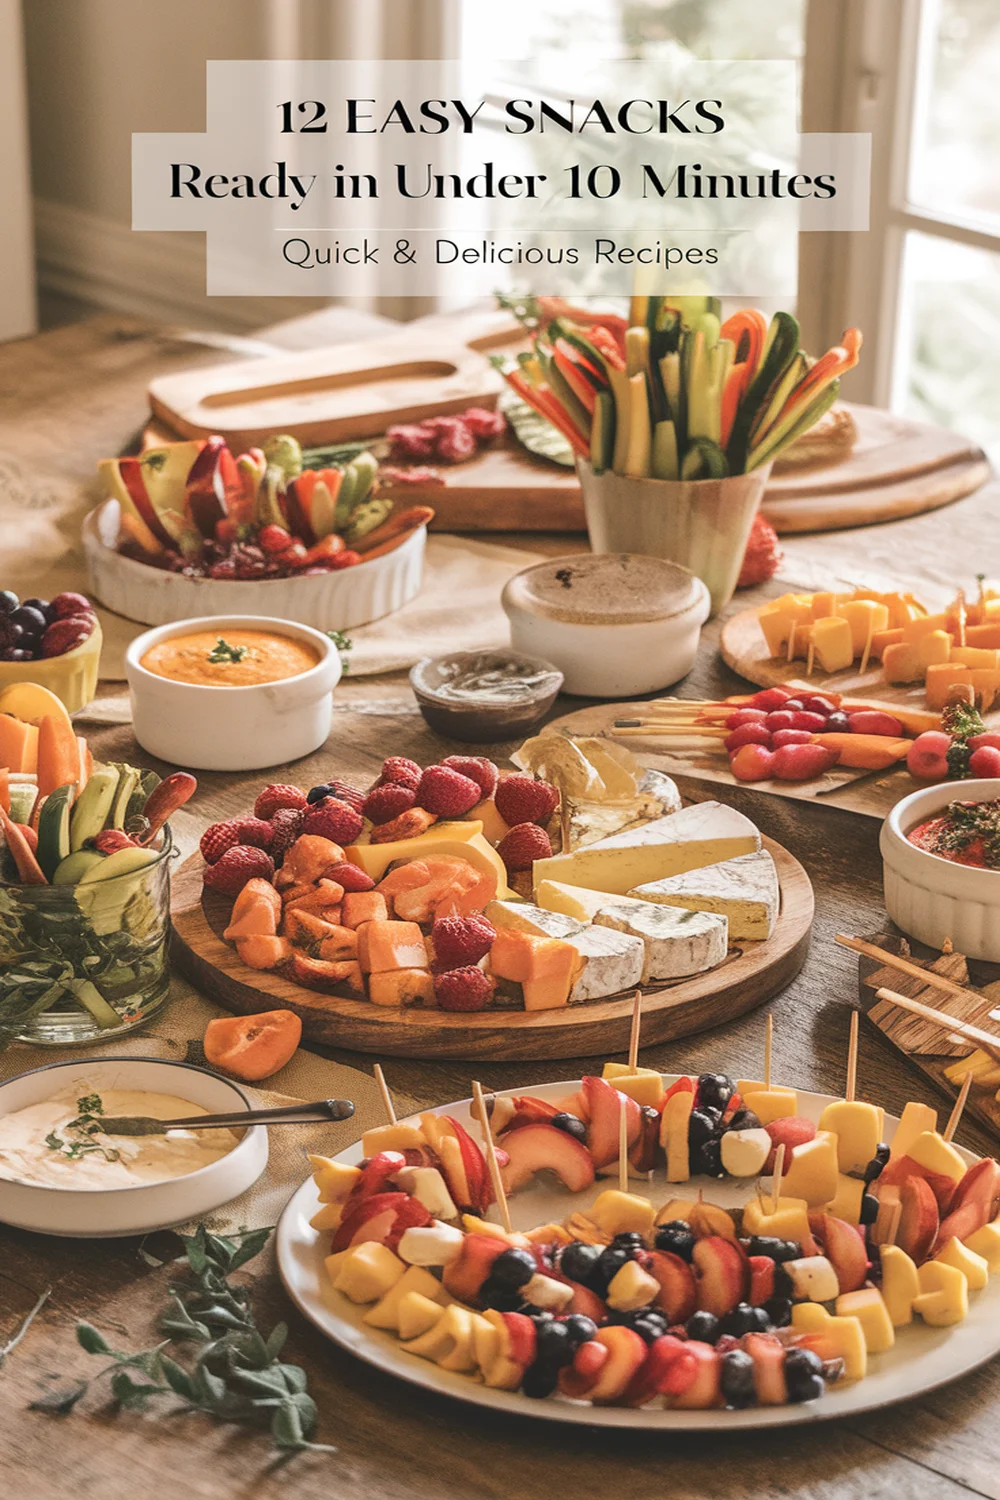
If you’re looking for quick and delicious snacks, try these easy recipes that take under 10 minutes! Whip up avocado toast with cherry tomatoes for a flavorful bite, or enjoy a Greek yogurt parfait layered with fruits. Peanut butter banana roll-ups are perfect for a sweet treat, while caprese skewers add a touch of elegance. Pair hummus with fresh veggies for a crunchy snack, and don’t miss out on smoked salmon wraps. There’s more tasty inspiration ahead!
Avocado Toast With Cherry Tomatoes
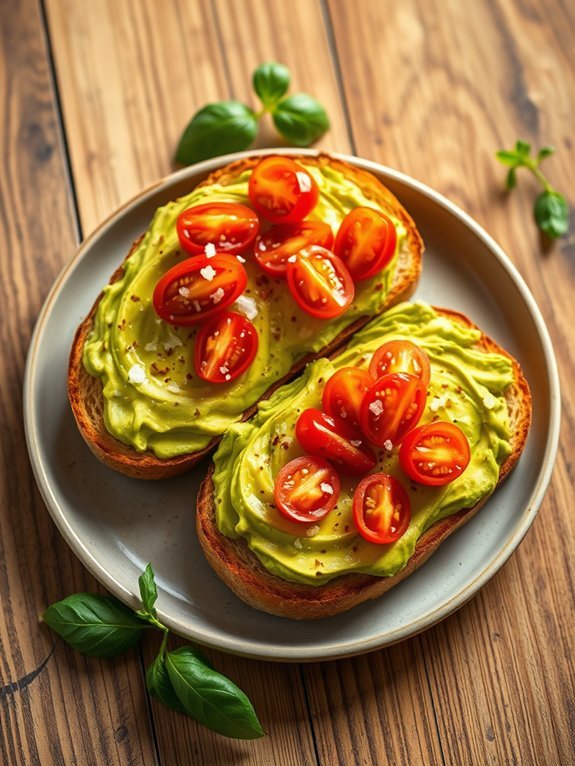
Avocado toast topped with cherry tomatoes is a delightful, nutritious snack that can be whipped up in just a few minutes. This simple dish isn’t only pleasing to the palate but also packs a punch when it comes to healthy fats and vitamins. Perfect for breakfast, a light lunch, or a quick snack, avocado toast is versatile and can be customized to suit your tastes.
To make a delicious version of this popular treat, you only need a handful of quality ingredients. Flavorful ripe avocados combined with the natural sweetness of cherry tomatoes create an invigorating bite. Add a sprinkle of salt and a drizzle of olive oil, and you’ve got an irresistible snack that will impress anyone you serve it to, including yourself!
- 1 ripe avocado
- 2 slices of bread (your choice, such as sourdough or whole grain)
- 1 cup cherry tomatoes, halved
- Salt, to taste
- Olive oil, for drizzling
- Optional: red pepper flakes, lemon juice, or fresh herbs
Start by toasting the slices of bread to your desired level of crispiness. While the bread is toasting, cut the avocado in half, remove the pit, and scoop out the flesh into a bowl. Mash the avocado with a fork until creamy, seasoning it with salt and optional lemon juice to enhance the flavor.
Once the toast is ready, spread the mashed avocado generously on each slice and top with the halved cherry tomatoes. Finish with a drizzle of olive oil and an optional sprinkle of red pepper flakes or fresh herbs for an extra flavor boost.
When making avocado toast, choosing ripe avocados is essential for achieving that creamy texture. If you find yourself with unripe avocados, place them in a brown paper bag with an apple or banana to speed up the ripening process.
Additionally, feel free to customize your toast by adding toppings such as feta cheese, sliced radishes, or a poached egg for a heartier option!
Recommended Items
Get ready to whip up some quick and delicious snacks with these must-have ingredients and tools!
Greek Yogurt Parfait

A Greek yogurt parfait isn’t only delicious but also packs a nutritional punch, making it a fantastic option for a quick snack or even breakfast. The creamy texture of Greek yogurt combines beautifully with fresh fruits and crunchy granola, creating a harmonious balance of flavors and textures in each bite.
This delightful dish can be custom-tailored to your taste preferences and is perfect for anyone seeking a healthy, satisfying treat that can be whipped up in under 10 minutes.
To make a Greek yogurt parfait, you can choose your favorite fruits and toppings. Whether you’re craving the zing of berries, the sweetness of bananas, or the tropical vibes of mango, the options are virtually limitless!
The beauty of this recipe lies in its versatility; you can experiment with different levels of sweetness, combinations of flavors, and even add-ins like nuts or seeds to boost the health benefits.
Ingredients:
- 1 cup Greek yogurt (plain or flavored)
- 1 cup mixed fresh fruits (berries, banana, mango, etc.)
- 1/2 cup granola
- 1 tablespoon honey or maple syrup (optional)
- 1 tablespoon chia seeds (optional)
- Mint leaves for garnish (optional)
Layer the Greek yogurt, fruits, and granola in a glass or bowl, starting with yogurt at the bottom. Add a layer of fruits, followed by granola, and repeat the layers until you reach the top.
Drizzle honey or maple syrup over the parfait for added sweetness if desired, and sprinkle with chia seeds for extra nutrition. Finish with mint leaves on top for a pop of color and freshness.
When creating your parfait, feel free to mix and match your ingredients. You can use frozen fruits if fresh ones aren’t available, and consider switching up the granola for other crunchy toppings like nuts or seeds.
To save time, prepare individual portions in advance and store them in the refrigerator for a quick grab-and-go snack. Enjoy the delightful variety each time you make this simple yet satisfying treat!
Quick Snack Preparation Guide
Peanut Butter Banana Roll-Ups
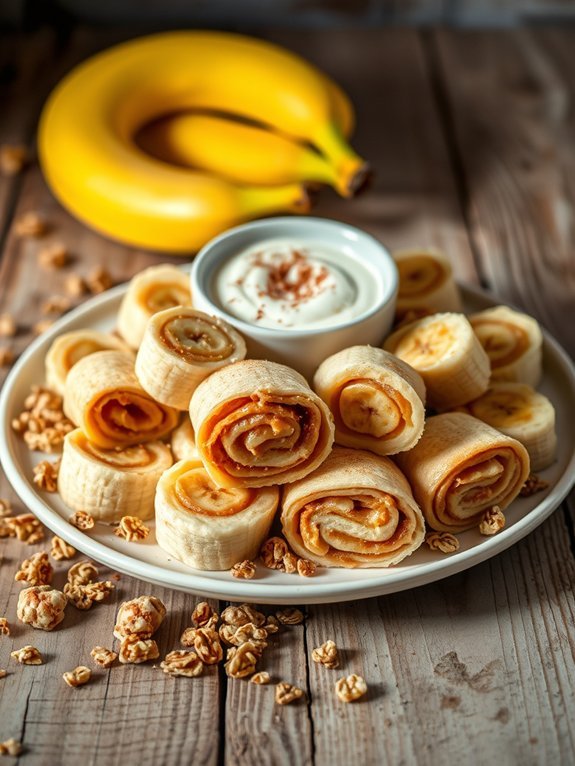
Peanut Butter Banana Roll-Ups are a delicious and nutritious snack that you can whip up in just a few minutes. Perfect for a quick breakfast, a tasty after-school treat, or a mid-afternoon snack, these roll-ups are sure to satisfy your cravings. With their creamy peanut butter and sweet banana filling, they provide a delightful combination of flavors and textures that everyone will love. Plus, they’re a great way to incorporate some fruit into your diet!
Making these roll-ups isn’t only simple but also customizable. You can use various types of tortillas or wraps, such as whole wheat, spinach, or gluten-free options, depending on your dietary needs. Feel free to get creative by adding toppings such as honey, granola, or a sprinkle of cinnamon to elevate the taste. In no time, you’ll have a delightful snack that’s both healthy and easy to make.
Ingredients:
- 1 large tortilla or wrap
- 2 tablespoons of peanut butter (or any nut butter)
- 1 medium banana
- Honey (optional)
- Granola or chopped nuts (optional)
- Cinnamon (optional)
Spread peanut butter evenly over the tortilla, leaving a small border around the edges. Place the banana at one end of the tortilla and roll it tightly until the entire tortilla is wrapped around the banana. If desired, drizzle honey on top, sprinkle with granola or chopped nuts, and a dash of cinnamon before rolling. Slice the roll-up into bite-sized pieces for easy snacking and serve immediately.
For an extra flavor boost, try adding some chocolate chips or dried fruits inside the roll-up alongside the banana. You can also experiment with different nut butters, such as almond or cashew, for a unique twist. Serving them with a side of yogurt for dipping can make this snack even more enjoyable.
Don’t forget to enjoy these roll-ups fresh, as the banana may become mushy if left too long.
Caprese Skewers
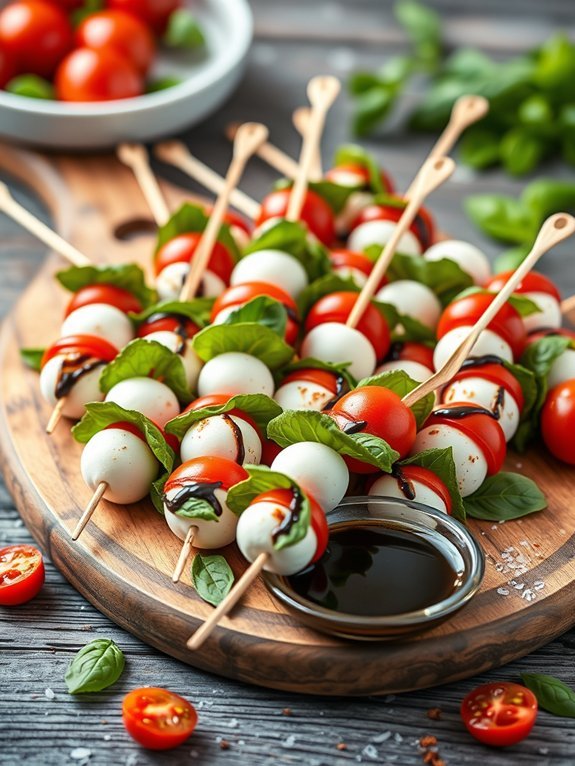
Caprese skewers are a simple yet delicious appetizer that beautifully showcases the freshness of Italian ingredients. Perfect for a quick snack, they combine ripe tomatoes, creamy mozzarella, and fragrant basil leaves, drizzled with a balsamic glaze for a burst of flavor.
Not only are these skewers visually appealing, but they also come together in minutes, making them an ideal choice for impromptu gatherings or when you need a quick bite.
To prepare these delightful bites, simply thread the ingredients onto skewers, allowing the vibrant colors to shine through. The combination of flavors creates a revitalizing treat that will impress your guests, and they can be served as an appetizer or even a light meal.
Whether you enjoy them at a picnic, barbecue, or as a quick snack at home, Caprese skewers are sure to satisfy your cravings.
- Cherry tomatoes
- Fresh mozzarella balls
- Fresh basil leaves
- Balsamic glaze
- Salt and pepper
- Skewers or toothpicks
Begin by taking a skewer and threading a cherry tomato onto it, followed by a basil leaf and a mozzarella ball. Repeat the process, alternating between the ingredients until the skewer is filled to your liking.
Once assembled, arrange the skewers on a serving plate and drizzle with balsamic glaze, then sprinkle with salt and pepper to taste.
For an even more delightful experience, try experimenting with different types of tomatoes or flavored mozzarella. You can also add a touch of extra virgin olive oil or a hint of crushed red pepper for a spicier kick.
These versatile skewers can be customized according to your taste, making them a perfect snack for any occasion!
Hummus and Veggie Plate
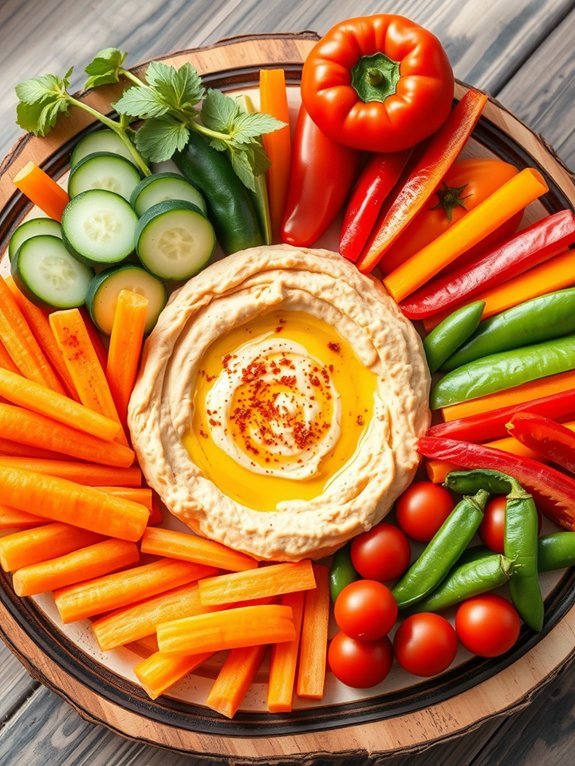
Hummus and veggie plates are a fantastic snack option that can be whipped up in no time. Loaded with flavor and packed with nutrients, this dish combines the creamy richness of hummus with the fresh crunch of assorted vegetables. It’s perfect for a quick snack, healthy appetizer, or light meal. Plus, you can customize it to your personal taste by choosing your favorite veggies and hummus flavor.
Making a hummus and veggie plate isn’t only quick but also incredibly versatile. Use store-bought hummus for a super fast preparation, or opt for homemade hummus if you have a few extra minutes to spare. By combining seasonal vegetables, you’re ensuring freshness and maximizing flavor, making your snack both satisfying and wholesome.
- 1 cup of hummus (store-bought or homemade)
- 1 cup of baby carrots
- 1 cup of cucumber, sliced
- 1 bell pepper, sliced (any color)
- 1 cup of cherry tomatoes
- 1 cup of snap peas or sugar snap peas
- Olive oil (optional, for drizzling)
- Salt and pepper (to taste, optional)
Arrange the hummus in the center of a large serving platter or a shallow bowl. Then, artfully place your assorted vegetables around the hummus, creating an inviting display. If desired, drizzle a little olive oil over the hummus and sprinkle with salt and pepper for added flavor. Serve immediately with a side of whole-grain pita chips or crackers if you want a bit of crunch!
Feel free to get creative with your veggie choices; zucchini, radishes, or broccoli florets can also be great additions to your plate. Additionally, consider making different flavors of hummus, such as roasted red pepper, garlic, or lemon, to offer a variety of taste experiences.
This colorful snack not only looks great but also encourages everyone to enjoy healthy eating without compromising on flavor.
Cheese Quesadilla
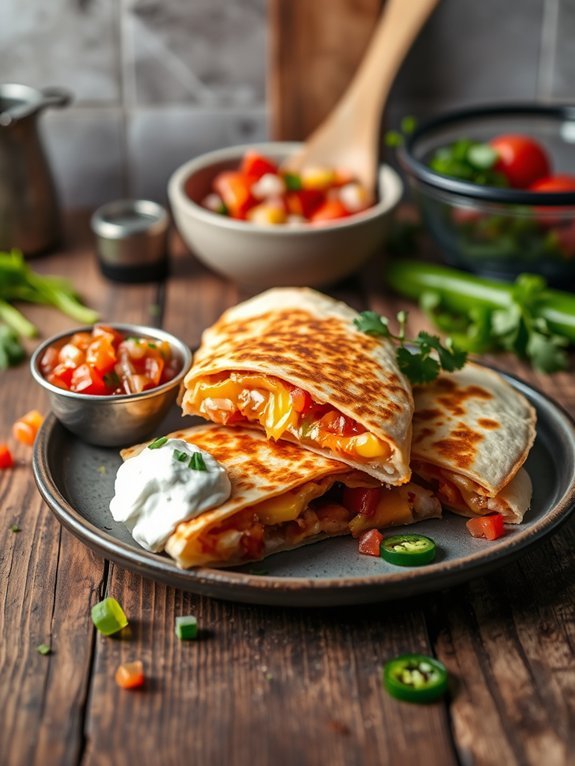
Cheese quesadillas are a fast and satisfying snack that can be whipped up in a matter of minutes. With their golden, crispy texture and gooey, melted cheese, they’re a crowd-pleaser for both kids and adults alike. Not only are they delicious, but they’re also incredibly versatile—you can throw in some veggies, beans, or even leftover chicken to enhance the flavor and add some nutrients.
Making cheese quesadillas is a breeze, requiring just a few simple ingredients and minimal prep time. Whether you want to enjoy them as a quick after-school snack, a late-night treat, or even a party appetizer, this recipe is sure to fulfill. With their savory goodness and satisfying crunch, cheese quesadillas are your go-to dish when you’re short on time but still want something delicious.
- Flour or corn tortillas
- Shredded cheese (cheddar, Monterey Jack, or a blend)
- Cooking oil or butter
- Salsa or sour cream (optional, for serving)
To prepare the cheese quesadilla, heat a non-stick skillet over medium heat and add a small amount of cooking oil or butter. Place one tortilla in the skillet and sprinkle a generous amount of shredded cheese over half of the tortilla.
Fold the tortilla in half to cover the cheese, pressing down lightly. Cook for 2-3 minutes on one side until golden brown, then carefully flip and cook for another 2-3 minutes until the other side is also golden and the cheese is melted. Remove from heat, slice, and serve with salsa or sour cream if desired.
For an even more delicious quesadilla, don’t hesitate to experiment with different types of cheese or add some sliced jalapeños, bell peppers, or even cooked meat for added flavor. Make certain not to overstuff your quesadilla, as it can be difficult to flip and may spill out during cooking.
Keeping the heat moderate will guarantee that the cheese melts perfectly without burning the tortillas. Enjoy your quick and easy snack!
Microwave Popcorn

Microwave popcorn is a classic snack that combines convenience and deliciousness, making it an ideal choice for those busy moments when you’re craving something crunchy and savory. Whether you’re settling down for a movie night, needing a quick pick-me-up during the day, or preparing for a game night with friends, microwave popcorn delivers a satisfying and tasty treat in just a few minutes.
With its light and fluffy texture and the option to customize flavors, it’s a versatile snack that won’t disappoint. The great thing about microwave popcorn is that it requires minimal preparation, allowing you to enjoy a warm bowl of popcorn without the fuss. There are various flavors to choose from, but if you’re in the mood, some add-ins like butter, cheese, or even spices can elevate the taste.
So, grab your favorite microwave bag and get ready to indulge in one of the easiest snacks around—the process is almost as enjoyable as the crunchy bites!
– 1 bag of microwave popcorn
To prepare your microwave popcorn, simply remove the plastic wrap from the bag and place it in the microwave with the side labeled “this side up” facing upwards. Set the microwave on high for about 2-4 minutes; cook time may vary based on the wattage of your microwave.
Listen carefully as the popping slows down to about 2 seconds between pops to determine when it’s done. Once finished, carefully remove the bag from the microwave (it will be hot!) and let it sit for a minute before opening. When cooking microwave popcorn, be cautious to avoid burns from steam when you open the bag.
Additionally, keep an eye on the cooking time, as some microwaves can cook at different speeds, leading to uneven popping or even burning. For a flavor boost, feel free to sprinkle some sea salt, melted butter, or your choice of seasonings on top once the popcorn is ready.
Always verify you check the package directions for specific cooking times and recommendations for best results!
Mini Pita Pizzas

Mini pita pizzas are an incredibly simple and delightful snack that can be whipped up in less than ten minutes.
They’re perfect for quick lunches, after-school snacks, or even as appetizers for gatherings. The versatility of mini pita pizzas allows you to get creative with toppings, accommodating various dietary preferences, and making it easy to please everyone.
Using pita bread as a base provides a crunchy yet soft texture that will hold your favorite toppings perfectly. You can use pre-made sauces, various cheeses, and a range of vegetables or proteins to create a custom mini pizza that suits your taste.
Children will love getting involved in making their own delicious creations, turning snack time into a fun activity.
Ingredients:
- Mini pita bread
- Pizza sauce (store-bought or homemade)
- Shredded mozzarella cheese
- Sliced pepperoni or other toppings (e.g., bell peppers, mushrooms, olives)
- Dried oregano or Italian seasoning
- Olive oil (optional)
Spread a thin layer of pizza sauce on each mini pita bread, then sprinkle a generous amount of shredded mozzarella cheese on top.
Add your choice of toppings such as pepperoni, vegetables, or any other favorite ingredients. Finally, sprinkle a dash of dried oregano or Italian seasoning on top for added flavor.
Place the mini pizzas on a baking sheet and broil in the oven for about 5 minutes, or until the cheese is melted and bubbly.
For the best results, watch the mini pizzas closely as they broil to prevent burning. You can customize the pizzas with different sauces—try barbecue sauce or pesto for a unique flavor.
If you’re short on time, consider using pre-cooked toppings that only need to be heated, making them ready in record time.
Always feel free to adjust cooking times based on your oven’s strength and the desired crispiness of your pita bases.
Egg and Cheese Breakfast Cups

Egg and Cheese Breakfast Cups are the perfect solution for those busy mornings when you need a quick, nutritious snack. These little cups aren’t only fast to prepare, but they can also be customized with your favorite ingredients, making them an excellent option for the whole family.
Just pop them in the oven, and within minutes, you have a delicious breakfast ready to go. They’re portable and can be made ahead of time, making them ideal for meal prep as well.
These breakfast cups are versatile and can be tailored to suit individual tastes. Feel free to add in diced vegetables, different cheeses, or meats to elevate the flavor.
Whether you’re in a rush or simply want a delicious snack, these Egg and Cheese Breakfast Cups will satisfy your cravings without taking up too much of your time. Let’s whip up a batch and enjoy a fulfilling start to your day!
- 6 large eggs
- 1 cup shredded cheese (cheddar, mozzarella, or your favorite)
- 1/2 cup diced bell peppers
- 1/2 cup diced onions
- 1/2 cup cooked and crumbled bacon or sausage (optional)
- Salt and pepper, to taste
- Cooking spray or muffin tin liners
Preheat your oven to 375°F (190°C). In a bowl, whisk together the eggs, salt, and pepper.
Grease a muffin tin with cooking spray or line it with muffin liners. Divide the diced vegetables and cooked meat (if using) evenly among the muffin cups, then pour the egg mixture over the top, filling each cup about three-quarters full.
Sprinkle cheese on top of each cup. Bake in the preheated oven for about 12-15 minutes, or until the eggs are set and the tops are lightly golden.
When making Egg and Cheese Breakfast Cups, feel free to experiment with different flavors by adding spices or herbs such as basil or paprika.
You can also make a larger batch and store leftovers in the refrigerator for a quick reheat option throughout the week. Simply pop any remaining cups in the microwave for about 30 seconds to warm them up, ensuring that you have a satisfying meal ready in no time.
Trail Mix
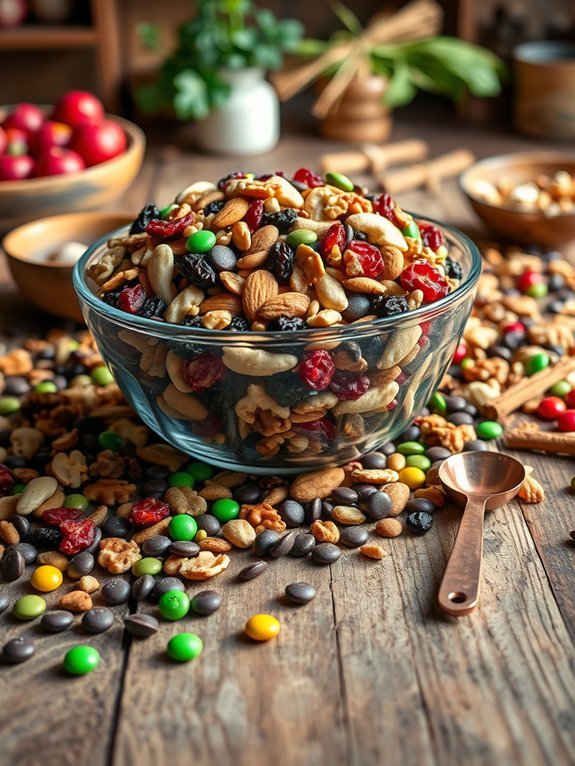
Trail mix is a versatile and energy-packed snack that requires minimal preparation and can easily be customized to suit your taste preferences. Perfect for on-the-go snacking or a quick boost during the day, making your own trail mix at home allows you to select exactly the ingredients you love. Not only can you tailor your own mix, but creating it yourself can also save you money and allow you to experiment with different flavors and textures.
To prepare a speedy trail mix, simply combine a mix of dried fruits, nuts, seeds, and any additional mix-ins you desire. This recipe focuses on a balance of sweet and savory, which can satisfy cravings and keep you energized. Each ingredient brings its own unique taste and nutritional benefits, ensuring that every handful is both delicious and fulfilling.
- 1 cup mixed nuts (almonds, walnuts, cashews)
- 1/2 cup dried cranberries
- 1/2 cup raisins
- 1/4 cup pumpkin seeds
- 1/4 cup chocolate chips or M&Ms (optional)
- 1 teaspoon cinnamon (optional for extra flavor)
In a large mixing bowl, combine all the ingredients together, ensuring they’re evenly distributed. Use a spatula or your hands to mix gently, and taste a small handful to see if you want to adjust the proportions of any specific ingredients.
When making trail mix, feel free to swap in or out your favorite nuts, seeds, and dried fruits based on availability and dietary preferences. Remember to store your trail mix in an airtight container to maintain freshness and prevent it from going stale.
You can also experiment with adding snacks like pretzels, granola, or even coconut flakes to add new flavors. Enjoy your personalized snack throughout the week for a healthy pick-me-up!
Apple Slices With Almond Butter
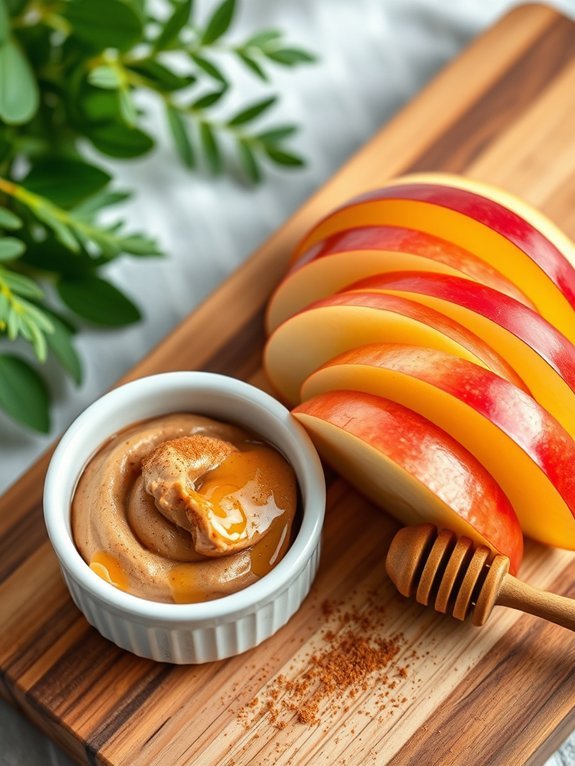
Apple slices with almond butter is a delightful and nutritious snack that can be prepared in just a few minutes. This simple yet satisfying combination isn’t only delicious but also packed with nutrients to keep your energy levels up throughout the day.
The crispness of the apple pairs beautifully with the creamy, nutty flavor of the almond butter, making it a perfect choice for a quick snack, post-workout fuel, or even a healthy dessert.
To prepare this snack, all you need are fresh apples and a good-quality almond butter. You can choose any variety of apple—such as Granny Smith, Honeycrisp, or Fuji—depending on your taste preference, whether you enjoy tart or sweet flavors.
This snack is also versatile and can be customized with additional toppings like cinnamon or honey, making it appealing to both kids and adults alike.
- Fresh apples (2, your choice of variety)
- Almond butter (2-3 tablespoons)
Begin by thoroughly washing the apples under running water. Once clean, slice each apple into wedges, removing the core and seeds as you go. Arrange the apple slices on a plate and serve alongside a generous dollop of almond butter for dipping.
For a little extra flavor and nutrition, feel free to add toppings like a sprinkle of cinnamon or a drizzle of honey over the almond butter. Additionally, if you prefer your almond butter warm, you can microwave it for about ten seconds before serving. This will enhance its creaminess and make for an even more enjoyable eating experience.
Smoked Salmon and Cream Cheese Wraps

Smoked salmon and cream cheese wraps are the perfect quick snack that pairs well with both breakfast and lunch. They’re not only delicious but also packed with nutrients from the salmon, which is rich in omega-3 fatty acids, and the cream cheese that adds a creamy texture.
This easy prep dish can be customized with your favorite ingredients, making it versatile to suit different tastes. This recipe takes less than 10 minutes, making it ideal for busy individuals or last-minute gatherings.
Smoked salmon and cream cheese wraps provide a delightful combination of flavors that will satisfy your cravings. Add fresh vegetables or herbs for an extra crunch and freshness. Get ready to enjoy a flavorful, satisfying snack that’s as easy to make as it’s enjoyable to eat!
- 4 large tortillas or wraps
- 8 oz cream cheese, softened
- 8 oz smoked salmon
- 1 cup fresh spinach or arugula
- 1/2 cucumber, thinly sliced
- 1/4 red onion, thinly sliced (optional)
- Fresh dill or capers (optional)
Spread a generous layer of cream cheese over each tortilla, leaving a small border around the edges.
Next, layer the smoked salmon, spinach or arugula, cucumber slices, and red onion (if using) evenly on top. Roll each tortilla tightly from one end to the other, tucking the filling in as you go.
Once rolled, slice the wraps into bite-sized pieces or halves to serve. For added flavor, consider adding a squeeze of lemon juice or a pinch of capers inside the wrap before rolling.
If you’re preparing these wraps in advance, store them wrapped tightly in plastic wrap in the refrigerator to prevent them from drying out. You can also experiment with different types of wraps, such as whole wheat or gluten-free options, or try out flavored cream cheeses for a variation in taste.
Enjoy your wraps fresh or serve them as an appetizer at your next gathering!

