This post may contain affiliate links. Please read our policy page.
You can easily recreate 12 delicious restaurant-style meals at home that impress and satisfy. Try the creamy garlic Tuscan chicken, zesty lemon herb grilled salmon, or comforting beef stroganoff for dinner. Don’t miss out on the indulgent chicken Alfredo pasta or vibrant caprese stuffed avocados. For added variety, consider baked ziti, teriyaki glazed meatballs, or a fresh vegetable stir-fry. Each dish is simple yet packed with flavor, and you’ll discover even more delightful recipes ahead!
Creamy Garlic Tuscan Chicken
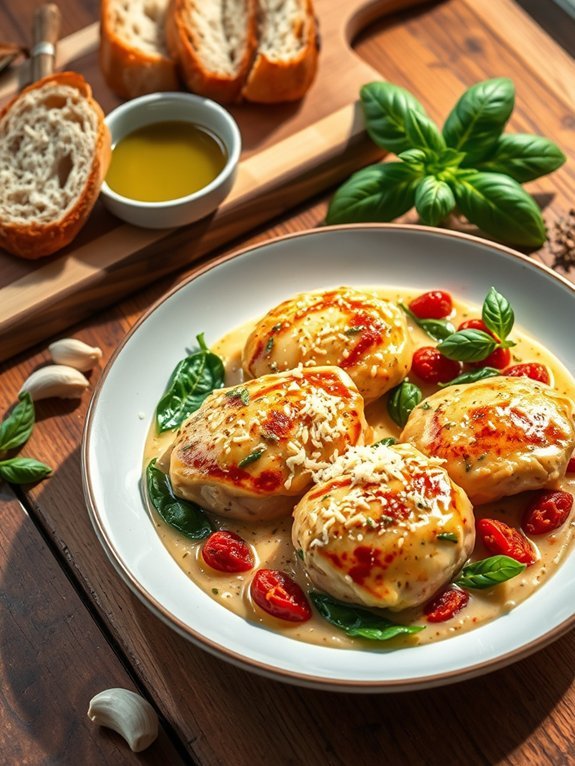
Creamy Garlic Tuscan Chicken is a delightful dish that transports your taste buds straight to the Italian countryside. Featuring tender chicken thighs or breasts, this recipe combines rich cream, savory garlic, and vibrant sun-dried tomatoes for a dish that’s both flavor-packed and comforting. The addition of spinach adds a lovely freshness, making this a well-rounded meal that feels indulgent yet is surprisingly simple to prepare.
Perfect for a romantic dinner or a weeknight family feast, this creamy Tuscan delight pairs beautifully with crusty bread or your favorite pasta.
Preparing Creamy Garlic Tuscan Chicken at home allows you to customize flavors and ingredients, ensuring every bite is to your liking. With just a few simple steps, you can create a restaurant-quality meal in the comfort of your kitchen. Whether you’re a seasoned cook or a novice, this recipe is straightforward and comes together in about 30 minutes.
Let’s plunge into the ingredients and make your culinary dreams come true!
- 4 boneless, skinless chicken thighs or breasts
- Salt and pepper, to taste
- 2 tablespoons olive oil
- 4 cloves garlic, minced
- 1 cup heavy cream
- 1/2 cup chicken broth
- 1/2 cup sun-dried tomatoes, chopped
- 2 cups fresh spinach
- 1/2 teaspoon Italian seasoning
- Grated Parmesan cheese, for serving
- Fresh basil, for garnish (optional)
Season the chicken with salt and pepper on both sides. In a large skillet, heat olive oil over medium-high heat and add the chicken. Cook for about 5-6 minutes on each side until golden brown and cooked through.
Remove the chicken from the skillet and set aside. In the same skillet, add minced garlic and sauté for about 30 seconds until fragrant. Add the heavy cream, chicken broth, sun-dried tomatoes, and Italian seasoning, bringing the mixture to a gentle simmer.
Stir in the spinach until wilted and then return the chicken to the skillet, allowing everything to soak up the delicious flavors. Serve hot with grated Parmesan and fresh basil if desired.
When cooking this dish, be careful not to overcook the chicken, as it can become dry; a meat thermometer should read 165°F when done. For added flavor, consider marinating the chicken in your favorite herbs or spices before cooking.
If you can’t find sun-dried tomatoes, you can substitute with roasted red peppers for a different twist. This creamy sauce can also be made ahead of time—just reheat gently and stir in fresh spinach right before serving to keep it vibrant and green. Enjoy this restaurant-style meal as a special treat at home!
Lemon Herb Grilled Salmon
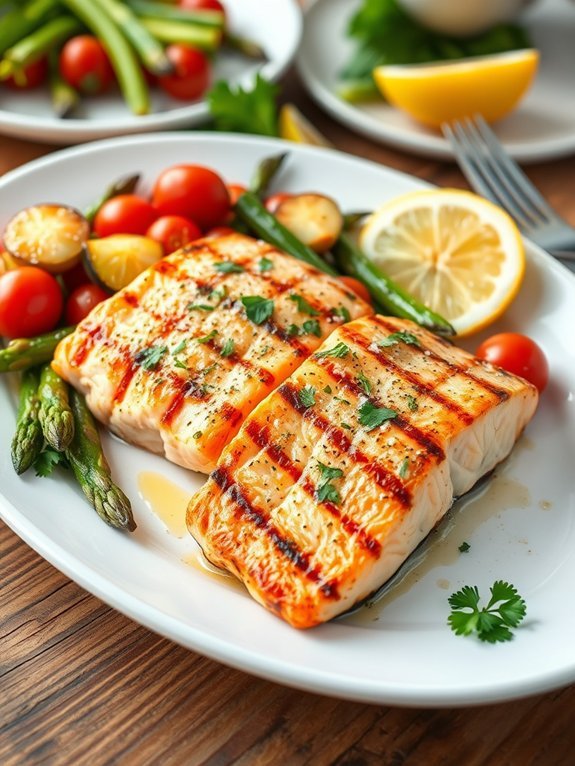
Lemon Herb Grilled Salmon isn’t only a healthy option but also a flavorful dish that evokes the essence of restaurant dining right at home. The combination of fresh lemon juice and fragrant herbs elevates the natural flavors of the salmon, making it a fantastic choice for a dinner party or a cozy family meal.
The dish is simple enough for weeknight cooking while maintaining an impressive flair for special occasions. To achieve the best results, choose fresh salmon fillets with the skin on for added moisture and flavor. This recipe allows the salmon to marinate briefly, infusing it with a tastiness that rivals that of any dinner you’d find in an upscale eatery.
Whether served with a side of vegetables or a light salad, this delicious grilled salmon will surely become a favorite in your home cooking repertoire.
- 4 salmon fillets (6 ounces each), skin on
- 2 tablespoons olive oil
- 2 tablespoons fresh lemon juice
- 2 teaspoons lemon zest
- 2 cloves garlic, minced
- 1 teaspoon dried oregano
- 1 teaspoon dried thyme
- Salt and pepper to taste
- Fresh parsley, chopped (for garnish)
- Lemon wedges (for serving)
In a small bowl, whisk together the olive oil, lemon juice, lemon zest, garlic, oregano, thyme, salt, and pepper.
Place the salmon fillets in a shallow dish and pour the marinade over them, ensuring they’re well coated. Let the salmon marinate for at least 15 minutes, then preheat your grill over medium-high heat.
Once hot, place the salmon fillets on the grill, skin-side down, and cook for about 5-6 minutes per side or until the salmon is cooked through and flakes easily with a fork.
When grilling the salmon, avoid flipping it too soon to prevent it from sticking to the grill. If you find it difficult to lift, give it a bit more time.
Additionally, using high-quality salmon can make a significant difference in flavor; look for wild-caught options when possible. You can also experiment with different herbs or add a touch of honey to the marinade for a slight sweetness.
Enjoy your grilled salmon with a sprinkle of fresh herbs and a squeeze of lemon juice for added brightness.
Beef Stroganoff
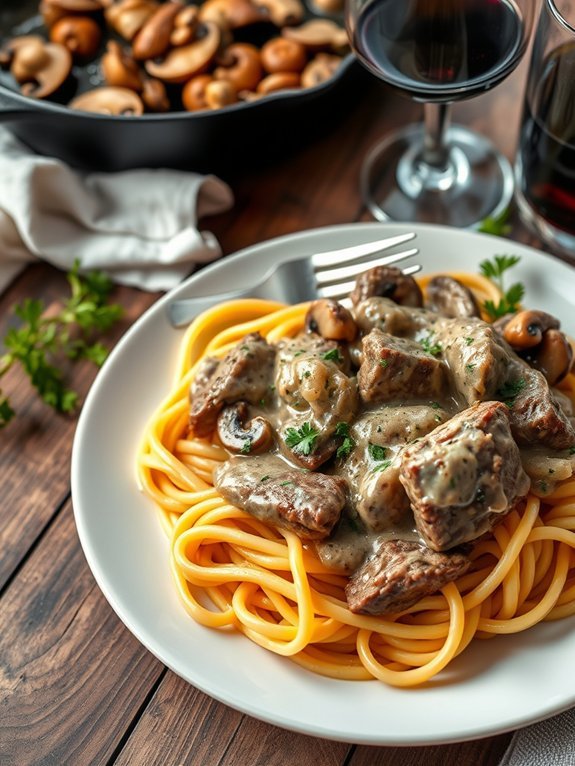
Beef Stroganoff is a classic comfort food dish that combines tender strips of beef with a rich and creamy mushroom sauce, often served over egg noodles or rice. This dish originated in 19th century Russia and has since become a favorite in many households around the world. Its savory flavors and hearty texture provide the perfect meal for busy nights or cozy weekends spent at home.
Making Beef Stroganoff at home allows you to control the ingredients and flavors, ensuring a delicious experience every time. With just a few simple steps, you can recreate this restaurant-style meal in your kitchen. Ideal for family dinners or entertaining guests, this dish not only satisfies hunger but also impresses with its elegant presentation. Get ready to indulge in a plate of warm, creamy goodness!
- 1 pound beef sirloin, cut into thin strips
- 2 tablespoons olive oil
- 1 medium onion, finely chopped
- 2 cloves garlic, minced
- 8 ounces mushrooms, sliced
- 1 tablespoon all-purpose flour
- 1 cup beef broth
- 1 tablespoon Worcestershire sauce
- 1 teaspoon Dijon mustard
- 1 cup sour cream
- Salt and pepper to taste
- Cooked egg noodles or rice, for serving
- Fresh parsley, chopped, for garnish
Heat the olive oil in a large skillet over medium-high heat. Add the beef strips and cook until browned, about 3-4 minutes. Remove the beef and set aside.
In the same skillet, add the onions and garlic, sautéing for 2-3 minutes until softened. Add the mushrooms and cook until tender. Sprinkle the flour over the mixture, then gradually stir in the beef broth, Worcestershire sauce, and mustard, and let it simmer for a few minutes until the sauce thickens.
Reduce the heat to low, stir in the sour cream, and return the beef to the pan. Season with salt and pepper and let it heat through before serving over cooked egg noodles or rice, garnished with fresh parsley.
When cooking Beef Stroganoff, choose tender cuts of beef, such as sirloin or tenderloin, for the best results. It’s important to cook the beef quickly over high heat to maintain tenderness.
Don’t rush the simmering process with the sauce; allowing it to thicken enhances the flavor and texture. For a richer taste, you can use a combination of sour cream and cream for the sauce. Additionally, if you’re a fan of extra flavor, consider adding a splash of white wine to the sauce while it simmers.
Adjust seasoning to your liking and enjoy a cozy meal that rivals your favorite restaurant’s dish.
Chicken Alfredo Pasta
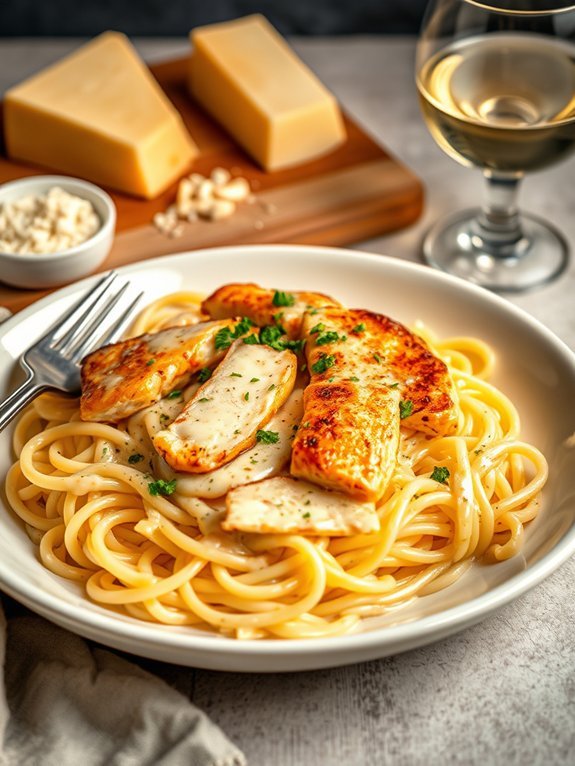
Chicken Alfredo Pasta is a classic Italian-American dish that features creamy alfredo sauce, tender chicken, and perfectly cooked pasta, all combined to create a comforting meal that feels indulgent yet is surprisingly simple to prepare at home. With just a few ingredients, you can replicate the rich and velvety flavors typically found in restaurants. This dish is perfect for a romantic dinner, a family gathering, or even just a cozy night in.
To make Chicken Alfredo Pasta, you fundamentally create a delicious sauce using cream, butter, and Parmesan cheese, which coats your choice of pasta beautifully. Adding succulent and juicy chicken breast elevates this dish to a whole new level, providing both protein and flavor. This satisfying meal will leave you and your loved ones craving more, making it a great addition to your weeknight dinner rotation.
- 2 boneless, skinless chicken breasts
- Salt and pepper, to taste
- 2 tablespoons olive oil
- 8 ounces fettuccine or your favorite pasta
- 4 tablespoons unsalted butter
- 2 cups heavy cream
- 1 cup grated Parmesan cheese
- 2 cloves garlic, minced
- Fresh parsley, chopped (for garnish)
Begin by seasoning the chicken breasts with salt and pepper. Heat olive oil in a large skillet over medium heat and cook the chicken until golden brown and cooked through, about 7-8 minutes per side. Remove the chicken and let it rest for a few minutes before slicing it into strips.
In the same skillet, melt the butter and add the minced garlic, cooking until fragrant. Pour in the heavy cream and bring it to a simmer. Gradually whisk in the Parmesan cheese until the sauce is smooth.
Meanwhile, cook the pasta according to the package instructions. Combine the pasta with the alfredo sauce and top with the sliced chicken. Serve hot, garnished with fresh parsley.
To elevate your Chicken Alfredo Pasta, consider adding vegetables such as broccoli or spinach to the dish for extra flavor and nutrition. Make sure not to overcook the chicken to keep it tender and juicy. Additionally, if you want to enhance the flavor of the sauce, you can add a pinch of nutmeg or a dash of white wine while simmering the cream.
This dish is best served immediately, but if you have leftovers, store them in an airtight container and reheat gently on the stove, adding a little extra cream if necessary to revive the sauce.
Recommended Items
Get ready to elevate your home cooking with these must-have products and equipment!
Products
Caprese Stuffed Avocados
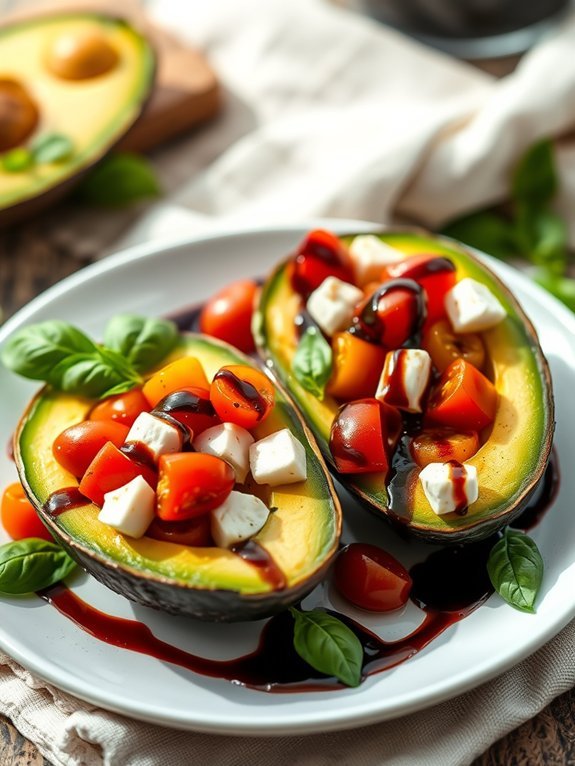
Caprese Stuffed Avocados are the perfect dish for those hot summer days when you want something light and invigorating, yet satisfying. This recipe combines the classic ingredients of a Caprese salad—ripe tomatoes, fresh mozzarella, and basil—with the creamy goodness of avocados. Not only is this dish bursting with flavor, but it’s also packed with nutrients, making it a great option for a healthy lunch or a light dinner.
Preparing Caprese Stuffed Avocados is a simple and quick process, allowing you to whip up an impressive meal in no time. The combination of rich avocados and tangy tomatoes creates a delightful balance of flavors, while the mozzarella adds a touch of creaminess that complements the dish perfectly. Each bite is a celebration of fresh ingredients that will make you feel like you’re dining in an upscale restaurant.
- 2 ripe avocados
- 1 cup cherry tomatoes, halved
- 1 cup fresh mozzarella balls (bocconcini), drained and halved
- 1/4 cup fresh basil leaves, chopped
- 2 tablespoons balsamic glaze
- Salt and pepper, to taste
- Optional: olive oil for drizzling
Cut the avocados in half, remove the pit, and scoop out a small portion of the flesh to create a slight indentation. In a bowl, combine the halved cherry tomatoes, mozzarella, and chopped basil. Drizzle with balsamic glaze and season with salt and pepper.
Gently mix to combine, then spoon the tomato mixture into each avocado half, topping each with an extra drizzle of balsamic glaze. Serve immediately.
For the best flavor, choose ripe avocados that yield slightly to pressure, but aren’t overly soft. This recipe is very versatile, and you can customize it by adding other ingredients such as grilled chicken or a sprinkle of red pepper flakes for a kick.
If you prefer a more balanced dressing, mix a tablespoon of olive oil with the balsamic glaze before drizzling it over the stuffed avocados. Enjoy your Caprese Stuffed Avocados fresh, as they may brown if left for too long.
Shrimp Tacos With Mango Salsa

Shrimp tacos with mango salsa are a delightful fusion of flavors that bring the beach to your dining table. The combination of tender shrimp, zesty lime, and the sweetness of ripe mango creates a perfect balance that’s both invigorating and satisfying. This dish is perfect for a casual get-together or a quick weeknight dinner, and it captures the essence of summer in every bite.
Making shrimp tacos at home isn’t only simple but allows you to customize the ingredients according to your preferences. The mango salsa adds a vibrant pop of color and flavor, making this dish visually appealing as well. With just a handful of ingredients, you can whip up a delicious meal that will impress family and friends alike.
Ingredients:
- 1 pound shrimp, peeled and deveined
- 2 tablespoons olive oil
- 1 teaspoon chili powder
- 1 teaspoon cumin
- Salt and pepper, to taste
- 8 small corn tortillas
- 1 ripe mango, diced
- 1/4 red onion, finely chopped
- 1 jalapeño, minced
- Juice of 1 lime
- Fresh cilantro, for garnish
In a bowl, toss the shrimp with olive oil, chili powder, cumin, salt, and pepper until well-coated. Heat a skillet over medium-high heat, then add the shrimp, cooking for about 2-3 minutes on each side or until they’re pink and opaque.
Meanwhile, in another bowl, combine diced mango, red onion, jalapeño, lime juice, and a pinch of salt to create the salsa. Warm the tortillas in a dry skillet or microwave, then layer the shrimp on each tortilla and top with a generous spoonful of mango salsa. Garnish with fresh cilantro before serving.
When cooking shrimp, be careful not to overcook them, as they can become rubbery and tough. Make sure your skillet is hot enough to sear the shrimp quickly but not so hot that they burn. You can also customize the salsa by adding ingredients like diced bell peppers or avocado for extra flavor and texture.
Don’t hesitate to adjust the level of spiciness according to your taste—add more jalapeño if you love heat, or skip it entirely for a milder version. Enjoy your homemade shrimp tacos with mango salsa!
Proposed Recipe
Spinach and Ricotta Stuffed Shells

Spinach and ricotta stuffed shells are a delicious and satisfying dish that brings a taste of Italy right to your dinner table. These large pasta shells are packed with a creamy mixture of ricotta cheese, fresh spinach, and savory herbs, then baked in a rich marinara sauce and topped with melted mozzarella cheese. It’s a perfect meal for a cozy family dinner or an impressive dish to serve guests.
Making stuffed shells isn’t only straightforward but also allows for a bit of creativity in the kitchen. You can customize the filling with additional ingredients like cooked sausage, mushrooms, or different herbs to suit your taste. This dish is a great way to incorporate greens and offer a hearty meal that feels indulgent yet is relatively easy to prepare.
Ingredients:
- 12 large pasta shells
- 1 cup ricotta cheese
- 2 cups fresh spinach, chopped
- 1 cup shredded mozzarella cheese
- 1/4 cup grated Parmesan cheese
- 1 egg
- 2 cloves garlic, minced
- 1 teaspoon dried basil
- 1 teaspoon dried oregano
- 2 cups marinara sauce
- Salt and pepper to taste
Cook the pasta shells according to the package instructions until al dente. While the shells cook, mix the ricotta cheese, chopped spinach, half of the mozzarella cheese, Parmesan cheese, egg, minced garlic, basil, oregano, salt, and pepper in a bowl until well combined.
Once drained, fill each cooked shell with the cheese and spinach mixture. In a baking dish, spread a layer of marinara sauce on the bottom and place the stuffed shells seam side up. Pour the remaining marinara sauce over the shells and sprinkle with the rest of the mozzarella cheese. Cover the dish with aluminum foil and bake at 375°F (190°C) for 25 minutes.
Remove the foil and bake for an additional 10-15 minutes until the cheese is bubbly and golden.
For the best flavors, you can prepare the filling mix a day ahead and store it in the refrigerator, allowing the flavors to meld together. Additionally, feel free to add fresh herbs or a pinch of red pepper flakes to the filling for extra flavor. If you want to give the dish an extra boost, consider adding sautéed vegetables or cooked meat to the filling.
This dish pairs wonderfully with a simple side salad and garlic bread for a delightful Italian feast!
One-Pan Chicken Fajitas
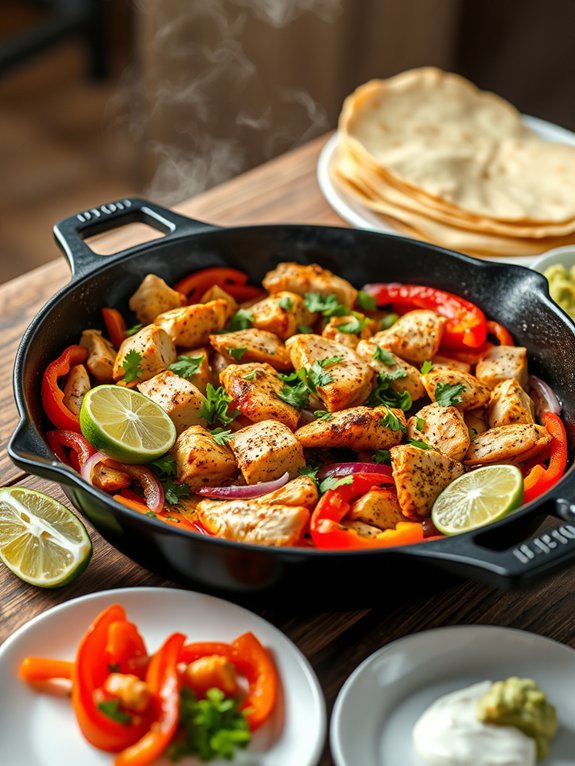
One-Pan Chicken Fajitas are a delicious and hassle-free way to bring the flavors of a Mexican restaurant right into your kitchen. This dish combines tender chicken strips with colorful bell peppers and onions, all seasoned to perfection with a blend of spices. Cooking everything in a single pan not only saves time on cleanup but also allows the ingredients to mingle, creating a harmonious and flavorful dish that’s perfect for family dinners or entertaining guests.
The beauty of one-pan meals lies in their simplicity, and these chicken fajitas are no exception. In just about 30 minutes, you can whip up a vibrant and tasty dinner that’s bursting with flavor and can be served in various ways. Whether you prefer them in warm tortillas, over rice, or even on a salad, these fajitas are versatile and sure to please everyone at the table.
Ingredients:
- 1 pound boneless, skinless chicken breasts, sliced into strips
- 1 red bell pepper, sliced
- 1 yellow bell pepper, sliced
- 1 red onion, sliced
- 2 tablespoons olive oil
- 2 teaspoons chili powder
- 1 teaspoon cumin
- 1 teaspoon garlic powder
- 1/2 teaspoon smoked paprika
- Salt and pepper to taste
- Fresh lime juice (for serving)
- Fresh cilantro, chopped (for garnish)
- Tortillas (for serving)
Heat olive oil in a large skillet over medium-high heat. Add the sliced chicken and season with chili powder, cumin, garlic powder, smoked paprika, salt, and pepper. Cook for 5-7 minutes until the chicken is browned and cooked through.
Add the sliced bell peppers and onion to the pan, and continue cooking for an additional 5-7 minutes until the vegetables are tender. Squeeze fresh lime juice over the fajitas and toss to combine.
For best results, slice the chicken and vegetables evenly to guarantee they cook at the same rate. Prepping the ingredients ahead of time can also streamline the cooking process. Feel free to customize your fajitas with additional toppings such as sour cream, guacamole, or shredded cheese.
To add extra flavor, you can marinate the chicken in the spice mixture for 30 minutes before cooking. Enjoy your homemade restaurant-style meal!
Baked Ziti With Italian Sausage
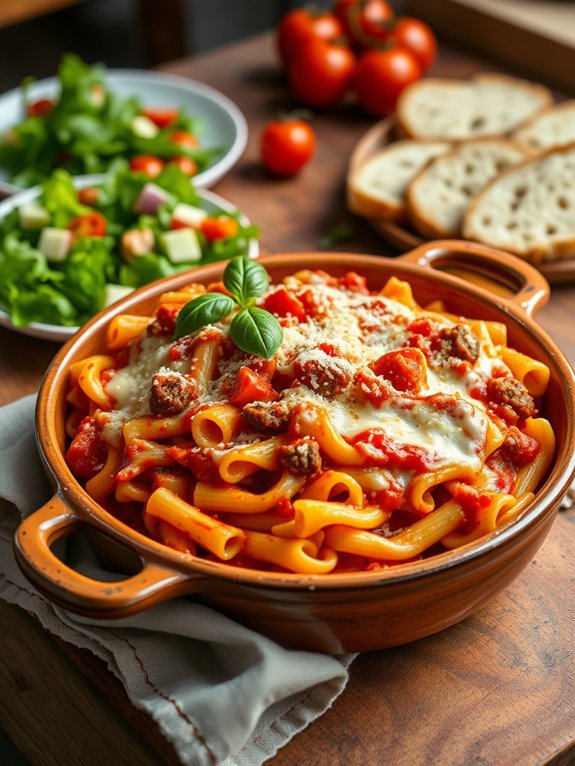
Baked Ziti with Italian sausage is a comforting and satisfying dish that combines layers of pasta, rich tomato sauce, savory sausage, and melted cheese. Perfect for family gatherings or a cozy dinner, this dish delivers the warm and hearty flavors reminiscent of your favorite Italian restaurant.
With a little preparation, you can easily whip up this delightful meal at home, impressing your loved ones with a homemade Italian feast that’s both easy to make and absolutely delicious.
This dish isn’t only flavorful but also versatile—you can customize it by adding your favorite vegetables, different types of cheeses, or even experimenting with various herbs and spices. Leftovers are equally delightful, as the flavors meld together even more after a day in the fridge.
Pair it with a side salad and garlic bread, and you’ll have a complete meal that will transport you straight to the heart of Italy.
Ingredients:
- 1 pound ziti or penne pasta
- 1 pound Italian sausage (mild or spicy)
- 1 onion, chopped
- 2 garlic cloves, minced
- 24 ounces marinara sauce
- 2 cups ricotta cheese
- 1 large egg
- 2 cups shredded mozzarella cheese
- 1 cup grated Parmesan cheese
- 2 teaspoons dried Italian herbs (oregano, basil, thyme)
- Salt and pepper to taste
- Fresh basil for garnish (optional)
Cook the pasta according to the package directions until al dente, then drain and set aside.
In a large skillet, cook the Italian sausage over medium heat until browned, breaking it up as it cooks. Add the chopped onion and minced garlic, cooking until the onion is translucent. Stir in the marinara sauce, and let it simmer for a few minutes.
In a separate bowl, mix the ricotta cheese, egg, dried herbs, salt, and pepper together.
In a large baking dish, combine the pasta, sausage mixture, and half the mozzarella cheese, then layer the ricotta mixture on top. Ultimately, sprinkle the remaining mozzarella and Parmesan cheeses on top.
Bake in a preheated oven at 375°F for about 25-30 minutes, until bubbly and golden.
When making baked ziti, feel free to adjust the ingredients to suit your taste or dietary preferences. You can add vegetables like spinach, zucchini, or bell peppers for added nutrition and flavor.
For extra creaminess, consider using a mixture of cheeses, or even layering in a bit of cream or béchamel sauce. If you’re short on time, using store-bought marinara sauce can save you some effort, but don’t hesitate to elevate it with your own spices and herbs.
Finally, letting the dish sit for a few minutes after baking will make slicing and serving much easier.
Teriyaki Glazed Meatballs
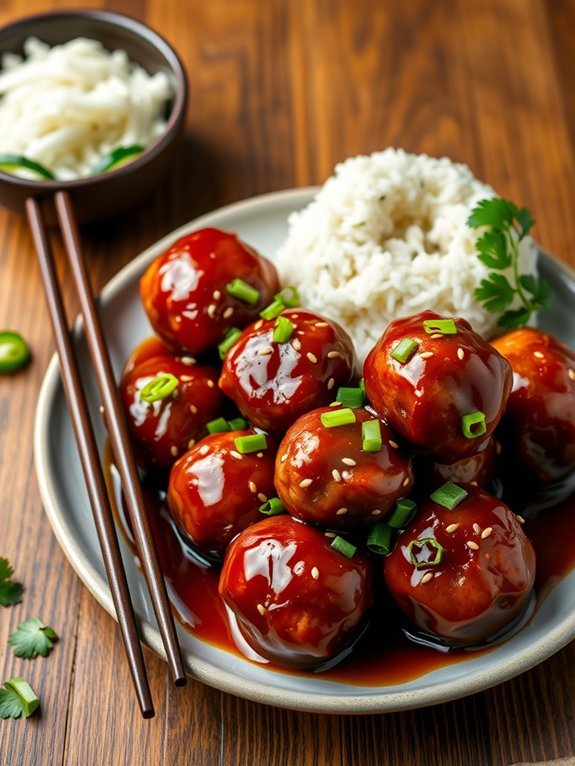
If you’re craving the savory, sweet, and slightly tangy flavor of teriyaki glazed meatballs but want to skip the restaurant trip, you can easily whip up this dish at home. This recipe brings together ground meat, traditional teriyaki sauce ingredients, and some fresh vegetables to create a deliciously satisfying meal. Not only will you delight your taste buds, but you’ll also enjoy the simplicity of preparing this enticing dish right in your own kitchen.
Perfect as an appetizer or a main course, teriyaki glazed meatballs are versatile and can be served with rice, noodles, or tossed in a salad for an easy weeknight dinner. The combination of ground meat with a homemade teriyaki glaze guarantees that each bite bursts with flavor, while also allowing for customization based on your preferences. Opt for chicken, beef, or turkey depending on what you have available, and get ready for a delightful fusion of textures and tastes.
Ingredients:
- 1 pound ground meat (beef, chicken, or turkey)
- 1/2 cup breadcrumbs
- 1/4 cup grated Parmesan cheese (optional)
- 1/4 cup chopped green onions
- 1 egg
- 2 cloves garlic, minced
- 1 teaspoon ginger, grated
- Salt and pepper to taste
- 1/2 cup teriyaki sauce
- 1 tablespoon cornstarch (optional, for thickening)
In a large bowl, combine the ground meat, breadcrumbs, Parmesan cheese (if using), green onions, egg, minced garlic, grated ginger, salt, and pepper. Mix until well incorporated, then shape the mixture into meatballs about 1 to 1.5 inches in diameter.
Heat a non-stick skillet over medium heat and cook the meatballs for about 8-10 minutes, turning occasionally until browned all over and cooked through. In another pan, warm the teriyaki sauce and stir in the cornstarch to thicken if desired. Once the meatballs are cooked, add them to the teriyaki sauce, coating each meatball thoroughly before serving.
To elevate your teriyaki glazed meatballs, consider garnishing them with additional green onions or sesame seeds for added crunch and flavor. You can also adjust the sweetness of the glaze by adding a bit of honey or brown sugar if you prefer a sweeter finish.
For a healthier twist, try adding finely chopped vegetables into the meatball mixture, such as bell peppers or carrots, for extra nutrition and texture. Serve with steamed rice or stir-fried vegetables to create a complete, restaurant-style meal at home.
Vegetable Stir-Fry With Tofu
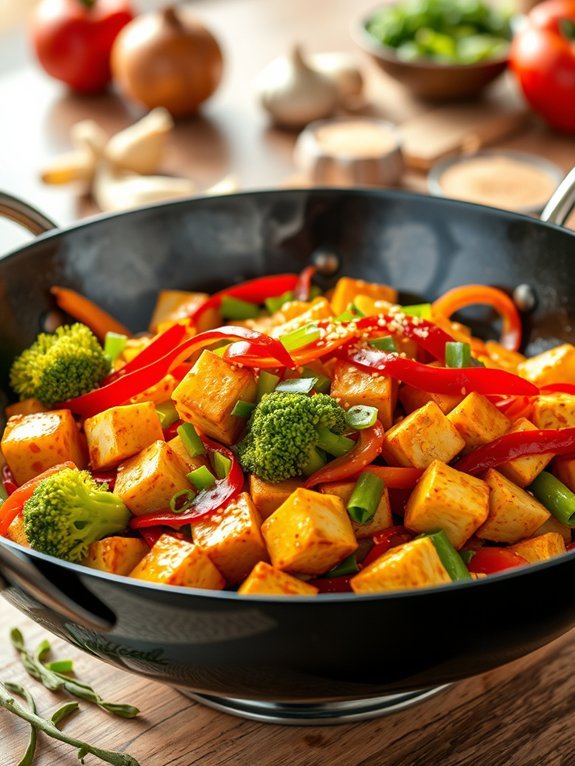
Vegetable stir-fry with tofu is a fantastic way to enjoy a healthy, quick, and delicious meal that you can easily recreate in your own kitchen. This vibrant dish showcases the flavors and colors of fresh vegetables combined with protein-rich tofu, making it a favorite for vegetarians and meat-eaters alike.
The beauty of stir-frying lies in its versatility; you can tailor the dish to include whatever vegetables you have on hand, making it an excellent way to use up leftovers or seasonal produce. In addition to being a nutritious option, stir-fry is also a joy to prepare.
The key lies in the cooking technique: high heat, quick cooking, and a little bit of prep work to guarantee everything comes together in a matter of minutes. With a simple stir-fry sauce and a handful of fresh ingredients, you’ll create a satisfying meal that’s reminiscent of your favorite restaurant experience, right in your own home.
Ingredients:
- 14 oz firm tofu, drained and cubed
- 2 tablespoons cornstarch
- 2 tablespoons vegetable oil
- 1 red bell pepper, sliced
- 1 cup broccoli florets
- 1 cup sugar snap peas
- 1 carrot, julienned
- 3 green onions, chopped
- 2 cloves garlic, minced
- 1 tablespoon ginger, minced
- 3 tablespoons soy sauce
- 2 tablespoons oyster sauce (or vegetarian alternative)
- 1 tablespoon sesame oil
- Sesame seeds for garnish (optional)
Cut the tofu into cubes and toss it with cornstarch, guaranteeing an even coating. Heat vegetable oil in a large skillet or wok over medium-high heat, then add the tofu and cook until golden and crispy on all sides, about 5-7 minutes. Remove the tofu from the pan and set aside.
In the same pan, add the bell pepper, broccoli, sugar snap peas, carrot, green onions, garlic, and ginger, stirring frequently until the vegetables are tender-crisp, about 3-5 minutes. Return the tofu to the pan and add the soy sauce, oyster sauce, and sesame oil. Stir well to coat everything in the sauce and heat through for an additional 2-3 minutes. Serve hot, garnished with sesame seeds if desired.
When cooking vegetable stir-fry, preparation is key. Make sure all your ingredients are prepped and within reach before you start cooking, as the cooking process will go quickly.
You can also experiment with different vegetables depending on your taste and what’s in season; just remember to cut them into similar sizes for even cooking. Additionally, you can adjust the level of sauce to your liking, adding more or less depending on the intensity of flavor you desire. Enjoy your homemade stir-fry!
Classic French Onion Soup
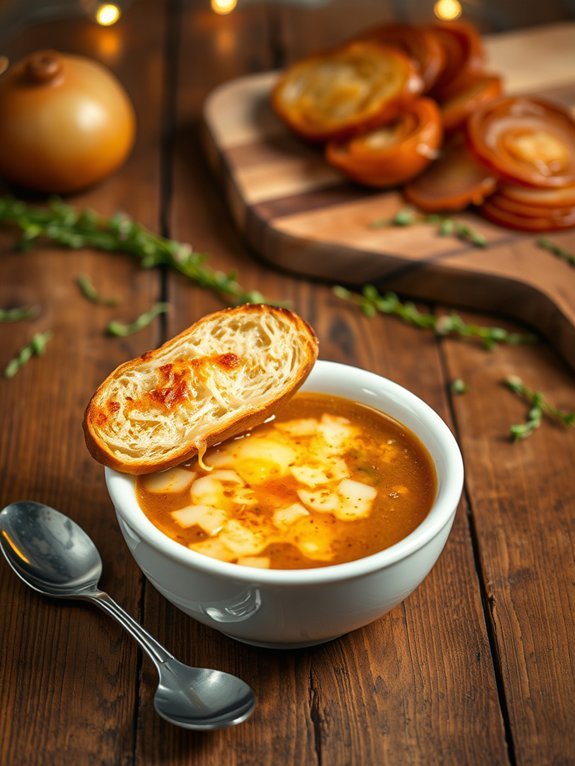
Classic French Onion Soup is a timeless dish that embodies the soul of French cuisine. This hearty soup, characterized by its rich, caramelized onions and a delightful topping of melted cheese, is the perfect comfort food for chilly evenings. With a deep, flavorful broth and a pleasing balance of savory and sweet elements, a homemade French onion soup can rival that of any restaurant.
Making French onion soup at home isn’t only satisfying but also surprisingly simple. The key lies in the caramelization of the onions, which sets the foundation for its rich flavor. While the process may require some patience, the results will be well worth the effort, providing a warm and inviting dish that’s perfect for entertaining or a cozy night in.
Ingredients:
- 4 large yellow onions, thinly sliced
- 4 tablespoons unsalted butter
- 1 tablespoon olive oil
- 1 teaspoon salt
- 1 teaspoon sugar
- 8 cups beef broth (or vegetable broth for a vegetarian option)
- 1/2 cup dry white wine (optional)
- 2 tablespoons fresh thyme leaves (or 1 tablespoon dried thyme)
- 1 bay leaf
- 1 French baguette
- 2 cups grated Gruyère cheese
- 1/2 cup grated Parmesan cheese
- Freshly ground black pepper (to taste)
To prepare the soup, begin by melting the butter and olive oil in a large pot over medium heat. Add the sliced onions, salt, and sugar, stirring frequently to guarantee even cooking. Allow the onions to caramelize over 30-40 minutes until they’re deep golden brown.
Once done, stir in the wine (if using), and scrape up any brown bits from the bottom of the pot. Add the beef broth, thyme, and bay leaf, bringing the mixture to a simmer for 30 minutes.
Meanwhile, slice the baguette into individual serving pieces, toast them lightly, and set aside. To serve, ladle the soup into oven-safe bowls, place a piece of toasted bread on top of each, and generously sprinkle with Gruyère and Parmesan cheese. Broil in the oven until the cheese is bubbly and golden brown.
For a deeper flavor, try using a combination of beef and chicken broth, or even homemade stock if you have it on hand. Additionally, don’t skip the caramelization stage; this is imperative for developing the rich, sweet flavor that defines classic French onion soup.
Experiment with toppings; while Gruyère is traditional, other cheeses like mozzarella or a sharp cheddar can add a different twist. Finally, consider adding a splash of sherry or balsamic vinegar to the soup just before serving for an extra layer of complexity!


