This post may contain affiliate links. Please read our policy page.
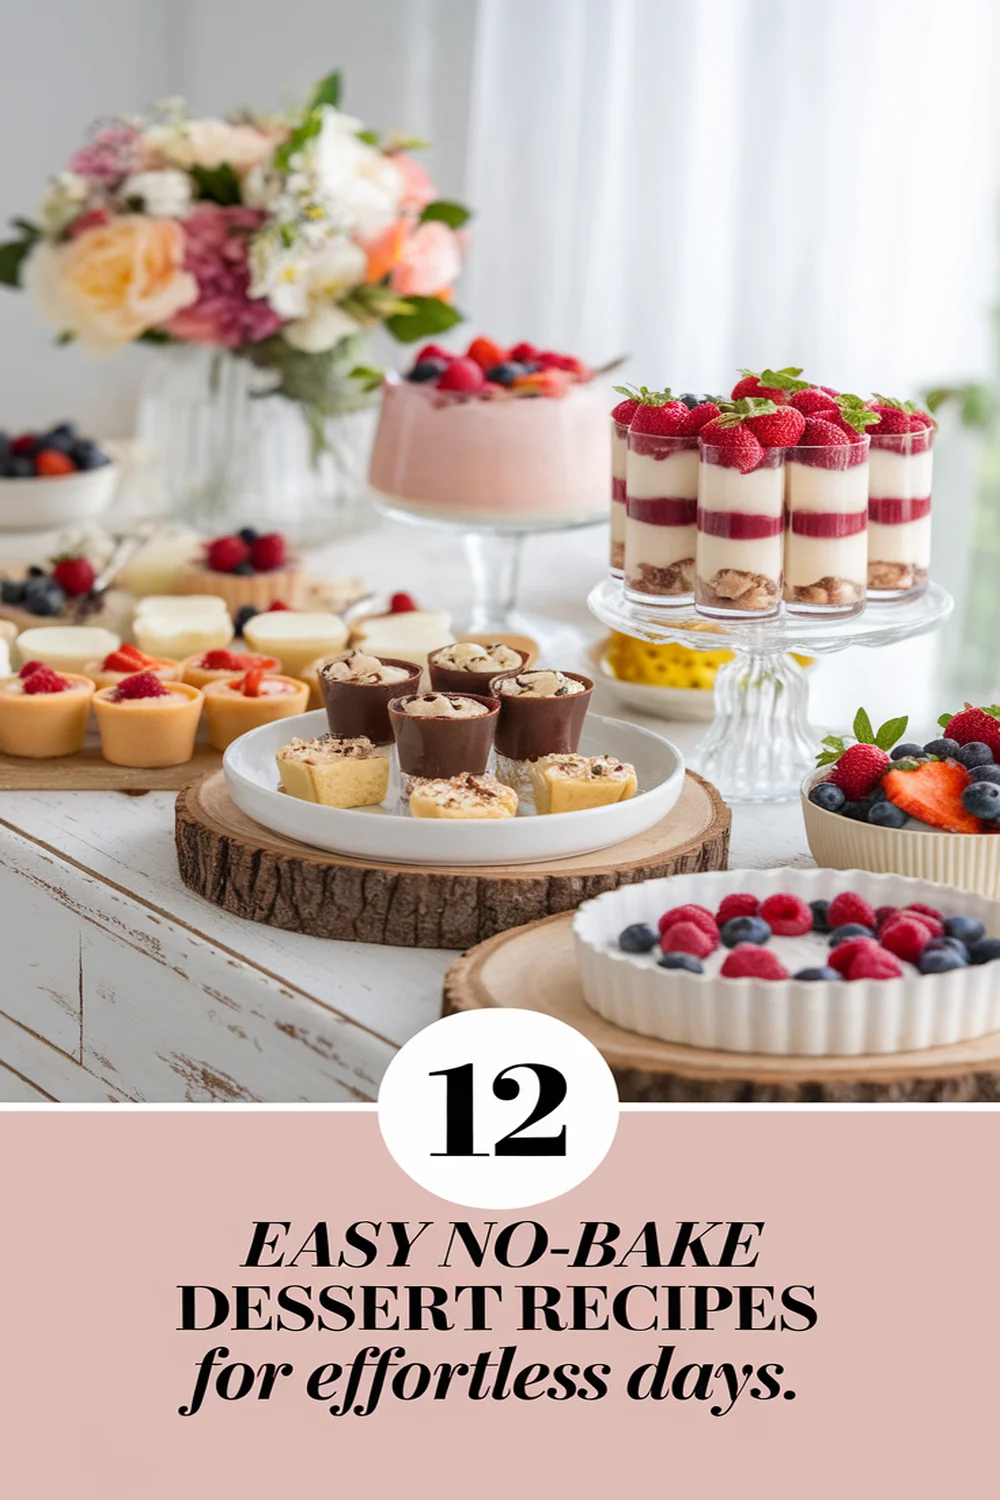
Looking for delicious no-bake dessert recipes that make entertaining a breeze? You’ll love these easy options! Try a creamy No-Bake Chocolate Cheesecake or invigorating Strawberry Shortcake Parfaits. Satisfy your sweet tooth with Peanut Butter Cup Cookies or indulge in a tropical Mango Coconut Chia Pudding. Delight your guests with No-Bake Oreo Truffles and a fun No-Bake Banana Split Dessert. Plus, you can whip up classic Rice Krispie Treats and healthy Nutty Granola Bars for the perfect gathering. Keep reading for more delightful ideas!
No-Bake Chocolate Cheesecake
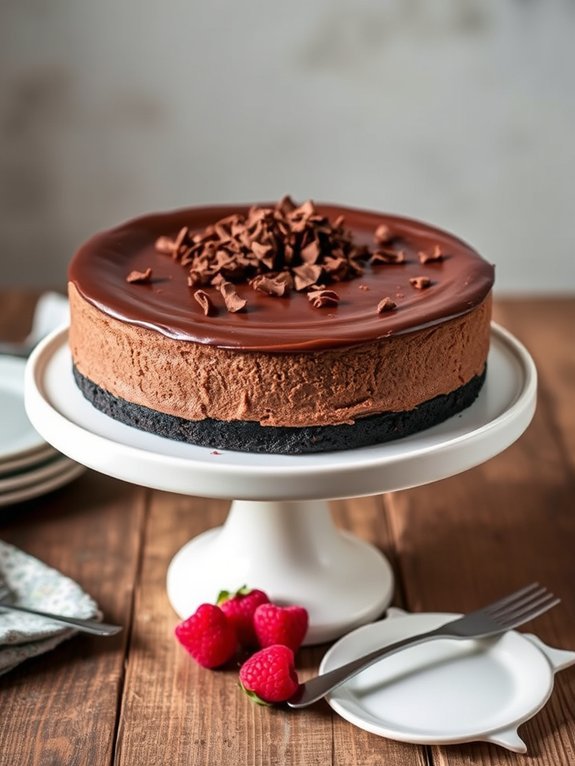
No-bake chocolate cheesecake is a delightful treat for chocolate lovers that combines the creamy texture of cheesecake with rich chocolate flavor, all achieved without the use of an oven. This dessert is perfect for warm weather or any occasion where you want to impress guests without the fuss of baking.
With an easy preparation process and minimal cooking time, you can have this luxuriously smooth cheesecake ready to chill in no time. The no-bake aspect allows for versatility in flavors, but chocolate reigns supreme for a decadent experience.
Whether enjoyed at a summer pool party or as a comforting dessert during a cozy evening indoors, this chocolate cheesecake will satisfy even the most discerning sweet tooth while remaining simple to prepare. Let’s explore the ingredients and see how easy it’s to create this mouthwatering no-bake dessert.
Ingredients:
- 1 1/2 cups chocolate cookie crumbs
- 1/2 cup unsalted butter, melted
- 1 cup cream cheese, softened
- 1 cup powdered sugar
- 1 cup heavy whipping cream
- 8 oz semi-sweet chocolate, melted
- 1 teaspoon vanilla extract
- Pinch of salt
- Chocolate shavings or cocoa powder for garnish (optional)
To make the cheesecake, start by combining the chocolate cookie crumbs and melted butter in a mixing bowl. Press this mixture into the bottom of a 9-inch springform pan to form the crust.
In a separate bowl, beat the cream cheese and powdered sugar until creamy and smooth. Gradually fold in the melted chocolate, then add the heavy whipping cream, vanilla extract, and a pinch of salt. Mix until fully combined and pour the chocolate cheesecake mixture onto the prepared crust. Smooth the top and refrigerate for at least 4 hours or until set.
When preparing your no-bake chocolate cheesecake, make sure that your cream cheese is at room temperature for a lump-free texture. Additionally, chilling the cheesecake overnight will yield the best results regarding flavor and firmness.
Feel free to customize the recipe by incorporating different flavored extracts or toppings such as whipped cream, berries, or crushed nuts to elevate your dessert experience.
Strawberry Shortcake Parfaits
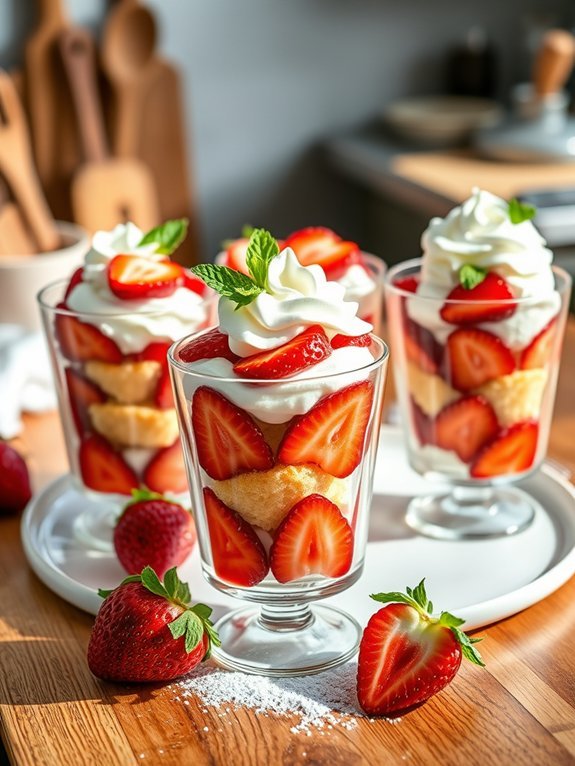
Strawberry Shortcake Parfaits are a delightful and invigorating summer dessert that combines layers of fluffy whipped cream, sweet strawberries, and tender shortcake. Perfect for gatherings or a casual weeknight treat, these parfaits are as visually appealing as they’re delicious. The best part? They require no baking, allowing you to whip them up in no time while still impressing friends and family with your culinary skills.
These individual servings boast a combination of flavors and textures that come together in a matter of minutes. The juicy strawberries provide a burst of freshness, while the creamy whipped topping contrasts beautifully with the soft shortcake pieces. Whether enjoyed at a picnic or as a sweet end to a dinner party, Strawberry Shortcake Parfaits are sure to please any crowd.
- 2 cups fresh strawberries, hulled and sliced
- 1 tablespoon sugar
- 1 cup heavy whipping cream
- 1/4 cup powdered sugar
- 1 teaspoon vanilla extract
- 2 cups store-bought shortcake or pound cake, cut into bite-sized pieces
- Fresh mint leaves for garnish (optional)
In a medium bowl, combine the sliced strawberries and sugar, and let them sit for about 10-15 minutes until the strawberries release some of their juices.
Meanwhile, whip the heavy cream until soft peaks form, then add the powdered sugar and vanilla extract, continuing to whip until stiff peaks form.
To assemble the parfaits, layer the shortcake pieces, a layer of strawberries, and a layer of whipped cream in serving glasses or bowls, repeating until the glasses are full. Top with a dollop of whipped cream and a sprig of mint if desired.
For the best results, choose ripe, sweet strawberries for maximum flavor. Feel free to customize the parfaits by adding other fruits such as blueberries or raspberries along with the strawberries.
If you prefer a lighter option, consider using Greek yogurt instead of heavy cream for the whipped topping. Assemble the parfaits right before serving to guarantee the cake stays moist and doesn’t become soggy.
Enjoy your delicious no-bake dessert!
Peanut Butter Cup Cookies
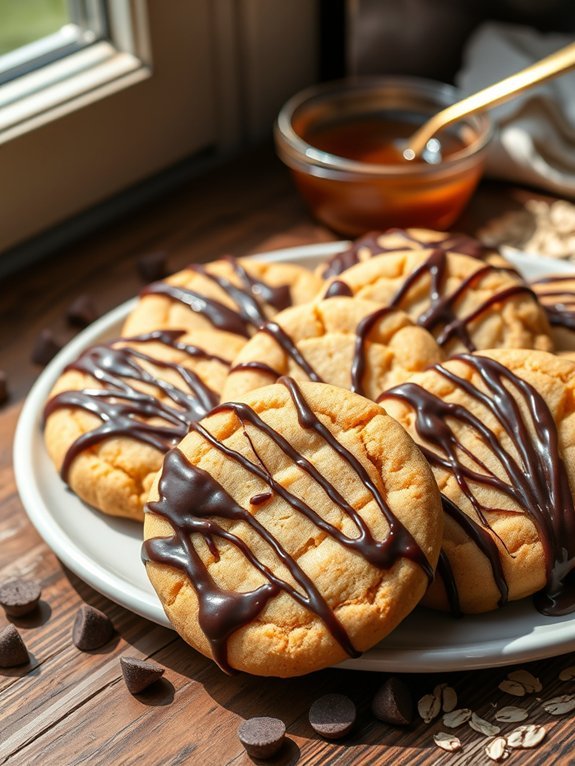
If you’re a fan of peanut butter and chocolate, these no-bake Peanut Butter Cup Cookies are sure to become your go-to dessert! They’re incredibly easy to make, requiring minimal time and effort. Perfect for a last-minute gathering or satisfying those sweet cravings, these cookies feature a delightful combination of creamy peanut butter and rich chocolate, all in a simple, bite-sized form.
These cookies don’t require any baking, which makes them a fantastic option during warmer months, as you won’t have to heat up your kitchen. The process is straightforward: mix, shape, and chill. The creamy texture of the peanut butter melds perfectly with the sweetness of the chocolate, creating a treat that’s hard to resist. A drizzle of chocolate on top adds an elegant touch and an extra layer of flavor to these delectable cookies.
- 1 cup creamy peanut butter
- 1/2 cup honey or maple syrup
- 1 cup rolled oats
- 1/2 cup chocolate chips
- 1/4 cup cocoa powder
- 1 teaspoon vanilla extract
- Pinch of salt
- Additional chocolate for drizzling (optional)
In a large mixing bowl, combine the peanut butter, honey (or maple syrup), vanilla extract, and salt. Mix well until smooth, then add in the cocoa powder and rolled oats. Stir until everything is well combined.
Now, fold in the chocolate chips. Once mixed thoroughly, use your hands or a cookie scoop to form small balls of dough and place them on a parchment-lined baking sheet. Flatten each ball slightly with your fingers, then refrigerate for at least 30 minutes to allow them to set.
When making Peanut Butter Cup Cookies, feel free to customize the recipe to fit your preferences. You can substitute almond butter for a different nutty flavor or add in crushed nuts or dried fruits for added texture and sweetness.
If you prefer a sweeter cookie, increase the quantity of honey or maple syrup. Additionally, experiment with different types of chocolate for drizzling—dark, milk, or even white chocolate will all provide a delicious finish. Enjoy your baking adventure!
Mango Coconut Chia Pudding
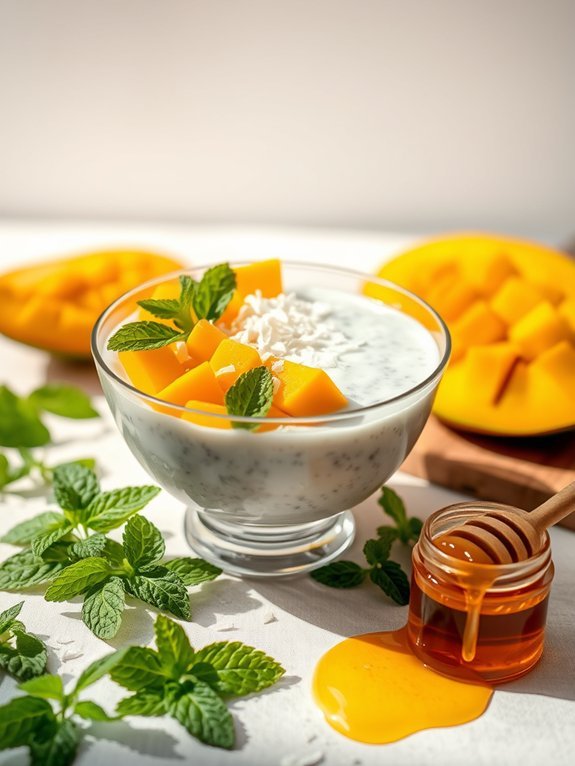
Mango Coconut Chia Pudding is a delightful treat that perfectly balances the creamy texture of coconut milk with the tropical sweetness of ripe mangoes. This no-bake dessert isn’t only invigorating but also packed with nutrients, making it a guilt-free indulgence. Chia seeds, known for their high fiber and omega-3 fatty acid content, transform into a pudding-like consistency when soaked in liquid, creating a delightful base for this recipe.
Preparing Mango Coconut Chia Pudding is incredibly simple and requires very little time, making it an excellent option for last-minute desserts or meal prep. Whether you enjoy it as a breakfast, snack, or dessert, this dish is sure to please anyone with a sweet tooth.
Serve it chilled, topped with fresh mango slices and shredded coconut for an added touch of flavor and elegance.
- 1 cup coconut milk (canned or carton)
- 1/4 cup chia seeds
- 2 tablespoons honey or maple syrup (adjust to taste)
- 1 teaspoon vanilla extract
- 1 ripe mango, diced
- 1/4 cup shredded coconut (optional, for topping)
- Fresh mint leaves (optional, for garnish)
In a medium-sized bowl, whisk together the coconut milk, chia seeds, honey or maple syrup, and vanilla extract until well combined. Cover the bowl and refrigerate for at least 4 hours or overnight, allowing the chia seeds to absorb the liquid and create a thick pudding consistency.
Once ready to serve, divide the chia pudding into serving bowls, top with diced mango and shredded coconut, and garnish with fresh mint leaves if desired.
When making Mango Coconut Chia Pudding, feel free to experiment with the sweetness level by adjusting the amount of honey or maple syrup to suit your taste. Additionally, using different fruits or toppings such as berries, nuts, or granola can elevate the dish and add variety.
Be sure to allow enough time for the chia seeds to absorb the coconut milk entirely for the best texture, and enjoy this pudding chilled for an invigorating treat.
Recommended Items
Discover our top picks for essential ingredients and tools to make your no-bake desserts a breeze!
Products
No-Bake Oreo Truffles

No-Bake Oreo Truffles are the perfect indulgence for any chocolate lover. These delightful little treats are made with just a handful of ingredients and require no baking, making them super easy to whip up for parties, holidays, or simply a sweet craving.
The creamy filling, made from crushed Oreos and cream cheese, is coated in rich chocolate, creating a delicious contrast in texture and flavor that’s sure to impress both family and friends. This recipe allows for endless variations, as you can customize the chocolate coating with different flavors or even a sprinkle of toppings for added flair.
What’s more, these truffles can be stored in the fridge or freezer, making them a convenient dessert option that you can prepare ahead of time. Once you plunge into these Oreo truffles, you may find it hard to stop at just one!
- 1 package (15.35 oz) Oreo cookies
- 8 oz cream cheese, softened
- 1 cup semi-sweet chocolate chips
- 1 tablespoon vegetable oil (optional)
- Additional crushed Oreos or sprinkles for garnish (optional)
To make the truffles, finely crush the Oreo cookies in a food processor until they turn into fine crumbs. In a mixing bowl, combine the cookie crumbs with the softened cream cheese and mix until fully incorporated.
Using your hands, shape the mixture into small balls (about 1 inch in diameter) and place them on a baking sheet lined with parchment paper. Once all the mixture is shaped, chill the truffles in the refrigerator for about 30 minutes to firm up.
When making Oreo truffles, consider experimenting with different types of chocolate for the coating—milk, dark, or white chocolate all work beautifully. If you find the chocolate coating too thick, you can add a small amount of vegetable oil to help it melt more smoothly.
Additionally, dusting the finished truffles with some crushed Oreos or colorful sprinkles can give them a festive touch. Always store the truffles in an airtight container in the fridge for the best taste and texture.
Berry Yogurt Popsicles
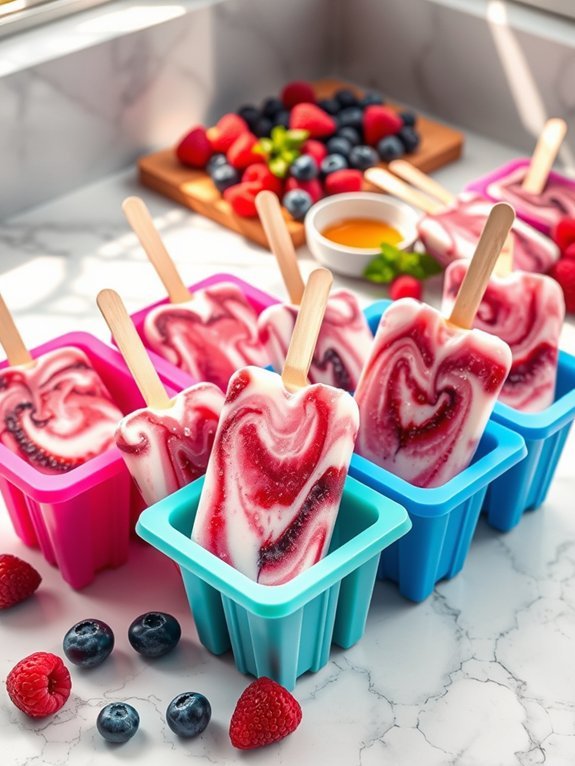
Berry yogurt popsicles are a revitalizing and healthy treat that will satisfy your sweet cravings without the guilt. Perfect for warm weather, these popsicles blend the richness of yogurt with the natural sweetness and tang of fresh berries. Not only are they simple to make, but they can also be customized with your favorite fruits, making them an excellent option for a family-friendly dessert that everyone will enjoy.
To create these delightful popsicles, you’ll want to select ripe, juicy berries—such as strawberries, blueberries, raspberries, or blackberries—and combine them with creamy yogurt. This no-bake recipe allows you to enjoy the fruits of summer in a convenient and portable form. Plus, they can quickly be made ahead of time and stored in the freezer for a tasty snack whenever the mood strikes.
Ingredients:
- 2 cups of fresh mixed berries (strawberries, blueberries, raspberries, blackberries)
- 2 cups of plain or flavored yogurt (greek yogurt works well)
- 2 tablespoons of honey or maple syrup (optional, depending on sweetness preference)
- 1 teaspoon of vanilla extract (optional)
- Silicone popsicle molds
Blend the berries in a blender or food processor until smooth. In a mixing bowl, combine the yogurt, honey (or maple syrup), and vanilla extract, stirring until well mixed. Layer the blended berries and the yogurt mixture into the popsicle molds, alternating between the two for a swirled effect. Insert popsicle sticks and freeze for at least 4 hours or until completely solid.
When making berry yogurt popsicles, consider varying the proportions of yogurt to berries according to your taste. Adding chopped mint or a squeeze of lemon juice can elevate the flavors even more.
If you don’t have popsicle molds, you can use small cups or ice cube trays and insert toothpicks as a fun alternative. Be sure to run warm water over the outside of the molds for a few seconds to make removing the popsicles easier!
Recipe Overview
Chocolate Avocado Mousse

Chocolate avocado mousse is a decadent yet healthy dessert option that combines the creaminess of ripe avocados with rich cocoa powder. This no-bake recipe isn’t only simple and quick to make, but it also provides a nutritious alternative to traditional mousse. The avocado acts as a natural thickener, creating a silky texture that feels indulgent without the high calorie count typically associated with desserts.
To enhance the flavor profile of the mousse, you’ll be using pure maple syrup as a natural sweetener and vanilla extract for added warmth. The results are a velvety smooth chocolate treat that will impress both health enthusiasts and dessert lovers alike.
Whether you’re preparing it for a family gathering or a romantic dinner, this chocolate avocado mousse is sure to be a hit.
- 2 ripe avocados
- ½ cup cocoa powder
- ½ cup pure maple syrup
- 1 teaspoon vanilla extract
- A pinch of salt
- ¼ cup almond milk (or any milk of your choice)
Start by peeling and pitting the ripe avocados, then place the avocado flesh into a food processor. Add cocoa powder, maple syrup, vanilla extract, and a pinch of salt. Blend everything together until the mixture is completely smooth and creamy. If needed, gradually add almond milk to achieve the desired consistency.
One important tip is to select ripe avocados for the best flavor and texture. You can check if an avocado is ripe by gently pressing the skin; it should yield slightly to pressure.
Additionally, feel free to adjust the sweetness by modifying the amount of maple syrup based on your personal taste preference. For an extra touch, consider garnishing the mousse with fresh berries or a sprinkle of chopped nuts just before serving.
Lemon Cream Pie

If you’re looking for a reviving dessert that’s both easy to make and requires no baking, then a Lemon Cream Pie is the perfect choice. This delightful dessert features a luscious lemon filling that’s both tangy and sweet, nestled in a creamy, smooth base, all while sitting atop a crunchy graham cracker crust. It’s perfect for summer gatherings, parties, or simply to satisfy your sweet tooth.
Creating a Lemon Cream Pie is a straightforward process, and it comes together quickly. With just a few ingredients, you’ll have a dessert that packs a punch of flavor and will impress your friends and family. There’s something about the bright and zesty lemon flavor that makes it a popular favorite, and the no-bake aspect means you can enjoy it without turning on the oven.
Ingredients:
- 1 ½ cups graham cracker crumbs
- ½ cup unsalted butter, melted
- 1 cup powdered sugar
- 1 cup heavy whipping cream
- 1 ½ cups lemon juice (freshly squeezed for best flavor)
- 2 tablespoons lemon zest
- 1 (8 oz) package cream cheese, softened
- 1 teaspoon vanilla extract
In a large mixing bowl, combine the graham cracker crumbs and melted butter until well mixed. Then, press the mixture firmly into the bottom of a 9-inch pie pan to form the crust.
In another bowl, beat together the softened cream cheese, powdered sugar, and vanilla extract until smooth. Gradually mix in the lemon juice and lemon zest until combined. Then, gently fold in the heavy whipping cream until the mixture is light and fluffy.
Pour the lemon filling into the prepared crust, spreading it evenly. Refrigerate the pie for at least 4 hours or until set, and then slice to serve.
For an extra touch of flavor, consider garnishing your Lemon Cream Pie with fresh whipped cream, additional lemon zest, or even some berries.
Make sure to store any leftovers in the refrigerator to keep the filling fresh and creamy. If you’re short on time, you can also use a pre-made store-bought graham cracker crust, which will save you some time during preparation.
No-Bake Banana Split Dessert
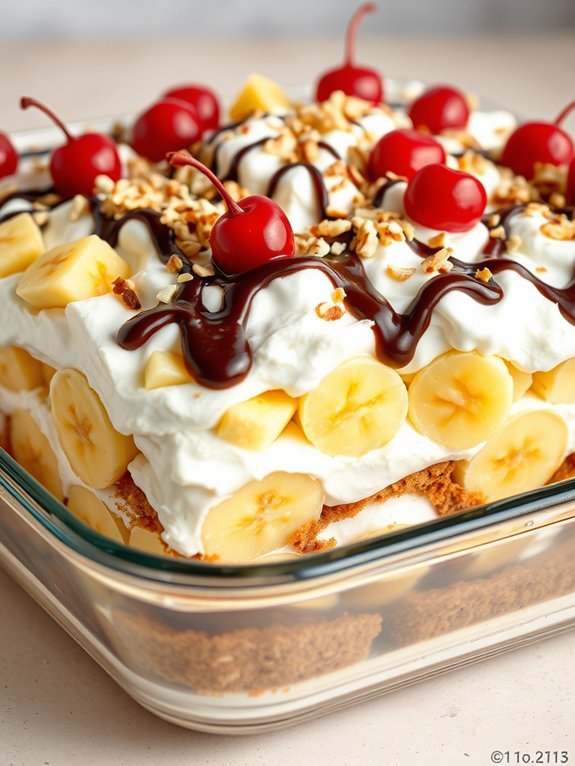
No-Bake Banana Split Dessert is a delightful treat that captures all the flavors of a traditional banana split without the need for baking. This dessert is perfect for warm weather gatherings or when you want to impress guests with minimal effort. Combining layers of creamy goodness with the sweetness of ripe bananas, this dessert is sure to please both kids and adults alike.
The beauty of the No-Bake Banana Split Dessert lies in its versatility and ease of preparation. You can customize the ingredients to suit your preferences, whether you want to add nuts for a bit of crunch or swap out the whipped cream for a dairy-free alternative. The layers of graham cracker crust, banana slices, and whipped topping create a delicious harmony that mimics the classic sundae experience.
- 1 ½ cups graham cracker crumbs
- ½ cup unsalted butter, melted
- 8 oz cream cheese, softened
- 1 cup powdered sugar
- 2 cups whipped topping (thawed)
- 3 ripe bananas, sliced
- 1 cup chocolate syrup
- 1 cup crushed pineapple, drained
- Maraschino cherries for garnish
- Chopped nuts (optional)
In a medium bowl, mix the graham cracker crumbs and melted butter until well combined. Press the mixture firmly into the bottom of a 9×13 inch glass baking dish to form the crust.
In another bowl, combine the softened cream cheese and powdered sugar, then fold in the whipped topping until smooth. Spread half of this mixture over the graham cracker crust, followed by a layer of banana slices, crushed pineapple, and chocolate syrup. Add the remaining cream cheese mixture on top, and finish with another layer of bananas, a drizzle of chocolate syrup, and a sprinkle of chopped nuts, if desired.
Chill in the refrigerator for at least 4 hours or overnight before serving.
To enhance the flavor and presentation of your No-Bake Banana Split Dessert, be sure to use fresh and ripe bananas, as they’ll provide better sweetness and texture. Additionally, for a fun twist, try adding a layer of your favorite ice cream between the cream cheese mixture and bananas for an even richer dessert.
If you’re making this dessert ahead of time, consider keeping the banana slices separately until just before serving to prevent browning. Enjoy the delicious layers of this invigorating dessert!
Rice Krispie Treats
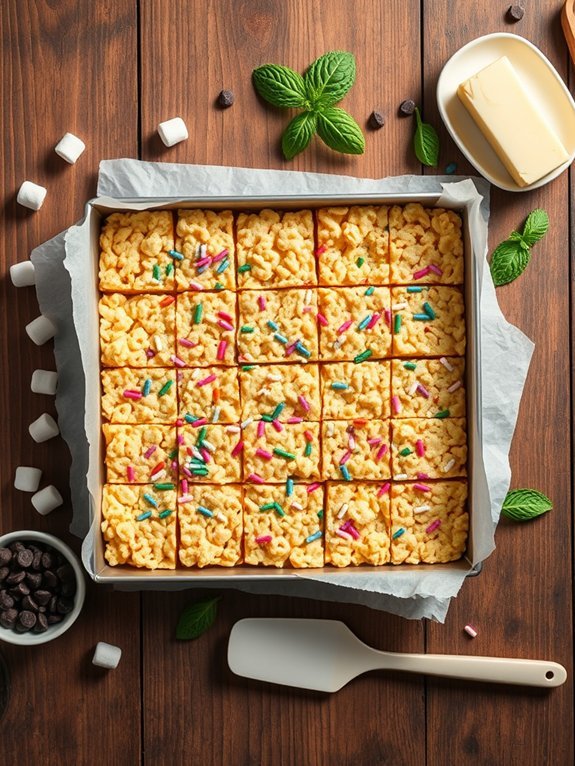
Rice Krispie Treats are a classic no-bake dessert that has delighted both kids and adults for generations. Their simple preparation and crunchy, gooey texture make them a favorite for lunchboxes, parties, or a sweet snack at home. With just a handful of ingredients, you can whip up a batch of these delicious treats in no time, keeping the oven off and the kitchen cool.
The magic of Rice Krispie Treats lies in their delightful combination of marshmallows and crispy rice cereal, held together by a touch of butter. This recipe can easily be customized with mix-ins like chocolate chips, sprinkles, or even a drizzle of caramel to suit your taste. Whether you’re making them for a special occasion or just to enjoy as a treat, Rice Krispie Treats are sure to bring a smile to everyone’s face.
- 3 tablespoons unsalted butter
- 1 package (10 oz) mini marshmallows
- 6 cups Rice Krispies cereal
- Optional: ½ cup chocolate chips, sprinkles, or any desired mix-ins
Begin by melting the butter in a large saucepan over low heat. Once melted, add in the mini marshmallows, stirring continuously until the marshmallows are completely melted and the mixture is smooth.
Remove from heat, then gently fold in the Rice Krispies cereal until well coated. Press the mixture into a greased 9×13-inch pan using a spatula or your hands, and let it cool at room temperature for about 30 minutes before cutting into squares.
When making Rice Krispie Treats, it’s important to work quickly after melting the marshmallows, as they can begin to harden as they cool. A greased spatula or a bit of butter on your hands can help prevent sticking.
For a fun twist, consider adding different types of cereals or toppings, and experiment with flavors by incorporating extracts like vanilla or almond. Finally, store leftover treats in an airtight container to keep them fresh and chewy.
Nutty Granola Bars
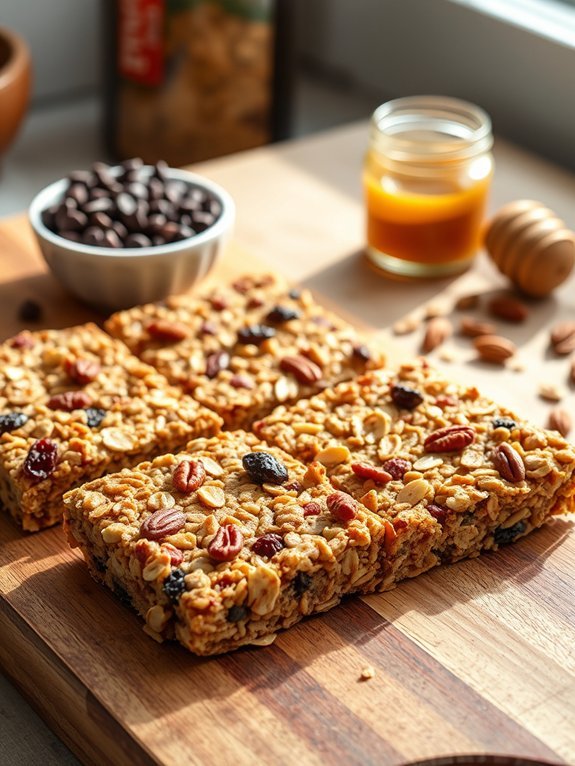
Nutty granola bars are a deliciously healthy and easy-to-make snack that can be customized to fit your taste preferences. Perfect for busy mornings or as a quick energy boost during the day, these bars are packed with protein and fiber from the nuts and oats. The great thing about this no-bake recipe is that it requires minimal effort and time but yields a satisfying result that everyone in your family will love.
These homemade granola bars aren’t only a healthier alternative to store-bought options, but they also allow you to choose your own mix-ins. From chocolate chips to dried fruits, the possibilities are endless. This recipe is perfect for incorporating leftover ingredients you might’ve around, making it a frugal and eco-friendly option.
With just a few simple steps, you can whip up a batch of these nutty delights to enjoy.
- 2 cups rolled oats
- 1 cup mixed nuts (such as almonds, walnuts, and pecans)
- 1/2 cup honey or maple syrup
- 1/4 cup nut butter (like almond or peanut butter)
- 1/2 teaspoon vanilla extract
- 1/2 cup chocolate chips (optional)
- 1/2 cup dried fruit (such as cranberries or raisins, optional)
- A pinch of salt
In a large bowl, combine the rolled oats, nuts, and any optional ingredients like chocolate chips or dried fruit. In a separate bowl, mix the honey (or maple syrup), nut butter, vanilla extract, and salt until smooth. Pour the wet mixture over the dry ingredients and stir until everything is well-coated.
Line an 8×8-inch pan with parchment paper, then press the mixture evenly into the pan. Refrigerate for at least 1-2 hours, then cut into bars and enjoy!
For ideal texture and flavor, allow your nutty granola bars to chill in the refrigerator for a few hours before cutting them. This helps the bars set up nicely and makes them easier to slice.
You can also store any leftovers in an airtight container in the fridge for up to a week. Feel free to experiment with different nuts, seeds, or sweeteners to make these bars your own.
S’mores Dip

S’mores Dip is a delightful twist on the classic campfire treat that you can enjoy without the need for a fire. This indulgent dessert combines creamy melted chocolate and gooey marshmallows, perfectly suited for dipping with graham crackers. It’s an ideal choice for gatherings, family movie nights, or simply as a cozy treat to satisfy your sweet tooth.
Creating this dip is incredibly simple and can be done in just a few minutes. Whether you want to prepare it for a special occasion or just for a spontaneous craving, S’mores Dip offers the same comforting flavors of the original s’mores but with added convenience. Gather your ingredients, and you’ll be on your way to a deliciously decadent dessert experience completely devoid of baking.
- 1 cup chocolate chips (semi-sweet or milk chocolate)
- 1 cup mini marshmallows
- 1 tablespoon unsalted butter
- 1 teaspoon vanilla extract
- Graham crackers (for dipping)
In a medium oven-safe skillet, combine the chocolate chips, mini marshmallows, and butter. Heat over medium-low heat, stirring regularly until the chocolate is melted and the mixture is well blended. Once melted, remove from the heat and stir in the vanilla extract.
Spread the mixture evenly in the skillet, ensuring the marshmallows are well distributed across the top. If desired, place the skillet under the broiler for a minute or two to toast the marshmallows lightly, keeping a close eye to prevent burning.
For the best results, use high-quality chocolate chips to achieve a smooth and rich melt. If you prefer a more customizable dip, feel free to add toppings like crushed graham crackers or a sprinkle of sea salt for extra flavor.
Always keep an eye while broiling the marshmallows, as they can quickly turn from perfectly toasted to burnt in just seconds. Enjoy your S’mores Dip warm with graham crackers or fruit for a fun twist!

