This post may contain affiliate links. Please read our policy page.
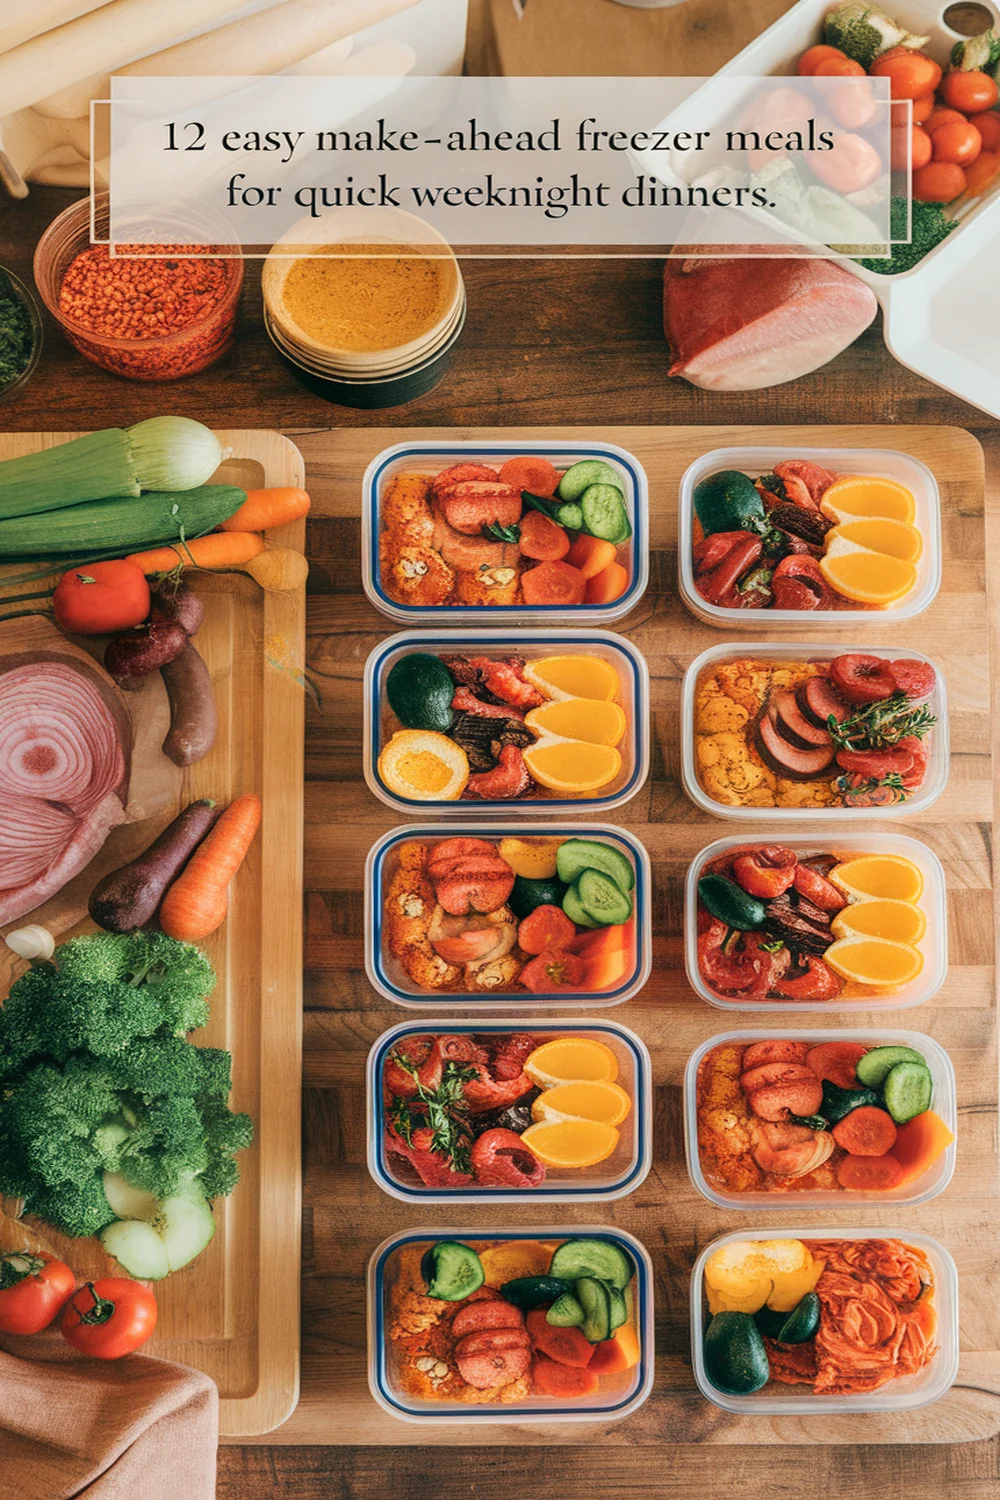
Trying to juggle a busy schedule? Make-ahead freezer meals can save you time and stress. Think cheesy spinach and ricotta stuffed shells, comforting baked ziti, or savory breakfast burritos. You can whip up black bean and quinoa chili or creamy chicken mushroom casserole for a nutritious twist. Homemade meatballs in marinara sauce or teriyaki salmon with stir-fried rice are also fantastic choices. Discover how effortless weeknight dinners can be as you explore even more delicious options!
Cheesy Spinach and Ricotta Stuffed Shells
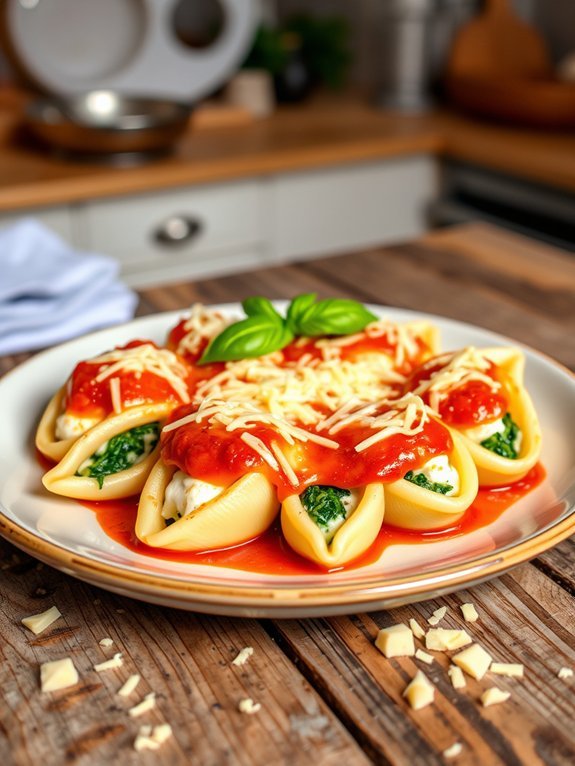
Cheesy Spinach and Ricotta Stuffed Shells are the perfect make-ahead meal that offers a delightful combination of flavors and textures. These large pasta shells are generously filled with a creamy mixture of ricotta and fresh spinach, then topped with a rich marinara sauce and melty cheese. Not only do they make an excellent weeknight dinner, but they also freeze remarkably well, allowing you to prepare and store them for future mealtimes.
The beauty of Cheesy Spinach and Ricotta Stuffed Shells lies in their versatility; you can customize the filling by adding ingredients like mozzarella, garlic, or even some sautéed mushrooms or bell peppers. This dish is ideal for making in bulk, so why not prepare a double batch to enjoy later? When you’re ready to eat them, simply reheat and serve for a comforting meal that tastes just as great as the day you made it.
Ingredients:
- 12 large jumbo pasta shells
- 1 cup ricotta cheese
- 2 cups fresh spinach, chopped
- 1 cup shredded mozzarella cheese
- 1/2 cup grated Parmesan cheese
- 1 egg, beaten
- 2 cups marinara sauce
- 1 teaspoon garlic powder
- Salt and pepper to taste
- Fresh basil, for garnish (optional)
To begin, cook the jumbo pasta shells according to package instructions until al dente. While the pasta is cooking, in a large bowl, mix together the ricotta cheese, chopped spinach, mozzarella cheese, Parmesan cheese, beaten egg, garlic powder, salt, and pepper until well combined.
Once the shells have cooled slightly, fill each shell with the cheese and spinach mixture. In a baking dish, spread a layer of marinara sauce on the bottom, place the stuffed shells on top, and then cover with remaining marinara sauce. Sprinkle extra mozzarella cheese on top and bake at 350°F (175°C) for 25-30 minutes until bubbly and golden.
When preparing Cheesy Spinach and Ricotta Stuffed Shells for freezing, allow them to cool completely before storing. It’s best to freeze them unbaked, so you can bake directly from the freezer when you’re ready to enjoy them. Wrap the dish tightly in plastic wrap and aluminum foil to prevent freezer burn.
Additionally, you can customize your filling based on your dietary preferences or what you have on hand, making this dish not only convenient but also versatile and delicious.
Beef and Vegetable Stir-Fry
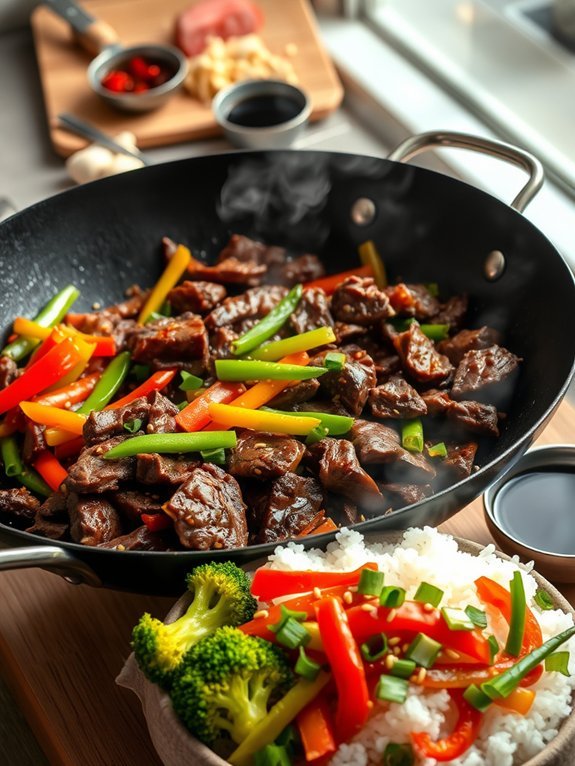
Beef and vegetable stir-fry is a quick and delicious meal that comes together in a flash, making it perfect for busy weeknights. This dish not only satisfies your hunger but also allows for flexibility with whatever vegetables you have on hand. Combining tender beef with a colorful medley of veggies creates a vibrant plate, guaranteeing you enjoy both flavor and nutrition.
Freezing the beef and vegetable mixture in advance is a brilliant strategy for meal prep aficionados. The key to a successful stir-fry lies in the preparation—slice the beef thinly against the grain to guarantee tenderness, and chop your vegetables into uniform pieces for even cooking. When it’s time to cook, a hot skillet or wok is essential to achieve that signature sear, enhancing the dish’s overall flavor.
- 1 lb beef sirloin, thinly sliced
- 2 cups mixed vegetables (bell peppers, broccoli, snap peas, carrots)
- 3 tablespoons soy sauce
- 2 tablespoons oyster sauce
- 1 tablespoon cornstarch
- 2 tablespoons vegetable oil
- 1 teaspoon minced garlic
- 1 teaspoon grated ginger
- Salt and pepper to taste
- Cooked rice or noodles (for serving)
Heat the vegetable oil in a large skillet or wok over medium-high heat. Add the sliced beef, cooking until browned (about 2-3 minutes), then remove the beef and set it aside. In the same pan, add minced garlic and grated ginger, followed by the mixed vegetables. Stir-fry for 3-4 minutes until they’re vibrant and tender-crisp.
Combine the beef back into the pan, followed by the soy sauce and oyster sauce. Sprinkle with cornstarch and toss everything together, cooking for an additional 1-2 minutes until the sauce thickens slightly. Serve hot over cooked rice or noodles.
When making this beef and vegetable stir-fry, it’s important to keep your cooking equipment preheated and your ingredients ready to go. Stir-frying requires high heat and quick movements, so have everything chopped and measured before you start cooking.
If desired, feel free to add other flavors like sesame oil or crushed red pepper for an extra kick. Once cooked, this stir-fry can also be stored in the freezer, making it a perfect meal prep option for future busy days.
Creamy Chicken and Mushroom Casserole

Creamy Chicken and Mushroom Casserole is a comforting dish that brings together tender chicken, savory mushrooms, and a rich creamy sauce. Perfect for busy weeknights, this casserole can be prepared in advance and stored in the freezer, allowing for a hassle-free meal on those days when time is tight.
With its homey flavors and ease of preparation, it’s sure to become a family favorite.
To make this dish even easier, you can use leftover rotisserie chicken or pre-cooked chicken pieces. This saves cooking time and makes it convenient for busy individuals or families. The creamy sauce binder, made with condensed soup and sour cream, complements the chicken and mushrooms beautifully, while a topping of crunchy breadcrumbs adds a delightful texture that elevates the dish.
Ingredients:
- 4 cups cooked chicken, shredded or diced
- 2 cups mushrooms, sliced
- 1 cup onion, chopped
- 2 cloves garlic, minced
- 1 can (10.5 oz) cream of chicken soup
- 1 cup sour cream
- 1 cup chicken broth
- 1 cup shredded cheddar cheese
- 1 teaspoon onion powder
- 1 teaspoon garlic powder
- Salt and pepper to taste
- 1 cup breadcrumbs
- 2 tablespoons melted butter
Combine the cooked chicken, sliced mushrooms, chopped onion, minced garlic, cream of chicken soup, sour cream, chicken broth, shredded cheddar cheese, onion powder, garlic powder, salt, and pepper in a large mixing bowl.
Mix until all ingredients are well incorporated, then transfer the mixture into a greased 9×13 inch casserole dish. Top with breadcrumbs mixed with melted butter for an added crunch.
Cover with aluminum foil and bake in a preheated oven at 350°F (175°C) for 30 minutes, then remove the foil and bake for an additional 10–15 minutes until the top is golden brown.
When preparing this casserole to freeze, be sure to let it cool completely before wrapping tightly in plastic wrap and aluminum foil. This will prevent freezer burn and help maintain the dish’s flavor and texture.
Additionally, consider adding vegetables such as peas or spinach to boost the nutritional value. For best results, thaw the casserole in the refrigerator overnight before baking, or increase the baking time if cooking from frozen.
Enjoy the ease and comfort of a homemade meal, ready when you need it!
Black Bean and Quinoa Chili
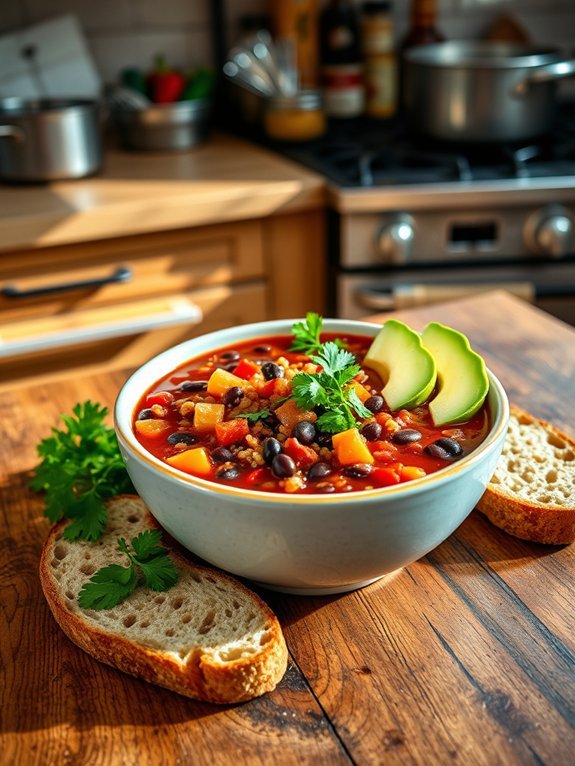
Black Bean and Quinoa Chili is a hearty, nutritious dish that’s perfect for meal prep and can be easily frozen for later enjoyment. This plant-based chili isn’t only comforting but also packed with protein from the black beans and quinoa, making it a great option for vegetarians and vegans alike.
The combination of spices and vegetables creates a flavorful blend that warms you up on cold days, while also being quick to prepare for busy weeknights.
Preparing this chili in advance is incredibly convenient, allowing you to portion it into freezer-safe containers and pop them in the freezer. When you’re ready to enjoy a bowl, simply reheat it on the stove or in the microwave. Serve it with your favorite toppings, like avocado, cilantro, or a dollop of dairy-free yogurt, and you’ve got a delicious meal ready in no time.
Ingredients:
- 1 cup quinoa, rinsed
- 2 cans black beans, drained and rinsed
- 1 can diced tomatoes (28 oz)
- 1 can tomato sauce (15 oz)
- 1 medium onion, chopped
- 2 cloves garlic, minced
- 1 bell pepper (any color), chopped
- 2 cups vegetable broth
- 2 teaspoons chili powder
- 1 teaspoon cumin
- 1 teaspoon smoked paprika
- Salt and pepper to taste
- 1 tablespoon olive oil
- Optional toppings: avocado, cilantro, dairy-free yogurt
In a large pot, heat the olive oil over medium heat and sauté the chopped onion and bell pepper until they’re soft, about 5 minutes. Add the minced garlic and cook for another minute until fragrant.
Stir in the quinoa, black beans, diced tomatoes, tomato sauce, vegetable broth, and spices—chili powder, cumin, smoked paprika, salt, and pepper. Bring the mixture to a boil, then reduce the heat and let it simmer for about 25-30 minutes, or until the quinoa is cooked and the chili has thickened to your desired consistency.
When making Black Bean and Quinoa Chili, consider adjusting the spice levels according to your preference. Feel free to add other vegetables like corn or zucchini for extra texture and flavor.
If you’re looking for a thicker consistency, you can let it simmer longer or mash some of the beans. Additionally, this chili can be stored in an airtight container in the fridge for up to a week or in the freezer for up to three months, making it a versatile option for meals on busy days.
Recommended Items
Get ready for stress-free cooking with these handy product and equipment recommendations!
Products
Baked Ziti With Italian Sausage
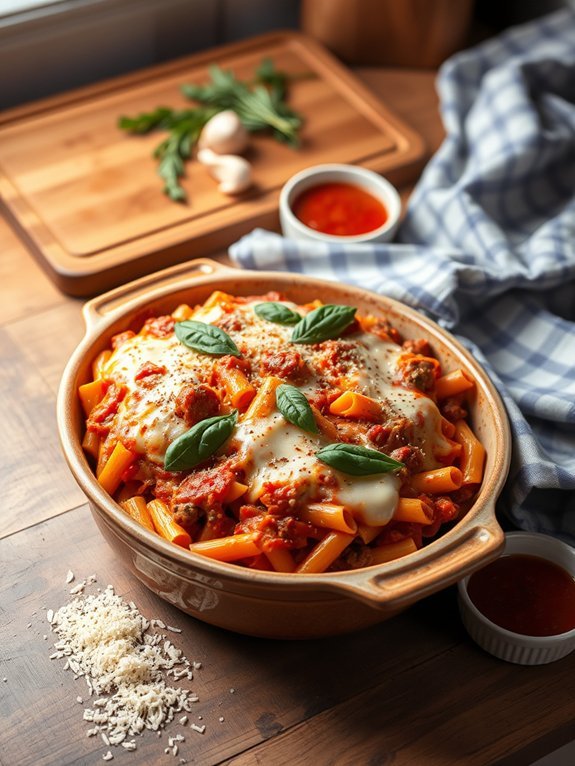
Baked Ziti with Italian Sausage is a comforting and delicious dish that combines hearty pasta, savory sausage, and a blend of cheesy goodness, making it perfect for a family dinner or a friendly gathering. The rich tomato sauce infused with Italian herbs brings a robust flavor that harmoniously complements the ziti pasta and gooey mozzarella cheese.
Best of all, this dish can be assembled ahead of time and frozen, allowing you to enjoy a home-cooked meal even on the busiest days.
To make the most of your time in the kitchen, this baked ziti recipe provides a simple way to prepare a meal that can be baked fresh or frozen for later. You can easily customize this dish by adding your favorite vegetables, such as spinach or mushrooms, or by using different types of cheese to suit your taste preferences.
Whether you’re cooking for a crowd or simply meal prepping for the week ahead, this baked ziti with Italian sausage is sure to become a family favorite.
Ingredients:
- 1 pound Italian sausage (mild or spicy, your choice)
- 1 package (16 ounces) ziti pasta
- 1 jar (28 ounces) marinara sauce
- 1 can (15 ounces) ricotta cheese
- 1 large egg
- 2 cups shredded mozzarella cheese
- 1/2 cup grated Parmesan cheese
- 1 teaspoon dried oregano
- 1 teaspoon garlic powder
- Salt and pepper to taste
- Fresh basil, for garnish (optional)
Cook the ziti pasta according to package instructions until al dente. While the pasta is cooking, brown the Italian sausage in a skillet over medium heat until fully cooked, breaking it up into smaller pieces as it cooks.
In a large bowl, combine the ricotta cheese, egg, oregano, garlic powder, salt, and pepper. Once the pasta is done, drain it and add it to the bowl with the ricotta mixture, followed by the marinara sauce and cooked sausage.
Mix well to combine everything thoroughly. Transfer half of the ziti mixture to a greased baking dish, layer half of the mozzarella cheese on top, then add the remaining ziti and finish with the remaining mozzarella and Parmesan cheese.
Cover with foil and bake at 375°F (190°C) for 25 minutes. Remove the foil and bake for an additional 15 minutes until the cheese is bubbly and golden.
When preparing baked ziti for freezing, make sure it’s completely cooled before wrapping it tightly in plastic wrap and then in aluminum foil to prevent freezer burn.
Additionally, you can bake it directly from frozen by adding an extra 15-20 minutes to the cooking time. Feel free to adjust the spice level of the sausage to cater to your family’s preferences, and consider adding chopped vegetables or herbs for an extra layer of flavor.
Chicken Enchiladas With Green Sauce
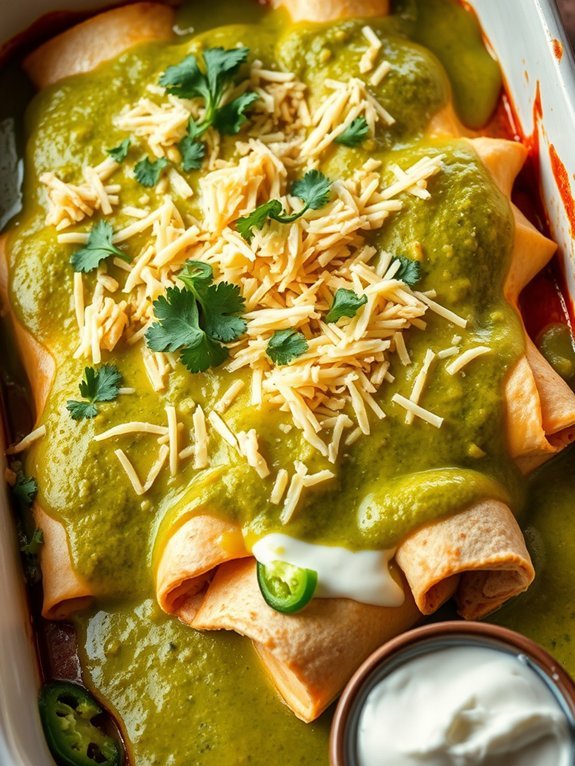
Chicken Enchiladas with Green Sauce are a delightful twist on the classic enchilada. These flavor-packed tortillas are filled with tender shredded chicken, smothered in a zesty green sauce, and topped with melted cheese, making them a perfect make-ahead meal. Once you’ve prepared and frozen them, they can be easily baked for a quick and satisfying dinner on a busy night.
This dish isn’t only delicious but also versatile, allowing you to customize the filling and toppings based on personal preferences. Making these enchiladas is a straightforward process that can be done in under an hour, making them ideal for meal prep. By using rotisserie chicken, you can save time and effort while still achieving great flavor. Plus, they store beautifully in the freezer, remaining delicious for up to three months.
Whether you serve them with a side of rice and beans or a simple salad, these chicken enchiladas are sure to please your family or guests.
Ingredients:
- 2 cups cooked shredded chicken (rotisserie or boiled)
- 8 flour or corn tortillas
- 2 cups green enchilada sauce
- 1 cup shredded cheese (cheddar, Monterey Jack, or a blend)
- 1/2 cup diced onion
- 1/2 cup sour cream
- 1 tablespoon olive oil
- 1 teaspoon ground cumin
- 1 teaspoon garlic powder
- Salt and pepper to taste
- Fresh cilantro (for garnish, optional)
In a large skillet, heat the olive oil over medium heat and sauté the diced onion until soft. Add the shredded chicken, cumin, garlic powder, salt, and pepper, mixing well until heated through.
Take a tortilla and spread a small amount of the green enchilada sauce on it. Place a generous spoonful of the chicken mixture and a sprinkle of cheese at the center of the tortilla, then roll it up tightly. Repeat this process for all tortillas and place them seam-side down in a greased baking dish.
Pour the remaining green sauce over the rolled enchiladas and sprinkle with the remaining cheese. At this point, you can freeze the dish or bake it immediately at 375°F (190°C) for 25-30 minutes, until bubbly and golden.
When making these enchiladas, consider adjusting the spice level to accommodate your taste buds by adding diced jalapeños or using a spicier green salsa. If you’re planning to freeze them, it’s best to do so before baking to preserve the texture.
Wrap the prepared dish tightly in plastic wrap and aluminum foil before placing it in the freezer. When you’re ready to bake, simply remove it from the freezer and let it thaw in the fridge overnight before baking, ensuring even cooking.
Meal Prep for Freezer-Friendly Dinners
Slow Cooker Beef Stroganoff
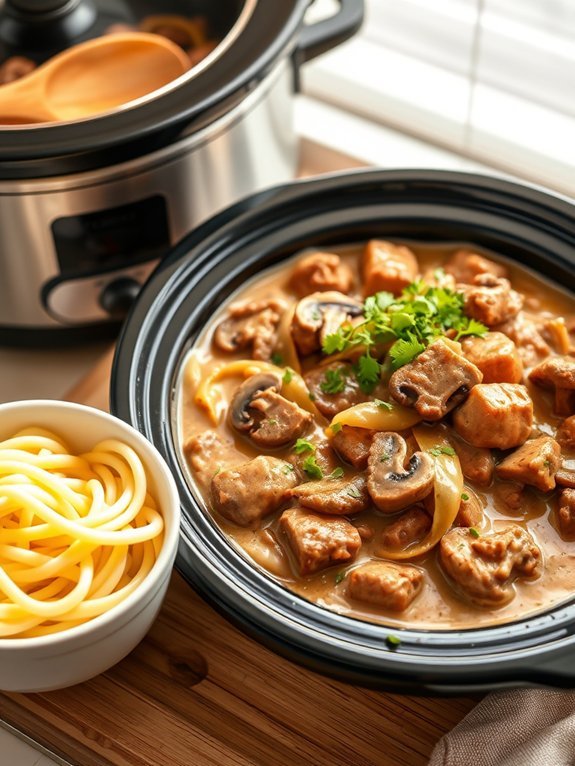
Slow Cooker Beef Stroganoff is a comforting and hearty dish that’s perfect for any family dinner. The tender pieces of beef simmered in a rich, creamy sauce are simply irresistible. By using a slow cooker, you can maximize flavor while minimizing effort—allowing you to set it and forget it, making it an ideal make-ahead meal for busy weeknights.
This delicious recipe can be prepared in advance and safely frozen, giving you a delicious home-cooked meal without last-minute stress. Just toss the ingredients together, freeze them, and when you’re ready, transfer them to your slow cooker, adding just a few finishing touches for a meal that’s as satisfying as it’s simple.
Ingredients:
- 2 pounds beef stew meat
- 1 medium onion, chopped
- 3 cloves garlic, minced
- 2 cups mushrooms, sliced
- 1 cup beef broth
- 1 tablespoon Worcestershire sauce
- 1 teaspoon Dijon mustard
- 1 teaspoon paprika
- ½ teaspoon salt
- ½ teaspoon black pepper
- 1 cup sour cream
- 2 tablespoons all-purpose flour (for thickening)
- Cooked egg noodles or rice, for serving
- Fresh parsley, chopped (for garnish)
Place the beef stew meat, onion, garlic, mushrooms, beef broth, Worcestershire sauce, Dijon mustard, paprika, salt, and black pepper into the slow cooker. Stir to combine all the ingredients. Cover and cook on low for 7-8 hours or on high for 4-5 hours, until the meat is tender.
Once cooked, mix the sour cream and flour together in a bowl, and then stir it into the slow cooker. Allow it to cook for an additional 30 minutes on low to thicken the sauce. Serve over cooked egg noodles or rice, garnished with parsley.
When preparing this dish, it’s important to cook the beef until it’s tender, as this enhances the flavors of your stroganoff. If you prefer a thicker sauce, you can adjust the amount of flour to your liking.
Also, consider adding other vegetables such as carrots or peas to boost the nutritional value. This dish can easily be stored in the freezer for up to three months, so make sure to label and date your containers for convenience.
Vegetable and Chickpea Curry
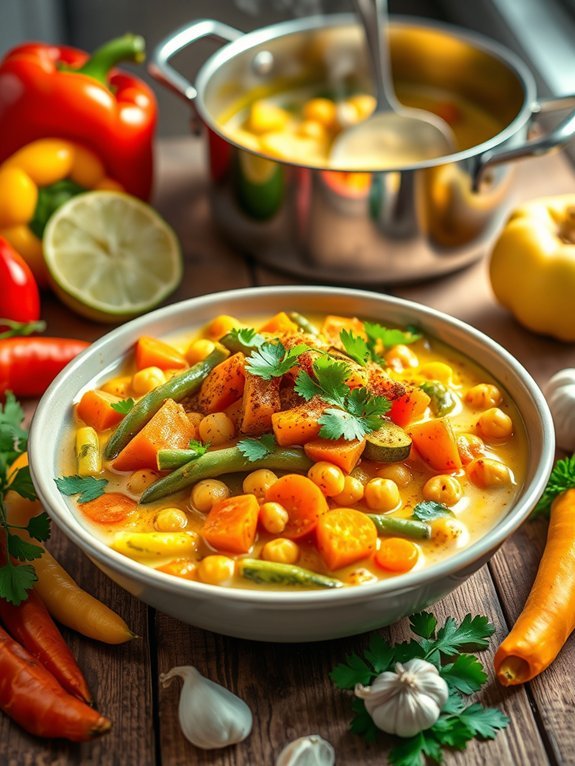
Make-Ahead Freezer Meals are a fantastic solution for busy lifestyles, helping to simplify meal prep and ensuring you always have something nourishing on hand. One such dish that freezes beautifully is Vegetable and Chickpea Curry. This hearty, spiced dish isn’t only packed with nutrients but also bursting with flavor, making it an excellent option for families or individuals looking to eat healthily without sacrificing taste.
Preparing a Vegetable and Chickpea Curry is a breeze, as it combines a medley of fresh vegetables, protein-rich chickpeas, and aromatic spices. The beauty of this recipe lies in its flexibility; you can substitute any vegetable you have on hand or enjoy at the moment, making it a versatile choice for meal planning. As it simmers, the flavors meld together, creating a comforting and satisfying meal that can easily be portioned for your freezer to enjoy at a later date.
- 1 tablespoon olive oil
- 1 onion, diced
- 2 cloves garlic, minced
- 1 tablespoon ginger, grated
- 1 bell pepper, diced (red or yellow)
- 1 carrot, sliced
- 1 zucchini, diced
- 1 cup green beans, trimmed and cut into bite-sized pieces
- 1 can (14 oz) diced tomatoes
- 1 can (15 oz) chickpeas, drained and rinsed
- 1 can (14 oz) coconut milk
- 2 tablespoons curry powder
- 1 teaspoon turmeric
- Salt and pepper, to taste
- Fresh cilantro, for garnish (optional)
In a large pot, heat olive oil over medium heat. Add the diced onion and sauté until translucent, around 5 minutes. Stir in the garlic and ginger, cooking for another minute. Add the bell pepper, carrot, zucchini, and green beans, and cook for about 5-7 minutes until the vegetables begin to soften.
Pour in the diced tomatoes, chickpeas, and coconut milk, then sprinkle with the curry powder and turmeric. Stir well to combine, seasoning with salt and pepper to taste. Let it simmer for 20–30 minutes, allowing the flavors to meld together before removing it from heat.
When preparing this dish, remember that the curry can be customized based on your preferred spice level. Adjust the amount of curry powder to your taste and consider adding a pinch of red pepper flakes or a splash of hot sauce for an extra kick.
Also, allow the curry to cool completely before transferring it to airtight containers for freezing to prevent ice crystals from affecting the texture. To reheat, simply thaw overnight in the refrigerator and warm gently on the stovetop, adding a splash of water if needed to bring back its original creaminess.
Homemade Meatballs in Marinara Sauce
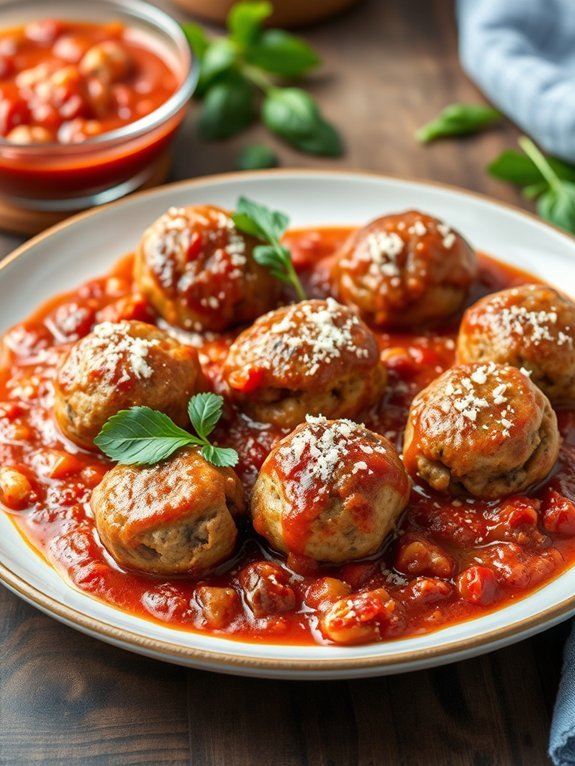
Homemade meatballs in marinara sauce are a comforting and satisfying meal that can be easily prepared in advance and frozen for those busy weeknights. The combination of seasoned ground meat, breadcrumbs, and aromatic herbs brings together a classic dish that can be served over pasta, in a sub, or on its own. Plus, making a large batch of meatballs allows for meal prepping, guaranteeing you always have a delicious option ready to go in your freezer.
When making these meatballs, the quality of the ingredients plays a crucial role in the flavor and texture of the dish. Opt for a good quality ground meat—beef, pork, or turkey all work well—combined with fresh herbs and spices for the best results. The marinara sauce adds a rich, tangy element that complements the meatballs perfectly, making this a dish the whole family will enjoy.
Ingredients:
- 1 pound ground beef (or a mix of beef and pork)
- 1/4 cup breadcrumbs (preferably Italian-style)
- 1/4 cup grated Parmesan cheese
- 1/4 cup chopped fresh parsley
- 1 large egg
- 2 cloves garlic, minced
- 1 teaspoon onion powder
- 1 teaspoon dried oregano
- Salt and pepper, to taste
- 2 cups marinara sauce (store-bought or homemade)
- Fresh basil for garnish (optional)
Preheat your oven to 375°F (190°C) and line a baking sheet with parchment paper. In a large mixing bowl, combine the ground meat, breadcrumbs, Parmesan cheese, parsley, egg, minced garlic, onion powder, dried oregano, salt, and pepper. Mix until well combined but be careful not to overwork the mixture.
Roll the mixture into meatballs about 1 inch in diameter and place them on the prepared baking sheet. Bake the meatballs for 20-25 minutes, or until golden brown and cooked through. While the meatballs are baking, heat the marinara sauce in a large skillet over medium heat.
Once the meatballs are done, add them to the sauce and let simmer for 10 minutes to allow the flavors to meld.
To guarantee your meatballs are moist and flavorful, consider using a combination of meats, such as beef and pork, as the fat content adds richness to the dish. If you prefer a healthier version, turkey or chicken can also be used, but be sure to add extra seasoning to enhance the flavor.
Additionally, allow the meatballs to cool completely before you freeze them, and store them in an airtight container or freezer bag with the marinara sauce for ideal freshness when you’re ready to enjoy them later.
Savory Breakfast Burritos
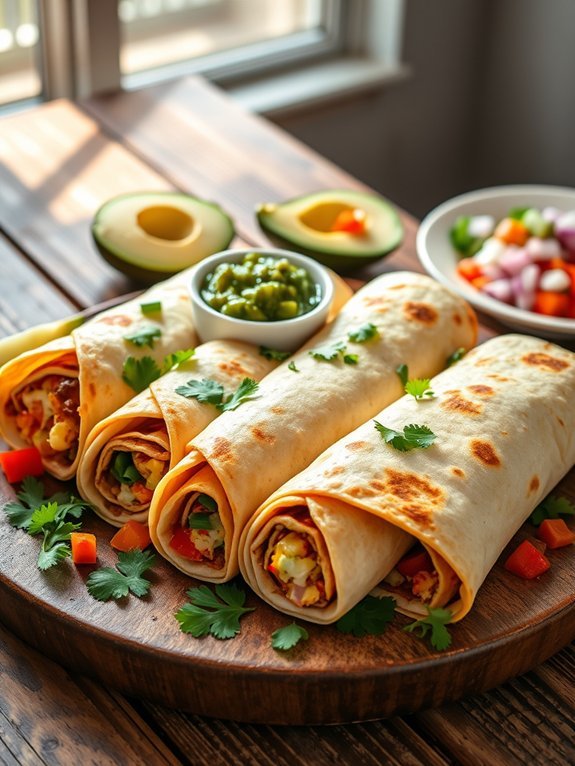
Savory breakfast burritos are a fantastic option for busy mornings or quick meals. They’re versatile, packed with protein, and can be tailored to suit your personal taste.
Preparing a batch of these burritos and freezing them isn’t only a time-saver but also guarantees you have a nutritious breakfast ready to go. These burritos can be enjoyed plain or topped with salsa, avocado, or cheese, making them a delicious way to start your day.
To make the most of your meal prep, consider assembling different varieties of breakfast burritos so you don’t get bored with the same flavors. You can mix and match ingredients such as meats, vegetables, and spices to create your desired taste.
Once cooked and wrapped, these burritos can be stored in the freezer for up to three months, allowing you to enjoy a homemade breakfast anytime.
Ingredients:
- 8 large eggs
- 1 cup milk
- 1 teaspoon salt
- 1/2 teaspoon black pepper
- 1 cup cooked and crumbled breakfast sausage (or diced ham, or bacon)
- 1 cup shredded cheddar cheese
- 1 cup diced bell peppers (any color)
- 1/2 cup chopped onions
- 8 large flour tortillas
- Optional: salsa, avocado, or hot sauce for serving
In a large mixing bowl, whisk together eggs, milk, salt, and pepper until well combined. In a skillet over medium heat, sauté the bell peppers and onions until soft, then add the sausage (or meat of your choice) and cook until heated through.
Pour the egg mixture into the skillet and scramble until the eggs are fully cooked. Remove from heat and stir in the shredded cheese until melted. Allow the mixture to cool slightly before filling the tortillas.
When making breakfast burritos, consider wrapping them in parchment paper before placing them in a freezer bag; this helps to prevent freezer burn and makes them easy to grab when you need a quick meal.
Label each bag with the date and contents so you can easily identify them later. When reheating, microwave them wrapped in a damp paper towel to retain moisture, guaranteeing they come out soft and delicious.
Teriyaki Salmon With Stir-Fried Rice
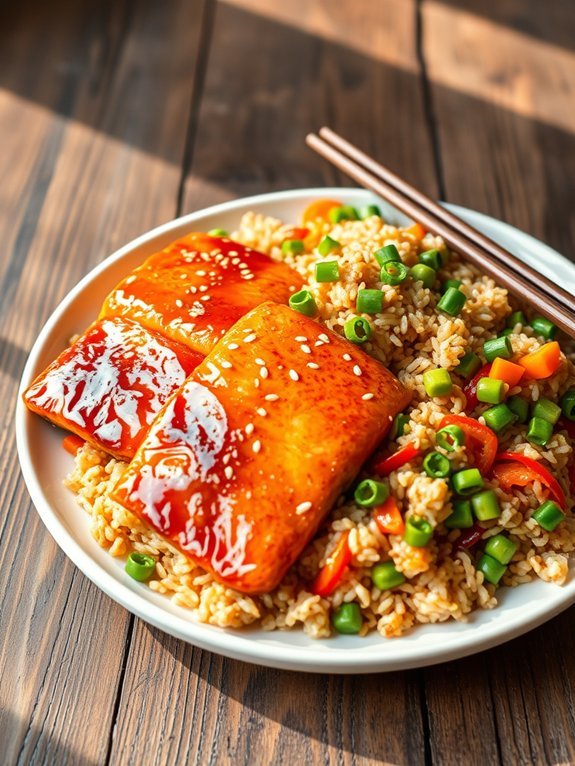
Teriyaki salmon with stir-fried rice is a delicious and nutritious meal that can be prepared in advance and stored in the freezer for future enjoyment. This dish combines flavorful teriyaki-marinated salmon with vibrant vegetables and perfectly cooked rice, making it a satisfying choice for any day of the week. Not only does it bring a taste of Asian cuisine to your weekly dinner rotation, but it also provides a balanced meal packed with protein, healthy fats, and carbohydrates.
Preparing this dish isn’t only easy but also customizable. You can choose your preferred vegetables to toss into the stir-fried rice, tailoring the recipe to your tastes. Whether it’s carrots, bell peppers, or snap peas, the possibilities are endless! Plus, the teriyaki glaze infuses the salmon with a sweet and savory flavor that pairs beautifully with the rice. With a little planning, you can have a delightful, home-cooked meal waiting for you in the freezer.
Ingredients:
- 4 salmon fillets
- 1 cup teriyaki sauce (store-bought or homemade)
- 4 cups cooked white or brown rice
- 1 cup frozen mixed vegetables (peas, carrots, bell peppers)
- 2 tablespoons vegetable oil
- 2 teaspoons sesame oil
- 2 green onions, sliced
- Sesame seeds for garnish
- Salt and pepper to taste
To prepare the teriyaki salmon, first, marinate the salmon fillets in the teriyaki sauce for at least 30 minutes. While the salmon is marinating, heat the vegetable oil in a large skillet over medium-high heat.
Add the frozen mixed vegetables and stir-fry for about 3-4 minutes until heated through. Add the cooked rice, sesame oil, and season with salt and pepper, stirring to combine everything.
Push the rice and vegetables to the side of the skillet to create space, then add the marinated salmon fillets, cooking for about 4-5 minutes on each side or until cooked through and the salmon flakes easily with a fork.
When making teriyaki salmon with stir-fried rice, ascertain your salmon is fresh and of high quality for the best taste. You can also prep the meal in individual portions for convenience, making it easier to defrost and reheat when you’re ready to eat.
If you want to enhance the dish further, consider adding a splash of rice vinegar or lime juice before serving to brighten the flavors. Enjoy garnishing with sliced green onions and sesame seeds for an extra touch!
Creamy Tomato Basil Soup
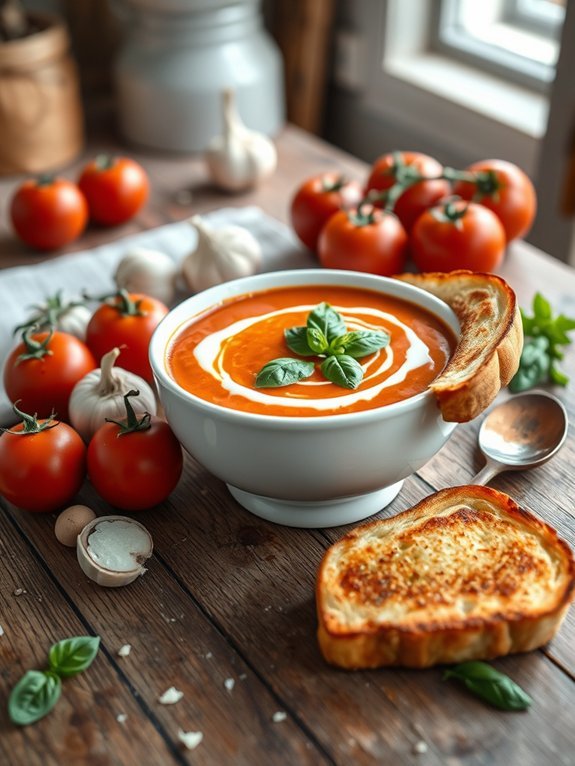
Creamy Tomato Basil Soup is the perfect comfort food that warms the soul and satisfies cravings. This delightful soup isn’t only smooth and velvety but also brims with the fresh brightness of basil and the rich flavor of tomatoes. It’s an ideal dish for batch cooking, and it freezes beautifully, making it a great make-ahead meal for busy weekdays or cozy weekends.
Crafting this soup is simple and requires minimal effort, but the end result is a dish that feels indulgent and homemade. Whether paired with a grilled cheese sandwich or served as a standalone starter, Creamy Tomato Basil Soup is a versatile addition to your meal repertoire. With just a few fresh ingredients, you can create a symphony of flavors that you and your family will adore time and time again.
Ingredients:
- 2 tablespoons olive oil
- 1 medium onion, diced
- 3 cloves garlic, minced
- 2 cans (28 ounces each) crushed tomatoes
- 4 cups vegetable broth
- 1 teaspoon sugar (optional)
- Salt and pepper to taste
- 1 cup heavy cream (or coconut milk for a dairy-free option)
- 1 cup fresh basil leaves, chopped
- Grated Parmesan cheese for serving (optional)
In a large pot, heat the olive oil over medium heat. Add diced onion and sauté until soft and translucent, about 5 minutes.
Stir in the minced garlic, followed by the crushed tomatoes and vegetable broth. Bring the mixture to a simmer, then reduce the heat to low and let it cook for about 20 minutes.
Afterward, stir in the sugar (if using), salt, and pepper to taste. Remove from heat and use an immersion blender to puree the soup to your desired consistency.
Return the pot to low heat and stir in the heavy cream and fresh basil, allowing everything to meld together for an additional 5 minutes.
When freezing, allow the soup to cool completely before transferring it to airtight containers or freezer bags. Make sure to leave some space for expansion if using bags.
It’s advisable to label the containers with the date and use them within 3 months for the best flavor. When you’re ready to enjoy, simply thaw in the refrigerator overnight and reheat on the stovetop, adding a splash of broth if needed to smooth out the consistency.
Enjoy your soup with a sprinkle of freshly grated Parmesan on top for an extra touch of flavor!

