This post may contain affiliate links. Please read our policy page.
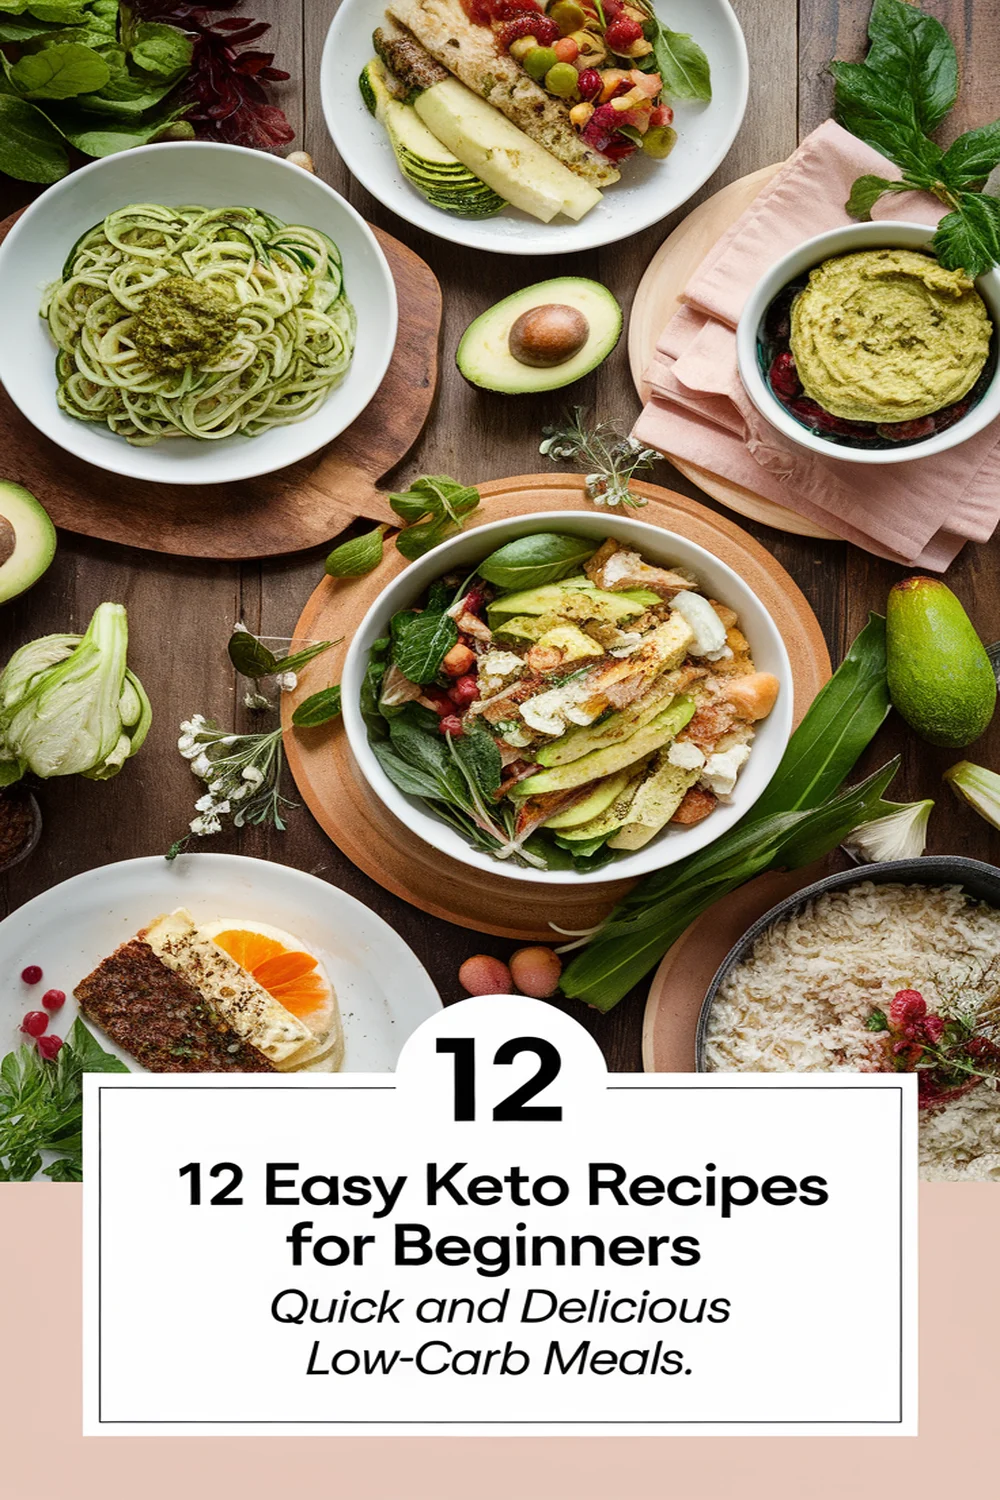
If you’re diving into the keto lifestyle, you’ll love these 12 easy recipes that are quick and delicious! Start your day with a hearty Keto Breakfast Casserole or Avocado and Bacon Egg Cups. For lunch or dinner, whip up Zucchini Noodles With Pesto or Cauliflower Fried Rice. Craving something fresh? Try Shrimp and Avocado Salad or Buffalo Chicken Lettuce Wraps. And don’t forget a sweet treat like Chocolate Avocado Mousse to satisfy your cravings! There’s so much more to discover!
Keto Breakfast Casserole

A Keto Breakfast Casserole is the perfect way to kickstart your day with a nutritious, low-carb meal that’s both satisfying and easy to prepare. This dish is packed with protein and healthy fats, making it ideal for anyone following a ketogenic lifestyle.
It can be prepared in advance, allowing you to enjoy a nutritious breakfast throughout the week without the hassle of daily cooking.
The beauty of the Keto Breakfast Casserole lies in its versatility. You can customize it with a variety of ingredients, such as different meats, veggies, or cheeses, based on your preference. Whether you prefer crispy bacon, savory sausage, or sautéed spinach, this casserole is bound to become a favorite breakfast staple in your home.
Ingredients:
- 8 large eggs
- 1 cup heavy cream
- 1 cup shredded cheese (cheddar, mozzarella, or your choice)
- 1 cup cooked sausage or bacon, crumbled
- 1 cup bell peppers, diced
- 1 cup spinach, chopped
- 1 teaspoon garlic powder
- 1 teaspoon onion powder
- Salt and pepper to taste
- Optional: fresh herbs (like chives or parsley) for garnish
Preheat your oven to 350°F (175°C). In a large mixing bowl, whisk together the eggs and heavy cream until well combined. Stir in the cheese, cooked sausage or bacon, diced bell peppers, chopped spinach, garlic powder, onion powder, salt, and pepper.
Pour the mixture into a greased 9×13-inch baking dish and bake for 25-30 minutes or until the casserole is set in the middle and lightly golden on top.
For best results, let the casserole cool slightly before cutting it into squares and serving. You can store leftovers in an airtight container in the fridge for up to 5 days. Reheat individual portions in the microwave or oven for a quick breakfast.
Feel free to experiment with ingredient variations to find the combination that suits your taste buds best. Additionally, consider adding spices like paprika or Italian seasoning to elevate the flavors further.
Avocado and Bacon Egg Cups
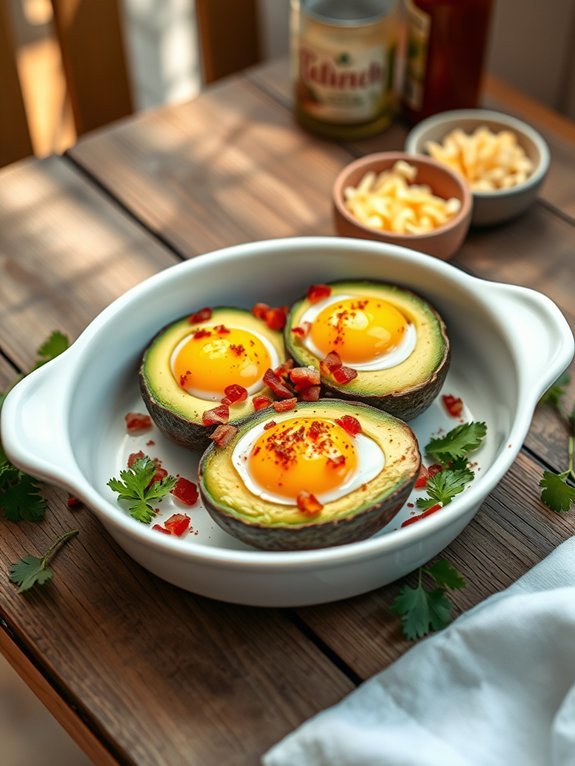
Avocado and Bacon Egg Cups are a perfect way to kickstart your day on a low-carb note. This deliciously rich dish combines the creamy texture of ripe avocados with the savory crunch of bacon and the heartiness of eggs, creating a satisfying meal that’s both nutritious and filling.
Whether you’re following a ketogenic diet or just looking for a healthy breakfast option, these egg cups are quick and easy to prepare, making them ideal for busy mornings or leisurely brunches alike.
To make this dish even more appealing, you can customize it to suit your taste. Feel free to add in chopped vegetables or spices you enjoy, such as diced tomatoes, bell peppers, or a sprinkle of chili flakes for a bit of heat.
These Egg Cups not only offer a delightful flavor but also an impressive presentation, making them great for entertaining guests. Plus, they’re gluten-free, ensuring that everyone can enjoy this tasty treat!
Ingredients:
- 2 ripe avocados
- 4 large eggs
- 4 strips of cooked bacon, crumbled
- Salt and pepper to taste
- Optional toppings: shredded cheese, chopped herbs, or hot sauce
Preheat your oven to 375°F (190°C). Cut the avocados in half and carefully remove the pits. Scoop out a little of the flesh from the center to create enough space for the egg.
Place the avocado halves in a baking dish, ensuring they fit snugly. Crack an egg into each avocado half, then sprinkle with crumbled bacon, salt, and pepper. Bake in the oven for about 15-20 minutes, or until the egg white is set to your desired doneness, and enjoy!
When making Avocado and Bacon Egg Cups, remember that the ripeness of the avocado is key; choose ones that are slightly soft but not overly mushy.
If you’re short on time, you can pre-cook the bacon and keep it in the fridge for a quick assembly in the morning. Additionally, don’t hesitate to experiment with different toppings or seasonings to make the dish your own – the possibilities are endless!
Zucchini Noodles With Pesto
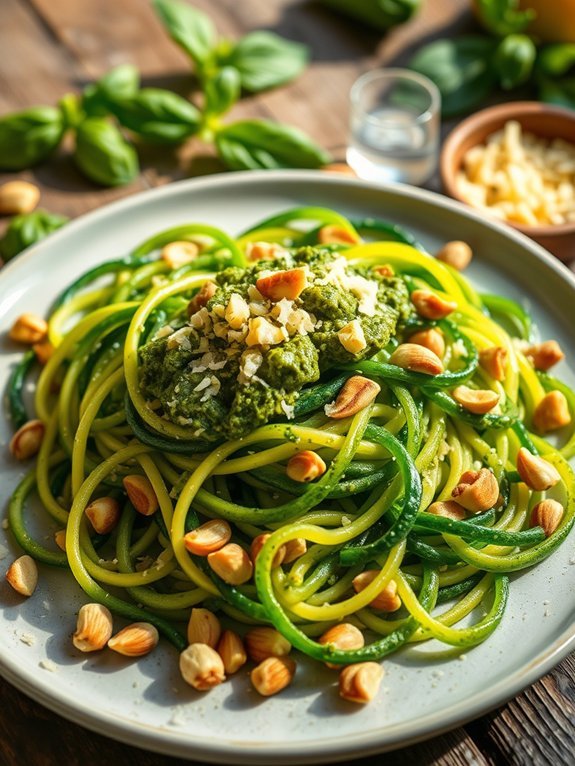
Zucchini noodles, often referred to as “zoodles,” are a fantastic low-carb alternative to traditional pasta, making them a perfect choice for anyone following a ketogenic diet. Not only do they deliver a fresh crunch and vibrant flavor, but they’re also incredibly easy to make. Pairing them with a homemade pesto adds a burst of herbal freshness and richness that elevates the dish to a whole new level. This recipe is straightforward enough for beginners and can be prepared in just a matter of minutes.
To prepare zucchini noodles, you’ll need a spiralizer or a vegetable peeler to create the desired noodle shape. The pesto sauce can be made from scratch using fresh ingredients, allowing you to control the flavors and avoid store-bought products that may contain added sugars or preservatives. This dish not only highlights the simple beauty of fresh produce but also offers a nutritious and satiating meal option that fits seamlessly into your keto lifestyle.
- 2 medium zucchini
- 1 cup fresh basil leaves
- 1/4 cup grated Parmesan cheese
- 1/4 cup pine nuts
- 1 clove garlic, minced
- 1/4 cup extra-virgin olive oil
- Salt and pepper to taste
To make the dish, start by spiraling the zucchini into noodles using a spiralizer or a vegetable peeler. Set the zoodles aside. For the pesto, blend together the basil, Parmesan cheese, pine nuts, garlic, and olive oil in a food processor until smooth. Season with salt and pepper to taste.
In a large skillet over medium heat, lightly sauté the zucchini noodles for about 2-3 minutes until they’re tender but still firm. Remove from heat and toss with the pesto sauce until evenly coated.
When making zucchini noodles, it’s important not to overcook them, as they can become mushy and lose their appealing texture. For added flavor, consider incorporating additional ingredients such as cherry tomatoes, cooked chicken, or toasted nuts.
If you want a creamier sauce, feel free to add a splash of heavy cream or cream cheese to the pesto before mixing it with the zoodles. Enjoy this dish fresh, as the flavors are at their best when served immediately!
Recommended Items
Get ready to cook up some delicious keto meals with our handpicked product and equipment suggestions!
Products
Cauliflower Fried Rice
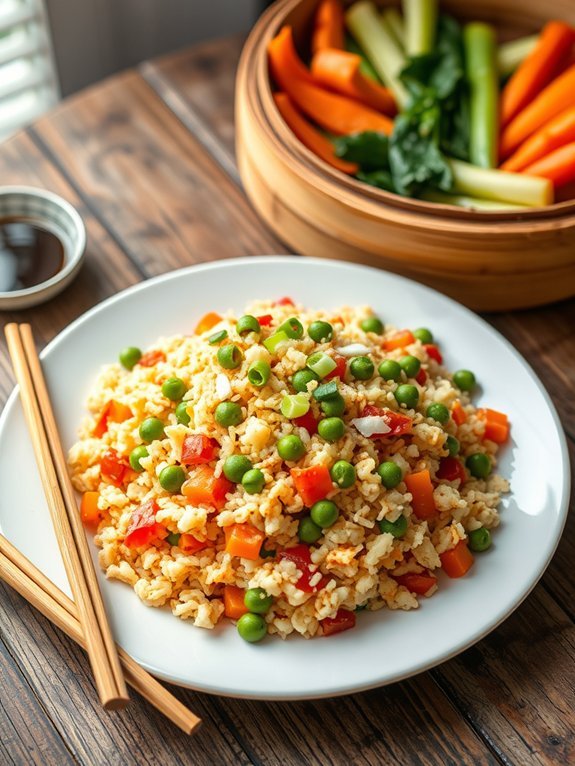
Cauliflower fried rice is a delicious and healthy alternative to traditional fried rice, perfect for those following a keto diet. This dish allows you to enjoy the flavors and textures you love without the added carbs that come from rice. Cauliflower isn’t only low in carbohydrates but also packed with nutrients, making it an excellent choice for a wholesome meal.
Whipping up a batch of cauliflower fried rice can easily be done in under 30 minutes, making it a quick and satisfying option for busy weeknight dinners. This versatile recipe can be adapted to include your favorite vegetables, proteins, or seasonings, so feel free to get creative.
Whether you’re using leftover chicken, shrimp, or simply loading it up with extra veggies, cauliflower fried rice can cater to your taste preferences while keeping you on track with your keto goals. Ready to jump in? Let’s get started!
- 1 medium head of cauliflower, riced
- 2 tablespoons sesame oil or coconut oil
- 2 eggs, beaten
- 1 cup mixed vegetables (like peas, carrots, and bell peppers)
- 3 green onions, sliced
- 2 cloves garlic, minced
- 2-3 tablespoons soy sauce or coconut aminos
- Salt and pepper to taste
Heat the sesame oil in a large skillet or wok over medium-high heat. Add the minced garlic and sauté for about 30 seconds until fragrant. Then stir in the mixed vegetables and cook for another 2-3 minutes.
Push the veggies to one side, pour in the beaten eggs and scramble until fully cooked. Finally, add the riced cauliflower, soy sauce, and sliced green onions to the pan, mixing everything together well.
Cook for an additional 5-7 minutes until the cauliflower is tender but still has a bit of crunch, seasoning with salt and pepper to taste. When cooking cauliflower fried rice, always remember to squeeze out excess moisture from the riced cauliflower if you’ve made it fresh; this helps prevent the dish from becoming soggy.
Additionally, aim to keep the heat high during cooking so that the cauliflower gets a bit of a char, giving it that wonderful fried rice flavor. Experiment with different proteins or spices to suit your taste, and don’t shy away from personalizing this recipe to make it your own!
Creamy Garlic Parmesan Chicken
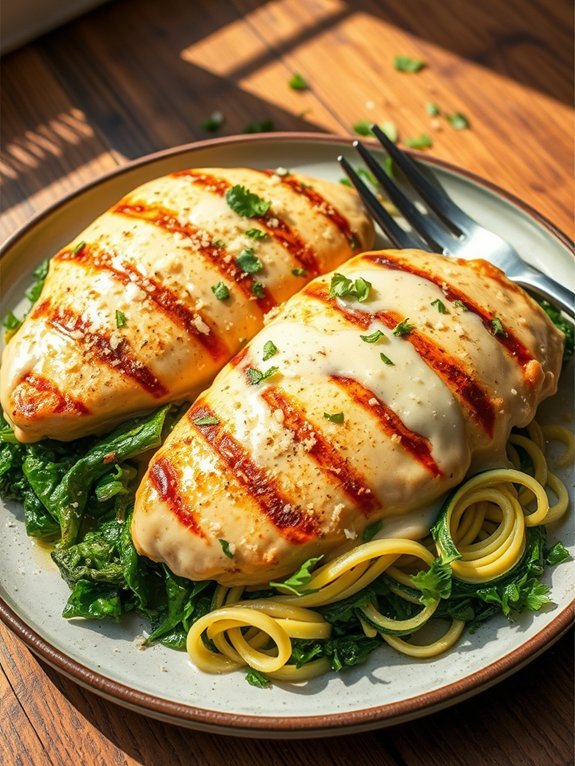
Creamy Garlic Parmesan Chicken is a deliciously satisfying dish that perfectly fits into a ketogenic lifestyle. This recipe combines tender, pan-seared chicken breasts with a rich and creamy sauce infused with garlic and parmesan cheese. Quick and easy to prepare, it’s perfect for busy weeknights or when you want to impress friends and family with minimal effort.
The sauce is what truly makes this dish stand out. The combination of garlic and parmesan creates a savory flavor that coats the chicken beautifully, while heavy cream adds a velvety texture. Serve this dish over a bed of zucchini noodles or alongside sautéed greens for a complete meal that adheres to keto principles while still being comforting and indulgent.
Ingredients:
- 4 boneless, skinless chicken breasts
- 2 tablespoons olive oil
- 4 cloves garlic, minced
- 1 cup heavy cream
- 1 cup grated parmesan cheese
- Salt and pepper to taste
- Fresh parsley, chopped (for garnish)
- Optional: 1 teaspoon Italian seasoning
To cook the dish, start by heating the olive oil in a large skillet over medium-high heat. Season the chicken breasts with salt and pepper, then add them to the skillet. Cook for about 6-7 minutes on each side until the chicken is golden brown and cooked through. Remove the chicken from the skillet and set it aside.
In the same skillet, add the minced garlic and sauté for about 30 seconds until fragrant. Pour in the heavy cream and bring it to a simmer, stirring in the parmesan cheese until it’s melted and the sauce is smooth. Return the chicken to the skillet and coat it with the creamy sauce.
When making Creamy Garlic Parmesan Chicken, feel free to adjust the thickness of the sauce by adding more or less cream, depending on your preference. Shredded chicken can also be mixed in for a different texture, plus you can easily make this dish ahead of time; just reheat gently to prevent the chicken from drying out.
Don’t forget to garnish with fresh parsley for a pop of color and fresh flavor!
Spaghetti Squash Bolognese

Spaghetti Squash Bolognese is a delicious and healthy twist on the traditional Bolognese sauce, using spaghetti squash as a low-carb substitute for pasta. This dish isn’t only packed with flavor but also provides a nutritious option for those following a ketogenic lifestyle. The spaghetti squash offers a mild, slightly sweet flavor and a unique texture that pairs perfectly with the rich, meaty sauce.
Making the Bolognese sauce from scratch allows you to control the ingredients and customize the flavors to your liking. This dish is perfect for meal prep or as a hearty dinner option that the whole family will love. With a few simple ingredients and easy steps, you can impress your taste buds and stay in line with your diet plan.
Ingredients:
- 1 medium spaghetti squash
- 1 lb ground beef or turkey
- 1 onion, diced
- 2 cloves garlic, minced
- 1 can (15 oz) crushed tomatoes
- 2 tbsp tomato paste
- 1 tsp dried oregano
- 1 tsp dried basil
- Salt and pepper, to taste
- Olive oil, for sautéing
- Grated Parmesan cheese (optional, for serving)
- Fresh basil leaves (optional, for garnish)
Preheat your oven to 400°F (200°C). Cut the spaghetti squash in half lengthwise and scoop out the seeds. Drizzle olive oil on the cut sides, sprinkle with salt and pepper, and place face down on a baking sheet. Roast for about 30-40 minutes until tender.
In a large skillet, heat olive oil over medium heat and sauté the diced onion and garlic until soft. Add the ground meat and cook until browned. Stir in the crushed tomatoes, tomato paste, oregano, basil, salt, and pepper, letting it simmer for about 15 minutes.
Once the spaghetti squash is tender, use a fork to scrape out the strands and serve topped with the Bolognese sauce. For the best flavor, let the Bolognese sauce simmer for a longer period if time allows, as this helps develop and deepen the flavors.
You can also add vegetables like bell peppers or mushrooms for extra nutrition. If you prefer a spicier kick, feel free to add a pinch of red pepper flakes. Finally, for a creamier texture, consider stirring in a splash of heavy cream before serving. Enjoy your Keto-friendly meal!
Cheesy Broccoli and Cauliflower Bake
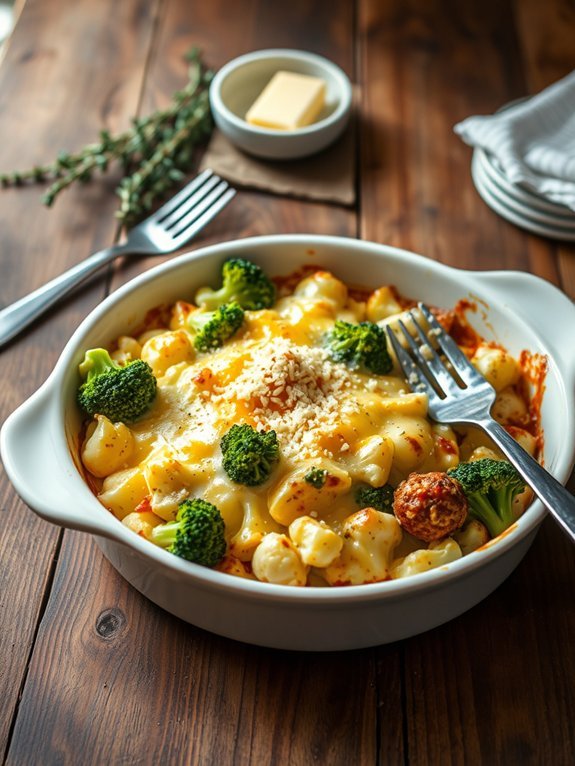
If you’re looking for a comforting and satisfying side dish that fits perfectly into a keto lifestyle, the Cheesy Broccoli and Cauliflower Bake is a fantastic choice. This recipe combines tender broccoli and cauliflower florets with a rich and creamy cheese sauce, making it not only low in carbs but also deliciously rich in flavor.
It’s an excellent way to add more vegetables to your meal while enjoying every bite. This bake is straightforward to prepare and can be a great side for meats, or even stand alone as a delightful vegetarian main course. Packed with nutritional goodness, the blend of cheesy flavor with the crunch of roasted vegetables will satisfy your cravings, all while keeping your macros in check.
Perfect for beginners, this recipe is a hit for both keto enthusiasts and family members alike.
- 2 cups broccoli florets
- 2 cups cauliflower florets
- 1 cup shredded cheddar cheese
- 1 cup cream cheese, softened
- 1/2 cup sour cream
- 1/4 cup grated Parmesan cheese
- 1 teaspoon garlic powder
- 1 teaspoon onion powder
- Salt and pepper to taste
- 1 tablespoon olive oil
Preheat your oven to 350°F (175°C). In a large pot of boiling water, lightly blanch the broccoli and cauliflower florets for about 2-3 minutes, then drain and set aside.
In a mixing bowl, combine the cream cheese, sour cream, garlic powder, onion powder, salt, pepper, and half of the shredded cheddar cheese until well blended.
In a greased baking dish, layer the blanched vegetables and pour the cheese mixture over them, mixing gently to combine. Top with the remaining cheddar cheese and Parmesan, then bake for 25-30 minutes until the cheese is bubbly and slightly golden.
For even more flavor, you can customize your Cheesy Broccoli and Cauliflower Bake by adding cooked bacon pieces or sautéed onions to the mix. Additionally, feel free to swap out the cheeses for different varieties, such as mozzarella or a spicy pepper jack for a kick.
Serving it fresh from the oven can elevate the experience, but leftovers can be stored in the fridge and reheated for a quick and satisfying meal.
Proposed Recipe
Keto Taco Salad
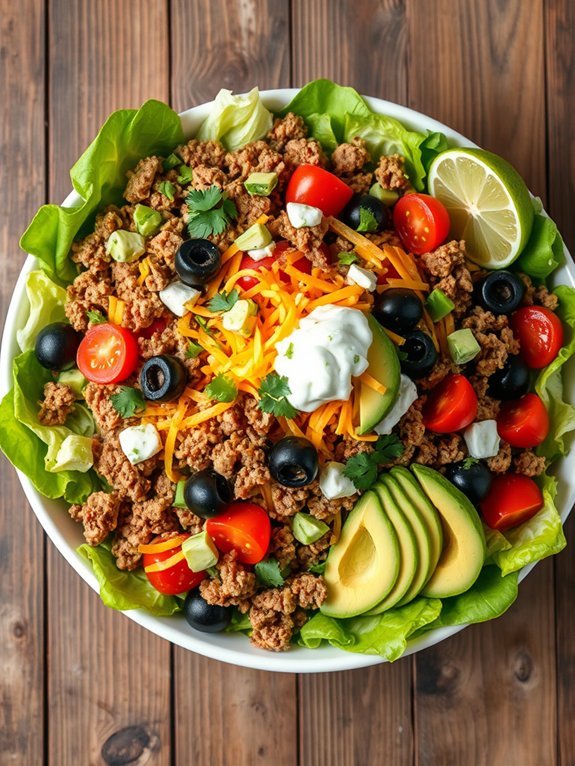
Keto Taco Salad is a delightful, flavorful dish that encapsulates the essence of a classic taco while staying true to the principles of a low-carb lifestyle. This recipe is perfect for beginners maneuvering the ketogenic diet, as it’s simple to prepare and requires minimal cooking skills. Packed with protein, healthy fats, and fresh vegetables, this meal isn’t only satisfying but also nutritious, making it an ideal choice for lunch or dinner.
The beauty of this Keto Taco Salad lies in its versatility. You can customize the ingredients to suit your taste preferences or what you have available in your pantry. The base of the salad typically includes ground meat, such as beef or turkey, seasoned with taco spices, layered over a bed of crisp lettuce, and topped with a variety of fresh toppings like cheese, avocado, and sour cream.
This dish isn’t only a tasty meal but can also be put together in under 30 minutes, making it a perfect go-to recipe for busy weeknights.
Ingredients:
- 1 pound ground beef or turkey
- 1 tablespoon olive oil (if needed)
- 1 packet taco seasoning (make sure it’s low-carb)
- 4 cups romaine or iceberg lettuce, chopped
- 1 cup cherry tomatoes, halved
- 1 cup shredded cheddar cheese
- 1 avocado, diced
- 1/2 cup sour cream
- 1/4 cup sliced black olives (optional)
- Fresh cilantro, chopped (for garnish)
In a large skillet over medium heat, cook the ground beef or turkey until browned and completely cooked through, adding olive oil if the meat is lean. Stir in the taco seasoning along with a splash of water to create a flavorful sauce. Cook until well combined and the water has evaporated.
Meanwhile, in a large serving bowl or on individual plates, create a bed of chopped lettuce and layer on the cooked meat, followed by cherry tomatoes, cheese, avocado, sour cream, black olives, and cilantro.
When preparing your Keto Taco Salad, feel free to experiment with different toppings or ingredients according to your preferences. For instance, you can add bell peppers, jalapeños, or even switch the cheese type to suit your taste.
To make it more filling, consider adding ingredients like guacamole or even a drizzle of lime juice for an extra burst of flavor. Remember that the key to a delicious Keto Taco Salad is freshness, so using high-quality ingredients will elevate the dish. Enjoy your low-carb culinary adventure!
Shrimp and Avocado Salad
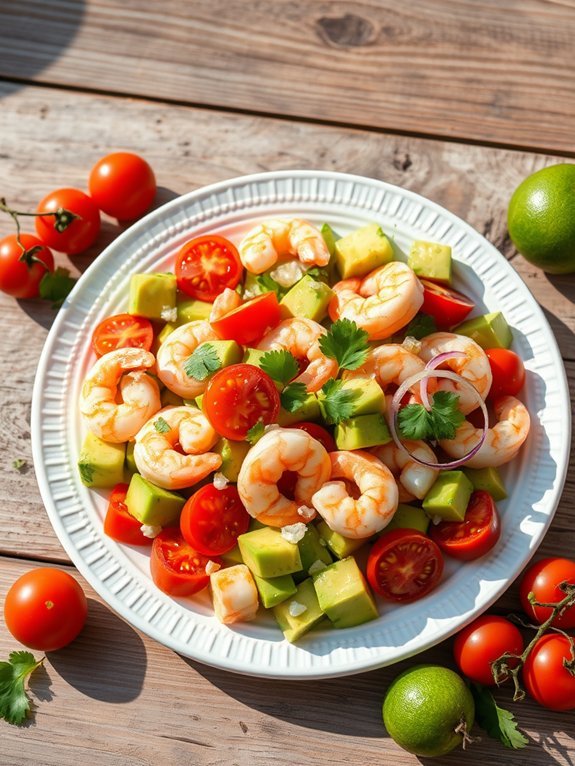
Shrimp and avocado salad is a revitalizing and satisfying dish to include in your keto meal plan. It’s packed with healthy fats, protein, and vibrant flavors that make it perfect for a light lunch or dinner. The combination of succulent shrimp, creamy avocado, and crisp vegetables creates a delicious balance that’s sure to please your taste buds while keeping your carbohydrate intake low.
This salad isn’t only easy to prepare but also customizable. You can add your favorite low-carb ingredients, such as cherry tomatoes or sliced cucumbers, or adjust the dressing to suit your palate. Whether you’re a keto novice or looking to expand your recipe repertoire, this shrimp and avocado salad is a great option that can be prepared in just a matter of minutes.
- 1 lb shrimp, peeled and deveined
- 2 ripe avocados, diced
- 1 cup cherry tomatoes, halved
- 1 small red onion, thinly sliced
- 1/4 cup fresh cilantro, chopped
- 2 tablespoons olive oil
- 1 tablespoon lime juice
- Salt and pepper to taste
In a medium skillet, heat olive oil over medium heat. Add the shrimp and season with salt and pepper. Cook until the shrimp turn pink and opaque, about 3-4 minutes, stirring occasionally.
In a large mixing bowl, combine the cooked shrimp, diced avocados, cherry tomatoes, red onion, and cilantro. Drizzle with lime juice, gently toss to combine, and serve immediately.
When preparing this shrimp and avocado salad, it’s crucial to use fresh ingredients for the best flavor and texture. Make sure your avocados are ripe but firm to prevent them from becoming mushy in the salad.
Additionally, for added crunch and nutrients, consider including some mixed greens or arugula as a base. This salad is best enjoyed fresh, but you can store leftovers in an airtight container in the refrigerator for up to a day.
Buffalo Chicken Lettuce Wraps
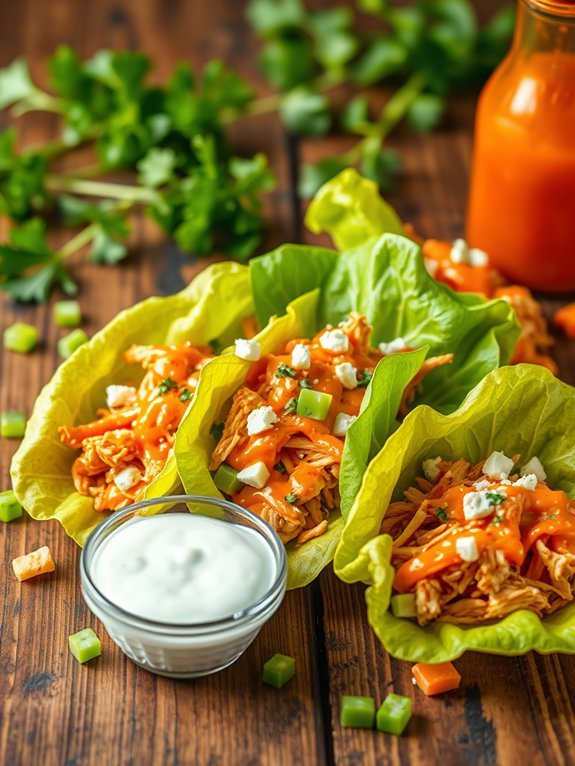
Buffalo Chicken Lettuce Wraps are a delightful and healthy way to enjoy the flavors of Buffalo chicken without the carbs. Perfect for a quick lunch or a light dinner, these wraps use crisp lettuce leaves as a substitute for traditional tortillas, making them not only low-carb but also gluten-free. The heat from the buffalo sauce combined with the creaminess of the ranch dressing creates a delicious flavor profile that’s sure to satisfy your cravings.
Making these wraps at home is simple and quick, making it an ideal choice for meal prepping or serving at gatherings. With just a handful of ingredients, you can whip up a batch of these scrumptious wraps that are packed with flavor and nutrients. Whether you’re following a keto diet or just looking for healthier meal options, Buffalo Chicken Lettuce Wraps are sure to become a staple in your recipe collection.
Ingredients:
- 1 pound of cooked shredded chicken
- 1/2 cup of buffalo sauce
- 1/4 cup of ranch dressing (preferably keto-friendly)
- 1 head of butter or romaine lettuce
- 1/2 cup of diced celery
- 1/4 cup of crumbled blue cheese (optional)
- Fresh chopped parsley for garnish (optional)
To prepare Buffalo Chicken Lettuce Wraps, begin by mixing the shredded chicken with buffalo sauce in a bowl until evenly coated. Take the leaves of lettuce and gently rinse them under cold water to remove any dirt. Pat them dry with a paper towel.
Assemble the wraps by placing a generous portion of the buffalo chicken mixture in the center of each lettuce leaf, followed by the diced celery, ranch dressing, and crumbled blue cheese, if using. Roll the lettuce leaves around the filling and serve immediately.
When making Buffalo Chicken Lettuce Wraps, feel free to customize the ingredients to suit your taste. You can adjust the spice level of the buffalo sauce according to your preference or even add additional toppings like avocado slices or sliced green onions for extra flavor.
Additionally, consider using leftovers from a rotisserie chicken for an even quicker preparation time. Enjoy these wraps fresh, and store any leftover filling in an airtight container in the refrigerator for a quick meal later on.
Coconut Flour Pancakes

Coconut flour pancakes are a delicious and gluten-free alternative to traditional pancakes, making them a perfect fit for the ketogenic diet. The natural sweetness and unique flavor of coconut flour lend a delightful twist, making breakfast time exciting and satisfying. Packed with healthy fats and fiber, these pancakes not only help keep you full longer but also provide essential nutrients, making them a wholesome choice for any meal of the day.
Making coconut flour pancakes is simple and requires only a few ingredients. They cook up fluffy and are perfect topped with sugar-free syrup, fresh berries, or a dollop of Greek yogurt. Whether you’re new to the keto lifestyle or just looking for a tasty breakfast option, these pancakes are quick to whip up and will surely please the whole family.
- 1/2 cup coconut flour
- 4 large eggs
- 1/4 cup unsweetened almond milk (or coconut milk)
- 1 tablespoon sweetener (like erythritol or stevia)
- 1 teaspoon baking powder
- 1/4 teaspoon salt
- 2 tablespoons melted coconut oil or butter
- Optional: vanilla extract or cinnamon for additional flavor
In a mixing bowl, combine the coconut flour, sweetener, baking powder, and salt. In another bowl, whisk together the eggs, almond milk, melted coconut oil, and any optional flavorings. Gradually mix the wet ingredients into the dry ingredients until you achieve a smooth batter.
Preheat a non-stick skillet over medium heat and lightly grease it with butter or oil. Pour 1/4 cup of batter onto the heated skillet and cook for about 2-3 minutes on each side or until golden brown.
When cooking coconut flour pancakes, it’s essential to keep the batter thick but pourable, as coconut flour absorbs liquid much more than regular flour. If necessary, you can adjust the consistency by adding a little more almond milk. Additionally, be patient while cooking; they may take a bit longer than traditional pancakes, so make sure they’re cooked through before flipping. A low and slow approach will yield perfectly fluffy coconut flour pancakes!
Chocolate Avocado Mousse
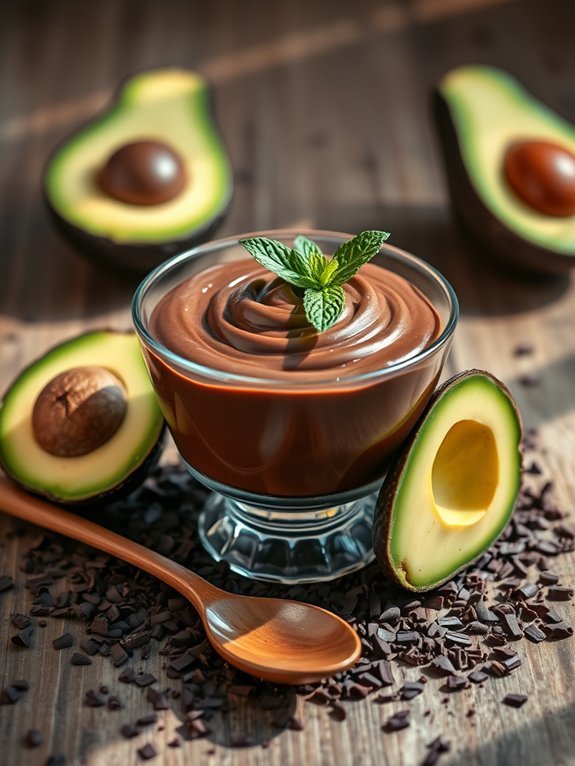
Indulging in a rich, creamy dessert while sticking to a keto diet can sometimes feel like an impossible task, but that’s where the delightful Chocolate Avocado Mousse comes into play. This luscious mousse takes advantage of ripe avocados that lend a smooth texture and healthy fats while remaining low in carbohydrates.
The combination of cocoa powder and sweetener creates a beautiful chocolate flavor, making this dish a guilt-free treat that will satisfy your sweet tooth. Perfect for beginners, this recipe requires minimal ingredients and is easy to prepare, making it ideal for those new to keto cooking.
Whether it’s for a special occasion or simply a treat for yourself, this mousse is sure to impress anyone with its incredible taste and silkiness. Plus, it’s a great way to sneak in more healthy fats and nutrients into your diet!
Ingredients:
- 2 ripe avocados
- 1/2 cup unsweetened cocoa powder
- 1/4 cup sweetener of choice (like erythritol or stevia)
- 1/4 cup unsweetened almond milk (or other low-carb milk)
- 1 teaspoon vanilla extract
- A pinch of salt
To make the mousse, start by scooping the flesh of the ripe avocados into a blender or a food processor. Add in the cocoa powder, sweetener, almond milk, vanilla extract, and a pinch of salt.
Blend the ingredients together until you achieve a creamy and smooth consistency. Taste and adjust sweetness if necessary, then transfer the mousse into serving bowls and refrigerate for at least an hour to allow it to set.
When preparing Chocolate Avocado Mousse, using perfectly ripe avocados is essential; they must be soft enough to blend smoothly without any lumps. Experimenting with different sweeteners can also yield different flavor profiles, so feel free to find the sweetener that best suits your taste.
Additionally, you could serve the mousse topped with some crushed nuts or unsweetened whipped cream for an extra treat!

