This post may contain affiliate links. Please read our policy page.
You can create delicious meals with just five ingredients, making cooking simpler than ever! Try Spaghetti Aglio E Olio for a quick pasta fix or Honey Garlic Shrimp for a sweet-savory delight. Enjoy a revitalizing Caprese Salad or zesty Lemon Herb Chicken. Beef Tacos are versatile and perfect for gatherings, while Balsamic Glazed Brussels Sprouts make a flavorful side. And don’t forget a sweet treat like Chocolate Covered Strawberries. Discover more easy recipes to impress!
Spaghetti Aglio E Olio

Spaghetti Aglio e Olio is a classic Italian dish that exemplifies simplicity and flavor. Originating from Naples, this pasta dish showcases how just a few quality ingredients can create something delectably satisfying.
With garlic, olive oil, and a hint of heat from red pepper flakes, you can indulge in a gourmet meal without spending hours in the kitchen. Perfect for those busy weeknights or a spontaneous dinner party, this dish is both quick and impressive.
The beauty of Spaghetti Aglio e Olio lies in its straightforward preparation. Those who appreciate the rich, aromatic qualities of sautéed garlic will find themselves enchanted by this recipe. Served with a sprinkle of fresh parsley and perhaps a dash of grated Parmesan, it’s a wonderful way to enjoy authentic Italian cuisine without any fuss.
Let’s explore the ingredients you’ll need to whip up this delightful dish.
- Spaghetti (400g)
- Extra virgin olive oil (100ml)
- Garlic (4 cloves, thinly sliced)
- Red pepper flakes (1 tsp)
- Fresh parsley (for garnish)
Cook the spaghetti in salted boiling water until al dente, following the package instructions. While the pasta cooks, heat the olive oil in a large pan over medium heat, then add the sliced garlic and red pepper flakes. Sauté until the garlic turns golden brown, ensuring it doesn’t burn.
Once the spaghetti is cooked, reserve a cup of pasta water, drain the rest, and add the spaghetti to the pan with garlic and oil. Toss everything together, adding reserved pasta water as needed to create a silky sauce, and garnish with freshly chopped parsley before serving.
When preparing Spaghetti Aglio e Olio, make sure to slice the garlic thinly to maximize its flavor and avoid burning it which can lead to bitterness. You can also adjust the amount of red pepper flakes to suit your spice preference.
For a twist, consider adding some freshly grated lemon zest or a splash of lemon juice for brightness. Enjoy, and remember that the secret to great Italian cooking is in the quality of the ingredients used!
Honey Garlic Shrimp
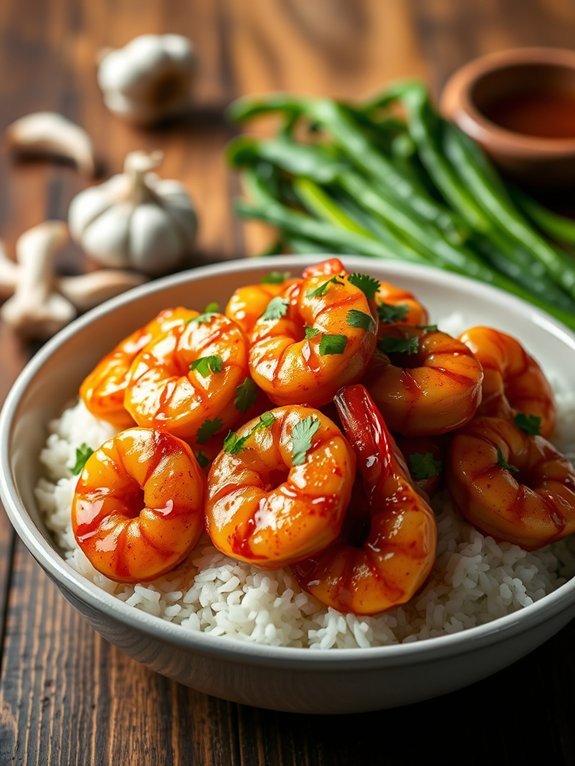
Honey Garlic Shrimp is a delightful dish that combines the sweet and savory flavors of honey and garlic with succulent shrimp. This meal is perfect for a quick weeknight dinner or even as an impressive dish for guests. It takes only a handful of ingredients to create a delicious meal that’s ready in no time. The shrimp takes on a beautiful glaze from the honey and garlic, making it both visually appealing and mouthwateringly tasty.
Cooking Honey Garlic Shrimp isn’t only simple but also versatile. You can serve it over rice, alongside steamed vegetables, or even toss it in a salad for a revitalizing twist. Plus, shrimp isn’t only delicious but also a great source of protein, making this meal not only fast and easy but also nutritious. In under 30 minutes, you can have this restaurant-quality dish on your table.
- 1 pound shrimp, peeled and deveined
- 1/4 cup honey
- 3 cloves garlic, minced
- 2 tablespoons soy sauce
- 1 tablespoon olive oil
In a large skillet, heat the olive oil over medium heat. Add the minced garlic and sauté for about 30 seconds until fragrant. Toss in the shrimp and cook for 2-3 minutes until they start to turn pink. Pour in the honey and soy sauce, then stir to coat the shrimp evenly. Cook for an additional 2-3 minutes until the shrimp are cooked through and the sauce has thickened slightly.
When making Honey Garlic Shrimp, it’s important to avoid overcooking the shrimp, as they can become tough and rubbery. Pay attention to the cooking time, as shrimp cooks very quickly.
You can also customize the flavors by adding a squeeze of lime or some red pepper flakes for a bit of heat. Fresh herbs like cilantro or chives can also be sprinkled on top for a burst of freshness before serving.
Caprese Salad
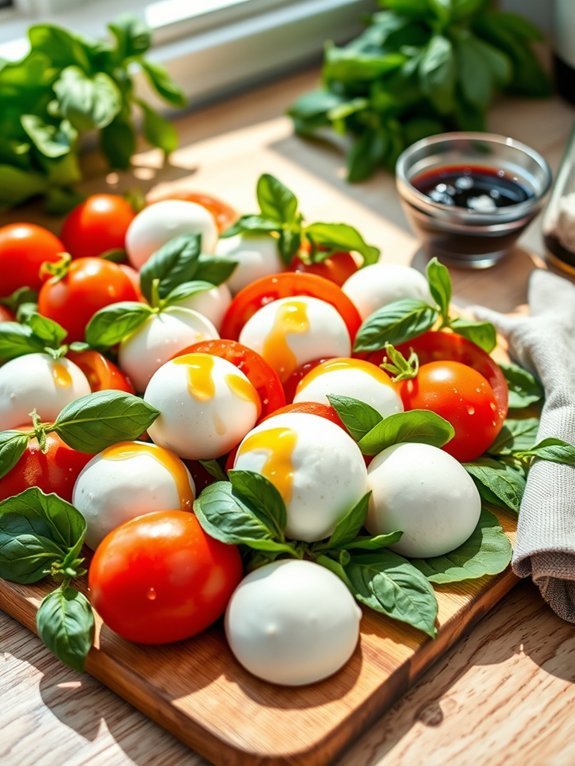
Caprese salad is a delightful Italian dish that showcases the simplicity and freshness of its ingredients. This classic salad is named after the island of Capri and is known for its vibrant colors that mirror the Italian flag: red tomatoes, white mozzarella, and green basil.
The combination of ripe tomatoes, creamy mozzarella, and fragrant basil makes it a perfect appetizer or side dish for any meal. Plus, it requires minimal preparation, making it an ideal choice for gatherings or a quick lunch.
The secret to a great Caprese salad lies in the quality of the ingredients. Using the freshest produce will elevate the flavors and make each bite a masterpiece. Extra-virgin olive oil, balsamic vinegar, and a sprinkle of salt bring everything together, enhancing the natural taste of each component.
This simple yet elegant dish isn’t only a feast for the eyes but also a celebration of the Italian culinary philosophy that values fresh ingredients in their best form.
- Ripe tomatoes (preferably heirloom or vine-ripened)
- Fresh mozzarella cheese
- Fresh basil leaves
- Extra-virgin olive oil
- Balsamic vinegar
To prepare the Caprese salad, slice the tomatoes and fresh mozzarella into even slices. Arrange them alternately on a serving platter, with a slice of tomato followed by a slice of mozzarella, and then a basil leaf on top. Continue this pattern until the platter is filled.
Drizzle with extra-virgin olive oil and balsamic vinegar, then finish with a sprinkle of salt to taste.
For an added dimension of flavor, consider using a high-quality balsamic glaze instead of regular balsamic vinegar so that it adds a sweet touch without making the salad too wet. You can also experiment with adding a pinch of black pepper or crushed red pepper flakes for a little heat.
If you want to prepare the salad in advance, keep the dressing separate until just before serving to maintain the freshness of the ingredients.
Recommended Items
Get ready to whip up some delicious meals with these handy products and tools!
Lemon Herb Chicken

Lemon Herb Chicken is a revitalizing and straightforward dish that can brighten any dinner table. With the zesty brightness of lemons and the earthy flavor of herbs, this recipe caters to both the flavor-seekers and those looking for a healthy meal. The beauty of this dish lies in its simplicity, requiring only five key ingredients, making it perfect for busy weeknights or casual gatherings.
Cooking Lemon Herb Chicken isn’t only easy but also versatile. You can serve it alongside a crisp salad, fluffy rice, or roasted vegetables, allowing for various pairing options that enhance the meal’s flavors. Whether you opt to grill, bake, or sauté, the succulent chicken infused with the tangy citrus and aromatic herbs is bound to impress family and friends alike.
Ingredients:
- 4 boneless, skinless chicken breasts
- 1/4 cup fresh lemon juice
- 2 tablespoons olive oil
- 2 teaspoons dried oregano
- Salt and pepper to taste
To prepare the Lemon Herb Chicken, start by marinating the chicken breasts in a mixture of lemon juice, olive oil, oregano, salt, and pepper for at least 30 minutes. Preheat your grill or oven to medium-high heat. Cook the chicken for about 6-7 minutes per side on the grill or bake in the oven for 20-25 minutes, until the chicken is cooked through and no longer pink in the center.
Allow the chicken to rest for a few minutes before slicing and serving. When cooking Lemon Herb Chicken, it’s crucial to avoid overcooking to maintain the juiciness of the chicken. Using a meat thermometer can help confirm it reaches the safe internal temperature of 165°F.
Additionally, letting the chicken rest after cooking allows the juices to redistribute, making each bite tender and full of flavor. Don’t hesitate to customize the herbs or add your favorite spices to the marinade for an extra twist!
Beef Tacos

Beef tacos are a versatile and satisfying meal that can easily be prepared with just a handful of ingredients, making them perfect for busy weeknights or casual gatherings. The beauty of this dish lies not only in its simplicity but also in its capacity to be customized according to personal tastes.
Juicy beef, coupled with fresh toppings and wrapped in soft or crunchy taco shells, create a delightful experience for your taste buds. With just five essential ingredients, this beef taco recipe is both quick and delicious. Ideal for those seeking both flavor and convenience, these tacos can be assembled in no time.
Whether you’re feeding a family or hosting friends, this dish remains an approachable option that brings everyone together around the table for a fun and tasty meal.
- Ground beef
- Taco seasoning
- Taco shells (hard or soft)
- Shredded cheese
- Lettuce
In a skillet over medium heat, brown the ground beef until fully cooked, breaking it into small pieces as it cooks. Once cooked, drain any excess fat and stir in the taco seasoning according to the instructions on the package, adding the appropriate amount of water if needed.
Let the mixture simmer for a few minutes until the flavors meld together. Next, carefully spoon the beef mixture into taco shells and top with shredded cheese and lettuce.
To elevate your beef tacos, consider adding additional toppings such as diced tomatoes, sour cream, salsa, or avocado for an extra burst of flavor and texture. You can also experiment with different proteins, such as chicken or turkey, for a variation on the classic beef recipe.
Don’t be afraid to mix and match ingredients to suit your preferences or make use of what you have on hand. Enjoy your cooking process and have fun with presentation—tacos are as much about the experience as they’re about the taste!
Pesto Zucchini Noodles

Pesto Zucchini Noodles, also known as “zoodles,” are a delicious and simple way to enjoy a healthy meal. This dish is perfect for those who want to reduce their carbohydrate intake or simply want to incorporate more vegetables into their diet. Using zucchini as a base provides a light and invigorating alternative to traditional pasta, while the vibrant pesto adds a burst of flavor that elevates the dish to new heights.
With only five ingredients required, this recipe is quick to prepare and perfect for a weeknight dinner.
To make your Pesto Zucchini Noodles even more satisfying, consider adding grilled chicken or cherry tomatoes for some added protein and color. The fresh basil in pesto perfectly complements the mild flavor of zucchini, making this dish a favorite for both kids and adults. Not only is it nutritious, but it also comes together in just a matter of minutes, making it a great option for busy lifestyles.
- 2 medium zucchinis
- 1 cup fresh basil pesto
- 1 tablespoon olive oil
- Salt, to taste
- Grated Parmesan cheese, for serving
Begin by spiralizing the zucchinis to create noodle-like strands, or use a vegetable peeler to create thin ribbons. In a large skillet, heat the olive oil over medium heat. Add the zucchini noodles and sauté for 2-3 minutes until just tender.
Remove the skillet from heat and stir in the pesto until the noodles are well-coated. Serve immediately, garnished with grated Parmesan cheese and a sprinkle of salt to taste.
When making Pesto Zucchini Noodles, it’s essential not to overcook the zucchini, as they can become mushy. Aim for a tender yet firm texture for the best experience. You can also customize your pesto by adding nuts or even spinach to enhance the flavor.
Additionally, for a festive touch, try adding fresh cherry tomatoes or cooked protein for a more filling meal. Enjoy your healthy and delightful dish!
Step-by-Step Cooking Guide
Greek Yogurt Parfait

A Greek Yogurt Parfait is a wonderfully simple yet delicious way to start your day or enjoy as a healthy snack. Combining the creamy texture of Greek yogurt with layers of fresh fruits and crunchy granola, this dish offers a delightful balance of flavors and textures. The best part is that it’s versatile, allowing you to customize it with your favorite fruits or even include a drizzle of honey for added sweetness.
This parfait not only pleases the palate but also packs a nutritious punch. Greek yogurt is rich in protein, which can help keep you feeling full longer, while the fruits provide essential vitamins and minerals. Additionally, granola adds fiber and energy. Assembling a Greek Yogurt Parfait takes minimal time, making it perfect for busy mornings or when you’re in need of a rejuvenating treat.
- 2 cups Greek yogurt
- 1 cup mixed fresh fruits (such as berries, banana, or peaches)
- 1 cup granola
- 2 tablespoons honey (optional)
- 1 teaspoon vanilla extract (optional)
In a tall glass or bowl, start by layering half of the Greek yogurt at the bottom. Follow with a layer of mixed fresh fruits, then add a layer of granola. Repeat this process with the remaining yogurt, fruits, and granola. If desired, you can drizzle honey over the top or mix in the vanilla extract for extra flavor before serving.
When preparing a Greek Yogurt Parfait, feel free to experiment with different combinations of fruits or even add nuts and seeds for extra crunch and nutrition. For a beautiful presentation, choose a clear glass to showcase the layers.
If making in advance, consider keeping the granola separate until you’re ready to eat to maintain its crispness.
Vegetable Stir-Fry
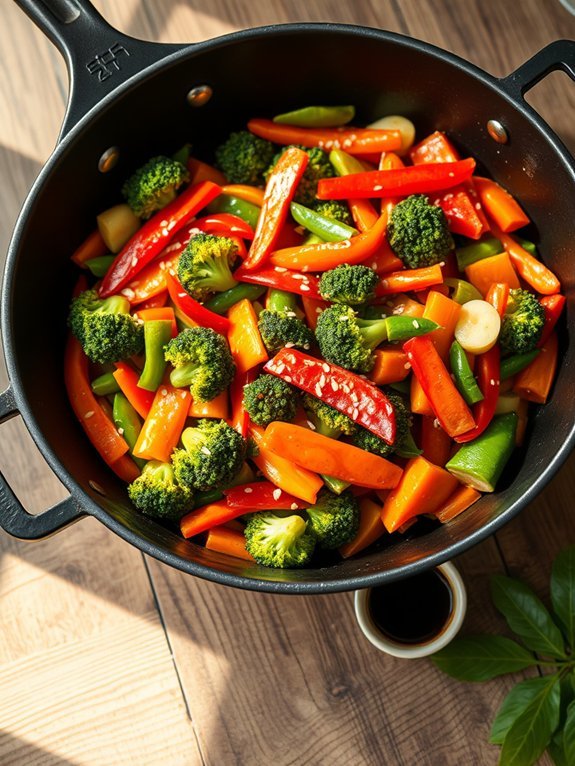
Vegetable stir-fry is a quick and vibrant dish that showcases the natural flavors and colors of fresh vegetables while keeping the cooking process simple. Perfect for weeknight dinners or a speedy lunch, this dish is versatile and can easily adapt to whatever veggies you have on hand. With just five ingredients, you can create a delicious, healthy meal that’s packed with nutrients and taste.
The magic of vegetable stir-fry lies in its ability to combine freshness and simplicity without sacrificing flavor. By using a variety of colorful vegetables, not only do you create a visually appealing dish, but you also guarantee a range of textures and flavors in every bite. This recipe allows you to explore different tastes by swapping in your favorite vegetables, making it a versatile choice for any palate.
- 2 cups mixed vegetables (e.g., bell peppers, broccoli, carrots, snap peas)
- 2 tablespoons soy sauce
- 1 tablespoon vegetable oil
- 1 tablespoon garlic, minced
- Cooked rice or noodles, to serve
In a large skillet or wok over medium-high heat, add the vegetable oil and let it heat up. Once hot, add the minced garlic and sauté for about 30 seconds until fragrant. Then, toss in the mixed vegetables and stir-fry for 5-7 minutes, or until they’re tender-crisp.
Finally, pour in the soy sauce, stirring well to coat the vegetables, and cook for another 2 minutes until everything is well combined.
To make your vegetable stir-fry even more exciting, consider adding a splash of sesame oil or a sprinkle of sesame seeds for additional flavor. You can also incorporate a protein source such as tofu or chicken to make the dish heartier.
For added freshness, toss in some green onions or cilantro just before serving. Remember to keep the heat high and the cooking time short to guarantee your vegetables maintain their vibrant color and crisp texture.
Balsamic Glazed Brussels Sprouts
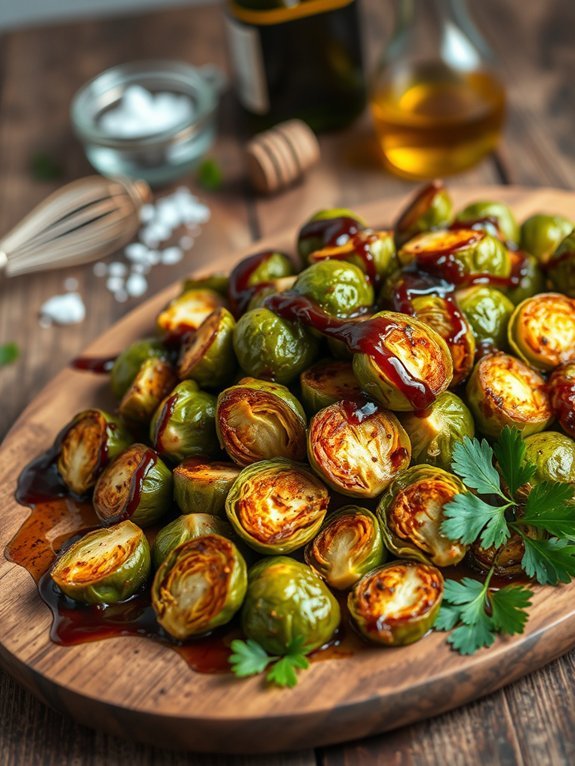
Balsamic glazed Brussels sprouts are a delightful combination of savory, sweet, and tangy flavors that elevate this humble vegetable to a whole new level. This dish isn’t only easy to prepare but also a perfect side for any meal, whether you’re entertaining guests or enjoying a quiet dinner at home. The rich balsamic vinegar complementing the natural nuttiness of Brussels sprouts creates a mouthwatering experience that makes even those skeptical about Brussels sprouts reconsider.
To achieve the perfect balance of flavors, roasting the Brussels sprouts is key. This method caramelizes the outer leaves, adding a depth of flavor that pairs beautifully with the balsamic glaze. With just five simple ingredients, you’ll find this recipe isn’t only budget-friendly but also quick to whip up, making it an ideal choice for busy weeknights or festive gatherings alike.
- 1 pound Brussels sprouts, trimmed and halved
- ¼ cup balsamic vinegar
- 2 tablespoons honey
- 2 tablespoons olive oil
- Salt and pepper to taste
Preheat your oven to 400°F (200°C). In a large bowl, combine the Brussels sprouts, olive oil, salt, and pepper, tossing them together until well-coated. Spread the Brussels sprouts in a single layer on a baking sheet and roast for about 20-25 minutes, or until they’re golden brown and tender.
While the sprouts are roasting, mix the balsamic vinegar and honey in a small saucepan over medium heat. Cook until the mixture thickens slightly, about 5 minutes. Drizzle the balsamic glaze over the roasted Brussels sprouts and toss to combine before serving.
For best results, try to select Brussels sprouts that are firm and vibrant in color. Smaller sprouts tend to be sweeter and more tender, so choose those when possible.
To guarantee even cooking, make sure the Brussels sprouts are spread out in a single layer on the baking sheet without overcrowding; this allows them to roast properly instead of steaming. Feel free to experiment by adding garlic or crispy bacon bits for additional flavor, or add a sprinkle of parmesan cheese before serving for an extra savory touch!
Mushroom Risotto
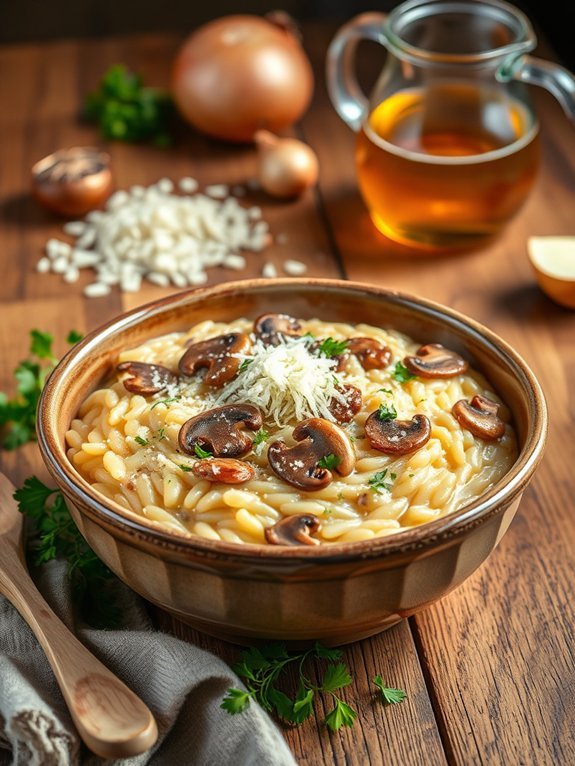
Mushroom risotto is a creamy, flavorful dish that embodies the warmth and comfort of Italian cuisine. With its simple ingredients, it transforms into a rich and satisfying meal that’s perfect for any occasion. The earthy taste of mushrooms combined with the silkiness of Arborio rice offers a delightful experience that’s sure to impress even the most discerning palates.
What makes this dish so special is its versatility. You can easily adjust the flavors by using different types of mushrooms or adding some fresh herbs and cheese for an enhanced taste.
While traditional risottos can require constant stirring and attention, this 5-ingredient version streamlines the process, making it accessible even for beginner cooks. Gather the essential ingredients, and get ready to whip up a delicious mushroom risotto!
- 1 cup Arborio rice
- 4 cups vegetable or chicken broth
- 1 cup sliced mushrooms
- 1/2 cup grated Parmesan cheese
- 1 small onion, finely chopped
In a large saucepan, heat a tablespoon of olive oil over medium heat and sauté the chopped onion until translucent. Add the sliced mushrooms and cook until they soften, about 5 minutes.
Stir in the Arborio rice and toast it for a couple of minutes before gradually adding the warm broth, one ladle at a time, stirring constantly. Once absorbed, continue adding broth until the rice is creamy and al dente. Finally, stir in the grated Parmesan cheese for added richness and seasoning.
To enhance your mushroom risotto, consider using homemade broth for deeper flavor and aroma. Be mindful not to rush the process; patience while adding the broth gradually will result in the perfect creamy consistency.
If you want to elevate the dish further, garnish with freshly chopped parsley, a drizzle of truffle oil, or serve with a side of roasted vegetables for added color and nutrition. Enjoy your cooking adventure!
BBQ Chicken Sandwiches

BBQ chicken sandwiches are a delicious and quick meal that can be made with minimal ingredients and effort, making them perfect for busy weeknights or casual gatherings. The combination of tender, flavorful chicken smothered in tangy BBQ sauce and served on a soft bun creates a satisfying dish that everyone will love.
Not only are these sandwiches easy to prepare, but they also allow you to customize the toppings to suit your taste or dietary preferences. This recipe requires just five key ingredients, making it straightforward and budget-friendly.
Whether you choose to grill, bake, or slow-cook your chicken, you can have a tasty meal ready in no time. Add a side of coleslaw or potato chips to complete the perfect BBQ experience, and enjoy the warmth and satisfaction of homemade comfort food.
- 2 boneless, skinless chicken breasts
- 1 cup BBQ sauce (your choice)
- 4 hamburger buns
- 1 cup shredded lettuce
- 1/2 cup sliced pickles
To prepare the BBQ chicken sandwiches, start by cooking the chicken breasts using your preferred method (grilling, baking, or slow cooking) until fully cooked and tender.
Once cooked, shred the chicken using two forks and mix it with the BBQ sauce until the chicken is evenly coated. Toast the hamburger buns lightly, then pile a generous amount of the BBQ chicken mixture onto each bun. Top with shredded lettuce and sliced pickles, then serve immediately.
When making BBQ chicken sandwiches, feel free to experiment with different types of BBQ sauce for varied flavors, such as sweet, smoky, or spicy. Additionally, you can add extras like sliced red onions, cheese, or even jalapeños for a little kick.
If you’re preparing these sandwiches for a crowd, consider doubling the recipe and setting up a DIY sandwich station where guests can assemble their own meals according to their preferences. Enjoy!
Chocolate Covered Strawberries

Chocolate covered strawberries are a delicious treat that combines the sweetness of strawberries with the rich flavor of chocolate. They’re perfect for special occasions, a romantic dessert, or simply as a delightful snack. The beauty of this recipe is its simplicity—using just five ingredients, you can whip up these delectable sweets in no time.
To make chocolate covered strawberries, you’ll need fresh, ripe strawberries and high-quality chocolate. The contrast between the juicy fruit and the smooth chocolate creates a wonderful balance of flavors. You can also add toppings like sprinkles or crushed nuts to enhance the appearance and add a little extra texture. With just a few steps, you’ll have a stunning dessert that’s sure to impress your family and friends.
- Fresh strawberries
- Semi-sweet chocolate (or milk chocolate)
- White chocolate (optional, for drizzling)
- Parchment paper
- Sprinkles or crushed nuts (optional)
Begin by washing the strawberries and patting them dry with a paper towel—make certain they’re fully dry to guarantee the chocolate adheres properly. Melt the semi-sweet chocolate in a microwave-safe bowl in 20-second intervals, stirring between each interval until smooth.
Once melted, dip each strawberry into the chocolate, coating it about two-thirds of the way up, and then place it on a parchment-lined baking sheet. If desired, you can melt white chocolate and drizzle it over the dipped strawberries before allowing them to set in the refrigerator for about 30 minutes.
When preparing chocolate covered strawberries, selecting the right chocolate is key. Opt for high-quality chocolate for the best flavor and smoothness. Also, make sure your strawberries are thoroughly dry and at room temperature before dipping, as moisture can cause the chocolate to seize.
Feel free to personalize your treats with different toppings, and store any leftovers in the refrigerator to maintain freshness. Enjoy your delicious creation!

