This post may contain affiliate links. Please read our policy page.
Baking bread at home is fun and rewarding! You can start with classic recipes like White and Whole Wheat Bread, or try something unique like Easy Focaccia and No-Knead Bread. If you’re looking for quick options, Banana Bread and Sweet Dinner Rolls are perfect. Each recipe features simple steps and accessible ingredients, making your baking experience enjoyable. Stick around to discover more easy recipes that will help you achieve baking success and impress everyone with your delicious creations!
Classic White Bread

Classic White Bread is a delightful staple that’s perfect for beginners looking to hone their baking skills. Its simple ingredients and straightforward process make it an ideal project for those new to the art of bread-making. This bread has a soft, fluffy texture that’s perfect for sandwiches, toast, or simply enjoying with butter and jam. The aroma of freshly baked bread wafting through your kitchen is sure to warm your heart and invite family and friends to gather around the table.
To get started, you don’t need any special equipment other than some basic kitchen tools. Measuring cups, a mixing bowl, and a baking pan will suffice!
As you blend simple ingredients such as flour, yeast, water, and salt, you’ll quickly learn the transformative power of kneading and proofing dough. With a little patience and practice, you’ll soon be enjoying your very own homemade classic white bread that’s both delicious and satisfying.
Ingredients:
- 4 cups all-purpose flour
- 2 teaspoons instant yeast
- 2 teaspoons salt
- 1 tablespoon sugar
- 1 ½ cups warm water (110°F)
- 2 tablespoons unsalted butter (melted)
Combine all the dry ingredients in a large mixing bowl, then gradually add the warm water and melted butter. Mix until a shaggy dough forms. Knead the dough on a floured surface for about 8-10 minutes until it becomes smooth and elastic. Place it in a greased bowl, cover with a cloth, and let it rise in a warm place for about 1-2 hours or until it doubles in size.
Preheat your oven to 375°F (190°C). Shape the dough into a loaf and place it in a greased 9×5-inch pan. Let it rise again for 30-45 minutes, then bake for 30-35 minutes until golden brown. Let it cool before slicing.
When baking classic white bread, it’s important to pay attention to the temperature of the water you use, as too hot or too cold can affect yeast activation. If your kitchen is cool, consider placing the dough near a warm oven to encourage proper rising.
Additionally, be sure to allow the bread to cool completely before slicing, as this helps achieve a better texture and prevents the bread from becoming gummy. Finally, don’t hesitate to experiment with variations, like adding herbs or spices, once you’re comfortable with the basic recipe!
Whole Wheat Bread
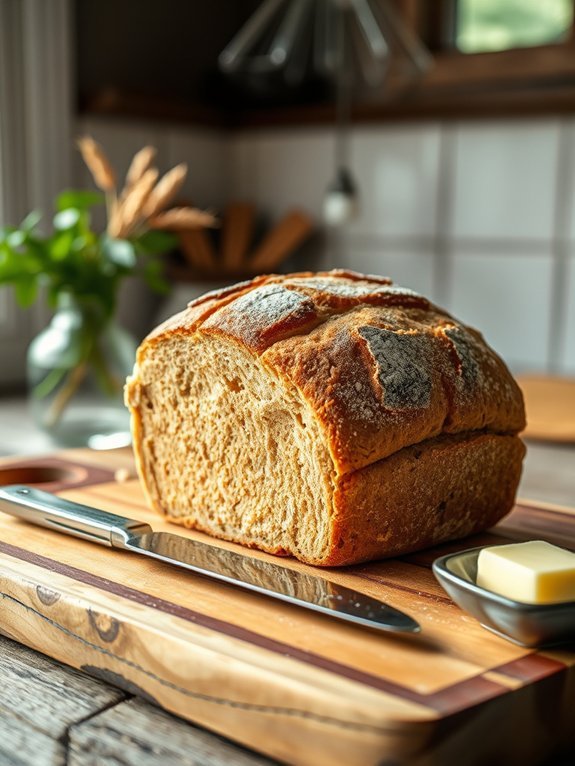
Whole wheat bread is a nutritious and hearty option that’s perfect for beginners venturing into the world of baking. Made primarily from whole wheat flour, this bread isn’t only rich in fiber but also offers a wonderfully nutty flavor and a dense, satisfying texture. Whole wheat bread can be enjoyed in numerous ways, whether as a slice for your morning toast, a base for a delicious sandwich, or simply enjoyed fresh out of the oven with a pat of butter.
The process of making whole wheat bread is straightforward and rewarding. You’ll find that this recipe uses simple ingredients, many of which you may already have in your pantry. With a little patience and practice, you’ll be able to master this wholesome bread that boasts homemade goodness.
Plus, the aroma of baking bread will fill your kitchen, making the whole experience even more enjoyable.
Ingredients:
- 3 cups whole wheat flour
- 1 ½ cups warm water
- 2 tablespoons honey or sugar
- 2 ¼ teaspoons active dry yeast (1 packet)
- 1 teaspoon salt
- 2 tablespoons olive oil or melted butter
In a large mixing bowl, combine the warm water, honey (or sugar), and yeast. Let it sit for about 5-10 minutes until foamy.
Then, add the whole wheat flour, salt, and olive oil (or melted butter) to the mixture. Stir until a dough forms, then knead on a floured surface for about 8-10 minutes until smooth and elastic.
Place the dough in a greased bowl, cover it with a damp cloth, and let it rise in a warm place until doubled in size, which typically takes around 1-2 hours.
Punch down the dough and shape it into a loaf, then place it in a greased loaf pan. Let it rise again for about 30-45 minutes before baking in a preheated oven at 350°F (175°C) for 30-35 minutes or until golden brown.
When making whole wheat bread, it’s important to adjust the hydration level as whole wheat flour absorbs more water than all-purpose flour. If your dough feels too dry, consider adding a little more warm water a tablespoon at a time until you achieve the desired consistency.
Additionally, allow the bread to cool completely before slicing, as this helps improve the texture and flavor. Store any leftovers in an airtight container to maintain freshness.
Easy Focaccia

Focaccia is a delicious Italian flatbread that’s both inviting and simple to make, perfect for beginners looking to hone their baking skills. Its soft, chewy texture and crispy crust make it a versatile bread that can be flavored with a variety of toppings. Whether you enjoy it as a side with pasta, as a base for sandwiches, or simply on its own with a dip of olive oil, focaccia can be customized to suit your palate.
This recipe will guide you through the basic steps to create a classic focaccia bread. With minimal ingredients and hands-on time, you’ll find this recipe easy to follow and great for introducing new bakers to the joys of homemade bread without the need for complicated techniques. The smell of freshly baked focaccia wafting through your kitchen will be hard to resist!
Ingredients:
- 4 cups all-purpose flour
- 2 teaspoons salt
- 1 tablespoon sugar
- 1 packet (2 ¼ teaspoons) active dry yeast
- 1 ¾ cups warm water (about 110°F/43°C)
- ⅓ cup olive oil, plus extra for drizzling
- Sea salt for topping
- Fresh herbs (e.g., rosemary, thyme) for flavoring
In a large mixing bowl, combine the warm water and sugar, then sprinkle the yeast on top and let it sit for about 5-10 minutes until it becomes frothy. Add the flour, salt, and olive oil to the yeast mixture. Stir until a dough begins to form, then knead the dough on a floured surface for about 5-7 minutes until it’s smooth and elastic.
Place the kneaded dough in a lightly-oiled bowl and cover it with a damp cloth; let it rise in a warm place for about 1 hour, or until it has doubled in size. For best results, remember to let the dough rise properly; the longer rise helps develop flavor and improves the texture.
Don’t skip the olive oil drizzle before baking—the oil not only adds flavor but helps create that desirable crispy crust. If you’re experimenting with toppings, be creative but don’t overload the dough, as it may affect the cooking time and texture.
Finally, serve warm for the best taste and texture, and enjoy the delightful aroma wafting through your home!
Recommended Items
Get ready to bake delicious bread with our top product and equipment picks—let’s get started!
Products
No-Knead Bread

No-Knead Bread is the perfect introduction for beginners looking to explore the wonderful world of bread making without the labor-intensive process of kneading. This method relies on time and a touch of chemistry to create a beautifully crusty loaf with a soft, airy interior. By allowing the dough to rise slowly, you develop incredible flavors with minimal effort, making it not only a hands-off recipe but also a delightful project for aspiring bakers.
The best part about No-Knead Bread is how simple and forgiving it is. With just a few staple ingredients and a little patience, you’ll be rewarded with a rustic, homemade loaf that’s both satisfying and delicious. Whether you’re enjoying it fresh out of the oven or toasted with butter, this bread elevates any meal or becomes a perfect companion for your favorite spreads.
Ingredients:
- 3 cups all-purpose flour
- 1 1/2 teaspoons salt
- 1/2 teaspoon instant or active dry yeast
- 1 1/2 cups warm water
In a large mixing bowl, combine the flour, salt, and yeast, stirring to mix well. Gradually add the warm water, using a wooden spoon or spatula to stir until a shaggy, sticky dough forms. Cover the bowl with plastic wrap or a damp kitchen towel and let it rise at room temperature for 12 to 18 hours, until bubbles form and the surface appears puffy.
Once ready, prepare a well-floured surface and turn the dough out, folding it over onto itself a few times. Preheat your oven to 450°F (230°C) while the dough rests for about 30 minutes.
To achieve the perfect crusty exterior, it’s essential to bake your bread in a preheated Dutch oven or heavy covered pot. This method traps steam, creating a professional-quality loaf. Don’t worry if your dough seems overly sticky; that’s normal for no-knead recipes.
You can also try varying the flavor by adding herbs, garlic, or cheese to the dough before the first rise. Enjoy the process and remember that each loaf is a chance to learn, so don’t hesitate to experiment with different ingredient combinations in future bakes!
Banana Bread
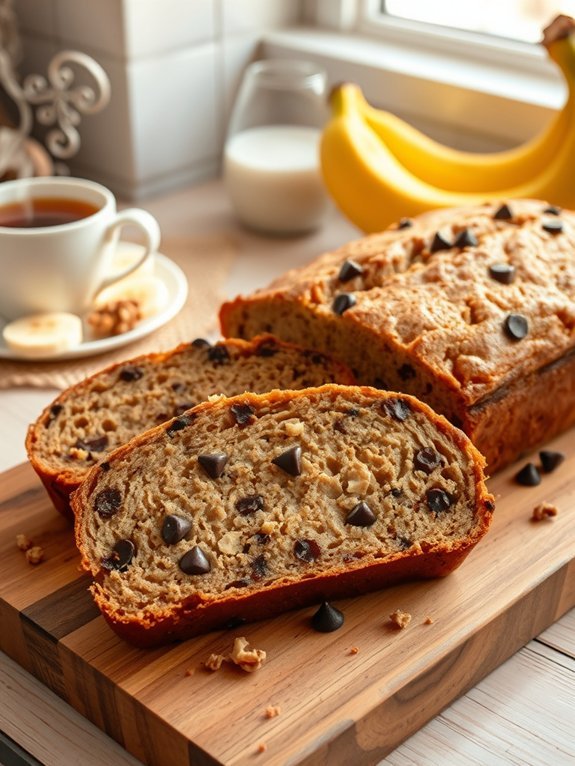
Banana bread is a beloved classic that combines the natural sweetness of ripe bananas with the comforting texture of homemade bread. Its simple preparation makes it an ideal recipe for beginners, even those who may have little to no baking experience.
Not only is it delicious as a breakfast option or snack, but it also provides a great way to use up overripe bananas that would otherwise go to waste.
This easy banana bread recipe is adaptable, allowing you to customize it with your favorite ingredients, such as nuts or chocolate chips. The moist and flavorful bread pairs perfectly with a warm cup of tea or coffee, making it a cherished addition to your baking repertoire.
Plus, with just a few basic ingredients and a little bit of time, you’ll have a delectable treat to share with family and friends.
- 3 ripe bananas
- 1/3 cup melted butter
- 1 teaspoon baking soda
- Pinch of salt
- 3/4 cup sugar
- 1 large egg, beaten
- 1 teaspoon vanilla extract
- 1 cup all-purpose flour
Preheat your oven to 350°F (175°C). In a mixing bowl, mash the ripe bananas with a fork until smooth, then mix in the melted butter.
Add the baking soda and salt, followed by the sugar, beaten egg, and vanilla extract. Finally, stir in the flour until just combined.
Pour the batter into a greased loaf pan and bake for 60-65 minutes, or until a toothpick inserted into the center comes out clean. Let it cool before slicing.
For even more flavor, consider adding chopped nuts, such as walnuts or pecans, or chocolate chips to the batter before baking. Make sure to use very ripe bananas, as they’ll provide the best flavor and sweetness to your bread.
If you’re feeling adventurous, you can experiment with spices like cinnamon or nutmeg for added warmth. Finally, store any leftovers in an airtight container to keep the banana bread fresh for several days.
Step-by-Step Cooking Guide
Simple Soda Bread
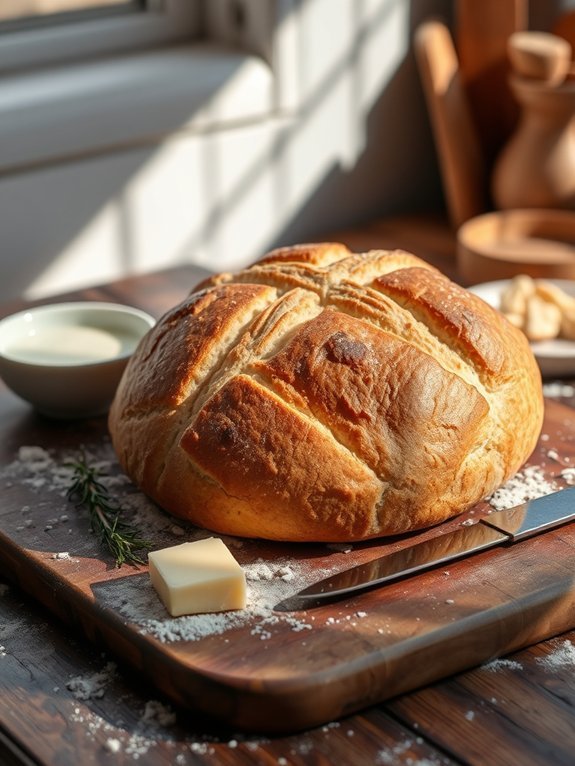
Simple Soda Bread is a quick and easy recipe perfect for beginners who want to get into baking without the need for yeast and long rising times. With just a few basic ingredients, you can whip up a homemade loaf that’s crisp on the outside and soft on the inside.
This no-fuss bread is a great accompaniment to soups, stews, or just a good slather of butter. What sets soda bread apart is its use of baking soda as a leavening agent, which combines with the acidity of buttermilk to create a light and fluffy texture.
The simplicity of this recipe makes it an ideal project for novice bakers or anyone looking for a quick and satisfying bread recipe. Enjoy the warm, freshly baked aroma filling your kitchen as you prepare this delightful loaf!
- 4 cups all-purpose flour
- 1 teaspoon baking soda
- 1 teaspoon salt
- 1 ¾ cups buttermilk
Preheat your oven to 425°F (220°C). In a large bowl, whisk together the flour, baking soda, and salt. Make a well in the center and pour in the buttermilk.
Stir until the dough begins to come together, then turn it out onto a lightly floured surface and knead gently for just a minute or two until smooth. Shape the dough into a round loaf, place it on a baking sheet, and cut a deep cross in the top before baking for 30-40 minutes until golden brown.
When making soda bread, it’s important not to over-knead the dough, as too much handling can create a dense texture. For added flavor, consider incorporating ingredients such as herbs, cheese, or dried fruits into the dough.
If buttermilk is unavailable, you can make a quick substitute by adding a tablespoon of vinegar or lemon juice to regular milk. Enjoy your soda bread warm, and store any leftovers wrapped tightly to keep it fresh!
Honey Oat Bread
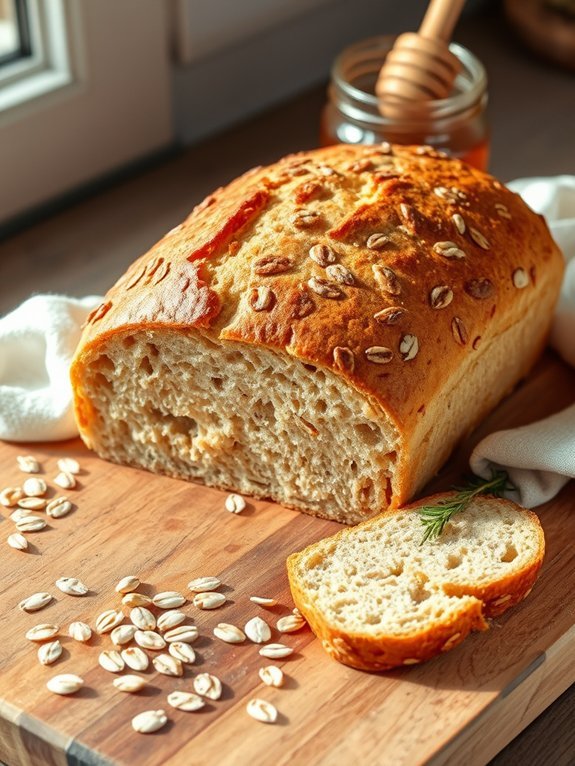
Honey oat bread is a delightful and wholesome option that’s perfect for beginners looking to bake their own bread at home. With its naturally sweet flavor from the honey and the added nutrition of rolled oats, this bread can be enjoyed on its own, as toast, or even as a base for delicious sandwiches. Its soft, chewy texture and rustic appearance make it an appealing choice for any meal.
The simplicity of this recipe makes it accessible for novice bakers, so there’s no need to feel intimidated. With just a few ingredients and straightforward steps, you can create a loaf that fills your home with the inviting scent of freshly baked bread. Plus, the use of honey not only adds sweetness but also helps to keep the bread moist for longer.
- 2 cups rolled oats
- 1 ½ cups warm water
- 1/4 cup honey
- 2 tablespoons olive oil
- 2 teaspoons salt
- 2 ½ teaspoons active dry yeast
- 3 to 4 cups all-purpose flour
In a large mixing bowl, combine the warm water, honey, and yeast, allowing it to sit for about 5 minutes until it becomes frothy. Then, add the olive oil, salt, and rolled oats to the mixture, followed by gradually incorporating the flour, one cup at a time, until the dough forms a soft consistency.
Knead the dough on a floured surface for about 10 minutes until it becomes smooth and elastic, then place it in a greased bowl, cover, and let it rise in a warm area for about an hour or until it has doubled in size.
When baking honey oat bread, remember to preheat your oven and ascertain it reaches the right temperature before placing the loaf inside. This helps to create the perfect crust. If you want a softer crust, you can cover the bread with a damp cloth after baking for a few minutes.
Additionally, consider adding a couple of tablespoons of seeds or nuts for extra flavor and texture, or use whole wheat flour in place of some of the all-purpose flour to make it even healthier!
Garlic Bread

Garlic bread is a delicious and aromatic accompaniment to a variety of meals, particularly pasta and soups. Its warm, buttery goodness combined with the distinct taste of garlic creates a comforting treat that everyone loves.
Furthermore, this dish is incredibly easy to prepare, making it perfect for beginners who want to impress their family or friends with their cooking skills. With just a few simple ingredients, you can enjoy this classic side dish in no time.
Making garlic bread at home allows you to customize the flavors according to your preference. You can choose to use fresh garlic for a more robust flavor or garlic powder for convenience.
Additionally, by using a good quality bread, whether it be a baguette, Italian loaf, or even a simple sandwich bread, you can elevate the overall taste. So, gather your ingredients and get ready to enjoy this delightful treat!
- 1 loaf of French or Italian bread
- 1/2 cup (1 stick) unsalted butter, softened
- 4 cloves of garlic, minced (or 1 teaspoon garlic powder)
- 1/4 cup fresh parsley, chopped (optional)
- Salt, to taste
- Grated Parmesan cheese (optional)
Preheat your oven to 375°F (190°C). Slice the loaf of bread in half lengthwise and lay it on a baking sheet, cut side up. In a mixing bowl, combine the softened butter, minced garlic, parsley, and salt.
Spread this mixture evenly over the cut sides of the bread. For an added touch, sprinkle grated Parmesan cheese over the buttered bread if using. Place the baking sheet in the oven and bake for about 10-15 minutes until the edges turn golden and crispy.
For an extra burst of flavor, consider using roasted garlic instead of raw garlic for a sweeter, milder taste. If you prefer your garlic bread extra crispy, pop it under the broiler for a minute or two after baking—just keep an eye on it to avoid burning.
You can also experiment with adding different herbs like oregano or thyme for a unique twist. Enjoy your homemade garlic bread fresh out of the oven for the best experience!
Artisan Boule
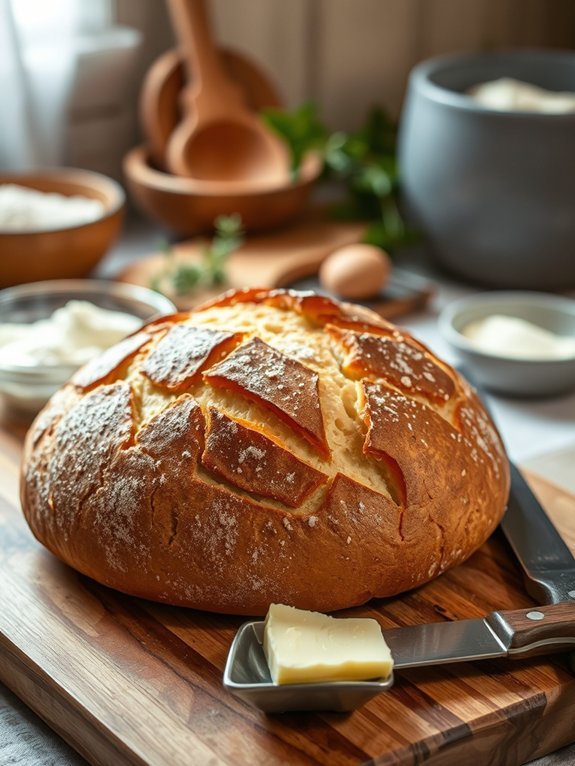
Artisan Boule is a classic rustic bread that’s perfect for beginners looking to explore the art of baking. This round-shaped loaf is known for its chewy crust and soft, airy interior, making it an ideal companion for soups, salads, or enjoyed on its own with a smear of butter. The beauty of this recipe lies in its simplicity, requiring minimal ingredients and equipment, allowing you to create bakery-quality bread right in your own kitchen.
The key to an exceptional Artisan Boule is time and a bit of patience. The dough needs to rest and rise properly to develop its unique flavor and texture. Using a combination of all-purpose flour and bread flour enhances the bread’s structure, while a splash of water and a pinch of salt elevate its taste. With just a few hands-on steps and the rest of the time left for the dough to mingle and rise, you’ll soon be rewarded with a beautifully crusty loaf.
Ingredients:
- 3 cups all-purpose flour
- 1 cup bread flour
- 1 ½ cups warm water (110°F)
- 2 teaspoons active dry yeast
- 1 teaspoon sugar
- 2 teaspoons salt
In a large mixing bowl, combine the warm water, sugar, and active dry yeast. Allow the mixture to sit for about 5-10 minutes until it’s frothy.
Add both types of flour and the salt, mixing until a rough dough forms. Knead the dough on a floured surface for about 10 minutes until elastic and smooth. Transfer it to a greased bowl, cover with a damp cloth, and let it rise in a warm place for 1 to 2 hours, or until it has doubled in size.
Once risen, shape the dough into a round loaf and place it on a baking sheet lined with parchment paper. Let it rest for an additional 30 minutes while you preheat your oven to 450°F. Just before baking, make a few shallow slashes on the surface of the dough with a sharp knife.
Bake for 30-35 minutes until the bread is golden brown and sounds hollow when tapped on the bottom.
One important tip to keep in mind is the humidity and temperature of your kitchen, as these factors can affect the rise of your dough. Adjust the amount of flour or water as necessary to achieve a sticky yet workable dough.
Additionally, using a Dutch oven can help create steam, which is beneficial for achieving a crispier crust. Finally, be patient and allow the bread to cool thoroughly before slicing; this will help set the crumb and enhance the bread’s flavor. Enjoy your delicious Artisan Boule!
Cheesy Pull-Apart Bread

Cheesy Pull-Apart Bread is the ultimate crowd-pleaser, combining the gooey goodness of melted cheese with the delightful texture of freshly baked bread. This recipe is perfect for those moments when you’re entertaining guests or simply looking to indulge in a comforting snack. The best part? It requires minimal ingredients and can be whipped up with ease, making it ideal for beginners in the kitchen.
To create this scrumptious pull-apart bread, you’ll work with pre-made dough, allowing you to focus on the fun part—loading it up with gooey cheese and delicious seasonings. The unique aspect of this bread is that it’s designed to be torn apart with your fingers, making it a fun and interactive dish. As the cheese melts and seeps between the pieces of bread, it creates a delightful pull-apart experience that everyone will love.
Ingredients:
- 1 loaf of frozen bread dough (thawed)
- 1 cup shredded mozzarella cheese
- 1 cup shredded cheddar cheese
- 4 tablespoons butter, melted
- 2 teaspoons garlic powder
- 2 teaspoons dried Italian herbs (like basil, oregano, and thyme)
- Salt and pepper to taste
- Fresh parsley for garnish (optional)
Preheat your oven to 350°F (175°C). Roll out the thawed bread dough on a clean surface and cut it into small squares. Dip each square in melted butter and layer shredded mozzarella and cheddar cheese in between these squares before stacking them in a greased bundt pan. Drizzle any remaining butter over the top and sprinkle with garlic powder, herbs, salt, and pepper. Bake for 25-30 minutes or until the cheese is melted and the top is golden brown.
Allow it to cool slightly before inverting the pan onto a plate, then serve warm.
When making Cheesy Pull-Apart Bread, feel free to customize it to your taste—try adding diced cooked bacon, finely chopped spinach, or even jalapeños for a kick!
Keep an eye on the bread while it’s in the oven to prevent over-browning, and remember that letting it rest after baking helps the cheese set a bit, making it easier to pull apart. Enjoy experimenting with different cheese combinations for a unique flavor each time!
Quick Flatbread

Quick flatbread is a versatile and simple recipe perfect for those just starting their baking journey. With minimal ingredients and a no-fuss approach, you can whip up these delicious, soft flatbreads in no time. They can be served alongside a variety of dishes, used as a wrap for fillings, or enjoyed simply with some olive oil and herbs for dipping.
Plus, the absence of yeast means you won’t have to wait for dough to rise, making this bread a fantastic option for a quick snack or meal accompaniment.
The beauty of quick flatbread lies in its adaptability. You can customize the flavors by adding herbs, spices, or even garlic to the dough, allowing you to experiment and find your perfect combination. With just a few ingredients and a hot skillet, you’ll discover that homemade flatbread is the key to elevating any meal.
So let’s gather our ingredients and get started!
- 2 cups all-purpose flour
- 1 teaspoon salt
- 1 teaspoon baking powder
- 3/4 cup water
- 2 tablespoons olive oil
In a mixing bowl, combine the flour, salt, and baking powder, then mix well. Gradually add the water and olive oil, stirring until the mixture forms a cohesive dough. Knead gently for a minute on a floured surface until smooth.
Divide the dough into small balls, roll each ball into a flat circle about 1/4 inch thick. Heat a skillet over medium-high heat, and place the rolled-out flatbreads in the skillet, cooking for about 2 minutes on each side or until golden and bubbly. Remove from the skillet and keep warm until serving.
When making quick flatbread, make certain your skillet is adequately heated for the best results; this allows the bread to puff up nicely. You can experiment with different flours like whole wheat or spelt for unique flavors and textures.
Additionally, if you’re looking for an extra touch, brush the cooked flatbreads with melted butter or olive oil and sprinkle with herbs or spices right after cooking for a burst of flavor.
Sweet Dinner Rolls

Sweet dinner rolls are a delightful addition to any meal, offering a soft, slightly sweetened bread that can complement both savory and sweet dishes. These rolls are perfect for family gatherings, holiday dinners, or simply as a comforting treat to enjoy at home.
The process is straightforward, making it an ideal recipe for beginners who want to practice their baking skills while creating something truly delicious. Making sweet dinner rolls involves a simple dough that rises to a fluffy texture. You’ll be amazed at how easy it is, and the aroma that fills your kitchen while they bake is just irresistible.
Whether served warm with butter or used to mop up gravy, these rolls are sure to become a staple in your recipe collection.
Ingredients:
- 2 1/4 teaspoons active dry yeast
- 1/2 cup warm milk (110°F)
- 1/4 cup granulated sugar
- 1/4 cup unsalted butter, melted
- 1 large egg
- 3 1/4 cups all-purpose flour
- 1 teaspoon salt
- 1/4 cup honey (optional for additional sweetness)
In a large mixing bowl, combine the warm milk and active dry yeast, letting it sit for about 5 minutes until foamy. Next, add in the sugar, melted butter, egg, and salt, mixing well.
Gradually incorporate the flour into the mixture, kneading it on a floured surface for about 5 to 7 minutes, until the dough is smooth and elastic. Place the dough in a greased bowl, cover it with a clean cloth, and let it rise in a warm area for about 1 hour or until doubled in size.
Once risen, punch down the dough, shape it into rolls, and place them on a greased baking sheet. Allow them to rise again for 30-45 minutes before baking in a preheated oven at 375°F for about 15-20 minutes, or until golden brown.
One of the most important tips when making sweet dinner rolls is to verify that your yeast is fresh and active; always check the expiration date before using. When letting the dough rise, find a warm spot in your kitchen, as drafts or cold temperatures can slow down the proofing process.
For an extra layer of flavor, consider brushing the rolls with melted butter immediately after they come out of the oven for a beautiful finish. Enjoy your freshly baked rolls!
Basic Pizza Dough

Making pizza at home is a fun and rewarding experience, especially when you have a simple dough recipe to follow. Basic pizza dough serves as a versatile base for countless toppings, allowing you to tailor your creation to your taste. With just a few ingredients and minimal effort, you can produce a delicious crust that’s satisfying to make and even better to eat.
This dough is perfect for beginners as it requires no special equipment and can be prepared in a matter of minutes. The key to a great pizza lies in allowing the dough to rise for the perfect texture. Whether you prefer a thin and crispy crust or a thicker, breadier base, this pizza dough recipe can be easily adjusted to meet your preferences.
Ingredients:
- 2 cups all-purpose flour
- 1 cup warm water (about 110°F)
- 2 teaspoons active dry yeast
- 1 teaspoon salt
- 1 tablespoon olive oil
- 1 teaspoon sugar
Combine the warm water and sugar in a bowl, then sprinkle the yeast on top. Let it sit for about 5-10 minutes until frothy.
In a large mixing bowl, combine the flour and salt. Make a well in the center, then add the activated yeast mixture and olive oil. Stir until it forms a dough, then knead on a floured surface for about 5-7 minutes until smooth.
Place the dough in a greased bowl, cover with a damp cloth, and let it rise in a warm place for about 1 hour, or until doubled in size.
For the best results, let your dough rest after kneading to develop flavor. If you have time, consider letting the dough rise overnight in the refrigerator for a more complex taste.
When forming your pizza crust, remember to stretch the dough gently instead of rolling it out, so it retains air bubbles for a light, crispy crust.
Experiment with your favorite sauces and toppings, and enjoy the process of creating your perfect pizza!
Cinnamon Swirl Bread
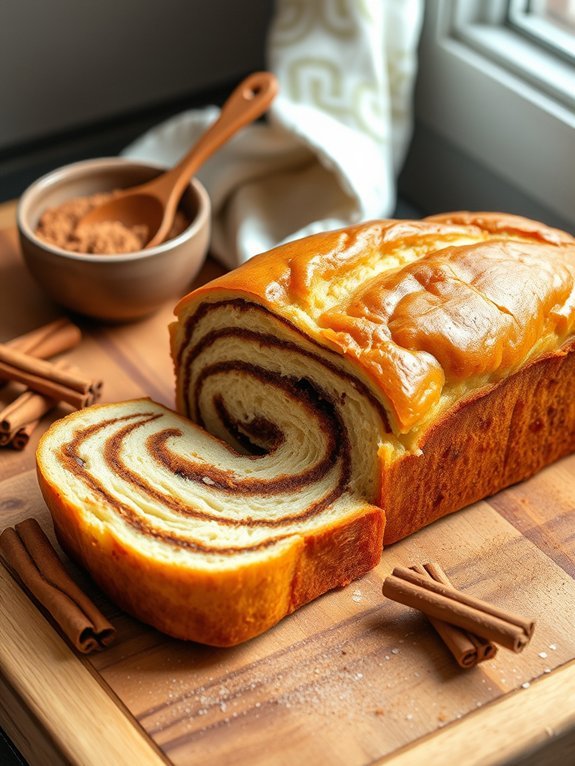
Cinnamon swirl bread is a delightful treat that perfectly combines the comforting aromas of warm, sweet cinnamon with the satisfying texture of freshly baked bread. This recipe is perfect for beginners, as it requires no special baking skills or complicated techniques. The dough is simple to prepare, and the swirl of cinnamon sugar adds an appealing touch that will impress anyone who takes a bite.
Whether enjoyed as breakfast, a snack, or a dessert, this cinnamon swirl bread is bound to become a favorite in your household.
The key to a successful cinnamon swirl bread is allowing the dough to rise adequately, which helps develop that soft and fluffy texture you crave. As the bread bakes, the sweet cinnamon scent fills your kitchen, making it nearly impossible to resist slicing into it right away. Serve it warm, toasted, or slathered with butter, and you’ll have a truly irresistible homemade loaf that will please both family and friends alike.
Ingredients:
- 2 1/4 cups all-purpose flour
- 1/4 cup granulated sugar
- 1 teaspoon salt
- 1 packet (2 1/4 teaspoons) instant yeast
- 1/2 cup warm milk (105-110°F)
- 1/4 cup unsalted butter, melted
- 1 large egg
- 1 tablespoon ground cinnamon
- 1/4 cup brown sugar
In a large mixing bowl, combine the flour, granulated sugar, salt, and instant yeast. In another bowl, whisk together the warm milk, melted butter, and egg. Gradually pour the wet ingredients into the dry ingredients, mixing until a soft dough forms.
Knead the dough on a floured surface for about 5-7 minutes until it’s smooth and elastic. Place the dough in a greased bowl, cover it with a clean kitchen towel, and allow it to rise in a warm place until doubled in size, about 1 hour.
Once risen, roll out the dough into a rectangular shape, spread a mixture of cinnamon and brown sugar across the surface, roll it up tightly, and place it in a greased loaf pan. Bake at 350°F for 30-35 minutes or until golden brown and sounding hollow when tapped.
To achieve the best results, make certain your ingredients are at room temperature, as this helps the yeast activate and the bread rise properly. If you want to add an extra touch, consider brushing the top of your loaf with melted butter immediately after it comes out of the oven for a beautiful, glossy finish.
Don’t hesitate to experiment with the filling by incorporating nuts, dried fruits, or even different spices to create your unique twist on cinnamon swirl bread!
Irish Brown Bread

Irish Brown Bread is a traditional staple that highlights the simplicity and richness of Irish cooking. Made with whole wheat flour, buttermilk, and just a few other ingredients, this hearty bread has a dense texture and a nutty flavor that pairs well with various toppings, from butter and jam to soups and stews.
The recipe is perfect for beginners as it requires no yeast or complicated kneading, making it a great introduction to baking bread. Not only is this bread delicious, but it’s also healthful thanks to the whole grains and the absence of refined sugars.
Irish Brown Bread is quick to prepare, allowing you to enjoy fresh bread right from your oven with minimal effort. Once you’ve mastered this straightforward recipe, you can experiment by adding seeds, nuts, or dried fruits to personalize your loaf to suit your taste.
Ingredients:
- 3 cups whole wheat flour
- 1 cup all-purpose flour
- 1 teaspoon baking soda
- 1 teaspoon salt
- 2 cups buttermilk
- 2 tablespoons honey (optional)
Combine the whole wheat flour, all-purpose flour, baking soda, and salt in a large bowl. Make a well in the center and pour in the buttermilk (and honey if using).
Mix the ingredients together with a wooden spoon or your hands until a soft dough forms. Turn the dough out onto a lightly floured surface and shape it into a round loaf about 1.5 inches thick. Place it on a baking sheet lined with parchment paper, score an ‘X’ on the top with a sharp knife, and bake in a preheated oven at 425°F (220°C) for 30-35 minutes, or until the loaf sounds hollow when tapped on the bottom.
For the best results, let the bread cool completely on a wire rack before slicing to prevent it from becoming dense and gummy.
Remember that the freshness of ingredients, especially the baking soda, can affect the rise and texture of your bread, so always check for their expiration dates. Additionally, feel free to customize the recipe with oats or seeds for added flavor and nutritional benefits.
Enjoy this timeless bread with your morning tea or as part of a hearty meal!

