This post may contain affiliate links. Please read our policy page.
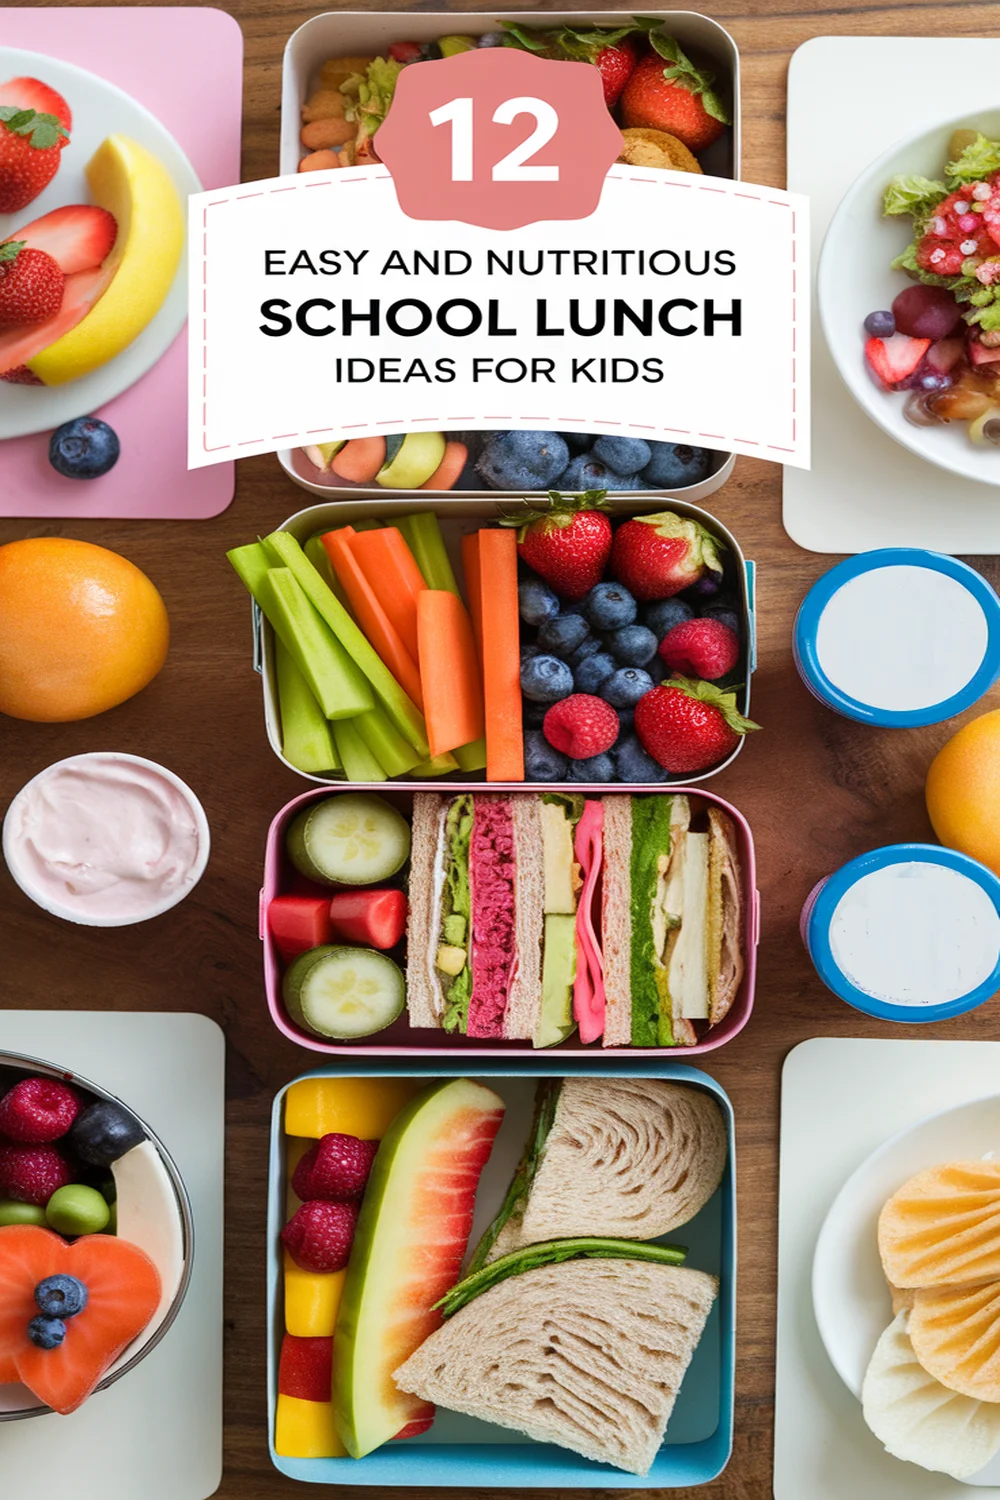
You can easily prepare nutritious and appealing school lunches for your kids that support their energy and focus all day. Consider options like Turkey and Hummus Wraps, Quinoa Salad with Veggies, and DIY Lunchables with whole grain crackers. Mini Pita Pockets filled with chicken salad, Veggie and Cheese Skewers, and Fruit and Yogurt Parfaits are great choices too. If you want to discover more delicious and healthy lunch ideas to keep lunchtime exciting, stick around for additional options.
Turkey and Hummus Wrap
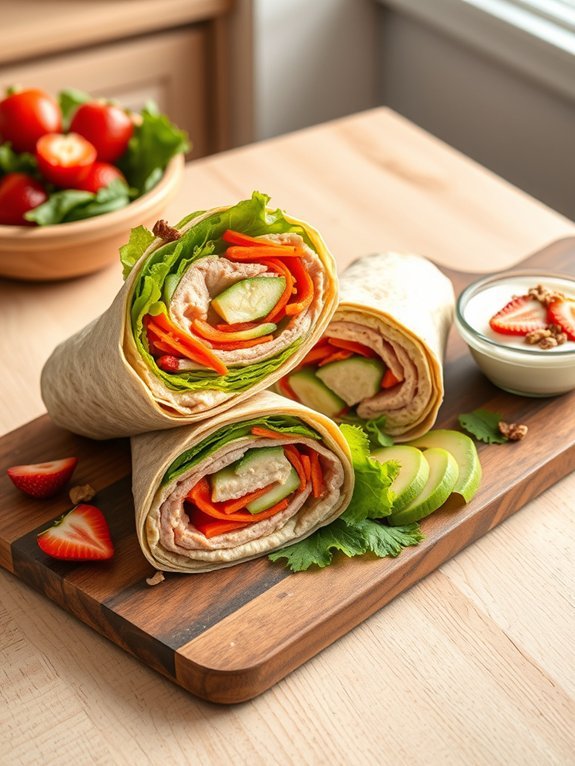
A Turkey and Hummus Wrap is a delicious and nutritious lunch option that kids will love. This recipe isn’t only easy to prepare but also packed with protein and healthy fats, making it a great choice for keeping your little ones energized throughout their school day.
Wraps are versatile, allowing you to include various ingredients based on your child’s preferences. Plus, they’re fun to eat, offering a delightful change from traditional sandwiches.
To make this turkey and hummus wrap even more appealing, feel free to incorporate some colorful vegetables and whole grains for added crunch and nutrition. Using whole wheat tortillas can enhance the flavor while providing essential nutrients. This dish is easily customizable, so you can experiment with different ingredients and flavors to keep lunchtime exciting for your kids.
- 1 whole wheat tortilla
- 3-4 slices of turkey breast
- 2-3 tablespoons of hummus
- 1/4 cup of shredded lettuce
- 1/4 cup of sliced cucumber
- 1/4 cup of shredded carrots
- Optional: slices of bell pepper or avocado
Spread the hummus evenly across the entire surface of the tortilla, then layer on the turkey slices. Next, add the shredded lettuce, cucumber slices, and carrots on top of the turkey. Roll the tortilla tightly, folding in the sides as you go, to keep the filling secure. Slice the wrap in half and serve immediately or store it in a container for a to-go lunch.
When making this turkey and hummus wrap, consider adding a side of fresh fruit or yogurt to round out the meal. You can also involve your kids in the preparation process, allowing them to choose their own toppings, which can make them more excited about eating a healthy lunch.
Additionally, you can prepare multiple wraps at once and store them in the refrigerator for easy meals throughout the week.
Recommended Items
Check out our favorite products and equipment to make lunchtime a breeze for your kids!
Products
Quinoa Salad With Veggies
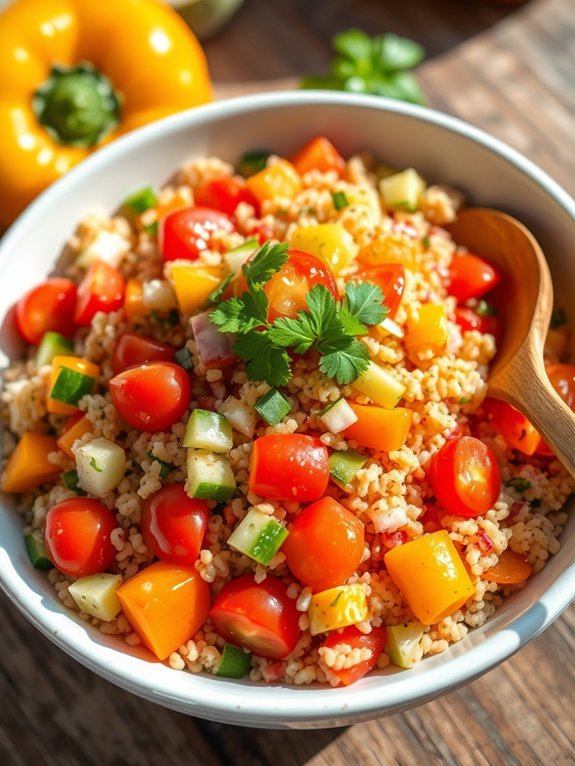
Quinoa salad with veggies is an excellent choice for a nutritious school lunch that kids will actually enjoy. Not only is it colorful and visually appealing, but it’s also loaded with protein, vitamins, and minerals, making it a well-rounded meal option. Quinoa is a gluten-free whole grain that cooks quickly and has a light, fluffy texture when prepared.
Throw in some fresh veggies, and you have a delightful salad that can be prepared ahead of time and served cold or at room temperature, perfect for school lunches. This recipe allows for versatility regarding the veggies you can incorporate, catering to your child’s taste preferences or whatever you have on hand. You can mix and match according to seasonal vegetables, making it a dish that can be adapted throughout the year.
Additionally, leftovers from dinner can be used to enhance this salad, reducing waste and saving time in the kitchen.
Ingredients:
- 1 cup quinoa
- 2 cups water or vegetable broth
- 1 cup cherry tomatoes, halved
- 1 cucumber, diced
- 1 bell pepper, diced (any color)
- 1 carrot, grated
- 1/4 cup red onion, finely chopped
- 1/4 cup parsley or cilantro, chopped
- 2 tablespoons olive oil
- 1 tablespoon lemon juice
- Salt and pepper to taste
Rinse the quinoa under cold water, then add it to a pot with the water or vegetable broth. Bring to a boil, then reduce the heat and cover, allowing it to simmer for about 15-20 minutes until the quinoa is fluffy and the liquid is absorbed.
Once cooked, let it cool. In a large bowl, combine the cooled quinoa with cherry tomatoes, cucumber, bell pepper, carrot, red onion, and parsley or cilantro. Drizzle with olive oil and lemon juice, then season with salt and pepper to taste. Toss everything together gently until the ingredients are well mixed.
For additional flavor, consider adding feta cheese or chickpeas for added protein. If you’re preparing the salad in advance, store it in an airtight container in the refrigerator for up to three days.
You can also mix in other vegetables or pantry items like corn or avocado. Finally, feel free to customize the dressing with your favorite vinaigrette or a splash of balsamic vinegar to enhance the taste even further. This dish not only provides excellent nutrition but also brings a burst of flavors that both kids and adults will appreciate!
DIY Lunchable With Whole Grain Crackers
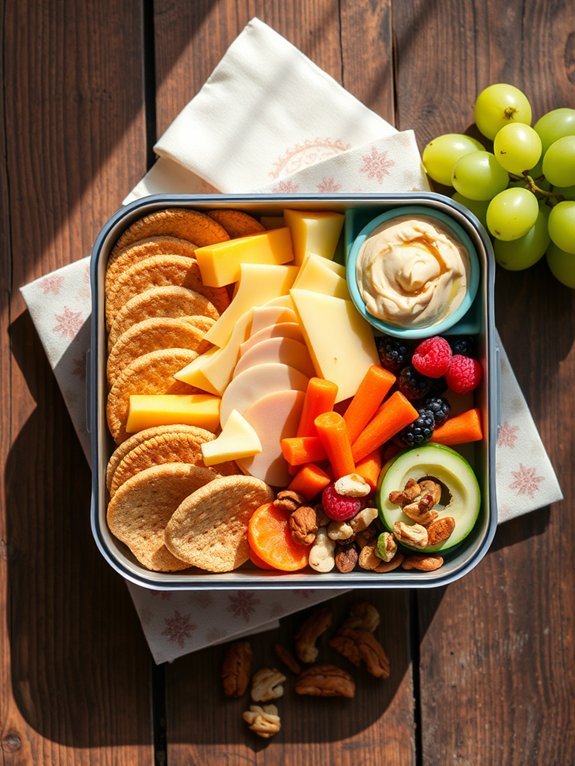
Creating a DIY Lunchable with whole grain crackers is a fun way to provide kids with a nutritious and satisfying meal. This easy-to-assemble option allows you to customize the ingredients based on your child’s tastes and dietary preferences. Whole grain crackers serve as a great base, offering fiber and whole grains, while a variety of cheeses, meats, and fruits can add different flavors and textures that make lunchtime something to look forward to.
Not only is this DIY Lunchable a healthy choice, but it also gives kids the opportunity to engage in the process of assembling their own meal, promoting independence and creativity. Whether you’re packing it for a school lunch or serving it as an after-school snack, this recipe is versatile and can be adapted to fit any occasion. Get ready to plunge into a world of flavors where kids can mix and match their favorite ingredients!
- Whole grain crackers
- Sliced cheese (cheddar, mozzarella, or gouda)
- Sliced deli meats (turkey, ham, or chicken)
- Fresh fruit (grapes, apple slices, or berries)
- Baby carrots or cucumber slices
- Hummus or ranch dip
- Optional: nuts or trail mix
To prepare the DIY Lunchable, start by selecting a container or lunchbox with separate compartments to keep the ingredients organized. Lay down a generous serving of whole grain crackers as the base. Next, layer on your sliced cheese and deli meats in equal portions, making sure that there’s enough variety to keep things interesting.
Add a handful of fresh fruit and some crunchy veggies to the mix, along with a small serving of hummus or dip for added flavor. Finally, if you desire, sprinkle in some nuts or a small portion of trail mix for an extra energy boost.
When preparing your DIY Lunchable, remember to choose ingredients that your child enjoys and mix it up regularly to keep lunches exciting. Involve your kids in selecting their favorite components to make it more engaging for them. Also, consider the use of seasonal fruits and vegetables to take advantage of freshness and flavor.
Keep everything refrigerated until it’s time to eat to guarantee that your ingredients stay fresh and safe.
Mini Pita Pockets With Chicken Salad
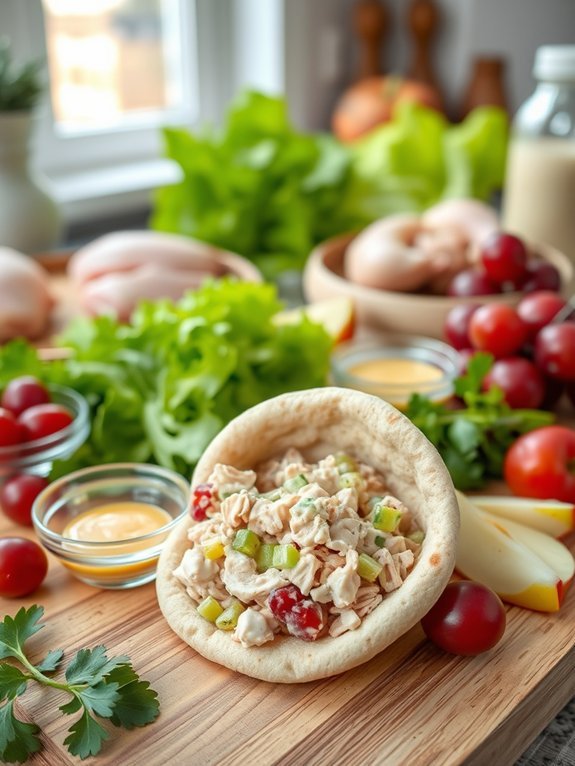
Mini pita pockets filled with chicken salad are a delightful and nutritious option for school lunches. They aren’t only easy to prepare but also customizable, allowing you to incorporate various vegetables and flavors to suit your child’s taste preferences.
The small size of the pita pockets makes them perfect for little hands, and they’re easy to pack for on-the-go meals. Plus, chicken salad is a classic dish that can be made with leftovers or freshly cooked chicken.
This recipe for mini pita pockets with chicken salad is perfect for busy parents looking for a quick yet healthy lunch option. With its appealing mix of textures and flavors, it’s sure to please even the pickiest eaters.
You can also experiment by adding your child’s favorite ingredients, such as crunchy apples or sweet grapes, to jazz up the chicken salad and make it even more enjoyable.
- 2 cups cooked chicken, shredded or diced
- 1/2 cup mayonnaise
- 1/4 cup plain Greek yogurt (optional for creaminess)
- 1 celery stalk, finely chopped
- 1/4 cup red grapes, halved (optional)
- 1/4 cup diced apple (optional)
- 1 tablespoon Dijon mustard
- Salt and pepper, to taste
- Mini pita bread pockets
- Leafy greens (like romaine or spinach) for filling
In a mixing bowl, combine the shredded chicken, mayonnaise, Greek yogurt, celery, grapes, apple, Dijon mustard, salt, and pepper. Mix well until all the ingredients are evenly coated in the dressing.
Then, carefully cut the mini pita pockets in half to create openings, and stuff each pocket generously with the chicken salad mixture. You can add a few leafy greens inside each pita for added crunch and nutrition.
When preparing mini pita pockets, be sure to use fresh ingredients, as they’ll enhance the flavor of the chicken salad. Consider preparing the chicken salad the night before to save time in the morning.
You can also pack the salad and pita halves separately, and let your child assemble their lunch at school for a fun, interactive experience. Finally, feel free to personalize the recipe by adding nuts or herbs for extra flavor and texture, while always ensuring that any allergens are mitigated based on your child’s dietary needs.
Veggie and Cheese Skewers
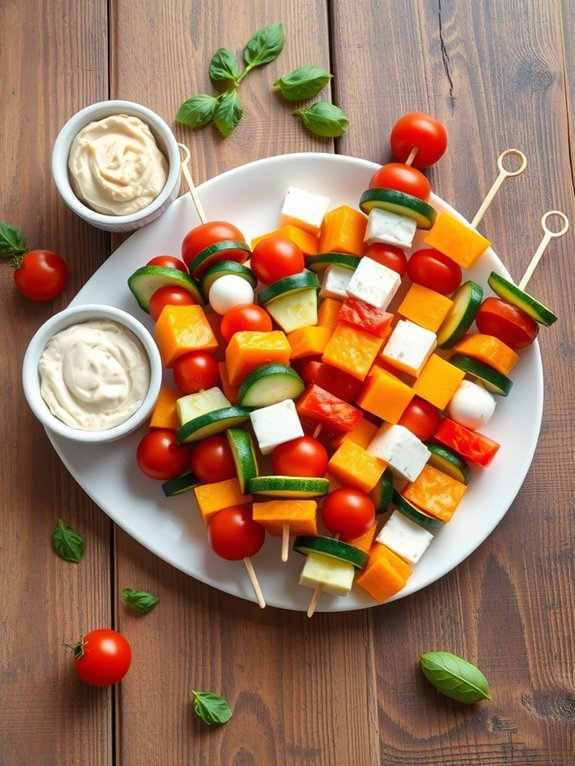
Veggie and cheese skewers are a fun and colorful way to make lunchtime more exciting for kids. These delightful mini-meals aren’t only nutritious but also allow children to engage in the preparation process, making them more likely to eat their vegetables. The combination of fresh veggies, creamy cheese, and a bit of creativity can transform simple ingredients into a vibrant dish that’s visually appealing and full of flavor.
These skewers are incredibly versatile and can be tailored to suit your child’s taste preferences. You can use a variety of vegetables and cheeses, letting your family experiment with different colors, textures, and flavors. Ideal for lunchboxes, picnic snacks, or even as a light dinner option, veggie and cheese skewers are easy to make and can be assembled in no time.
- Cherry tomatoes
- Cucumber (sliced)
- Bell peppers (cubed)
- Zucchini (sliced)
- Cheddar cheese (cubed)
- Mozzarella balls
- Olives
- Skewers or toothpicks
To prepare the veggie and cheese skewers, simply take your skewers or toothpicks and thread a cherry tomato onto one end, followed by a cucumber slice, a cheese cube, a bell pepper piece, and a zucchini slice. Continue layering your ingredients until the skewer is filled, leaving a little space at the end for easy handling. You can mix and match the vegetables and cheese according to what your child likes best.
To make the skewers extra special, consider adding dips on the side, like hummus or ranch dressing, to encourage dipping and enhance the flavor. You can also try marinated mozzarella or flavored cheese varieties for an extra kick. Remember that these skewers can be served cold or at room temperature, making them a convenient option for school lunches.
Finally, when creating your veggie and cheese skewers, involve your kids in the process! Let them pick out their favorite veggies and cheeses, and encourage them to create their unique combinations. This not only makes the skewers more appealing but also helps them develop a sense of autonomy over their food choices. Plus, it’s a fun kitchen activity that promotes bonding and teamwork!
Proposed Recipe Ideas for School Lunches
Smoothie Bowl With Fruits and Granola
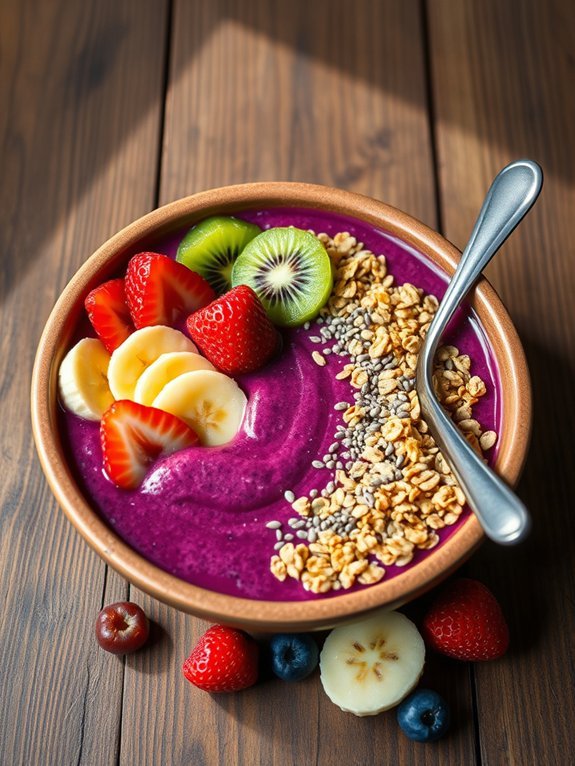
Smoothie bowls are an excellent way to start the day or enjoy a nutritious snack. They aren’t only visually appealing but also packed with vitamins and minerals, making them a kid-friendly option that doesn’t compromise on health.
This innovative dish can be customized to suit individual tastes, allowing kids to pick their favorite fruits and toppings. Plus, it’s an interactive meal with the opportunity to get children involved in the kitchen as they can help choose toppings and mix the ingredients.
To create a smoothie bowl, you can use a base of blended fruits, which are then poured into a bowl and topped with an array of delicious garnishes like granola, nuts, and seeds. This not only makes the bowl flavorful but visually delightful too, enticing kids to dig in.
The texture of the smoothie combined with the crunch of the toppings creates an enjoyable eating experience that can be fueled by creativity and healthy eating habits.
- 1 cup frozen mixed berries (strawberries, blueberries, raspberries)
- 1 banana
- 1/2 cup yogurt (plain or flavored)
- 1/2 cup almond milk (or any milk of choice)
- 1/4 cup granola
- 1 tablespoon honey or agave syrup (optional)
- Fresh fruit slices for topping (such as banana, kiwi, or strawberries)
- Chia seeds or flaxseeds (optional)
In a blender, combine the frozen mixed berries, banana, yogurt, almond milk, and honey or agave syrup if desired. Blend until smooth and creamy.
Pour the mixture into a bowl and create a fun design with fresh fruit slices on top. Finish off with a generous sprinkle of granola and any additional toppings like chia seeds for added crunch and nutrition.
When making smoothie bowls, feel free to experiment with different fruits and toppings to keep things exciting! Avoid too much liquid while blending to achieve a thick consistency that’s easy to eat with a spoon.
Also, consider freezing a ripe banana and using it in the blend for extra creaminess and natural sweetness. Ultimately, don’t hesitate to involve your kids in the process; letting them choose their own toppings can make them more likely to enjoy their meal!
Bento Box With Sushi Rolls
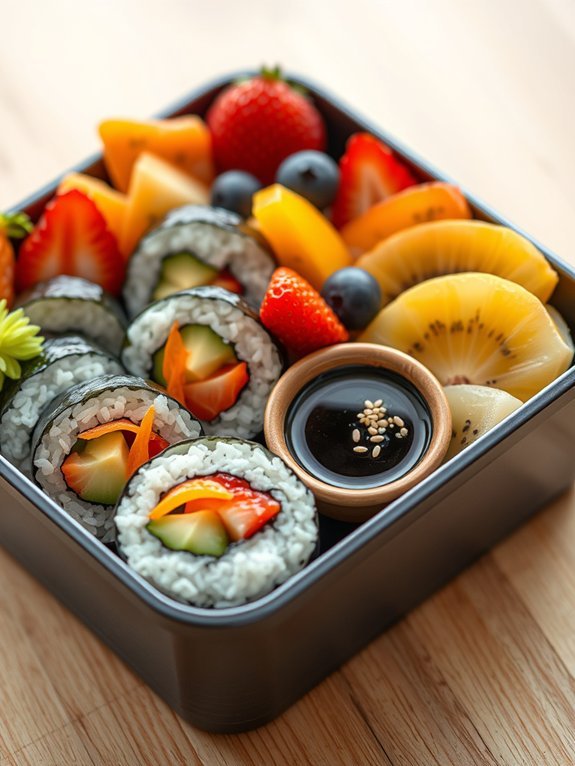
Bento boxes filled with sushi rolls can be a fun and nutritious lunch option for kids. These delightful bundles of rice, seaweed, and various fillings not only provide great nutrition but also encourage kids to explore different flavors and textures.
With the strong colors and appealing presentation, sushi can turn an ordinary lunch into an exciting culinary experience, making it easier for kids to enjoy healthy eating.
Making sushi at home is simpler than it may seem, especially with the right ingredients and tools. You can customize the fillings to accommodate your child’s tastes, whether they prefer classic ingredients like cucumber and avocado, or something more adventurous like crab or tempura shrimp.
Once you master the technique, sushi rolls can become a staple in your bento box lineup.
Ingredients:
- 2 cups sushi rice
- 2 1/2 cups water
- 1/4 cup rice vinegar
- 2 tablespoons sugar
- 1 teaspoon salt
- 4 sheets of nori (seaweed)
- 1 cucumber, julienned
- 1 avocado, sliced
- 1 small carrot, julienned
- Optional protein (cooked shrimp, crab sticks, or tofu)
- Soy sauce for dipping
- Sesame seeds for garnish
Rinse the sushi rice under cold water until the water runs clear, then combine it with water in a rice cooker and cook according to the manufacturer’s instructions.
In a small saucepan, mix rice vinegar, sugar, and salt, and gently heat until dissolved. Once the rice is cooked, transfer it to a large bowl and mix in the vinegar mixture. Allow it to cool slightly.
Place a sheet of nori on a bamboo sushi mat, spread a layer of rice evenly on top, leaving about an inch at the top free. Add your desired fillings in a line along the bottom edge, then roll tightly away from you, using the mat to shape it. Seal the edge with a little water.
Once rolled, slice into bite-sized pieces and repeat the process with the remaining sheets.
When making sushi, it’s important to use short-grain sushi rice for optimum texture and stickiness. Verify your hands are wet when handling the rice to prevent it from sticking to your fingers.
Let the sushi rolls sit for a few minutes after slicing to help them hold their shape better. Feel free to experiment with different fillings and even try adding a small amount of cream cheese or spicy mayo for an extra flavor kick.
Personalize your bento boxes with colorful fruits and snacks for a balanced and appealing meal!
Pasta Salad With Cherry Tomatoes and Spinach
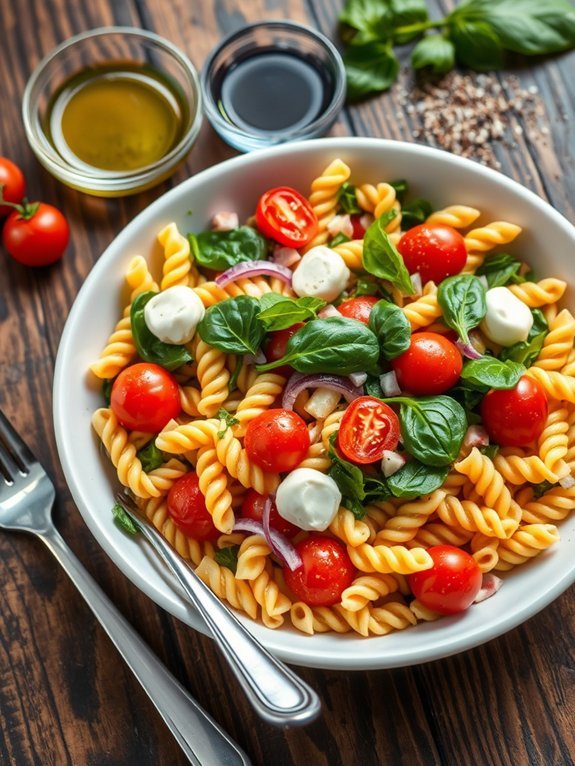
Pasta salad is a delightful and versatile dish that can be enjoyed by kids and adults alike. This version features the vibrant flavors of cherry tomatoes and fresh spinach, making it not only appealing to the eyes but also bursting with nutrients. Perfect for school lunches, picnics, or as a quick dinner option, this pasta salad can be made ahead of time and stored in the fridge, allowing the flavors to meld beautifully.
Cooking pasta salad is simple and quick, which is ideal for busy weeknights or when you need to prepare lunch for your little ones. You can customize this recipe by adding other vegetables or proteins according to your child’s preferences. The combination of chewy pasta, juicy tomatoes, and tender spinach creates a satisfying and wholesome meal that keeps kids full and happy.
- 8 oz pasta (penne or rotini works well)
- 1 cup cherry tomatoes, halved
- 2 cups fresh spinach, roughly chopped
- 1/4 cup red onion, finely chopped
- 1/2 cup mozzarella balls, halved (optional)
- 1/4 cup olive oil
- 2 tablespoons balsamic vinegar
- 1 teaspoon Italian seasoning
- Salt and pepper to taste
Cook the pasta according to the package instructions until al dente. Drain and rinse with cold water to stop the cooking process. In a large bowl, combine the cooked pasta, cherry tomatoes, spinach, red onion, and mozzarella balls (if using).
In a separate small bowl, whisk together the olive oil, balsamic vinegar, Italian seasoning, salt, and pepper. Pour the dressing over the pasta mixture and toss to combine thoroughly.
When preparing pasta salad, keep in mind that letting it chill in the refrigerator for about 30 minutes after mixing will enhance the flavors. You can also make it a day in advance for even better results.
Feel free to experiment with seasonal vegetables or add cooked proteins like chicken or chickpeas to make it more filling. Adjust the dressing ingredients based on your taste preference for a personalized touch!
Fruit and Yogurt Parfait
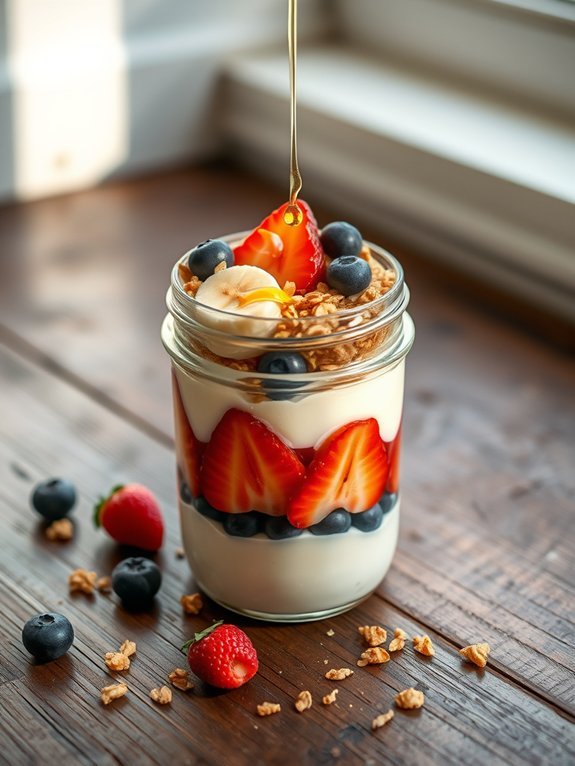
A fruit and yogurt parfait is a delicious and nutritious option that kids will love for their school lunches. Easy to prepare and customizable, it combines layers of creamy yogurt, fresh fruits, and crunchy granola, offering a delightful mix of textures and flavors that make lunchtime enjoyable. This dish isn’t only perfect for satisfying hunger but also provides valuable nutrients, making it a fantastic choice for growing kids.
Creating a fruit and yogurt parfait is simple and can be tailored to fit your child’s preferences. You can experiment with different types of fruits based on the season or what your children enjoy the most. Whether it’s sweet strawberries, tangy blueberries, or tropical mango, the possibilities are endless. Additionally, it’s a great way to introduce your kids to healthier snack options in a fun and tasty way.
- 2 cups of yogurt (plain or flavored)
- 1 cup of granola
- 2 cups of mixed fruits (such as strawberries, blueberries, bananas, or peaches)
- Honey or maple syrup (optional, for added sweetness)
- 1 teaspoon vanilla extract (optional)
In a clear glass or bowl, start by adding a layer of yogurt at the bottom, followed by a layer of granola, and then a layer of mixed fruits. Repeat the layers until all ingredients are used, making sure to finish with a layer of fruit on top. Drizzle honey or maple syrup and sprinkle some granola on the final layer for added sweetness and crunch. Serve immediately or cover and store in the refrigerator until ready to pack for lunch.
For best results, consider using a variety of colors and textures in your parfait to make it visually appealing. You can also substitute yogurt for dairy-free alternatives if your child has dietary restrictions.
Prepare the ingredients the night before and layer them in the morning to guarantee the granola stays crisp. Finally, involve your kids in the preparation process; they’ll be more excited to eat what they helped create!
Egg Muffins With Spinach and Cheese
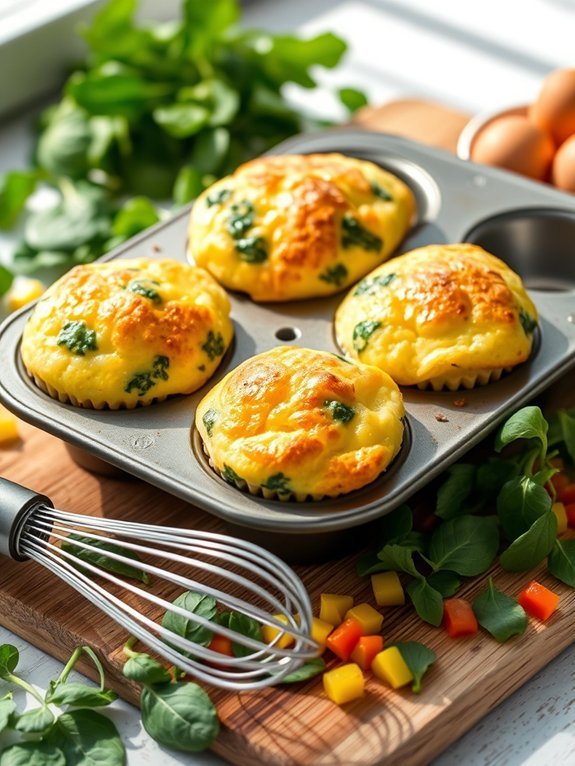
Egg muffins with spinach and cheese are a delicious and nutritious option for school lunches, perfect for providing kids with the energy they need throughout the day. These bite-sized delights are highly versatile and can be easily customized with various vegetables and cheeses, making them an excellent way to use up leftovers in the fridge.
Not only are they simple to make, but they can also be prepared in advance, ensuring busy parents have a quick and healthy meal option ready to go.
To make these egg muffins, you’ll need a muffin tin, some fresh ingredients, and a little bit of time. The combination of eggs, spinach, and gooey cheese creates a delightful flavor that’ll have kids excited to eat. Plus, these muffins are perfect for meal prepping; you can whip up a batch over the weekend and enjoy them throughout the week.
With just a few easy steps, you’ll have tasty egg muffins that are as appealing to the eyes as they’re to the palate.
Ingredients:
- 6 large eggs
- 1 cup fresh spinach, chopped
- 1/2 cup shredded cheese (cheddar, mozzarella, or your choice)
- 1/4 cup milk
- 1/4 teaspoon salt
- 1/4 teaspoon pepper
- Optional: diced bell peppers, onions, or any other favorite vegetables
Preheat your oven to 350°F (175°C) and grease a muffin tin with cooking spray or olive oil. In a mixing bowl, whisk together the eggs, milk, salt, and pepper until well combined.
Stir in the chopped spinach and shredded cheese (and any additional veggies if using). Pour the egg mixture evenly into each muffin cup, filling them about three-quarters full. Bake for 18-20 minutes or until the egg muffins are set and lightly golden on top.
Let them cool for a few minutes before carefully removing from the muffin tin.
When making egg muffins, it’s essential not to overfill the muffin cups, as the egg mixture will puff up while baking. You can also try varying the ingredients based on your child’s preferences—swap in different vegetables, or use a combination of cheeses for added flavor.
These muffins can be stored in an airtight container in the refrigerator for up to a week or frozen for longer storage, making them a great make-ahead option for busy weekdays.
Homemade Pizza With Whole Wheat Crust
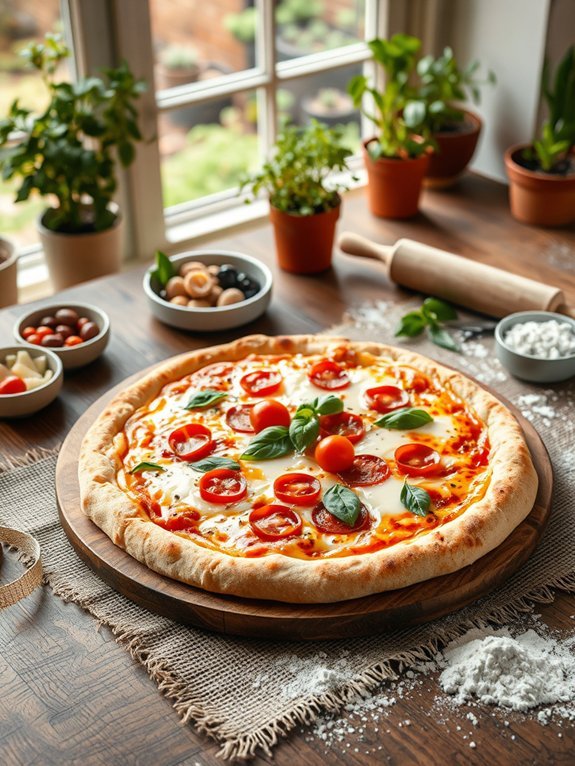
Homemade pizza with whole wheat crust is a fantastic way to provide healthy and delicious meals for your kids. You can customize toppings to suit your children’s tastes, making it both a fun cooking activity and a way to sneak in some nutritious ingredients. The whole wheat crust adds fiber and essential nutrients, offering a wholesome alternative to traditional pizza crusts.
Kids will love helping to spread the sauce and sprinkle the cheese, making it an interactive experience for the whole family. Creating your own pizza at home also allows for creativity and experimentation. Let your kids decide on their favorite toppings, whether it’s classic cheese and pepperoni or a rainbow of fresh vegetables.
This dish encourages healthier eating choices while being a beloved favorite among children. Plus, making pizza together can be a relaxing way to bond after a busy day, filling the kitchen with delightful aromas and laughter.
Ingredients:
- 1 ½ cups whole wheat flour
- 1 cup all-purpose flour
- 2 ¼ teaspoons active dry yeast (1 packet)
- 1 teaspoon salt
- 1 tablespoon olive oil
- 1 teaspoon honey or sugar
- 1 cup warm water (about 110°F or 43°C)
- 1 cup pizza sauce
- 2 cups shredded mozzarella cheese
- Toppings of choice (pepperoni, vegetables, etc.)
In a large mixing bowl, combine the warm water, honey, and yeast. Let it sit for about 5-10 minutes until foamy. In another bowl, mix the whole wheat flour, all-purpose flour, and salt. Once the yeast mixture is ready, gradually stir the dry ingredients into the wet ingredients.
Add olive oil and mix until a dough forms. Knead on a floured surface for about 5-7 minutes until smooth, then place in a greased bowl, cover, and let rise in a warm area for about an hour, or until doubled in size. Preheat the oven to 475°F (245°C) and roll out the dough on a floured surface.
Transfer the dough to a baking sheet or pizza stone, spread the pizza sauce, sprinkle cheese, and add selected toppings before baking for 12-15 minutes.
For the best results, allow the dough to rest and rise sufficiently for a soft and chewy crust. You can get creative with the shapes – try making mini pizzas or using cookie cutters for fun shapes!
Be sure to monitor the baking time closely as oven temperatures can vary, and you want the cheese to be perfectly melted and bubbly without burning the crust. Enjoy experimenting with different sauces and toppings to keep it exciting!
Sliced Apple With Almond Butter
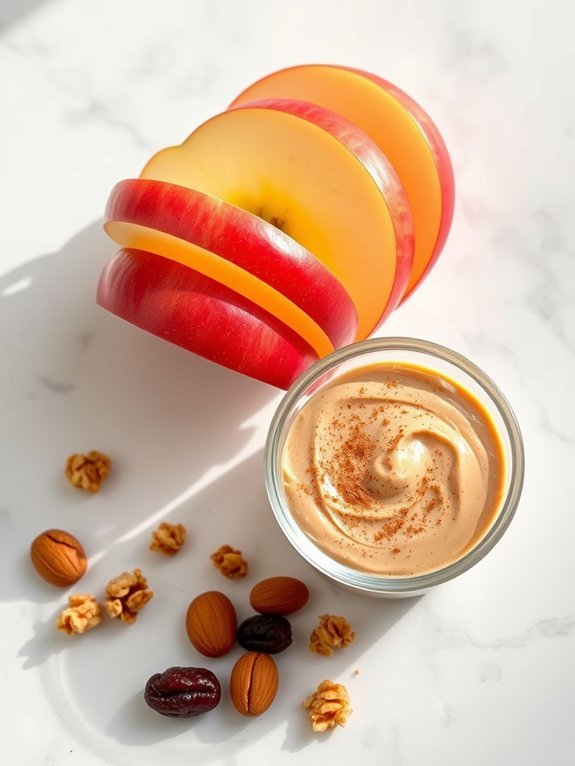
Sliced apple with almond butter is an easy, nutritious, and delicious snack option that kids will love. Combining the sweetness of fresh apples with the creamy texture of almond butter creates a delightful contrast in flavors and textures, making it an ideal addition to any lunchbox. This simple dish isn’t just pleasing to the palate; it also provides essential vitamins and minerals to fuel your child’s day at school.
Preparing sliced apple with almond butter can be a fun activity for kids, encouraging them to participate in their own meal prep. Whether enjoyed at home or packed for school, this snack is versatile enough to satisfy any craving and can be adapted to suit various tastes. Feel free to experiment with different types of apples and almond butter flavors, such as crunchy or smooth, to find the perfect combination for your family.
- 1 medium-sized apple (any variety: Granny Smith, Honeycrisp, or Fuji)
- 2 tablespoons almond butter
- Optional toppings (cinnamon, granola, or raisins)
To prepare the dish, start by washing the apple thoroughly under running water to remove any pesticides or wax. Using a sharp knife, carefully slice the apple into thin wedges or rounds, depending on your child’s preference.
Arrange the apple slices on a plate, and serve with the almond butter in a small bowl for dipping or spread it generously over the apple slices.
For added appeal, consider introducing different flavors to the almond butter or experimenting with toppings. A sprinkle of cinnamon can enhance the flavor profile, while adding granola or raisins can provide extra texture and nutrients.
If there are leftovers, toss the apple slices with a little lemon juice to keep them from browning, ensuring your child enjoys a fresh, vibrant snack at lunchtime.

