This post may contain affiliate links. Please read our policy page.
Meal prepping can simplify your week while ensuring you eat healthy. Start with a batch-cooked quinoa salad or overnight oats for speedy breakfasts. Consider pre-portioned snack packs and easy stir-fry kits for quick meals. One-pan roasted veggies and whole grain pasta can add variety, while freezer-friendly soups and homemade energy bars provide nutritious options. With these ideas, you can maintain a balanced diet effortlessly. There’s even more to discover to enhance your meal prep experience.
Batch Cook Quinoa Salad
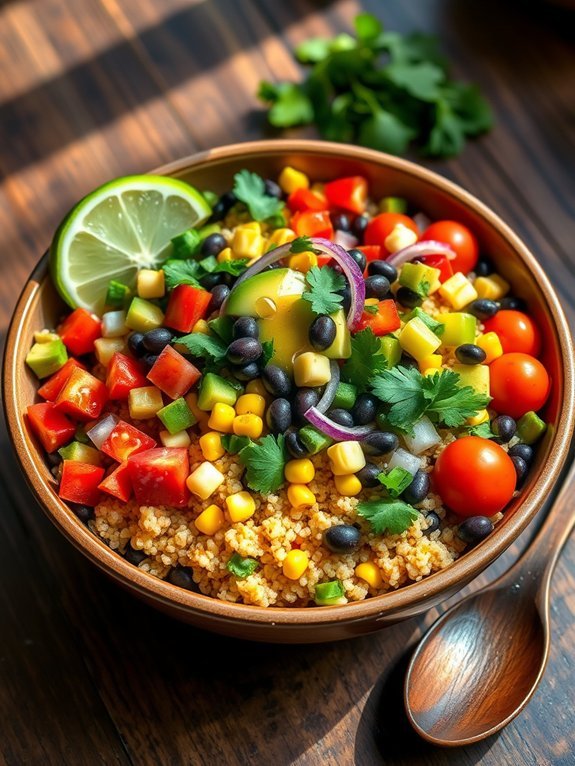
Batch cooking quinoa salad is a fantastic way to guarantee you have healthy, filling meals ready for the week. Quinoa isn’t only a gluten-free grain but also a great source of protein, making it an excellent base for salads. When you combine it with various veggies, beans, and a zesty dressing, it transforms into a nutritious meal that can be enjoyed on its own or as a side dish. The beauty of quinoa salad lies in its versatility; you can personalize it with your favorite ingredients and flavors.
To get started with your batch-cooked quinoa salad, consider incorporating ingredients that are in season or ones you enjoy the most. Feel free to experiment with different herbs, dressings, and toppings to keep the salad fresh throughout the week. Once made, this salad stores well in the fridge, allowing the flavors to marinate and intensify over time, making your meal prep not only efficient but also delectable.
Ingredients:
- 1 cup quinoa
- 2 cups vegetable broth or water
- 1 can (15 oz) black beans, drained and rinsed
- 1 bell pepper, diced (any color)
- 1 cup cherry tomatoes, halved
- 1 small red onion, finely chopped
- 1 cup corn (fresh, frozen, or canned)
- 1 avocado, diced
- 1/4 cup fresh cilantro, chopped (optional)
- Juice of 1 lime
- 2 tablespoons olive oil
- Salt and pepper to taste
Begin by rinsing the quinoa under cold water to remove its natural bitterness. In a medium pot, combine the quinoa and vegetable broth (or water) and bring to a boil. Reduce heat to a simmer, cover, and cook for about 15 minutes or until the liquid has been absorbed and the quinoa is fluffy. Once done, let it cool.
In a large bowl, mix the cooked quinoa with black beans, bell pepper, cherry tomatoes, red onion, corn, avocado, and cilantro. Drizzle with lime juice and olive oil, then season with salt and pepper to your liking. Toss everything together until well combined, and you’re ready to serve or store your salad.
For a more impactful flavor, allow the quinoa salad to marinate in the dressing for at least 30 minutes before enjoying it. Consider preparing it a day in advance to allow the ingredients to blend harmoniously. If you’re looking for added texture, you can also include nuts or seeds like pumpkin seeds or walnuts, which can be added just before serving. This will keep them crunchy and maintain their nutritional benefits.
Overnight Oats for Quick Breakfasts
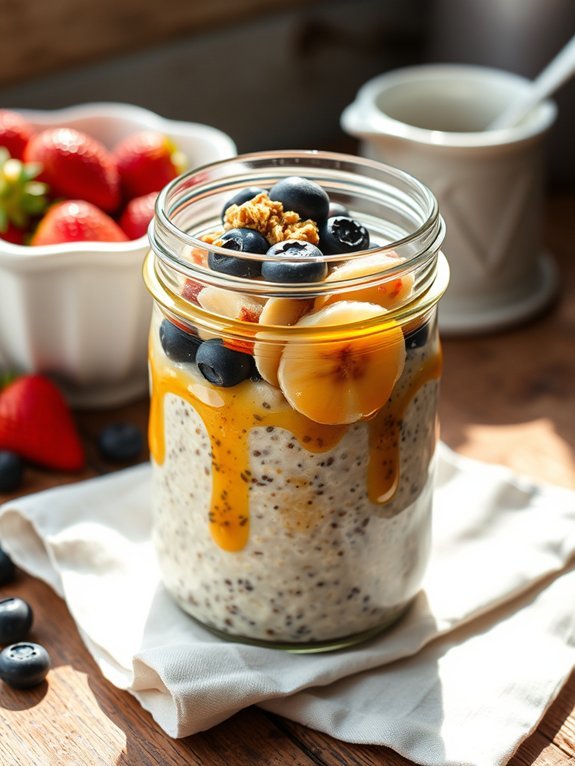
Overnight oats are a fantastic solution for busy mornings; they can be prepped ahead of time, require no cooking, and offer a nutritious start to the day. This versatile dish is as simple as mixing oats with your favorite liquids and toppings, and letting them sit overnight in the refrigerator. The result is a creamy, satisfying meal that can be customized to fit your taste preferences and nutritional goals.
To make overnight oats, all you need are a few basic ingredients, and the process is incredibly forgiving. You can play around with various combinations of oats, liquids, and add-ins, allowing you to create nourishing breakfast options that you’ll actually look forward to. Whether you prefer fruity, nutty, or spicy flavors, overnight oats can accommodate a wide array of tastes.
Ingredients:
- 1/2 cup rolled oats
- 1 cup milk (dairy or non-dairy)
- 1 tablespoon yogurt (optional)
- 1 tablespoon chia seeds
- 1 tablespoon honey or maple syrup (optional)
- 1/2 teaspoon vanilla extract
- 1/2 cup diced fruits (e.g., bananas, berries, apples)
- A pinch of salt
- Nuts, seeds, or spices for topping (e.g., cinnamon, nutmeg)
In a mason jar or bowl, combine the rolled oats, milk, yogurt (if using), chia seeds, sweetener (if desired), vanilla extract, diced fruits, and a pinch of salt. Stir well until all ingredients are mixed thoroughly. Cover the jar or bowl with a lid or plastic wrap and place it in the refrigerator. Allow the mixture to sit overnight (or for at least 4 hours) so that the oats can absorb the liquid and soften.
In the morning, stir the mixture, add any additional toppings, and enjoy!
When making overnight oats, feel free to experiment with the ratios of liquids and oats for your desired creaminess. You can also prep several jars at once by doubling or tripling the recipe, allowing for different flavor combinations each day. For an even quicker breakfast, consider incorporating protein powder or nut butter for added nutrition.
Enjoy the convenience and versatility of overnight oats by making them a regular part of your meal prep routine!
Pre-Portioned Snack Packs
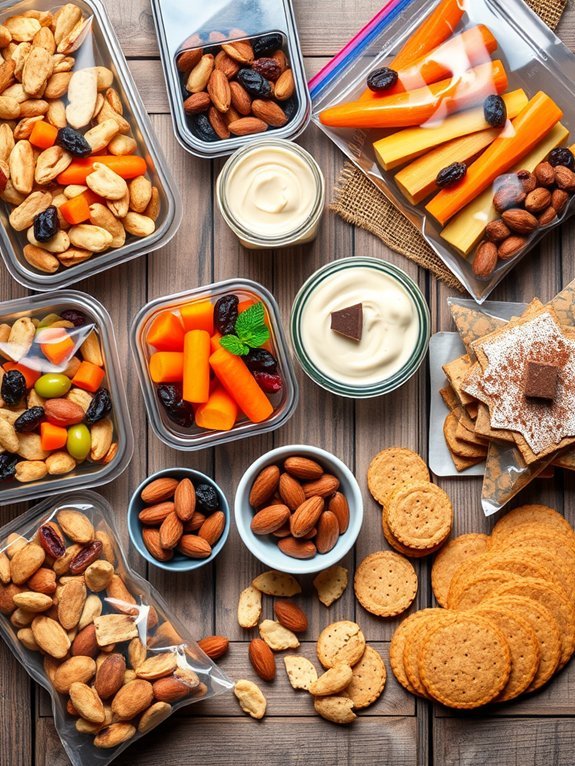
Pre-portioned snack packs are an excellent way to stay on track with your healthy eating goals. By preparing your snacks in advance, you eliminate the temptation of reaching for unhealthy options during your busy day.
These snack packs are easy to assemble and can include a variety of nutritious options to satisfy different cravings. Whether you’re looking for something crunchy, sweet, or savory, having pre-portioned snacks ready will help you make better food choices.
Creating snack packs not only saves time but also helps with portion control. By measuring your snacks in advance, you reduce the chances of overeating and can keep your calorie intake in check.
You can customize your snack packs based on your dietary preferences, such as opting for low-carb, high-protein, or vegan snacks. This flexibility makes it a practical choice for anyone looking to incorporate healthier habits into their lifestyle.
- Mixed nuts (almonds, walnuts, pecans)
- Dried fruits (apricots, cranberries, raisins)
- Baby carrots or cut celery sticks
- Hummus or guacamole (for dipping)
- Rice cakes or whole grain crackers
- Greek yogurt or cottage cheese (in small containers)
- Dark chocolate pieces or cocoa-dusted almonds
To prepare your pre-portioned snack packs, start by gathering your chosen snack ingredients. Divide the nuts into individual servings and place them in small bags or containers, ensuring you measure out the appropriate portion size.
For the fresh veggies, wash and cut them into sticks or bite-sized pieces. Pack the hummus or guacamole in small containers, and add a side of fresh veggies for a crunchy dip experience. For dairy options, scoop the yogurt or cottage cheese into portioned containers.
Finally, add any sweet treats like dark chocolate as an enjoyable balance to your savory snacks.
When assembling your snack packs, keep in mind that variety is key. Mixing different textures and flavors will make your snack packs more enjoyable and satisfying. You can also switch up the ingredients based on what’s in season or what you have on hand.
Using airtight containers or resealable bags will help keep everything fresh, and labeling the packs with dates can help you keep track of their freshness. Remember to store your snack packs in an easily accessible place, like your fridge or pantry, so you’re reminded to reach for them when hunger strikes!
One-Pan Roasted Vegetables
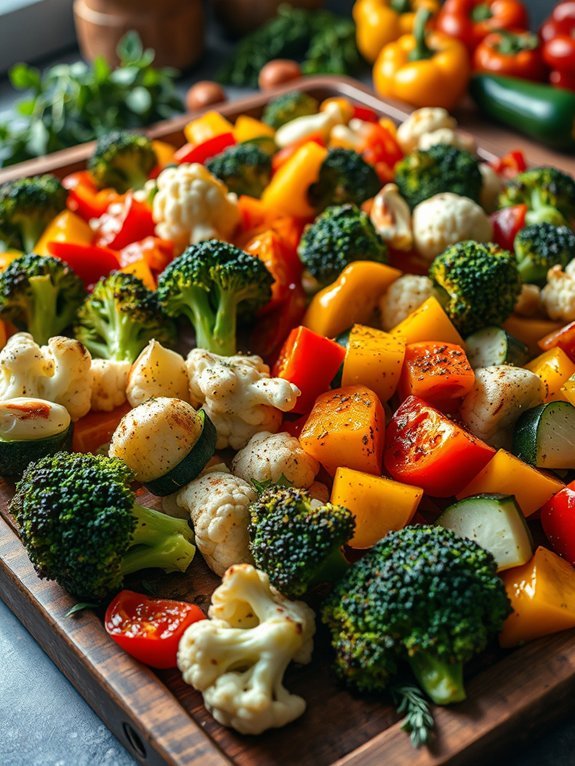
One-pan roasted vegetables are the perfect way to bring color, flavor, and nutrition to your meal prep with minimal effort. This versatile dish can be customized based on your preferences and seasonal produce, making it a fantastic option for anyone looking to eat healthier without sacrificing taste. The combination of different vegetables adds both variety and a rich array of vitamins and minerals, guaranteeing you have a nutritious side dish or a base for hearty meals.
Roasting vegetables enhances their natural sweetness and caramelizes the edges, providing a delightful texture and flavor. This dish is easily adaptable to pair with grains or proteins, making it suitable for lunches, dinners, or even as a snack. With just one pan to clean, you’ll enjoy a hassle-free cooking experience while still enjoying delicious roasted veggies that can brighten up any meal.
Ingredients:
- 2 cups of broccoli florets
- 2 cups of cauliflower florets
- 1 bell pepper (any color), chopped
- 1 medium zucchini, sliced
- 1 medium red onion, sliced
- 4 cloves of garlic, minced
- 3 tablespoons olive oil
- 1 teaspoon dried oregano
- 1 teaspoon paprika
- Salt and pepper to taste
Preheat your oven to 425°F (220°C). In a large mixing bowl, combine all the chopped vegetables and minced garlic. Drizzle with olive oil, then sprinkle the dried oregano, paprika, salt, and pepper over the top. Toss everything together until the vegetables are evenly coated with the oil and seasonings.
Spread the mixture in a single layer on a baking sheet, making sure not to overcrowd the pan. Roast in the preheated oven for about 25-30 minutes, tossing halfway through, until the vegetables are tender and caramelized.
For best results, make sure your vegetables are cut into similar sizes to guarantee they cook evenly. Feel free to experiment with different seasoning blends or add a splash of balsamic vinegar before roasting for added tanginess.
You can also add protein, such as chickpeas or chicken, to the pan for a complete one-pan meal. If you have leftovers, they can be stored in an airtight container in the fridge for up to four days, making them perfect for quick meals throughout the week.
Recommended Items
Get ready to elevate your meal prep game with these fantastic product and equipment recommendations!
Products
Freezer-Friendly Soup Recipes
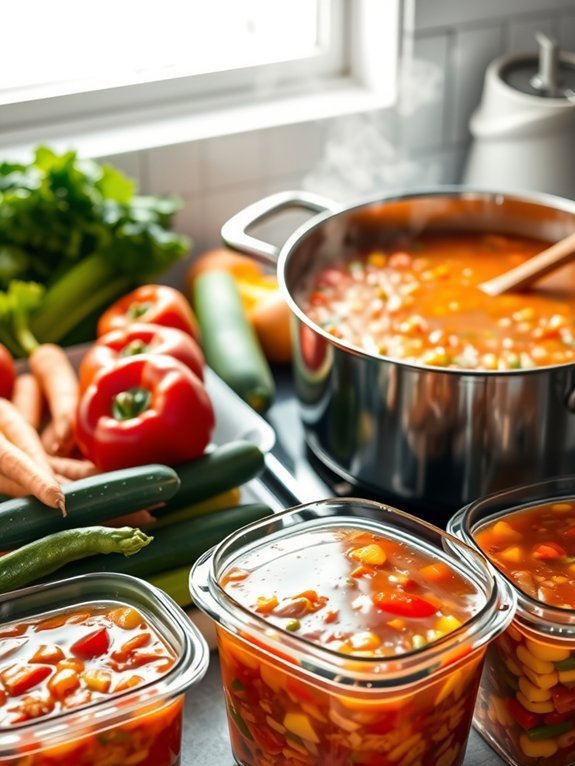
Freezer-friendly soups are a fantastic meal prep solution for those busy days when cooking from scratch isn’t an option. These soups are perfect for preparing in advance, allowing you to enjoy homemade goodness without the hassle. By making a large batch and freezing individual portions, you can guarantee nutritious, hearty meals are always at your fingertips.
Plus, the best part about soups is their versatility; you can easily adjust ingredients to fit your taste preferences or dietary needs. One of the best soup recipes to freeze is classic vegetable soup. Packed with colorful veggies and rich flavors, it nourishes the body and warms the soul. This recipe isn’t only easy to prepare but also allows for substitutions based on what you have on hand or what’s in season.
Let’s explore and create a healthy, satisfying vegetable soup that you can enjoy all year round!
- 1 tablespoon olive oil
- 1 onion, chopped
- 2 carrots, diced
- 2 celery stalks, diced
- 2 cloves garlic, minced
- 1 zucchini, diced
- 1 bell pepper, diced
- 1 can (14.5 oz) diced tomatoes (with juice)
- 3 cups vegetable broth
- 1 bay leaf
- 1 teaspoon dried thyme
- Salt and pepper to taste
- 1 cup green beans, trimmed and cut into 1-inch pieces
- 1 cup corn (fresh, frozen, or canned)
- Fresh parsley for garnish (optional)
In a large pot, heat the olive oil over medium heat. Add the chopped onion, carrots, and celery, sautéing for about 5-7 minutes until the vegetables soften. Stir in the garlic and cook for another minute before adding the zucchini, bell pepper, diced tomatoes with their juice, vegetable broth, bay leaf, and thyme.
Bring the mixture to a boil, reduce the heat, and let it simmer for about 20 minutes. Then, add in the green beans and corn, cooking for an additional 10 minutes. Season with salt and pepper to taste, and remove the bay leaf before serving or cooling for freezing.
When it comes to freezing soup, it’s best to let it cool completely before transferring it to airtight containers or freezer bags to prevent freezer burn. Remember to leave some headspace in the containers, as the soup will expand when frozen.
Soups can generally be stored in the freezer for up to 3 months. When you’re ready to eat, simply thaw in the refrigerator overnight and reheat on the stove or in the microwave until heated through. Enjoy experimenting with different vegetables and herbs to make the soup uniquely yours!
Meal Prep Guide for Healthy Eating
Grilled Chicken or Tofu Strips
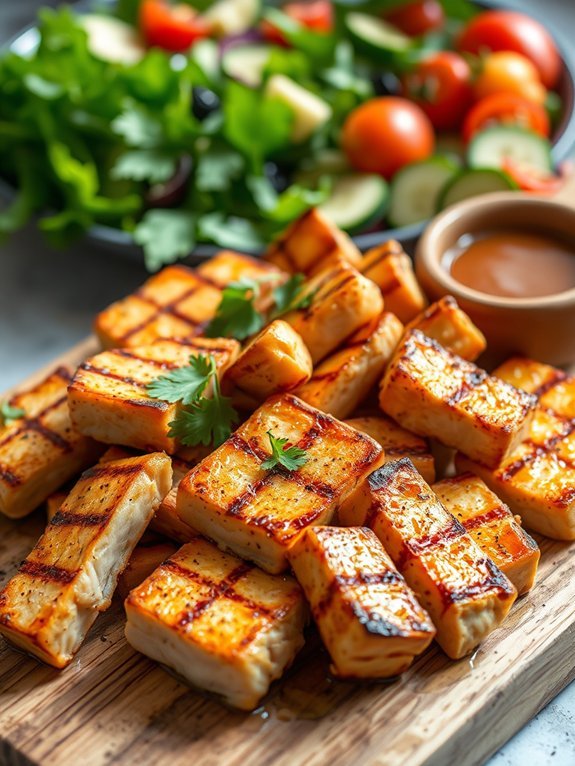
Grilled chicken or tofu strips make for a versatile and delicious option that can elevate any meal prep. Whether you’re looking to add a protein-packed component to salads, wraps, rice bowls, or enjoy them as a snack, these strips are an excellent choice. The marinade infuses them with flavor, making each bite tender and satisfying. Plus, they’re simple to make, requiring minimal ingredients and cookware.
To guarantee the best results, selecting high-quality chicken or firm tofu is essential. If you choose chicken, opt for boneless, skinless breasts for a lean protein source. For tofu lovers, pressing the tofu before marinating will help achieve a firmer texture, allowing it to absorb the marinade more effectively. Cooking these strips on the grill or a grill pan imparts a smoky flavor that enhances their taste even further.
Ingredients:
- 1 lb boneless skinless chicken breasts or firm tofu
- 2 tablespoons olive oil
- 3 tablespoons soy sauce
- 2 tablespoons lemon juice
- 1 tablespoon honey or maple syrup
- 2 garlic cloves, minced
- 1 teaspoon smoked paprika
- 1 teaspoon black pepper
- 1 teaspoon salt
Cut the chicken or tofu into strips and place them in a bowl. In a separate bowl, whisk together olive oil, soy sauce, lemon juice, honey (or maple syrup), minced garlic, smoked paprika, black pepper, and salt. Pour the marinade over the strips, guaranteeing they’re well-coated. Allow them to marinate for at least 30 minutes in the refrigerator.
Preheat a grill or grill pan over medium heat, then cook the strips for about 5-7 minutes on each side, until the chicken is cooked through or the tofu is golden and crispy.
When grilling chicken or tofu strips, it’s important not to overcrowd the grill to guarantee even cooking. If you’re using tofu, consider marinating it longer for a more intense flavor, as it can absorb marinades better than chicken. Always have a meat thermometer handy for chicken to check that it reaches an internal temperature of 165°F for safety. Enjoy your flavorful and healthy strips in various dishes throughout the week!
Sheet Pan Fajitas
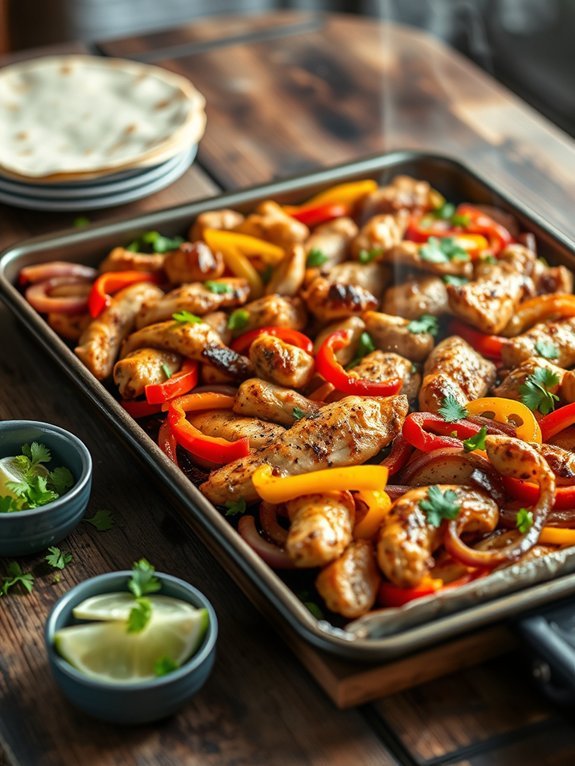
Sheet pan fajitas are a fantastic way to enjoy a flavorful meal while also keeping things simple and healthy. This one-pan dish combines marinated chicken, colorful bell peppers, and onions, all roasted together to create a delicious and satisfying dinner.
It’s perfect for meal prep since you can easily portion it out for the week. Just warm it up with your favorite tortillas, and you have a quick meal ready to go!
Not only are these fajitas bursting with flavor, but they’re also packed with nutrients from the fresh vegetables. You can customize them based on your vegetable preferences or what you have on hand, making them versatile and adaptable.
Plus, they require minimal clean-up, making them a great choice for busy weeknights.
Ingredients:
- 1 pound chicken breast, sliced into thin strips
- 1 red bell pepper, sliced
- 1 yellow bell pepper, sliced
- 1 green bell pepper, sliced
- 1 medium onion, sliced
- 3 tablespoons olive oil
- 2 teaspoons chili powder
- 1 teaspoon cumin
- 1 teaspoon paprika
- 1 teaspoon garlic powder
- Salt and pepper to taste
- Fresh lime, for serving
- Tortillas, for serving
Preheat your oven to 425°F (220°C). In a large bowl, combine the sliced chicken, bell peppers, and onion. Drizzle the olive oil over the top, followed by the chili powder, cumin, paprika, garlic powder, salt, and pepper.
Toss everything together until evenly coated. Spread the mixture in an even layer on a sheet pan and roast in the oven for about 20-25 minutes, or until the chicken is cooked through and the vegetables are tender, stirring halfway through.
For an even more delicious result, consider marinating the chicken in the spice mix and olive oil for at least 30 minutes (or up to overnight) before cooking. This step allows the flavors to penetrate the meat more deeply.
Additionally, feel free to experiment with other toppings such as avocado, fresh cilantro, or sour cream when serving your fajitas. Finally, remember to watch your chicken closely, as cooking times can vary depending on the thickness of the strips.
Mason Jar Salads
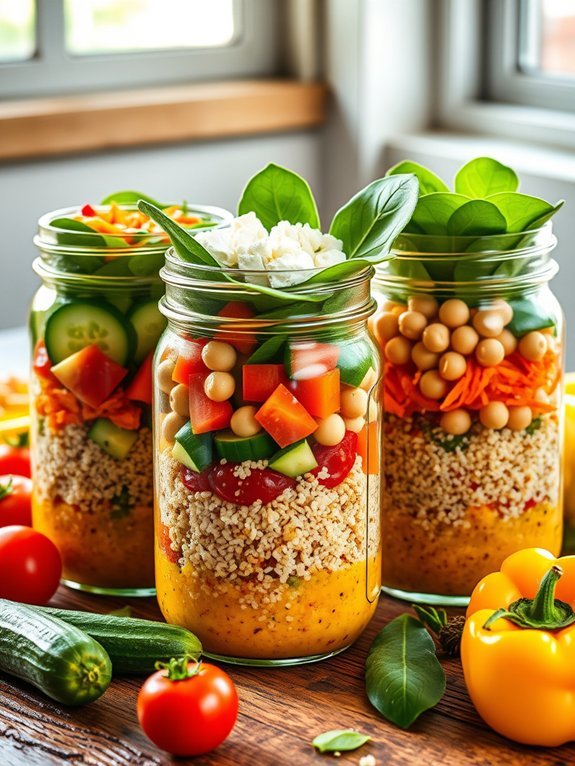
Mason jar salads are a convenient and healthy way to prepare meals ahead of time. These layered salads aren’t only visually appealing but also guarantee that your ingredients stay fresh and crisp until you’re ready to enjoy them. The key to a successful mason jar salad is to place the dressing at the bottom, followed by hearty vegetables, grains, proteins, and leafy greens at the top. This prevents premature wilting and sogginess, allowing you to grab a nutritious meal on the go.
Creating your own mason jar salad allows for endless customization based on your tastes and dietary preferences. Whether you prefer a Mediterranean blend with olives and feta or a classic chicken Caesar, the possibilities are as broad as your imagination.
To help you get started, here’s a simple recipe for a vibrant and filling mason jar salad that can be prepped in under 30 minutes.
- 1 cup cooked quinoa
- 1 cup cherry tomatoes, halved
- 1 cucumber, diced
- 1 bell pepper, diced
- 1 cup shredded carrots
- 1 can chickpeas, rinsed and drained
- 2 cups baby spinach
- 1/4 cup feta cheese (optional)
- 1/4 cup olive oil
- 1/4 cup red wine vinegar
- 1 tablespoon Dijon mustard
- Salt and pepper to taste
To assemble your mason jar salad, start by adding the dressing to the bottom of each jar. Next, layer in the quinoa followed by the cherry tomatoes, cucumber, bell pepper, carrots, chickpeas, and finish with the baby spinach. If you’re using feta cheese, sprinkle it on top. Make sure the jars are sealed tightly with lids, and store them in the refrigerator until you’re ready to eat.
When it’s time for your meal, simply shake the jar to distribute the dressing before enjoying.
When prepping mason jar salads, consider portion sizes and how many salads you’d like to prepare for the week. It’s a good idea to make a batch of different salads, so you won’t get bored with your meals. You can also adjust the ingredients based on what you have on hand—this is a great way to reduce food waste.
For added protein, consider including grilled chicken, tofu, or hard-boiled eggs. Just remember to keep the delicate greens at the top to maintain their freshness!
Easy Stir-Fry Kits
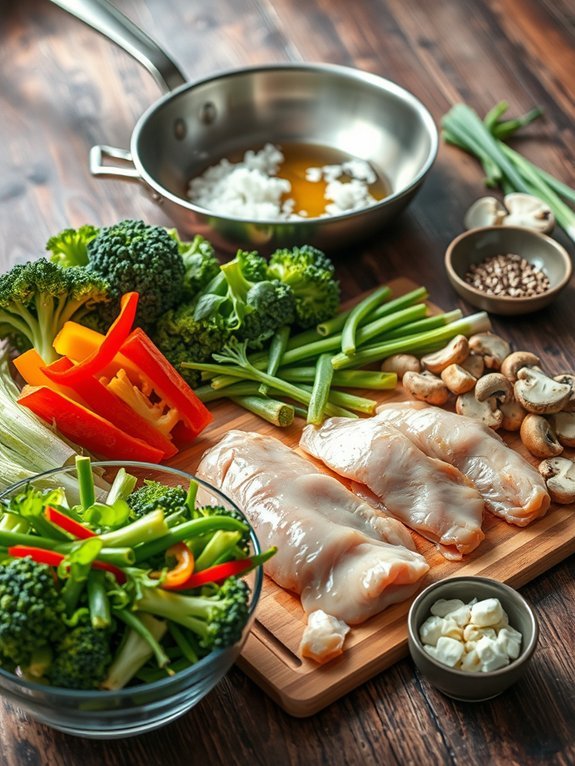
Easy stir-fry kits are the ultimate solution for those busy weeknights when you want a nutritious meal without spending hours in the kitchen. With a mix of vibrant vegetables, protein, and a flavorful sauce, these kits come together in just a matter of minutes. By preparing the ingredients ahead of time, you can simply toss them in a hot pan and create a delicious dish packed with taste and nutrition.
Plus, stir-fry allows for plenty of variation, so you can switch up the veggies and proteins according to what you have on hand or what’s in season.
To create your own easy stir-fry kits, you can prepare and portion out ingredients into separate bags or containers. When you’re ready to cook, just grab a kit from the fridge or freezer, and you’ll have everything you need for a quick dinner. Not only does this meal prep method save you time, but it also encourages you to eat more vegetables and maintain a balanced diet, making it a perfect choice for healthy eating enthusiasts.
- 2 cups mixed vegetables (broccoli florets, bell peppers, and snap peas)
- 1 cup sliced mushrooms
- 1 lb protein (chicken breast, tofu, or shrimp)
- 2 tablespoons vegetable oil
- 3 tablespoons soy sauce
- 1 tablespoon ginger (minced)
- 2 cloves garlic (minced)
- 1 teaspoon sesame oil
- Cooked rice or noodles (for serving)
- Optional toppings (sesame seeds, green onions, or crushed red pepper)
Begin by heating the vegetable oil in a large skillet or wok over medium-high heat. Add the minced garlic and ginger, sautéing for about 30 seconds until fragrant. Next, add your protein of choice and stir-fry until fully cooked.
Once the protein is ready, add the mixed vegetables and mushrooms, continuing to stir and cook for 3-5 minutes until everything is tender-crisp. Finally, pour in the soy sauce and sesame oil, mixing well to combine. Serve the stir-fry over cooked rice or noodles, and enjoy!
For the best results when cooking your stir-fry, make sure your pan is hot before you add the ingredients. This will help achieve that perfect sear on your protein and lock in the flavors. Additionally, if using frozen vegetables, be sure to thaw them beforehand to avoid excess water in your stir-fry.
Feel free to experiment with different sauces or add heat with some chili paste for a spicy kick. Stir-frying is flexible, so enjoy getting creative with your ingredients!
Homemade Energy Bars
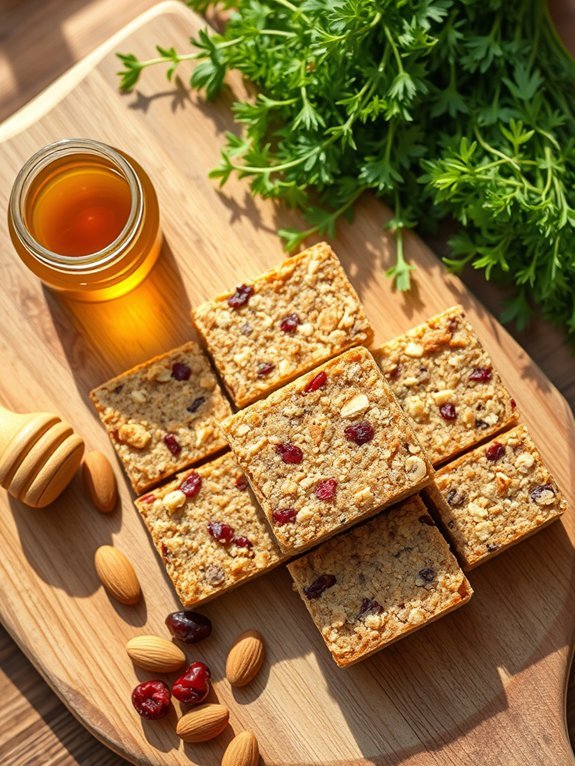
Homemade energy bars are an excellent option for nutritious snacking, especially for those with a busy lifestyle. They’re easy to prepare, packed with healthy ingredients, and can be customized to fit your taste preferences.
Whether you need a quick post-workout booster or a mid-afternoon pick-me-up, making these energy bars at home guarantees you have full control over the ingredients, allowing for a healthier choice compared to store-bought versions.
This simple recipe combines oats, nuts, and dried fruits for a satisfying treat that provides sustained energy throughout the day. Not only are these bars wholesome and delicious, but they’re also versatile, allowing you to substitute or add ingredients based on what you have on hand.
So gather your supplies and let’s get started!
- 2 cups rolled oats
- 1 cup nut butter (such as almond or peanut butter)
- 1/2 cup honey or maple syrup
- 1/2 cup chopped nuts (such as almonds, walnuts, or pecans)
- 1/2 cup dried fruits (such as cranberries, raisins, or apricots)
- 1/4 cup seeds (such as sunflower or chia seeds)
- 1 teaspoon vanilla extract
- A pinch of salt
In a large mixing bowl, combine the rolled oats, nut butter, honey or maple syrup, chopped nuts, dried fruits, seeds, vanilla extract, and salt.
Stir the mixture until everything is well combined and sticky. Line an 8×8 inch baking dish with parchment paper, then transfer the mixture into the dish. Press it down firmly and evenly to create a compact layer.
Refrigerate for at least 2 hours until set, then cut into bars or squares.
For maximum freshness, store your homemade energy bars in an airtight container in the refrigerator for up to two weeks. You can also experiment with different flavor variations by adding ingredients like chocolate chips, coconut flakes, or protein powder.
If you find the texture too soft, try adding more oats or nuts, and if they’re too dry, a little more nut butter or honey can help bind them better.
Happy snacking!
Whole Grain Pasta Meal Prep
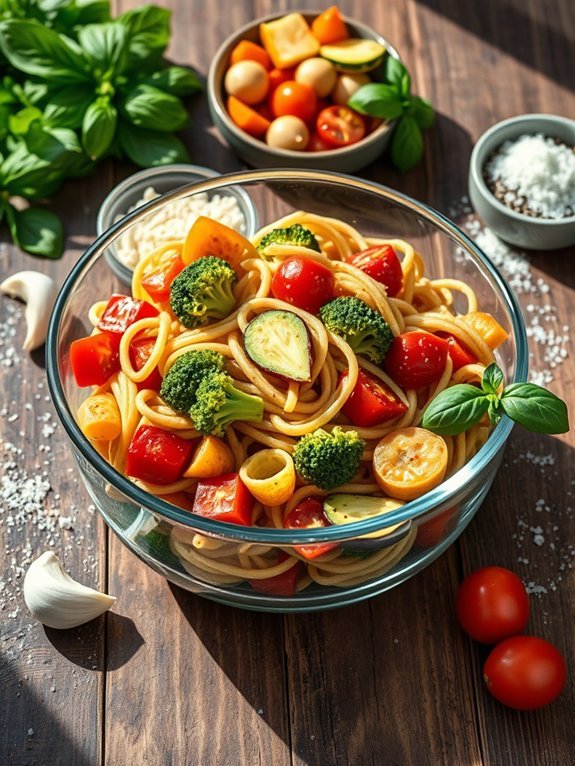
Whole grain pasta isn’t only a nutritious alternative to traditional pasta, but it also provides more fiber and essential nutrients, making it a great choice for meal prep. By incorporating whole grain pasta into your meal prep routine, you can enjoy hearty, delicious dishes throughout the week that are both filling and satisfying.
Whether you choose to pair it with fresh vegetables, lean proteins, or zesty sauces, whole grain pasta can be a versatile base for a variety of healthy meals.
For this meal prep recipe, we’ll combine whole grain pasta with roasted vegetables and a light garlic sauce, creating a balanced and flavorful meal that can be stored in the fridge and enjoyed over several days. This dish is quick to prepare, making it perfect for busy weeknights or as part of your weekend meal prepping.
Simply cook the pasta and roast the veggies in the oven for a delightful combination that serves as a nourishing lunch or dinner option.
Ingredients:
- 8 ounces of whole grain pasta
- 2 cups of broccoli florets
- 1 bell pepper, diced
- 1 zucchini, sliced
- 1 cup of cherry tomatoes, halved
- 3 tablespoons olive oil
- 3 cloves of garlic, minced
- Salt and pepper, to taste
- 1 teaspoon Italian seasoning
- Grated Parmesan cheese (optional for serving)
- Fresh basil, for garnishing (optional)
Cook the whole grain pasta according to the package instructions until al dente. Meanwhile, preheat the oven to 400°F (200°C).
Toss the broccoli, bell pepper, zucchini, and cherry tomatoes with olive oil, minced garlic, salt, pepper, and Italian seasoning. Spread the vegetables on a baking sheet and roast for about 20 minutes, or until tender and slightly caramelized.
Once the pasta is cooked and drained, combine it with the roasted vegetables in a large mixing bowl. If desired, top with grated Parmesan cheese and fresh basil before serving.
When preparing whole grain pasta, be mindful of the cooking time, as overcooking can result in a mushy texture. To enhance the dish, feel free to add your choice of protein, such as grilled chicken, shrimp, or chickpeas, for added substance.
Additionally, whenever meal prepping, store your pasta and vegetables in airtight containers to keep them fresh longer, and consider separating sauces to prevent sogginess until you’re ready to eat.
Slow Cooker Chili
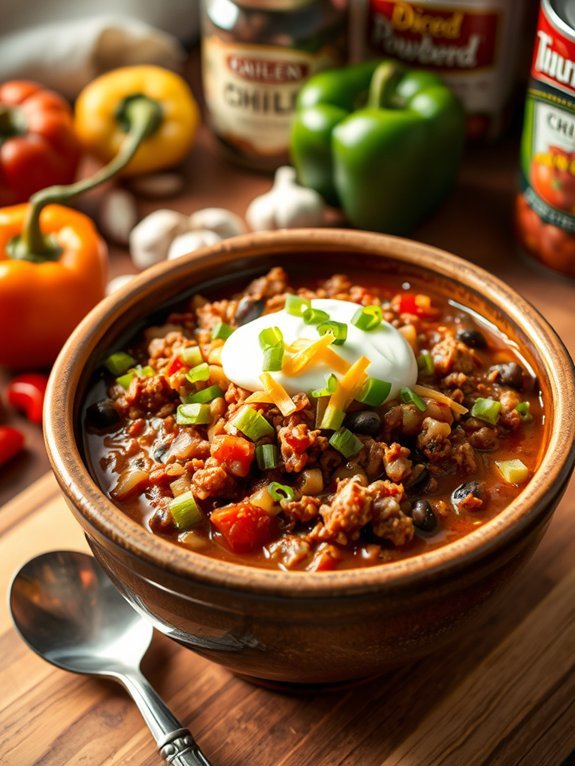
If you’re in search of a hearty and satisfying dish that requires minimal effort, slow cooker chili is a perfect choice. This dish isn’t only rich in flavor but also packed with nutrients, making it an excellent option for meal prepping.
Whether you’re looking for a protein boost, some fiber, or a warm, comforting meal at the end of the day, slow cooker chili delivers all that and more. Ideal for busy individuals or families, you can put all the ingredients into the slow cooker and let it work its magic while you focus on other tasks.
One of the best features of slow cooker chili is its versatility. You can customize it by adding your favorite beans, vegetables, or spices. The low and slow cooking method allows the ingredients to meld together beautifully, creating a rich and robust flavor.
Plus, with plenty of leftovers, it’s perfect for enjoying throughout the week or freezing for a later date.
- 1 pound ground beef or turkey
- 1 onion, chopped
- 2 cloves garlic, minced
- 1 bell pepper, chopped
- 1 can (14 oz) diced tomatoes
- 1 can (15 oz) kidney beans, drained and rinsed
- 1 can (15 oz) black beans, drained and rinsed
- 1 can (8 oz) tomato sauce
- 2 tablespoons chili powder
- 1 teaspoon cumin
- 1 teaspoon paprika
- Salt and pepper to taste
- Optional toppings: shredded cheese, sour cream, green onions
In a slow cooker, add the ground beef or turkey, onion, garlic, bell pepper, diced tomatoes, kidney beans, black beans, tomato sauce, chili powder, cumin, paprika, salt, and pepper. Stir well to combine all the ingredients.
Cover and set the slow cooker to low heat for 6-8 hours or high heat for 3-4 hours. Stir occasionally if possible, and make sure the chili is heated through before serving.
For a thicker chili, you can either reduce the amount of liquid by using less tomato sauce or beans or let it cook uncovered for the last hour.
Feel free to let your creativity shine by incorporating additional vegetables like corn or zucchini. To enhance the flavor, consider letting the chili sit overnight in the refrigerator before reheating, as this allows the flavors to develop even further.
Don’t forget to adjust the spices to your personal preference for a mild or spicy kick!


