This post may contain affiliate links. Please read our policy page.
Freezer meals are a game-changer for busy weeks! Try comforting dishes like Creamy Chicken and Rice Casserole and hearty Beef and Bean Chili. For lighter options, whip up a Vegetable Stir-Fry with Tofu or Shrimp Fried Rice. Don’t miss the flavorful Italian Sausage and Peppers or satisfying Lentil Soup with Kale. With options like BBQ Pulled Pork and Teriyaki Beef Bowls, you’ll always have something delicious on hand. There’s even more to explore, so keep going for more handy recipes!
Creamy Chicken and Rice Casserole
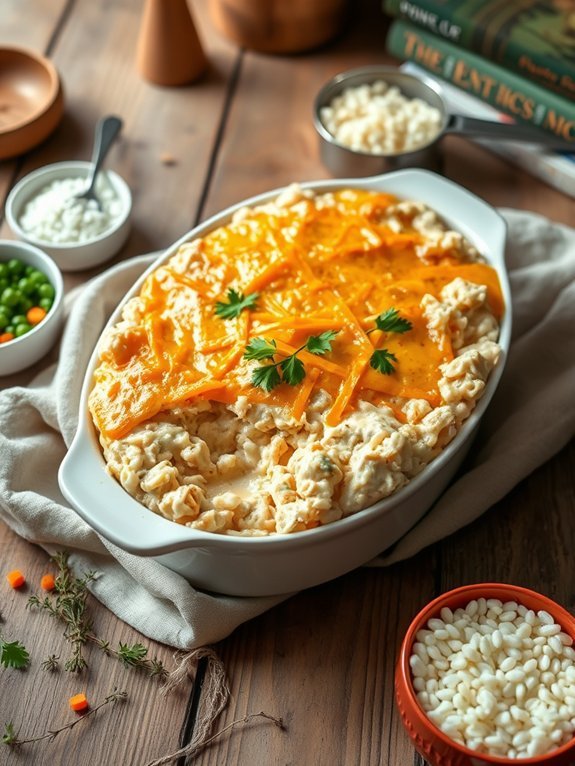
Creamy Chicken and Rice Casserole is the ultimate comfort food, perfect for busy weeknights or as a freezer-friendly meal prep option. This dish combines tender chicken, fluffy rice, and a rich, creamy sauce, all topped with a cheesy layer that’s sure to please the whole family.
It’s not only satisfying but also very simple to prepare, making it a go-to recipe for both seasoned cooks and beginners alike.
One of the best parts about this casserole is its versatility. You can easily customize it by adding your favorite vegetables or switching up the type of cheese. Plus, it freezes beautifully, allowing you to make a large batch and store portions for future meals.
When you’re ready to enjoy it, just pop it in the oven or microwave, and dinner is served without the hassle!
Ingredients:
- 2 cups cooked chicken, shredded
- 1 cup uncooked long-grain white rice
- 4 cups chicken broth
- 1 can (10.5 oz) cream of chicken soup
- 1 cup sour cream
- 1 cup shredded cheddar cheese
- 1/2 cup frozen peas and carrots (optional)
- 1 teaspoon garlic powder
- 1 teaspoon onion powder
- Salt and pepper to taste
- 1/2 teaspoon paprika (optional)
Preheat your oven to 350°F (175°C). In a large mixing bowl, combine cooked chicken, uncooked rice, chicken broth, cream of chicken soup, sour cream, and half of the shredded cheddar cheese. Mix well to combine all the ingredients, then season with garlic powder, onion powder, salt, pepper, and paprika if using.
Pour the mixture into a greased 9×13-inch baking dish, spreading it evenly. Cover the dish with aluminum foil and bake for about 45 minutes. Remove the foil, sprinkle the remaining cheddar cheese on top, and return to the oven for an additional 15 minutes, or until the cheese is melted and bubbly.
When preparing this casserole, consider using leftover rotisserie chicken to save time, or add some sautéed mushrooms or broccoli for extra flavor and nutrition.
If you’re freezing the casserole, allow it to cool completely before wrapping it tightly in plastic wrap and aluminum foil. It can be stored in the freezer for up to three months. To reheat, thaw it in the refrigerator overnight, then bake it at 350°F until heated through.
Recommended Items
Get ready to make meal prep a breeze with these recommended products and equipment!
Beef and Bean Chili
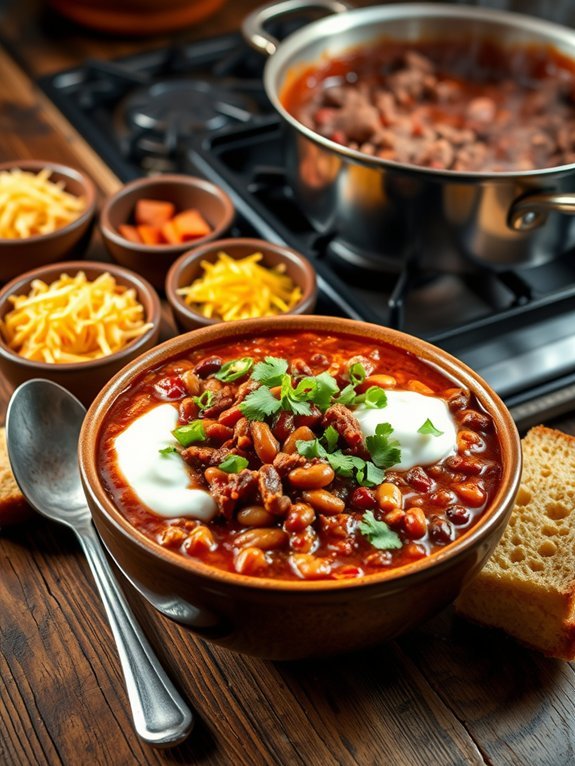
Beef and Bean Chili is a hearty and comforting dish that’s perfect for making ahead and freezing for later. This chili combines ground beef, nutritious beans, and a medley of spices to create a satisfying meal that’s easy to prepare and even easier to enjoy after a long day. The rich flavors develop beautifully when allowed to simmer together, making it an ideal candidate for meal prepping.
You can serve it on its own, or with toppings like cheese, sour cream, and cilantro to add extra flavor and texture.
Not only is Beef and Bean Chili delicious, but it’s also versatile. You can adjust the spice levels according to your preference, and you can add other favorite ingredients like corn or bell peppers for variation. This dish can be stored in the freezer and can be quickly reheated for a busy weeknight dinner.
Let’s explore the simple recipe that will bring warmth and satisfaction to your table.
Ingredients:
- 1 lb ground beef
- 1 can (15 oz) kidney beans, drained and rinsed
- 1 can (15 oz) black beans, drained and rinsed
- 1 can (14 oz) diced tomatoes
- 1 small onion, chopped
- 3 cloves garlic, minced
- 2 tbsp chili powder
- 1 tsp cumin
- 1 tsp paprika
- ½ tsp salt
- ½ tsp black pepper
- 1 cup beef broth
- Optional: shredded cheese, sour cream, chopped cilantro for serving
In a large pot or Dutch oven, brown the ground beef over medium heat, breaking it apart as it cooks until it’s no longer pink. Drain any excess fat, then add the chopped onion and minced garlic, sautéing until the onion becomes translucent.
Stir in the chili powder, cumin, paprika, salt, and pepper for about a minute until fragrant. Next, add in the drained beans, diced tomatoes, and beef broth, stirring to incorporate. Bring the mixture to a simmer, reduce the heat to low, and let it cook uncovered for about 30 minutes, stirring occasionally.
When cooking Beef and Bean Chili, feel free to customize it to your tastes. For a spicier chili, add diced jalapeños or a pinch of cayenne pepper during cooking.
If you prefer a thicker chili, allow it to simmer longer or reduce the amount of beef broth. This dish can also be doubled or tripled easily for larger gatherings or meal prep, making it an excellent go-to for busy families.
Remember to let it cool completely before storing in freezer-safe containers for future meals!
Vegetable Stir-Fry With Tofu
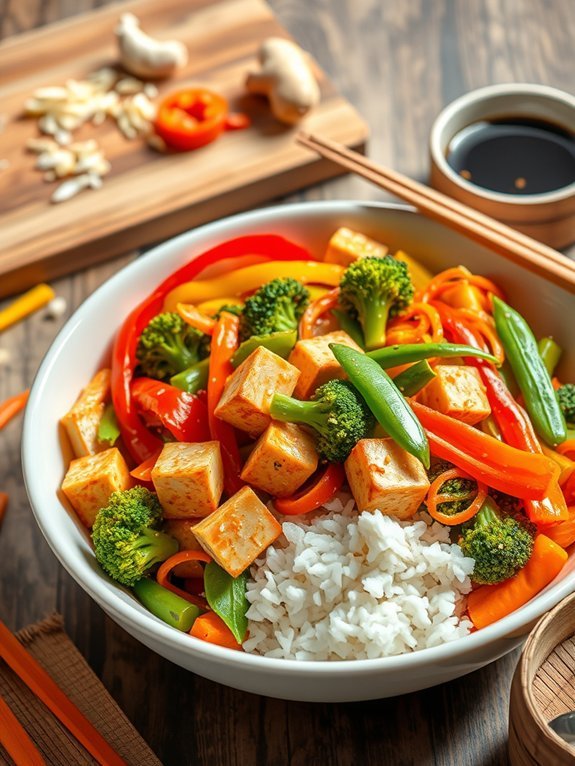
Vegetable stir-fry with tofu is a vibrant and nutritious dish, perfect for a quick weeknight dinner or for meal prepping on the weekend. This dish is highly versatile, allowing you to tailor the vegetables according to the season or what you have available in your fridge. Tofu, packed with protein, adds a hearty element that balances out the vibrant array of vegetables.
When cooked correctly, it absorbs flavor beautifully, making every bite delicious. This freezer-friendly recipe isn’t only quick to prepare but also easy to store. You can batch-cook it and freeze portions for later use.
Having this colorful stir-fry on hand will make it easy to enjoy a healthy meal whenever you need it. Simply heat it up and serve over rice or quinoa for a complete and satisfying dinner in minutes!
- 1 block firm tofu, drained and pressed
- 2 tablespoons vegetable oil
- 1 red bell pepper, sliced
- 1 yellow bell pepper, sliced
- 1 cup broccoli florets
- 1 cup snow peas
- 2 carrots, julienned
- 3 cloves garlic, minced
- 1 inch ginger, grated
- 3 tablespoons soy sauce
- 1 tablespoon sesame oil
- 1 tablespoon cornstarch (optional, for thickening)
- Cooked rice or quinoa, for serving
Cut the pressed tofu into cubes and toss with cornstarch if using. Heat vegetable oil in a large pan or wok over medium-high heat, then add the tofu and sauté until golden brown on all sides.
Remove tofu from the pan and set aside. In the same pan, add the garlic and ginger, followed by the vegetables. Stir-fry for 5-6 minutes until vegetables are tender yet crisp.
Return the tofu to the pan, add soy sauce and sesame oil, and stir to combine. Cook for an additional minute before serving over rice or quinoa.
For the best flavor, let the tofu marinate in soy sauce for about 15 minutes before cooking it. If you’re using frozen vegetables, add them straight to the pan without thawing to maintain their texture.
Additionally, feel free to customize the recipe by adding your favorite vegetables or adjusting the soy sauce to your taste preference. This dish isn’t only nutritious but also an excellent way to incorporate a variety of colorful vegetables into your diet.
Shrimp Fried Rice
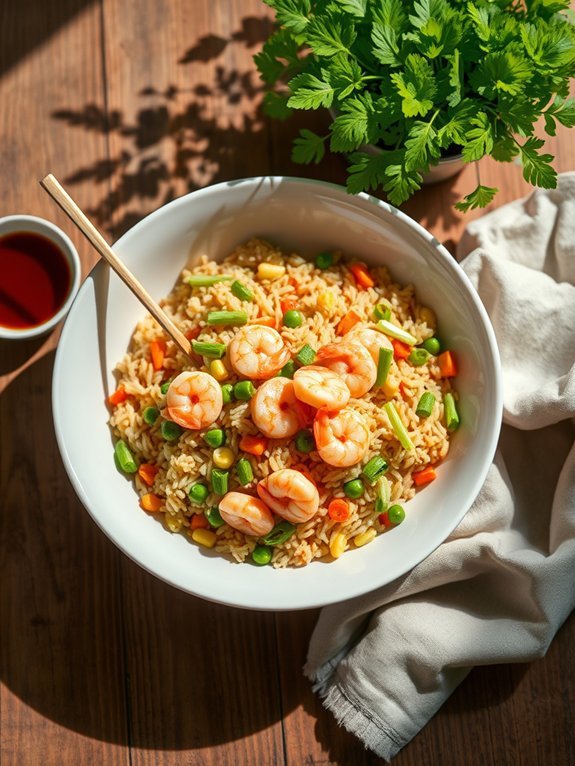
Shrimp Fried Rice is a delightful and versatile dish that combines succulent shrimp with vibrant vegetables and flavorful rice, making it an excellent option for both quick weeknight dinners and meal prep. This dish allows you to use leftover rice, ensuring that none of your ingredients go to waste, which is perfect for those looking to make freezer meals.
Additionally, shrimp cooks quickly, allowing this recipe to come together in a matter of minutes, making it ideal for busy days.
The beauty of Shrimp Fried Rice lies in its adaptability. You can customize it by adding your favorite vegetables, such as peas, carrots, bell peppers, or even broccoli. With the use of soy sauce, garlic, and green onions, the dish is bursting with flavor and can easily satisfy even the pickiest of eaters.
Plus, it stores well in the freezer, making it a convenient meal option that you can prepare in advance and enjoy on a busy day.
Ingredients:
- 2 cups cooked rice (preferably day-old)
- 1 pound shrimp, peeled and deveined
- 1 cup mixed vegetables (peas, carrots, corn)
- 2 tablespoons soy sauce
- 1 tablespoon oyster sauce (optional)
- 2 tablespoons vegetable oil
- 2 green onions, sliced
- 2 cloves garlic, minced
- 1 teaspoon ginger, minced
- Salt and pepper to taste
- 1 egg (optional)
In a large skillet or wok, heat the vegetable oil over medium-high heat. Add the garlic and ginger, stirring for about 30 seconds until fragrant. Add the shrimp and cook until they turn pink and are cooked through, about 2-3 minutes.
Push the shrimp to one side of the pan, crack in the egg if using, and scramble it until cooked. Then, add the cooked rice and mixed vegetables, pour in the soy sauce and oyster sauce, and toss everything together until evenly combined and heated through. Ultimately, stir in the sliced green onions and season with salt and pepper to taste.
When making Shrimp Fried Rice, it’s important to use cold, leftover rice rather than freshly cooked rice, as this helps prevent the rice from becoming mushy. If you don’t have day-old rice on hand, you can spread freshly cooked rice on a baking sheet to cool it quickly.
Additionally, for a little extra flavor, feel free to experiment with other sauces like sesame oil or add a splash of rice vinegar for a tangy kick. Finally, consider prepping individual portions in freezer-safe containers for an easy grab-and-go meal!
Italian Sausage and Peppers
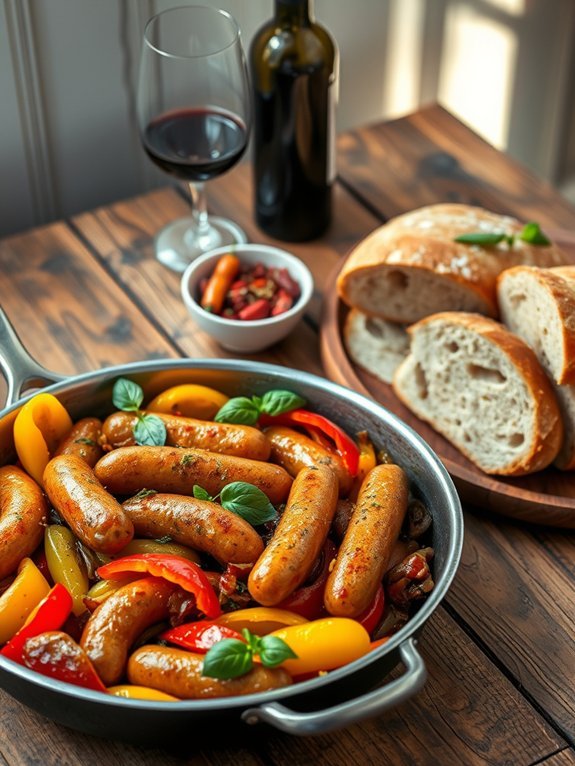
Italian sausage and peppers is a delightful and hearty dish that captures the essence of Italian cuisine. It features juicy Italian sausages cooked alongside vibrant bell peppers, onions, and a blend of spices that enhance the flavor profile. This dish can easily adapt from a comforting weeknight meal to a satisfying dish for gatherings, making it versatile and popular among many.
The beauty of Italian sausage and peppers lies in its simplicity. The combination of the smoky sausage with the sweetness of the bell peppers creates a delicious balance that’s sure to please any crowd. Additionally, this recipe is perfect for meal prepping or making freezer meals, as it stores and reheats well, allowing you to enjoy a homemade meal anytime.
Ingredients:
- 1 pound Italian sausage (sweet or spicy, according to preference)
- 2 bell peppers (any color), sliced
- 1 large onion, sliced
- 3 cloves garlic, minced
- 1 teaspoon dried oregano
- 1 teaspoon dried basil
- 1/2 teaspoon red pepper flakes (optional for added heat)
- 2 tablespoons olive oil
- Salt and pepper to taste
- Fresh basil or parsley for garnish (optional)
- Italian bread or hoagie rolls (optional, for serving)
In a large skillet, heat olive oil over medium heat. Add the Italian sausage and cook until browned on all sides, about 5-7 minutes. Remove the sausages from the skillet and set aside.
In the same skillet, add the sliced bell peppers and onion. Sauté for about 5 minutes until softened, then stir in the garlic, oregano, basil, and red pepper flakes. Return the cooked sausages to the skillet and simmer everything together for another 10 minutes, allowing the flavors to meld.
When preparing Italian sausage and peppers, consider using high-quality sausages for the best flavor. If you prefer roasting, you can place the sausages and vegetables on a baking sheet and roast them in the oven at 400°F for about 25-30 minutes.
Additionally, this dish freezes exceptionally well, so if you plan on making it in advance, verify it’s stored in an airtight container. When reheating, add a splash of water or broth to maintain moisture.
Proposed Recipe
Slow Cooker Chicken Tacos
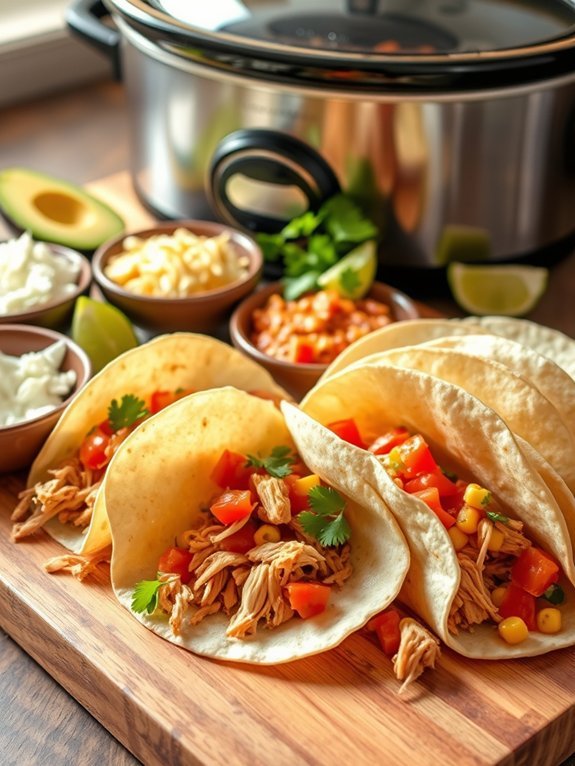
Slow cooker chicken tacos are a delightful and convenient meal option that will surely please the entire family. With minimal prep time, this dish allows you to throw everything into the slow cooker and let it work its magic while you focus on other tasks or simply relax. The tender chicken simmers in a flavorful blend of spices, making it perfect for filling soft tortillas and topped with your favorite toppings like avocado, salsa, or shredded cheese.
One of the best aspects of this recipe is its versatility; it can easily be adjusted based on your preferences or dietary needs. You can also make a large batch, making it ideal for meal prepping or serving at gatherings. Plus, leftovers can be used in various meals throughout the week, ensuring your time spent in the kitchen is well worth it.
- 2 pounds of boneless, skinless chicken breasts
- 1 can (15 oz) black beans, drained and rinsed
- 1 cup corn (fresh, frozen or canned)
- 1 jar (16 oz) salsa
- 1 tablespoon taco seasoning
- Salt and pepper to taste
- Small tortillas (flour or corn)
- Optional toppings: avocado, shredded cheese, sour cream, cilantro, and lime wedges
Place the chicken breasts at the bottom of the slow cooker, then add the black beans, corn, salsa, and taco seasoning. Season with salt and pepper to taste, then cover and cook on low for 6-8 hours or on high for 3-4 hours until the chicken is cooked through and easily shreddable. Use two forks to shred the chicken directly in the slow cooker, and mix everything well to combine.
When preparing slow cooker chicken tacos, remember that you can customize the spice level by choosing a mild or hot salsa to suit your taste. Additionally, for a more intense flavor, feel free to marinate the chicken in the salsa and taco seasoning overnight before cooking.
Serve the tacos with your choice of fresh toppings, and don’t hesitate to experiment with adding extra ingredients like jalapeños or diced bell peppers for more color and flavor.
Cheesy Broccoli and Chicken Bake
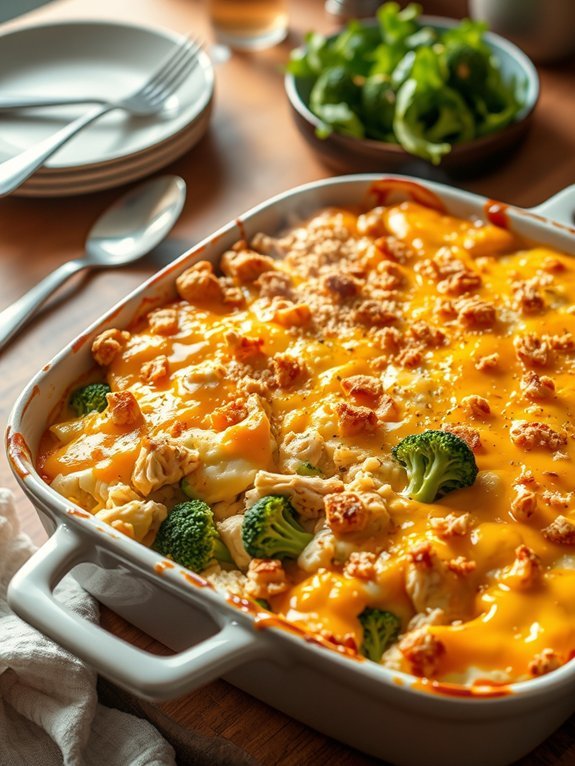
Cheesy Broccoli and Chicken Bake is a comforting dish that combines tender chicken, vibrant broccoli, and gooey cheese to create a satisfying meal every time. This recipe is perfect for meal prepping, as it can be easily assembled and stored in the freezer for later use.
Whether you’re looking for a quick weeknight dinner or a filling dish for a gathering, this cheesy bake will be a hit with the whole family. The combination of flavors and textures in this dish makes it not only delicious but also nutritious.
The broccoli adds a lovely crunch and is packed with vitamins, while the chicken provides a source of lean protein. With this recipe, you’ll have a complete meal that’s easy to prepare, freezes well, and can be reheated for a quick serving during busy days.
Ingredients:
- 2 cups cooked chicken, shredded
- 2 cups fresh or frozen broccoli florets
- 1 cup uncooked rice
- 2 cups chicken broth
- 1 cup cheddar cheese, shredded
- 1 cup cream of mushroom soup
- 1 teaspoon garlic powder
- 1 teaspoon onion powder
- Salt and pepper to taste
- Optional: breadcrumbs for topping
In a large mixing bowl, combine the shredded chicken, broccoli florets, uncooked rice, chicken broth, cream of mushroom soup, garlic powder, onion powder, salt, and pepper.
Mix everything together until well combined, then transfer the mixture to a greased baking dish. Top with shredded cheddar cheese and optionally sprinkle breadcrumbs on top for added crunch.
Cover the dish with foil and bake in a preheated oven at 375°F (190°C) for 45 minutes. Remove the foil and bake for an additional 10-15 minutes until the cheese is bubbly and golden.
When preparing this dish, consider making a double batch to freeze for future meals. To freeze, allow the casserole to cool completely after baking, then store it in an airtight container or a freezer-safe dish.
Thaw in the refrigerator overnight before reheating, and you can also add a splash of chicken broth during reheating to keep it moist. Enjoy your cheesy broccoli and chicken bake any time you need a comforting meal ready in minutes!
Spinach and Ricotta Stuffed Shells
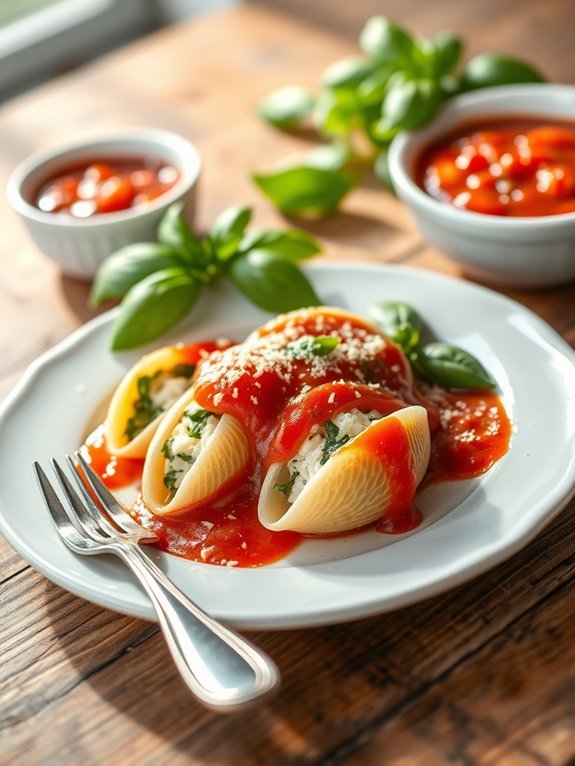
Spinach and Ricotta Stuffed Shells are a classic Italian dish that brings together the richness of ricotta cheese with the earthy flavors of spinach, all enveloped in tender pasta shells. This meal not only delivers a comforting taste that feels like a warm hug but it also provides an excellent way to sneak in some greens into your family’s diet.
Perfect for a hearty dinner, these stuffed shells can be prepared in advance and stored in the freezer for busy weeknights. To make this dish even more convenient, layering on a delicious marinara sauce before freezing adds an extra punch of flavor while guaranteeing the pasta remains moist and tender when baked. Guests will be enchanted by the gooey cheese and deliciously seasoned filling, making it a wonderful option for gatherings or family dinners.
Whether you serve it fresh or heat it directly from the freezer, this dish is sure to impress.
Ingredients:
- 12 jumbo pasta shells
- 1 cup ricotta cheese
- 1 cup fresh spinach, chopped
- 1 cup shredded mozzarella cheese
- 1/2 cup grated Parmesan cheese
- 1 egg
- 2 cups marinara sauce
- 1 teaspoon garlic powder
- 1 teaspoon Italian seasoning
- Salt and pepper, to taste
Boil the jumbo pasta shells according to package instructions until al dente, then drain and rinse under cold water to stop the cooking process. In a bowl, mix the ricotta cheese, chopped spinach, mozzarella, Parmesan, egg, garlic powder, Italian seasoning, salt, and pepper until well combined.
Carefully stuff each pasta shell with the spinach and cheese mixture. Spread a layer of marinara sauce in a baking dish, place the stuffed shells on top, and cover with the remaining sauce. If you plan to freeze them, cover the dish tightly with aluminum foil.
When preparing this dish, it’s important to verify that your shells aren’t overcooked to prevent them from falling apart during stuffing. You can also experiment with adding other ingredients to the filling, such as cooked ground meat or different herbs for an extra layer of flavor.
Additionally, if you choose to freeze the shells, make sure to label the container with the date and cooking instructions for a hassle-free meal prep experience later on.
Moroccan Chicken and Chickpeas
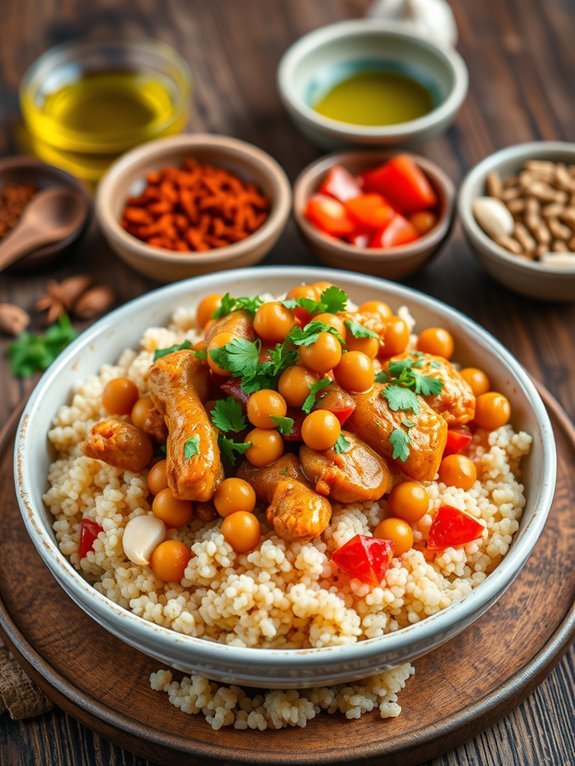
Moroccan Chicken and Chickpeas is a delightful dish that brings together the exotic flavors of North Africa. The combination of tender chicken, hearty chickpeas, and aromatic spices creates a meal that’s not only satisfying but also packed with nutrients. This dish is perfect for meal prep, and it freezes exceptionally well, allowing you to enjoy the vibrant taste of Moroccan cuisine any night of the week without the fuss of last-minute cooking.
The beauty of Moroccan Chicken and Chickpeas lies in its versatility. You can customize the spices and vegetables to suit your taste preferences or what you have available in your pantry. Serve it over fluffy couscous or alongside a green salad for a complete and balanced meal. It’s a great way to introduce your family to bold flavors while keeping dinner simple, healthy, and delicious.
Ingredients:
- 4 boneless, skinless chicken thighs
- 1 can (15 oz) chickpeas, drained and rinsed
- 1 large onion, diced
- 2 cloves garlic, minced
- 1 can (14 oz) diced tomatoes
- 2 cups chicken broth
- 2 teaspoons ground cumin
- 1 teaspoon ground coriander
- 1 teaspoon cinnamon
- 1 teaspoon paprika
- ½ teaspoon cayenne pepper (optional)
- Salt and pepper to taste
- 2 tablespoons olive oil
- Fresh cilantro or parsley for garnish
Sauté the diced onion and minced garlic in olive oil over medium heat in a large pot until they soften, about 5 minutes. Season the chicken thighs with salt, pepper, cumin, coriander, cinnamon, paprika, and cayenne pepper (if using), then add them to the pot to brown on both sides.
Add the rinsed chickpeas, diced tomatoes, and chicken broth to the pot. Stir well, cover, and let it simmer for about 30-35 minutes, or until the chicken is cooked through and tender. You can serve it immediately or let it cool completely before freezing in airtight containers.
When cooking Moroccan Chicken and Chickpeas, it’s important to adjust the level of spices according to your taste. If you’re unfamiliar with Moroccan spices, start with a smaller amount and add more as needed to avoid overpowering your dish.
Additionally, feel free to add vegetables like carrots or bell peppers for extra nutrients and flavor. If you plan to freeze the meal, make sure to cool it thoroughly before placing it in the freezer, and it will keep well for up to three months.
BBQ Pulled Pork
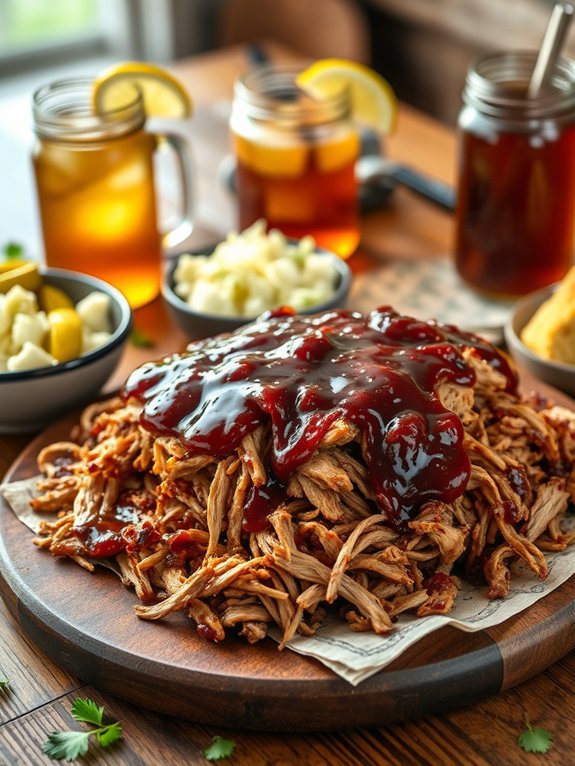
BBQ Pulled Pork is a tantalizing dish that brings the essence of smoky, tender, and flavorful pork right to your dinner table. This recipe is perfect for meal prepping and freezing; simply cook a large batch and store it in portion sizes to enjoy on busy days.
The slow-cooking process allows the pork to absorb all the rich flavors from the barbecue sauce and seasonings, resulting in a moist and delicious meal that pairs well with a variety of sides.
The beauty of BBQ Pulled Pork is that it requires minimal hands-on time, allowing you to focus on other tasks while it cooks. Additionally, it’s incredibly versatile—enjoy it on sandwiches, tacos, or alongside your favorite sides.
Whether you’re hosting a barbecue, feeding a crowd, or simply wanting a hearty meal ready to go during the week, this dish is sure to please everyone.
Ingredients:
- 3 to 4 pounds pork shoulder (also known as pork butt)
- 1 cup barbecue sauce (your favorite variety)
- 1 onion, chopped
- 4 cloves garlic, minced
- 2 teaspoons paprika
- 2 teaspoons cumin
- 1 teaspoon salt
- 1 teaspoon black pepper
- 1/2 teaspoon red pepper flakes (optional, for heat)
- 1/2 cup chicken broth or water
Season the pork shoulder with the paprika, cumin, salt, black pepper, and red pepper flakes (if using).
In a slow cooker, add the chopped onion and minced garlic at the bottom before placing the seasoned pork on top. Pour in the chicken broth or water, then cover the pork with barbecue sauce, ensuring it’s well coated.
Cook on low for 8 hours or high for 4 hours, until the pork is fork-tender. Once done, shred the pork with two forks and mix it with the remaining sauce before serving.
For the best flavor and texture, let the pulled pork cool completely before storing it in freezer-safe containers or bags. It can last for up to three months in the freezer.
When reheating, add a splash of barbecue sauce or chicken broth to keep it moist. Additionally, always taste and adjust the seasoning after shredding, as the flavors can mellow during cooking, and everyone has their preferred level of seasoning!
Teriyaki Beef Bowls
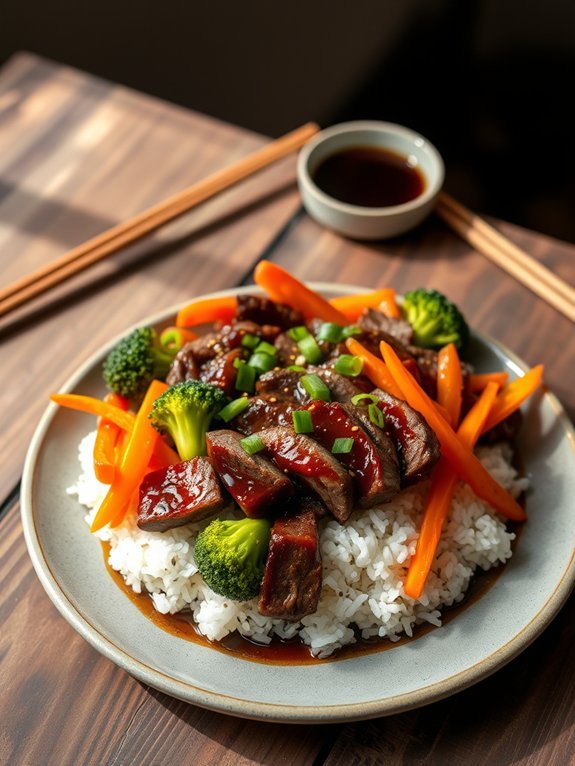
Teriyaki beef bowls are a deliciously satisfying meal that combines tender beef with a sweet and savory teriyaki sauce, all served over a bed of rice or noodles. This dish balances flavors and textures beautifully, making it a perfect option for a family dinner or meal prep.
With the right preparation, you can whip this up in no time or make a batch to freeze for later, allowing you to enjoy this tasty meal even on the busiest of days. Ideal for busy individuals and families, teriyaki beef bowls can be frozen and reheated without sacrificing flavor or texture.
Once all the ingredients are prepared and cooked, they can be assembled in individual portions, making it easy to grab a bowl and heat it when hunger strikes. The blend of beef, vegetables, and teriyaki sauce makes for a fulfilling meal that everyone will love, making it a great addition to your freezer meal repertoire.
- 1 lb flank steak, thinly sliced
- 1 cup teriyaki sauce
- 2 cups steamed rice (white or brown)
- 1 cup broccoli florets
- 1 cup bell peppers, sliced
- 1/2 cup carrots, julienned
- 2 tablespoons vegetable oil
- 1 teaspoon garlic, minced
- 1 teaspoon ginger, minced
- Green onions for garnish
- Sesame seeds for garnish
In a large skillet or wok, heat the vegetable oil over medium-high heat. Add the minced garlic and ginger, cooking for about 30 seconds until fragrant.
Then, add the sliced flank steak, cooking until browned and no longer pink, which should take about 3-4 minutes. Once the beef is cooked, stir in the teriyaki sauce and vegetables, cooking for an additional 5 minutes until the vegetables are tender.
Serve the teriyaki beef and vegetables over a bed of steamed rice, topping with green onions and sesame seeds for added flavor.
When preparing teriyaki beef bowls, you can save time by slicing the beef and vegetables ahead of time. Consider marinating the flank steak in the teriyaki sauce for a few hours or overnight to enhance the flavor even more.
Additionally, feel free to customize the bowl with your favorite vegetables or serve it over quinoa or cauliflower rice for a different twist. When freezing, make sure to cool the dish completely before storing it in airtight containers to maintain freshness.
Lentil Soup With Kale
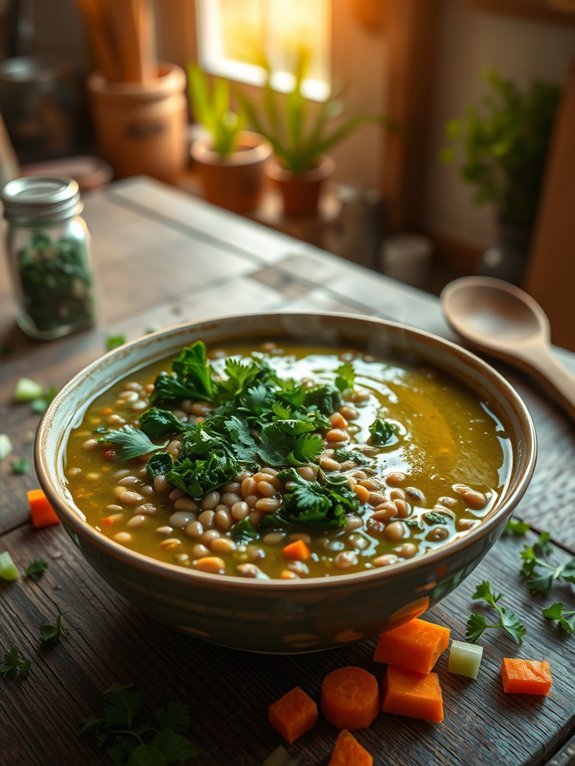
Lentil soup with kale is a hearty and nutritious dish that’s not only easy to prepare but also perfect for freezing. This wholesome soup is packed with protein from the lentils and vitamins from the kale, making it a great meal option for those looking to eat healthier. Once frozen, this soup retains its flavors and textures, allowing you to enjoy a warm, comforting bowl at any time.
With its earthy flavors and vibrant greens, lentil soup with kale is an ideal choice for a satisfying dinner or a quick lunch. The ingredients come together seamlessly, allowing each component to shine while offering rich flavors and a comforting warmth. This soup can be customized with various spices and additional vegetables, making it versatile and adaptable to your preferences.
- 1 cup green or brown lentils, rinsed
- 1 tablespoon olive oil
- 1 medium onion, chopped
- 3 cloves garlic, minced
- 2 large carrots, diced
- 2 celery stalks, diced
- 6 cups vegetable broth
- 1 teaspoon dried thyme
- 1 teaspoon cumin
- Salt and pepper to taste
- 4 cups kale, stems removed and chopped
- Juice of 1 lemon
In a large pot, heat the olive oil over medium heat, then add the onions, carrots, and celery and sauté for about 5 minutes until the onions are translucent. Stir in the garlic, thyme, and cumin, cooking for an additional minute.
Add the lentils and vegetable broth, bring the mixture to a boil, and then reduce heat to simmer for 25 minutes. Once the lentils are tender, stir in the kale and cook for another 5-10 minutes until the kale is wilted. Season to taste with salt, pepper, and lemon juice before serving.
When making lentil soup with kale, consider using fresh herbs or spices to enhance the flavor profile. You can also add diced tomatoes or bell peppers for an extra layer of taste and nutrition.
If you plan to freeze the soup, let it cool completely before transferring it to airtight containers to prevent ice crystals from forming. To reheat, simply thaw it in the refrigerator overnight, then warm on the stove or in the microwave before serving.

