This post may contain affiliate links. Please read our policy page.
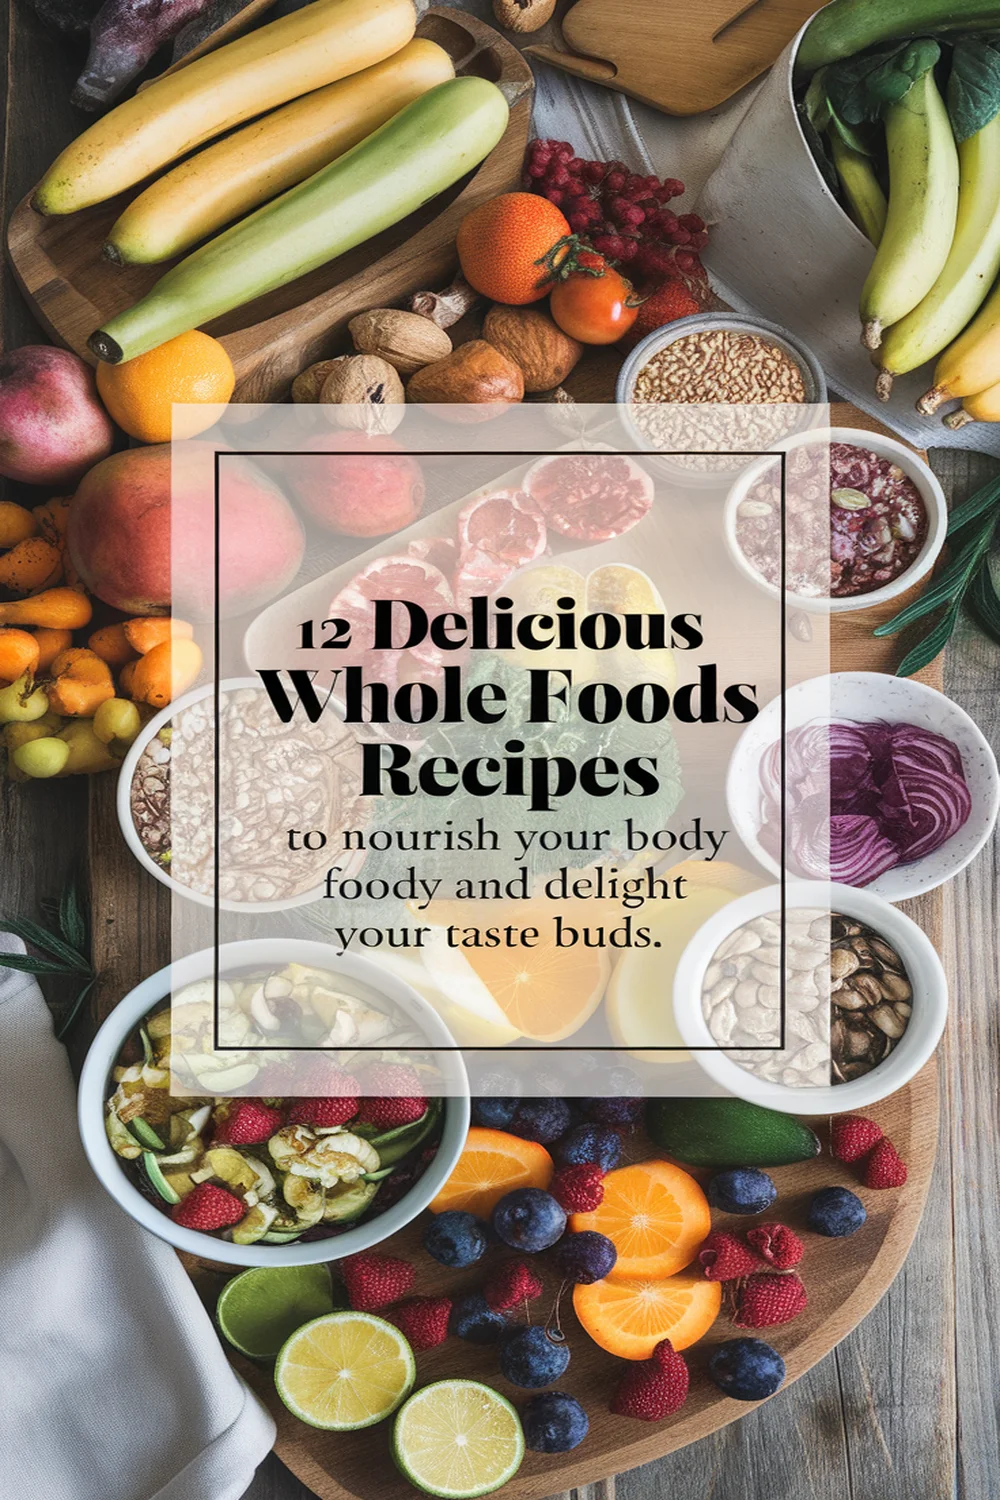
Looking for delicious whole foods recipes to nourish your body and tickle your taste buds? Try a Quinoa and Black Bean Salad that’s packed with protein, or indulge in a vibrant Sweet Potato and Chickpea Curry. If you’re in the mood for something hearty, a Lentil Soup with Spinach and Carrots will warm you up. For a sweet treat, whip up Almond Butter Energy Balls. Keep exploring, and you’ll discover even more tasty options to refresh your meals!
Quinoa and Black Bean Salad
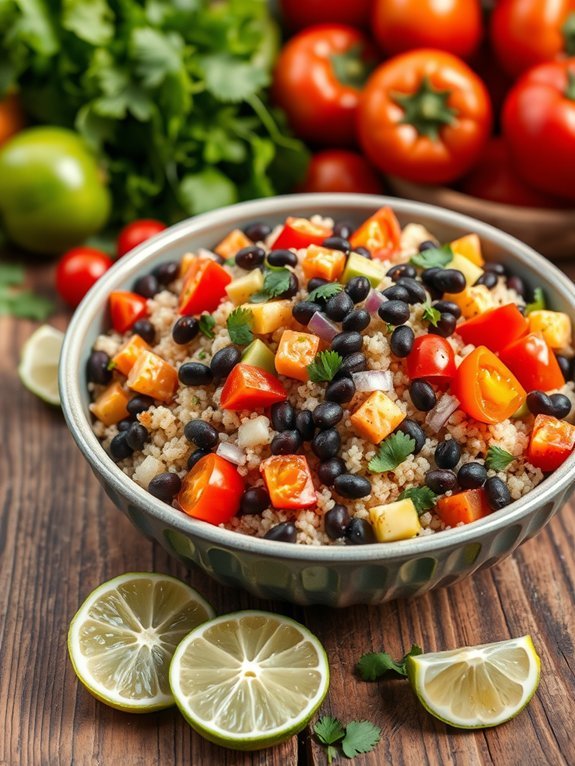
Quinoa and black bean salad is a vibrant, nutritious dish that’s perfect for a light lunch, side, or even a potluck contribution. Packed with protein, fiber, and a multitude of vitamins, this salad not only tastes great but is also incredibly healthy.
The earthiness of the black beans complements the fluffy quinoa beautifully, while the addition of colorful vegetables adds texture and flavor. With just a few simple ingredients, you can whip up a delicious dish that will impress anyone at the dinner table.
Preparing quinoa and black bean salad is as easy as it’s delicious. The recipe allows for customization based on what you have on hand or your personal preferences. You can toss in your favorite fresh ingredients or keep it simple for a quick meal.
It’s a great dish to make in advance since the flavors meld together beautifully over time, making it a perfect option for meal prepping as well.
Ingredients:
- 1 cup quinoa
- 2 cups water or vegetable broth
- 1 can (15 oz) black beans, drained and rinsed
- 1 cup cherry tomatoes, halved
- 1 bell pepper, diced (any color)
- 1 small red onion, diced
- 1 avocado, diced
- 1/4 cup fresh cilantro, chopped
- Juice of 2 limes
- 2 tablespoons olive oil
- Salt and pepper to taste
Rinse the quinoa under cold water to remove any bitterness, then combine it with the water or broth in a saucepan. Bring it to a boil, reduce the heat, cover, and simmer for about 15 minutes or until all the liquid is absorbed.
Once cooked, fluff the quinoa with a fork and let it cool. In a large bowl, combine the cooled quinoa, black beans, tomatoes, bell pepper, red onion, and avocado. Drizzle with lime juice and olive oil, and season with salt and pepper. Toss everything together gently until well mixed.
For best results, make sure to let the salad sit for at least 15 minutes after mixing to allow the flavors to meld. You can serve it chilled or at room temperature.
Feel free to experiment with additional toppings like feta cheese, corn, or chopped jalapeños for an added kick. To keep the avocado fresh, add it right before serving if you plan to store leftovers. Enjoy your wholesome and satisfying quinoa and black bean salad!
Roasted Vegetable Medley
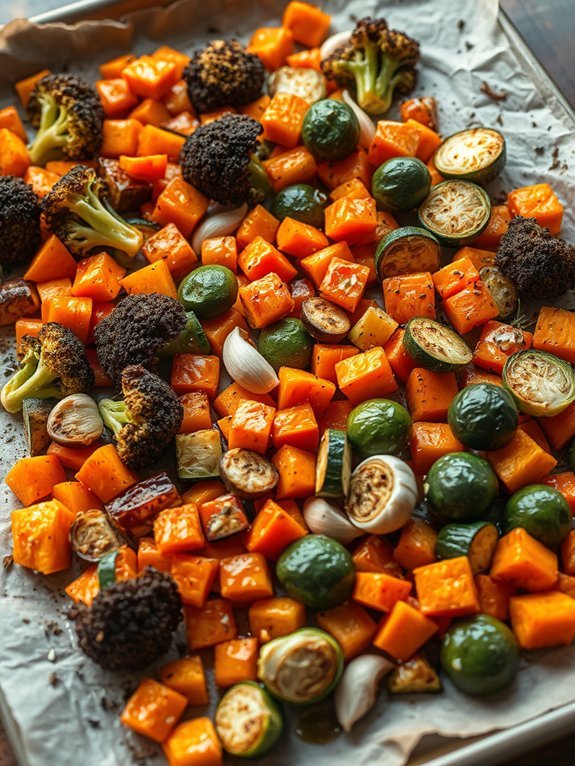
Roasted vegetable medley is a vibrant, flavorful dish that’s perfect for any occasion. By combining a variety of fresh vegetables, you can create a colorful and nutritious side that pairs well with almost any main course. The roasting process caramelizes the natural sugars in the vegetables, enhancing their flavors and creating delightful textures.
Whether served alongside a hearty protein or as a standalone vegetarian option, this dish is sure to please everyone at the table. In addition to being tasty, roasted vegetable medley is highly versatile. You can customize it based on the vegetables in season or your personal preferences.
Popular choices include carrots, bell peppers, zucchini, and Brussels sprouts, but feel free to experiment with other seasonal vegetables such as asparagus or sweet potatoes. The combination of herbs and spices can further elevate the dish, making it a delightful addition to your culinary repertoire.
- 2 cups broccoli florets
- 1 cup chopped carrots
- 1 cup diced bell peppers (any color)
- 1 cup chopped zucchini
- 1 cup Brussels sprouts, halved
- 3 tablespoons olive oil
- 2 cloves garlic, minced
- 1 teaspoon dried thyme
- 1 teaspoon dried rosemary
- Salt and pepper to taste
Preheat your oven to 425°F (220°C). In a large mixing bowl, combine all the prepared vegetables. Drizzle with olive oil, add minced garlic, thyme, rosemary, salt, and pepper; toss until the vegetables are well coated.
Spread them evenly on a baking sheet lined with parchment paper and roast in the preheated oven for 25-30 minutes or until the vegetables are tender and slightly browned, stirring halfway through for even cooking.
To achieve the best flavor and texture, choose fresh, seasonal vegetables that are at their peak ripeness. Cut the veggies into uniform sizes for even cooking, and don’t overcrowd the baking sheet, as this can lead to steaming rather than roasting.
Experiment with different herbs and spices to find the combination that you love most. For a touch of heat, consider adding red pepper flakes, or for a hint of sweetness, a drizzle of balsamic glaze before serving. Enjoy your roasted vegetable medley warm as a fantastic side dish or even as a main course over grains or pasta!
Sweet Potato and Chickpea Curry
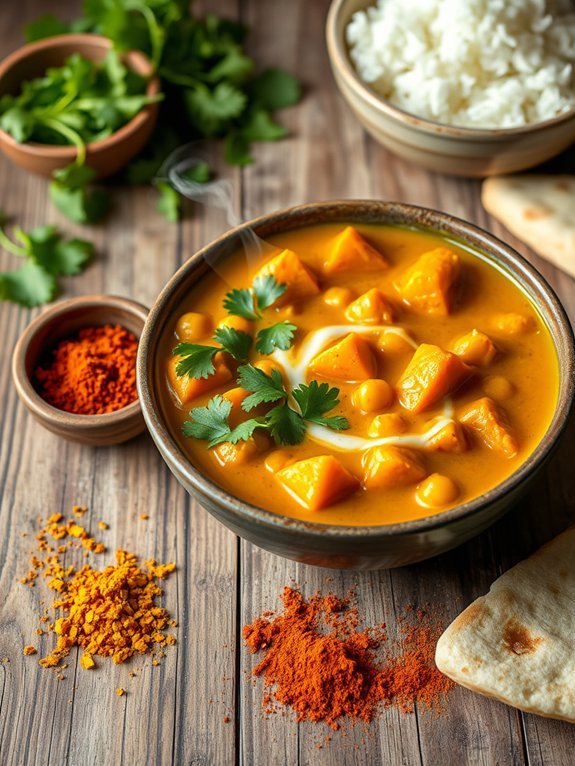
Sweet Potato and Chickpea Curry is a vibrant and hearty dish that’s perfect for any occasion. The combination of sweet potatoes and chickpeas not only provides a wonderful mix of textures but also delivers a wealth of nutrients, making this curry both comforting and healthy. With its aromatic spices and creamy coconut milk, this dish is sure to tantalize your taste buds and warm your soul.
This curry is incredibly versatile and can be enjoyed on its own, served over rice, or with a side of naan bread. Easy to prepare, it’s also a fantastic option for meal prep, as the flavors deepen and improve after sitting for a while.
Whether you’re cooking for yourself or for a crowd, this Sweet Potato and Chickpea Curry is a surefire hit that will leave everyone asking for seconds.
- 2 medium sweet potatoes, peeled and diced
- 1 can (15 oz) chickpeas, drained and rinsed
- 1 can (14 oz) coconut milk
- 1 medium onion, chopped
- 2 cloves garlic, minced
- 1 tablespoon ginger, grated
- 1 tablespoon curry powder
- 1 teaspoon cumin
- 1 teaspoon turmeric
- 1 tablespoon olive oil
- Salt and pepper, to taste
- Fresh cilantro, for garnish (optional)
In a large pot, heat the olive oil over medium heat, then add the chopped onion and cook until softened. Stir in the minced garlic and grated ginger, cooking for an additional minute until fragrant.
Add the diced sweet potatoes, chickpeas, curry powder, cumin, turmeric, and coconut milk to the pot. Bring to a gentle simmer, cover, and cook for about 20-25 minutes, or until the sweet potatoes are tender.
Season with salt and pepper to taste, and garnish with fresh cilantro before serving.
When preparing this dish, consider adding extra vegetables such as spinach or kale to boost the nutrition and flavor. For a little heat, toss in some chopped chili peppers or a pinch of cayenne pepper, depending on your spice tolerance.
If you prefer a thicker curry, let it simmer uncovered for the last few minutes of cooking. This dish also freezes well, making it a great option for quick meals later on.
Recommended Items
Explore our curated selection of wholesome ingredients and essential cooking tools to elevate your culinary adventures!
Lentil Soup With Spinach and Carrots
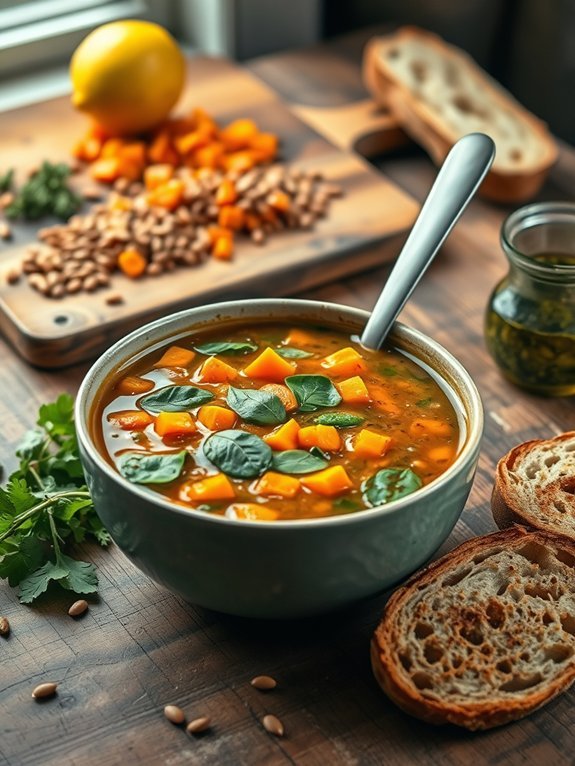
Lentil soup is a nutritious and hearty dish that’s perfect for anyone looking to warm up during chilly days. Packed with protein-rich lentils, vibrant spinach, and sweet carrots, this recipe not only delights the palate but also brings a rich array of vitamins and minerals to your meal. The best part about lentil soup is its versatility; it can be easily customized with your favorite herbs and spices, and it keeps well in the fridge, making it ideal for meal prep.
This particular lentil soup with spinach and carrots isn’t only simple to make but also bursts with flavor. The earthy taste of lentils is complemented by the sweetness of the carrots and the richness of fresh spinach. It’s a wholesome dish that can stand on its own or be served alongside crusty bread for a complete, satisfying meal.
Perfect for busy weeknights, you can have this dish ready in under an hour, making it an ideal choice for families or busy individuals alike.
Ingredients:
- 1 cup dried green or brown lentils, rinsed
- 1 medium onion, diced
- 2 cloves garlic, minced
- 2 medium carrots, diced
- 4 cups vegetable broth
- 2 cups fresh spinach, roughly chopped
- 1 teaspoon ground cumin
- 1 teaspoon dried thyme
- 2 tablespoons olive oil
- Salt and pepper to taste
- Juice of 1 lemon (optional)
In a large pot, heat the olive oil over medium heat. Add the diced onion and carrots, sautéing until the onion becomes translucent. Stir in the minced garlic, ground cumin, and dried thyme, cooking for another minute until fragrant.
Add the rinsed lentils and vegetable broth to the pot. Bring to a boil, then reduce the heat and let the soup simmer for about 30 minutes or until the lentils are tender. Once cooked, stir in the chopped spinach and season with salt and pepper. If desired, add a splash of lemon juice before serving for an extra zesty flavor.
To enhance the depth of flavor in your lentil soup, consider sautéing your onion and carrots a bit longer to caramelize them lightly before adding the garlic and spices. Additionally, feel free to experiment with other vegetables or herbs — such as bell peppers, kale, or parsley — to personalize the soup to your taste.
Finally, allowing the soup to sit for a few hours or overnight allows the flavors to meld beautifully, making it even more delicious the next day.
Grilled Lemon Herb Chicken With Asparagus
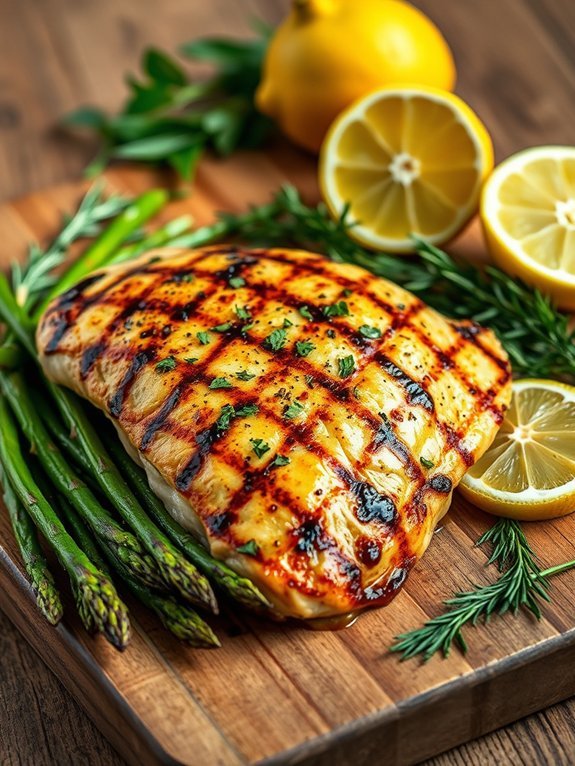
Grilled Lemon Herb Chicken with Asparagus is a delightful dish that captures the essence of fresh ingredients and vibrant flavors. The tangy punch of lemon complements the savory notes of herbs, making it a perfect meal for those who enjoy a light yet satisfying dinner. Pairing the chicken with asparagus adds a nutritious crunch, enhancing the dish’s overall appeal.
Whether you’re hosting a summer barbecue or simply looking for a quick weeknight dinner, this recipe is certain to please. Grilling the chicken imparts a smoky flavor that elevates its taste, while the versatility of the marinade allows you to customize it according to your preferences. Asparagus, a wonderful seasonal vegetable, not only tastes great but is also packed with vitamins, making this dish both healthy and delectable.
With minimal prep and cooking time, Grilled Lemon Herb Chicken with Asparagus isn’t just easy to prepare but also looks stunning as a centerpiece on your table.
Ingredients:
- 4 boneless, skinless chicken breasts
- 1 bunch of asparagus, trimmed
- 1/4 cup olive oil
- 2 lemons (zest and juice)
- 3 cloves garlic, minced
- 2 tablespoons fresh rosemary, chopped
- 2 tablespoons fresh thyme, chopped
- Salt and pepper to taste
To prepare the dish, start by marinating the chicken breasts in a mixture of olive oil, lemon juice, lemon zest, minced garlic, rosemary, thyme, salt, and pepper for at least 30 minutes, or up to 4 hours for maximum flavor.
Preheat your grill to medium heat, and then place the marinated chicken on the grill, cooking each side for approximately 6-7 minutes until fully cooked through. In the final few minutes of cooking, add the asparagus to the grill, allowing them to char and soften.
For best results, verify the chicken is cooked to an internal temperature of 165°F for safety and tenderness. Allow the chicken to rest for a few minutes before slicing to keep it juicy. When grilling asparagus, avoid overcrowding the grill; this allows for an even char and confirms they remain crisp.
Feel free to swap in other vegetables or herbs based on what’s available or in season, and consider serving the dish with a side of quinoa or a fresh salad for a complete meal.
Zucchini Noodles With Avocado Pesto
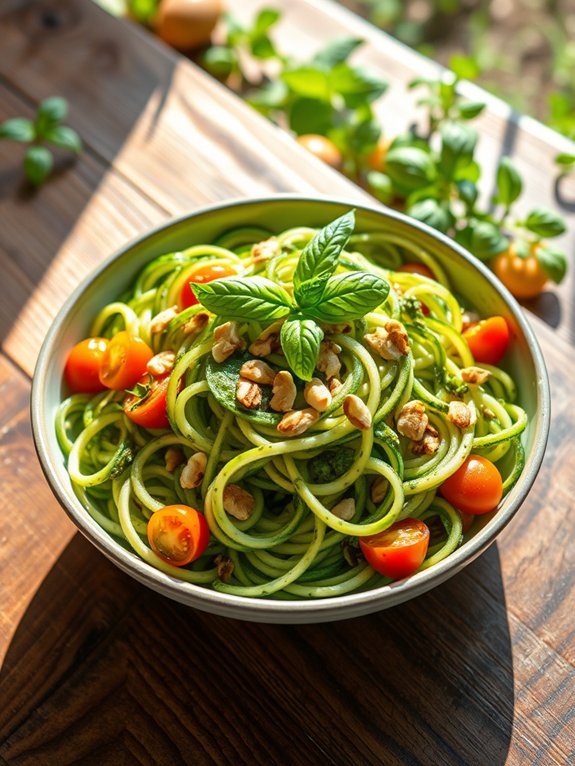
Zucchini noodles, commonly referred to as “zoodles,” are a fantastic pasta alternative that provides a fresh and vibrant twist on traditional dishes. With the trend toward healthier eating, zucchini noodles not only elevate your meals but also pack in nutrients without the excess carbohydrates.
Pairing these zoodles with a creamy avocado pesto adds richness and depth, making this dish a satisfying choice for both vegans and those seeking a lighter meal option.
Making zucchini noodles is surprisingly simple and requires minimal equipment. A spiralizer is ideal for creating long, curly noodles, but a julienne peeler can also yield excellent results.
The avocado pesto, made with ripe avocados, fresh basil, garlic, and a squeeze of lemon, comes together quickly in a food processor, creating a luscious sauce that clings perfectly to the zoodles. Whether enjoyed warm or cold, this dish is perfect for a quick weeknight dinner or as a delightful side for a summer gathering.
Ingredients:
- 2 medium zucchinis
- 2 ripe avocados
- 1 cup fresh basil leaves
- 2 cloves garlic, minced
- 2 tablespoons lemon juice
- 1/4 cup olive oil
- Salt and pepper to taste
- Cherry tomatoes, halved (for garnish, optional)
- Pine nuts or walnuts (for garnish, optional)
Using a spiralizer or julienne peeler, turn the zucchinis into noodles and place them in a large bowl. In a food processor, combine the avocados, basil, garlic, lemon juice, and olive oil. Blend until smooth, then season with salt and pepper to taste.
Add the avocado pesto to the zucchini noodles and toss until well coated. Serve immediately, garnished with cherry tomatoes and nuts if desired.
When cooking zucchini noodles, it’s important not to overcook them to retain their crunch and texture. If you prefer warm zoodles, consider briefly sautéing them in a non-stick pan for 1-2 minutes just until heated through.
Additionally, for extra flavor, feel free to customize your pesto by adding ingredients like nutritional yeast, spinach, or even a hint of red pepper flakes for some heat. Enjoy experimenting with this vibrant dish!
Stuffed Bell Peppers With Brown Rice and Turkey
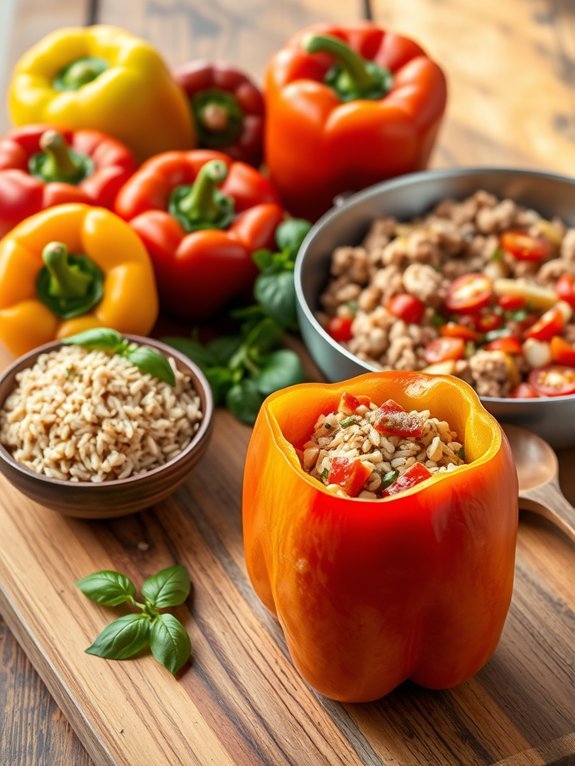
Stuffed bell peppers are a delightful and nutritious meal that can easily be customized to suit your taste. The combination of colorful peppers, savory turkey, and hearty brown rice makes for a satisfying dish that’s perfect for any occasion. This recipe not only boasts flavor but also provides a balanced mix of protein, fiber, and vitamins, making it a great choice for a healthy dinner.
Preparing stuffed peppers is a straightforward process that will impress both family and friends. You’ll begin by cooking the brown rice and combining it with seasoned ground turkey, vegetables, and spices. The mixture is then stuffed into vibrant bell peppers and baked to perfection. Serve them warm and watch as everyone digs into this wholesome dish!
Ingredients:
- 4 large bell peppers (any color)
- 1 cup cooked brown rice
- 1 pound ground turkey
- 1 small onion, diced
- 2 cloves garlic, minced
- 1 can (14 oz) diced tomatoes, drained
- 1 teaspoon Italian seasoning
- Salt and pepper, to taste
- 1 cup shredded cheese (optional)
- 1 tablespoon olive oil
In a large skillet over medium heat, add olive oil and sauté the diced onion and minced garlic until translucent. Add the ground turkey and cook until browned. Stir in the cooked rice, diced tomatoes, Italian seasoning, salt, and pepper. Mix well, then remove from heat.
Preheat your oven to 375°F (190°C). While it heats, slice the tops off the bell peppers and remove the seeds. Stuff the peppers with the turkey and rice mixture, place them upright in a baking dish, and sprinkle cheese on top if desired. Bake for 25-30 minutes, until the peppers are tender.
When cooking stuffed bell peppers, feel free to experiment with additional fillings such as black beans, corn, or spices to elevate the flavor. If you prefer a lighter option, you can substitute the ground turkey for ground chicken or a plant-based protein. For added moisture, you may also pour a little broth into the bottom of the baking dish before baking. Enjoy your culinary adventure!
Recipe Overview
Cauliflower Fried Rice
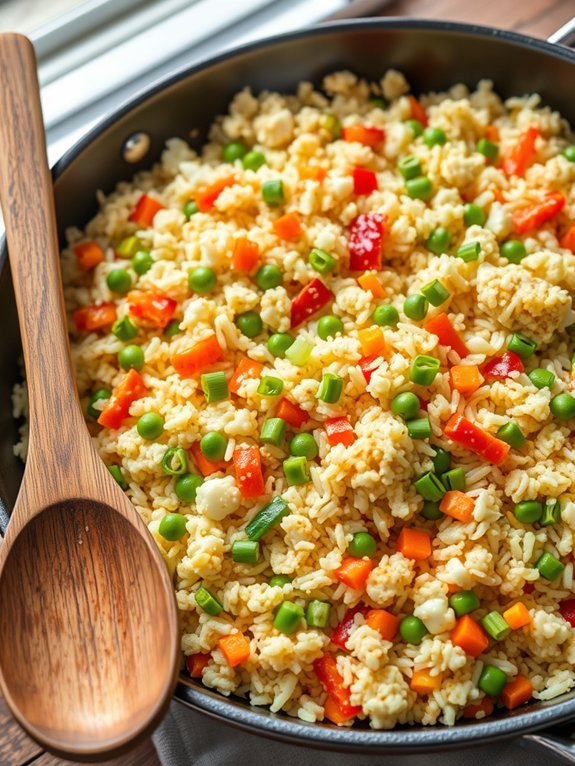
Cauliflower Fried Rice is a fantastic low-carb alternative to traditional fried rice. This dish utilizes riced cauliflower as a base, making it both nutritious and satisfying. With its ability to absorb flavors and provide a perfect texture, cauliflower can mimic the size and feel of rice without added carbohydrates, creating a guilt-free meal that everyone will love.
This recipe isn’t only simple to prepare but also customizable with your favorite vegetables and proteins, allowing for endless variations tailored to your preferences. Making cauliflower fried rice is a great way to incorporate more vegetables into your diet while enjoying a dish that’s flavorful and filling.
This recipe can be made in under 30 minutes, making it an ideal option for busy weeknights or meal prep for the week ahead. With vibrant colors and an assortment of flavors, you can easily elevate this dish by adding scrambled eggs, cooked chicken, shrimp, or tofu to create a complete meal that’s both delicious and nourishing.
Ingredients:
- 1 medium head of cauliflower
- 1 tablespoon of sesame oil (or olive oil)
- 2 eggs, lightly beaten (optional)
- 1 cup of mixed vegetables (e.g., peas, carrots, bell peppers)
- 3 cloves of garlic, minced
- 2-3 green onions, sliced
- 2-3 tablespoons of soy sauce (or tamari for a gluten-free option)
- Salt and pepper to taste
To begin, remove the leaves and stem from the cauliflower, then cut it into chunks. Place the cauliflower in a food processor and pulse it until it resembles rice or small grains. In a large skillet or wok, heat the sesame oil over medium heat and add the minced garlic; sauté for about 30 seconds until fragrant.
If using eggs, pour them into the skillet, scrambling them briefly. Next, add the riced cauliflower, mixed vegetables, and soy sauce, and cook for about 5-7 minutes, stirring occasionally until the cauliflower is tender while retaining a bit of crunch. Finally, stir in the green onions and season with salt and pepper as desired.
When cooking cauliflower fried rice, be sure to avoid overcrowding the pan, as this can lead to steaming instead of frying. If your pan is too small, consider working in batches. Additionally, for more depth of flavor, try toasting the cauliflower in the skillet for a minute before adding the other ingredients.
Feel free to experiment with different vegetables and proteins according to your taste preferences and dietary needs, ensuring that you make this dish your own while keeping it healthy.
Baked Salmon With Dill and Lemon
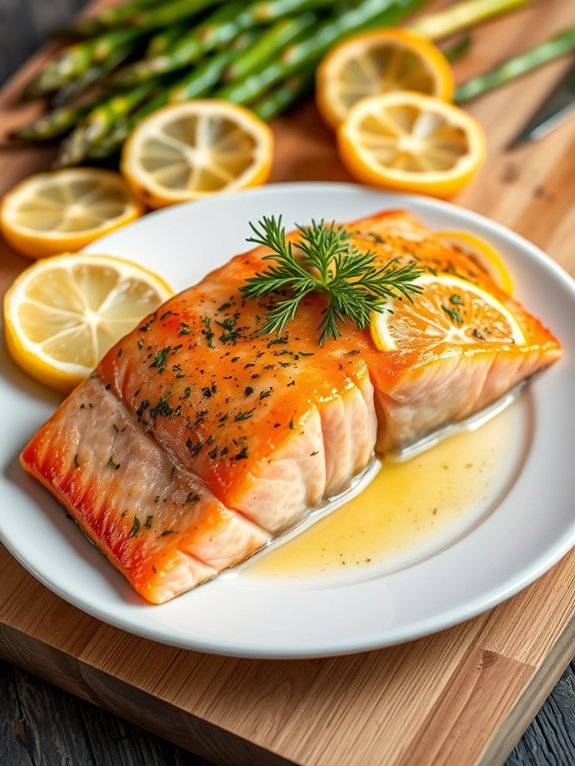
Baked Salmon with dill and lemon is a vibrant, healthy dish that’s simple to prepare yet bursting with flavor. This recipe highlights the natural richness of the salmon, enhanced by the bright acidity of lemon and the aromatic freshness of dill.
It’s perfect for a weeknight dinner or a special occasion, and pairs beautifully with a variety of sides such as roasted vegetables or couscous.
The key to a perfect baked salmon is to not overcook it. Salmon fillets cook quickly and maintaining the right temperature guarantees they remain tender and moist. The combination of dill and lemon not only adds flavor but also complements the health benefits of the fish.
Serve this dish with a light salad for a well-rounded meal that’s sure to impress your family or guests.
Ingredients:
- 4 salmon fillets
- 2 tablespoons olive oil
- 2 tablespoons fresh dill, chopped
- 1 lemon (zested and juiced)
- Salt and pepper to taste
- Lemon slices for garnish
Preheat your oven to 400°F (200°C). Place salmon fillets on a lined baking sheet and drizzle with olive oil.
In a small bowl, mix dill, lemon zest, lemon juice, salt, and pepper. Spread the mixture evenly over the salmon fillets. Bake for 12-15 minutes or until the salmon flakes easily with a fork. Garnish with additional lemon slices and serve immediately.
For the best results, consider letting the salmon sit at room temperature for about 15 minutes before baking to warrant more even cooking. If available, opt for wild-caught salmon for superior flavor and texture.
Feel free to customize this recipe by experimenting with other herbs, such as thyme or parsley, to suit your personal taste preferences.
Additionally, a side of steamed asparagus or a quinoa salad can be a delightful complement to this dish.
Spinach and Feta Stuffed Portobello Mushrooms
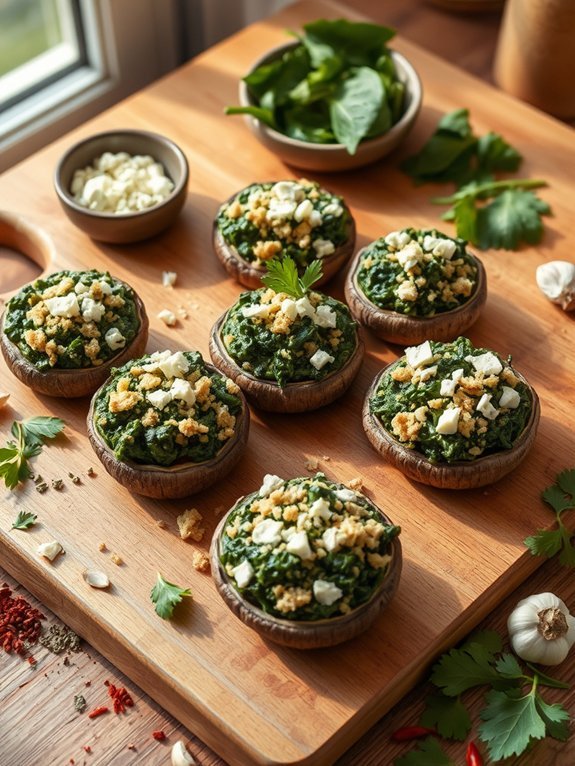
Spinach and feta stuffed Portobello mushrooms make for a deliciously healthy dish that can be served as an appetizer, side, or even a light main course. The meaty texture of the Portobello mushrooms pairs wonderfully with the creamy texture of feta cheese and the earthy flavor of spinach. This combination not only provides a delightful medley of flavors but also packs a nutritious punch, making it an ideal choice for both vegetarians and non-vegetarians alike.
This recipe is simple to prepare and takes minimal time from start to finish. The stuffed mushrooms can be baked in the oven until they’re perfectly tender and infused with flavors, ensuring a gourmet experience right at home. This dish is perfect for gatherings and entertaining, as it’s both visually appealing and delicious, pleasing your guests with every bite.
Ingredients:
- 4 large Portobello mushrooms
- 2 cups fresh spinach, chopped
- 1 cup feta cheese, crumbled
- 1/2 cup breadcrumbs
- 2 cloves garlic, minced
- 1 small onion, finely chopped
- 2 tablespoons olive oil
- Salt and pepper, to taste
- 1/2 teaspoon dried oregano
- 1/4 teaspoon red pepper flakes (optional)
Preheat your oven to 375°F (190°C). Begin by cleaning the Portobello mushrooms with a damp cloth and removing the stems. In a skillet, heat the olive oil over medium heat and sauté the minced garlic and chopped onion until translucent.
Add the chopped spinach and cook until wilted. Remove from heat and mix in the feta cheese, breadcrumbs, oregano, red pepper flakes, salt, and pepper to taste. Spoon the spinach and feta mixture generously into each mushroom cap.
Place the stuffed mushrooms on a baking sheet and bake for 20-25 minutes or until the mushrooms are tender and the tops are golden brown.
For the best results, try using fresh spinach rather than frozen to keep the filling light and invigorating. You can also experiment with adding other ingredients such as sun-dried tomatoes, artichoke hearts, or even different cheeses to customize the flavors to your liking.
Additionally, consider serving these mushrooms alongside a simple salad or squeeze of lemon juice for an uplifting contrast to the richness of the filling.
Overnight Oats With Berries and Chia Seeds
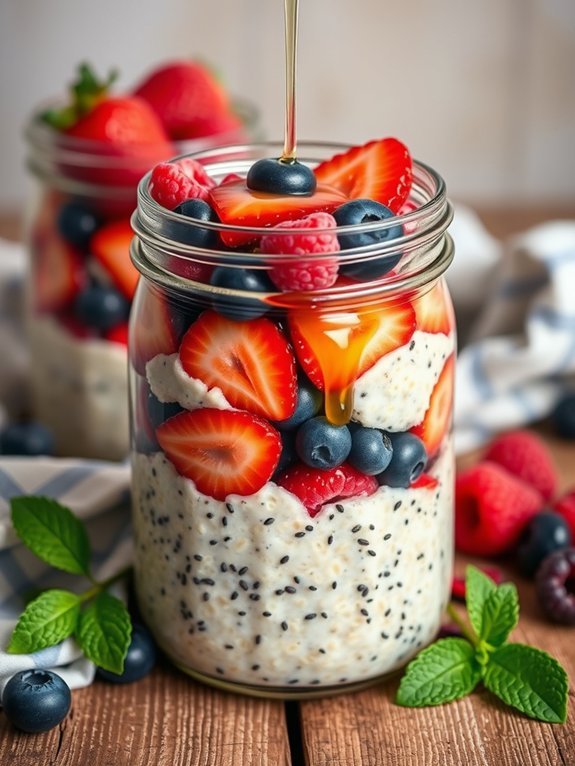
Overnight oats are a quick and nutritious breakfast option that can be prepared in advance, making your mornings simpler and healthier. Combining the wholesome texture of oats with the vibrant flavors of fresh berries and the nutrition-packed benefits of chia seeds, this dish isn’t only delicious but also an excellent source of fiber, protein, and antioxidants.
Whether you’re gearing up for a busy day or just looking for a satisfying morning treat, overnight oats are versatile enough to cater to different taste preferences.
Making overnight oats is incredibly simple, and it allows for countless variations. The base of oats can be complemented with various fruits, nuts, seeds, and sweeteners to create a breakfast that you’ll look forward to.
In this recipe, we’ll highlight the delightful combination of assorted berries and chia seeds, emphasizing the ease of preparation and the capability to enjoy a nutritious breakfast with minimal effort.
Ingredients:
- 1 cup rolled oats
- 2 cups almond milk (or any milk of choice)
- 2 tablespoons chia seeds
- 1 tablespoon honey or maple syrup (optional)
- 1 cup mixed fresh berries (strawberries, blueberries, raspberries)
- 1 teaspoon vanilla extract
- A pinch of salt
In a medium-sized bowl or mason jar, combine the rolled oats, almond milk, chia seeds, honey or maple syrup (if using), vanilla extract, and salt. Stir well to guarantee all ingredients are mixed and the oats are fully submerged in the liquid.
Gently fold in the mixed berries, reserving a few for topping later. Cover the bowl or jar and refrigerate overnight or for at least 4 hours. When ready to serve, give the oats a good stir and add more berries on top if desired.
When preparing overnight oats, feel free to adjust the consistency to your preference by adding more or less milk. You can also experiment with different types of fruits, nuts, or spices like cinnamon to find your favorite combination.
To save time, consider preparing several jars at once to enjoy throughout the week; they’ll stay fresh in the refrigerator for up to five days.
Almond Butter Energy Balls

Almond Butter Energy Balls make for a perfect snack, packed with nutrition and energy-boosting ingredients. These bite-sized treats aren’t only delicious but also incredibly simple to make, requiring minimal preparation time. The combination of almond butter, oats, and sweeteners creates a satisfying snack that can help satisfy your cravings without the guilt.
Ideal for busy mornings or as a post-workout boost, these energy balls are a smart addition to any health-conscious diet.
Customization is key when it comes to these energy balls. You can easily modify the recipe by adding your favorite mix-ins such as chocolate chips, dried fruits, or seeds. This versatility allows you to create a flavor that suits your taste preferences while still keeping the nutritional benefits intact.
Whether you’re looking for a quick snack at the office or a healthy treat for your kids, Almond Butter Energy Balls are sure to please everyone.
- 1 cup rolled oats
- 1/2 cup almond butter
- 1/4 cup honey or maple syrup
- 1/4 cup mini chocolate chips (optional)
- 1/4 cup chopped nuts or seeds (optional)
- 1/2 teaspoon vanilla extract
- A pinch of salt
In a mixing bowl, combine the rolled oats, almond butter, honey or maple syrup, mini chocolate chips (if using), chopped nuts or seeds (if using), vanilla extract, and a pinch of salt.
Stir all the ingredients together until well combined and the mixture holds together. Grab small portions of the mixture and roll them into balls, about 1 inch in diameter.
Place the energy balls on a parchment-lined baking sheet and refrigerate for at least 30 minutes to help them firm up.
When making Almond Butter Energy Balls, feel free to experiment with different ingredients based on your dietary needs or personal tastes.
You could substitute almond butter for peanut butter or sunflower seed butter if you have nut allergies. Try different types of sweeteners, add protein powder for an extra boost, or incorporate coconut flakes for added flavor and texture.
The key is to find the balance that works for you while enjoying the process of creating these nutritious snacks.

