This post may contain affiliate links. Please read our policy page.
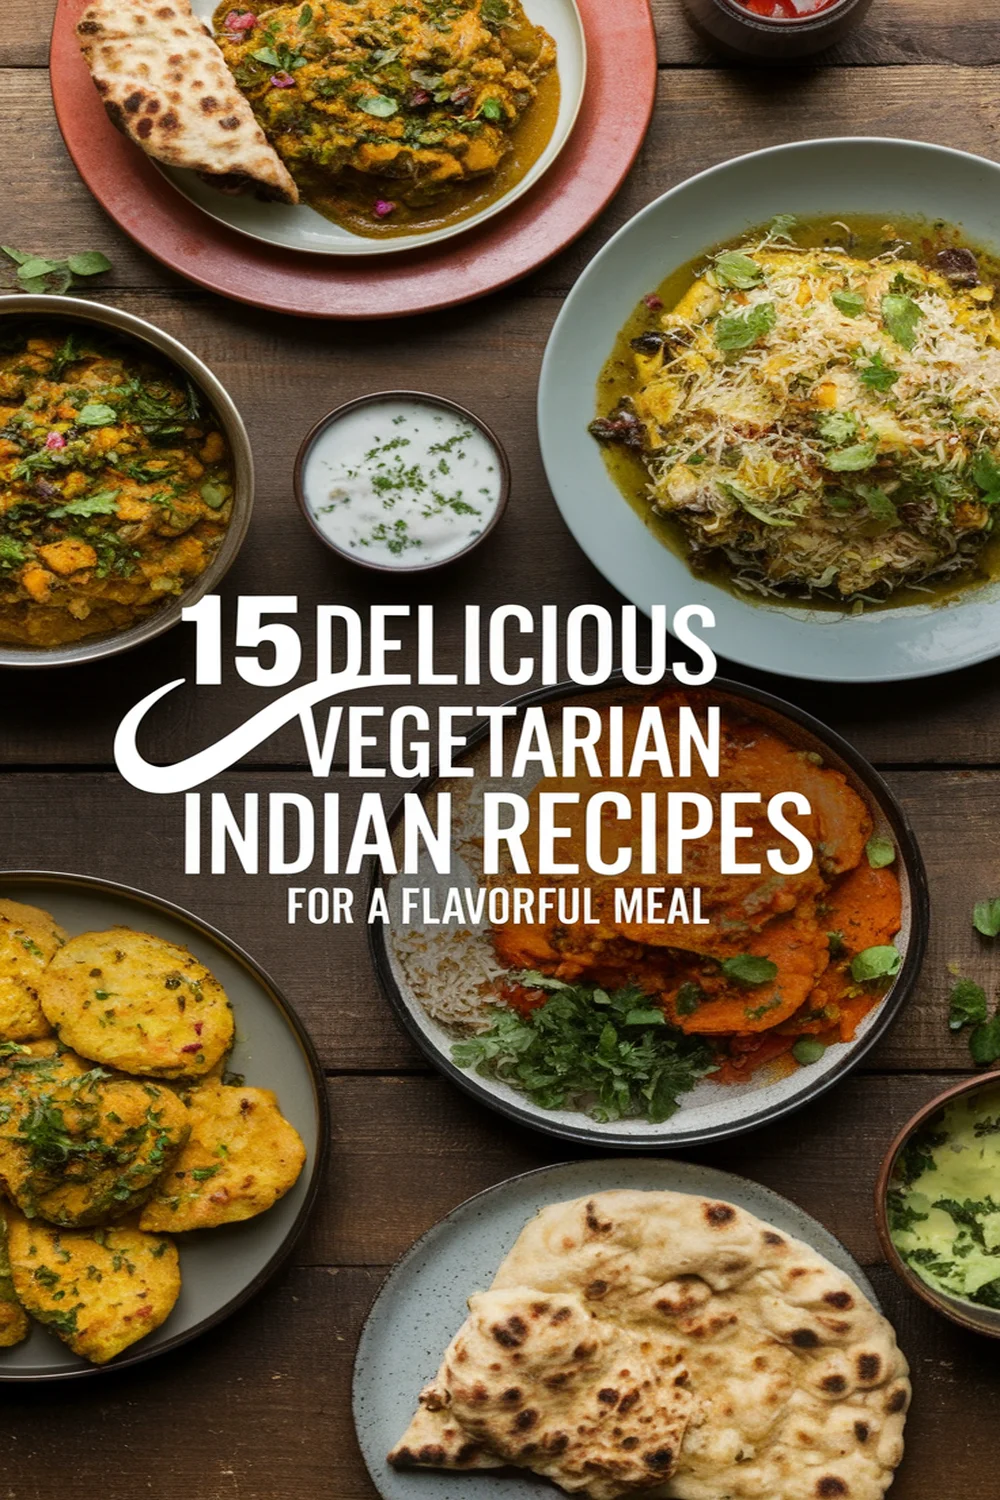
If you’re craving bold flavors, try these 15 delicious vegetarian Indian recipes! Savor the creamy richness of Paneer Tikka Masala, the hearty spices of Chana Masala, or the nutritious Palak Paneer. Don’t miss Aloo Gobi for a comforting classic or Vegetable Biryani for a fragrant rice dish. Stuffed Parathas and Methi Thepla add variety, while Kadai Paneer and Pani Puri spark excitement. Each dish offers a unique taste sensation that keeps your meals vibrant and satisfying—discover more scrumptious options ahead!
Paneer Tikka Masala
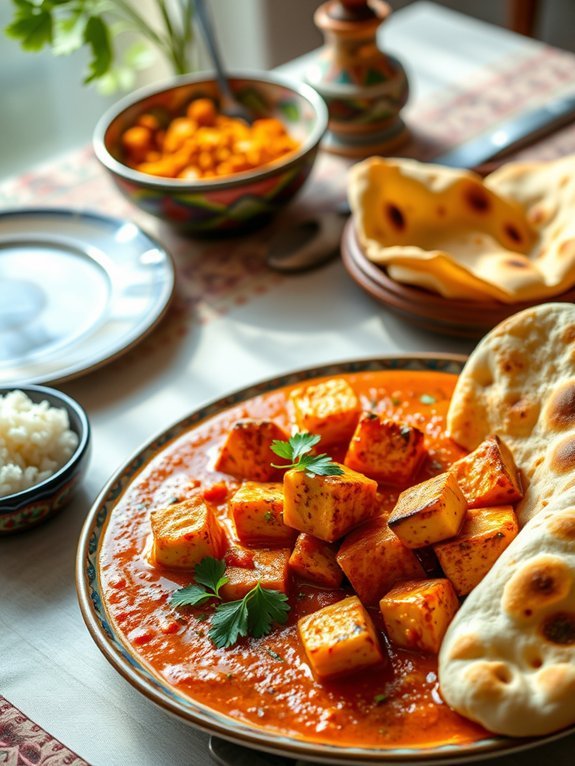
Paneer Tikka Masala is a beloved dish in Indian cuisine, known for its rich flavors and creamy texture. Paneer, a type of Indian cottage cheese, is marinated with a mix of yogurt and spices to create a succulent and flavorful filling, which is then cooked in a spiced tomato-based gravy. The dish is typically served with naan, roti, or rice, making it a satisfying meal for vegetarians and meat-eaters alike.
The magic of Paneer Tikka Masala lies in its combination of spices, which transform simple ingredients into a restaurant-quality dish. The marination process not only infuses the paneer with flavor but also helps in achieving a nice char during grilling or pan-searing.
Whether you’re preparing it for a family dinner or a special occasion, this dish is sure to impress everyone at the table.
Ingredients:
- 400 grams paneer, cut into cubes
- 1 cup plain yogurt
- 1 tablespoon ginger-garlic paste
- 2 teaspoons garam masala
- 1 teaspoon coriander powder
- 1 teaspoon cumin powder
- 1 teaspoon red chili powder (adjust to taste)
- Salt, to taste
- 1 tablespoon lemon juice
- 2 tablespoons vegetable oil
- 2 medium onions, finely chopped
- 2 medium tomatoes, pureed
- 1/2 cup heavy cream
- Fresh coriander leaves, chopped for garnish
To cook Paneer Tikka Masala, start by marinating the paneer cubes in a mixture of yogurt, ginger-garlic paste, garam masala, coriander powder, cumin powder, red chili powder, salt, lemon juice, and 1 tablespoon of oil for at least 30 minutes.
Preheat your oven or grill and skewer the marinated paneer along with slices of onion and bell peppers, and grill until golden brown. In a separate pan, heat the remaining oil, add chopped onions, and sauté until they turn translucent.
Add the pureed tomatoes, cook until the oil separates, and then stir in the grilled paneer cubes and heavy cream. Simmer for a few minutes and garnish with chopped coriander leaves.
When cooking Paneer Tikka Masala, feel free to customize the vegetables used in the dish. Adding bell peppers, zucchini, or mushrooms can enhance the flavor and nutritional value.
Make sure to adjust the spice levels according to your preference, and don’t hesitate to use homemade paneer for an authentic taste. For those who love a smoky flavor, try adding a few drops of liquid smoke or placing a hot charcoal piece directly into the gravy for a few seconds before sealing it, which can replicate the traditional tandoor essence.
Chana Masala
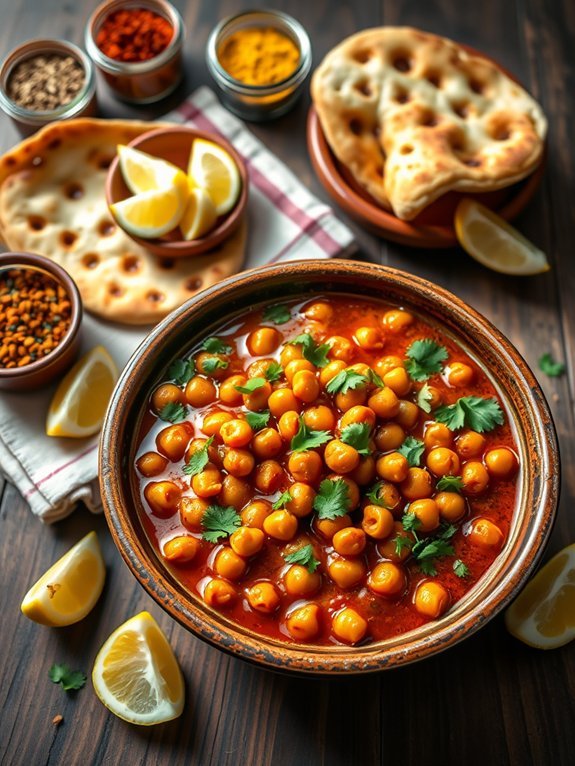
Chana Masala is a popular North Indian dish that features chickpeas (also known as chana) cooked in a rich and flavorful tomato-based sauce. This dish isn’t only delicious but also packed with protein and fiber, making it a nutritious option for vegetarians and vegans alike.
The blend of spices used in chana masala brings the dish to life, creating a comforting meal that pairs wonderfully with rice, naan, or roti. Cooking chana masala at home allows you to customize the spice levels to match your personal preferences. The dish can be made using dried chickpeas or canned ones, depending on the time you have available.
Dried chickpeas require soaking and longer cooking times, but their texture is often preferred by those looking for a heartier bite. With its vibrant flavors and appetizing aroma, chana masala is sure to become a staple in your culinary repertoire.
Ingredients:
- 1 cup dried chickpeas (or 2 cans of canned chickpeas)
- 2 tablespoons oil
- 1 teaspoon cumin seeds
- 1 large onion, finely chopped
- 2 tomatoes, pureed
- 2-3 green chilies, slit (adjust to taste)
- 1 tablespoon ginger-garlic paste
- 1 teaspoon turmeric powder
- 1 teaspoon coriander powder
- 1 teaspoon cumin powder
- 1 teaspoon garam masala
- Salt to taste
- Fresh cilantro for garnish
- Lemon wedges, for serving
Soak the dried chickpeas overnight in water or for at least 6 hours, then drain and rinse them before cooking. In a large pot, heat the oil over medium heat, add the cumin seeds, and let them splutter.
Add the chopped onions and sauté until golden brown. Stir in the ginger-garlic paste and green chilies, cooking for another minute before adding the pureed tomatoes. Cook until the oil separates from the tomato mixture, then add the turmeric, coriander, and cumin powders, mixing well.
After that, add the chickpeas, water (enough to cover the chickpeas), and salt. Bring to a boil, reduce the heat, and simmer until the chickpeas are tender and the flavors meld, about 30 minutes if using canned chickpeas or longer if using dried chickpeas.
When cooking chana masala, using freshly ground spices can greatly enhance the flavor of the dish. If you prefer a thicker sauce, you can mash a few chickpeas against the side of the pot and stir them back into the sauce.
Additionally, let the dish sit for a while after cooking—allowing it to rest will allow the flavors to deepen. Don’t forget to adjust the spice levels according to your taste; if you like it spicier, feel free to add more green chilies or a dash of red chili powder.
Enjoy with a sprinkle of fresh cilantro and a squeeze of lemon for a revitalizing finish!
Palak Paneer
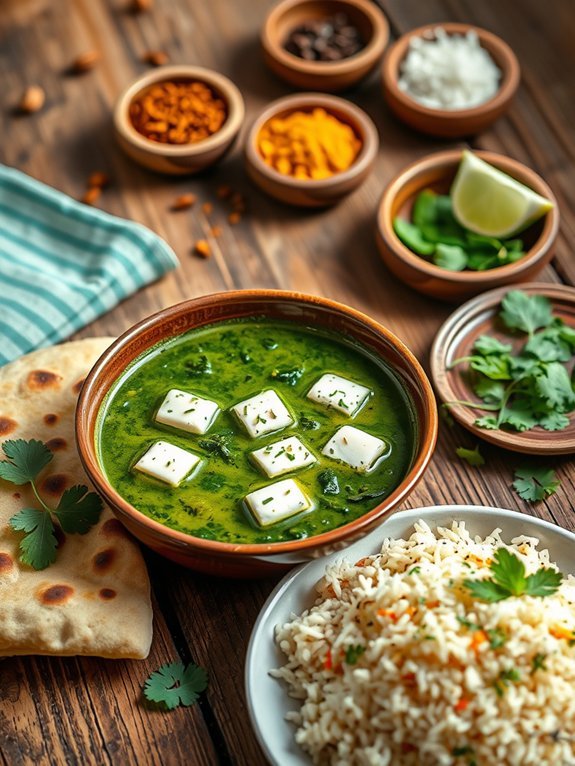
Palak Paneer is a classic Indian dish that combines the earthiness of spinach with the creamy richness of paneer (Indian cottage cheese). This beloved vegetarian option isn’t only packed with flavor but is also a nutritional powerhouse, offering an excellent source of vitamins and minerals.
The vibrant green hue of the dish makes it visually appealing, while the blend of spices creates a fragrant aroma that fills the kitchen. Perfect for both weeknight dinners and special occasions, Palak Paneer is loved by many for its comforting taste and versatility.
To make Palak Paneer, fresh spinach leaves are blanched and then blended into a smooth puree, forming the basis of the dish. This puree is then cooked with a blend of spices, tomatoes, and cream, offering a perfect balance of flavors.
Paneer cubes are gently simmered in the spinach sauce until they absorb the delicious flavors, making each bite a delightful experience. Serve it with warm naan or steamed basmati rice for a fulfilling meal.
Ingredients:
- 250 grams fresh spinach leaves
- 200 grams paneer, cubed
- 1 medium onion, finely chopped
- 2 medium tomatoes, chopped
- 1 tablespoon ginger-garlic paste
- 2 green chilies, chopped (adjust to taste)
- 1/2 cup cream (or yogurt for a lighter option)
- 1 teaspoon cumin seeds
- 1 teaspoon garam masala
- 1/2 teaspoon turmeric powder
- 1 teaspoon coriander powder
- Salt to taste
- 2 tablespoons oil or ghee
Heat oil or ghee in a pan over medium heat and add the cumin seeds until they crackle. Then, add the chopped onions and sauté until golden brown. Stir in the ginger-garlic paste and green chilies, cooking for another minute before adding the chopped tomatoes.
Cook until the tomatoes soften, then toss in the turmeric and coriander powders. Add the blanched and pureed spinach along with salt and simmer the mixture for a few minutes. Finally, gently add the paneer cubes and cream, stirring to combine, and sprinkle with garam masala before serving.
When preparing Palak Paneer, it’s crucial to use fresh spinach for the best flavor and nutrient retention. Blanching the spinach quickly in boiling water enhances its color and makes blending easier, yielding a vibrant green puree.
Additionally, for a richer taste, allow the dish to rest for a few minutes after cooking before serving; this lets the flavors meld beautifully. Adjust the spice levels to match your preference, and don’t hesitate to experiment with adding other ingredients like peas or bell peppers for extra texture and flavor.
Aloo Gobi
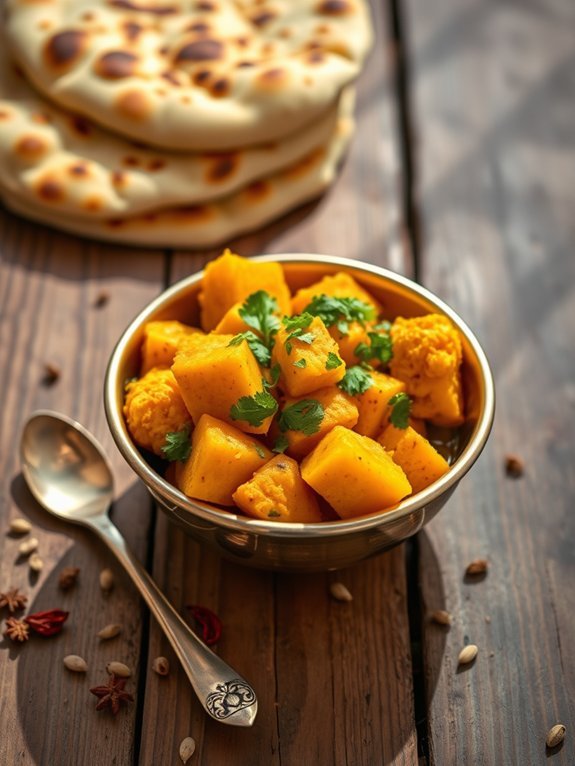
Aloo Gobi is a classic Indian dish that beautifully combines the richness of potatoes (aloo) and the vibrant color and nutritional benefits of cauliflower (gobi). The dish isn’t only easy to prepare, but it also packs a flavorful punch thanks to an array of aromatic spices.
This rustic vegetarian dish is commonly served with Indian bread like chapati or naan, making it a comforting and satisfying meal. The balance of spices, along with the earthy flavors of potatoes and cauliflower, creates a delightful curry that appeals to vegetarians and non-vegetarians alike.
Whether you’re hosting a dinner party or simply looking to enjoy a nutritious meal after a long day, Aloo Gobi is sure to become a family favorite with its wholesome ingredients and comforting taste.
Ingredients:
- 2 medium potatoes, peeled and cubed
- 1 medium cauliflower, cut into florets
- 1 medium onion, finely chopped
- 2 tomatoes, chopped
- 2-3 green chilies, slit
- 1 teaspoon ginger paste
- 1 teaspoon garlic paste
- 1 teaspoon cumin seeds
- 1 teaspoon turmeric powder
- 1 teaspoon coriander powder
- 1 teaspoon garam masala
- 2 tablespoons oil
- Salt to taste
- Fresh cilantro for garnish
Start by heating the oil in a large pan over medium heat. Add the cumin seeds and let them splutter before adding the chopped onions. Sauté the onions until they turn translucent, then mix in the ginger and garlic paste.
Allow it to cook for a minute before adding the chopped tomatoes and green chilies. Once the tomatoes soften, incorporate the potatoes and cauliflower florets along with the turmeric powder, coriander powder, and salt. Stir well to coat the vegetables with the spices, then cover the pan and cook for about 15-20 minutes, stirring occasionally until the vegetables are tender.
Finally, sprinkle garam masala, mix again, and allow it to simmer for a couple of minutes before garnishing with fresh cilantro.
For a more flavorful Aloo Gobi, you can roast the cauliflower florets in the oven for a few minutes before adding them to the pan. This will enhance their natural sweetness and add a delicious depth of flavor to the dish.
Additionally, feel free to adjust the heat level by varying the number of green chilies you use, or even substituting them with red chili powder for a different spice profile. A squeeze of fresh lemon juice before serving can also brighten up the flavors of this hearty dish.
Vegetable Biryani
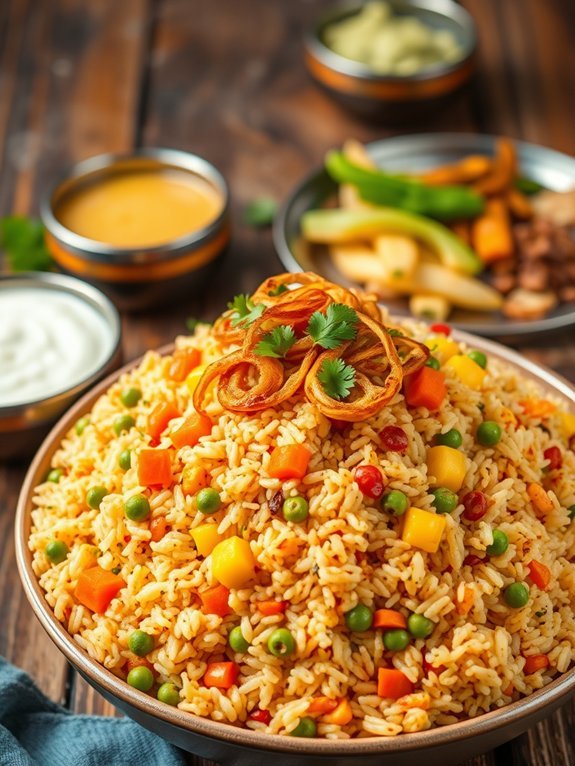
Vegetable Biryani is a vibrant and aromatic rice dish that hails from the Indian subcontinent. It’s prepared with basmati rice, a medley of vegetables, and a variety of spices that make it not just filling but also rich in flavors. This one-pot meal is perfect for any occasion, whether it’s a festive gathering, a casual family dinner, or as a hearty lunch option. The layering technique used in biryani allows each ingredient to maintain its distinct flavor while also mingling beautifully with the others.
The dish is deeply rooted in tradition, often associated with royal kitchens where the slow-cooking method is used to enhance the aroma and taste. One of the beauties of Vegetable Biryani is its versatility; you can adapt the recipe to suit your taste preferences and seasonal vegetable availability. Furthermore, it can easily be prepared in a pressure cooker or a traditional pot, making it accessible to home cooks everywhere.
Ingredients:
- 1 ½ cups basmati rice
- 2 cups mixed vegetables (carrots, peas, beans, and bell peppers)
- 1 large onion, thinly sliced
- 2 tomatoes, diced
- 2-3 green chilies, slit
- 1 teaspoon ginger-garlic paste
- 1 teaspoon cumin seeds
- 1 bay leaf
- 4-5 cloves
- 2-3 green cardamom pods
- 1 cinnamon stick
- ½ teaspoon turmeric powder
- 1 teaspoon red chili powder (adjust to taste)
- ½ teaspoon garam masala
- 3-4 tablespoons oil or ghee
- Salt, to taste
- Fresh coriander leaves, chopped (for garnish)
- Fried onions (for garnish, optional)
In a large pot, heat the oil or ghee and sauté the cumin seeds, bay leaf, cloves, cardamom pods, and cinnamon stick until fragrant. Add the sliced onions, and cook until golden brown. Stir in the ginger-garlic paste and green chilies, followed by the diced tomatoes.
Cook until the tomatoes soften, then add the mixed vegetables, turmeric powder, red chili powder, and salt. After a few minutes, add the rinsed basmati rice, and water (2 ½ cups) and bring to a boil. Once boiling, reduce the heat to low, cover, and cook for 20 minutes or until the rice is fully cooked. Fluff with a fork and sprinkle garam masala before serving.
For an added depth of flavor, soak the basmati rice in water for about 30 minutes before cooking. This helps to guarantee the grains remain separate and fluffy once cooked.
Additionally, feel free to customize the vegetables according to your preference or availability. You can also enhance the biryani with nuts and raisins for a contrasting texture. Finally, serve it with sides such as yogurt or raita to complement the spices and round out the meal.
Dal Makhani
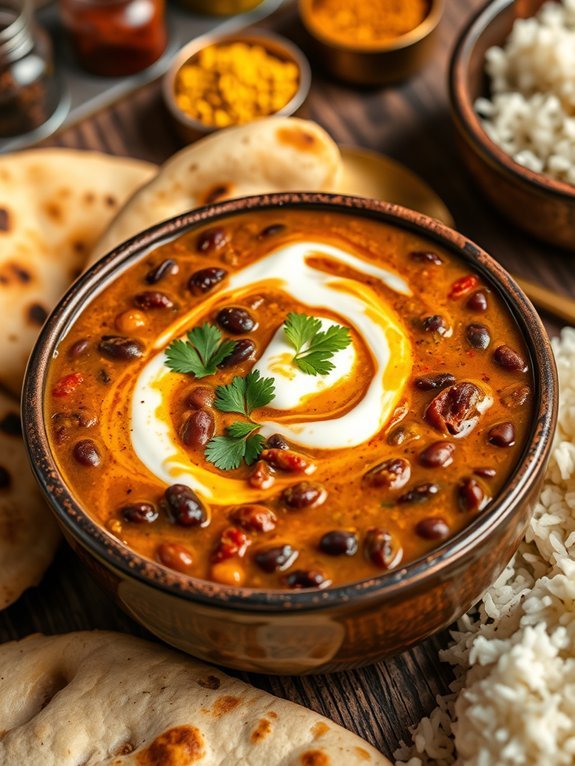
Dal Makhani is a classic North Indian dish that hails from the Punjab region. This creamy lentil dish is made using black urad dal (black gram) and kidney beans, simmered to perfection with a blend of aromatic spices. Traditionally cooked in a tandoor, today’s versions can easily be prepared on the stovetop or in a pressure cooker, making it a beloved comfort food for many households.
Its rich, buttery texture and mildly spiced flavor profile make it a perfect accompaniment for naan, roti, or even steamed rice. This delightful dish not only satisfies hunger but also is an excellent source of protein and nutrients, especially for vegetarians.
The slow-cooking process allows the flavors to meld beautifully, resulting in a dish that’s irresistibly delicious and perfect for special occasions or family gatherings. With its luscious gravy and hearty lentils, Dal Makhani can easily steal the spotlight on any dining table.
Ingredients:
- 1 cup black urad dal (whole black gram)
- ¼ cup kidney beans (rajma)
- 1 large onion, finely chopped
- 2 medium tomatoes, pureed
- 1-2 green chilies, slit
- 1 tablespoon ginger-garlic paste
- 1 teaspoon cumin seeds
- 1 teaspoon garam masala
- ½ teaspoon red chili powder
- 1 tablespoon butter
- 1 tablespoon oil
- Salt to taste
- ½ cup heavy cream
- Fresh coriander leaves for garnish
Soak the black urad dal and kidney beans overnight in plenty of water. Drain and rinse them before cooking.
In a pressure cooker, heat oil and butter over medium heat. Add cumin seeds and allow them to crackle. Then, add chopped onions and sauté until golden. Incorporate the ginger-garlic paste and green chilies, cooking for a minute until aromatic.
Stir in the pureed tomatoes, red chili powder, and salt, and let the mixture cook until the oil separates. Add the soaked lentils and beans, along with 4 cups of water. Close the lid and pressure cook for about 15-20 minutes.
Once done, open the cooker and stir in the heavy cream and garam masala, cooking on low heat for another 10 minutes. For an extra layer of flavor, let the dal simmer on low heat for an extended period after pressure cooking; this mimics the traditional slow-cooked methods.
You can adjust the consistency of the dal by adding more water as needed, depending on your preference for thickness. Finally, remember that the taste will deepen and improve if allowed to rest for a little while before serving, and garnishing with fresh coriander leaves just before serving will add a burst of freshness.
Samosas

Samosas are a beloved Indian snack, known for their crispy exterior and flavorful filling. This popular dish can be found in street stalls, homes, and restaurants across the country.
Traditionally filled with spiced potatoes and peas, samosas can also be adjusted to incorporate other vegetables or spices to suit your taste preferences. The golden color and crunchy texture of freshly fried samosas are certainly a delightful treat for any occasion.
Making samosas can seem intimidating at first, but it’s actually quite simple with a little practice. The process involves preparing the dough, making the filling, and then shaping and frying the samosas to perfection.
Once you get the hang of it, you can experiment with different fillings and seasonings to create your own signature version of this iconic snack.
Ingredients:
- 2 cups all-purpose flour
- 4 tablespoons vegetable oil
- 1 teaspoon ajwain (carom seeds)
- Water (as needed for dough)
- 3 medium potatoes, boiled and mashed
- 1 cup green peas, boiled
- 1 tablespoon grated ginger
- 1 teaspoon cumin seeds
- 1 teaspoon garam masala
- 1 teaspoon red chili powder
- Salt to taste
- Oil for deep frying
To make the samosas, begin by preparing the dough. In a mixing bowl, combine the all-purpose flour, ajwain, and salt. Add the vegetable oil and mix until the flour has a crumbly texture.
Gradually add water and knead the mixture into a smooth dough. Cover the dough with a damp cloth and let it rest for 30 minutes.
Meanwhile, prepare the filling by heating a small amount of oil in a pan, adding cumin seeds and ginger, then mixing in the mashed potatoes, green peas, garam masala, red chili powder, and salt.
Once the filling is well combined, take small portions of the dough, roll them out into circles, and shape them into cones filled with the potato mixture before sealing the edges.
Finally, deep fry the samosas in hot oil until golden brown and crispy.
For a perfect samosa, make sure your oil is hot enough before adding the samosas, as this prevents them from becoming greasy.
You can also experiment with different spices and herbs in your filling for a unique flavor or try baking them instead of frying for a healthier option.
Additionally, serving samosas with mint chutney or tamarind sauce can enhance the snacking experience. Don’t hesitate to get creative with your fillings and enjoy these delicious snacks!
Baingan Bharta
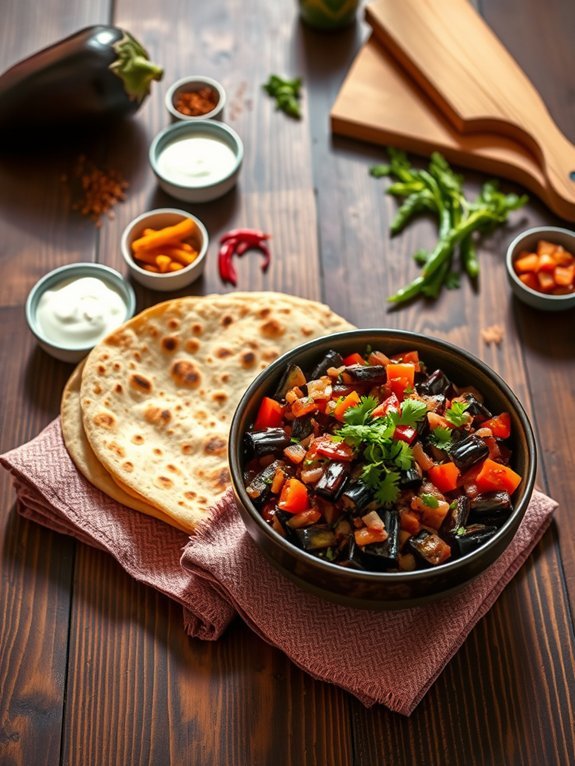
Baingan Bharta is a delightful dish that showcases the rich flavors of roasted eggplant combined with aromatic spices. This traditional Indian recipe is particularly popular in Punjab and is often served with roti or rice.
The key to a successful Baingan Bharta lies in the roasting of the eggplant, which imparts a smoky flavor to the dish, elevating its taste profile and providing a unique depth of flavor.
To prepare this mouthwatering vegetarian delight, you’ll need to select a perfectly ripe eggplant. The quality of the eggplant is essential, as it should be shiny and firm.
Roasting can be done over an open flame, in the oven, or on a grill, allowing for a delicious caramelization of flavors. Once roasted and peeled, the eggplant is combined with a medley of spices, tomatoes, onions, and green chilies to create a vibrant and hearty dish that appeals to both vegetarians and meat-lovers alike.
Ingredients:
- 1 large eggplant (baingan)
- 2 tablespoons vegetable oil
- 1 medium onion, finely chopped
- 2 tomatoes, chopped
- 2-3 green chilies, slit
- 1 teaspoon ginger-garlic paste
- 1 teaspoon cumin seeds
- 1 teaspoon coriander powder
- 1 teaspoon garam masala
- Salt to taste
- Fresh cilantro, chopped (for garnish)
- Lemon juice (optional)
Once you’ve roasted the eggplant until its skin is charred and the flesh is soft, allow it to cool slightly and then peel off the skin.
In a pan, heat the vegetable oil and splutter the cumin seeds. Add the chopped onions and sauté until golden. Stir in the ginger-garlic paste and sauté for another minute before adding the chopped tomatoes and green chilies.
Cook until the tomatoes soften, then add the roasted eggplant pulp, followed by coriander powder and salt. Mix everything well and cook for a few minutes on low heat.
Finish by stirring in the garam masala and garnish with fresh cilantro and a squeeze of lemon juice if desired.
For a richer flavor, try adding a little bit of smoked paprika or a pinch of asafoetida (hing) while sautéing the onions. You can also adjust the heat by varying the number of green chilies based on your preference.
Pair Baingan Bharta with a side of yogurt or pickles for added taste and texture, making it a well-rounded meal. Alternatively, you can experiment by adding ingredients like bell peppers or peas to give a colorful twist to this classic dish.
Recommended Items
Get ready to spice up your kitchen with our recommended products and equipment—let’s dive in!
Masoor Dal
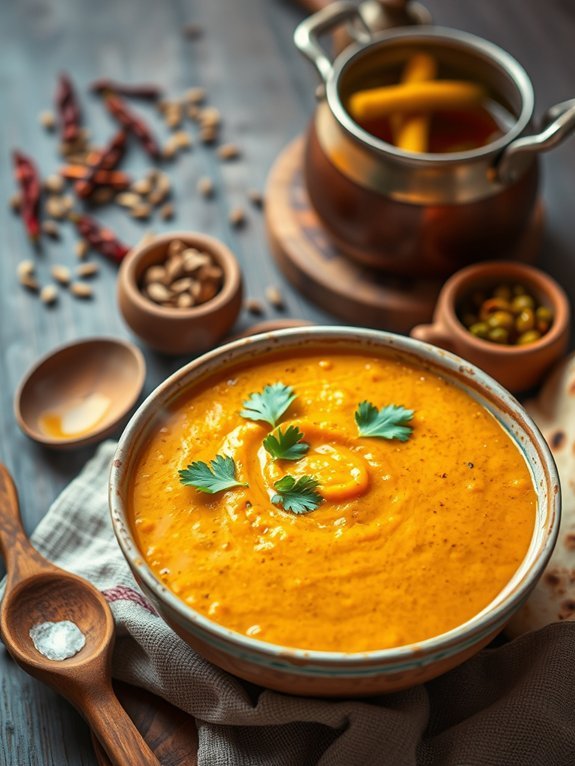
Masoor Dal, or red lentil dal, is a staple in Indian households that showcases the beauty of simplicity in plant-based cooking. Known for its quick cooking time and rich protein content, masoor dal isn’t only nutritious but also incredibly versatile. With its lovely golden-orange hue, this dish can be enjoyed on its own or paired with rice, roti, or naan. Perfect for a comforting weeknight dinner, it’s easy to prepare and packed with flavor, making it a favorite among both vegetarians and non-vegetarians.
The preparation of Masoor Dal involves a few basic ingredients that come together beautifully to create a fulfilling and aromatic dish. You’ll find that not only is this dish healthy, but it’s also an excellent canvas for different spices, which can be adjusted to taste. Whether you enjoy it mild or with an extra kick, masoor dal can easily be adapted to suit personal preferences.
- 1 cup masoor dal (red lentils)
- 3 cups water
- 1 onion, finely chopped
- 2 tomatoes, chopped
- 2 green chilies, slit (adjust to taste)
- 1-inch ginger, grated
- 4 cloves garlic, minced
- 1 teaspoon cumin seeds
- 1 teaspoon turmeric powder
- 1 teaspoon garam masala
- 2 tablespoons vegetable oil or ghee
- Salt, to taste
- Fresh coriander leaves, for garnish (optional)
Rinse the masoor dal thoroughly under running water until the water runs clear. In a pot, heat the oil or ghee over medium heat, and add the cumin seeds. Once they start to sizzle, add the chopped onions and sauté until they turn golden brown.
Add in the ginger, garlic, and green chilies, cooking for a couple more minutes. Then, stir in the chopped tomatoes, turmeric powder, and salt, and cook until the tomatoes soften.
Add the rinsed lentils and water, bring to a boil, then reduce the heat to low and let it simmer uncovered for about 20 minutes, or until the lentils are soft and the mixture is slightly thickened. Finish off with garam masala and garnish with fresh coriander if desired.
When cooking masoor dal, it’s important to monitor the consistency; you may want to adjust the amount of water depending on your preference for thickness. If you like your dal soupier, feel free to add a little more water during cooking.
Additionally, for a richer flavor, consider tempering spices such as mustard seeds or curry leaves before adding the onion, or even a splash of coconut milk towards the end for a creamy texture. Finally, serving it with a side of pickles or papadum can elevate the meal experience even further!
Chole Bhature
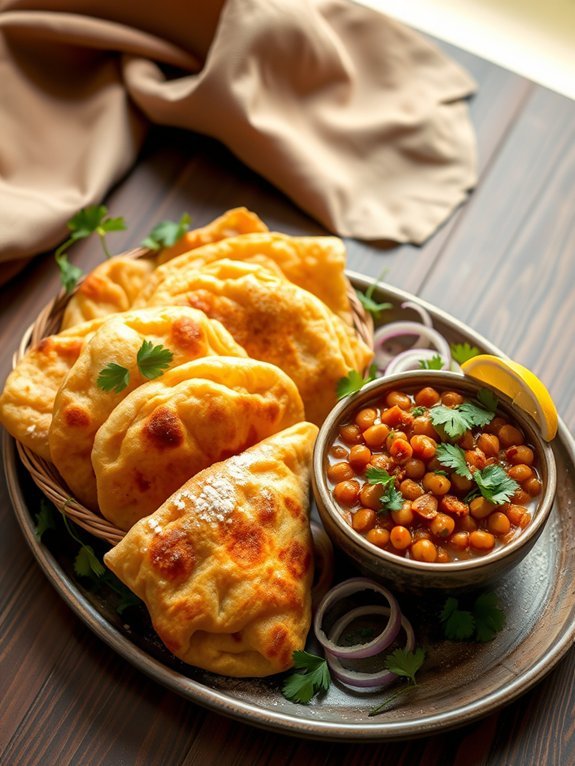
Chole Bhature is a beloved dish hailing from the Indian subcontinent, particularly popular in North India. It pairs spicy chickpeas, known as chole, with fluffy deep-fried bread called bhature. This iconic combination isn’t just a meal; it’s a celebration of flavors and textures that engage all the senses. Richly spiced with aromatic herbs and served with tangy pickles and onions, Chole Bhature is a staple at street food stalls and family gatherings alike.
Making Chole Bhature at home is a rewarding experience. The process may seem intimidating at first, but with the right ingredients and a little patience, you can create an authentic meal that rivals your favorite local eatery. You can customize the spices according to your taste and even adjust the size of the bhature to suit your preference. Enjoy this delightful dish for breakfast, lunch, or dinner, and impress family and friends with your culinary skills.
Proposed Recipe
Ingredients
- 1 cup dried chickpeas (chole)
- 1 large onion (finely chopped)
- 2 medium tomatoes (pureed)
- 1-2 green chilies (slit)
- 1 tablespoon ginger-garlic paste
- 2 teaspoons garam masala
- 1 teaspoon cumin seeds
- 1 teaspoon coriander powder
- 1 teaspoon turmeric powder
- Salt to taste
- 2 tablespoons oil
- Fresh coriander leaves (for garnish)
For Bhature:
- 2 cups all-purpose flour
- 1 tablespoon semolina (rava)
- 1 tablespoon yogurt
- 1 teaspoon baking powder
- Salt to taste
- Water (as needed)
- Oil (for deep frying)
Soak the dried chickpeas overnight in water. Drain and rinse them before pressure cooking them with water, salt, and turmeric for 2-3 whistles or until tender.
In a pan, heat oil and add cumin seeds followed by onions, frying them until golden brown. Stir in ginger-garlic paste and green chilies, then add the pureed tomatoes and spices. Cook the mixture until the oil separates. Add the cooked chickpeas along with some of the cooking water and simmer for about 10 minutes.
Meanwhile, mix all bhature ingredients to form a soft dough, let it rest for 30 minutes, then roll out small rounds and deep fry until golden brown.
When preparing Chole Bhature, verify the bhature dough has adequate resting time for it to become soft and pliable, which will result in fluffy bhature. The temperature of the oil is essential; too hot will cause bhature to burn on the outside while remaining raw inside, while too cool will lead to greasy bread.
For a healthier option, you can also opt to bake the bhature. Additionally, feel free to adjust the spices for the chole to suit your taste, and don’t skip on the garnish of fresh coriander—it adds a burst of freshness!
Vegetable Pakoras

Vegetable pakoras are a popular Indian snack, enjoyed for their crispy texture and flavorful taste. These savory fritters are made by coating a variety of vegetables in a spiced chickpea flour batter before frying them until golden brown. The versatility of this dish makes it a perfect appetizer to serve at gatherings or simply as a comforting snack paired with chutney or yogurt.
To prepare vegetable pakoras, you can use a medley of vegetables such as potatoes, onions, spinach, and cauliflower, or customize it according to your preferences. The key to achieving the ideal taste is in the seasoning of the batter, which usually includes spices like cumin, coriander, and turmeric. When served hot, these pakoras deliver a delightful crunch and are sure to satisfy your cravings for something spicy and tasty.
- 1 cup chickpea flour (besan)
- 1 medium potato, thinly sliced
- 1 medium onion, thinly sliced
- 1 cup spinach leaves, chopped
- 1/2 cup cauliflower florets
- 1-2 green chilies, finely chopped
- 1 teaspoon cumin seeds
- 1/2 teaspoon turmeric powder
- 1 teaspoon red chili powder
- Salt, to taste
- Water, as needed
- Oil, for deep frying
In a mixing bowl, combine the chickpea flour, spices, and salt. Gradually add water until you achieve a smooth, thick batter. Add the sliced vegetables to the batter, making certain they’re fully coated.
Heat oil in a deep frying pan over medium heat. Once hot, carefully drop spoonfuls of the batter-coated vegetables into the oil, frying until they turn golden brown and crispy. Remove the pakoras and drain on paper towels before serving.
When making vegetable pakoras, verify that the oil is hot enough before frying; if it’s not, the pakoras will absorb too much oil and become greasy. For an extra crunch, you can add a tablespoon of rice flour to the chickpea flour mixture. Mixing in different vegetables can also add variety, so feel free to experiment with what’s available.
Serve with a tangy mint chutney or your favorite dipping sauce to elevate the flavors.
Stuffed Paratha
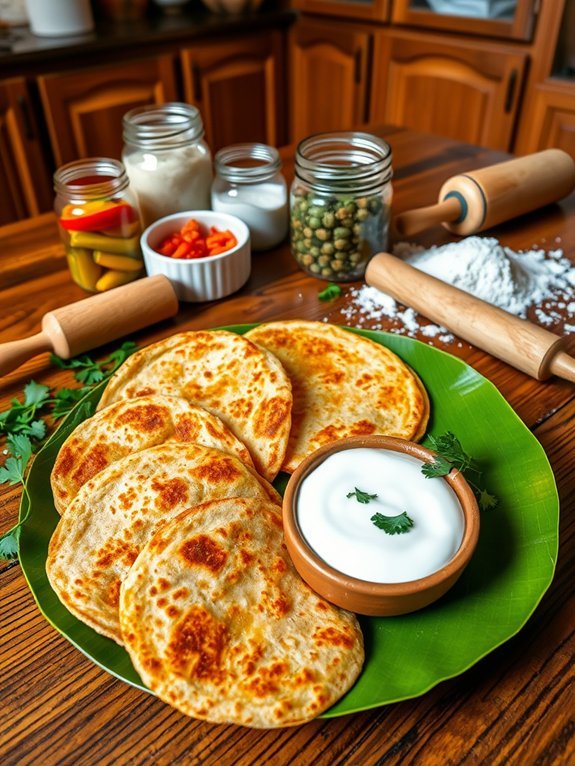
Stuffed Paratha is a beloved dish in Indian cuisine, cherished for its hearty flavors and versatility. This delightful flatbread is typically filled with spiced vegetables, but you can get creative by using various fillings such as paneer, lentils, or even mashed potatoes. It’s a wholesome meal that can be enjoyed for breakfast, lunch, or dinner, making it a favorite among vegetarian options.
Making stuffed parathas is a wonderful way to add a nutritious twist to your meal while being easy to prepare. The key to a successful stuffed paratha lies in the dough’s consistency and the right seasoning for the filling. Once mastered, you’ll have a delicious comfort food that can impress family and friends alike.
Pair the paratha with yogurt, pickles, or a side salad for a complete meal!
Ingredients:
- 2 cups whole wheat flour
- Water (as needed)
- Salt (to taste)
- 1 cup boiled and mashed potatoes (or filling of choice)
- 1 teaspoon cumin seeds
- 1 teaspoon garam masala
- 1 teaspoon red chili powder
- 1 tablespoon finely chopped coriander leaves
- Ghee or oil (for cooking)
Knead the whole wheat flour with water and a pinch of salt into a soft dough; let it rest for 20-30 minutes. Meanwhile, mix the boiled and mashed potatoes with cumin seeds, garam masala, red chili powder, and coriander leaves to prepare your filling.
Divide the dough into equal balls, take one ball, roll it into a small circle, and place a portion of the filling in the center. Fold the edges over the filling, pinch to seal, and roll out gently into a flat circle. Cook on a hot pan with ghee or oil until golden brown and crispy on both sides.
When making stuffed parathas, make sure that the filling isn’t too watery so that the parathas retain their shape and texture during cooking. If using vegetables, they should be cooked and well-drained to avoid excess moisture.
Additionally, adjusting the spice level according to your taste preferences can make a significant difference in flavor. Don’t hesitate to experiment by adding different herbs and spices to the filling for a unique twist!
Methi Thepla
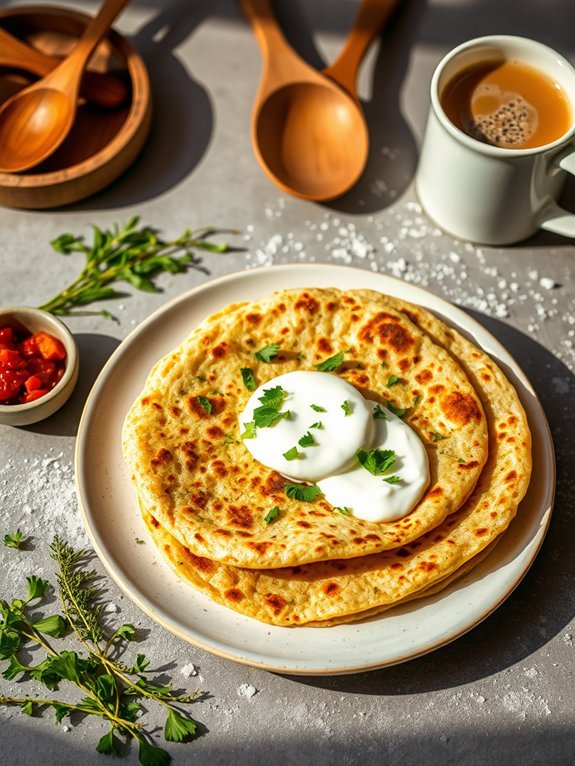
Methi Thepla is a popular Gujarati flatbread that’s not only flavorful but also packed with nutrition, thanks to the inclusion of fresh fenugreek leaves (methi). The dish is versatile and can be enjoyed for breakfast, lunch, or dinner. Its delightful combination of spices offers a warm, aromatic taste that pairs wonderfully with yogurt or pickles.
Making Methi Thepla is a fantastic way to incorporate greens into your diet while still enjoying a satisfying meal. The simplicity of the ingredients used in Methi Thepla makes it accessible to anyone looking to try their hand at Indian cooking. It’s a great option for meal prep, as it can be made in batches and stored for later.
The flatbreads can be eaten plain, stuffed, or even served alongside a warm cup of tea. Let’s plunge into this nutritious and delicious recipe!
- 2 cups whole wheat flour
- 1 cup fresh methi leaves, chopped
- 1 teaspoon cumin seeds
- 1 teaspoon turmeric powder
- 1 teaspoon red chili powder
- 1 teaspoon coriander powder
- Salt to taste
- 2 tablespoons yogurt
- Water, as needed
- Oil or ghee for cooking
Combine the whole wheat flour, chopped methi leaves, cumin seeds, turmeric powder, red chili powder, coriander powder, and salt in a large mixing bowl. Mix well and add yogurt, followed by water, little by little, to form a smooth and soft dough.
Let the dough rest for about 20 minutes. Divide the dough into equal portions and roll each portion into a ball. Using a rolling pin and a dusting of flour, roll each ball into a thin circle. Cook on a hot tava or skillet, drizzling a little oil or ghee on both sides, until golden brown and cooked through.
When making Methi Thepla, feel free to adjust the spices according to your taste preference. You can also add other ingredients like grated ginger or finely chopped green chilies for an extra kick. If you’re using frozen methi leaves, make sure they’re thawed and excess moisture is squeezed out before mixing.
Thepla can be stored in an airtight container and reheated easily, making it a great dish to enjoy throughout the week!
Kadai Paneer
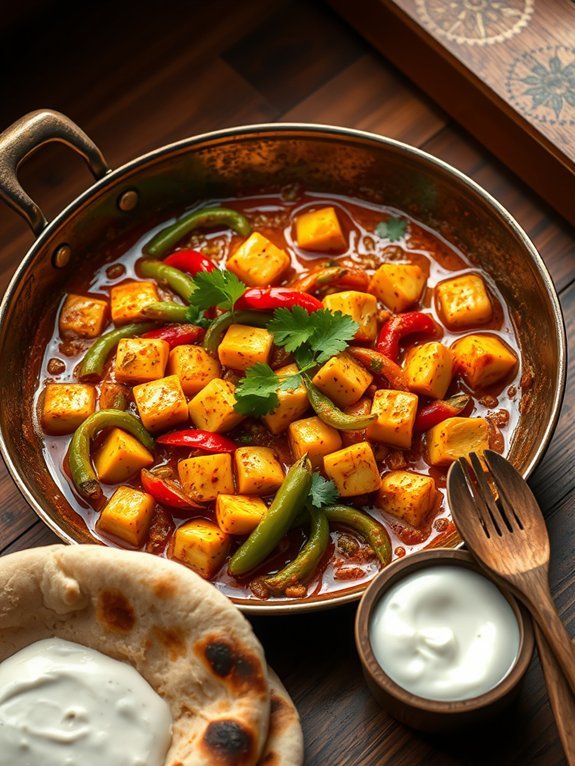
Kadai Paneer is a vibrant and flavorful Indian dish that features paneer, or Indian cottage cheese, sautéed with a medley of spices and colorful bell peppers. Named after the traditional Indian wok-like cooking vessel called a “kadai,” this dish is characterized by its rich gravy and aromatic blend of masalas that make it a favorite among vegetarians.
Perfectly paired with naan or rice, Kadai Paneer offers a delightful balance of textures and tastes that will tantalize your taste buds. The key to making a perfect Kadai Paneer lies in the use of freshly ground spices and a technique that allows the paneer to soak in the flavors of the gravy. With its robust taste and vibrant appearance, it’s an ideal dish for both casual dinners and special occasions.
Whipping up this classic recipe is simpler than you might think, and it’s a great way to impress your family and friends with your culinary skills.
Ingredients:
- 250 grams paneer (cubed)
- 2 tablespoons oil
- 1 teaspoon cumin seeds
- 1 medium onion (finely chopped)
- 2 medium tomatoes (pureed)
- 1 green bell pepper (cubed)
- 1 red bell pepper (cubed)
- 1 teaspoon ginger-garlic paste
- 1 teaspoon red chili powder
- 1 teaspoon turmeric powder
- 1 teaspoon garam masala
- Salt to taste
- Fresh coriander leaves (for garnish)
Heat oil in a kadai or heavy-bottomed pan, and add cumin seeds. Once they splutter, add the chopped onions and sauté till golden brown. Mix in the ginger-garlic paste and sauté for a minute before adding the tomato puree, red chili powder, turmeric powder, and salt. Cook until the oil separates from the masala, then add the cubed paneer and bell peppers.
Stir well, cover, and let it cook for about 5-7 minutes, allowing the flavors to meld. Finish with garam masala and garnish with fresh coriander leaves.
When cooking Kadai Paneer, consider marinating the paneer in a mixture of spices and yogurt for 30 minutes before cooking, as this enhances its flavor. Additionally, for a smoky flavor, you can add a piece of charcoal in the dish and cover it briefly, allowing the smoke to infuse into your Kadai Paneer.
Adjust the spice levels according to your palate, and feel free to add vegetables like zucchini or carrots for added nutrition and variety.
Pani Puri
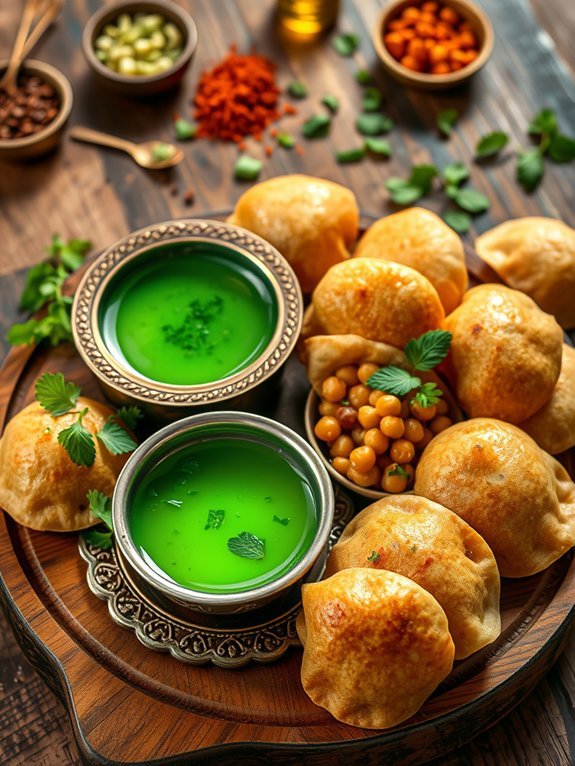
Pani Puri, also known as Golgappa or Phuchkas in different regions of India, is a beloved street food that’s both invigorating and tantalizing to the taste buds. Originating from the Indian subcontinent, these small, hollow puris are crisp and fried to perfection, waiting to be filled with a zesty mix of flavorful water, tangy tamarind, and spicy chutneys. The burst of flavors and textures makes Pani Puri a favorite snack or appetizer, enjoyed by people of all ages.
The preparation of Pani Puri is an art in itself, where every component plays a vital role. From the crispy puris to the spicy water and the tangy filling, each layer adds depth to the overall experience. Though it may seem intricate, making Pani Puri at home can be fun and rewarding. This recipe will guide you through creating your own version of this delightful treat, perfect for parties or casual gatherings.
Ingredients:
- Semolina (or suji) – 1 cup
- All-purpose flour – 2 tablespoons
- Baking soda – a pinch
- Salt – to taste
- Water – as required
- Tamarind pulp – ¼ cup
- Boiled potatoes – 2 medium, mashed
- Boiled chickpeas – ½ cup
- Chaat masala – 1 teaspoon
- Fresh coriander leaves – chopped, for garnish
- Green chilies – 1-2, finely chopped
- Cumin powder – ½ teaspoon
- Hing (asafoetida) – a pinch
- Ice-cold water – 2-3 cups
- Mint leaves – 1 bunch
- Lemon juice – 1 tablespoon
- Sugar – 1 teaspoon
To prepare the Pani Puri, start by making the puris. Mix semolina, all-purpose flour, baking soda, and salt in a bowl. Gradually add water to form a stiff dough. Let it rest for about 30 minutes. Roll the dough into small balls and flatten them into thin discs. Deep fry the discs in hot oil until they puff up and turn golden brown.
For the spicy water, blend mint leaves, coriander leaves, green chilies, tamarind pulp, lemon juice, sugar, and cumin powder with water. Adjust the spice level according to your taste. For the filling, mix the mashed potatoes, boiled chickpeas, chaat masala, and chopped green chilies.
When serving, gently crack the top of the puris and fill them with the potato-chickpea mixture, then dip them into the spicy mint water, or pour the water into the puris. Enjoy immediately for the best experience.
For extra tips, make sure to fry the puris on medium heat to achieve the perfect puffiness without burning them. You can prepare the spicy water in advance and refrigerate it to enhance the flavors. Experiment with different fillings, such as sprouted beans or various vegetables, to create your unique twist on this classic dish.
The key to a great Pani Puri lies in the balance of flavors, so don’t hesitate to adjust the ingredient proportions to suit your palate.

