This post may contain affiliate links. Please read our policy page.
You’ll love these 10 delicious sugar-free desserts that satisfy your cravings without the guilt! Indulge in rich Avocado Chocolate Mousse or creamy Coconut Chia Pudding. Try fudgy Almond Flour Brownies or chewy Banana Oatmeal Cookies for a satisfying treat. Experience the smoothness of Sugar-Free Cheesecake and the energy boost from Peanut Butter Energy Bites. Don’t forget the moist Zucchini Bread Muffins and revitalizing Dark Chocolate Raspberry Bark. Keep exploring for more mouthwatering recipes that’ll delight your taste buds!
Avocado Chocolate Mousse

Avocado chocolate mousse is a delectable and healthy alternative to traditional desserts. With creamy avocados as the base, this treat isn’t only rich and satisfying but also packed with nutrients. The natural fats from the avocados lend a velvety texture, while unsweetened cocoa powder creates that indulgent chocolate flavor.
This sugar-free dessert is perfect for anyone looking to satisfy their sweet tooth without the guilt. Creating this mousse is incredibly simple and requires just a few basic ingredients, all of which combine seamlessly for a delightful treat. In just a few minutes, you can whip up this decadent dessert that’s perfect for entertaining guests or enjoying on your own.
Plus, it’s vegan-friendly and can easily be adjusted to fit various dietary preferences.
- 2 ripe avocados
- 1/2 cup unsweetened cocoa powder
- 1/4 cup almond milk (or any non-dairy milk)
- 1/4 cup pure maple syrup (or preferred sweetener)
- 1 teaspoon vanilla extract
- A pinch of salt
To prepare the mousse, scoop the flesh from the avocados and add it to a blender or food processor along with the cocoa powder, almond milk, maple syrup, vanilla extract, and salt. Blend until smooth and creamy, scraping down the sides as needed to guarantee everything is well incorporated.
Once you achieve a fluffy texture, taste and adjust sweetness, if necessary, before transferring the mousse to serving dishes. Chill in the refrigerator for at least 30 minutes before serving to allow it to set.
For the best results, use ripe avocados, as they’ll provide the desired creaminess and flavor. If you prefer a sweeter mousse, feel free to increase the quantity of maple syrup or experiment with other sweeteners like agave or stevia.
Adding a touch of instant coffee or espresso powder can also enhance the richness of the chocolate flavor. Serve the mousse topped with fresh berries or coconut whipped cream for an added twist!
Coconut Chia Pudding
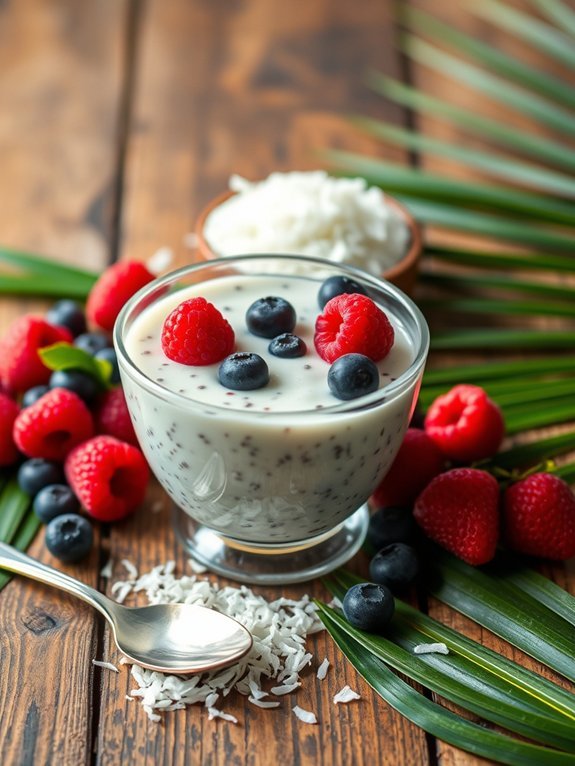
Coconut Chia Pudding is a delightful and nutritious dessert that fits perfectly within a sugar-free lifestyle. Chia seeds are rich in omega-3 fatty acids, fiber, and antioxidants, making them a powerhouse of nutrition. When combined with coconut milk and left to thicken, they create a creamy and satisfying pudding that not only tastes great but also offers a healthy alternative to traditional sugary desserts.
This pudding is incredibly versatile and can be enjoyed at any time of day. Whether as a breakfast option, a midday snack, or a sweet treat after dinner, Coconut Chia Pudding can be customized to suit your preferences. You can add fruits, nuts, or even spices like vanilla or cinnamon to enhance the flavor while keeping the dish deliciously healthy.
- 1 cup canned coconut milk (full-fat for creaminess)
- 1/4 cup chia seeds
- 1 teaspoon vanilla extract
- A pinch of salt
- Optional toppings: fresh fruit, nuts, or unsweetened shredded coconut
In a mixing bowl, combine the coconut milk, chia seeds, vanilla extract, and salt. Stir well to guarantee that the chia seeds are evenly distributed. Let the mixture sit for about 5 minutes, then stir again to prevent clumping.
Cover the bowl and refrigerate for at least 2 hours or overnight, allowing the pudding to thicken to your desired consistency.
For best results, use full-fat coconut milk to achieve a creamier texture. If you find the pudding too thick after refrigerating, simply stir in a little water or extra coconut milk to reach your desired consistency.
Be sure to experiment with different toppings, like berries or nuts, as they add flavor and texture while maintaining the health benefits.
Almond Flour Brownies
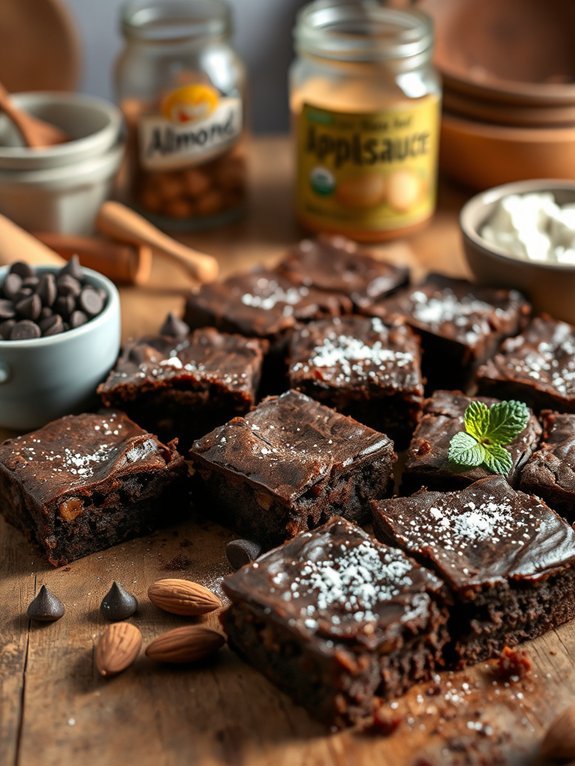
Almond flour brownies are a delightful way to enjoy a rich and fudgy dessert without the sugar. This recipe allows you to indulge your chocolate cravings while sticking to a healthier eating plan. Almond flour provides a gluten-free alternative that also adds a slightly nutty flavor to the brownies, making them unique and delicious.
These brownies aren’t only simple to make but they also come together quickly, requiring minimal ingredients that are easy to find. You’ll be amazed at how these brownies are both satisfying and guilt-free. Perfect for any occasion, they’re sure to be a hit with family and friends, whether they’re sugar-conscious or not.
Ingredients:
- 1 cup almond flour
- 1/2 cup unsweetened cocoa powder
- 1/2 cup sugar substitute (like erythritol or stevia)
- 1/4 teaspoon salt
- 1/2 teaspoon baking powder
- 1/2 cup unsweetened applesauce
- 1/4 cup melted coconut oil or butter
- 1 teaspoon vanilla extract
- 1/2 cup sugar-free chocolate chips (optional)
Mix all the dry ingredients — almond flour, cocoa powder, sugar substitute, salt, and baking powder — together in one bowl. In another bowl, combine the wet ingredients — applesauce, melted coconut oil or butter, and vanilla extract.
Pour the wet mixture into the dry mixture, stirring until just combined. If you’re using chocolate chips, fold them in gently. Pour the brownie batter into a greased 8×8 inch baking dish and bake at 350°F (175°C) for about 20-25 minutes, or until a toothpick inserted in the center comes out mostly clean.
For the best texture, allow the brownies to cool completely in the pan before cutting them into squares. They might seem a little soft when you take them out of the oven, but they’ll firm up as they cool.
If you like, you can also store them in an airtight container for several days, and they can be frozen for longer storage. Enjoy experimenting with mix-ins like nuts or dried fruits to customize your brownies even further!
Recommended Items
Get ready to whip up some delightful treats with these must-have products and tools!
Banana Oatmeal Cookies
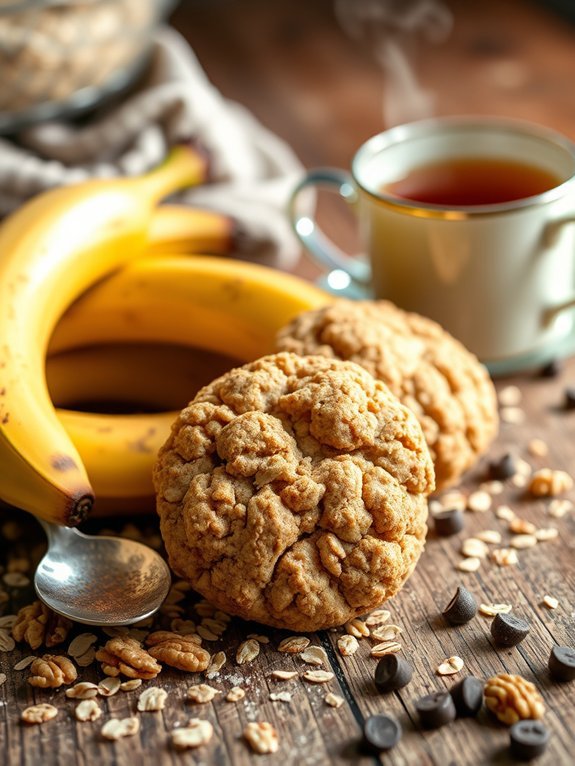
Banana oatmeal cookies are a deliciously healthy treat that satisfy your sweet tooth without relying on sugar. This recipe is perfect for anyone looking to enjoy a homemade dessert that’s both nutritious and satisfying.
Banana oatmeal cookies are also incredibly versatile, allowing you to customize them with your favorite mix-ins such as nuts, dried fruits, or even dark chocolate chips, while still keeping them sugar-free. The natural sweetness of ripe bananas combined with the hearty texture of oats creates an irresistible cookie that’s great for snacks, breakfast on-the-go, or even a guilt-free dessert.
Not only are these cookies easy to make, but they also require minimal ingredients, making them a great option for busy bakers. Simply mash some ripe bananas, combine them with oats, and pop them in the oven!
These cookies boast a chewy texture that pairs perfectly with a cup of tea or coffee. Plus, with no added sugar, you can feel good about serving them to your family or enjoying them yourself without worrying about excess calories.
Ingredients:
- 2 ripe bananas
- 1 cup rolled oats
- 1/2 teaspoon vanilla extract
- 1/2 teaspoon ground cinnamon
- 1/4 teaspoon salt
- Optional mix-ins: nuts, chocolate chips, or dried fruit
Preheat your oven to 350°F (175°C) and line a baking sheet with parchment paper. In a mixing bowl, mash the ripe bananas until smooth, then add the rolled oats, vanilla extract, cinnamon, and salt. Mix until well combined. If desired, fold in your preferred mix-ins.
Drop spoonfuls of the cookie mixture onto the prepared baking sheet, shaping them into round cookies as needed. Bake for about 12-15 minutes, or until they’re golden and set. Allow them to cool for a few minutes before transferring to a wire rack to cool completely.
When making banana oatmeal cookies, remember that the riper the bananas, the sweeter your cookies will be. If you prefer a little more sweetness without adding sugar, consider using very ripe bananas or adding a splash of unsweetened apple sauce.
Additionally, these cookies can be stored in an airtight container for up to a week, making them perfect for meal prep or snack time throughout the week. Enjoy experimenting with different mix-ins to find your favorite flavor combinations!
Sugar-Free Cheesecake
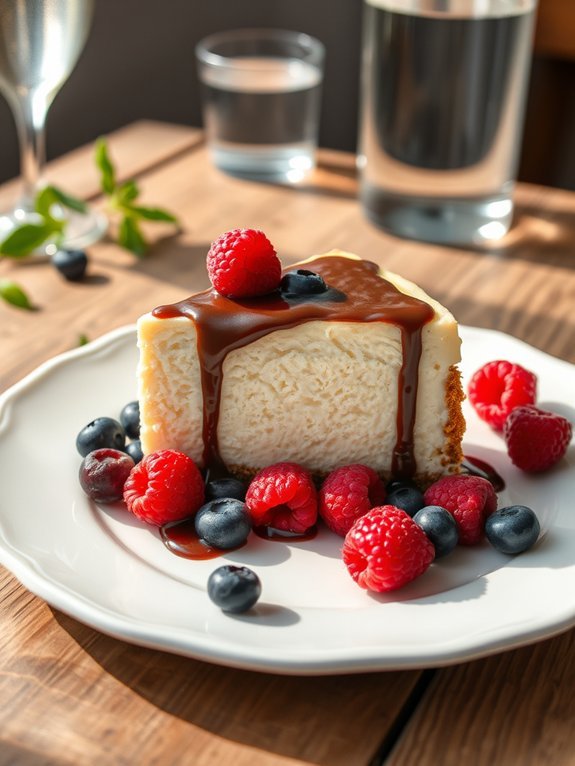
Sugar-Free Cheesecake is a deliciously rich and creamy dessert that satisfies your sweet tooth without spiking your blood sugar levels. This recipe is perfect for those who are watching their sugar intake, whether due to dietary preferences, health conditions, or lifestyle choices.
With the delightful combination of cream cheese, vanilla, and a sugar substitute, you’ll find that this cheesecake is just as indulgent as its traditional counterpart.
Making a sugar-free cheesecake isn’t only easy but also versatile. You can add various flavors such as lemon zest or chocolate to create different variations. This dessert can be served plain or topped with sugar-free fruit compote for an extra burst of flavor. Whether you’re hosting a gathering or just enjoying a quiet evening at home, this sugar-free cheesecake is sure to impress.
Ingredients:
- 2 cups cream cheese, softened
- 1 cup sour cream
- 1/2 cup sugar substitute (like erythritol or stevia)
- 3 large eggs
- 1 teaspoon vanilla extract
- 1/4 cup lemon juice (optional)
- 1 tablespoon cornstarch (optional, for a firmer texture)
- 1 cup almond flour (for crust)
- 1/4 cup melted butter (for crust)
- 1 tablespoon sugar substitute (for crust)
To make the cheesecake, preheat your oven to 325°F (160°C). In a mixing bowl, combine the cream cheese, sour cream, and sugar substitute until smooth and creamy.
Add in the eggs one at a time, mixing well after each addition. Stir in the vanilla extract and lemon juice, if using. For the crust, mix the almond flour, melted butter, and sugar substitute until well combined, then press it into the bottom of a springform pan.
Pour the cheesecake filling over the crust and smooth the top. Bake for 45-50 minutes, or until the edges are set and the center is slightly jiggly. Turn off the oven, crack the door, and allow the cheesecake to cool gradually in the oven for an hour.
When making sugar-free cheesecake, be mindful of the type of sugar substitute you use, as different brands can have varying levels of sweetness. Always taste your filling before baking to ascertain it aligns with your preferences.
Additionally, it’s best to chill the cheesecake in the refrigerator for at least four hours, or overnight if possible, to allow the flavors to meld and the texture to firm up. For serving, consider garnishing with fresh berries or a sugar-free chocolate drizzle for added elegance.
Proposed Recipe
Berry Coconut Sorbet
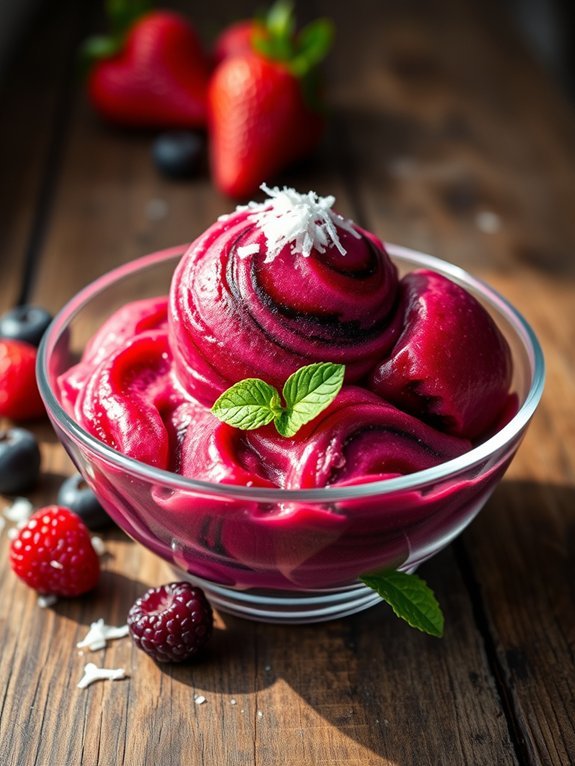
Berry coconut sorbet is a revitalizing and delicious dessert that combines the sweet and tangy flavors of berries with the tropical essence of coconut. Perfect for warm weather or as a healthier alternative to high-sugar treats, this sorbet isn’t only sugar-free but also dairy-free, making it a great choice for those with dietary restrictions.
The vibrant color and natural sweetness of the berries make this dessert visually appealing and satisfying without any added sugars.
Making berry coconut sorbet is a simple and straightforward process. With just a few ingredients and minimal preparation time, you can whip up this delightful frozen treat in no time. Utilizing fresh or frozen berries allows you to enjoy this sorbet year-round, while the coconut milk guarantees a creamy texture that will keep you coming back for more.
So grab your blender and prepare to indulge in a guilt-free dessert that’s bound to impress your family and friends!
- 2 cups mixed berries (strawberries, blueberries, raspberries, or blackberries)
- 1 can (13.5 oz) full-fat coconut milk
- 1 teaspoon vanilla extract
- 2 tablespoons unsweetened shredded coconut (optional)
- Fresh mint leaves for garnish (optional)
In a blender or food processor, combine the mixed berries, coconut milk, and vanilla extract. Blend until smooth and creamy, making sure there are no berry lumps.
If you desire a little texture, you can add in the shredded coconut at this stage and pulse a few times to combine. Pour the mixture into a shallow dish or an ice cream maker and freeze for at least 4 hours or until firm. If using a shallow dish, stir the mixture every 30 minutes for a creamier texture.
For the best results, let the sorbet sit at room temperature for a few minutes before serving to make it easier to scoop. Additionally, you can personalize this recipe by using your favorite berries or even incorporating a splash of citrus juice for an extra flavor boost.
When storing leftovers, keep the sorbet covered to prevent freezer burn and preserve its delightful texture and taste. Enjoy garnished with fresh mint for an added touch!
Peanut Butter Energy Bites
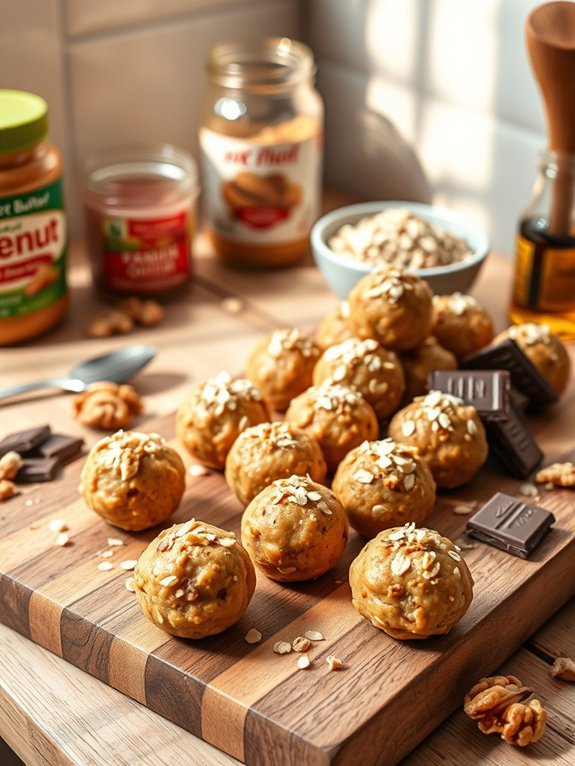
Peanut Butter Energy Bites are a delicious and nutritious snack perfect for satisfying your sweet tooth without the guilt. These no-bake energy bites are packed with peanut butter, oats, and a hint of sweetness from natural ingredients, making them an excellent option for a quick breakfast or mid-afternoon pick-me-up. Additionally, the combination of protein and fiber in these little morsels provides a sustained energy boost, ideal for busy days or post-workout replenishment.
Creating Peanut Butter Energy Bites is simple and only requires a few ingredients that you likely already have in your pantry. The best part is that you can customize the recipe by adding your favorite mix-ins, such as chocolate chips, shredded coconut, or chopped nuts. Not only do they come together in just a few minutes, but they can also be stored in the refrigerator for a week, making them a convenient option to have on hand for snacking.
Ingredients:
- 1 cup peanut butter (natural and unsweetened recommended)
- 1 cup rolled oats
- 1/2 cup honey or maple syrup
- 1/2 cup ground flaxseed (optional)
- 1/2 cup mini chocolate chips or dried fruit (optional)
- 1 teaspoon vanilla extract
- A pinch of salt (optional)
In a large mixing bowl, combine the peanut butter, rolled oats, honey (or maple syrup), ground flaxseed, chocolate chips, vanilla extract, and salt. Use a sturdy spoon or spatula to mix until well combined.
Once the mixture is fully combined, use your hands to shape the mixture into small bite-sized balls, approximately 1-inch in diameter. Place them on a parchment-lined baking sheet or plate and refrigerate for about 30 minutes to firm up.
To make these energy bites even tastier, try rolling them in shredded coconut, crushed nuts, or cocoa powder before refrigerating. Also, feel free to adjust the sweetness by adding more or less honey or maple syrup based on your taste.
If you’re looking to boost the nutritional value, substituting half of the oats with protein powder is a great option. Enjoy these bites after workouts, as a quick breakfast, or as a wholesome snack anytime you need an energy boost!
Zucchini Bread Muffins
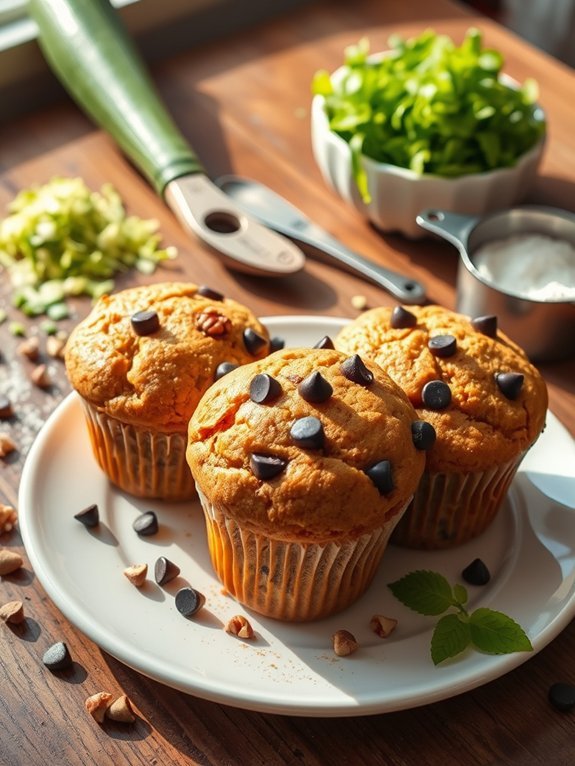
Zucchini bread muffins are an excellent way to enjoy a sweet treat without all the added sugar. These muffins are moist, flavorful, and packed with nutritional benefits thanks to the addition of zucchini. By using natural sweeteners or sugar substitutes, you can indulge in these delightful muffins without compromising your sugar-free lifestyle. They make for an ideal breakfast option or a versatile snack for any time of the day.
Whether you’re looking to use up excess zucchini from your garden or simply want a wholesome dessert, these muffins are easy to whip up and can be stored for days. The addition of spices like cinnamon and nutmeg not only enhances the flavor but also adds warmth to this comforting recipe.
Let’s explore creating these delectable sugar-free zucchini bread muffins.
- 1 ½ cups finely grated zucchini (about 1 medium zucchini)
- 1 cup almond flour
- ½ cup coconut flour
- ½ teaspoon baking soda
- 1 teaspoon baking powder
- 1 teaspoon cinnamon
- ¼ teaspoon nutmeg
- ¼ teaspoon salt
- 3 large eggs
- ½ cup unsweetened applesauce
- 1 teaspoon vanilla extract
- ⅓ cup erythritol or your preferred sugar substitute
- Optional: ½ cup chopped walnuts or pecans, and/or ½ cup sugar-free chocolate chips
Preheat your oven to 350°F (175°C) and line a muffin tin with paper liners or grease it lightly. In a large mixing bowl, combine the grated zucchini, almond flour, coconut flour, baking soda, baking powder, cinnamon, nutmeg, and salt.
In a separate bowl, whisk together the eggs, applesauce, vanilla extract, and sweetener until well combined. Slowly mix the wet ingredients into the dry ingredients until just combined. If desired, fold in nuts or chocolate chips for added texture, then spoon the batter into the prepared muffin tin, filling each cup about two-thirds full.
Bake for 20-25 minutes, or until a toothpick inserted in the center comes out clean. Allow cooling before serving.
For the best results, make sure to squeeze out excess moisture from the grated zucchini before adding it to the mixture. This prevents the muffins from becoming too soggy. You can also experiment with flavor by adding spices such as cardamom or incorporating chopped fruits like apples or bananas.
To store, keep the muffins in an airtight container at room temperature for up to three days or refrigerate for a week. Enjoy them warm or chilled; they can be a versatile addition to your snack repertoire!
Dark Chocolate Raspberry Bark

Indulging in sweets doesn’t have to mean compromising on health, especially with the delightful option of dark chocolate raspberry bark. This sugar-free dessert hits all the right notes with its rich chocolate flavor and the tang of fresh raspberries. Not only is it simple to make, but it’s also a great treat to enjoy at any time of the year.
The combination of creamy dark chocolate and tart berries offers a balance that’s sure to satisfy even the most discerning sweet tooth while keeping sugar intake in check.
Making this dark chocolate raspberry bark isn’t just a treat for your taste buds but also a feast for your eyes. The vibrant red of the raspberries against the dark chocolate creates a beautiful presentation, perfect for serving at gatherings or for treating yourself after a long day.
Plus, this recipe can easily be customized with your favorite nuts or other berries if you wish, making it a versatile addition to your dessert repertoire without the added guilt.
Ingredients:
- 8 oz sugar-free dark chocolate (chopped)
- 1 cup fresh raspberries
- 1 teaspoon coconut oil
- Sea salt (optional, for sprinkling)
Melt the sugar-free dark chocolate with the coconut oil in a microwave-safe bowl or over a double boiler until smooth.
Line a baking sheet with parchment paper and pour the melted chocolate onto the sheet, spreading it evenly into a rectangle.
Scatter the fresh raspberries over the melted chocolate and gently press them in slightly. If desired, sprinkle a touch of sea salt on top.
Refrigerate for about 30-60 minutes or until fully set, then break or cut into pieces to serve.
When making dark chocolate raspberry bark, be sure to use a high-quality sugar-free dark chocolate for the best flavor.
If fresh raspberries aren’t available, you can substitute with freeze-dried raspberries for a similar tangy kick.
Additionally, for added texture, consider folding in some chopped nuts or seeds before chilling the bark. Just remember to keep an eye on the chocolate while melting to prevent it from seizing up.
Enjoy your deliciously guilt-free creation!
Apple Cinnamon Overnight Oats
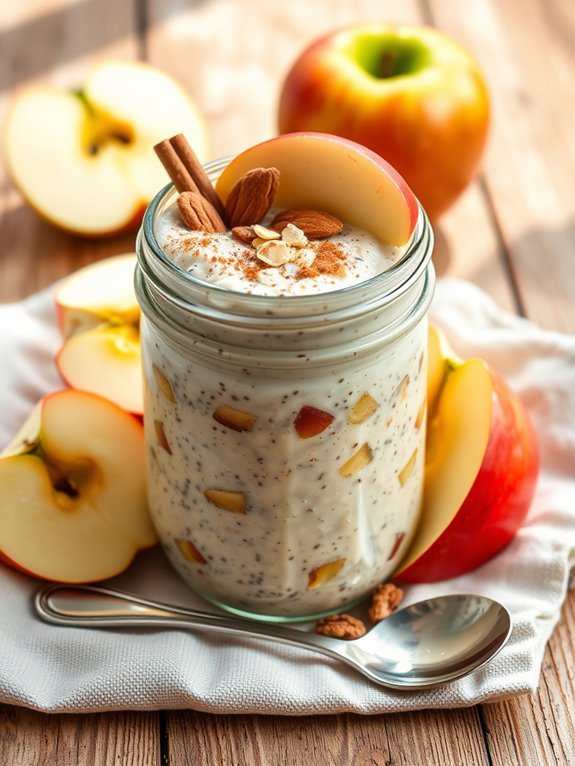
Apple Cinnamon Overnight Oats are a delicious and nutritious way to start your day without the added sugar. This easy-to-make recipe combines the goodness of oats, the sweetness of apples, and warming spices that not only satisfy your taste buds but also provide lasting energy.
Whether you’re rushing out the door in the morning or seeking a wholesome breakfast option on a lazy Sunday, these overnight oats can be quickly prepared the night before, helping you stay organized and stress-free.
This recipe is perfect for those who want to enjoy the flavors of fall any time of year. With the natural sweetness of ripe apples and a hint of cinnamon, you can indulge without worrying about harmful sugars. Plus, it’s customizable—feel free to add toppings like nuts or seeds, or swap in different fruits based on your preference.
With just a few simple ingredients, you’ll be on your way to a tasty, sugar-free breakfast that will keep you fueled throughout your busy day.
- 1 cup rolled oats
- 1 cup unsweetened almond milk (or any milk of choice)
- 1 medium apple, diced (preferably a sweet variety)
- 1 teaspoon cinnamon
- 1 tablespoon chia seeds (optional)
- 1 teaspoon vanilla extract
- A pinch of salt
- Optional toppings: sliced almonds, walnuts, or additional chopped apples
In a mixing bowl, combine the rolled oats, almond milk, diced apple, cinnamon, chia seeds, vanilla extract, and a pinch of salt. Stir the mixture well to guarantee all ingredients are evenly combined.
Transfer the mixture to an airtight container or mason jar, cover it, and refrigerate overnight. In the morning, give it a good stir and add your preferred toppings before enjoying your healthy breakfast.
For ideal flavor and texture, allow the oats to sit for at least 6-8 hours in the refrigerator. You can experiment with different apple varieties for varying sweetness levels. If you prefer a creamier texture, consider blending the oats with almond milk before refrigerating.
Additionally, feel free to adjust the cinnamon to your liking or add nutmeg for an extra layer of flavor. Enjoy your customizations and make this recipe your own!


