This post may contain affiliate links. Please read our policy page.
You can savor seasonal fruit desserts year-round with delightful options like Strawberry Shortcake, Peach Cobbler, and Blueberry Crisp. Each dessert showcases fresh ingredients that create beautiful flavors and textures. Don’t miss out on unique treats like Fig and Almond Tart or comforting Pear and Ginger Crumble. These desserts not only celebrate seasonal fruits but also evoke cozy memories and gatherings. If you’re curious about more sweet surprises, keep exploring the delicious possibilities!
Strawberry Shortcake

Strawberry shortcake is a delightful summery dessert that celebrates the sweetness of ripe strawberries, the richness of whipped cream, and the fluffy texture of homemade biscuits.
Traditionally served at picnics and special gatherings, this dessert is as pleasing to the eye as it’s to the palate. The balance of flavors and textures makes it an irresistible choice for fruit lovers, and with a few simple ingredients, you can create a luscious and enchanting dessert that’s guaranteed to impress.
Making strawberry shortcake involves preparing buttery biscuits that are light and airy, which serve as the perfect base for juicy strawberries and creamy whipped topping. As the strawberries macerate with a bit of sugar, they release their natural juices, creating a delicious syrup that enhances the overall flavor of the dish.
This recipe will guide you through the process of crafting this classic dessert, providing an easy and enjoyable cooking experience.
Ingredients:
- 2 cups fresh strawberries, hulled and sliced
- ¼ cup granulated sugar
- 2 cups all-purpose flour
- 1 tablespoon baking powder
- ½ teaspoon salt
- ½ cup unsalted butter, cold and diced
- 1 cup heavy cream
- 1 teaspoon vanilla extract
- 2 tablespoons powdered sugar
In a medium bowl, combine the sliced strawberries with granulated sugar, gently tossing until the strawberries are well coated. Set aside to allow the sugars to draw out the natural juices.
In another bowl, whisk together the flour, baking powder, and salt. Cut in the cold butter using a pastry cutter or your fingers until the mixture resembles coarse crumbs. Stir in ¾ cup of heavy cream until just combined.
Turn the dough onto a floured surface, knead it gently, then pat it out to about 1-inch thick. Cut biscuits with a round cutter and place them on a baking sheet. Bake at 400°F (200°C) for 15-20 minutes or until golden brown.
Once the biscuits are cool, split them in half and layer with strawberries and whipped cream made by whipping the remaining heavy cream with vanilla and powdered sugar until soft peaks form.
When preparing strawberry shortcake, opt for the freshest strawberries you can find, as they’ll enhance the overall flavor of the dish. Feel free to experiment with different types of berries or add a splash of lemon juice to the strawberries for a zesty twist.
For an extra indulgence, consider making the biscuits a day ahead or substituting with store-bought ones if you’re short on time. Assembling the dessert just before serving will guarantee the biscuits remain fluffy and the strawberries retain their juiciness.
Enjoy your summer treat!
Peach Cobbler
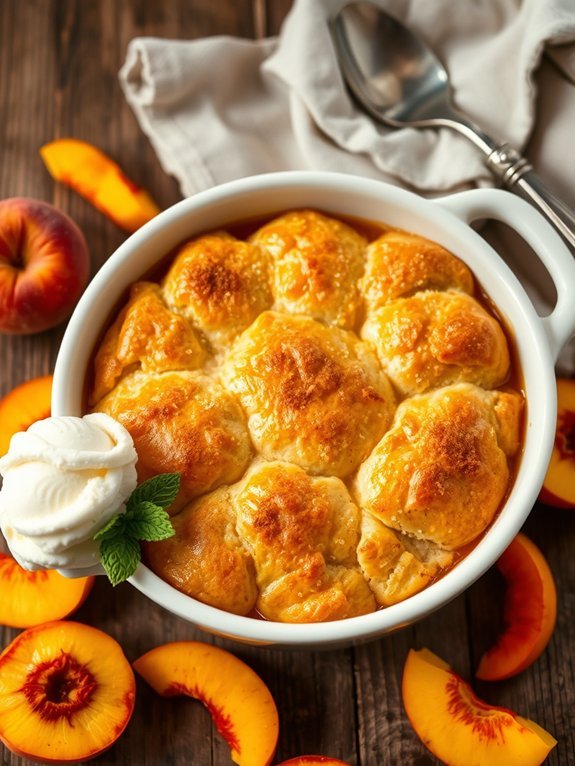
Peach cobbler is a delightful dessert that captures the essence of summer in every bite. This classic dish, with its warm, juicy peaches and buttery biscuit topping, is perfect for satisfying any sweet tooth. Whether served warm with a scoop of vanilla ice cream or on its own, peach cobbler is an easy and delicious way to make the most of ripe peaches during their peak season.
Making peach cobbler isn’t only simple but also allows for flexibility with ingredients. You can opt for fresh, frozen, or canned peaches, depending on what you have available. This dish is typically enjoyed warm, making it an excellent choice for a family gathering, picnic, or cozy evening at home. Once you try this easy peach cobbler recipe, you’ll want to make it a staple in your dessert rotation.
- 6 cups fresh peaches, peeled and sliced
- 1 cup granulated sugar, divided
- 1 tablespoon lemon juice
- 2 teaspoons ground cinnamon
- 1 teaspoon vanilla extract
- 1 cup all-purpose flour
- 1 tablespoon baking powder
- 1/2 teaspoon salt
- 1/2 cup milk
- 1/2 cup unsalted butter, melted
Preheat your oven to 350°F (175°C). In a large mixing bowl, combine the sliced peaches, 1/2 cup of sugar, lemon juice, cinnamon, and vanilla extract; stir well to coat the peaches.
In another bowl, whisk together the flour, baking powder, salt, remaining 1/2 cup of sugar, and milk until well combined. Pour the melted butter into a greased 9×13-inch baking dish, spreading it evenly. Next, pour the batter over the melted butter (do not stir), and then spoon the peach mixture over the batter. Bake for 35-40 minutes, or until the topping is golden brown and the peaches are bubbly.
For an extra special touch, consider adding a pinch of nutmeg or almond extract to the peach mixture for added flavor. Serve the cobbler warm, and don’t hesitate to mix things up by adding a handful of blueberries or raspberries along with the peaches for a twist on the classic recipe.
Finally, for an even more indulgent dessert, top your peach cobbler with a scoop of homemade whipped cream or vanilla ice cream for a delightful contrast to its warm, sweet filling.
Recommended Items
Get ready to create mouthwatering desserts with these recommended products and equipment—let’s dive in!
Products
Blueberry Crisp
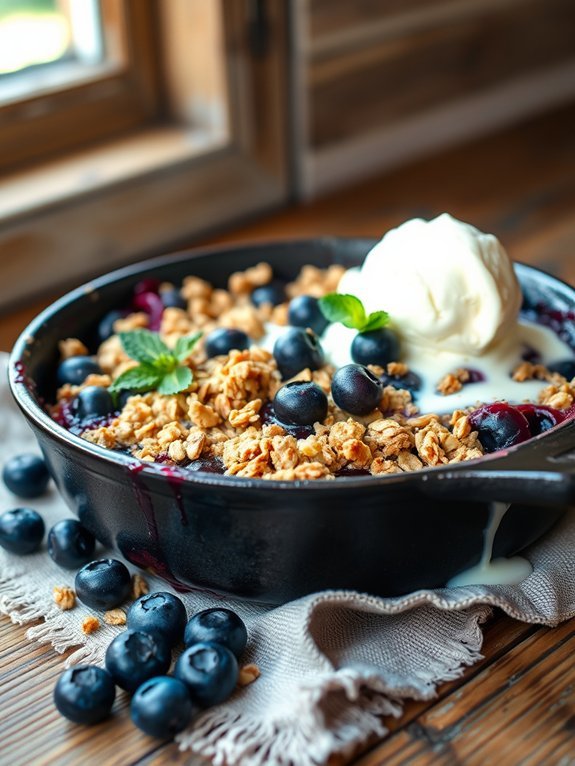
Blueberry crisp is a delightful dessert perfect for showcasing the bright, sweet flavors of fresh blueberries. This dish combines juicy berries with a crunchy, buttery topping, creating a comforting balance of textures. It’s an ideal treat for summer gatherings or cozy evenings at home, making use of seasonal fruits to enhance its natural sweetness.
The simplicity of this recipe also means it can be made quickly, allowing you to enjoy the heavenly smell of berries baking in your oven while you savor the anticipation of a delicious reward.
The beauty of blueberry crisp lies not only in its flavor but also in its versatility. You can serve it warm with a scoop of vanilla ice cream for an indulgent dessert or enjoy it cold with a dollop of whipped cream for a revitalizing treat. It’s a fantastic way to use up any surplus blueberries you might’ve or to impress your guests with minimal effort. Let this blueberry crisp become a go-to recipe whenever you crave something sweet yet wholesome.
Ingredients:
- 4 cups fresh blueberries
- 1 cup granulated sugar
- 1 tablespoon cornstarch
- 1 teaspoon lemon juice
- 1 cup rolled oats
- 1 cup all-purpose flour
- 1/2 cup brown sugar
- 1/2 teaspoon cinnamon
- 1/2 cup unsalted butter, melted
- A pinch of salt
Preheat your oven to 350°F (175°C). In a large bowl, combine the fresh blueberries, granulated sugar, cornstarch, and lemon juice. Mix until the berries are well-coated and pour them into a greased baking dish.
In another bowl, stir together the rolled oats, flour, brown sugar, cinnamon, melted butter, and salt until crumbly. Spread this mixture evenly over the blueberries. Bake in the preheated oven for about 30-35 minutes or until the topping is golden brown and the blueberries are bubbly.
For best results, let the blueberry crisp cool for at least 10 minutes before serving, allowing the juices to thicken slightly. You can adapt this recipe by adding nuts or swapping different fruits, such as peaches or raspberries, depending on what you have on hand.
Storing leftovers can be tricky as this dessert is best enjoyed fresh, but you can cover and refrigerate it for up to two days—just reheat in the oven to regain that delightful crispiness.
Watermelon Sorbet
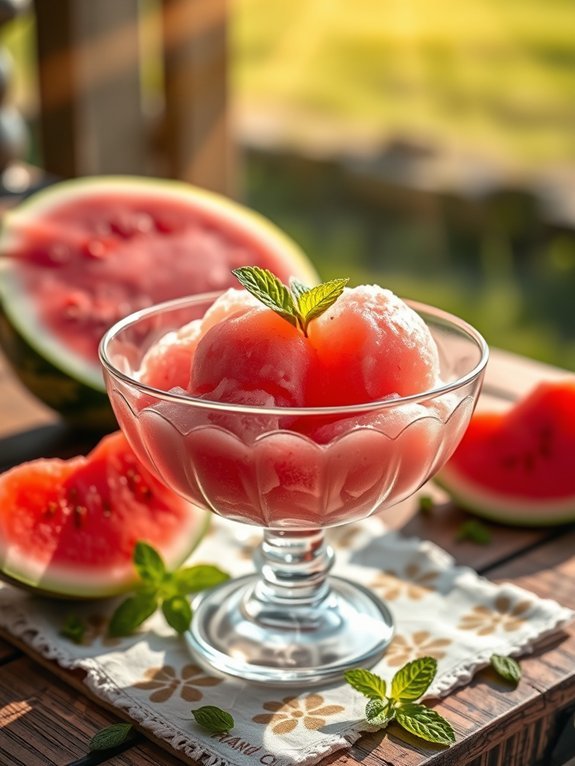
Watermelon sorbet is a revitalizing and light dessert that’s perfect for hot summer days. With its vibrant color and naturally sweet flavor, watermelon sorbet offers a guilt-free treat that can be enjoyed by everyone, making it a favorite for gatherings and family barbecues.
This simple recipe requires minimal ingredients and can be made in just a few hours, allowing you to savor the taste of summer in every bite. To make this delightful sorbet, start with a ripe watermelon. The riper the fruit, the sweeter and more flavorful the sorbet will be.
You can also customize the recipe by adding a splash of lime juice or fresh mint for an added zing. Once you’ve got your ingredients ready, you’ll be amazed at how easy it’s to whip up this icy delight in the comfort of your own kitchen.
- 4 cups of seedless watermelon, cubed
- 1 tablespoon of lime juice (optional)
- 2 tablespoons of sugar or honey (adjust based on sweetness preference)
- Fresh mint leaves for garnish (optional)
In a blender, combine the watermelon, lime juice, and sugar or honey, then blend until the mixture is smooth. Pour the watermelon mixture into a shallow dish and place it in the freezer.
Stir the mixture every 30 minutes for about 3-4 hours, or until it’s fully frozen and has a fluffy texture. Once frozen, scoop into serving bowls and garnish with fresh mint leaves if desired.
When making watermelon sorbet, make sure that you start with a high-quality, ripe watermelon for the best flavor. Freezing times may vary depending on your freezer settings, so keep an eye on the texture and adjust accordingly.
If you want a creamier sorbet, consider blending in a small amount of coconut milk before freezing. To add a twist, try experimenting with different fruits or herbs in combination with the watermelon. Enjoy this delightful dessert on its own or pair it with a scoop of vanilla ice cream for an indulgent treat!
Pumpkin Spice Cheesecake

Embracing the flavors of autumn, Pumpkin Spice Cheesecake is a delightful dessert that combines the rich creaminess of cheesecake with the warm, spiced flavor of pumpkin. Perfect for Thanksgiving or any fall gathering, this delectable treat brings a touch of sophistication to your seasonal dessert table.
The infusion of classic spices like cinnamon, nutmeg, and ginger not only enhances the flavor of the pumpkin but also transports your taste buds to a cozy fall day with every bite.
Creating this cheesecake is simpler than you might think and it’s a great way to showcase seasonal ingredients. The crust is made from crushed ginger snaps, providing a spicy and crisp base that perfectly complements the velvety filling.
Additionally, it can be made ahead of time, allowing the flavors to meld and the texture to set, making it an ideal choice for busy holiday preparations.
- 1 ½ cups crushed ginger snap cookies
- ½ cup unsalted butter, melted
- 3 (8-ounce) packages cream cheese, softened
- 1 cup granulated sugar
- 1 cup canned pumpkin puree
- 3 large eggs
- 1 teaspoon vanilla extract
- 2 teaspoons pumpkin pie spice
- 1 teaspoon cinnamon
- ½ teaspoon nutmeg
- 1 pinch salt
Preheat your oven to 325°F (165°C). In a medium bowl, mix the crushed ginger snap cookies with melted butter until combined, then press the mixture into the bottom of a 9-inch springform pan to form the crust.
In a large mixing bowl, beat the softened cream cheese with sugar until smooth, then add in the pumpkin puree, eggs (one at a time), vanilla, and spices, mixing until well incorporated.
Pour the filling over the crust and bake for 55-60 minutes, or until the center is set and slightly jiggly. Allow the cheesecake to cool at room temperature, then refrigerate for at least 4 hours before serving.
For best results, use room-temperature cream cheese to avoid lumps in the batter, and make sure to beat the filling until smooth.
Additionally, consider adding a dollop of whipped cream and a sprinkle of cinnamon on top before serving to elevate the presentation. If you want to prepare this dessert in advance, it can be made up to two days prior; just make sure to cover it well in the refrigerator.
Proposed Recipe for Seasonal Fruit Desserts
Cranberry Tart

Cranberry tart is a delightful dessert that perfectly captures the essence of the fall and winter seasons. This dish highlights the tartness of fresh cranberries, balanced by a buttery crust and a sweet filling. It’s an ideal treat for holiday gatherings, family dinners, or even just a cozy evening at home. The vibrant crimson color of cranberries not only makes the tart visually appealing but also provides a burst of flavor that’s hard to resist.
Creating a cranberry tart is a rewarding process, delivering a fresh, homemade dessert that will impress any guest. As the cranberries cook down, they release their juices, creating a luscious filling that pairs beautifully with a flaky crust.
Whether you’re an experienced baker or a novice in the kitchen, this recipe will guide you through the steps to create a heavenly cranberry tart that warms the heart.
Ingredients:
- 1 1/2 cups all-purpose flour
- 1/2 cup unsalted butter, chilled and cubed
- 1/4 cup granulated sugar
- 1/4 teaspoon salt
- 1/4 teaspoon vanilla extract
- 1/4 to 1/2 cup cold water
- 2 cups fresh cranberries
- 1 cup granulated sugar (for filling)
- 1 tablespoon cornstarch
- 1/4 teaspoon cinnamon
- 1 tablespoon lemon juice
- 1 egg, beaten (for egg wash)
Preheat your oven to 375°F (190°C). In a large bowl, combine the flour, butter, 1/4 cup sugar, and salt. Use a pastry cutter or your hands to mix until the mixture resembles coarse crumbs. Gradually add cold water, one tablespoon at a time, until the dough comes together. Roll out the dough and fit it into a tart pan, trimming the edges.
In another bowl, mix cranberries, 1 cup sugar, cornstarch, cinnamon, and lemon juice until well combined. Pour the cranberry mixture into the prepared crust and spread evenly. Brush the edges of the tart with the beaten egg and bake for 30-35 minutes or until the cranberries are bubbly and the crust is golden brown.
For best results, make sure to use fresh cranberries, as they provide the best flavor and texture. Be cautious not to overmix the dough when preparing the crust, as this can lead to a tough texture.
If you find the cranberry mixture too tart, feel free to adjust the sweetness by adding more sugar. Allow the tart to cool completely before serving, as this will help the filling set properly and enhance the flavors.
Enjoy this delicious dessert with a dollop of whipped cream or a scoop of vanilla ice cream for an extra touch!
Apple Galette
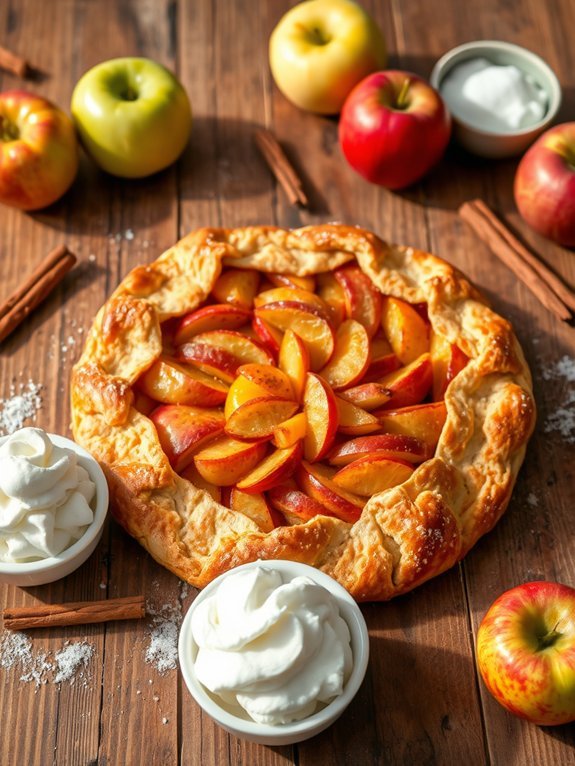
There’s nothing quite like the taste of fresh, seasonal apples nestled in a buttery, flaky crust, and a rustic apple galette is the perfect way to highlight their natural sweetness.
This free-form tart isn’t only delicious but also incredibly easy to make, making it an ideal dessert for those who want to impress without the fuss of a traditional pie. With just a handful of ingredients, you can create a stunning dessert that’s sure to please friends and family alike.
To make an apple galette, start with your favorite varieties of apples, such as Granny Smith for tartness and Honeycrisp for sweetness. The beauty of a galette lies in its simple presentation; you can create an enchanting centerpiece with minimal effort. Serve it warm with a scoop of vanilla ice cream or a dollop of whipped cream for an indulgent finale to any meal.
- 1 ½ pounds mixed apples (about 4 medium apples), peeled, cored, and sliced
- 1 tablespoon lemon juice
- ¾ cup sugar
- 1 teaspoon cinnamon
- 1 tablespoon all-purpose flour
- 1 tablespoon unsalted butter, cut into small pieces
- 1 pre-made pie crust (store-bought or homemade)
- 1 egg (for egg wash)
- Pinch of salt
Preheat your oven to 400°F (200°C). In a large bowl, toss the sliced apples with lemon juice, sugar, cinnamon, flour, and salt until evenly coated.
Roll out your pie crust on a baking sheet lined with parchment paper. Arrange the apple mixture in the center of the crust, leaving a 2-inch border. Gently fold the edges of the crust over the apples, pleating it as necessary, and dot the filling with small pieces of butter.
Brush the crust with beaten egg for a golden finish, then bake for 35-40 minutes or until the apples are tender and the crust is golden brown.
When making an apple galette, feel free to experiment with different spices or add-ins, such as nutmeg or raisins, to customize the flavor. Choosing a mix of sweet and tart apples will provide a more complex taste and ascertain your galette is both flavorful and balanced.
Also, let your galette cool slightly before serving, as this will help the juices set up a bit, making it easier to slice and serve. Enjoy your homemade dessert!
Mango Sticky Rice
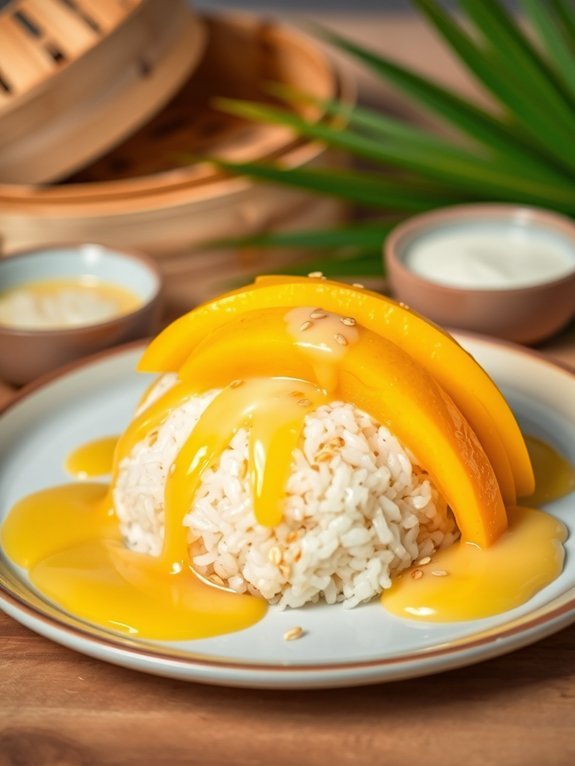
Mango Sticky Rice is a delightful Thai dessert that combines sweet, ripe mangoes with glutinous rice and a luscious coconut sauce. This dish isn’t just visually appealing but also offers a perfect balance of flavors and textures, making it a favorite among many.
Traditionally served warm or at room temperature, Mango Sticky Rice captures the essence of tropical summer and is best enjoyed with fresh, juicy mangoes, which are at their peak during the warmer months.
The foundation of this dessert lies in the preparation of glutinous rice, also known as sticky rice, which is steamed to maintain its chewy texture. Once prepared, it’s infused with sweetened coconut milk, elevating the flavor profile.
To finish off this decadent treat, it’s topped with ripe mango slices and a sprinkle of sesame seeds or mung beans for added crunch. This recipe isn’t just easy to follow; it’s a delightful way to celebrate seasonal fruit.
Ingredients:
- 1 cup glutinous rice
- 1 1/2 cups coconut milk
- 1/2 cup sugar
- 1/4 teaspoon salt
- 2 ripe mangoes, peeled and sliced
- Sesame seeds or mung beans for garnish (optional)
- Water (for soaking and steaming)
Soak the glutinous rice in water for at least 2 hours, or overnight if time allows. Drain the rice and steam it in a bamboo steamer or a heatproof dish lined with cheesecloth for about 30-40 minutes, or until tender.
Meanwhile, in a saucepan, combine the coconut milk, sugar, and salt, and heat over medium until the sugar dissolves. Once the rice is done, mix in 1 cup of the coconut sauce and stir until evenly coated.
Serve the sticky rice warm, topped with mango slices and drizzled with the remaining coconut sauce. Garnish with sesame seeds or mung beans, if desired.
When preparing Mango Sticky Rice, selecting the right mango is essential for the best flavor. Look for mangoes that are bright in color, slightly soft to the touch, and fragrant. Thai varieties like Nam Dok Mai or Keo Savoy are ideal.
If you can’t find fresh mangoes, canned mango can be used as an alternative, but fresh is always preferable. Additionally, controlling the consistency of the coconut sauce can enhance your dish; adjust the sweetness to your preference.
Finally, serving this dessert slightly warm or at room temperature allows the flavors to shine through beautifully.
Raspberry Pavlova

Raspberry Pavlova is a delightful dessert that showcases the light and airy texture of meringue, perfectly complemented by the tartness of fresh raspberries. Originating from New Zealand and Australia, this dessert is named after the famous Russian ballerina Anna Pavlova, as it’s said to evoke the delicate beauty of her performances.
The crisp exterior and soft, marshmallow-like interior of the pavlova serve as an excellent base for a variety of toppings, but for raspberry enthusiasts, this rendition is simply divine.
The perfect Raspberry Pavlova is defined by its contrast of textures and flavors. The sweetness of the meringue balances the tangy burst of fresh raspberries, while a cloud of whipped cream adds richness to each bite. Ideal for summertime gatherings or festive occasions, this dessert is as stunning to present as it’s to eat. With just a few simple ingredients, you can impress your guests with this elegant treat.
- 4 large egg whites
- 1 cup granulated sugar
- 1 teaspoon white vinegar
- 1 teaspoon cornstarch
- 1 cup heavy whipping cream
- 2 tablespoons powdered sugar
- 1 teaspoon vanilla extract
- 2 cups fresh raspberries
- Mint leaves for garnish (optional)
Preheat your oven to 250°F (120°C) and line a baking sheet with parchment paper. In a large mixing bowl, beat the egg whites on medium speed until soft peaks form. Gradually add the granulated sugar, continuing to beat until the mixture is glossy and stiff peaks form.
Carefully fold in the vinegar and cornstarch. Spoon the meringue onto the prepared baking sheet, shaping it into a disk about 8 inches in diameter. Bake for about 1 hour, then let it cool in the oven with the door slightly ajar.
Once the pavlova is cool, whip the heavy cream with the powdered sugar and vanilla extract until soft peaks form. Spread the whipped cream over the meringue and top with fresh raspberries, garnishing with mint leaves if desired.
For the best results, be sure to use room temperature eggs to create stable peaks, and avoid any contact with yolks in the egg whites. It’s also important to bake the pavlova at a low temperature to prevent it from browning too much.
Serve the pavlova immediately after assembling to maintain its crispy exterior, as the humidity from the whipped cream and fruit can cause the meringue to soften over time. If you need to prepare the meringue in advance, store it in an airtight container to keep it fresh until you’re ready to assemble your dessert.
Cherry Clafoutis
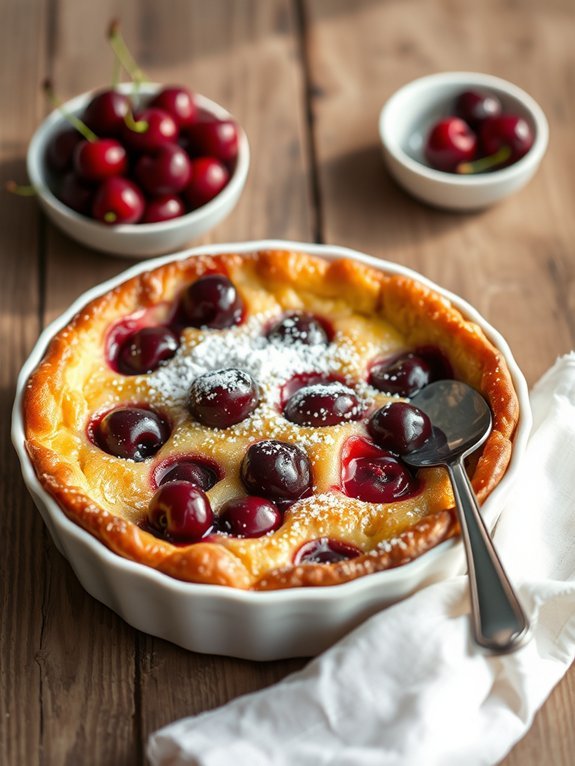
Cherry Clafoutis is a delightful and rustic French dessert that showcases the fresh and juicy flavors of ripe cherries. This dish is traditionally made using black cherries, which are baked in a simple batter that resembles a sweet pancake or flan. The result is a beautifully presented dessert that’s both light and satisfying, making it perfect for summer gatherings, picnics, or any occasion where fruits are in season.
Making Cherry Clafoutis isn’t only easy but also a gorgeous way to impress your family and friends. The cherries are suspended in a custardy batter that puffs up as it bakes, creating a satisfying texture that’s both creamy and slightly firm. Traditionally, the cherries aren’t pitted, as the pits add a unique flavor and texture to the dessert. However, if you’re concerned about this, feel free to use pitted cherries to suit your preference.
- 2 cups fresh cherries (black or red), pitted or unpitted
- 3 eggs
- 1 cup milk
- 1/2 cup granulated sugar
- 1 teaspoon vanilla extract
- 1/2 teaspoon salt
- 1/2 cup all-purpose flour
- Butter, for greasing the baking dish
- Powdered sugar, for dusting (optional)
Preheat your oven to 350°F (175°C). Butter a round pie dish or baking dish and evenly distribute the cherries at the bottom. In a mixing bowl, whisk together the eggs, milk, granulated sugar, vanilla extract, and salt until well combined. Gradually add the flour, mixing until smooth, and then pour the batter over the cherries.
Bake for 35-40 minutes or until the clafoutis is set and golden brown. Allow it to cool slightly before dusting with powdered sugar and serving warm or at room temperature.
For the best flavor, choose ripe, in-season cherries; they’ll provide the sweetest taste to your clafoutis. If you’d like an extra dimension of flavor, consider adding a splash of almond extract to the batter or sprinkling sliced almonds on top before baking.
This dessert is incredibly versatile, and you can experiment with other fruits like plums or peaches. Serve it with a dollop of whipped cream or a scoop of vanilla ice cream for an indulgent treat!
Lemon Meringue Pie

Lemon Meringue Pie is a classic dessert that combines a tangy lemon filling with a light and fluffy meringue topping, all perched atop a buttery, flaky crust. This delightful pie is perfect for warm weather gatherings and special occasions, as its bright and zesty flavor is sure to impress guests and family alike. The invigoratingly tart lemon filling beautifully complements the sweet, airy meringue, creating a balance that makes each bite a blissful experience.
Making a Lemon Meringue Pie might seem challenging at first, but with a little practice, it can easily become a staple dessert in your repertoire. The key to success lies in achieving the perfect balance between the tartness of the lemon filling and the sweetness of the meringue.
Plus, your homemade crust will take the pie to a whole new level of deliciousness. As long as you pay attention to the details in each stage of the process, you’ll be rewarded with a stunning pie that not only looks beautiful but tastes phenomenal.
Ingredients:
- 1 pie crust (homemade or store-bought)
- 1 cup granulated sugar
- 2 tablespoons all-purpose flour
- 2 tablespoons cornstarch
- 1/8 teaspoon salt
- 1 cup water
- 3 large egg yolks (lightly beaten)
- 2 tablespoons unsalted butter
- 1/2 cup freshly squeezed lemon juice
- 1 tablespoon lemon zest
- 1 teaspoon vanilla extract
- 3 large egg whites
- 1/4 teaspoon cream of tartar
To prepare your Lemon Meringue Pie, first, preheat the oven to 350°F (175°C). Roll out the pie crust and fit it into a 9-inch pie dish, crimping the edges as desired. Bake the crust for about 10-12 minutes or until lightly golden.
Meanwhile, in a medium saucepan, combine sugar, flour, cornstarch, and salt. Gradually stir in water and bring the mixture to a boil over medium heat. In a separate bowl, whisk the egg yolks and temper them by slowly adding a bit of the hot mixture. Then, return the egg mixture to the saucepan, cook for an additional 2-3 minutes until thickened, and stir in the butter, lemon juice, lemon zest, and vanilla. Pour this filling into the baked pie crust.
To make the meringue, beat the egg whites and cream of tartar until soft peaks form, then gradually add the sugar, beating until stiff peaks form. Spread the meringue over the lemon filling, sealing the edges to prevent shrinking. Bake for an additional 10-12 minutes until the meringue is golden.
For the best results, confirm that your mixing bowls and beaters are completely clean and free of grease when whipping the egg whites. This is vital for achieving the fluffy peaks that are characteristic of meringue.
Additionally, make sure not to overbake the meringue, as this can lead to a tough texture. Allow the pie to cool completely at room temperature before slicing, as this will help the filling set properly.
Enjoy your homemade Lemon Meringue Pie and the delightful compliments that are sure to follow!
Fig and Almond Tart
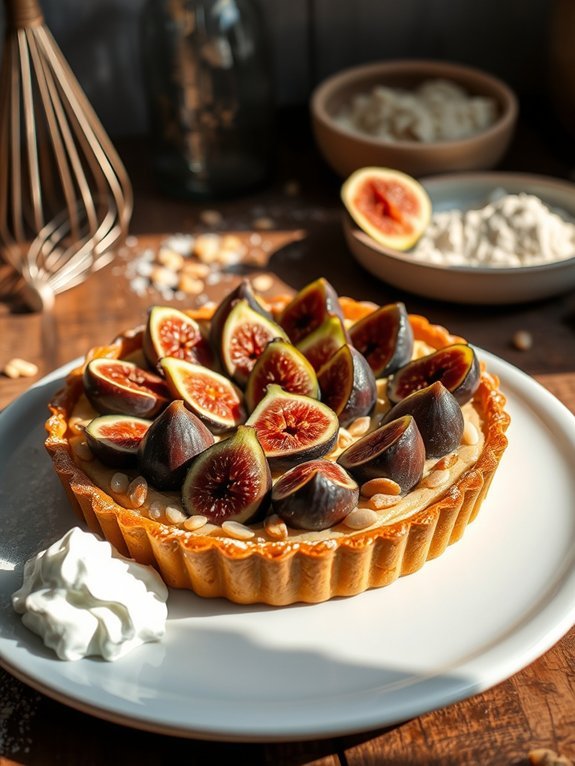
The Fig and Almond Tart is a delightful dessert that beautifully blends the natural sweetness of figs with the rich, nutty flavor of almonds. This tart is perfect for showcasing the vibrant flavors of seasonal figs, making it a favorite for gatherings or simple family dinners. The buttery crust complements the filling, while the added crunch from slivered almonds creates an appealing texture, transforming the tart into a sophisticated treat for any occasion.
Preparing this tart is relatively straightforward, making it a perfect choice for both beginner and experienced bakers. The combination of fresh figs and almond cream creates a luscious filling that pairs wonderfully with a hint of vanilla and a sprinkle of sugar. Once baked, the tart emits an irresistible aroma, inviting everyone to indulge in this seasonal delight.
Ingredients:
- 1 1/2 cups all-purpose flour
- 1/2 cup powdered sugar
- 1/2 cup unsalted butter, chilled and cubed
- 1 egg yolk
- 1/4 teaspoon salt
- 1/2 cup almond meal
- 1/3 cup granulated sugar
- 2 tablespoons unsalted butter, softened
- 1 egg
- 1 teaspoon vanilla extract
- 8-10 fresh figs, quartered
- Slivered almonds, for topping
- Extra sugar, for dusting
To make the Fig and Almond Tart, start by preheating your oven to 350°F (175°C). For the crust, combine the flour, powdered sugar, and salt in a bowl. Mix in the chilled butter until the mixture resembles coarse crumbs. Add the egg yolk and mix until the dough comes together. Press the dough into a tart pan and prick the bottom with a fork. Pre-bake the crust for about 10 minutes, then remove it from the oven.
In another bowl, mix together the almond meal, granulated sugar, softened butter, egg, and vanilla extract until smooth. Pour the almond filling into the pre-baked crust and arrange the quartered figs on top. Scatter slivered almonds over the figs and sprinkle with a little extra sugar. Bake for an additional 25-30 minutes, or until the filling is golden and set. Allow to cool before serving.
When preparing your Fig and Almond Tart, consider using ripe but firm figs, as they hold up better during baking and will yield a better texture. If fresh figs aren’t available, dried figs can be a substitute, though they’ll need to be rehydrated in warm water for about 30 minutes before use.
For added flavor, you might want to infuse the almond mixture with a touch of almond extract or a hint of lemon zest. Serve the tart with a dollop of whipped cream or a scoop of vanilla ice cream for a truly decadent dessert experience.
Orange Olive Oil Cake
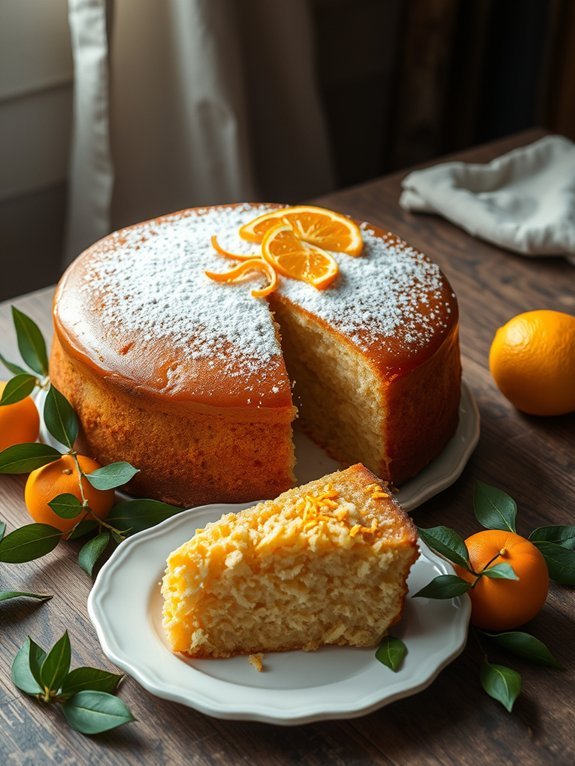
Orange Olive Oil Cake is a delightful and moist dessert that beautifully balances citrusy brightness with the richness of olive oil. The unique use of olive oil not only adds depth of flavor but also creates a tender crumb that’s perfect for any occasion.
Whether you’re serving it at a spring gathering or indulging in a quiet evening at home, this cake is sure to impress with its aromatic notes and inviting appearance.
Infused with fresh orange juice and zest, this cake captures the essence of the season in every bite. It’s a simple yet elegant dessert that can be enjoyed on its own or paired with a dollop of whipped cream or a scoop of vanilla ice cream.
Let’s explore the ingredients and simple steps needed to create this seasonal treat.
- 1 cup extra virgin olive oil
- 1 cup granulated sugar
- 3 large eggs
- Zest of 2 oranges
- 1 cup freshly squeezed orange juice
- 2 cups all-purpose flour
- 2 teaspoons baking powder
- ½ teaspoon salt
- Powdered sugar for dusting (optional)
In a large mixing bowl, whisk together the olive oil, granulated sugar, and eggs until well combined. Stir in the orange zest and juice until smooth. In a separate bowl, whisk together the flour, baking powder, and salt.
Gradually add the dry ingredients to the wet mixture, folding gently until just combined. Pour the batter into a greased 9-inch round cake pan, and bake in a preheated oven at 350°F (175°C) for about 30-35 minutes or until a toothpick inserted in the center comes out clean.
Allow the cake to cool in the pan for 10 minutes before transferring it to a wire rack to cool completely.
When making Orange Olive Oil Cake, choose a high-quality extra virgin olive oil for the best flavor. Be careful not to overmix the batter to maintain your cake’s light texture.
Storing the cake covered at room temperature will keep it fresh for up to three days, or you can refrigerate it for a longer shelf life. For an extra burst of flavor, consider adding a glaze made from orange juice and powdered sugar drizzled over the cooled cake.
Enjoy your baking!
Pear and Ginger Crumble
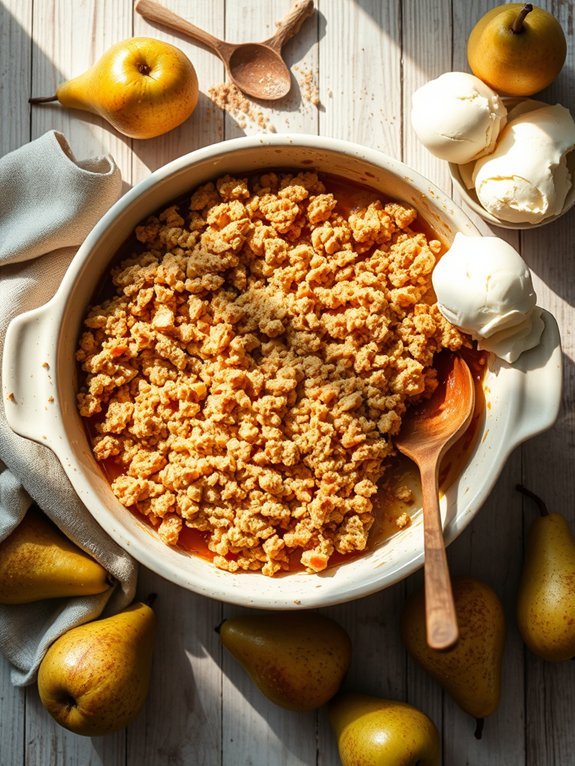
Pear and ginger crumble is a delightful dessert that perfectly marries the sweetness of ripe pears with the warm, spicy kick of ginger. This dish isn’t only satisfying to the taste buds but also ideal for showcasing fresh seasonal fruits.
The juicy pears, when baked, transform into a luscious filling, while the ginger adds a unique flavor profile that enhances the overall experience. The crumble topping, with its buttery crunch, complements the soft fruit beneath, making every bite a decadent treat.
This dessert is simple enough for a weeknight gathering yet elegant enough to impress guests at a dinner party. The combination of flavors and textures creates a comforting dish that’s perfect for cool evenings. Serve warm with a scoop of vanilla ice cream or a dollop of whipped cream for an added indulgence.
Whether you’re a seasoned baker or just starting out, this pear and ginger crumble is sure to become a beloved staple in your recipe repertoire.
- 4 ripe pears, peeled, cored, and sliced
- 1 tablespoon fresh ginger, grated
- 1/4 cup brown sugar
- 1 teaspoon cinnamon
- 1 tablespoon lemon juice
- 1 cup all-purpose flour
- 1/2 cup rolled oats
- 1/2 cup unsalted butter, softened
- 1/4 cup granulated sugar
- 1/2 teaspoon salt
In a large mixing bowl, combine the sliced pears, grated ginger, brown sugar, cinnamon, and lemon juice, and toss until the pears are well coated. Pour the mixture into a greased baking dish.
In another bowl, combine the flour, oats, softened butter, granulated sugar, and salt. Mix until the mixture resembles coarse crumbs. Sprinkle the crumble topping over the pears evenly.
Bake in a preheated oven at 350°F (175°C) for 30-35 minutes, or until the topping is golden brown and the pears are bubbly.
For best results, let the crumble sit for at least 10 minutes after taking it out of the oven; this allows the juices to set a bit, making it easier to serve. If you prefer a sweeter dessert, feel free to adjust the amount of sugar based on the tartness of the pears you use.
Adding a pinch of nutmeg or some chopped nuts to the crumble topping can also add a lovely depth of flavor and texture. Enjoy experimenting with different fruit combinations, as this recipe works well with apples or peaches, too!
Kiwi Fruit Salad
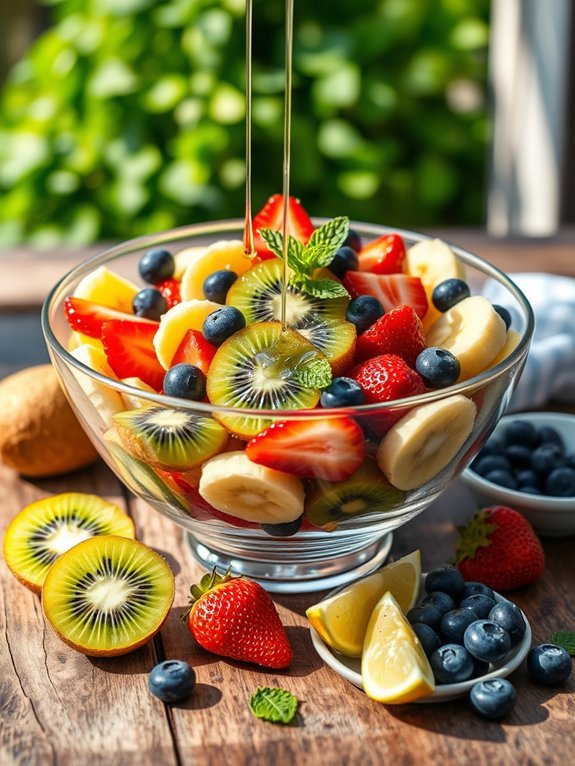
Kiwi fruit salad is a revitalizing and vibrant dish that embodies the essence of sunny days and wholesome fruit. The striking green color of kiwis, combined with their sweet and slightly tangy flavor, makes them a delightful addition to any fruit salad. This dish not only tantalizes the taste buds but also provides a hefty dose of nutrients—rich in vitamin C, fiber, and antioxidants, kiwis offer a delicious way to boost your health while enjoying a flavorful treat.
Incorporating other fruits like strawberries, bananas, and blueberries into the kiwi fruit salad elevates both the flavor and presentation. The assortment of colors and textures creates a visually appealing dish that’s perfect for summer picnics, brunches, or as a light dessert. Whether enjoyed on its own or paired with yogurt and granola, this fruit salad is versatile and easy to prepare, making it an ideal choice for any occasion.
- 4 ripe kiwis, peeled and sliced
- 1 cup strawberries, hulled and quartered
- 1 banana, sliced
- 1 cup blueberries
- 2 tablespoons honey (optional)
- 1 tablespoon lime juice
- Fresh mint leaves for garnish
In a large mixing bowl, combine the sliced kiwis, strawberries, banana, and blueberries. Drizzle the honey and lime juice over the fruit and gently toss everything together until well mixed. Allow the salad to sit for about 5 minutes to let the flavors meld before serving.
When preparing your kiwi fruit salad, try to select ripe, vibrant fruits for the best taste and texture. You can also customize the salad by adding other fruits like oranges or pineapple, or even a sprinkle of chia seeds for added crunch and nutrition. If you want extra sweetness, feel free to adjust the amount of honey according to your taste.
Finally, remember to serve the salad chilled for maximum freshness!


