This post may contain affiliate links. Please read our policy page.
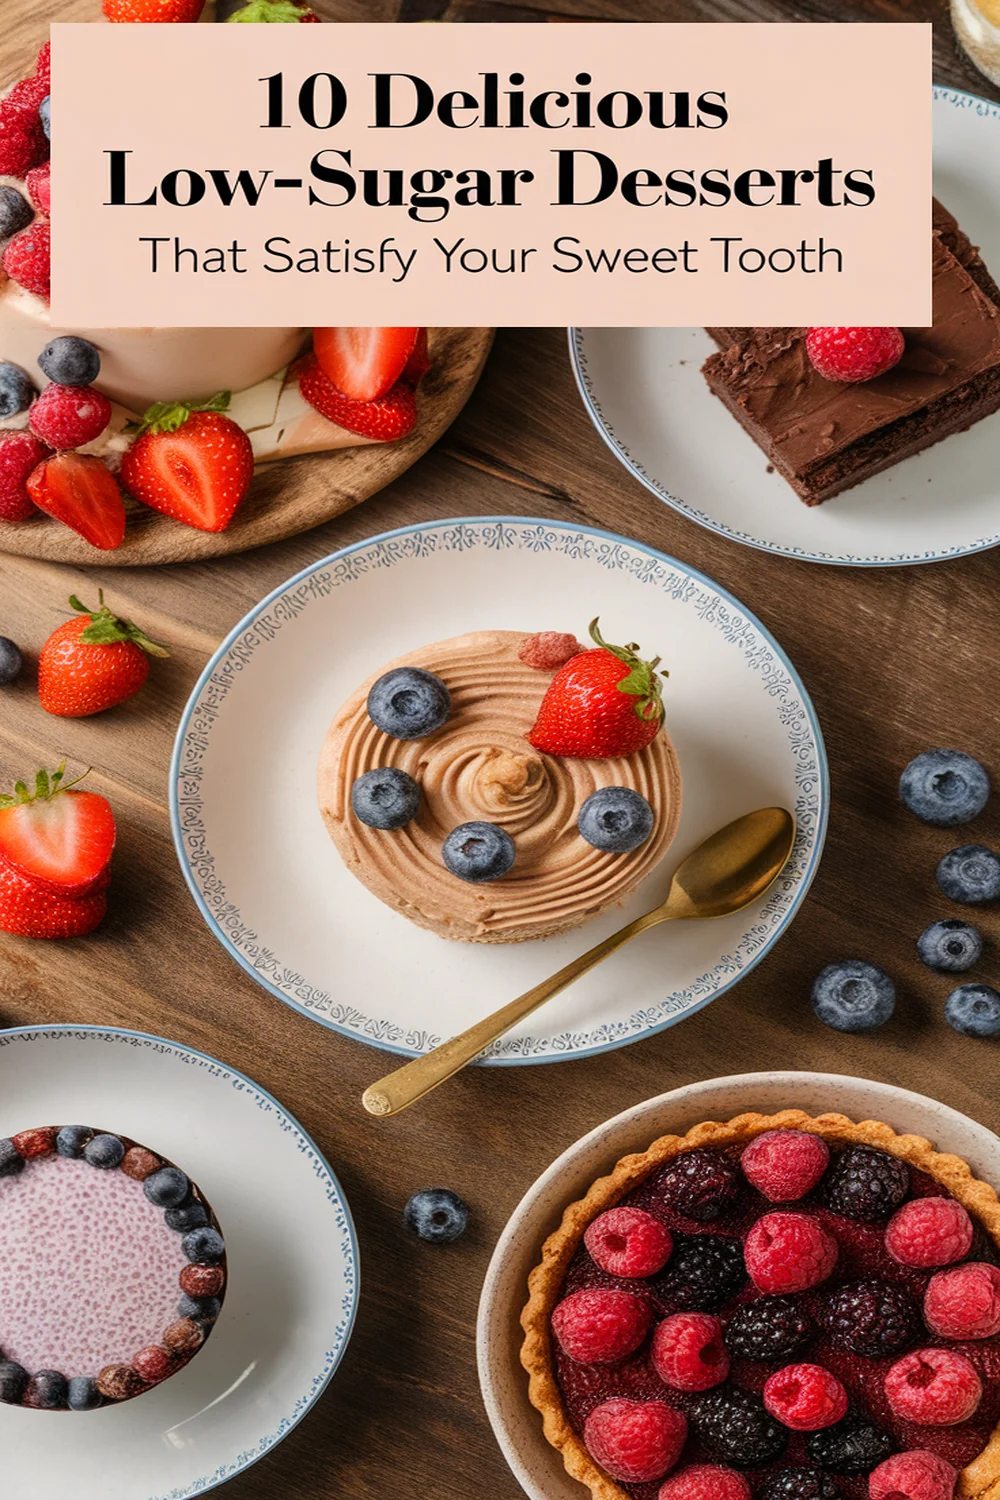
If you’re craving something sweet without the sugar overload, you’re in luck! Try the creamy Chocolate Avocado Mousse or the chewy Almond Flour Brownies for a delicious treat. Enjoy warm Baked Cinnamon Apples or a reviving Greek Yogurt Parfait. Coconut Chia Pudding and Dark Chocolate Dipped Strawberries are great choices too! Need a quick snack? Peanut Butter Energy Bites will hit the spot. For something fruity, savor the zesty Lemon Almond Cake and unique Matcha Green Tea Cookies. Discover more delightful options ahead!
Chocolate Avocado Mousse

Chocolate avocado mousse is a rich and creamy dessert that allows you to enjoy a delectable treat while keeping sugar content low. By combining ripe avocados with cocoa powder and a low-calorie sweetener, you can create a luscious dessert that’s both satisfying and nutritious. This mousse is perfect for anyone wanting to indulge without the guilt, providing healthy fats from the avocados alongside the antioxidant benefits of dark chocolate.
This versatile dessert can easily be customized to your taste. Feel free to experiment with different flavors by adding a splash of vanilla extract, a hint of coffee, or even a pinch of sea salt to elevate the taste. Serve it chilled in small cups or bowls, garnished with berries or nuts for a beautiful presentation. The rich texture and deep flavor of this chocolate avocado mousse will surprise your guests and leave them asking for seconds.
- 2 ripe avocados
- 1/2 cup unsweetened cocoa powder
- 1/4 cup low-calorie sweetener (such as stevia or erythritol)
- 1/4 cup unsweetened almond milk (or any milk of choice)
- 1 teaspoon vanilla extract
- A pinch of salt
To prepare the mousse, pit and scoop the ripe avocados into a food processor. Add the cocoa powder, low-calorie sweetener, almond milk, vanilla extract, and salt. Blend all ingredients until completely smooth and creamy, scraping down the sides of the bowl as needed. Once you achieve a velvety texture, taste and adjust sweetness if necessary.
Transfer the mousse into individual serving dishes and refrigerate for at least 30 minutes before serving. When making chocolate avocado mousse, opting for ripe avocados is essential for a smooth consistency and rich flavor. If your avocados aren’t ripe enough, the mousse can become grainy.
Additionally, chilling the mousse not only enhances its texture but also deepens the flavors, so don’t skip this step. If you want to add a touch of sophistication, consider garnishing with fresh mint leaves, whipped coconut cream, or a sprinkle of cocoa powder before serving.
Almond Flour Brownies

Almond flour brownies are a delightful and healthier alternative to traditional chocolate brownies, making use of almond flour instead of all-purpose flour. This switch not only helps reduce the carb content, but also adds a nutty flavor and a moist texture to the brownies. Packed with rich chocolate goodness, these brownies are naturally gluten-free and can easily be adapted for various dietary preferences, including low-sugar options.
This recipe is simple yet satisfies the sweet tooth without the excess sugar, making it perfect for those looking to indulge guilt-free. By using natural sweeteners such as stevia or erythritol, you can create a dessert that feels indulgent without compromising your dietary goals. Whether enjoyed fresh from the oven or stored for later, they promise to be a hit with both kids and adults alike.
- 1 cup almond flour
- 1/4 cup unsweetened cocoa powder
- 1/2 cup low-calorie sweetener (such as stevia or erythritol)
- 1/4 teaspoon sea salt
- 1/4 teaspoon baking powder
- 2 large eggs
- 1/3 cup melted coconut oil or grass-fed butter
- 1 teaspoon vanilla extract
- 1/2 cup dark chocolate chips (sugar-free if preferred)
Preheat your oven to 350°F (175°C) and grease an 8×8 inch baking dish. In a mixing bowl, combine almond flour, cocoa powder, sweetener, sea salt, and baking powder. In another bowl, whisk together the eggs, melted coconut oil (or butter), and vanilla extract until smooth. Gradually add the wet mixture to the dry ingredients and stir until combined. Fold in the dark chocolate chips.
Pour the batter into the prepared baking dish and spread it evenly. Bake for 20-25 minutes or until a toothpick inserted in the center comes out clean. Allow to cool before slicing into squares.
When making almond flour brownies, be cautious not to overmix the batter as this can lead to a denser texture. It’s also essential to allow the brownies to cool completely in the pan before cutting, as this helps them firm up and retain their shape.
If you want to enhance the flavor, consider adding a pinch of espresso powder to intensify the chocolate taste or a dash of cinnamon for a warm spice note. Enjoy experimenting with mix-ins like nuts or dried fruits to tailor the brownies to your liking!
Recommended Items
Discover our favorite products and tools to make your low-sugar dessert journey even sweeter!
Baked Cinnamon Apples
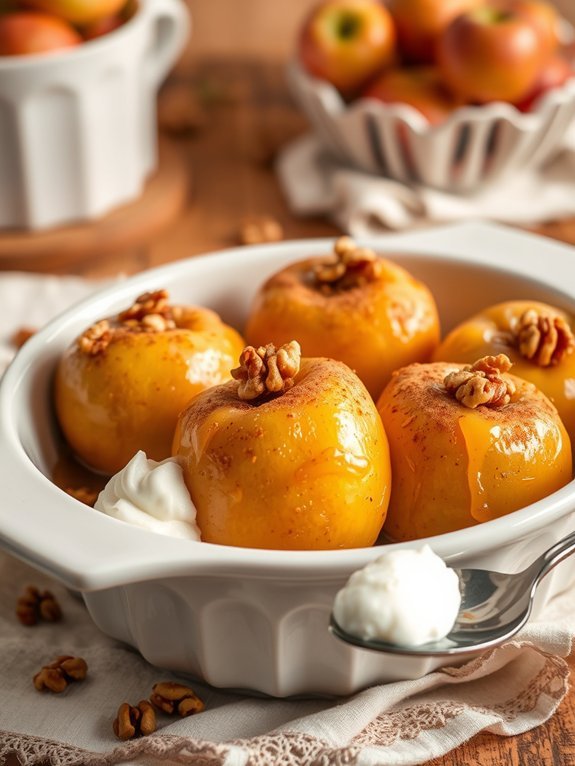
Baked cinnamon apples are a delightful, healthy dessert option that allows you to indulge your sweet tooth without overwhelming your body with sugar. This classic dish is simple to prepare, making it a perfect choice for both novice bakers and seasoned chefs alike. The combination of warm, tender apples with a hint of cinnamon creates a comforting aroma that fills your kitchen, setting the mood for family gatherings or cozy evenings at home.
Using fresh, seasonal apples enhances the flavor and texture of this dessert. While traditional recipes might use a lot of sugar, this version focuses on the natural sweetness of the apples and a little hint of cinnamon for seasoning. You can also customize the spices to your liking or add a handful of nuts for extra crunch. Enjoy your baked cinnamon apples warm, or serve them with a dollop of yogurt or a scoop of low-sugar ice cream for an extra treat.
Ingredients:
- 4 medium-sized apples (such as Granny Smith or Honeycrisp)
- 2 teaspoons ground cinnamon
- 2 tablespoons unsweetened applesauce
- 1 tablespoon maple syrup or honey (optional)
- 1/4 cup chopped walnuts or pecans (optional)
- 1 tablespoon lemon juice
- Cooking spray or a small amount of butter for greasing
Preheat your oven to 350°F (175°C) and lightly grease a baking dish. Core the apples and cut them in half (or quarters if you prefer), leaving the skin on for added nutrition. In a bowl, mix together the ground cinnamon, applesauce, and lemon juice. If using, add the maple syrup or honey to the mixture.
Coat the apple halves with this cinnamon mixture and place them in the prepared baking dish, cut side up. Sprinkle the chopped nuts over the apples if desired. Cover the dish with aluminum foil and bake for 25-30 minutes, until the apples are tender but still hold their shape.
For the best results, choose apples that are firm and slightly tart, as they’ll hold up better during baking and provide a nice contrast to the sweetness of the applesauce and your optional sweetener. You can also experiment with different spices like nutmeg or ginger for a unique twist or add raisins for a chewy texture.
Keep an eye on the baking time, as overcooking can make the apples too mushy. Enjoy your baked cinnamon apples as a wholesome dessert or healthy snack option!
Greek Yogurt Parfait
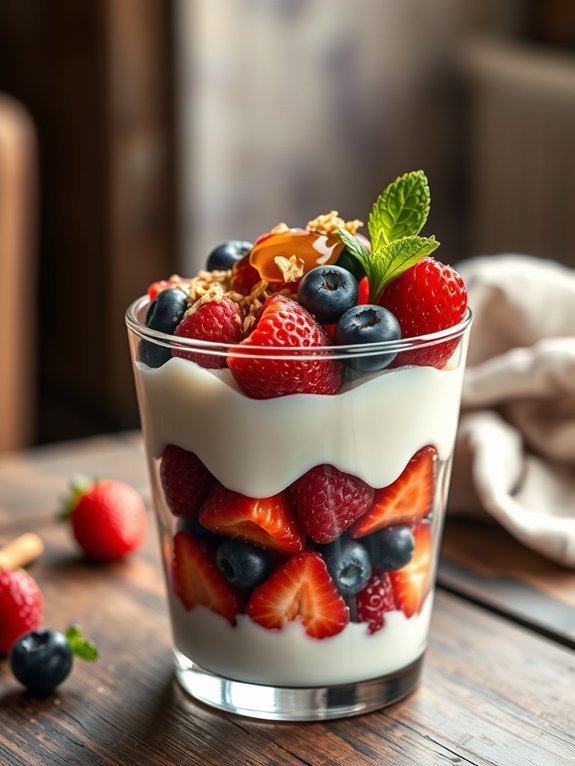
Greek yogurt parfaits are a delightful and nutritious way to satisfy your sweet tooth without overindulging in sugar. This simple dessert combines the creamy texture of Greek yogurt with layers of fresh fruits and a sprinkle of crunchy granola.
It’s not only a treat for your taste buds but also a wholesome option packed with protein, probiotics, and vitamins. Plus, it can be easily customized based on your favorite flavors and seasonal fruits.
Making a Greek yogurt parfait is straightforward and can be done in just a few minutes. A perfect choice for breakfast, a snack, or even a light dessert, this recipe encourages you to release your creativity. By selecting low-sugar or no-sugar-added ingredients, you can savor a guilt-free indulgence any time of day.
Let’s plunge into the deliciousness!
- 2 cups Greek yogurt (plain, low-fat or non-fat)
- 1 cup fresh fruits (such as berries, banana slices, or chopped apples)
- ½ cup granola (low-sugar or sugar-free)
- 1 tablespoon honey or maple syrup (optional)
- 1 teaspoon vanilla extract
- A sprinkle of cinnamon (optional)
In a clear glass or bowl, start by layering half of the Greek yogurt on the bottom, followed by a layer of your chosen fresh fruits, and then a layer of granola.
Repeat the layers with the remaining yogurt, fruits, and granola. Drizzle honey or maple syrup on top if desired, and finish with a sprinkle of cinnamon for added flavor. Serve immediately for the best texture and taste.
When preparing your Greek yogurt parfait, feel free to play around with different toppings and flavors. Adding nuts or seeds can provide extra crunch and healthy fats, while a touch of nut butter can elevate the flavor profile.
Additionally, try to stick with lower-sugar granola options to keep your parfait healthy and balanced. Enjoy the process of creating your perfect dessert!
Step-by-Step Cooking Guide
Coconut Chia Pudding
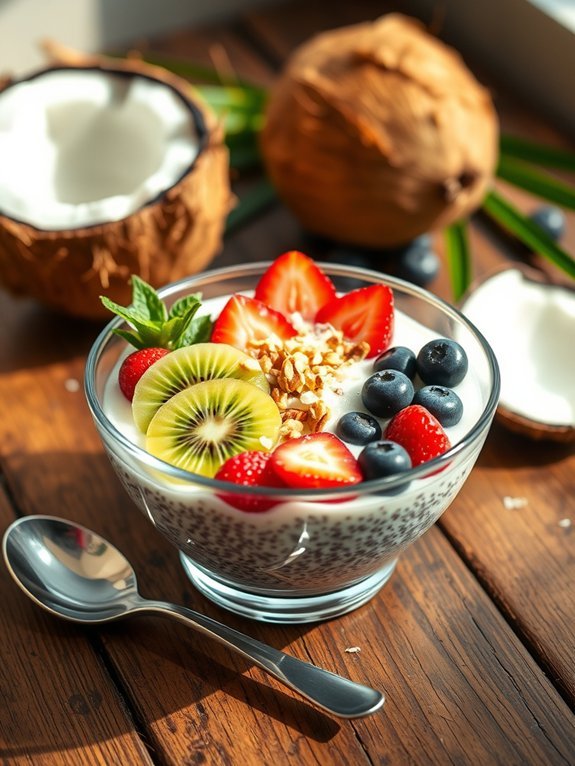
Coconut chia pudding is a delightful and nutritious dessert that provides a satisfying alternative to traditional sugary options. With its creamy, coconut-infused texture and a hint of nuttiness from the chia seeds, it makes for a perfect low-sugar treat.
This pudding isn’t only easy to make but also versatile; you can customize it with your favorite toppings, such as fresh fruits or nuts, to enhance its flavor and appearance.
The beauty of chia pudding lies in its simplicity and the health benefits associated with chia seeds. Rich in omega-3 fatty acids, fiber, and protein, chia seeds form a gel-like consistency when mixed with liquid, creating a filling and wholesome dessert. This recipe combines coconut milk, a natural sweetness, and the goodness of chia seeds for a satisfying treat that won’t spike your blood sugar levels.
- 1 cup coconut milk (canned or carton)
- 1/4 cup chia seeds
- 1 tablespoon pure vanilla extract
- 1 teaspoon maple syrup or honey (optional, for sweetness)
- Pinch of salt
- Fresh fruit, nuts, or shredded coconut for topping (optional)
In a large bowl, whisk together the coconut milk, chia seeds, vanilla extract, maple syrup (if using), and salt until well combined. Make sure there are no clumps of chia seeds.
Cover the bowl and refrigerate for at least 4 hours, or preferably overnight, until the mixture thickens to a pudding-like consistency. Once set, stir the mixture again, and serve in individual cups, topped with your choice of fresh fruit, nuts, or shredded coconut.
To enhance the flavor, consider experimenting with different types of milks or adding spices like cinnamon or cocoa powder. If you find the pudding is too thick after refrigerating, simply stir in a little more coconut milk until it reaches your desired consistency.
Make sure to keep it stored in an air-tight container in the refrigerator, where it can last for up to five days. Enjoy this versatile dessert any time of the day!
Low-Sugar Fruit Sorbet

Low-Sugar Fruit Sorbet is a revitalizing dessert that satisfies your sweet tooth without the guilt. Perfect for warm weather or as a light finish to any meal, this enjoyable treat highlights the natural sweetness of fruits without overwhelming them with excess sugar.
The best part? It’s incredibly simple to make, and you can customize it to your liking using your favorite fruits, leading to countless flavor combinations.
This recipe uses ripe fruits that are naturally low in sugar to create a delicious sorbet that you can feel good about serving. You’ll only need a few ingredients to make a smooth, creamy texture that rivals any store-bought version.
With just a blender or food processor, you can whip up a delightful sorbet that’s perfect for everyone, including those watching their sugar intake.
- 4 cups of ripe fruit (such as strawberries, raspberries, peaches, or mango)
- 2 tablespoons of honey or maple syrup (optional, to taste)
- 1 tablespoon of freshly squeezed lemon or lime juice
- A pinch of salt
- 1 cup of water (if needed, to adjust consistency)
To prepare the sorbet, start by cleaning and chopping the fruit, then blend it in a food processor until smooth. If the mixture is too thick, slowly add water until you reach your desired consistency.
Add honey or maple syrup, lemon juice, and a pinch of salt, and blend again until everything is well combined. Transfer the mixture to a shallow freezer-safe container and freeze for about 2-4 hours or until solid.
Before serving, let it sit at room temperature for a few minutes to soften slightly for easier scooping.
For the best flavor and texture, it’s essential to use ripe fruits, as they contain more natural sugars and flavor. You can also mix and match different fruits to create unique flavors.
If you prefer a smoother texture, you can churn the mixture using an ice cream maker before freezing it. Store the sorbet in an airtight container in the freezer to keep it fresh, and remember to stir it once or twice during the freezing process to prevent ice crystals from forming.
Enjoy your guilt-free indulgence!
Dark Chocolate Dipped Strawberries

Dark Chocolate Dipped Strawberries are a delightful and healthier treat that combines the natural sweetness of fresh strawberries with the rich flavor of dark chocolate. Perfect for indulging your sweet tooth without overloading on sugar, these berries make an elegant dessert. Whether you’re celebrating a special occasion or simply enjoying a quiet night in, this simple recipe is a crowd-pleaser that can be whipped up in no time.
This dessert not only looks impressive but is also packed with antioxidants from the dark chocolate and the vitamins from the strawberries. By choosing high-quality dark chocolate with a higher cocoa content (70% or more), you can enhance the health benefits while keeping the sugar content to a minimum.
This fun treat is great for party platters, romantic dinners, or even as a healthy snack option to satisfy cravings.
Ingredients:
- 1 pound fresh strawberries, washed and dried
- 8 ounces dark chocolate (70% cocoa or higher)
- Optional toppings: crushed nuts, sea salt, or unsweetened shredded coconut
To prepare the Dark Chocolate Dipped Strawberries, start by gently melting the dark chocolate. You can do this by placing the chopped chocolate in a microwave-safe bowl and heating it in 30-second intervals, stirring between each interval until fully melted and smooth.
Once the chocolate is melted, hold each strawberry by the stem and dip it into the chocolate, allowing any excess to drip off before placing the dipped strawberry on a parchment-lined baking sheet.
Repeat this process with all the strawberries, and if desired, sprinkle some toppings before the chocolate sets. Place the baking sheet in the refrigerator for about 30 minutes to allow the chocolate to harden.
For best results, verify your strawberries are completely dry before dipping them into the chocolate; any moisture can cause the chocolate to seize and not adhere properly. You can also customize your dipping experience by trying different types of chocolate or toppings according to your preference.
Keep an eye on the chocolate while melting to avoid burning, and if you’re looking to streamline the process, consider dipping just half of each strawberry for a delightful presentation.
Peanut Butter Energy Bites
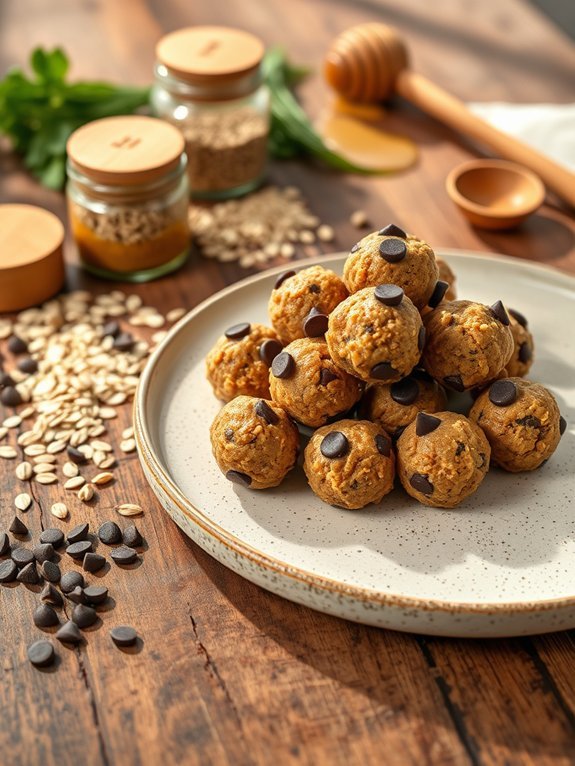
Peanut Butter Energy Bites are the perfect low-sugar treat for anyone looking to satisfy their sweet cravings without the guilt. Packed with protein and healthy fats, these no-bake bites aren’t just delicious but also energy-boosting. They’re ideal for an afternoon snack, post-workout fuel, or even as a quick breakfast option on the go.
With just a handful of wholesome ingredients, you can whip up these delightful bites in no time. Making Peanut Butter Energy Bites is straightforward and fun. The simplicity of the recipe means it can be a great activity to do with kids or friends, and the versatility allows for plenty of customization. You can easily adjust the flavors by adding in your favorite seeds, nuts, or dried fruits.
Get ready to indulge in a healthy yet satisfying treat that you can feel good about!
- 1 cup natural peanut butter
- 1 cup rolled oats
- 1/4 cup honey or maple syrup
- 1/2 cup ground flaxseed
- 1/2 cup dark chocolate chips (or raisins for a sugar-free option)
- 1 teaspoon vanilla extract
- A pinch of salt
In a large mixing bowl, combine the peanut butter, rolled oats, honey or maple syrup, ground flaxseed, dark chocolate chips, vanilla extract, and a pinch of salt. Mix well until all ingredients are fully incorporated.
Once the mixture is well combined, use your hands to form small balls, about 1 inch in diameter, and place them on a parchment-lined baking sheet. Refrigerate for about 30 minutes to firm them up before enjoying.
When making Peanut Butter Energy Bites, feel free to experiment with the ingredients based on your preferences. Swap peanut butter for almond or cashew butter, or try adding different mix-ins like chopped nuts, seeds, or even a sprinkle of cinnamon for added flavor.
Remember to store the energy bites in an airtight container in the refrigerator for maximum freshness, and they can last for up to a week. Enjoy the convenience and taste without sacrificing your health goals!
Lemon Almond Cake
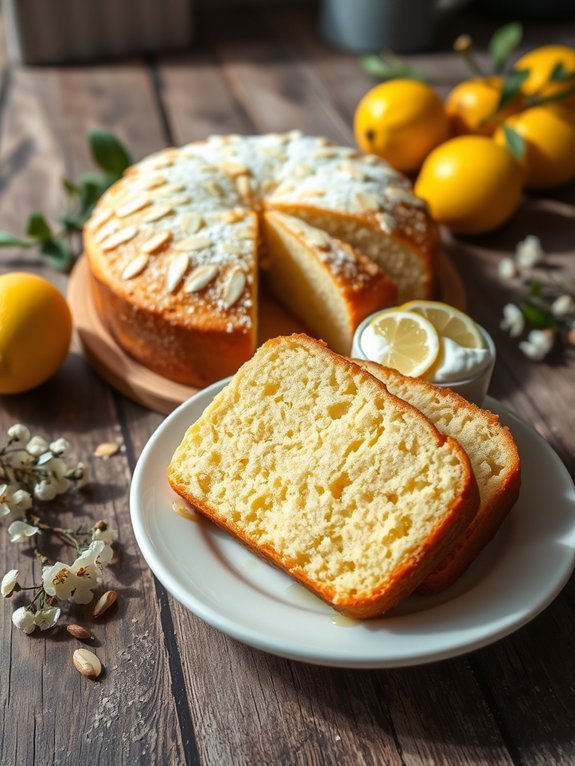
Lemon Almond Cake is a delightful and invigorating dessert that combines the zesty flavor of lemons with the nutty richness of almonds. This low-sugar treat is perfect for those looking to indulge without the guilt, as it uses natural ingredients to provide just the right amount of sweetness. The bright citrus notes in this cake offer a light, vibrant flavor that can easily elevate any occasion, whether it’s a summer celebration or an elegant afternoon tea.
Baked to perfection, this cake has a moist texture and an aromatic essence that will have your guests coming back for seconds. It showcases the beauty of simple cooking, requiring minimal effort while delivering outstanding results. With just a few pantry staples, you can whip up this scrumptious dessert that makes for a wonderful alternative to traditional sugary cakes.
- 1 cup almond flour
- 1/2 cup whole wheat flour
- 1 teaspoon baking powder
- 1/4 teaspoon salt
- 3 large eggs
- 1/2 cup unsweetened applesauce
- 1/4 cup honey or maple syrup
- Zest of 2 lemons
- 1/4 cup fresh lemon juice
- 1 teaspoon vanilla extract
- 1/2 teaspoon almond extract
- Optional: powdered erythritol or monk fruit sweetener for dusting
Preheat your oven to 350°F (175°C) and grease a 9-inch round cake pan. In a large bowl, whisk together the almond flour, whole wheat flour, baking powder, and salt.
In another bowl, beat the eggs, then mix in the applesauce, honey (or maple syrup), lemon zest, lemon juice, vanilla extract, and almond extract until well combined. Gradually fold the wet ingredients into the dry ingredients until just blended.
Pour the batter into the prepared cake pan and smooth the top. Bake for 25-30 minutes or until a toothpick inserted into the center comes out clean. Let the cake cool in the pan for about 10 minutes before transferring it to a wire rack to cool completely.
To guarantee the best results, make sure to accurately measure your ingredients to maintain the right texture and flavor. If you’d like a lighter cake, consider sifting the flour first, which helps incorporate air and can create a fluffier outcome.
This cake can be served plain, or you can add a simple lemon glaze made with lemon juice and erythritol for a touch of sweetness without extra sugar. It pairs beautifully with fresh fruits or a dollop of Greek yogurt for a tasty finish.
Matcha Green Tea Cookies
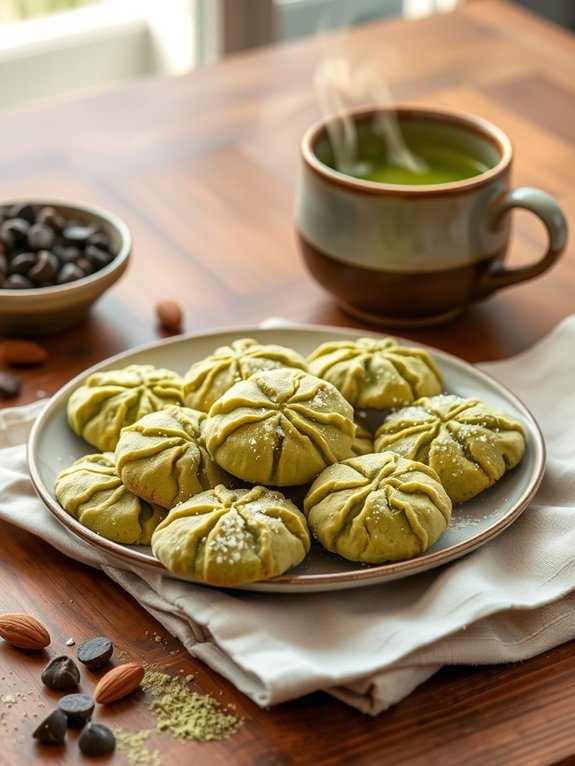
Matcha green tea cookies are a delightful and healthier alternative to traditional cookies, offering a unique flavor profile and a beautiful green hue thanks to the vibrant matcha powder. These cookies aren’t only low in sugar but also high in antioxidants, which can provide a range of health benefits.
The earthy taste of matcha pairs wonderfully with the buttery goodness of the cookie, creating a treat that’s both satisfying and guilt-free. To make these low-sugar treats, you’ll need only a few simple ingredients. The use of almond flour adds nuttiness and moisture while maintaining a lower carbohydrate count.
With just a touch of sweetness from natural sweeteners, these cookies will indulge your cravings without derailing your healthy eating habits. Perfect for tea time or as a light snack, matcha green tea cookies are sure to impress your friends and family.
- 1 cup almond flour
- 1/4 cup coconut flour
- 1-2 tablespoons matcha green tea powder
- 1/4 teaspoon baking soda
- 1/4 teaspoon salt
- 1/4 cup coconut oil (melted)
- 1/4 cup erythritol or your preferred low-sugar sweetener
- 1 teaspoon vanilla extract
- 1 large egg
Preheat your oven to 350°F (175°C) and line a baking sheet with parchment paper. In a mixing bowl, combine the almond flour, coconut flour, matcha powder, baking soda, and salt.
In a separate bowl, whisk together the melted coconut oil, erythritol, vanilla extract, and egg. Gradually add the wet ingredients to the dry ingredients, mixing until a dough forms. Scoop tablespoon-sized portions of the dough onto the prepared baking sheet, spacing them a couple of inches apart.
Bake for 10-12 minutes or until the edges are golden. Allow the cookies to cool on a wire rack before serving. For an extra flavor dimension, consider adding dark chocolate chips or chopped nuts to the cookie dough for a delightful crunch.
When storing the cookies, keep them in an airtight container to maintain their freshness, and try to let them cool completely before storing to avoid moisture buildup. You can also experiment with different herbs or spices, such as a dash of cinnamon or ginger, to create your own unique variations of these matcha cookies.

