This post may contain affiliate links. Please read our policy page.
Looking for tasty low-carb snacks to support your healthy lifestyle? Try Crispy Cauliflower Bites, Avocado and Cheese Stuffed Mini Peppers, or Zucchini Chips with Spices. Almond Butter Celery Sticks and Spicy Buffalo Chicken Lettuce Wraps make delicious and satisfying choices too. Don’t forget about Hard-Boiled Eggs with Avocado and Cheese Crisps with Seasoning for a protein boost. For a sweet treat, Coconut Flour Chocolate Chip Cookies or Roasted Radishes with Herbs are excellent options. You’ll find even more delightful recipes ahead!
Crispy Cauliflower Bites

Crispy cauliflower bites are a delicious and healthy alternative to traditional snacks. These savory nuggets bring a satisfying crunch while keeping the carbohydrate count low, making them perfect for those following a low-carb lifestyle. Tossed in spices and baked to perfection, they serve as an excellent snack or a side dish that even non-vegetarians will love.
The versatility of cauliflower allows it to soak up flavors beautifully, resulting in each bite bursting with taste. Not only are crispy cauliflower bites easy to prepare, but they also cater to various dietary preferences, making them a favorite among family and friends.
Whether you’re enjoying them as a party appetizer or a guilt-free midnight snack, these bites will become a staple in your kitchen.
- 1 head of cauliflower, cut into bite-sized florets
- 1 cup almond flour
- 2 large eggs
- 1 teaspoon garlic powder
- 1 teaspoon onion powder
- 1 teaspoon paprika
- Salt and pepper to taste
- Olive oil spray or cooking oil for greasing
Preheat your oven to 400°F (200°C). In a mixing bowl, whisk together the eggs, garlic powder, onion powder, paprika, salt, and pepper. Dip each cauliflower floret into the egg mixture, allowing excess to drip off, then coat with almond flour.
Place the coated florets on a baking sheet lined with parchment paper, spray lightly with olive oil, and bake for 20-25 minutes or until golden and crispy, flipping halfway through the cooking time.
For an extra crispy texture, make sure to space out the cauliflower florets on the baking sheet to allow for even cooking. You can also experiment with different spices or herbs for added flavor, such as Italian seasoning or cayenne pepper for a kick.
If you want to make the recipe ahead of time, prepare the cauliflower bites and store them in an airtight container in the refrigerator before baking. Simply pop them in the oven when you’re ready to enjoy!
Recommended Items
Check out these fantastic products and equipment to help you whip up some tasty low-carb snacks!
Avocado and Cheese Stuffed Mini Peppers

Avocado and Cheese Stuffed Mini Peppers are a delightful low-carb snack that combines creamy avocado with cheesy goodness, all wrapped up in a sweet, crunchy pepper. These bite-sized treats are perfect for parties, game day, or a simple afternoon snack. They aren’t only easy to make but also provide a healthy dose of fats and nutrients, ensuring that you can indulge without the guilt.
Preparing these stuffed mini peppers is a breeze, making them ideal for both experienced cooks and those just starting in the kitchen. Whether served as an appetizer or a light snack, the combination of fresh ingredients and flavorful seasonings makes this dish a crowd-pleaser. So gather your ingredients, and let’s get started on creating these delicious bites!
- 10 mini sweet peppers
- 1 ripe avocado
- 1/2 cup cream cheese, softened
- 1/2 cup shredded cheese (cheddar, mozzarella, or your preference)
- 1 tablespoon lime juice
- 1/2 teaspoon garlic powder
- Salt and pepper to taste
- Fresh cilantro or parsley for garnish (optional)
Preheat your oven to 375°F (190°C). While the oven heats, cut the mini sweet peppers in half lengthwise and remove the seeds. In a mixing bowl, mash the ripe avocado and mix it with cream cheese, lime juice, garlic powder, salt, and pepper until well combined.
Stir in the shredded cheese of your choice. Stuff each pepper half generously with the avocado and cheese mixture. Place the stuffed peppers on a baking sheet and bake for about 15 minutes, or until the peppers are tender and the tops are lightly golden.
For an extra burst of flavor, consider adding diced jalapeños or chopped sun-dried tomatoes to the filling for a spicy or tangy twist. Additionally, you can garnish the stuffed peppers with fresh herbs such as cilantro or parsley before serving for a pop of color.
If you’re looking to elevate the dish further, drizzle with balsamic glaze or a sprinkle of everything bagel seasoning for added taste and presentation.
Proposed Recipe
Zucchini Chips With Spices

Zucchini chips are a delightful and low-carb alternative to traditional potato chips, making them a perfect snack for those who are health-conscious or following a ketogenic diet. These crispy, seasoned chips not only satisfy your crunch cravings but are also packed with vitamins and minerals. The best part is that they’re incredibly easy to make at home, allowing you to control the seasoning and ingredients for an even tastier treat.
Creating zucchini chips is a straightforward process that involves slicing the zucchini thinly and baking it to achieve that perfect crispiness. With the addition of spices, you can customize the flavor profile to suit your taste preferences—whether you fancy something spicy, herbaceous, or simply savory. These chips make for a great snack on their own or can be paired with your favorite low-carb dips for an extra indulgence.
- 2 medium zucchinis
- 2 tablespoons olive oil
- 1 teaspoon garlic powder
- 1 teaspoon onion powder
- 1 teaspoon paprika
- 1/2 teaspoon salt
- 1/4 teaspoon black pepper
- Optional: grated Parmesan cheese for sprinkling
Preheat your oven to 225°F (110°C). Wash and dry the zucchinis, then slice them into thin rounds (about 1/8 inch thick). Place the zucchini slices in a bowl and toss them with olive oil, garlic powder, onion powder, paprika, salt, and black pepper until they’re evenly coated. Arrange the zucchini slices in a single layer on a baking sheet lined with parchment paper and bake for 1-2 hours, flipping halfway through, until they’re crispy and golden brown. Let them cool before enjoying your homemade zucchini chips.
When making zucchini chips, it’s important to slice the zucchinis as evenly as possible to guarantee uniform cooking. Thicker slices may result in chewy, less crispy chips, while thinner slices could burn quickly. If time allows, you can dehydrate the sliced zucchini with a paper towel beforehand to remove excess moisture; this step can help achieve a crispier texture.
Feel free to experiment with different spices and seasoning blends to create your ideal flavor combination!
Almond Butter Celery Sticks
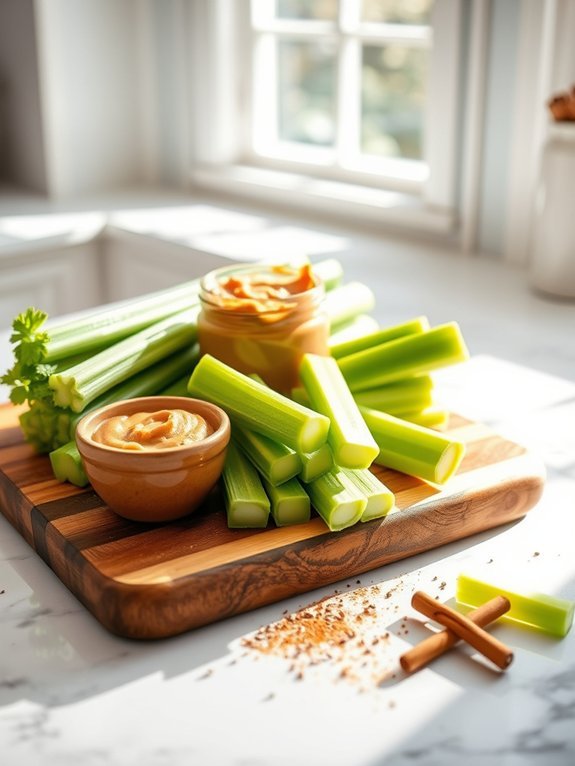
Almond butter celery sticks are a delightful and nutritious low-carb snack that satisfies hunger while providing a burst of flavor. This simple recipe combines the crunchy texture of fresh celery with the rich creaminess of almond butter, making it an excellent option for a quick snack or a light appetizer. Not only is this dish easy to prepare, but it also provides a healthy dose of fiber, healthy fats, and essential nutrients.
Making almond butter celery sticks is just a matter of minutes, yet the satisfying crunch and satisfying taste make it an irresistible choice. Whether you’re enjoying them as a mid-afternoon pick-me-up or serving them at a gathering, these snack sticks are sure to please everyone. Plus, they’re naturally gluten-free, making them a suitable snack for various dietary needs.
Ingredients:
- Fresh celery stalks
- Almond butter (unsweetened)
- Optional toppings: chia seeds, hemp seeds, or a sprinkle of cinnamon
Cut the celery stalks into 3-4 inch pieces and wash them thoroughly. Using a small spatula or a knife, spread a generous layer of almond butter down the center of each celery stick. If desired, sprinkle your chosen toppings over the almond butter for an added flavor and nutritional boost.
When preparing almond butter celery sticks, choose fresh, organic celery for the best flavor and crunch. If you find that the almond butter is too thick, you can consider warming it slightly in the microwave for about 10-15 seconds to make it easier to spread.
Additionally, feel free to experiment with different nuts butters or toppings based on your taste preferences, as this snack can easily be customized!
Spicy Buffalo Chicken Lettuce Wraps

If you’re craving a flavorful and low-carb snack, Spicy Buffalo Chicken Lettuce Wraps are the perfect choice. These delicious wraps offer a satisfying crunch and a kick of heat, making them an excellent option for a quick snack or even a light meal. The crispness of the lettuce complements the richness of the spicy buffalo chicken, creating a delightful contrast in textures that will leave your taste buds wanting more.
Preparing these wraps is simple and requires minimal ingredients, making them an ideal snack for busy weeknights or an afternoon energy boost. Just whip up the buffalo chicken filling, assemble your wraps using fresh lettuce leaves, and enjoy a burst of flavor in every bite. You can easily customize the heat level by adjusting the amount of hot sauce, tailoring it to your personal preference.
Ingredients:
- 2 cups cooked chicken, shredded
- 1/4 cup buffalo hot sauce
- 1 tablespoon butter, melted
- 1/4 cup cream cheese, softened
- 1/4 cup celery, finely chopped
- 1/4 cup green onions, sliced
- Lettuce leaves (such as romaine or iceberg)
- Blue cheese or ranch dressing (optional)
To make the wraps, combine the shredded chicken, buffalo hot sauce, melted butter, cream cheese, celery, and green onions in a mixing bowl. Stir until the ingredients are well mixed and the chicken is evenly coated with the buffalo sauce.
Take a lettuce leaf, spoon some of the chicken mixture onto it, and roll it up or simply fold it over to enjoy.
When making these wraps, feel free to experiment with different toppings. You can add sliced avocado, diced tomatoes, or even shredded cheese for an extra layer of flavor.
If you prefer a milder version, consider using a mild buffalo sauce or mixing in some Greek yogurt to tone down the heat while still keeping the creaminess that pairs so well with the spicy chicken.
Enjoy your wraps fresh, or store any leftovers in an airtight container in the refrigerator for a quick snack later!
Greek Yogurt Dip With Veggies
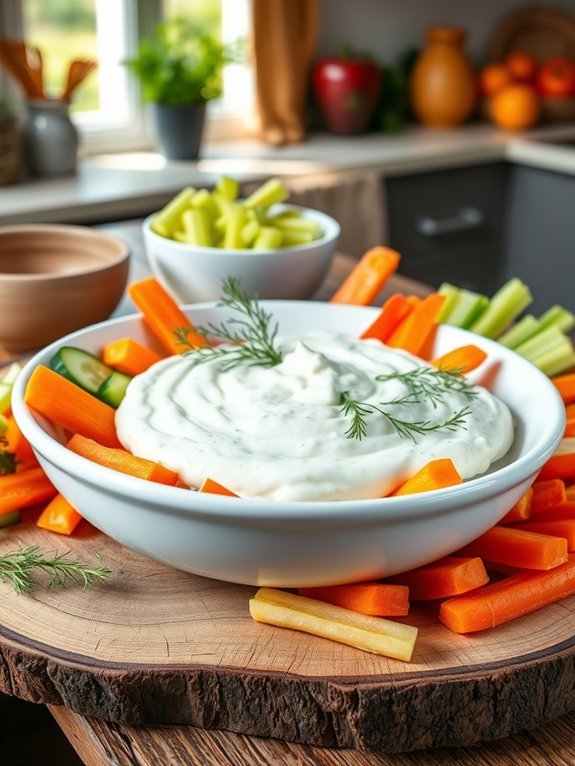
If you’re looking for a revitalizing and nutritious option to pair with your favorite crunchy vegetables, a Greek yogurt dip is the perfect choice. This dip is creamy, tangy, and versatile, making it a fantastic low-carb snack that can be prepared in a matter of minutes. Not only is it delicious, but it’s also packed with protein and beneficial probiotics, which can aid in digestion and overall health.
You can enjoy it with a variety of veggies, such as carrots, cucumbers, bell peppers, and celery, making it a colorful and healthy addition to any snack platter.
Making your own Greek yogurt dip allows you to tailor the flavors to your preferences. You can keep it simple with just garlic and herbs, or you can spice it up with additional ingredients like lemon juice, chopped olives, or even a sprinkle of feta cheese. The base of Greek yogurt provides a satisfying creaminess that complements the crispness of fresh vegetables perfectly, making this a great snack choice for any time of day.
Ingredients:
- 1 cup plain Greek yogurt
- 1 clove garlic, minced
- 1 tablespoon fresh lemon juice
- 1 teaspoon dried dill (or 1 tablespoon fresh dill, chopped)
- Salt and pepper, to taste
- Assorted fresh veggies (carrots, cucumbers, bell peppers, celery)
In a medium bowl, combine the Greek yogurt, minced garlic, lemon juice, dill, salt, and pepper. Stir the mixture until all the ingredients are well combined. Taste and adjust the seasoning if necessary.
Once your dip is ready, transfer it to a serving bowl and surround it with a colorful array of fresh vegetables for dipping.
When making this dip, feel free to experiment with different herbs and spices to find the combination that suits your taste. Adding a splash of hot sauce or a pinch of cayenne pepper can elevate the flavor if you enjoy some heat.
Additionally, make sure to use fresh vegetables for the best texture and flavor; washing and cutting them ahead of time will make for a more convenient snacking experience.
Hard-Boiled Eggs With Avocado

Hard-boiled eggs with avocado make for an excellent low-carb snack that’s not only satisfying but also packed with vital nutrients. This simple dish combines the creamy texture of ripe avocado with protein-rich eggs, creating a healthy option that can keep you energized throughout the day. It’s perfect for a quick breakfast, a post-workout snack, or a light lunch when you’re on the go.
Preparing hard-boiled eggs is straightforward, and when paired with avocado, it elevates this snack to a delightful level. You can customize the flavor by adding your favorite seasonings or a squeeze of lemon juice for a bit of zing. The beauty of this recipe is that it can be prepared in advance and stored in the refrigerator, making it a convenient option for busy days.
- 2 large eggs
- 1 ripe avocado
- Salt, to taste
- Pepper, to taste
- Lemon juice (optional)
- Paprika or chili flakes (optional)
To begin, place the eggs in a saucepan and cover them with cold water. Bring the water to a gentle boil over medium heat. Once boiling, cover the pan and remove it from heat, allowing the eggs to sit for about 9-12 minutes for hard-boiled perfection. Afterward, transfer the eggs to an ice bath to cool, then peel them.
Cut the hard-boiled eggs in half, scoop out some avocado flesh into each half, and season with salt, pepper, and any additional spices you prefer.
When preparing hard-boiled eggs with avocado, it’s important to choose perfectly ripe avocados for the best texture and flavor. If you’re making this dish ahead of time, store the eggs and avocado separately to prevent the avocado from browning. To keep the avocado fresh, you may also sprinkle a bit of lemon juice over it before serving.
Enjoy experimenting with different seasonings to find your favorite combination!
Cheese Crisps With Seasoning

Cheese crisps are a delightful low-carb snack that can satisfy those cravings for something crunchy and savory. They’re incredibly versatile and can be seasoned to suit your taste, whether you prefer a simple flavor profile or something with a punch.
Made primarily with cheese, these crisps provide a high-protein, low-carb option that’s perfect for snacking or even as a topping for salads or soups.
To prepare cheese crisps, you’ll need just a few essential ingredients. With a bit of creativity, you can customize your cheese crisps to include various seasonings or additional flavors. This makes them an interesting addition to any low-carb diet, guaranteeing you don’t miss out on tasty snacks while maintaining your nutritional goals.
Let’s plunge into making these crunchy delights!
- 1 cup shredded cheese (cheddar, Parmesan, or your choice)
- 1 teaspoon garlic powder
- 1 teaspoon onion powder
- 1/2 teaspoon paprika
- 1/2 teaspoon black pepper
- Optional: chopped herbs (like rosemary or oregano)
Preheat your oven to 400°F (200°C) and line a baking sheet with parchment paper. In a bowl, combine the shredded cheese with the garlic powder, onion powder, paprika, and black pepper until well mixed.
Spoon small mounds of the cheese mixture onto the prepared baking sheet, leaving space between each mound. Bake for 5-7 minutes, or until the edges are golden and crispy. Allow the crisps to cool for a few minutes before removing them from the baking sheet.
For the best results, make sure that the cheese is finely shredded for even melting and crisping. You can also experiment with different types of cheese and seasonings to create unique flavors.
Additionally, be careful not to overcrowd the baking sheet, as this can lead to uneven cooking. If you like your cheese crisps particularly crunchy, leaving them in the oven an extra minute or two can help achieve that perfect texture. Enjoy your delicious low-carb snack!
Coconut Flour Chocolate Chip Cookies

Coconut flour chocolate chip cookies are a delightful low-carb treat that will satisfy your sweet tooth without sending your blood sugar soaring.
Coconut flour is a fantastic gluten-free alternative that adds a subtle sweetness and a moist texture to your cookies, making them perfect for anyone following a keto or low-carb lifestyle. These cookies aren’t only easy to whip up, but they also come together in under 30 minutes, allowing you to enjoy freshly baked cookies in no time!
What’s great about these cookies is that they can be customized to suit your taste preferences. Whether you like your cookies chewy or crispy, adding nuts or dried fruit can enhance the flavor and texture. The combination of coconut flour and chocolate chips creates a rich, indulgent treat that’s both satisfying and guilt-free.
Gather your ingredients, and let’s get baking!
- 1/2 cup coconut flour
- 1/4 cup unsweetened cocoa powder
- 1/2 teaspoon baking soda
- 1/4 teaspoon salt
- 1/4 cup coconut oil (melted)
- 1/4 cup erythritol or your preferred low-carb sweetener
- 2 large eggs
- 1 teaspoon vanilla extract
- 1/2 cup sugar-free chocolate chips
In a mixing bowl, combine the coconut flour, cocoa powder, baking soda, and salt.
In a separate bowl, whisk together the melted coconut oil, erythritol, eggs, and vanilla extract until smooth.
Gradually add the dry ingredients into the wet mixture, stirring until everything is well incorporated.
Fold in the sugar-free chocolate chips, and let the dough sit for a few minutes.
Preheat your oven to 350°F (175°C), then scoop tablespoon-sized portions of dough onto a baking sheet lined with parchment paper.
Bake for 10-12 minutes, allowing them to cool slightly before enjoying.
When making coconut flour chocolate chip cookies, be mindful that coconut flour is highly absorbent, so it’s crucial to measure it accurately.
If you find the dough too dry, you can add a small amount of almond milk or water to achieve your desired consistency.
Additionally, these cookies store well in an airtight container, so you can make a batch ahead of time to enjoy throughout the week.
Remember that the flavors often deepen as they cool, making them even more delicious the next day!
Roasted Radishes With Herbs
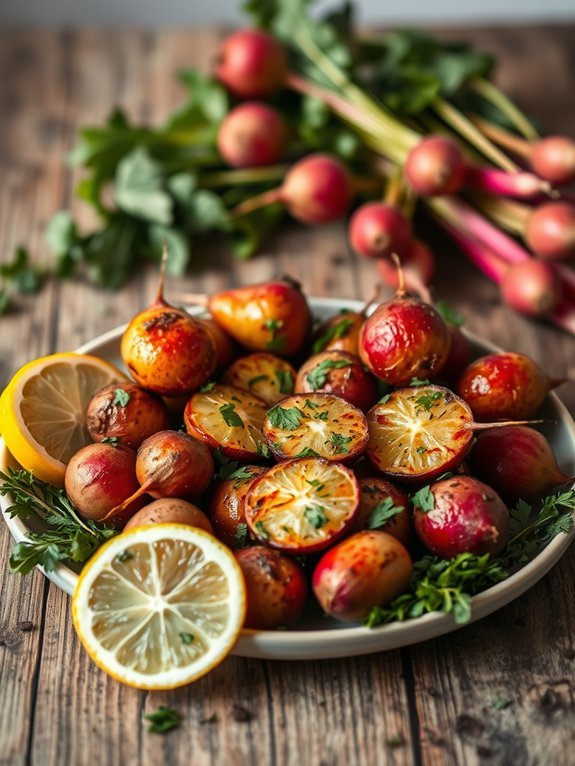
Roasted radishes are a delightful and nutritious addition to any low-carb snack repertoire. Often overlooked in the vegetable aisle, radishes transform when roasted, shedding their sharp bite and taking on a nutty, sweet flavor that’s surprisingly delicious.
With the addition of fresh herbs, this dish not only becomes a treat for the taste buds but also a visual delight on your plate. Perfect for a quick afternoon pick-me-up or as an elegant side to your main meal, roasted radishes are versatile and easy to make.
The simplicity of this recipe lies in its method. By roasting radishes in the oven, you maximize their flavor and tenderness while keeping the cooking process fast and efficient. Paired with fragrant herbs like rosemary, thyme, or parsley, this dish is both hearty and healthy. You can easily adapt the herbs based on your personal preference or what you have on hand, making it a flexible option for any kitchen.
Ingredients:
- 1 pound radishes, trimmed and halved
- 2 tablespoons olive oil
- 1 teaspoon garlic powder
- 1 teaspoon salt
- 1/2 teaspoon black pepper
- 2 tablespoons fresh herbs (such as parsley, thyme, or rosemary), chopped
- Optional: lemon wedges for serving
Toss the halved radishes with olive oil, garlic powder, salt, and black pepper in a large mixing bowl until evenly coated. Spread them out on a baking sheet in a single layer and roast in a preheated oven at 425°F (220°C) for 20-25 minutes or until they’re tender and golden brown.
Halfway through cooking, give them a gentle stir to ascertain even roasting. Once done, remove from the oven and sprinkle with the fresh herbs before serving. Enjoy them hot or at room temperature!
When roasting radishes, it’s important to choose firm and fresh ones for the best result. You can also experiment with different spices if desired; a sprinkle of paprika or a dash of chili powder can add a nice kick.
For a flavorful variation, consider tossing the finished radishes with a squeeze of fresh lemon juice to brighten the flavor even more. Remember not to overcrowd the baking sheet, as this can steam the radishes and result in a less desirable texture.

