This post may contain affiliate links. Please read our policy page.
You can easily whip up delicious homemade ice cream with flavors like classic vanilla, rich chocolate, and strawberry sensation that rival your favorite store-bought options. Try mint chocolate chip for a cool treat or indulge in salted caramel for a luxurious delight. Lavender honey brings a floral twist, while matcha green tea offers a unique flavor boost. For dessert lovers, Oreo cheesecake ice cream is a must-try! If you’re ready to explore even more delightful options, keep going!
Classic Vanilla Ice Cream

Classic vanilla ice cream is a timeless treat that can elevate any dessert experience. This smooth, creamy indulgence is rich in flavor and incredibly easy to make at home, allowing you to enjoy a fresh and delicious version of this beloved ice cream. Using simple ingredients, you can whip up a batch that will impress friends and family, making it the perfect addition to summer cookouts, birthday celebrations, or simply a weeknight treat.
The beauty of homemade vanilla ice cream lies in its versatility. You can savor it on its own, pair it with pies and cakes, or even use it as a base for various toppings like chocolate syrup, fresh fruit, or nuts. Once you master this classic recipe, feel free to experiment by infusing different flavors or adding mix-ins to create your own signature version of this classic dessert.
- 2 cups heavy cream
- 1 cup whole milk
- ¾ cup granulated sugar
- 1 tablespoon pure vanilla extract
- ½ teaspoon salt
- 5 large egg yolks
In a medium saucepan, combine the heavy cream, whole milk, and sugar; heat over medium heat until the mixture is warm and the sugar has dissolved.
In a bowl, whisk together the egg yolks, and gradually pour in about a cup of the warm cream mixture while whisking continuously to temper the yolks. Return this mixture to the saucepan on the stove and cook over low heat, stirring constantly until the mixture thickens enough to coat the back of a spoon (about 170°F).
Remove from heat, stir in the vanilla extract and salt, then let it cool to room temperature. Once cooled, refrigerate the mixture for at least 4 hours or overnight.
Finally, pour the chilled mixture into an ice cream maker and churn according to the manufacturer’s instructions until it reaches a soft-serve consistency. Transfer to an airtight container and freeze for at least 4 hours before serving.
When making homemade vanilla ice cream, verify that your mixing bowl and ice cream maker are well-chilled to promote ideal freezing. For the best flavor, consider using high-quality vanilla extract or even scraping the seeds from a vanilla bean for a more pronounced taste.
If you prefer a creamier texture, let the ice cream soften for a few minutes at room temperature before serving. Enjoy your delightful creation!
Recommended Items
Get ready to whip up some delightful treats! Here are our recommended products and equipment to help you make the perfect homemade ice cream.
Rich Chocolate Ice Cream
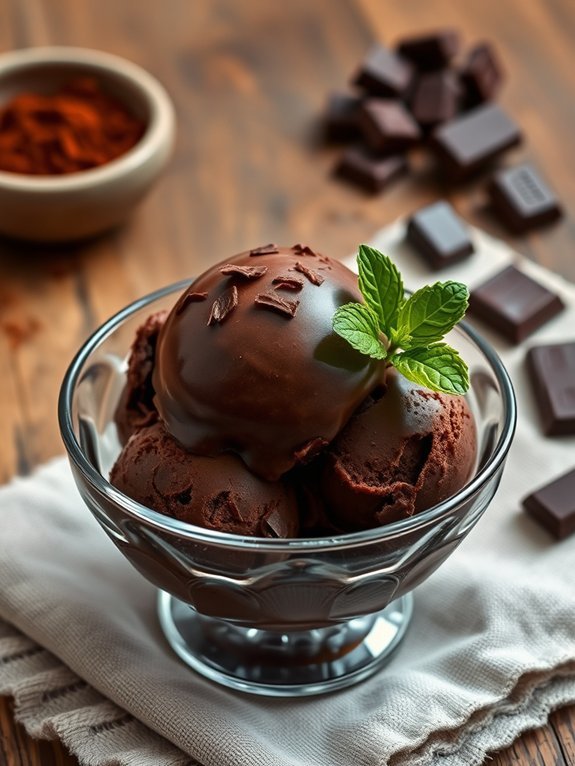
There’s nothing quite as indulgent as a scoop of rich chocolate ice cream on a warm day. This divine treat bursts with flavor and creamy texture, making it a favorite for chocolate lovers.
Making it from scratch not only allows you to control the sweetness and richness but also gives you the joy of creating something truly delicious right in your kitchen. With just a few simple ingredients and a little time, you’ll have a luxurious dessert that can rival even the best ice cream parlors.
To achieve the perfect balance of chocolatey goodness, use high-quality cocoa powder and chocolate. While the base of the ice cream is made with a rich custard, incorporating both cocoa and melted chocolate will satisfy even the most fervent chocolate cravings.
Whether enjoyed in a cone, a bowl, or as a decadent topping for your favorite dessert, this homemade recipe provides a wonderful way to cool off and treat yourself.
- 2 cups heavy cream
- 1 cup whole milk
- 3/4 cup granulated sugar
- 1/2 cup unsweetened cocoa powder
- 1 cup semi-sweet chocolate, chopped
- 1 teaspoon vanilla extract
- 1/4 teaspoon salt
- 4 large egg yolks
In a medium saucepan, combine the heavy cream, whole milk, granulated sugar, cocoa powder, and salt. Heat the mixture over medium heat, stirring frequently, until the sugar and cocoa are dissolved and the mixture is warm but not boiling.
Remove from heat and add the chopped chocolate, stirring until melted and smooth. In a separate bowl, whisk the egg yolks, then gradually add a cup of the warm chocolate mixture to temper the yolks.
Once combined, pour the yolk mixture back into the saucepan and heat until the mixture thickens slightly, about 5 minutes. Remove from heat, stir in the vanilla extract, and let it cool before chilling it in the refrigerator for at least 4 hours or overnight.
Finally, follow your ice cream maker’s instructions to churn the mixture until creamy, and then transfer it to an airtight container and freeze until firm.
When making rich chocolate ice cream, the quality of your ingredients matters tremendously. Opt for a high-fat percentage in your cream and milk, and don’t skimp on the chocolate – a higher cacao percentage will result in a more intense flavor.
For an added twist, consider folding in some mix-ins like chocolate chips or nuts just before the ice cream is fully churned, or experiment with flavorings such as espresso or a dash of sea salt to enhance the chocolate.
Enjoy your homemade creation, and consider sharing it with family and friends for a truly delightful experience!
Strawberry Sensation Ice Cream
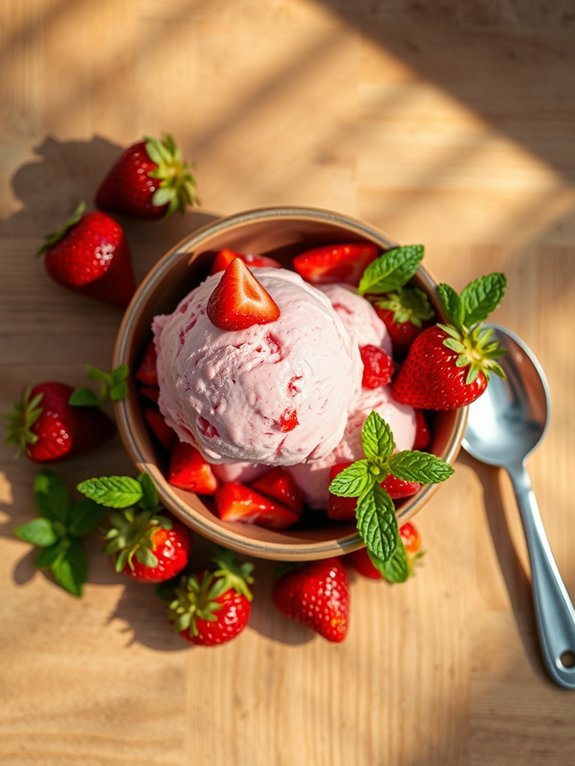
Strawberry Sensation Ice Cream is a delightful treat that captures the essence of fresh strawberries in every creamy bite. This homemade ice cream is perfect for hot summer days or as a sweet ending to any meal. Made with simple ingredients, it showcases the natural flavor of strawberries while providing a smooth, rich texture that’s hard to resist.
Whether you’re enjoying this dessert on its own or paired with a warm slice of pie, it’s bound to be a hit with family and friends.
Creating your own strawberry ice cream at home allows you to control the ingredients and adjust the sweetness to your liking. You can use fresh strawberries when they’re in season, or opt for frozen ones if you prefer. No ice cream maker? No problem! This recipe offers a simple method that requires just a few minutes of prep time, making it accessible for anyone who wants to indulge in a homemade frozen treat.
So grab your ingredients, and let’s get started on this strawberry sensation!
- 2 cups fresh strawberries, hulled and sliced
- 3/4 cup granulated sugar
- 1 cup heavy cream
- 1 cup whole milk
- 1 teaspoon vanilla extract
- A pinch of salt
In a blender or food processor, puree the sliced strawberries until smooth, then stir in half of the granulated sugar.
In a separate mixing bowl, whisk together the heavy cream, whole milk, the remaining sugar, vanilla extract, and a pinch of salt until well combined.
Combine the strawberry puree with the cream mixture and stir until everything is evenly blended. Pour the mixture into an airtight container and freeze for about 4-6 hours or until solid.
For the best results, let your Strawberry Sensation Ice Cream sit at room temperature for a few minutes before scooping so that it softens slightly and becomes easier to serve. If you prefer a chunkier ice cream, reserve some diced strawberries to fold in just before freezing.
Additionally, feel free to experiment with other fruits or mix-ins such as chocolate chips or nuts for a personalized touch. Enjoy your delicious homemade strawberry ice cream!
Mint Chocolate Chip Ice Cream
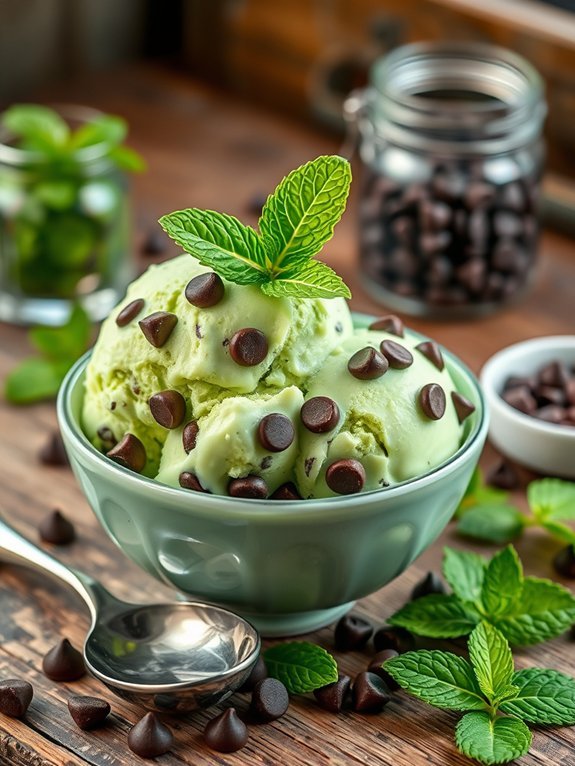
Mint Chocolate Chip Ice Cream is a revitalizing and delightful treat that combines the coolness of mint with the rich sweetness of chocolate. Perfect for summertime gatherings or a cozy night in, this homemade version beats anything you can get at the store. The brilliant green color and enthusiastic flavor will have your guests asking for seconds, and the satisfaction of making it yourself is a reward in itself.
This recipe allows you to capture the intensity of mint flavor while incorporating chocolate chips that provide a satisfying crunch with every bite. Using fresh ingredients, including real mint leaves, enhances the overall experience, elevating this dessert from ordinary to extraordinary. Follow these steps to create your own batch of this delightful ice cream that’s sure to impress.
- 2 cups heavy cream
- 1 cup whole milk
- 1 cup granulated sugar
- 1 teaspoon pure peppermint extract
- 1 cup fresh mint leaves, roughly chopped
- A few drops of green food coloring (optional)
- 1 cup semi-sweet chocolate chips
- Pinch of salt
In a medium saucepan, combine the heavy cream, whole milk, and granulated sugar, stirring over medium heat until the sugar has completely dissolved.
Once dissolved, add the chopped mint leaves and salt, then turn off the heat and let the mixture steep for about 30 minutes.
After steeping, strain out the mint leaves and return the liquid to the saucepan. Stir in the peppermint extract and food coloring (if using), then chill the mixture in the refrigerator for at least 2 hours.
After chilling, pour the mixture into an ice cream maker and churn according to the manufacturer’s instructions. In the last few minutes of churning, add the chocolate chips.
Once finished, transfer to a container and freeze until firm, about 4 hours or overnight.
For an even more vibrant flavor, consider using fresh mint leaves for steeping and chopping up some dark or white chocolate to mix in as well!
Additionally, if you don’t have an ice cream maker, you can pour the mixture into a shallow dish and freeze it, stirring every 30 minutes for the first few hours to maintain a smooth texture. Enjoy the process, and don’t hesitate to adjust the mint and chocolate proportions to suit your taste!
Coffee Espresso Ice Cream
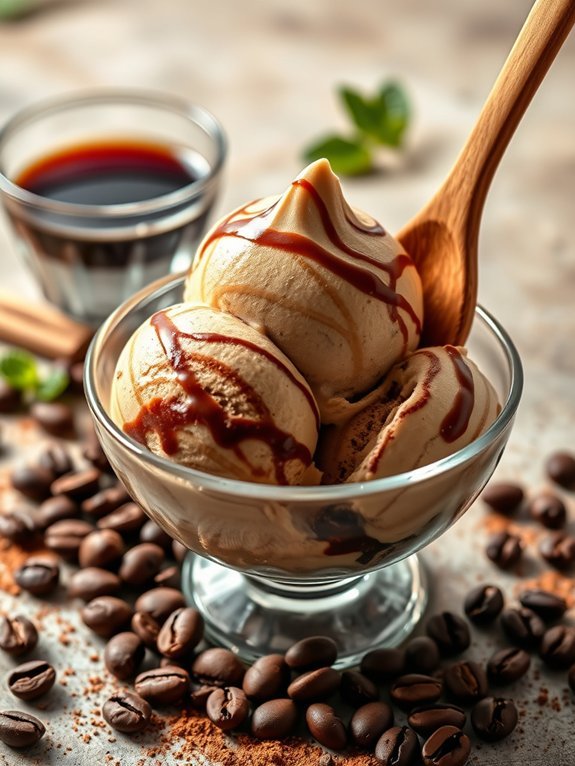
Indulging in a homemade coffee espresso ice cream is one of the ultimate joys for coffee lovers. This creamy and rich ice cream brings together the bold flavor of espresso with a creamy base that melts in your mouth.
It’s perfect for a hot summer day or as a delightful dessert at any gathering. Not only does it taste divine, but making your own ice cream allows you to control the ingredients and avoid the preservatives found in store-bought varieties.
Creating this delectable treat at home is easier than you might think. With a few simple steps, you can enjoy luscious ice cream that’s the ideal blend of sweetness and coffee flavor. Whether you prefer your ice cream soft or firm, this recipe will guide you towards achieving the perfect consistency.
So grab your ice cream maker and let’s get started!
- 2 cups heavy cream
- 1 cup whole milk
- 3/4 cup granulated sugar
- 1 tablespoon pure vanilla extract
- 2 tablespoons instant espresso powder
- 1/4 teaspoon salt
- 4 large egg yolks
In a saucepan over medium heat, combine the heavy cream, whole milk, sugar, and salt, stirring until the sugar dissolves.
In a separate bowl, whisk the egg yolks until smooth. Once the milk mixture is hot but not boiling, slowly pour it into the egg yolks while whisking continuously to temper them.
Return the mixture to the saucepan and cook on low heat, stirring consistently until it thickens and is able to coat the back of a spoon.
Remove from heat, stir in the vanilla extract and instant espresso powder, and let the mixture cool completely. Once cooled, pour it into your ice cream maker and churn according to manufacturer instructions until it reaches a soft-serve consistency.
Transfer to a container and freeze until firm.
For an even richer flavor, consider using freshly brewed espresso instead of instant powder; just verify it’s cold before mixing with the cream base.
Additionally, letting the ice cream sit in the freezer for longer after churning allows it to firm up nicely. Don’t be afraid to get creative; mix in chocolate chunks or ripple in caramel for a unique twist.
Enjoy your homemade coffee espresso ice cream!
Cookies and Cream Ice Cream

Cookies and Cream Ice Cream is a delightful treat that’s perfect for hot summer days or any time you’re in the mood for something sweet. This homemade version takes the classic flavor we all love and transforms it into a creamy, dreamy dessert that’s just as good as any ice cream shop’s offering. The combination of vanilla ice cream with crunchy chocolate sandwich cookies creates a delicious contrast in texture and flavor, making each scoop irresistible.
Making your own Cookies and Cream Ice Cream at home allows you to customize the recipe to suit your taste. Whether you prefer a generous helping of cookie chunks or a smoother texture with fewer pieces, this recipe can help you achieve your ideal balance. Plus, it’s a fun project to whip up on a lazy afternoon and will surely impress family and friends alike.
- 2 cups heavy cream
- 1 cup whole milk
- 3/4 cup granulated sugar
- 1 teaspoon vanilla extract
- 10-12 chocolate sandwich cookies, coarsely crushed
- Pinch of salt
In a large mixing bowl, whisk together the heavy cream, whole milk, granulated sugar, vanilla extract, and salt until the sugar is fully dissolved.
Pour the mixture into an ice cream maker and churn according to the manufacturer’s instructions. In the last few minutes of churning, gently fold in the crushed cookies. Once the ice cream reaches a soft-serve consistency, transfer it to an airtight container and freeze for at least 4 hours or until firm.
For best results, allow the ice cream to sit at room temperature for about 5-10 minutes before scooping, as homemade ice cream can be quite hard after freezing.
Additionally, consider using high-quality sandwich cookies for a richer flavor, and feel free to mix in any extras like chocolate chips or other cookie varieties for an even more decadent indulgence. Remember to store any leftover ice cream in a container with minimal air exposure to prevent freezer burn.
Step-by-Step Cooking Guide
Mango Coconut Sorbet
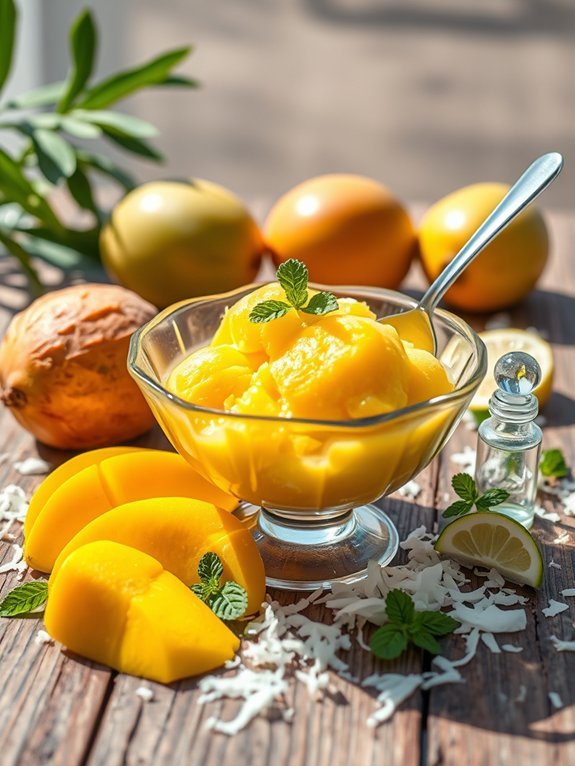
Mango Coconut Sorbet is a revitalizing and tropical treat that’s perfect for hot summer days or as a light dessert any time of the year. The sweet, juicy flavor of ripe mangoes combines beautifully with the creamy texture of coconut milk, resulting in a vibrant and delicious sorbet that’s both dairy-free and vegan-friendly.
This simple recipe requires just a few ingredients and minimal preparation, making it an ideal choice for those who want to whip up something special in no time.
To create the perfect Mango Coconut Sorbet, choose ripe mangoes that yield slightly to pressure when squeezed. The quality of the mango will greatly influence the flavor of the sorbet, so it’s worth investing in good, ripe fruit.
This versatile dessert can also easily be adapted by blending in other fruits or flavors, giving you the freedom to experiment and customize your sorbet to suit your taste preferences.
- 4 ripe mangoes, peeled and diced
- 1 cup coconut milk (full fat for creaminess)
- 1/2 cup sugar (adjust according to sweetness preference)
- 2 tablespoons lime juice
- Pinch of salt
In a blender, combine the diced mangoes, coconut milk, sugar, lime juice, and a pinch of salt. Blend until smooth and creamy.
Pour the mixture into a shallow dish or an ice cream maker. If using a shallow dish, freeze for about 4-6 hours, stirring every 30 minutes to break up ice crystals until it reaches a smooth consistency. If using an ice cream maker, churn according to the manufacturer’s instructions until it reaches a soft serve consistency, then transfer to a container and freeze until firm.
For the best texture and flavor, allow the sorbet to sit at room temperature for about 5-10 minutes before serving. This will make it easier to scoop and enhance the overall eating experience.
You can also garnish the sorbet with fresh mint leaves or a sprinkle of shredded coconut for an added touch of flavor and presentation. Enjoy your homemade Mango Coconut Sorbet as a delightful treat on its own or as a topping for fresh fruits or desserts!
Peanut Butter Swirl Ice Cream

Indulging in a creamy, rich Peanut Butter Swirl Ice Cream is a delightful way to satisfy your sweet tooth, especially during the hotter months. This homemade ice cream recipe combines the luxurious texture of traditional ice cream with the irresistible flavor of peanut butter, creating a treat that’s perfect for both kids and adults alike.
Whether enjoyed in a cone, a bowl, or as a topping for your favorite dessert, this ice cream is sure to become a household favorite.
Making homemade ice cream might seem challenging, but it’s surprisingly simple, and you don’t need an ice cream maker to achieve a smooth, luscious finish. With just a few ingredients and some time for freezing, you can enjoy a homemade treat that beats store-bought versions any day.
The swirls of peanut butter add an unexpected texture and flavor burst that elevates this dessert to another level, making each bite a delightful experience.
- 2 cups heavy cream
- 1 cup whole milk
- 3/4 cup granulated sugar
- 1 teaspoon vanilla extract
- 1/2 cup creamy peanut butter
- 1/4 cup milk (for loosening peanut butter)
In a large mixing bowl, whisk together the heavy cream, whole milk, sugar, and vanilla extract until the sugar dissolves completely. In a separate bowl, combine the peanut butter with 1/4 cup of milk and microwave for about 20-30 seconds, stirring until smooth.
Pour the cream mixture into an ice cream maker, if you have one, and churn according to the manufacturer’s instructions. If you don’t have an ice cream maker, pour the mixture into a shallow dish and freeze it for about 4-6 hours, stirring every 30-45 minutes for the first few hours to break up ice crystals.
When the ice cream is nearly frozen, gently swirl the peanut butter mixture throughout the ice cream, then freeze until firm.
To enhance the flavor and texture of your Peanut Butter Swirl Ice Cream, consider using natural peanut butter for a richer taste. Additionally, adding chopped peanuts or a sprinkle of sea salt can provide a delightful contrast to the sweetness.
If you prefer a creamier texture, letting the ice cream sit at room temperature for a few minutes before serving will make scooping easier. Enjoy experimenting with different mix-ins like chocolate chips or banana slices to create your personalized version of this delicious treat!
Salted Caramel Ice Cream

Indulging in homemade salted caramel ice cream is a delightful treat that’s both rich and satisfying. With its creamy vanilla base harmoniously blended with luscious salted caramel, this ice cream becomes a luxurious dessert perfect for any occasion.
Whether you’re hosting a gathering or simply want to enjoy a sweet escape at home, this salted caramel ice cream is sure to impress and tantalize your taste buds.
Making salted caramel at home can seem intimidating, but with a little practice, it becomes an effortless skill that opens the door to countless delicious desserts. The warm, gooey caramel paired with a hint of sea salt enhances the flavor profile and elevates the ice cream to another level.
This recipe is a must-try for anyone who loves the combination of sweet and salty flavors.
Ingredients:
- 2 cups heavy cream
- 1 cup whole milk
- 3/4 cup granulated sugar
- 1 teaspoon pure vanilla extract
- Pinch of salt
- 1 cup homemade salted caramel sauce (or store-bought)
- Flaky sea salt (for garnish)
In a medium saucepan, combine the heavy cream, whole milk, granulated sugar, and a pinch of salt. Heat over medium heat, stirring occasionally, until the sugar has dissolved.
Remove the mixture from heat and stir in the vanilla extract. Allow it to cool to room temperature before placing it in the refrigerator to chill for at least 2 hours.
Once chilled, churn the mixture in your ice cream maker according to the manufacturer’s instructions. Gradually mix in the salted caramel sauce during the last few minutes of churning, then transfer the ice cream to an airtight container and freeze for at least 4 hours before serving.
When making salted caramel ice cream, patience is key. Confirm your caramel sauce reaches the right color and consistency for maximum flavor.
Additionally, using high-quality ingredients enhances the overall taste, so opt for pure vanilla extract and fresh cream whenever possible. If you don’t have an ice cream maker, you can still make this treat by pouring the mixture into a shallow dish and stirring it every 30 minutes until it’s smooth and creamy!
Lavender Honey Ice Cream

Lavender honey ice cream is a delightful twist on traditional flavors that combines the floral notes of lavender with the natural sweetness of honey. This unique treat doesn’t just serve as a revitalizing dessert; it also offers a soothing aromatic experience. Lavender, often used in aromatherapy for its calming properties, enhances the ice cream, making it perfect for a relaxing evening or a special occasion.
Making this ice cream at home allows you to control the ingredients and confirm that you’re using high-quality honey and fresh lavender. The process is relatively simple, and with some patience during the chilling stages, you’ll have a creamy, dreamy dessert that can impress anyone. Pair it with fresh berries or a sprinkle of edible flowers for an elegant presentation.
- 2 cups heavy cream
- 1 cup whole milk
- 3/4 cup honey
- 2 tablespoons dried culinary lavender
- 4 egg yolks
- 1 teaspoon vanilla extract
- Pinch of salt
In a saucepan, combine the heavy cream, whole milk, honey, and dried lavender. Heat the mixture over medium heat until it starts to simmer. Remove from heat and let it steep for about 30 minutes.
After steeping, strain the mixture through a fine sieve to remove the lavender. In a separate bowl, whisk the egg yolks. Gradually pour the warm cream mixture into the egg yolks, whisking constantly to avoid cooking the eggs.
Once combined, return the mixture to the saucepan, and cook over low heat, stirring until it thickens enough to coat the back of a spoon. Remove from heat, stir in the vanilla and salt, and let it cool. Transfer to a container and refrigerate until well chilled. Then, churn in an ice cream maker according to the manufacturer’s instructions.
When making lavender honey ice cream, it’s important to use culinary-grade lavender to confirm that it’s safe to consume, as some lavender varieties can be too bitter or floral for eating. Additionally, if you prefer a stronger lavender flavor, you can allow the flowers to steep for a longer period, but be cautious as too much lavender can overpower the honey sweetness.
Serving this ice cream in a waffle cone or with freshly baked cookies can elevate your dessert experience.
Matcha Green Tea Ice Cream

Matcha green tea ice cream is a delightful and invigorating treat that’s perfect for those who appreciate the unique, earthy flavor of matcha. This vibrant green ice cream not only tastes fantastic but is also packed with antioxidants, making it a healthier dessert option.
With just a few ingredients and some simple steps, you can create your own creamy version of this popular Japanese dessert right at home. Making matcha ice cream is an easy and rewarding process that allows for creativity in flavor and texture.
You can serve it as is, or pair it with other desserts like mochi or drizzled chocolate for an exceptional eating experience. Whether for a summer gathering, a special occasion, or just a quiet evening at home, homemade matcha ice cream is sure to impress.
- 2 cups heavy cream
- 1 cup whole milk
- 3/4 cup granulated sugar
- 2 tablespoons matcha green tea powder
- 1 teaspoon vanilla extract
- 1/2 teaspoon salt
- 5 egg yolks
In a medium saucepan, whisk together the heavy cream, whole milk, granulated sugar, matcha powder, vanilla extract, and salt over medium heat until the mixture is hot but not boiling.
In a separate bowl, whisk the egg yolks until smooth. Gradually pour the hot cream mixture into the egg yolks, whisking constantly to temper them. Return the mixture to the saucepan and cook over low heat, stirring continuously until it thickens enough to coat the back of a spoon.
Remove from heat, let cool, then refrigerate until thoroughly chilled. Once chilled, churn the mixture in an ice cream maker according to the manufacturer’s instructions, then transfer to an airtight container and freeze for about 4 hours or until firm.
When preparing matcha ice cream, it’s important to use high-quality matcha powder for the best flavor and vibrant color. Also, consider adjusting the sweetness to your preference; you can reduce the amount of sugar if desired, or experiment with natural sweeteners like honey or maple syrup.
If you don’t have an ice cream maker, you can freeze the mixture in a shallow container, stirring it every 30 minutes for the first few hours to achieve a creamy texture. Enjoy your homemade matcha ice cream as a unique and indulgent treat!
Oreo Cheesecake Ice Cream
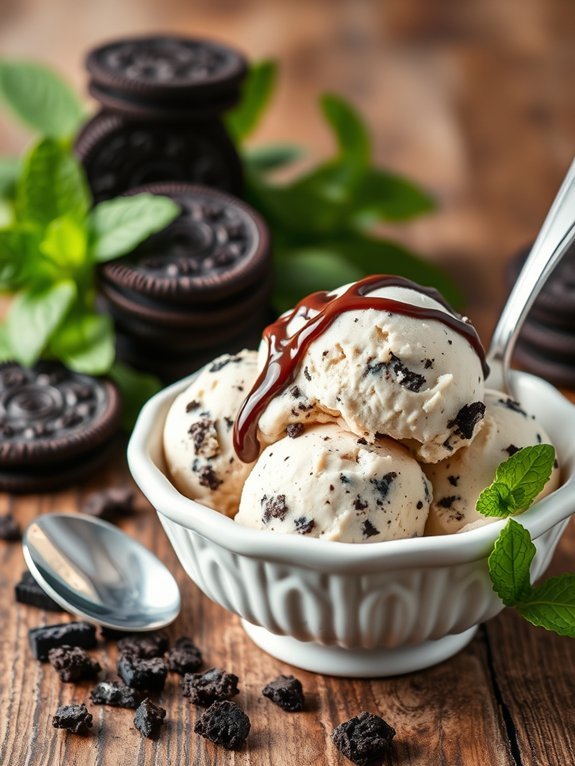
Oreo Cheesecake Ice Cream is a decadent and irresistible treat that combines the rich and creamy flavors of cheesecake with the beloved crunch of Oreo cookies. This delightful no-churn ice cream is perfect for hot summer days or any occasion when you need a sweet and indulgent dessert.
With its creamy base and chunky cookie pieces, it provides a satisfying texture that will have everyone coming back for more. Plus, this recipe is simple enough that you can whip it up in no time, making it a great option for both beginners and experienced cooks alike.
To make your own Oreo Cheesecake Ice Cream, all you need is a handful of ingredients and a little bit of patience while it freezes. This luscious ice cream is sure to impress your family, friends, and guests, and it’s a fantastic way to elevate your ice cream game.
Whether you serve it in a bowl, cone, or as part of an epic sundae, this dessert is guaranteed to be a crowd-pleaser.
- 2 cups heavy whipping cream
- 1 cup cream cheese, softened
- 1 cup sweetened condensed milk
- 1 teaspoon vanilla extract
- 10-12 Oreo cookies, crushed (plus extra for garnishing)
- 1/4 cup powdered sugar
In a large mixing bowl, combine the softened cream cheese and sweetened condensed milk, whisking until smooth and creamy. Then, gradually add in the heavy whipping cream, vanilla extract, and powdered sugar while continuing to whip the mixture until it forms soft peaks.
Gently fold in the crushed Oreo cookies, making sure they’re evenly distributed throughout the creamy base. Pour the mixture into an airtight container, smoothing out the top, and cover it tightly before freezing for at least 4-6 hours or until firm.
For the best texture and taste, allow your ice cream to sit at room temperature for about 5-10 minutes before scooping. This will make it easier to serve and will help it have that perfect creamy consistency.
Consider experimenting with different flavors by adding a swirl of chocolate or caramel sauce, or even incorporating additional cookie bits into the mixture. Don’t be afraid to customize your Oreo Cheesecake Ice Cream to your liking—it’s all about enjoying the process and creating a dessert that satisfies your sweet tooth!

