This post may contain affiliate links. Please read our policy page.
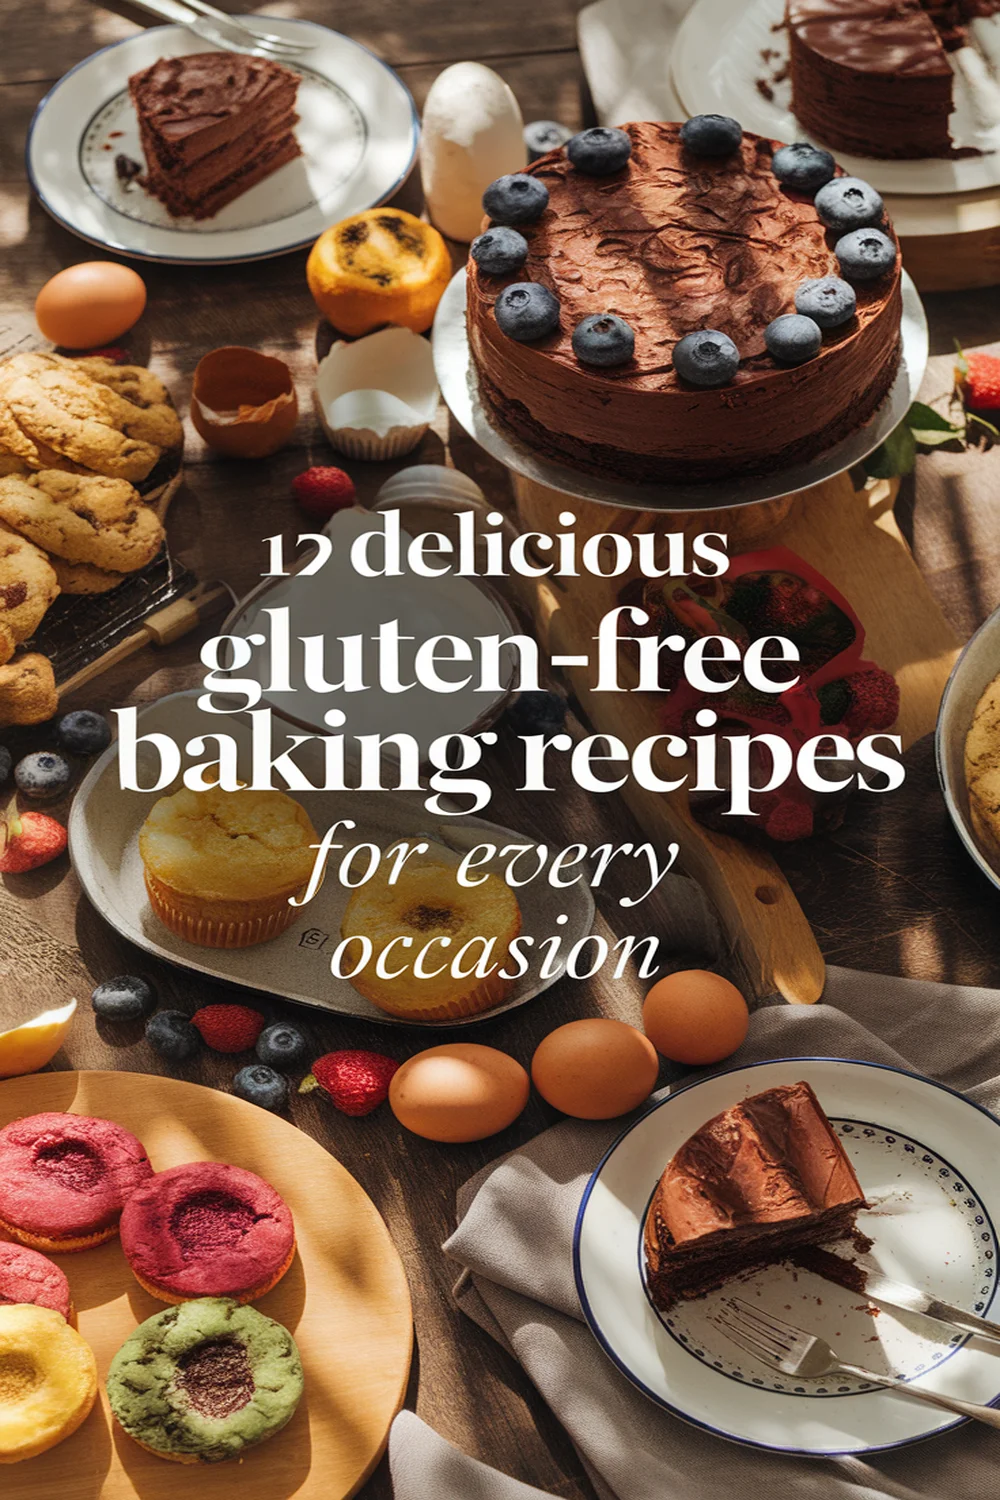
If you’re looking for 12 delicious gluten-free baking recipes perfect for any occasion, you’re in for a treat! From chewy chocolate chip cookies and rich flourless brownies to zesty lemon drizzle cake and moist almond flour banana bread, there’s something for everyone. Don’t forget the sweet coconut macaroons and indulgent peanut butter blondies! Each recipe is designed to satisfy your cravings while keeping it gluten-free. Stick around to discover more delightful baking ideas that will impress your guests!
Gluten-Free Chocolate Chip Cookies
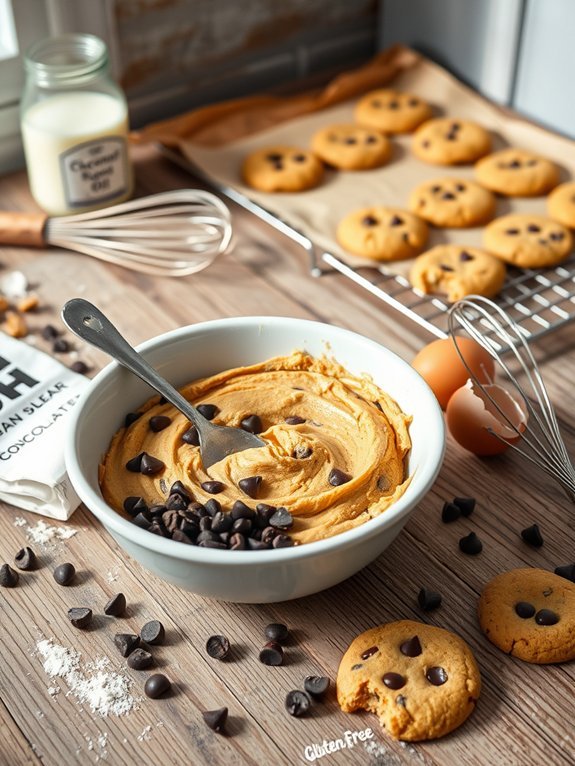
Gluten-free chocolate chip cookies are a delicious treat that can be enjoyed by everyone, regardless of dietary restrictions. With the perfect balance of crispy edges and a soft, chewy center, these cookies will satisfy even the most discerning sweet tooth. Using gluten-free flour blends, these cookies not only taste great but also offer the classic cookie experience that you crave. Plus, they’re easy to prepare and can be whipped up in no time!
To make the most of your gluten-free baking experience, it’s crucial to choose the right flour blend. Many grocery stores now offer pre-mixed gluten-free flours, which can yield excellent results. However, if you prefer to create your own blend, a combination of almond flour, coconut flour, and a gluten-free all-purpose flour works wonderfully. Add in your favorite mix-ins like nuts or dried fruit to give your cookies a personal touch.
- 1 cup gluten-free all-purpose flour
- 1/2 teaspoon baking soda
- 1/4 teaspoon salt
- 1/4 cup coconut oil (melted)
- 1/4 cup brown sugar
- 1/4 cup granulated sugar
- 1/2 teaspoon vanilla extract
- 1 large egg
- 1/2 cup gluten-free chocolate chips
Preheat your oven to 350°F (175°C) and line a baking sheet with parchment paper. In a mixing bowl, combine the gluten-free flour, baking soda, and salt. In another bowl, mix the melted coconut oil, brown sugar, granulated sugar, vanilla extract, and egg until smooth. Gradually add the dry ingredients to the wet mixture, stirring until just combined. Fold in the chocolate chips.
Drop spoonfuls of the cookie dough onto the prepared baking sheet, ensuring they’re spaced adequately apart. Bake for 10-12 minutes or until the edges are lightly golden, then let them cool on the baking sheet for a few minutes before transferring them to a wire rack.
When making gluten-free chocolate chip cookies, it’s important to keep in mind that the texture may differ slightly from traditional cookies. Allow the cookies to cool completely on the baking sheet, as this will help firm them up. If your cookie dough seems too dry, consider adding a tablespoon of milk or a bit more melted coconut oil.
Experiment with different gluten-free flour blends to find the one that suits your taste, and don’t hesitate to adjust the sweetness by adding more or fewer sugars based on your preference. Enjoy your tasty treats!
Almond Flour Banana Bread
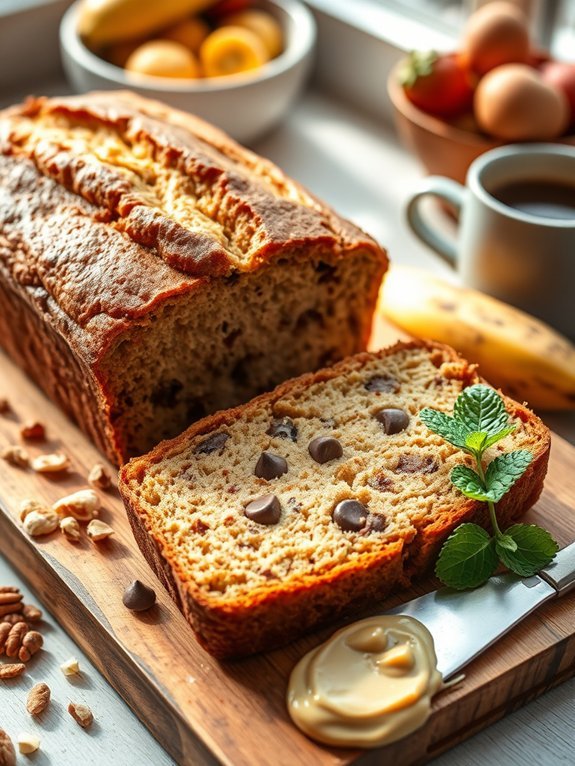
Almond Flour Banana Bread is a delightful and healthy alternative to traditional banana bread, perfect for those practicing a gluten-free diet. Making this bread with almond flour not only provides a nutty flavor and moist texture but also incorporates healthy fats and protein. Bananas add natural sweetness and moisture, making this recipe an excellent way to use ripe bananas that might otherwise go to waste.
This recipe is simple and quick to prepare, ideal for a nutritious breakfast or a tasty snack throughout the day. Whether you enjoy it plain, slathered with nut butter, or as part of a decadent dessert topped with fresh fruit or coconut yogurt, this Almond Flour Banana Bread will surely please your taste buds and keep your diet gluten-free.
- 3 ripe bananas, mashed
- 3 large eggs
- 1 teaspoon vanilla extract
- 2 cups almond flour
- 1 teaspoon baking soda
- 1/4 teaspoon salt
- 1 teaspoon cinnamon (optional)
- 1/2 cup chopped nuts or chocolate chips (optional)
Preheat your oven to 350°F (175°C) and grease a 9×5 inch loaf pan. In a large mixing bowl, combine the mashed bananas, eggs, and vanilla extract until well blended. In another bowl, mix the almond flour, baking soda, salt, and cinnamon.
Gradually combine the dry ingredients with the wet ingredients until just mixed; fold in the nuts or chocolate chips if using. Pour the batter into the prepared loaf pan and smooth the top, then bake for 45-55 minutes or until a toothpick inserted in the center comes out clean.
For best results, allow the banana bread to cool in the pan for about 10 minutes before transferring it to a wire rack. This will help maintain its moistness and structure.
Make sure to store any leftovers in an airtight container at room temperature for up to three days or refrigerate for a longer shelf life. You can also freeze slices for easy access in the future. If you want to personalize your banana bread, consider adding spices like nutmeg or allspice, or even experimenting with add-ins like dried fruits or seeds!
Flourless Brownies
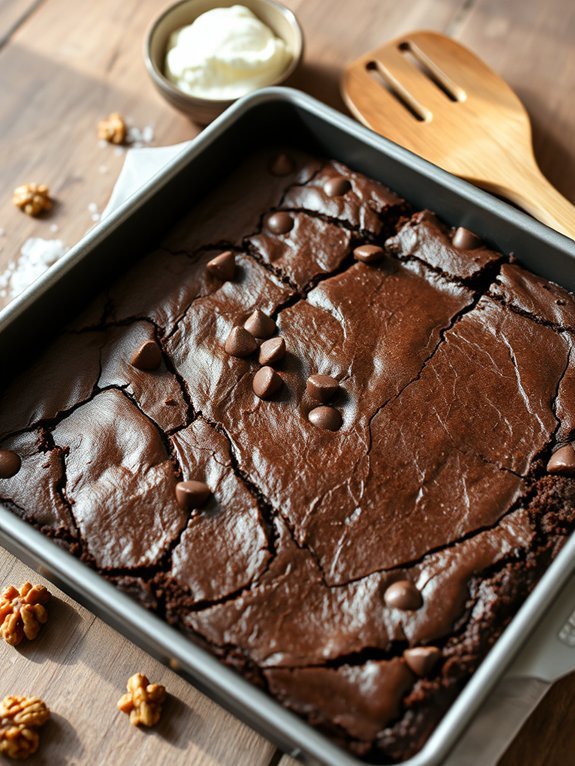
Flourless brownies are a delightful treat that combine rich chocolate flavor with a fudgy texture, perfect for those following a gluten-free diet or simply looking to indulge in a delicious dessert. These brownies aren’t only easy to make but also require minimal ingredients, making them an accessible and satisfying option for any occasion.
With a few simple steps, you’ll have a pan of gooey brownies that are sure to impress your family and friends.
What sets flourless brownies apart from traditional brownies is their use of alternative ingredients. Instead of flour, they typically rely on eggs and cocoa powder to achieve their dense and chewy consistency. This makes them an excellent option for those seeking a sweet treat without sacrificing taste or texture.
Whether enjoyed warm with a scoop of ice cream or cooled and cut into squares, flourless brownies are a decadent delight that everyone can enjoy.
- 1 cup unsweetened cocoa powder
- 1 cup granulated sugar
- 1/2 cup unsalted butter, melted
- 3 large eggs
- 1 teaspoon vanilla extract
- 1/4 teaspoon salt
- Optional: 1/2 cup chocolate chips or nuts for added texture
Preheat your oven to 350°F (175°C) and grease an 8×8-inch baking pan or line it with parchment paper. In a large mixing bowl, combine the melted butter, sugar, and cocoa powder until well blended.
Add the eggs, one at a time, mixing well after each addition. Stir in the vanilla extract and salt until the mixture is smooth. If desired, fold in the chocolate chips or nuts. Pour the batter into the prepared baking pan and spread it evenly, baking for 20-25 minutes or until a toothpick inserted in the center comes out with a few moist crumbs.
For the best results, make sure that all your ingredients are at room temperature, particularly the eggs, as this helps create a better emulsion and a smoother batter. You can also experiment with adding flavors, such as a dash of espresso powder to intensify the chocolate flavor or a sprinkle of sea salt on top before baking for a delightful contrast.
Allow the brownies to cool in the pan before cutting, as this will help them set and make slicing easier. Enjoy your flourless brownies with a scoop of vanilla ice cream or a drizzle of chocolate sauce for an extra special treat!
Gluten-Free Lemon Drizzle Cake
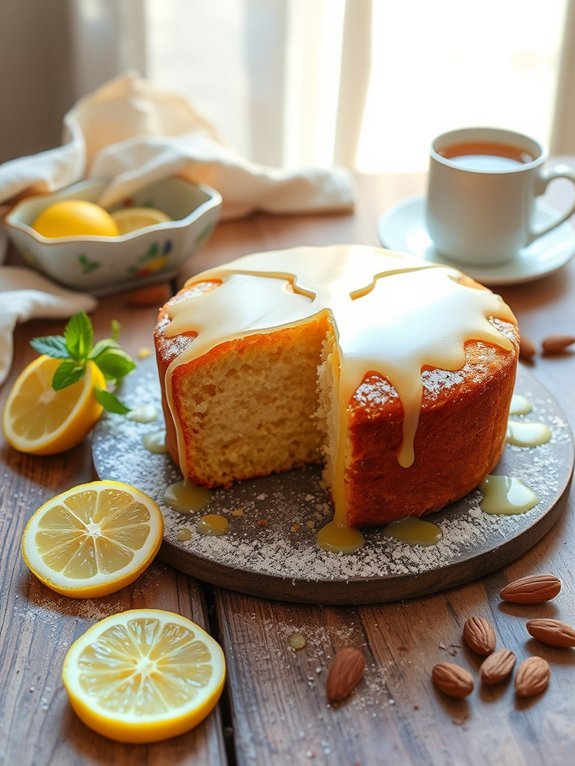
Gluten-Free Lemon Drizzle Cake is a delightful dessert that combines the bright, zesty flavor of lemons with a moist, tender crumb. Perfect for those who are gluten-sensitive or simply looking to try something new, this cake is reminiscent of the traditional lemon drizzle, but made without any wheat flour. The combination of almond flour and coconut flour achieves a lovely texture while keeping the cake light and flavorful.
This cake isn’t only a delicious treat to satisfy your sweet tooth, but it’s also incredibly easy to make. With a few simple ingredients and straightforward steps, you can whip up this scrumptious lemon drizzle cake in no time. It’s perfect for afternoon tea, a casual dessert after dinner, or just when you need a little pick-me-up during the day.
Ingredients:
- 1 ½ cups almond flour
- ½ cup coconut flour
- 1 cup granulated sugar
- 4 large eggs
- ½ cup unsweetened applesauce
- ½ cup lemon juice (freshly squeezed)
- Zest of 2 lemons
- 1 teaspoon baking soda
- ½ teaspoon salt
In a mixing bowl, combine the almond flour, coconut flour, baking soda, and salt.
In another bowl, whisk together the eggs, granulated sugar, applesauce, lemon juice, and lemon zest until smooth. Gradually add the dry mixture to the wet ingredients, stirring until just combined.
Pour the batter into a greased loaf pan and bake in a preheated oven at 350°F (175°C) for 40-45 minutes, or until a toothpick inserted into the center comes out clean. Allow the cake to cool in the pan for about 10 minutes before transferring it to a wire rack.
For an extra burst of flavor, you can drizzle a simple lemon glaze made from powdered sugar and lemon juice over the cooled cake.
Make sure the cake is completely cooled before adding the glaze to prevent it from melting away. Additionally, if you don’t have almond or coconut flour, other gluten-free flour blends may work, but be mindful of the texture and moisture as these flours have different absorbencies.
Enjoy your delicious gluten-free treat!
Coconut Macaroons
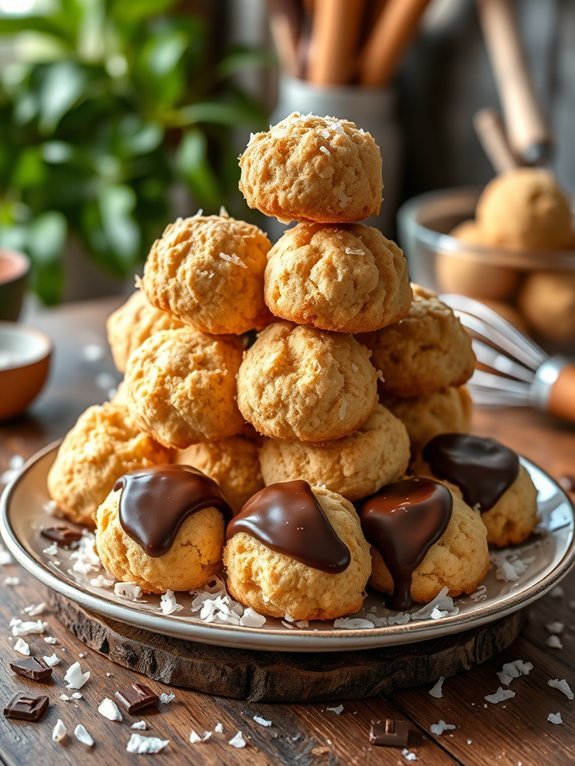
Coconut macaroons are a delightful treat that promises a satisfying crunch with a soft, chewy center, making them a favorite for those on gluten-free diets.
These sweet confections are easy to prepare and require only a handful of ingredients, making them a perfect choice for both novice bakers and seasoned chefs. With the tropical flavor of coconut shining through, they’re an indulgent dessert that pairs well with a range of beverages or can be enjoyed on their own.
This recipe will yield a batch of coconut macaroons that are perfect for special occasions or simple everyday snacking. Made from shredded coconut, egg whites, and sweetener, they offer a quick and satisfying baking experience. You can also dip them in chocolate for an even more decadent treat. Let’s plunge into this simple yet delicious recipe!
- 3 cups sweetened shredded coconut
- 2/3 cup granulated sugar
- 1/4 teaspoon salt
- 2 large egg whites
- 1 teaspoon vanilla extract
- Optional: 1 cup semi-sweet chocolate chips (for dipping)
Preheat your oven to 325°F (165°C) and line a baking sheet with parchment paper.
In a large mixing bowl, combine the shredded coconut, sugar, and salt.
In a separate bowl, lightly whisk the egg whites and vanilla extract until frothy.
Pour the egg mixture into the coconut mixture and stir until well combined.
Use a tablespoon to scoop the mixture onto the prepared baking sheet, forming small mounds.
Bake in the preheated oven for about 20-25 minutes, or until the macaroons are lightly golden on top.
Once baked, allow them to cool completely on the sheet.
For an added touch, you can melt chocolate chips in a microwave-safe bowl or over a double boiler and dip the cooled macaroons into the melted chocolate.
Be sure to let any excess chocolate drip off before setting them back on the parchment paper to dry.
If you prefer a crispier texture, bake the macaroons a few minutes longer until they become golden.
Additionally, experimenting with different types of coconut, like unsweetened coconut or flavored extracts, can add an exciting twist to your macaroons.
Enjoy your baking!
Pumpkin Spice Muffins
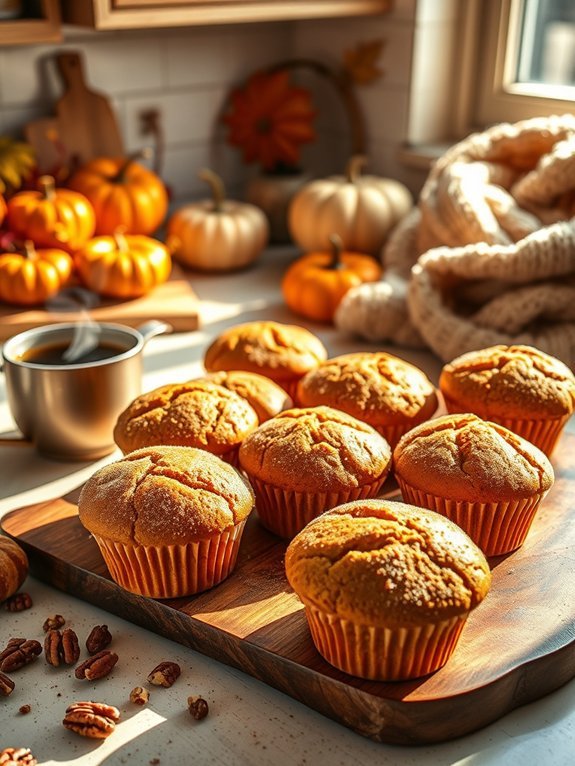
Pumpkin spice muffins are a delightful treat that perfectly captures the essence of fall with their warm spices and moist texture. These gluten-free muffins aren’t only delicious but also easy to make, making them an ideal choice for breakfast or a satisfying snack. With the richness of pumpkin puree and the aromatic blend of spices like cinnamon, nutmeg, and ginger, these muffins will fill your kitchen with wonderful scents, inviting everyone to join you for a cozy moment.
Whether you’re gluten intolerant or simply looking to enjoy a healthier option, these pumpkin spice muffins use gluten-free flour alternatives that keep the texture airy and fluffy. Adding ingredients such as coconut sugar or maple syrup instead of refined sugars makes them healthier without compromising on flavor. Enjoy them fresh out of the oven, or store them for later; they make rewarding leftovers that stay moist and flavorful.
- 1 cup gluten-free all-purpose flour
- 1 teaspoon baking soda
- 1 teaspoon baking powder
- 1 teaspoon cinnamon
- 1/2 teaspoon nutmeg
- 1/4 teaspoon ginger
- 1/4 teaspoon salt
- 1/2 cup coconut sugar or brown sugar
- 1 cup pumpkin puree
- 1/4 cup vegetable oil or melted coconut oil
- 2 large eggs
- 1 teaspoon vanilla extract
- 1/2 cup chopped walnuts or pecans (optional)
Preheat your oven to 350°F (175°C) and line a muffin tin with paper liners. In a large bowl, whisk together the gluten-free flour, baking soda, baking powder, cinnamon, nutmeg, ginger, and salt. In a separate bowl, mix the pumpkin puree, oil, eggs, vanilla extract, and coconut sugar until smooth.
Gradually add the dry ingredients to the wet mixture, stirring until just combined. If desired, fold in the nuts. Fill each muffin cup about three-quarters full and bake for 18-20 minutes, or until a toothpick inserted in the center comes out clean.
For the best results, let the muffins cool in the pan for about 5 minutes before transferring them to a wire rack, which allows them to set properly and prevents them from becoming soggy. You can also explore different variations by adding chocolate chips, dried cranberries, or sunflower seeds for added texture and flavor.
Storing the muffins in an airtight container keeps them fresh for several days, and they can even be frozen for longer storage—simply reheat them in the oven or microwave when you’re ready to enjoy!
Chewy Gluten-Free Oatmeal Cookies
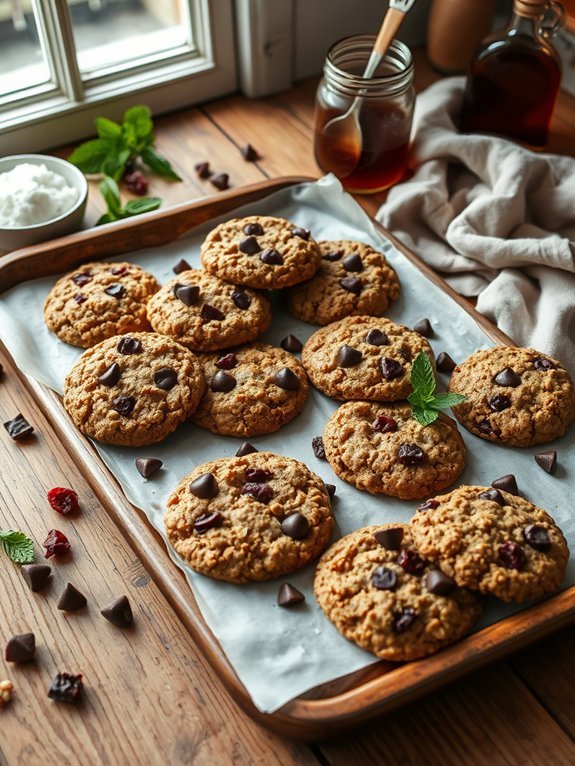
Chewy gluten-free oatmeal cookies are a delicious and satisfying treat that you can enjoy any time of day. Made with wholesome gluten-free oats and naturally sweet ingredients, these cookies have a delightful chewiness that makes them hard to resist.
Not only are they gluten-free, but they also provide a great source of fiber, making them a healthier snack option for you and your family.
These cookies can be customized with your favorite add-ins, such as chocolate chips, dried fruits, or nuts, to create a unique flavor profile that suits your taste. They’re perfect for lunchboxes, after-school snacks, or even as a quick breakfast on the go.
Let’s explore the ingredients and get baking!
- 1 cup gluten-free oats
- 1 cup almond flour
- 1/2 teaspoon baking soda
- 1/2 teaspoon salt
- 1/2 cup coconut sugar or brown sugar
- 1/4 cup maple syrup or honey
- 1/4 cup coconut oil, melted
- 1 teaspoon vanilla extract
- 1/2 cup chocolate chips or dried fruit (optional)
Preheat your oven to 350°F (175°C) and line a baking sheet with parchment paper. In a large bowl, combine the gluten-free oats, almond flour, baking soda, and salt.
In another bowl, mix together the coconut sugar, maple syrup, melted coconut oil, and vanilla extract until well combined. Pour the wet ingredients into the dry ingredients and stir until just combined.
Fold in the chocolate chips or dried fruit if using, then drop spoonfuls of the dough onto the prepared baking sheet, leaving space between each cookie. Bake for 12-15 minutes or until the edges are golden brown.
Allow the cookies to cool on the baking sheet for a few minutes before transferring them to a wire rack to cool completely.
To achieve the best texture and flavor, be sure to let the cookies cool fully before storing them. Chewy oatmeal cookies are best enjoyed fresh, but they can be stored in an airtight container at room temperature for up to five days or frozen for longer shelf life.
You can also experiment with different sweeteners or add-ins to find your perfect combination. If you prefer a softer cookie, try slightly underbaking them, as they’ll continue to firm up as they cool.
Happy baking!
Raspberry Almond Tart
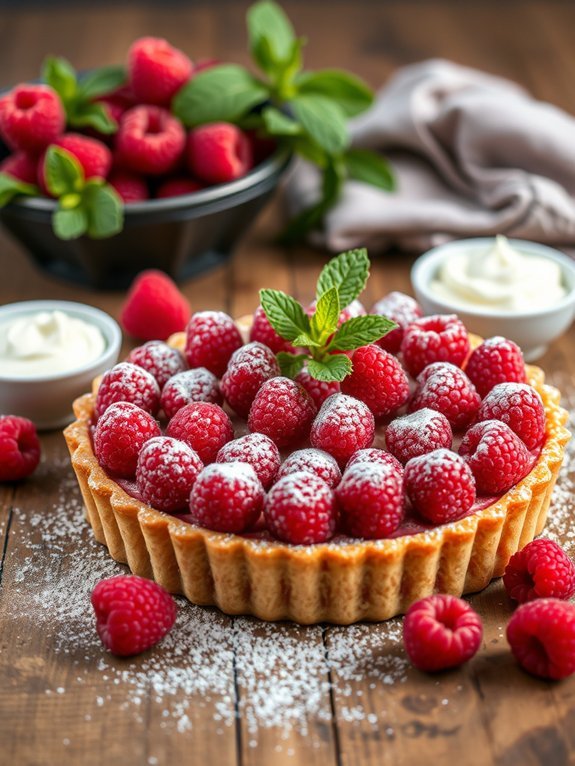
Indulging in a gluten-free dessert no longer means sacrificing flavor or texture. This Raspberry Almond Tart is a deliciously wholesome treat that combines the richness of almond flour with the sweet-tart burst of fresh raspberries.
Perfect for special occasions or a cozy afternoon with coffee, this tart isn’t only gluten-free but also elegant enough to impress your guests. Its nutty crust and vibrant fruit filling create a delightful harmony that will have everyone coming back for seconds.
The key to a perfect Raspberry Almond Tart lies in the balance of sweet and tart, complemented beautifully by the almond flavor. The almond flour gives it a unique, buttery taste, while the raspberries add a lovely freshness.
This tart is simple to make and showcases how gluten-free baking can be both easy and satisfying. So gather your ingredients and let’s get baking!
- 1 ½ cups almond flour
- ¼ cup powdered sugar
- 1/4 cup unsalted butter, melted
- 1 large egg
- 1 teaspoon vanilla extract
- 2 cups fresh raspberries
- 2 tablespoons honey or maple syrup
- 1 tablespoon cornstarch
- ½ teaspoon almond extract
- Pinch of salt
Preheat the oven to 350°F (175°C). In a bowl, mix the almond flour, powdered sugar, melted butter, egg, vanilla extract, and salt until the dough comes together. Press the mixture firmly into a tart pan, covering the bottom and sides evenly.
Bake the crust for 10-12 minutes until lightly golden. Meanwhile, in a separate bowl, combine the raspberries, honey or maple syrup, cornstarch, and almond extract. Once the crust is baked, fill it with the raspberry mixture and bake for an additional 20-25 minutes until the raspberries are bubbly and vibrant.
When making the Raspberry Almond Tart, affirm your raspberries are fresh and firm for the best flavor and texture. You can substitute other berries or fruits if desired, just adjust the sweetness as needed.
Let the tart cool before slicing to help it set properly. For an added touch, consider dusting the top with extra powdered sugar or serving it with a dollop of whipped cream or a scoop of vanilla ice cream for a delightful contrast.
Recommended Items
Get ready to bake deliciously with our curated selection of must-have products and equipment!
Products
Gluten-Free Red Velvet Cupcakes

Gluten-Free Red Velvet Cupcakes are a delightful treat that provide all the rich flavors and vibrant colors of traditional red velvet, without the gluten. These cupcakes are perfect for any occasion, whether it’s a birthday party, a holiday gathering, or just a sweet indulgence for yourself. The soft and velvety texture, combined with a light cream cheese frosting, makes these cupcakes irresistible for everyone, regardless of dietary restrictions.
Baking gluten-free can sometimes be challenging, but with the right blend of gluten-free flours and the addition of cocoa powder and buttermilk, these cupcakes turn out just as scrumptious as their gluten-filled counterparts. The vibrant red hue not only looks stunning but also adds a touch of festive charm.
So, gather your ingredients and get ready to whip up an unforgettable batch of gluten-free red velvet cupcakes!
Ingredients:
- 1 ½ cups gluten-free all-purpose flour
- 1 cup granulated sugar
- 1 tablespoon cocoa powder
- 1 teaspoon baking soda
- ½ teaspoon baking powder
- ½ teaspoon salt
- 1 cup vegetable oil
- 1 cup buttermilk, room temperature
- 2 large eggs
- 2 tablespoons red food coloring
- 1 teaspoon vanilla extract
- 1 teaspoon white vinegar
Preheat your oven to 350°F (175°C) and line a cupcake tin with paper liners.
In a large mixing bowl, whisk together the gluten-free flour, sugar, cocoa powder, baking soda, baking powder, and salt.
In another bowl, mix the vegetable oil, buttermilk, eggs, red food coloring, vanilla extract, and vinegar until well combined.
Gradually add the wet ingredients to the dry ingredients, mixing until smooth.
Fill each cupcake liner about 2/3 full with the batter and bake for 18-20 minutes, or until a toothpick inserted in the center comes out clean.
Allow the cupcakes to cool completely before frosting.
When making gluten-free red velvet cupcakes, it’s important to measure your ingredients accurately and use a high-quality gluten-free all-purpose flour blend for the best results.
You may also add a touch more cocoa powder for a richer flavor or use a combination of almond and coconut flour for a different texture.
For an extra treat, consider adding chocolate chips or nuts into the batter.
Remember that gluten-free baked goods can dry out quickly, so keep an eye on your cupcakes while baking and store any leftovers in an airtight container.
Step-by-Step Cooking Guide
Peanut Butter Blondies
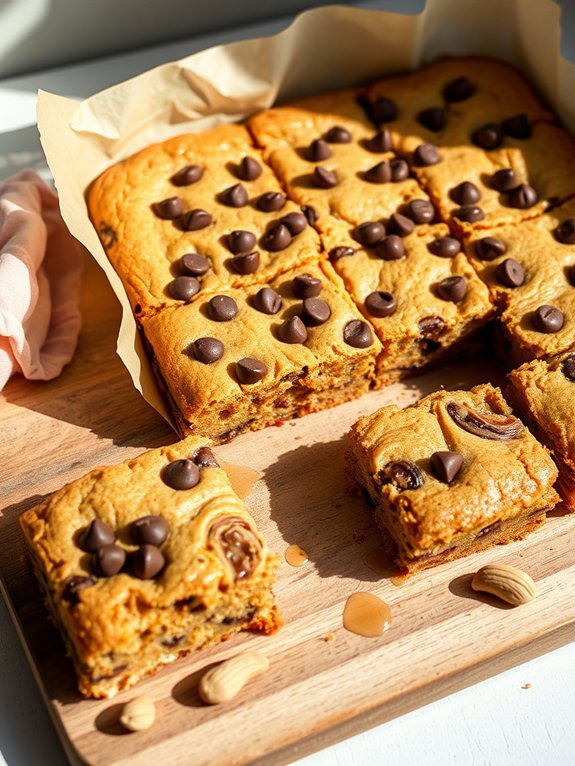
Peanut Butter Blondies are a delightful treat that perfectly combine the rich, creamy flavor of peanut butter with a sweet, cake-like texture. This gluten-free dessert is fantastic for those who need a gluten-free option without sacrificing taste.
Whether you’re baking for a special occasion or just want something sweet to enjoy at home, these blondies are certain to please friends and family alike. This recipe not only highlights the beloved flavor of peanut butter but also throws in a chocolatey twist for all the chocolate lovers out there. The addition of chocolate chips guarantees these blondies have that indulgent bite that makes every morsel irresistible.
They’re perfect for an afternoon snack, dessert, or even as a lunchbox treat!
- 1 cup creamy peanut butter
- 1/2 cup honey or maple syrup
- 2 large eggs
- 1 teaspoon vanilla extract
- 1 teaspoon baking soda
- 1/4 teaspoon salt
- 1/2 cup gluten-free flour blend
- 1/2 cup chocolate chips (dairy-free if needed)
Preheat your oven to 350°F (175°C) and line an 8×8 inch baking pan with parchment paper. In a large mixing bowl, combine the peanut butter, honey (or maple syrup), eggs, and vanilla extract, mixing well until smooth.
In another bowl, whisk together the baking soda, salt, and gluten-free flour. Gradually incorporate the dry ingredients into the peanut butter mixture until everything is well combined. Fold in the chocolate chips and pour the batter into the prepared baking pan, smoothing the top with a spatula.
Bake for 20-25 minutes or until a toothpick comes out clean from the center. Allow the blondies to cool before slicing them into squares.
Make certain to let your blondies cool completely before cutting; this will help them set and guarantee they hold together nicely when you bite into them. If you prefer a fudgier texture, you can remove them from the oven just a minute earlier, but keep a close eye on them!
These blondies can be stored in an airtight container at room temperature for up to a week, or frozen for longer storage. You can also experiment by adding nuts, dried fruits, or even a sprinkle of sea salt on top for added flavor. Enjoy your baking!
Chocolate Avocado Pudding
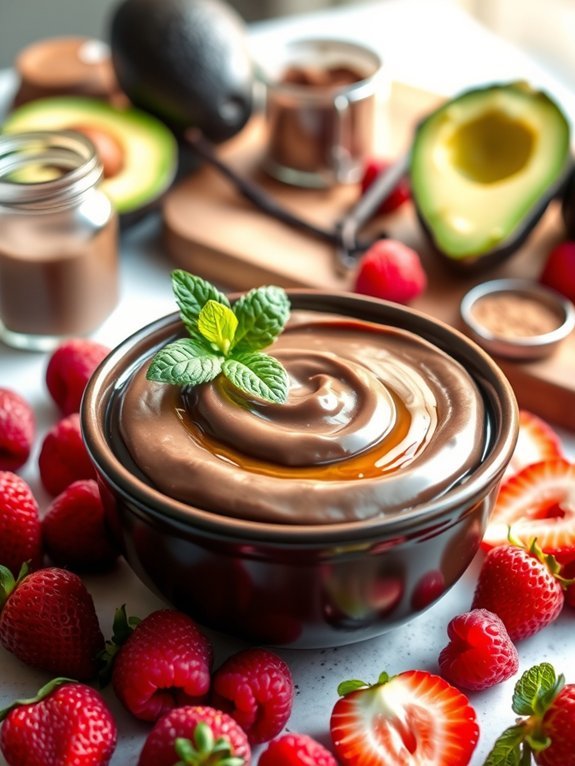
Chocolate avocado pudding is a velvety dessert that proves indulgence can also be healthy. The creamy texture of ripe avocados creates a rich base that pairs wonderfully with cocoa powder, making this treat both decadent and nutritious. This gluten-free option not only satisfies chocolate cravings but also provides healthy fats and fiber, making it a guilt-free pleasure.
Preparing chocolate avocado pudding is incredibly simple and can be a fun activity to do with friends or family. With just a few basic ingredients, you can whip up a delightful dessert in no time. It’s perfect for a dinner party or as a sweet snack to enjoy on a quiet night in. Your guests will be impressed by how delicious and rich this pudding is, and they may never suspect that it’s made with avocado!
- 2 ripe avocados
- 1/2 cup unsweetened cocoa powder
- 1/3 cup honey or maple syrup
- 1/4 cup almond milk (or any milk of choice)
- 1 teaspoon pure vanilla extract
- A pinch of salt
To make the chocolate avocado pudding, simply scoop the flesh from the ripe avocados and place it in a blender or food processor. Add the cocoa powder, honey or maple syrup, almond milk, vanilla extract, and salt. Blend everything together until smooth and creamy, scraping down the sides as necessary.
Adjust the sweetness or consistency by adding more honey and almond milk if desired, then transfer to serving bowls and refrigerate for at least 30 minutes before enjoying.
When making chocolate avocado pudding, it’s important to use ripe avocados for the best texture. If they’re underripe, the pudding may have an unpleasant, chunky consistency. Additionally, you can customize the flavor by adding a pinch of cinnamon or a splash of espresso for a unique twist.
Serve with fresh berries or a dollop of whipped coconut cream for an enhanced presentation and flavor contrast.
Gluten-Free Apple Crisp
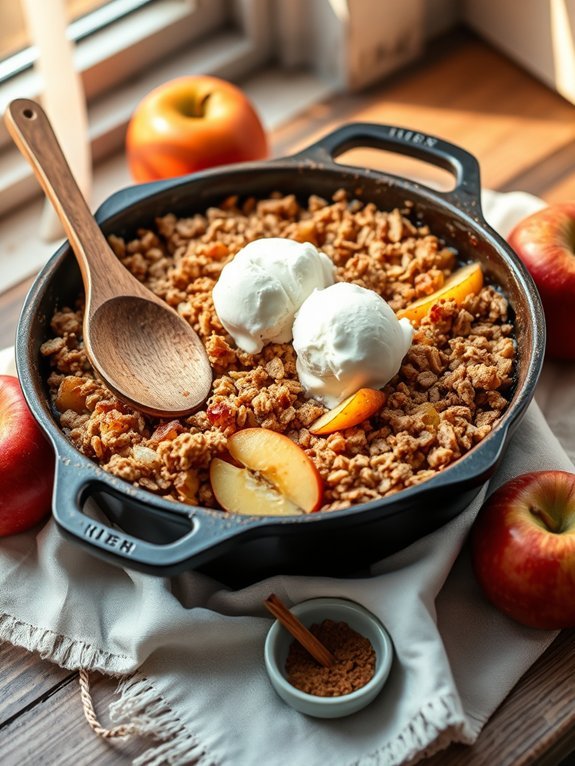
Gluten-free apple crisp is a delightful dessert that celebrates the warm, comforting flavors of baked apples topped with a crunchy, sweet overlay. Perfect for a cozy gathering or a family meal, this recipe showcases the natural sweetness of apples while providing a satisfying crunch from the gluten-free topping.
With a mix of spices like cinnamon and nutmeg, this dish will fill your home with an inviting aroma that beckons everyone to the table.
Using fresh, tart apples works particularly well for this recipe, balancing their acidity with sugar to create the ideal filling. The topping is crafted using gluten-free oats and a medley of flours, ensuring that everyone can enjoy this classic dessert without the worry of gluten. Serve it warm with a scoop of vanilla ice cream or a dollop of whipped cream for an extra touch of indulgence.
Ingredients:
- 4 cups of peeled and sliced Granny Smith apples (or any tart variety)
- 1 tablespoon lemon juice
- 1/2 cup granulated sugar
- 1 teaspoon ground cinnamon
- 1/2 teaspoon ground nutmeg
- 1 cup gluten-free rolled oats
- 1/2 cup gluten-free all-purpose flour
- 1/2 cup packed brown sugar
- 1/2 cup unsalted butter, melted
- 1/4 teaspoon salt
Preheat your oven to 350°F (175°C). In a large mixing bowl, combine the sliced apples, lemon juice, granulated sugar, cinnamon, and nutmeg. Pour the apple mixture into a greased baking dish.
In another bowl, mix together the gluten-free oats, all-purpose flour, brown sugar, melted butter, and salt until crumbly, then evenly spread the topping over the apple mixture. Bake in the preheated oven for 30-35 minutes or until the topping is golden brown and the apples are tender.
When making gluten-free apple crisp, it’s important to choose the right apples for best flavor. Feel free to experiment with a blend of different apple varieties for added depth.
Additionally, using a combination of sugars can enhance the sweetness and caramelization of the top. Be sure to let the apple crisp cool slightly before serving, allowing the juices to thicken for a perfect slice.

