This post may contain affiliate links. Please read our policy page.
If you’re craving something sweet, fruit desserts are the perfect solution. Indulge in a classic Strawberry Shortcake, enjoy the comforting warmth of Peach Cobbler, or savor the delightful crunch of Blueberry Crumble. For something lighter, try a revitalizing Mango Sorbet or a rich Coconut Cream Pie. Each dessert celebrates seasonal flavors and vibrant colors. Keep exploring; there’s a world of fruity delights just waiting for your taste buds!
Strawberry Shortcake
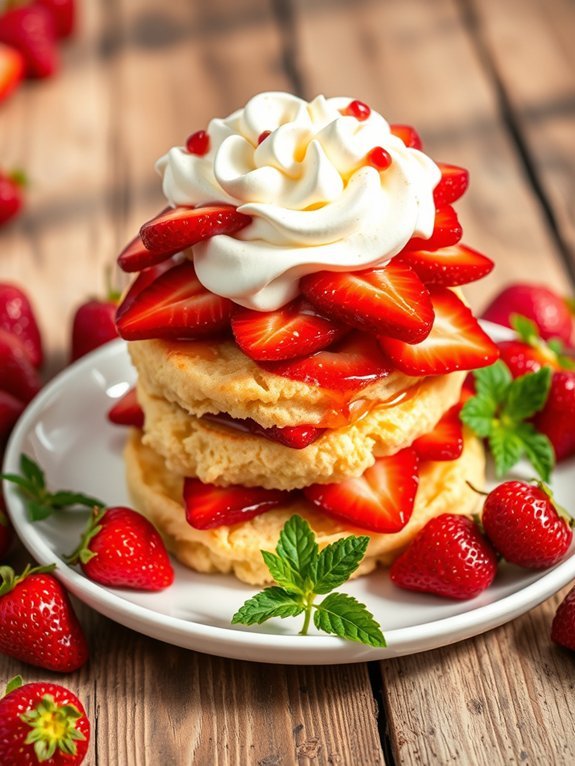
Strawberry shortcake is a delightful and classic dessert that pairs the natural sweetness of strawberries with light, airy whipped cream and fluffy biscuit-like cakes. This indulgent treat is perfect for summer gatherings, celebrations, or simply as a delicious way to enjoy strawberries at their peak ripeness.
The beauty of strawberry shortcake lies not just in its taste but also in its simplicity, making it a favorite among both seasoned bakers and novice cooks alike.
To create the perfect strawberry shortcake, you’ll need fresh strawberries, a light and buttery cake, and a dollop of whipped cream to tie it all together. The key is to allow the strawberries to macerate in sugar, enhancing their natural sweetness and creating a delicious syrup that will soak into the shortcake.
With just a few basic ingredients, you’ll impress your guests with this charming and flavorful dessert.
Ingredients:
- 1 pound fresh strawberries, hulled and sliced
- 1/4 cup granulated sugar
- 2 cups all-purpose flour
- 1 tablespoon baking powder
- 1/2 teaspoon salt
- 1/4 cup unsalted butter, chilled and cubed
- 1 cup heavy cream
- 1/4 cup powdered sugar
- 1 teaspoon vanilla extract
To make the strawberry shortcake, begin by combining the sliced strawberries and granulated sugar in a bowl. Toss well and let them sit for at least 30 minutes to macerate.
Meanwhile, preheat your oven to 425°F (220°C). In a large mixing bowl, whisk together the flour, baking powder, and salt. Cut in the cubed butter until the mixture resembles coarse crumbs. Gradually add 3/4 cup of the heavy cream and mix until a soft dough forms.
Turn the dough onto a floured surface, gently knead it a few times, and then roll it out to about 1-inch thickness. Cut out round biscuits using a biscuit cutter or a glass and place them on a baking sheet. Bake for 12-15 minutes until golden.
While the biscuits cool, whip the remaining heavy cream with powdered sugar and vanilla until soft peaks form. To assemble, slice the biscuits in half, layer with macerated strawberries, and top with whipped cream.
For a delightful twist, consider adding a splash of lemon juice to the strawberries for an extra zing or incorporating different berries like raspberries or blueberries.
You can also experiment with the whipped cream by folding in a bit of mascarpone cheese for a richer texture. When assembling the shortcake, serve immediately after layering to keep the biscuits from becoming too soggy.
Enjoy your strawberry shortcake at room temperature and garnish with fresh mint leaves for an elegant touch!
Recommended Items
Dive into our curated selection of products and equipment to help you create these delightful fruit desserts!
Products
Peach Cobbler
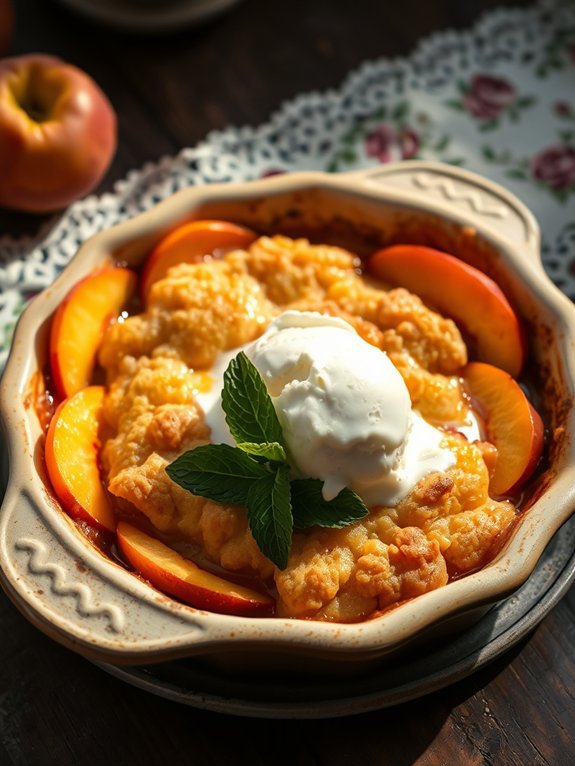
Peach cobbler is a classic dessert that perfectly blends the sweet and tangy flavors of fresh peaches with a buttery, crumbly topping. It originated in the southern United States and has since become a favorite for summer gatherings and family meals. The joy of peach cobbler lies not only in its delightful taste but also in the way it captures the essence of ripe peaches at their peak!
Making peach cobbler is an easy and gratifying process that can be accomplished with just a few simple ingredients. When selecting peaches, look for ones that are ripe but still firm, ensuring they hold their shape during baking while providing a delicious burst of flavor. Served warm with a scoop of vanilla ice cream, peach cobbler is a comforting dish that brings nostalgia and satisfaction to every bite.
Ingredients:
- 4 cups fresh peaches, peeled and sliced
- 1 cup granulated sugar
- 1 teaspoon ground cinnamon
- 1 teaspoon vanilla extract
- 2 cups all-purpose flour
- 1 tablespoon baking powder
- 1/2 teaspoon salt
- 1 cup milk
- 1/2 cup unsalted butter, melted
In a large mixing bowl, combine the sliced peaches with 1/2 cup of sugar, cinnamon, and vanilla extract. Allow this mixture to sit while you preheat your oven to 375°F (190°C).
In a separate bowl, whisk together the flour, remaining sugar, baking powder, and salt. Stir in the milk and melted butter until you have a smooth batter.
Pour the peach mixture into a greased baking dish, and then pour the batter over the top without stirring. Bake in the preheated oven for about 40-45 minutes, or until the batter is golden brown and a toothpick inserted into the cobbler comes out clean.
For the best results, make sure to use fresh, ripe peaches for an unbeatable flavor. If the peaches aren’t sweet enough, feel free to adjust the amount of sugar to your preference.
Additionally, you can add a squeeze of lemon juice to the peach mixture for a tangy kick or experiment with different spices like nutmeg for a unique twist. For an extra indulgent dessert, serve with whipped cream or ice cream for the perfect finishing touch!
Proposed Recipe
Blueberry Crumble
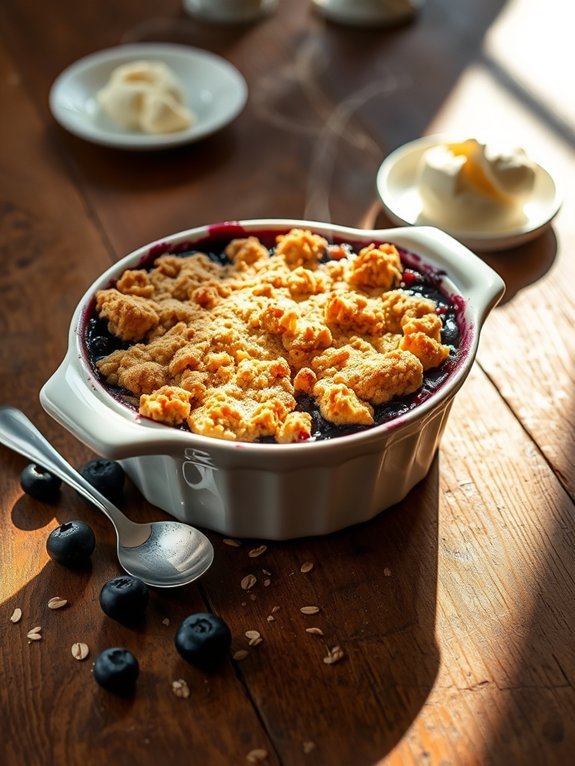
Blueberry crumble is a delightful dessert that showcases the natural sweetness of fresh blueberries, paired with a buttery, crumbly topping that adds a satisfying crunch.
This classic dish is perfect for summer gatherings, barbecues, or cozy gatherings during the colder months. It’s easy to prepare and can be served warm with a scoop of vanilla ice cream or a dollop of whipped cream for an extra special touch.
The beauty of a blueberry crumble lies in its simplicity. With just a few basic ingredients, you can whip up this dessert in no time. Blueberries are the star of the show, bursting with flavor and nutrients, making this treat not only delicious but also a bit healthier than many other desserts.
Whether you’re using fresh or frozen blueberries, this crumble is sure to please everyone at the table.
Ingredients:
- 4 cups fresh or frozen blueberries
- 1 cup granulated sugar
- 1 tablespoon lemon juice
- 1 tablespoon cornstarch
- 1 teaspoon cinnamon
- 1 cup rolled oats
- 1 cup all-purpose flour
- 1/2 cup packed brown sugar
- 1/2 cup unsalted butter, melted
- Pinch of salt
Preheat your oven to 350°F (175°C). In a large bowl, combine the blueberries, granulated sugar, lemon juice, cornstarch, and cinnamon, mixing well to guarantee all the blueberries are coated.
Pour this mixture into a greased 9×13-inch baking dish. In another bowl, combine the rolled oats, flour, brown sugar, melted butter, and salt, stirring until crumbly.
Sprinkle the oat mixture evenly over the blueberry filling. Bake for 35-40 minutes, or until the crumble is golden brown and the blueberries are bubbling.
For best results, allow the blueberry crumble to cool for about 10 minutes before serving. This will help the juices settle a bit and make for cleaner serving.
If you want to add a twist, consider mixing in some chopped nuts for added crunch or a splash of vanilla extract to the blueberry mixture for extra flavor.
This dessert stores well in the refrigerator for a few days, making it perfect for leftovers. Enjoy your sweet creation!
Mango Sorbet
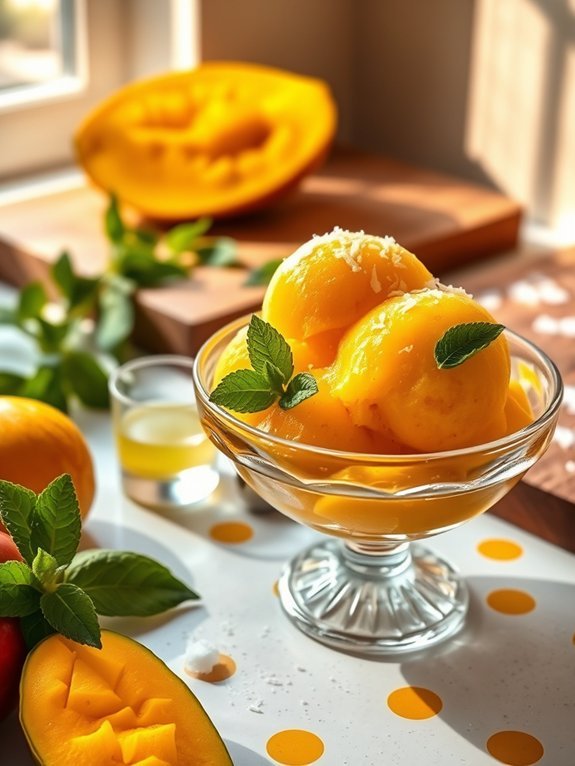
Mango sorbet is a revitalizing and vibrant dessert that captures the essence of summer in every spoonful. It combines the sweet, tropical flavor of ripe mangoes with a smooth and creamy texture, providing the perfect treat for hot days or as a light finish to any meal. The beauty of mango sorbet lies in its simplicity—requiring just a few ingredients, it can be easily whipped up in a matter of minutes.
To make your own mango sorbet, you need to choose perfectly ripe mangoes for the best flavor. Look for mangoes that yield slightly to pressure, indicating they’re soft and sweet inside. This simple dessert can be made with or without an ice cream maker, making it versatile for any kitchen setting. Serve it in bowls or cones, or even as a topping over other desserts for a delightful twist.
- 4 ripe mangoes, peeled and diced
- 1/2 cup granulated sugar
- 1/4 cup water
- 1 tablespoon lime juice
- Pinch of salt
In a blender or food processor, combine the diced mangoes, sugar, water, lime juice, and salt. Blend until smooth and creamy, ensuring all the sugar is dissolved.
If you have an ice cream maker, pour the mixture into it and churn according to the manufacturer’s instructions until it reaches a soft-serve consistency. If you don’t have an ice cream maker, transfer the mango blend into a shallow container and freeze for about 4-6 hours, stirring every 30 minutes to break up ice crystals until the mixture is fluffy and sorbet-like.
For an extra touch of flavor, consider adding a splash of coconut milk for creaminess or a handful of mint leaves for brightness when blending.
Using very ripe mangoes will enhance the sweetness of your sorbet, so don’t rush the ripening process. Additionally, for a unique twist, try combining mango with other fruits like pineapple or passionfruit to create a tropical flavor explosion.
Enjoy your revitalizing mango sorbet on a sweltering day or as a delightful end to any meal!
Raspberry Chocolate Tart

Raspberry Chocolate Tart is a delectable dessert that combines the rich, velvety flavor of chocolate ganache with the tart and revitalizing essence of fresh raspberries. This harmonious blend creates an irresistible treat that captivates the senses and is perfect for special occasions or a delightful end to a lavish meal.
With its elegant presentation and delightful taste, the Raspberry Chocolate Tart is sure to impress family and friends.
Making this tart is simpler than you might think. With a buttery, crumbly crust that holds a luscious chocolate filling, topped with juicy raspberries, it’s a balance of decadence and bright flavors. Serve it chilled or at room temperature, and watch as everyone savors each bite, indulging in the perfect combination of sweet and tart.
Ingredients:
- 1 ½ cups all-purpose flour
- ½ cup unsweetened cocoa powder
- ½ cup powdered sugar
- ½ teaspoon salt
- ½ cup unsalted butter, cold and cubed
- 1 large egg yolk
- 2 tablespoons cold water
- 1 cup heavy cream
- 8 ounces semisweet chocolate, chopped
- 1 cup fresh raspberries
- Mint leaves (for garnish)
To prepare the Raspberry Chocolate Tart, start by preheating your oven to 350°F (175°C). In a large bowl, whisk together the flour, cocoa powder, powdered sugar, and salt.
Next, add the cold, cubed butter and mix using a pastry cutter or your fingertips until the mixture resembles coarse crumbs. Stir in the egg yolk and add cold water, mixing until the dough comes together. Press the dough into a tart pan, making sure it covers the bottom and sides evenly. Bake for about 15 minutes and allow it to cool.
In a saucepan, heat the heavy cream until it simmers, then pour it over the chopped chocolate. Let it sit for a few minutes before stirring until smooth. Pour the ganache into the cooled tart shell and evenly distribute the raspberries on top. Chill in the fridge for at least an hour before serving.
When making the Raspberry Chocolate Tart, verify your chocolate ganache is smooth by letting the cream sit on the chocolate for sufficient time before mixing. Using fresh raspberries is key for flavor, but if they’re out of season, consider using frozen ones; just make sure to thaw and drain excess moisture.
To make your tart even more visually appealing, dust it lightly with powdered sugar before serving and garnish with fresh mint leaves. Enjoy your decadent dessert!
Pineapple Upside-Down Cake
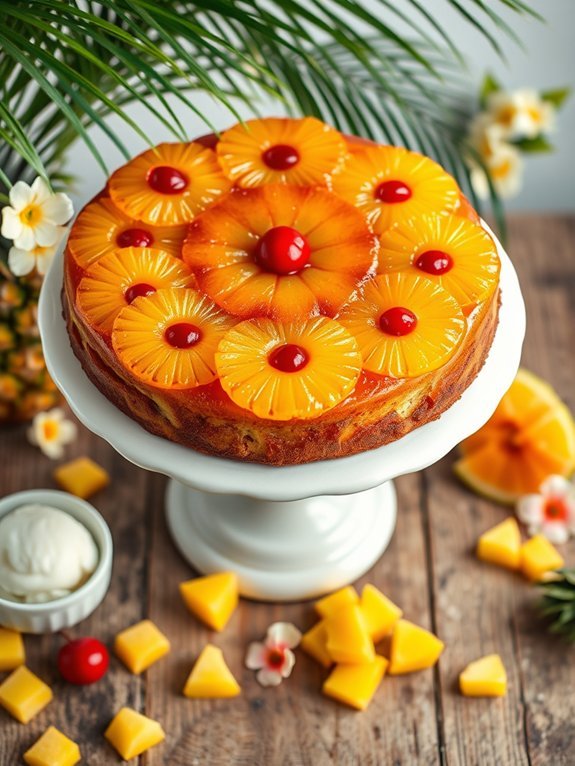
Pineapple Upside-Down Cake is a classic dessert that combines the sweet, tropical flavor of pineapple with a moist, buttery cake. Originating in the United States in the 1920s, this cake has become a beloved treat for celebrations and casual gatherings alike. The upside-down presentation not only enhances its visual appeal but also allows the caramelized pineapple to shine through, creating a delightful topping that contrasts beautifully with the tender cake beneath.
Making a Pineapple Upside-Down Cake is easier than you might think! It requires a few simple ingredients and some basic baking skills. The process begins with preparing the fruit and indulgent caramel topping, followed by whipping up the cake batter. In no time, you’ll have a stunning dessert that’s sure to impress your family and friends. Serve it warm or at room temperature, and don’t forget a scoop of vanilla ice cream for the perfect finish!
- 1 can (20 oz) sliced pineapple in syrup
- 1/2 cup (1 stick) unsalted butter
- 1 cup packed brown sugar
- Maraschino cherries (optional)
- 1 1/2 cups all-purpose flour
- 1 cup granulated sugar
- 1/2 cup milk
- 3/4 cup vegetable oil
- 3 large eggs
- 2 tsp baking powder
- 1 tsp vanilla extract
- 1/4 tsp salt
Preheat the oven to 350°F (175°C). In a 9-inch round cake pan, melt the butter over low heat and sprinkle the brown sugar evenly on top. Arrange the pineapple slices over the sugar mixture, placing a cherry in the center of each slice if desired.
In a mixing bowl, combine the flour, granulated sugar, milk, oil, eggs, baking powder, vanilla, and salt. Beat until smooth and pour the batter over the pineapple arrangement in the cake pan. Bake for 30-35 minutes, or until a toothpick inserted into the center comes out clean. Let it cool for a few minutes before inverting onto a serving plate.
When making Pineapple Upside-Down Cake, be cautious not to overmix the batter, as this can lead to a dense texture. Additionally, you can experiment with different fruits, such as peaches or cherries, to customize the flavor of your cake.
To guarantee an easy release from the pan, grease it well with butter and sprinkle a little flour before adding the fruit and batter. Finally, for added flavor, consider incorporating a splash of rum or coconut extract into the cake batter for a tropical twist!
Key Lime Pie
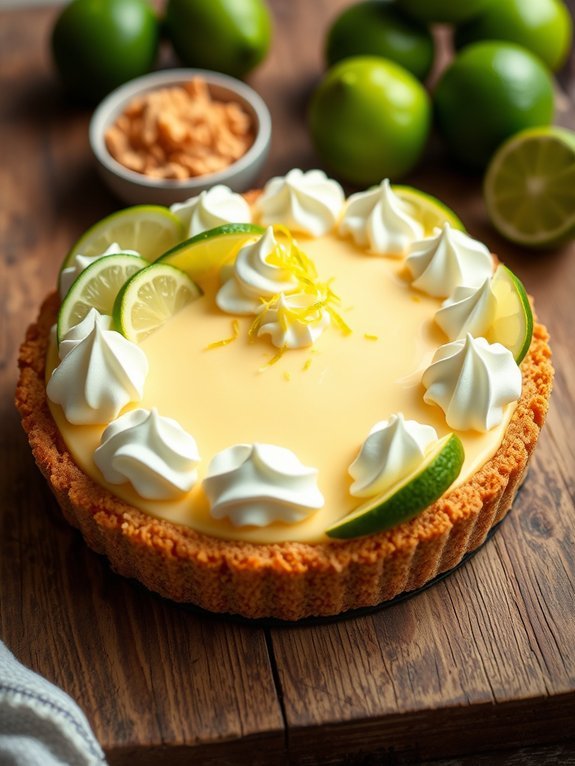
Key Lime Pie is a timeless dessert that combines the tangy flavor of key limes with a rich, creamy filling, all nestled in a buttery graham cracker crust. This dessert isn’t only invigorating but also easy to make, making it a popular choice for gatherings and celebrations. The key to a great Key Lime Pie lies in using fresh key lime juice, which adds a vibrant tartness that beautifully balances the sweetness of the filling.
Preparing this pie is a straightforward process that will impress your friends and family. The combination of zesty lime and whipped topping creates a light and airy texture, while the graham cracker crust provides a satisfying crunch. Once you master this recipe, you’ll find yourself making it for every occasion, from summer barbecues to holiday dinners.
Ingredients:
- 1 ½ cups graham cracker crumbs
- ½ cup granulated sugar
- ½ cup unsalted butter, melted
- 4 large egg yolks
- 1 can (14 oz) sweetened condensed milk
- ½ cup key lime juice (freshly squeezed is best)
- Zest of 2 key limes
- 1 cup heavy cream
- 2 tablespoons powdered sugar
- Lime wedges and additional zest for garnish (optional)
Preheat your oven to 350°F (175°C). In a medium bowl, combine the graham cracker crumbs, sugar, and melted butter. Mix well and press the mixture into the bottom and up the sides of a 9-inch pie plate. Bake for 8-10 minutes or until the crust is lightly golden.
In another bowl, whisk together the egg yolks, sweetened condensed milk, key lime juice, and lime zest until smooth. Pour this filling into the prepared crust and bake for an additional 15 minutes. Allow the pie to cool, then refrigerate for at least 2 hours.
Before serving, whip the heavy cream with the powdered sugar until stiff peaks form and spread it over the pie. Garnish with lime wedges and additional zest if desired.
For the best results, make certain your key limes are fresh and ripe, as they provide the best flavor. If you can’t find key limes, Persian limes can be used as a substitute, though the taste will differ slightly. Preparing the pie a day in advance allows the flavors to meld beautifully, and chilling it overnight makes it extra invigorating.
When whipping the cream, make certain your mixing bowl and beaters are chilled for maximum volume. Enjoy this vibrant dessert on a warm day for a delightful finish to any meal!
Cherry Clafoutis
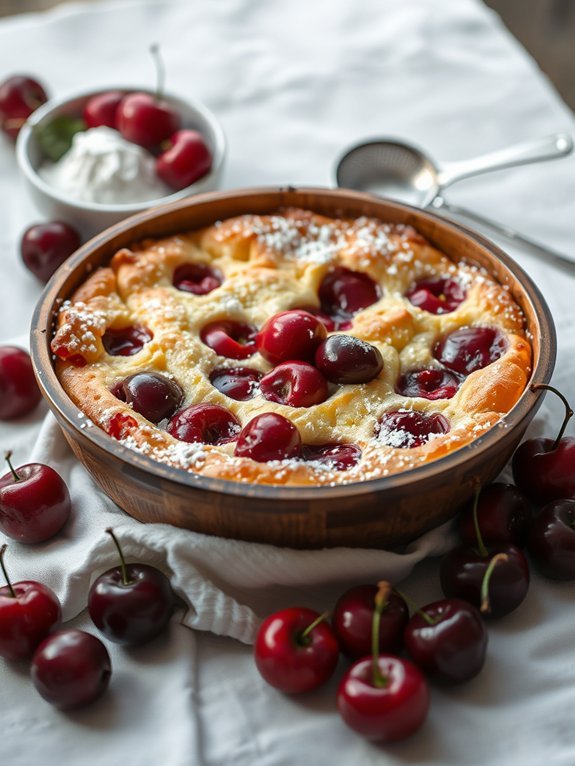
Cherry clafoutis is a classic French dessert that beautifully showcases the sweet-tart flavor of ripe cherries. This custard-like dish is simple to make yet stunning in presentation. Traditionally, clafoutis is made with black cherries, but you can use any variety or even mix them for a delightful twist.
It’s a perfect dessert for summer gatherings, offering a light and airy texture that pairs wonderfully with a scoop of vanilla ice cream or a dollop of whipped cream. The beauty of cherry clafoutis lies in its versatility. You can easily customize it by adding different fruits, spices, or even a splash of liqueur to elevate the flavors.
While often served warm, it’s equally enjoyable at room temperature. With its delightful blend of creamy and fruity elements, this dessert is sure to impress your guests and leave them yearning for more.
Ingredients:
- 1 pound (about 450g) fresh cherries, pitted
- 3 large eggs
- 1 cup whole milk
- 1/2 cup granulated sugar
- 1 teaspoon vanilla extract
- 1/4 teaspoon almond extract (optional)
- 1/2 cup all-purpose flour
- 1/4 teaspoon salt
- Butter or cooking spray (for greasing the baking dish)
- Powdered sugar (for dusting)
Preheat your oven to 350°F (175°C). Grease a 9-inch round or square baking dish with butter or cooking spray. Spread the pitted cherries evenly across the bottom of the dish. In a mixing bowl, whisk together the eggs, milk, granulated sugar, vanilla extract, almond extract (if using), flour, and salt until smooth.
Pour the batter over the cherries, ensuring they’re well-covered. Bake for about 35-40 minutes, or until the clafoutis is puffed and golden brown around the edges, and a toothpick inserted in the center comes out clean.
For the best results, use fresh, in-season cherries that are ripe but firm. If you prefer a more intense cherry flavor, consider macerating the pitted cherries in a bit of sugar and let them sit for 30 minutes before adding them to the batter.
Also, make sure to serve the clafoutis warm or at room temperature; it can be dusted with powdered sugar just before serving for a touch of elegance. Enjoy your delightful creation!
Banana Foster
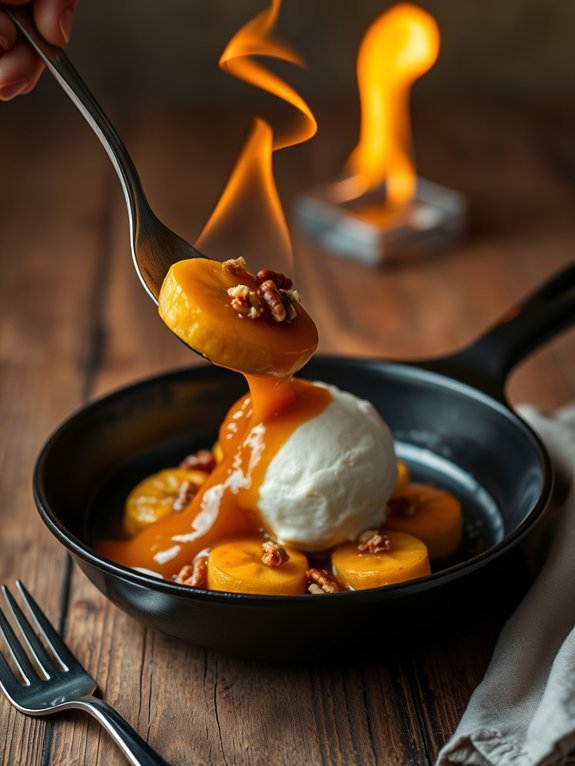
Banana Foster is a delightful dessert that originated in New Orleans, known for its rich flavors and dramatic presentation. This delectable dish features ripe bananas sautéed in a luscious sauce made from butter, brown sugar, cinnamon, and rum, which is then flambéed to create a mesmerizing spectacle. Traditionally served over vanilla ice cream, Banana Foster isn’t only a treat for the taste buds but also an adventurous way to finish off a meal.
To create the perfect Banana Foster, selecting ripe bananas is key. The bananas should be yellow with just a few brown spots to guarantee they’re sweet and soft enough to absorb the sauce’s rich flavor. The flambé process, while it may seem intimidating, adds a depth of flavor and an exciting visual element, making it a perfect dish for entertaining guests. With just a few simple ingredients and steps, you can easily impress your friends and family with this classic New Orleans dessert.
- 2 ripe bananas
- 1/4 cup unsalted butter
- 1/2 cup brown sugar
- 1/2 teaspoon ground cinnamon
- 1/4 cup dark rum
- Vanilla ice cream (for serving)
- Optional: chopped walnuts or pecans for garnish
Start by slicing the bananas in half lengthwise, then crosswise into bite-sized pieces. In a skillet, melt the butter over medium heat and stir in the brown sugar and cinnamon until it bubbles and forms a syrup. Add the banana slices and cook for 2-3 minutes, until they soften.
Carefully add the rum and ignite it with a long lighter or match, allowing the flames to burn off the alcohol for about 30 seconds. Once the flames subside, spoon the warm banana mixture over scoops of vanilla ice cream and serve immediately.
When making Banana Foster, it’s important to confirm you have a good quality rum for the best flavor. If you prefer not to flambé, you can simply skip that step and allow the bananas to cook in the syrup until they’re soft and caramelized.
Be cautious when igniting the alcohol; keep a fire extinguisher nearby just in case, and avoid using low-quality rum, as it greatly influences the taste of the final product. Finally, feel free to add a little extra flair with nuts or whipped cream for added texture and flavor!
Watermelon Granita
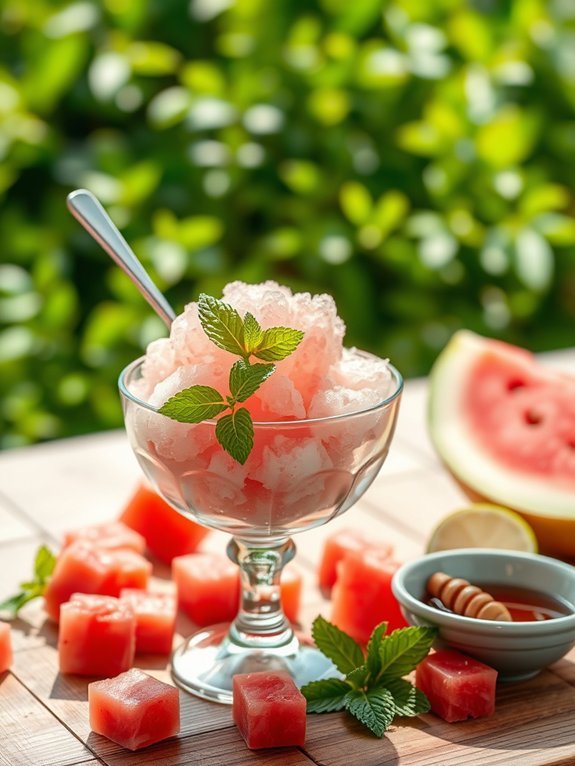
Watermelon granita is a delightful, revitalizing dessert that’s perfect for hot summer days. This Italian frozen treat is light, airy, and packed with the natural sweetness of fresh watermelon, making it an ideal way to cool down while enjoying a healthy indulgence. The beautiful pink hue and icy texture make it a great choice for gatherings or simply as a personal refreshment.
Making watermelon granita is simple and requires minimal ingredients and equipment. With just a few steps, you can transform juicy watermelon into a beautifully icy dessert that’s sure to impress family and friends. Whether served in a bowl or scooped into elegant cups, watermelon granita provides a tasty and colorful end to any meal.
Ingredients:
- 4 cups ripe watermelon, cubed and seeded
- 2 tablespoons fresh lime juice
- 2 tablespoons honey or agave syrup (optional)
- Pinch of salt
- Fresh mint leaves (for garnish, optional)
To prepare the granita, start by placing the cubed watermelon in a blender or food processor, and blend until smooth. If desired, strain the mixture through a fine mesh sieve to remove the pulp for a smoother texture. Then, mix in the lime juice, honey, and a pinch of salt until combined.
Pour the mixture into a shallow dish and place it in the freezer. Every 30 minutes, use a fork to scrape the mixture, breaking up any ice crystals, until the granita is fully frozen and fluffy, typically taking around 3 hours.
For the best results, be sure to use ripe, sweet watermelon as this will enhance the flavor of your granita. If you’re short on time, you can use pre-cut watermelon from the grocery store. Adjust the sweetness by adding more or less honey to suit your taste, and feel free to get creative by adding other fruits or herbs to the blend for a unique twist.
Serve the granita in chilled bowls or glasses for an extra revitalizing touch, and don’t forget to garnish with fresh mint leaves for an aromatic finish.
Lemon Meringue Tart
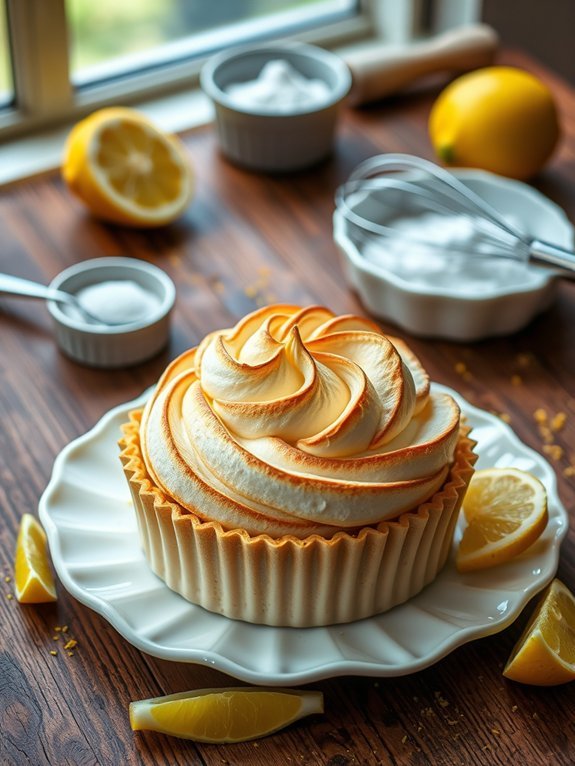
Lemon Meringue Tart is a classic dessert that showcases a perfect balance of tangy lemon curd and sweet, fluffy meringue on a buttery tart shell. This delectable treat is perfect for any occasion, whether it’s a family gathering or a special celebration. The bright flavor of the lemons pairs beautifully with the light texture of the meringue, creating a delightful contrast that’s sure to impress your guests.
Making a Lemon Meringue Tart from scratch may seem intimidating, but with a little patience, you can create a stunning dessert that will wow everyone at the table. The key to a successful tart lies in the quality of the ingredients and the precision of your technique.
From the buttery shortcrust pastry to the zesty lemon filling and the cloud-like meringue, each element plays a critical role in achieving the perfect dessert. Get ready to plunge into the world of baking with this irresistible tart!
- 1 ½ cups all-purpose flour
- ½ cup unsalted butter, chilled and cubed
- ¼ cup powdered sugar
- 1 egg yolk
- 3 tablespoons cold water
- 1 cup granulated sugar
- ½ cup fresh lemon juice
- 2 tablespoons lemon zest
- 3 large eggs
- 2 tablespoons cornstarch
- ¼ teaspoon salt
- 4 large egg whites
- ½ teaspoon cream of tartar
Preheat your oven to 350°F (175°C). For the crust, combine the flour, butter, and powdered sugar in a food processor, and blend until the mixture resembles coarse crumbs. Add the egg yolk and cold water, and pulse until the dough comes together.
Roll the dough out and fit it into a tart pan. Prick the bottom with a fork and bake for 15 minutes or until lightly golden. In a saucepan, whisk together granulated sugar, lemon juice, lemon zest, eggs, cornstarch, and salt. Cook over medium heat, stirring constantly until thickened. Pour the lemon curd into the tart crust.
For the meringue, beat the egg whites with cream of tartar until stiff peaks form, then gradually add sugar until glossy. Spread the meringue over the lemon filling and bake for another 10-15 minutes, until golden brown.
An essential tip for a successful Lemon Meringue Tart is to make certain that the lemon curd is fully cooled before adding the meringue; this will help keep the meringue from weeping. Additionally, make sure to spread the meringue to the edges of the tart crust to seal it properly, preventing shrinkage as the tart cools.
For an extra touch, consider using a kitchen torch to achieve a beautifully caramelized meringue topping that will elevate the visual appeal of your dessert. Enjoy your delightful creation!
Apple Galette
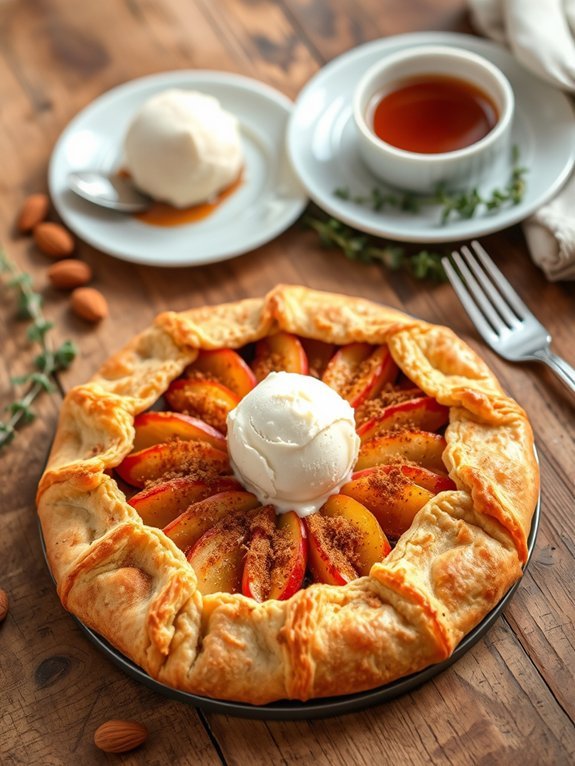
Apple galette is a rustic dessert that celebrates the essence of fresh apples while wrapping them in a flaky, buttery crust. This free-form tart isn’t only visually appealing but also incredibly simple to prepare, making it an ideal choice for both novice and seasoned bakers. The combination of sweet and tart apples, along with a hint of cinnamon, creates a delicious filling that’s bound to impress family and friends.
When making an apple galette, the key is to use high-quality apples that provide a good balance of sweetness and tartness. Varieties like Granny Smith, Honeycrisp, or Braeburn work particularly well. The crust is the backbone of this recipe, and a homemade dough adds an unparalleled richness that pre-made versions simply can’t match. Serve warm from the oven with a scoop of vanilla ice cream or a dollop of whipped cream for an irresistible treat.
Ingredients:
- 1 1/2 cups all-purpose flour
- 1/2 cup unsalted butter, chilled and diced
- 1/4 cup granulated sugar
- 1/4 teaspoon salt
- 4 to 6 tablespoons ice water
- 3 to 4 medium apples, peeled, cored, and sliced
- 1 tablespoon lemon juice
- 1 teaspoon ground cinnamon
- 1 tablespoon brown sugar
- 1 egg, beaten (for egg wash)
To prepare the apple galette, start by making the crust. In a large bowl, mix the flour, sugar, and salt. Add the chilled, diced butter and work it into the dry ingredients using a pastry cutter or your fingers until the mixture resembles coarse crumbs.
Slowly add ice water, one tablespoon at a time, mixing until the dough just comes together. Shape the dough into a disk, wrap it in plastic wrap, and refrigerate for at least 30 minutes.
Meanwhile, in another bowl, toss the sliced apples with lemon juice, cinnamon, and brown sugar. Preheat your oven to 400°F (200°C), then roll out the dough on a floured surface into a rough circle. Transfer it to a parchment-lined baking sheet, pile the apple mixture into the center, leaving a border for folding, then fold the edges of the crust over the apples.
Brush the crust with beaten egg for a golden finish, and bake for about 30-35 minutes or until the crust is golden and the apples are tender.
When making an apple galette, it’s important to serve it fresh for the best flavor and texture. You can experiment with different apple varieties to suit your taste, and consider adding nuts or raisins to the filling for added texture and flavor.
If you have leftover galette, it can be stored in the refrigerator for a few days, but reheating it in the oven will help restore some of the crust’s crispiness. Don’t hesitate to drizzle a bit of caramel sauce over the top for an extra indulgent touch!
Coconut Cream Pie
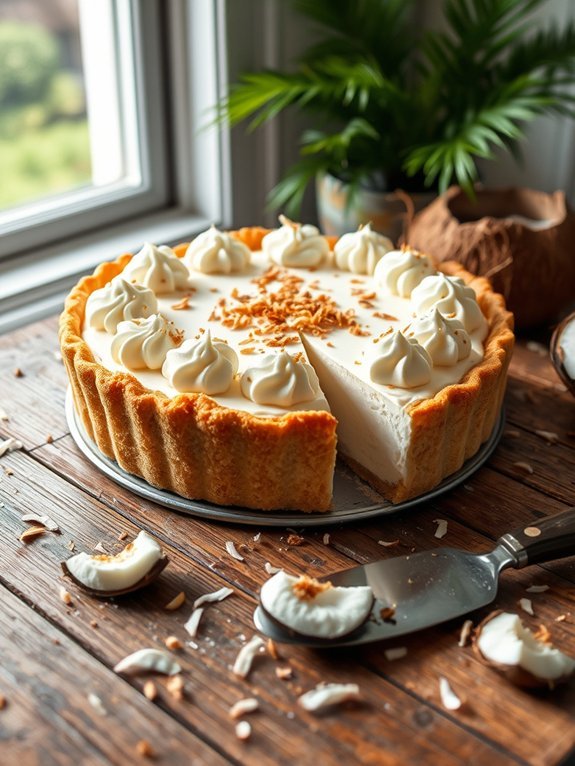
Coconut Cream Pie is a delightful dessert that marries the rich, creamy goodness of coconut with a flaky crust, making it a favorite among dessert lovers. It’s an indulgent treat perfect for any occasion, whether you’re celebrating a special event or simply craving something sweet.
The combination of coconut milk, whipped cream, and toasted coconut flakes delivers a tropical experience that’s both revitalizing and satisfying.
This pie not only tastes delicious but is also simple to prepare. With a few basic ingredients and a bit of patience, you can whip up a Coconut Cream Pie that rivals those from your favorite bakery. The sweet and creamy filling pairs beautifully with the crisp crust, making for a dessert that’s sure to impress your family and friends.
Ingredients:
- 1 pre-made pie crust (9-inch)
- 1 cup sweetened shredded coconut
- 2 cups coconut milk
- 3/4 cup sugar
- 1/4 cup cornstarch
- 1/4 teaspoon salt
- 4 large egg yolks
- 2 tablespoons unsalted butter
- 1 teaspoon vanilla extract
- 1 cup heavy whipping cream
- 2 tablespoons powdered sugar
- Additional toasted coconut for garnish
To prepare the pie, first, preheat your oven to 350°F (175°C). Place the pie crust into the oven and bake for about 10-12 minutes or until golden brown.
While the crust is baking, combine the coconut milk, sugar, cornstarch, and salt in a saucepan over medium heat. Whisk continuously until the mixture starts to thicken and bubble.
In a separate bowl, whisk the egg yolks, then gradually add a small amount of the hot mixture into the yolks to temper them. Return the mixture to the saucepan and cook for another 2-3 minutes.
Add butter and vanilla extract, then fold in the shredded coconut. Pour the filling into the baked crust and refrigerate for at least 4 hours.
Before serving, whip the heavy cream with powdered sugar until stiff peaks form and spread on top of the pie. Garnish with toasted coconut flakes.
For the best results, verify that your ingredients are at room temperature before starting the recipe, particularly the egg yolks and coconut milk. This helps in achieving a smoother custard.
Additionally, to toast coconut, simply spread it on a baking sheet and bake in a 350°F oven for about 5-7 minutes, stirring occasionally, until golden brown. Keep a close eye on it, as it can burn quickly.
Finally, for a more intense coconut flavor, consider using coconut extract in addition to the vanilla. Enjoy your delicious Coconut Cream Pie!
Plum Crisp
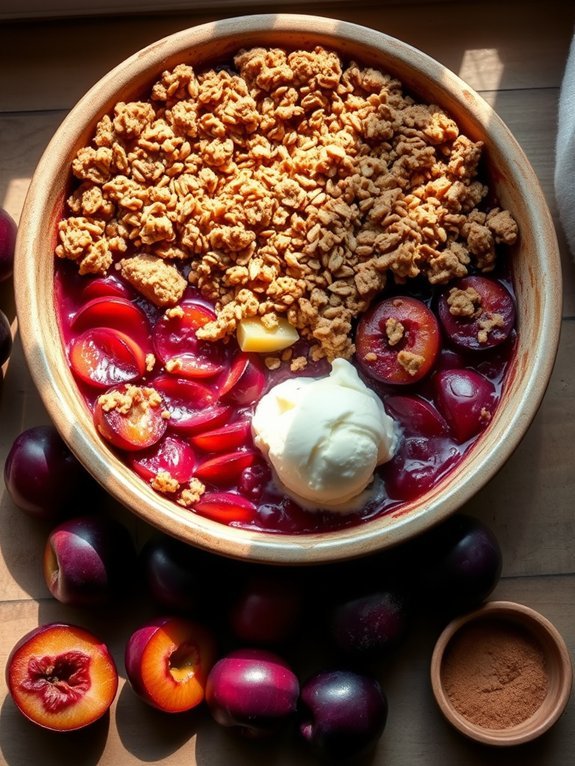
Plum crisp is a delightful dessert that perfectly combines the tart sweetness of fresh plums with a crunchy, buttery topping. Ideal for late summer and early fall when plums are at their peak, this dish isn’t only easy to prepare but also a great way to showcase the fruit’s natural flavors. The warm, comforting aroma of baked plums paired with a golden crumble will fill your kitchen, making it a perfect treat for gatherings or a cozy family dinner at home.
To make a plum crisp, you’ll need ripe, juicy plums, which contribute a vibrant splash of color and flavor to the dish. The simple crumble topping, made with old-fashioned oats, flour, and brown sugar, adds a textural contrast that makes each bite satisfying. Serve it warm, perhaps with a scoop of vanilla ice cream or a dollop of whipped cream, for a truly indulgent experience.
Ingredients:
- 4 cups ripe plums, pitted and sliced
- 1/2 cup granulated sugar
- 1 tablespoon lemon juice
- 1 teaspoon vanilla extract
- 1 cup all-purpose flour
- 1 cup old-fashioned oats
- 1/2 cup packed brown sugar
- 1/2 teaspoon cinnamon
- 1/4 teaspoon salt
- 1/2 cup unsalted butter, melted
Preheat your oven to 350°F (175°C). In a mixing bowl, combine the sliced plums with granulated sugar, lemon juice, and vanilla extract, then pour this mixture into a greased 9×13-inch baking dish.
In another bowl, stir together the flour, oats, brown sugar, cinnamon, and salt. Drizzle the melted butter over this dry mixture and mix until crumbly. Sprinkle the crumble evenly over the plums and bake for about 30-35 minutes, or until the topping is golden brown and the plum filling is bubbling.
For the best results, verify the plums are ripe and at their peak freshness, as this will enhance the flavor of the crisp.
You can easily substitute or mix in other fruits, such as peaches or berries, for a different taste. If you like, add a pinch of nutmeg for extra warmth or fold in some chopped nuts for added crunch in the topping.
Remember that the crisp can be made ahead of time; just reheat it in the oven before serving!
Fruit Salad With Honey Lime Dressing
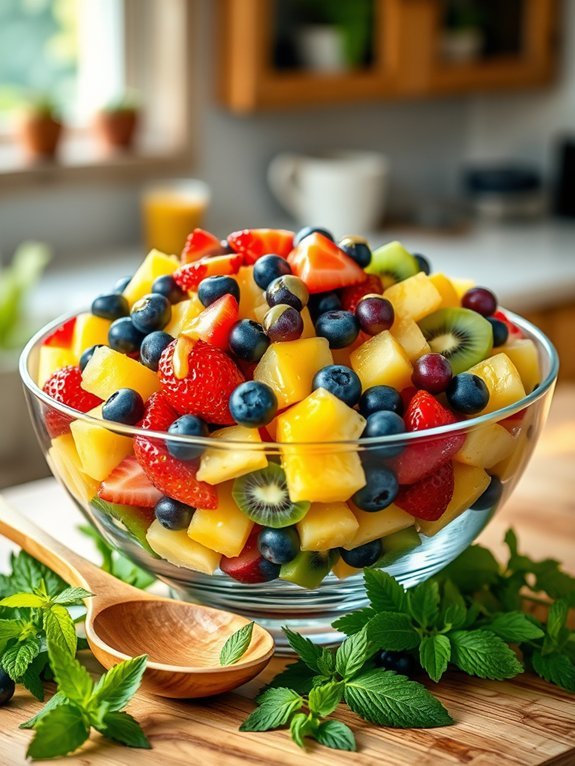
Fruit salad is a delightful way to enjoy a variety of fresh fruits, and it can be made even more delicious with a simple yet flavorful dressing. The addition of a honey lime dressing elevates the natural sweetness and adds a zesty kick that ties all the ingredients together beautifully. This dish is perfect for any occasion, whether it’s a summer barbecue, a light dessert after dinner, or a healthy snack to enjoy during the day.
Making a fruit salad with honey lime dressing isn’t only easy but also offers you the flexibility to use whatever seasonal fruits you have on hand. From strawberries and blueberries to pineapple and kiwi, this salad can be customized to your taste. Its vibrant colors and invigorating flavors make it an appealing choice for both kids and adults, guaranteeing that everyone can find something they love.
- 2 cups strawberries, hulled and sliced
- 1 cup blueberries
- 1 cup pineapple, diced
- 1 cup kiwi, peeled and sliced
- 1 cup grapes, halved
- 1 lime, juiced
- 2 tablespoons honey
- 1 tablespoon fresh mint, chopped (optional)
In a large bowl, combine all the chopped fruit. In a separate small bowl, whisk together the lime juice and honey until well combined. Drizzle the honey lime dressing over the fruit and gently toss everything together to confirm the fruit is evenly coated.
Allow the fruit salad to sit for about 10-15 minutes to let the flavors meld before serving.
When preparing your fruit salad, feel free to experiment with different fruits based on what you enjoy or have on hand. For a unique twist, consider adding a sprinkle of chili powder for a kick, or mix in some toasted nuts for added crunch.
Serving the fruit salad chilled can enhance its invigorating nature, so consider refrigerating it for a short time before enjoying it. If making in advance, add the dressing just before serving to keep the fruit fresh and vibrant.


