This post may contain affiliate links. Please read our policy page.
Looking to elevate your meals? Try mouthwatering pairings like sweet bacon-wrapped dates and revitalizing watermelon with feta. Indulge in creamy mac and cheese enhanced with truffle oil or earthy roasted beets paired with tangy goat cheese. For a bold contrast, enjoy dark chocolate with a sprinkle of sea salt or the zing of sriracha balanced with honey’s sweetness. Each combo brings out unique flavors that’ll have you craving more. Discover more delicious ideas waiting for you!
Sweet and Savory: Bacon-Wrapped Dates

Bacon-wrapped dates are a delightful treat that perfectly blend sweet and savory flavors. These delectable bites aren’t only easy to prepare but also make for a fantastic appetizer at parties or a mouthwatering snack for any occasion. The combination of the natural sweetness of the dates with the crispy, salty bacon creates a delightful contrast that’s sure to please your taste buds.
Add in a hint of nuttiness from optional fillings like cheese or almonds, and you’ve got a dish that stands out for its simplicity and sophistication. To elevate your flavor experience, consider experimenting with different types of bacon—smoked, maple, or even spicy bacon can enhance the profile of the dish.
Additionally, serving these bites alongside a dip, like a balsamic reduction or yogurt sauce, adds another layer of taste that complements the rich flavors of the bacon and dates. Whether you’re hosting a gathering or enjoying a cozy night in, bacon-wrapped dates are a versatile dish that’s bound to impress.
Ingredients:
- 20 Medjool dates, pitted
- 10 slices of bacon, cut in half
- Optional: 20 almonds or goat cheese for stuffing (if desired)
- Toothpicks
- Black pepper (to taste)
Wrap each date with a half slice of bacon, securing it with a toothpick. If you’re using almonds or cheese, stuff each date with one before wrapping it in bacon. Preheat your oven to 400°F (200°C) and line a baking sheet with foil or parchment paper for easy cleanup.
Place the wrapped dates on the baking sheet, making sure they aren’t overcrowded, and sprinkle with black pepper. Bake for about 15-20 minutes, or until the bacon is crispy and golden brown, flipping halfway through for even cooking.
For extra crispiness, you can broil the bacon-wrapped dates in the last few minutes of cooking, keeping a close eye to prevent burning. If you’re preparing this dish ahead of time, you can wrap the dates and refrigerate them until you’re ready to bake. Just remember to increase the baking time slightly if you’re cooking them from a cold state.
Serve hot for the best flavor and texture, and enjoy this crowd-pleasing appetizer!
Recommended Items
Discover our favorite products and tools to elevate your culinary creations—get ready to enhance your flavors!
Classic Brunch: Avocado and Eggs

Brunch is often seen as the perfect opportunity to indulge in a feast that balances both breakfast and lunch flavors. One of the trendiest and tastiest options that has graced brunch tables around the world is the combination of creamy avocado and perfectly cooked eggs. This duo not only offers a delightful blend of textures and flavors but also packs a nutritious punch, making it an ideal choice to fuel your day.
You can enjoy these two ingredients in various forms, but one of the most beloved ways is to smash that ripe avocado and top it off with eggs cooked just the way you like them, whether poached, scrambled, or fried.
To elevate this classic pairing, consider adding a sprinkle of salt, a squeeze of lime, or a dash of your favorite hot sauce. The beauty of this recipe lies in its simplicity and versatility, allowing you to customize it to your taste preferences.
Whether you’re entertaining guests or treating yourself to a cozy meal at home, avocado and eggs make for a delicious and nourishing dish that sets the tone for a delightful day ahead.
Ingredients:
- 1 ripe avocado
- 2 large eggs
- Salt and pepper to taste
- 1 tablespoon olive oil or butter (for frying)
- Optional garnishes: lime juice, red pepper flakes, fresh herbs (such as cilantro or parsley), and cherry tomatoes
Cook the eggs according to your preference: for poached eggs, bring a pot of water to a gentle simmer and add a small splash of vinegar; crack the eggs into a cup and gently slide them into the water, cooking for about 3-4 minutes. For scrambled eggs, whisk in a bowl, then heat the olive oil or butter in a non-stick skillet over medium heat and pour in the eggs, stirring gently until they’re just set.
While the eggs are cooking, slice the avocado in half, remove the pit, and scoop the flesh into a bowl. Mash the avocado with a fork, and season with salt, pepper, and a squeeze of lime. Serve the avocado on toast or a plate, top with your eggs, and finish with any additional garnishes.
For the best results, choose ripe avocados that yield slightly to pressure when squeezed. If you’re preparing this dish for a crowd, you can keep the smashed avocado from browning by covering it with plastic wrap pressed directly onto the surface and storing it in the fridge for a couple of hours.
Feel free to experiment with additional toppings such as feta cheese, smoked salmon, or even a sprinkle of everything bagel seasoning for an extra flavor boost. Enjoy your brunch!
Proposed Recipe
Bold Contrast: Dark Chocolate and Sea Salt

There’s something undeniably magical about the rich, velvety texture of dark chocolate paired with a sprinkle of sea salt. This combination elevates the sweetness of the chocolate, enhancing its complex flavors while providing a satisfying contrast that tantalizes the taste buds. Dark chocolate, with its intense cocoa notes, offers a depth that harmonizes beautifully with flaky sea salt, creating an indulgent experience that’s both sweet and savory.
Whether you’re preparing a sophisticated dessert for a dinner party or simply treating yourself to something special, this pairing is sure to impress.
Creating this delightful treat is both simple and rewarding. You can enjoy dark chocolate and sea salt in various forms, but for a quick and fulfilling option, making dark chocolate sea salt bites is an excellent choice. By melting high-quality dark chocolate and setting it with just the right amount of sea salt, you create small morsels that are perfect for savoring on their own or serving alongside fresh fruit or nuts.
The allure of these little bites lies not only in their flavor but also in their elegance and ease of preparation.
Ingredients:
- 8 ounces of high-quality dark chocolate (70% cocoa or higher)
- Sea salt (to taste)
- Optional toppings: chopped nuts, dried fruit, or sea salt flakes
- Parchment paper
Melt the dark chocolate in a heatproof bowl over a pot of simmering water, stirring occasionally until smooth. Alternatively, you can melt it in the microwave in 30-second intervals, stirring between each time. Once melted, remove the bowl from heat and let it cool for a minute before spooning the chocolate onto a parchment-lined baking sheet, forming small dollops or shapes.
While the chocolate is still melted, sprinkle a pinch of sea salt over each piece. Allow the chocolate to cool and harden completely at room temperature or refrigerate for faster results.
For a successful outcome, remember to use high-quality dark chocolate, as the flavor profile plays a significant role in enhancing the overall experience. Experiment with different types of sea salt — flaky or coarse varieties can add texture and an added burst of salty goodness.
Additionally, consider incorporating complementary flavors by adding toppings like crushed nuts or dried fruits, allowing for personalized creations that cater to your taste preferences. Enjoy!
Refreshing Twist: Watermelon and Feta
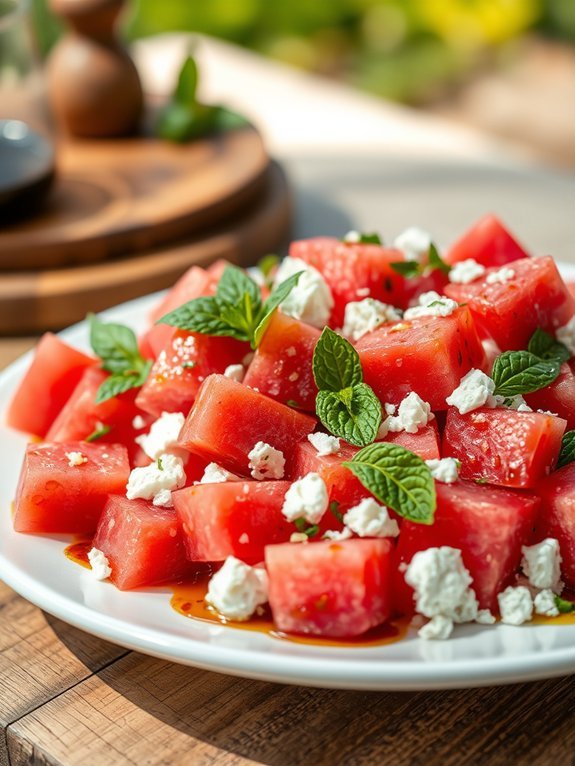
Watermelon and feta cheese may seem like an unusual combination at first, but their contrasting flavors come together beautifully, creating a revitalizing and vibrant dish perfect for any summer gathering. The sweetness of the watermelon balances the salty, creamy feta, making it an ideal appetizer or side dish to complement a variety of meals.
This dish isn’t only quick and easy to prepare, but it also bursts with color and offers a delightful textural contrast that will excite your taste buds. To elevate this combination, we can enhance the dish with a drizzle of olive oil, a sprinkle of fresh herbs, and some optional add-ins to personalize it according to your preferences.
Whether you keep it simple or add additional ingredients, watermelon and feta is sure to impress your guests and provide a rejuvenating respite from traditional heavy summer dishes.
- 4 cups of seedless watermelon, cubed
- 1 cup of feta cheese, crumbled
- 1/4 cup of fresh mint leaves, chopped
- 2 tablespoons of extra virgin olive oil
- Salt and pepper to taste
- Optional: Balsamic glaze for drizzling
In a large bowl, combine the cubed watermelon and crumbled feta cheese. Gently toss them together, being careful not to break up the feta too much.
Add the chopped mint leaves and drizzle with olive oil. Season with salt and pepper to taste, mixing everything lightly to combine, and serve immediately. For an extra gourmet touch, you can drizzle some balsamic glaze over the top before serving.
When preparing this dish, choose a ripe and sweet watermelon for the best flavor and texture. You can also experiment with the addition of other ingredients such as sliced cucumbers, red onions, or even a bit of jalapeño for a kick.
This dish can be made ahead of time but is best enjoyed fresh to preserve the crispy texture of the watermelon and the creaminess of the feta. If making it in advance, keep the components separate and combine them just before serving.
Hearty Comfort: Mac and Cheese With Truffle Oil

There’s something irresistibly comforting about a warm bowl of mac and cheese, a classic dish that has been bringing joy to hearts and homes for generations. This creamy delight, made with al dente pasta enveloped in a luscious cheese sauce, forms the foundation for endless variations. Adding truffle oil takes this classic comfort food to an entirely new level, elevating the earthiness of the truffles and imparting a gourmet touch that transforms your average mac and cheese into a luxurious experience.
To achieve a perfect balance between the cheese and the truffle oil, it’s crucial to choose high-quality ingredients. The richness of the cheese combined with the distinctive aroma of truffles will tantalize your taste buds and create a dish that’s both satisfying and sophisticated. Whether it’s for a cozy night in or a lavish gathering, this mac and cheese recipe is sure to impress.
- 8 oz elbow macaroni
- 2 cups shredded sharp cheddar cheese
- 1 cup shredded Gruyère cheese
- 4 tablespoons unsalted butter
- ¼ cup all-purpose flour
- 2 cups milk
- 1 teaspoon garlic powder
- 1 teaspoon onion powder
- Salt and black pepper to taste
- 2 tablespoons truffle oil
- ½ cup breadcrumbs (optional, for topping)
In a large pot, bring salted water to a boil and cook the elbow macaroni according to package instructions until al dente. Meanwhile, in a saucepan, melt the butter over medium heat, whisk in the flour, and cook until golden brown, about 2 minutes. Gradually pour in the milk, whisking continuously until the mixture thickens, then stir in the garlic powder, onion powder, and season with salt and pepper.
Reduce the heat to low, and mix in the cheddar and Gruyère cheese until melted and creamy. Once the pasta is cooked, drain it and combine it with the cheese sauce, and finally, drizzle in the truffle oil, stirring gently to incorporate. If desired, transfer the mixture to a baking dish, top with breadcrumbs, and broil for a few minutes until the topping is golden.
For a more intense truffle flavor, consider adding a little extra drizzle of truffle oil just before serving. You can also experiment with different cheese combinations; adding a bit of blue cheese or goat cheese can create an unexpected and delightful twist. If you’re feeling adventurous, incorporate sautéed mushrooms or caramelized onions into your mac and cheese for added depth and complexity in flavor.
Zesty Delights: Pineapple and Jalapeño
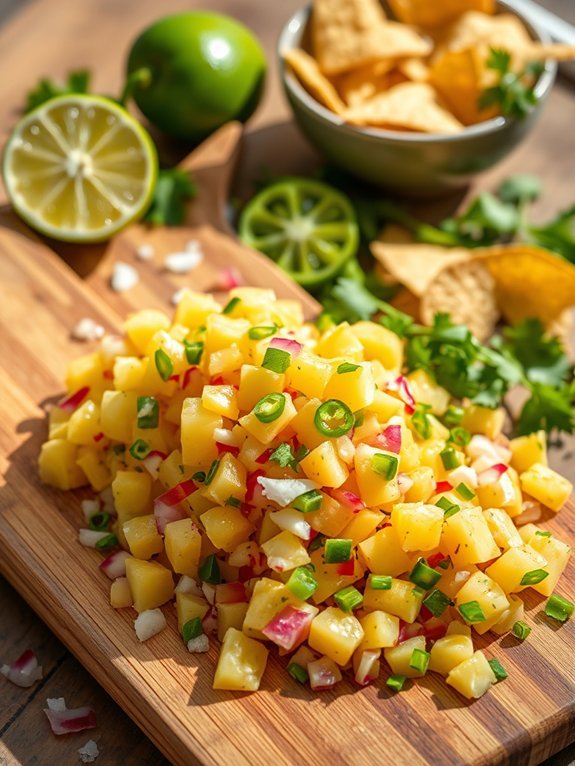
Pineapple and jalapeño unite to create a zesty blend that tantalizes the taste buds. The sweetness of juicy pineapple pairs perfectly with the heat of fresh jalapeños, making this combination a favorite for salsas, grilled dishes, or even as a topping for tacos.
When combined, the flavors create a revitalizing contrast that’s perfect for summer barbecues or casual family dinners.
For a simple yet flavorful dish that showcases these ingredients, try making a Pineapple-Jalapeño Salsa. This vibrant salsa isn’t only easy to prepare but also adds a delightful punch to a variety of dishes, from grilled chicken and fish to tortilla chips.
The bright colors and fresh taste will impress your guests and elevate your next meal.
Ingredients:
- 1 ripe pineapple, diced
- 2 fresh jalapeños, minced (seeds removed for less heat if desired)
- 1 red onion, finely chopped
- 1/4 cup fresh cilantro, chopped
- Juice of 2 limes
- Salt and pepper to taste
In a mixing bowl, combine the diced pineapple, minced jalapeños, chopped red onion, and cilantro. Squeeze the juice of the limes over the mixture and add salt and pepper to taste.
Gently toss all the ingredients together until well combined, allowing the flavors to meld. Allow the salsa to sit for about 15-20 minutes at room temperature before serving.
When preparing your Pineapple-Jalapeño Salsa, consider adjusting the heat level by varying the amount of jalapeño you use. If you’re unsure of how spicy you want your salsa, start with one jalapeño and taste before adding more.
Additionally, for a unique twist, try adding diced avocado or mango for extra creaminess and sweetness, or serve it atop grilled chicken or fish for a delightful fusion of flavors.
Indulgent Treat: Peanut Butter and Banana
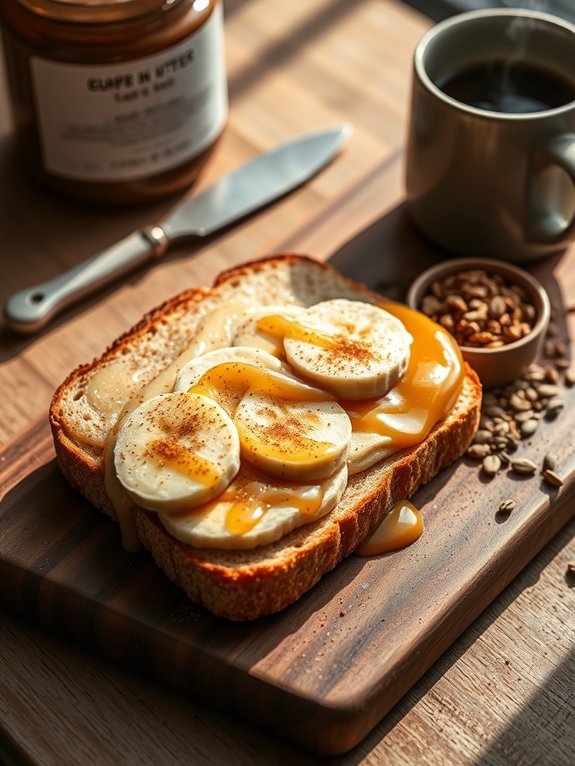
Peanut butter and banana make a classic combination that’s both indulgent and nutritious. The creamy, nutty flavor of peanut butter complements the sweet, natural taste of ripe bananas, creating a treat that’s perfect for breakfast, a snack, or even dessert. Whether you’re spreading it on toast, tossing it in a smoothie, or just enjoying it on its own, this pairing is guaranteed to satisfy your cravings while also offering a hearty dose of protein and potassium.
In this simple recipe, we’ll guide you on how to create a delightful peanut butter and banana sandwich with a twist. Enhanced with a hint of honey and a sprinkle of cinnamon, this sandwich takes the traditional snack to a whole new level. Easy to prepare in just a few minutes, it’s the ideal quick meal that will keep you energized throughout the day.
- 2 slices of whole-grain bread
- 2 tablespoons of creamy or crunchy peanut butter
- 1 ripe banana, sliced
- 1 teaspoon of honey (optional)
- A pinch of ground cinnamon (optional)
- 1 tablespoon of chia seeds or flaxseeds (optional)
Spread the peanut butter evenly on one side of each slice of bread. Then layer the banana slices on top of the peanut butter. If desired, drizzle honey over the banana and sprinkle cinnamon for extra flavor. Carefully place the other slice of bread on top, peanut butter side down, and gently press down to combine.
For an extra touch, you can grill the sandwich in a pan over medium heat until golden brown, flipping once.
When choosing your bananas, be sure to pick ones that are perfectly ripe – they should be yellow with some speckled brown spots for the best sweetness. If you prefer a bit of crunch, consider adding chopped nuts or granola to the inside of your sandwich.
For those who are looking for a more indulgent experience, feel free to add a layer of dark chocolate spread or a few mini chocolate chips along with the bananas. Enjoy your delicious creation!
Flavorful Fusion: Mango and Chili Powder

When it comes to creating a delightful fusion of flavor that tantalizes the taste buds, few combinations can rival the sweet and spicy contrast of mango and chili powder. The luscious, juicy mango provides a rejuvenating, tropical sweetness, while the chili powder adds a kick that awakens the palate. Together, they make an irresistible topping for snacks, salads, or even as a zesty side dish that can compliment a variety of meals.
This simple yet flavorful recipe showcases this delightful pairing and is easy to whip up for any occasion. This dish isn’t only vibrant in taste but also visually appealing. The bright yellow-orange of ripe mango pairs beautifully with the rich red-brown of chili powder. It’s an excellent option for summer barbecues, picnics, or even as a complement to spicy entrees.
That’s the beauty of this mango and chili powder fusion; it appeals to both adventurous foodies and those looking to explore new flavor horizons. Let’s plunge into the ingredients and get started on this culinary adventure.
- 2 ripe mangoes, peeled and diced
- 1 tablespoon chili powder (adjust to taste)
- 1 tablespoon lime juice
- 1 tablespoon honey or agave syrup (optional)
- Fresh cilantro leaves for garnish (optional)
In a mixing bowl, combine the diced mango with chili powder, lime juice, and honey or agave syrup if you prefer a touch of sweetness. Gently toss the ingredients together until the mango is well-coated with the chili powder mixture. Allow it to marinate for about 10-15 minutes to let the flavors meld together. Serve chilled or at room temperature, garnished with fresh cilantro leaves if desired.
For an extra layer of flavor, consider adding finely chopped red onion or bell pepper to the mixture for crunch and additional color. If you’re feeling adventurous, you can experiment with different chili powders, as some may have smokier or more intense flavors. Make sure to adjust the spice level to your preference, especially if this dish is for guests!
Also, using perfectly ripe mangoes will enhance both the sweetness and texture, so choose those that are fragrant and slightly soft to the touch for the best results.
Rustic Goodness: Pear and Gorgonzola
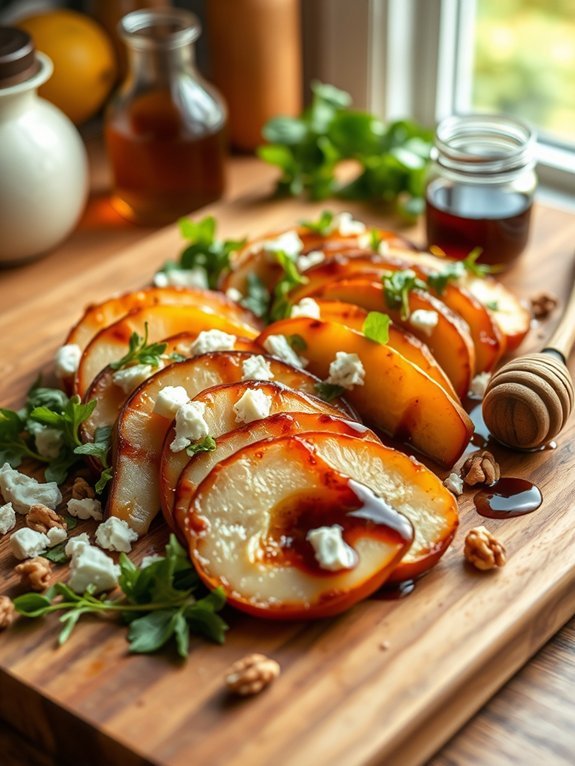
Rustic Goodness: Pear and Gorgonzola pairs the sweet, juicy flavor of ripe pears with the bold, savory notes of Gorgonzola cheese, creating a delightful balance of tastes and textures. This dish is perfect as an appetizer, a topping for a gourmet salad, or even as a unique addition to a cheese board.
The contrasting flavors meld beautifully, making it an excellent choice for gatherings or a cozy night at home. To prepare this simple yet elegant dish, you’ll first need to caramelize the pears, which brings out their natural sweetness. Complementing this with crumbled Gorgonzola adds a luxurious creaminess that enhances the overall experience. Serve it warm for a delightful sensation, or let it cool to enjoy as a revitalizing snack. The harmony of ingredients will have everyone savoring each bite.
- 2 ripe pears, sliced
- 3 oz Gorgonzola cheese, crumbled
- 2 tbsp butter
- 2 tbsp honey
- 1 tbsp balsamic vinegar
- Freshly cracked black pepper to taste
- Fresh arugula or spinach (optional for garnish)
- Chopped walnuts or pecans (optional for garnish)
In a skillet, melt the butter over medium heat and add the sliced pears. Sauté them for about 4-5 minutes until they begin to soften and caramelize. Drizzle in the honey and balsamic vinegar, stirring gently to coat the pears in the mixture. Cook for an additional couple of minutes until the pears are tender and golden.
Remove from heat and sprinkle the crumbled Gorgonzola over the warm pears, allowing it to melt slightly. Season with freshly cracked black pepper before serving.
When using pears, aim for varieties like Bartlett or Anjou, which have a wonderful sweetness and a buttery texture. Feel free to experiment with different nuts for crunch, and consider adding herbs like thyme or rosemary for an earthy flavor contrast. If you prefer a creamier texture, you can add a dollop of mascarpone or cream cheese along with the Gorgonzola for a richer dish.
Savory Pairing: Lamb and Mint

Lamb and mint make for a timeless pairing that captures the essence of comfort food while bringing a reviving twist to the table. The rich, tender flavor of lamb complements the brightness of mint beautifully, creating a dish that’s perfect for special occasions or a cozy family dinner.
With this recipe, you’ll learn how to create a succulent roasted leg of lamb infused with fragrant mint pesto, illustrating just how well these ingredients play together. This dish not only showcases excellent flavor but also offers versatility. Serve it alongside creamy mashed potatoes, roasted vegetables, or a crisp green salad to create a well-rounded meal.
Whether you’re preparing for a holiday gathering or simply treating yourself to a culinary delight at home, this lamb and mint recipe will delight your taste buds and impress your guests.
Ingredients:
- 4-5 pounds bone-in leg of lamb
- 4 cloves garlic, minced
- 2 tablespoons fresh rosemary, chopped
- 2 tablespoons fresh thyme, chopped
- Salt and pepper, to taste
- 1/4 cup olive oil
- 1 cup fresh mint leaves
- 1/2 cup parsley leaves
- 1/4 cup pine nuts, toasted
- 1/2 cup grated Parmesan cheese
- Juice of 1 lemon
- 1/2 cup extra virgin olive oil (for pesto)
Rub the leg of lamb with minced garlic, rosemary, thyme, salt, and pepper, followed by drizzling with olive oil. Let it marinate for at least one hour, or overnight for a deeper flavor.
Preheat your oven to 350°F (175°C) and place the marinated lamb on a roasting pan. Roast the lamb for approximately 1.5 to 2 hours, or until the internal temperature reaches 145°F (medium rare).
While the lamb is roasting, prepare the mint pesto by blending together mint leaves, parsley, toasted pine nuts, Parmesan cheese, lemon juice, and extra virgin olive oil until smooth.
Once the lamb is cooked to your liking, let it rest for 15-20 minutes before slicing and serving with a generous dollop of mint pesto.
When cooking lamb, make sure you let it rest after removing it from the oven, as this helps redistribute the juices and keeps the meat moist. Additionally, using fresh herbs will make a noticeable difference in flavor, so opt for fresh mint and parsley rather than dried.
If you find the mint flavor is too strong for your taste, balance it out by adding more parsley to the pesto. This will create a harmonious blend that elevates the entire dish. Enjoy your cooking adventure!
Citrusy Burst: Shrimp and Lemon
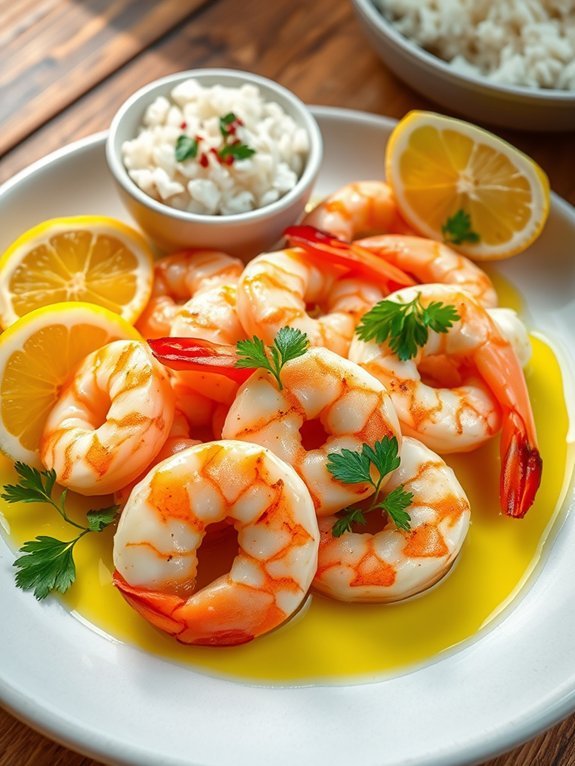
Shrimp and lemon make a perfect pair that brings together the freshness of seafood with the vibrant zing of citrus. This dish isn’t only quick and easy to prepare but also tantalizes the taste buds with a burst of flavors that elevate any meal. Ideal for a weeknight dinner or a casual gathering, shrimp and lemon is a delightful combination that’s sure to impress.
The preparation begins with plump, succulent shrimp, marinated in a mixture of zesty lemon juice and aromatic garlic. This marinade enhances the natural sweetness of the shrimp while adding a revitalizing twist.
Paired with a delicious side of rice or a crisp salad, this dish is a symphony of taste and texture that’s both satisfying and wholesome.
Ingredients:
- 1 pound large shrimp, peeled and deveined
- 3 tablespoons olive oil
- 2 lemons (one for juice and one for wedges)
- 4 cloves garlic, minced
- Salt and pepper to taste
- Fresh parsley, chopped for garnish
- Red pepper flakes (optional for a bit of heat)
In a mixing bowl, combine the shrimp, olive oil, lemon juice, minced garlic, salt, and pepper. Allow the shrimp to marinate for at least 15 minutes to absorb the flavors. In a skillet over medium-high heat, cook the shrimp for about 2-3 minutes on each side or until they turn pink and opaque.
Squeeze the remaining lemon over the shrimp and garnish with fresh parsley before serving. When preparing shrimp and lemon, remember to avoid overcooking the shrimp as they can turn rubbery.
A quick cook on high heat will help retain their tender texture. Feel free to adjust the amount of garlic or red pepper flakes according to your taste preferences. For an extra layer of flavor, consider adding a splash of white wine to the skillet while cooking, allowing it to reduce slightly for a richer sauce.
Enjoy the light yet decadent experience of this citrusy dish!
Earthy Richness: Beets and Goat Cheese
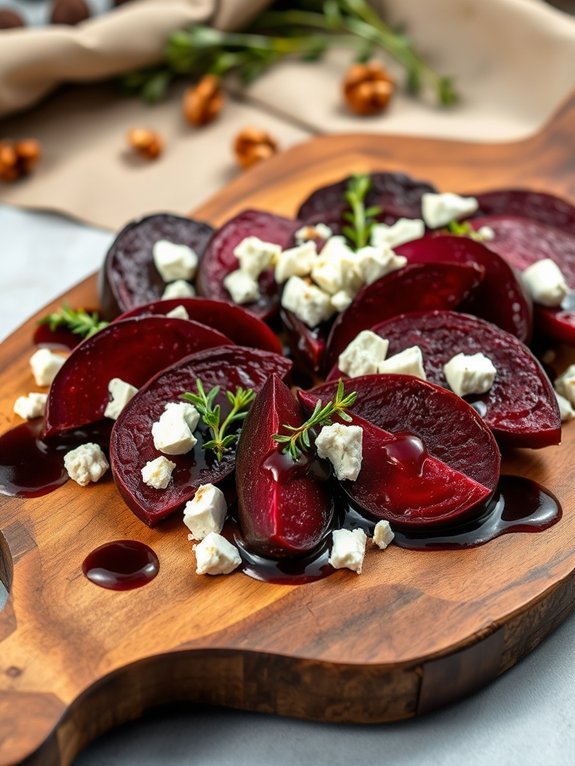
Beets and goat cheese create a delightful harmony on the palate with their contrasting flavors and textures. The earthy sweetness of roasted beets pairs beautifully with the tangy creaminess of goat cheese, resulting in a dish that’s both sophisticated and approachable. This pairing is perfect as an appetizer, salad, or even a main course when accompanied by grains or greens.
Whether served warm or at room temperature, it’s an excellent choice for gatherings or simple weeknight dinners. To enhance the dish, a drizzle of balsamic reduction or a sprinkle of toasted walnuts can add an additional layer of complexity. Choosing fresh, high-quality beets and creamy goat cheese is vital to elevate this dish. Roasting the beets brings out their natural sweetness and guarantees they remain tender and vibrant, making each bite a celebration of flavor.
- 4 medium-sized beets
- 2 tablespoons olive oil
- Salt and pepper, to taste
- 4 ounces goat cheese, crumbled
- 1 tablespoon fresh thyme leaves (optional)
- Balsamic reduction (for drizzling)
Preheat your oven to 400°F (200°C). Scrub the beets thoroughly, trim the tops and roots, and wrap them individually in aluminum foil drizzled lightly with olive oil. Place the wrapped beets on a baking sheet and roast for about 45-60 minutes or until tender when pierced with a fork.
Once cooked, allow the beets to cool slightly, then peel and slice them into wedges. Arrange the beet slices on a serving platter, sprinkle with crumbled goat cheese, season with salt and pepper, and finish with fresh thyme and a drizzle of balsamic reduction.
When cooking beets, it’s important to wear gloves to prevent staining your hands, as beet juice can be quite persistent. Feel free to experiment by adding different toppings such as toasted nuts or microgreens for added texture and flavor. Additionally, you can vary the cheese used; a creamy feta or ricotta can provide a different but equally enjoyable taste profile if goat cheese isn’t to your liking.
Preparing the dish ahead of time allows the flavors to meld beautifully.
Classic Combo: Tomato and Basil
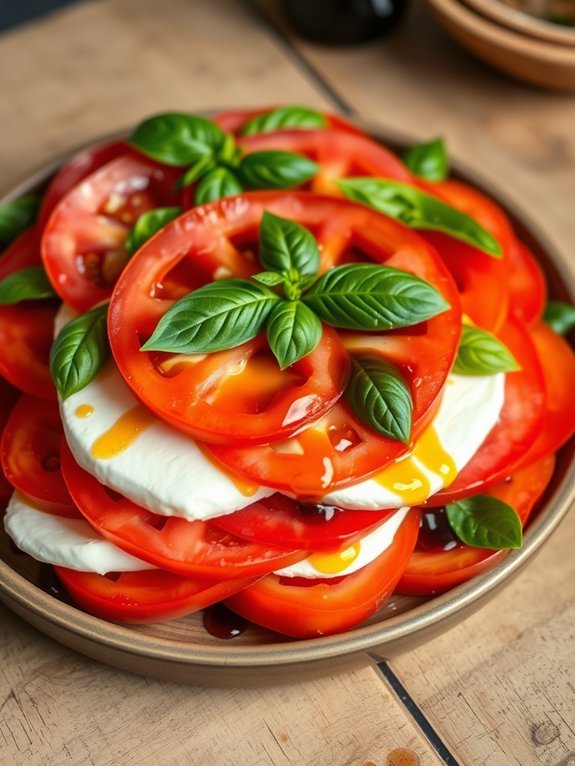
The classic combination of tomato and basil is a timeless delight, celebrated for its fresh, vibrant flavors that come together harmoniously.
Whether you’re preparing a simple salad, a comforting pasta, or a delightful bruschetta, this duo is sure to elevate your dish. The bright acidity of tomatoes paired with the fragrant sweetness of basil creates a symphony of taste that’s both invigorating and satisfying.
This recipe showcases their perfect partnership with a simple yet delicious Caprese salad, where the ingredients shine in their natural state. The quality of your tomatoes and basil will greatly influence the overall taste, so opt for the ripest tomatoes and freshest basil you can find.
Prepare to enjoy this delightful dish that’s ideal for summer gatherings or as an appetizer for any meal!
- Ripe tomatoes (preferably heirloom or vine-ripened)
- Fresh basil leaves
- Fresh mozzarella cheese
- Extra virgin olive oil
- Balsamic vinegar (optional)
- Salt
- Pepper
Start by slicing the ripe tomatoes and fresh mozzarella cheese into even, round slices. On a serving platter, alternate layers of tomato and mozzarella slices, placing fresh basil leaves between each layer.
Drizzle the assembled salad with extra virgin olive oil and, if desired, a splash of balsamic vinegar. Finally, season with salt and pepper to taste.
When preparing a Caprese salad, it’s crucial to keep the ingredients at room temperature for the best flavor. Additionally, you can experiment with different types of tomatoes, such as cherry or grape tomatoes, and even try adding a touch of pesto for a unique twist.
Remember that the simplicity of this dish is its charm, so avoid overwhelming it with too many additional ingredients. Enjoy the fresh and delicious flavors!
Spicy Kick: Sriracha and Honey

Sriracha and honey might seem like an unlikely duo, but together they create a flavor explosion that’s both spicy and sweet, making them the perfect pair for a variety of dishes.
Whether you’re looking to spice up a simple snack, glaze a main dish, or create a dipping sauce that will impress your guests, this combination is incredibly versatile. In this recipe, we’ll combine Sriracha and honey to create a mouthwatering glaze that enhances the flavors of roasted chicken wings, turning a classic appetizer into something unforgettable.
The sweet heat from the Sriracha and honey glaze not only adds an exciting kick but also creates a beautiful caramelized finish on the wings. This recipe is easy to follow and requires minimal ingredients, which means you can whip it up any night of the week or for your next party.
Get ready to enjoy wings that aren’t only delicious but also incredibly easy to make, ensuring everyone will be reaching for seconds.
Ingredients:
- 2 pounds chicken wings
- ¼ cup Sriracha sauce
- ¼ cup honey
- 2 tablespoons soy sauce
- 1 tablespoon apple cider vinegar
- 2 cloves garlic, minced
- 1 teaspoon sesame oil
- Salt and pepper, to taste
- Green onions, chopped (for garnish)
- Sesame seeds (for garnish)
Preheat your oven to 425°F (220°C) and line a baking sheet with parchment paper. In a mixing bowl, combine Sriracha, honey, soy sauce, apple cider vinegar, minced garlic, sesame oil, salt, and pepper to create the glaze.
Toss the chicken wings in the mixture until they’re evenly coated. Spread the wings out in a single layer on the prepared baking sheet and bake for 30-35 minutes, flipping them halfway through, until the wings are crispy and the glaze is caramelized.
Garnish with chopped green onions and sesame seeds before serving.
When making this dish, feel free to adjust the level of spicy heat by adding more or less Sriracha based on your personal preference. For extra flavor, marinate the wings in the glaze for a few hours or overnight in the refrigerator.
This adds depth to the taste and allows the spices to seep into the chicken. If you desire even more caramelization, you can finish the wings under a broiler for a few minutes after baking.
Enjoy experimenting with different sweet and heat ratios to find your perfect mix!
Unique Blend: Cinnamon and Sweet Potato
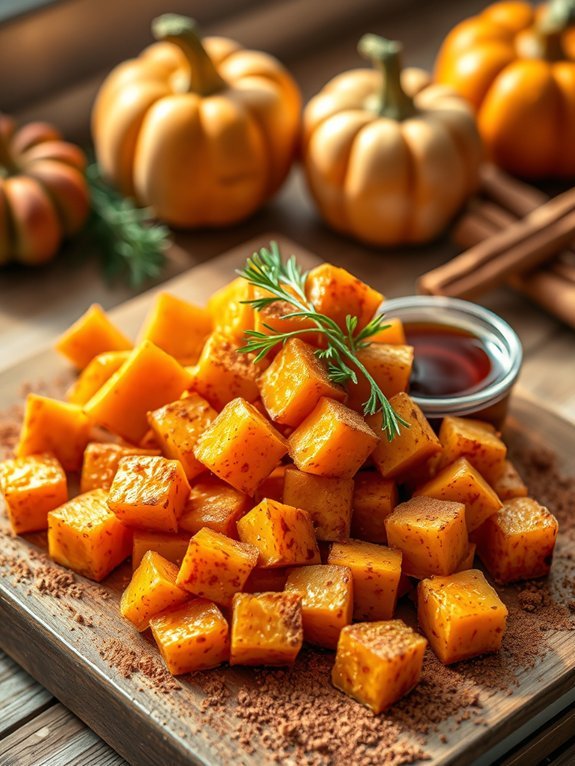
Cinnamon and sweet potato create a delightful flavor pairing that warms the soul and tantalizes the taste buds. The natural sweetness of the sweet potato is accentuated by the warm, spicy notes of cinnamon, making this combination not only delicious but also comforting.
Whether served as a side dish for a festive meal or as a healthy snack, this delightful recipe will elevate your culinary repertoire and provide a nutritious option for you and your family.
In addition to their incredible flavor, both sweet potatoes and cinnamon offer an array of health benefits. Sweet potatoes are packed with vitamins A and C, fiber, and antioxidants, which contribute to overall health and wellness.
Cinnamon, known for its anti-inflammatory and antioxidant properties, adds a hint of warmth and depth to this dish. Together, they create a must-try side dish that’s both easy to prepare and satisfying to eat.
- 2 large sweet potatoes, peeled and diced
- 2 tablespoons olive oil
- 1 teaspoon ground cinnamon
- 1 tablespoon maple syrup (optional)
- Salt and pepper, to taste
- Fresh parsley or chives, for garnish (optional)
Preheat your oven to 400°F (200°C). In a large bowl, combine the diced sweet potatoes with olive oil, cinnamon, maple syrup (if using), salt, and pepper. Toss until the sweet potatoes are evenly coated.
Spread the mixture on a baking sheet lined with parchment paper in a single layer. Roast in the preheated oven for 25-30 minutes, or until the sweet potatoes are tender and caramelized, stirring halfway through for even cooking.
When preparing this dish, feel free to adjust the quantity of cinnamon and maple syrup to suit your taste preference; you can even experiment with additional spices such as nutmeg or ginger for a more complex flavor.
If you’re looking for a crunchier texture, you can broil the sweet potatoes for the last 2-3 minutes of cooking. Finally, remember to check for doneness by piercing the sweet potatoes with a fork; they should be soft and easily pierced when fully cooked.


