This post may contain affiliate links. Please read our policy page.
As autumn arrives, cozy up with delicious fall recipes that warm your soul. Try a creamy pumpkin soup or savor the sweet tang of apple cider braised pork. A rich butternut squash risotto and comforting chicken pot pie invite you to gather around the table. Don’t forget seasonal treats like caramel apple muffins and cinnamon roll bundt cake to satisfy your sweet tooth. Discover more comforting dishes that celebrate the flavors of the season!
Creamy Pumpkin Soup
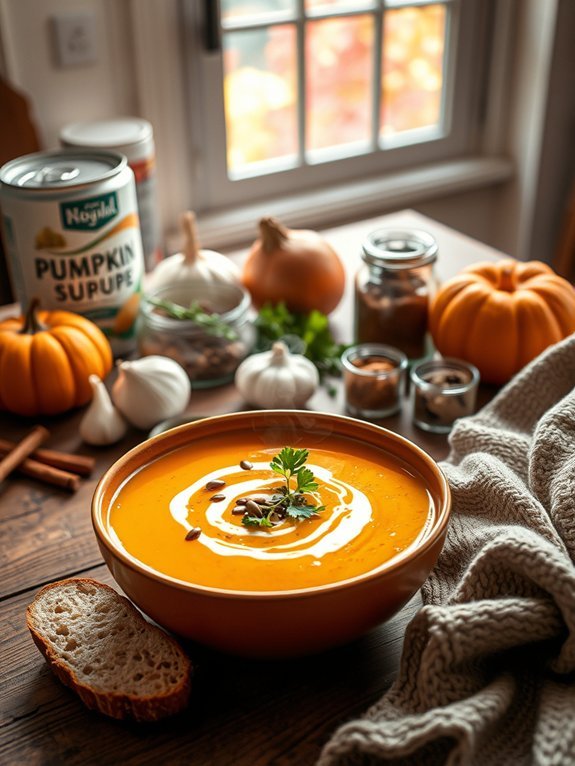
As the leaves change color and the air turns crisper, there’s nothing quite like a warm bowl of creamy pumpkin soup to embrace the cozy vibes of fall. This delightful dish combines the earthy sweetness of pumpkin with aromatic spices, resulting in a comforting meal that can be enjoyed on chilly afternoons or balmy evenings alike.
Whether you’re hosting a dinner party or simply treating yourself, creamy pumpkin soup is a great way to celebrate the season’s harvest.
What makes this soup particularly appealing is its versatility. You can blend in a variety of additional ingredients to personalize it to your taste. For instance, a splash of coconut milk can elevate the creaminess, while a touch of nutmeg or cinnamon adds warmth and depth to the flavor profile.
Paired with crusty bread or a light salad, this soup makes for a nourishing and satisfying dish that welcomes the fall season with every spoonful.
Ingredients:
- 1 can (15 oz) pure pumpkin puree
- 1 medium onion, diced
- 2 cloves garlic, minced
- 4 cups vegetable or chicken broth
- 1 cup heavy cream or coconut milk
- 1 tablespoon olive oil
- 1 teaspoon ground cinnamon
- 1/2 teaspoon ground nutmeg
- Salt and pepper to taste
- Fresh parsley or pumpkin seeds for garnish
In a large pot, heat the olive oil over medium heat. Add the diced onion and cook until softened, about 5 minutes.
Stir in the minced garlic and sauté for another minute until fragrant. Next, add the pumpkin puree, broth, cinnamon, and nutmeg, stirring to combine. Bring to a gentle simmer and let it cook for about 15-20 minutes, allowing the flavors to meld.
Finally, stir in the heavy cream or coconut milk, season with salt and pepper, and blend until smooth using an immersion blender or stand blender for a creamy consistency.
When making creamy pumpkin soup, opt for fresh pumpkin for a more vibrant flavor if you’re feeling adventurous. If using canned pumpkin, confirm it’s pure pumpkin puree, not pumpkin pie filling, to avoid unwanted sweetness.
You can also experiment with other spices like cayenne pepper for a hint of heat, or add a dollop of sour cream on top for a tangy finish.
Enjoy your cooking, and don’t hesitate to adjust any seasonings to suit your palate!
Apple Cider Braised Pork
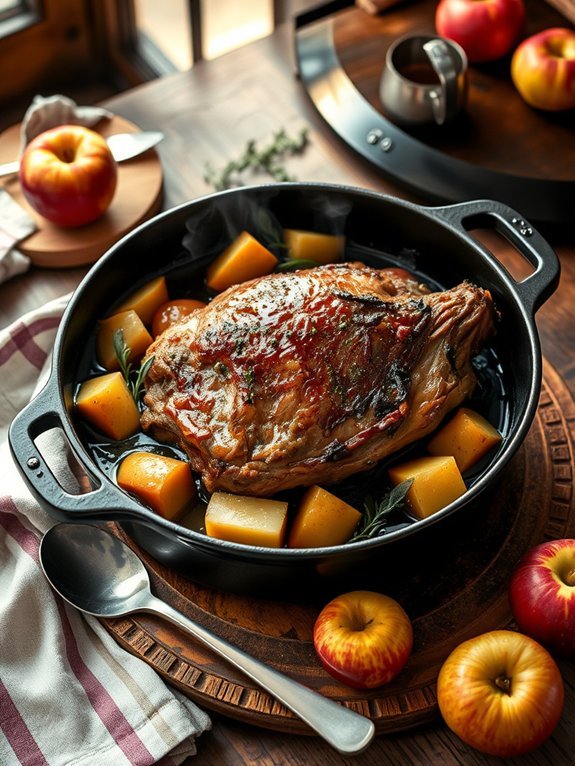
Apple cider braised pork is a delightful dish that perfectly captures the essence of fall. The sweet and tangy apple cider pairs brilliantly with succulent cuts of pork, creating a comforting meal that’s both hearty and flavorful. As the pork braises, it transforms from a tough cut into a tender, melt-in-your-mouth delicacy.
This dish not only showcases seasonal ingredients but also fills the kitchen with a warm, inviting aroma that’s sure to please any gathering.
To make this dish even more enticing, the addition of aromatic herbs such as thyme and sage complements the natural sweetness of the apple cider. Whether served over creamy mashed potatoes or alongside roasted vegetables, apple cider braised pork makes for a satisfying dinner that can be enjoyed by family and friends alike.
It’s a dish that warms the heart as much as it does the stomach, making it a must-try this fall.
- 2 lbs pork shoulder, cut into chunks
- 2 cups apple cider
- 1 onion, diced
- 4 cloves garlic, minced
- 2 apples, cored and sliced
- 1 cup chicken broth
- 2 sprigs fresh thyme
- 2 sprigs fresh sage
- Salt and pepper to taste
- 2 tablespoons olive oil
In a large, heavy-bottomed pot or Dutch oven, heat the olive oil over medium-high heat. Season the pork chunks with salt and pepper, then add them to the pot, browning on all sides. Once browned, remove the pork and set aside.
In the same pot, add the onions and garlic, cooking until softened. Pour in the apple cider and chicken broth, scraping the bottom of the pot to deglaze. Return the pork to the pot along with the apples, thyme, and sage. Bring the mixture to a simmer, cover, and reduce heat to low. Cook for 2 to 3 hours, or until the pork is tender and can be easily shredded with a fork.
When preparing apple cider braised pork, it’s important to choose a good quality cider for the best flavor. Avoid using overly sweet ciders, as you want a balance between sweetness and acidity.
Additionally, let the dish rest for at least 10 minutes after cooking to allow the flavors to meld before serving. This recipe can also be made a day ahead—it’s even more delicious the next day after the flavors have had time to develop further.
Butternut Squash Risotto

Butternut squash risotto is an exquisite fall dish that encapsulates the essence of the season with its creamy texture and vibrant flavor. This recipe combines the sweet, nutty profile of butternut squash with the rich, creamy goodness of arborio rice, making it a delightful centerpiece for any autumn meal. The dish isn’t only comforting but also a great way to incorporate seasonal produce into your cooking.
Cooking risotto may seem challenging due to its need for attention, but the rewards are plentiful. With a little patience, you can create a creamy, restaurant-quality dish that will impress family and friends. This butternut squash risotto is further enhanced with Parmesan cheese and sage, leading to a harmony of flavors that will warm you from the inside out.
- 1 medium butternut squash, peeled and diced
- 1 tablespoon olive oil
- 1 onion, finely chopped
- 2 cloves garlic, minced
- 1 ½ cups arborio rice
- ½ cup dry white wine
- 4 cups vegetable or chicken broth
- 1 cup grated Parmesan cheese
- 2 tablespoons unsalted butter
- Salt and pepper, to taste
- Fresh sage leaves, for garnish
To prepare the butternut squash risotto, start by roasting the diced squash: preheat your oven to 400°F (200°C) and arrange the squash on a baking sheet, drizzling it with olive oil, salt, and pepper. Roast for about 25 minutes or until tender and golden brown.
In a large saucepan, heat a bit of olive oil over medium heat and sauté the onion and garlic until translucent. Add the arborio rice and toast it for 2 minutes before pouring in the white wine, stirring until absorbed. Gradually add the warm broth, one ladle at a time, stirring continuously and allowing the rice to absorb the liquid fully before adding more.
Once the rice is creamy and al dente, stir in the roasted squash, grated Parmesan, and butter. Season to taste.
When making butternut squash risotto, remember a few key tips: keep your broth warm during cooking, as this helps the rice cook evenly; stir frequently to release the rice’s starch, which creates that coveted creamy texture; and don’t skip the resting time after incorporating the cheese and butter, as it allows the flavors to meld beautifully.
Enjoy this comforting dish with a sprinkle of freshly grated Parmesan and a few sage leaves for a gorgeous presentation.
Recommended Items
Get ready to savor the flavors of fall with our curated selection of must-have ingredients and cooking tools!
Savory Chicken Pot Pie

When the crisp fall air sets in, there’s nothing quite like a warm, hearty dish to bring comfort and joy to your kitchen. A savory chicken pot pie combines tender chicken, seasonal vegetables, and a creamy sauce wrapped in a flaky, buttery crust. It’s the perfect meal to share with family or to enjoy on a cozy night in. As the leaves change color outside, this dish will envelop you in warmth and deliciousness.
Creating a chicken pot pie isn’t only satisfying but also allows for creativity in the kitchen. Whether you opt for store-bought crusts for convenience or make your own from scratch, the result will be a delightful blend of flavors. You can customize your filling with your favorite vegetables or herbs. This dish is an excellent way to use leftover chicken, making it a practical choice for a busy fall evening.
Ingredients:
- 1 pound boneless, skinless chicken thighs or breasts, cooked and diced
- 1 cup carrots, diced
- 1 cup frozen peas
- 1 cup potatoes, diced
- 1 cup onion, diced
- 2 cups chicken broth
- 1 cup milk
- 1/3 cup flour
- 1 teaspoon thyme
- 2 tablespoons butter
- Salt and pepper to taste
- 1 package refrigerated pie crusts or homemade crust
Preheat your oven to 425°F (220°C). In a large skillet, melt the butter over medium heat and sauté the onions, carrots, and potatoes until they begin to soften. Stir in the flour, cooking for an additional minute. Gradually add the chicken broth and milk, stirring constantly until the mixture thickens.
Add the cooked chicken, peas, thyme, salt, and pepper. Pour the filling into a pie dish lined with one crust, then cover with the top crust, sealing the edges. Cut slits in the top crust to allow steam to escape, and bake for 30-35 minutes, or until golden brown.
When making chicken pot pie, feel free to experiment with different herbs and spices according to your taste. You can also use a variety of vegetables based on what you have available; consider adding corn, green beans, or mushrooms for additional flavor and texture.
Letting the pie rest for a few minutes before slicing will make serving easier, ensuring the filling stays in place for that perfect slice. Enjoy your meal with a side salad or warm bread for an added touch of comfort.
Cozy Fall Recipe Journey
Maple-Glazed Brussels Sprouts
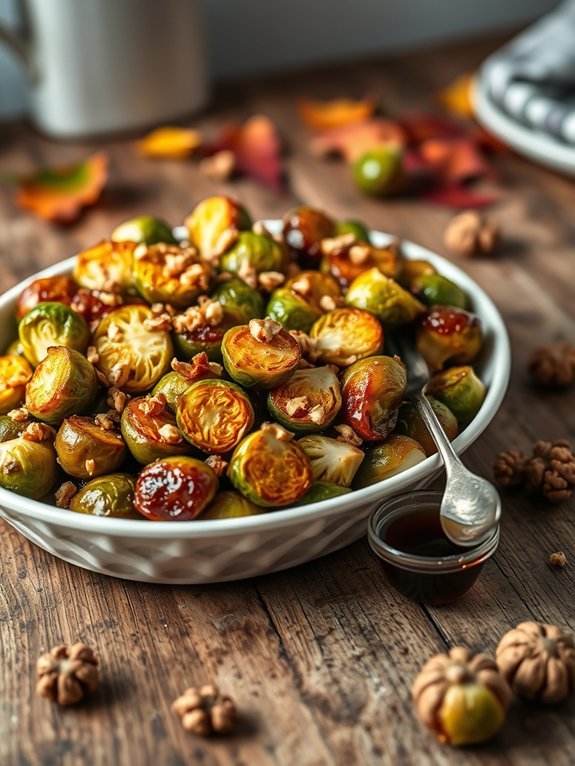
Maple-glazed Brussels sprouts are the perfect fall side dish that combines the earthy flavors of Brussels sprouts with the rich sweetness of pure maple syrup. This delightful recipe isn’t only simple to prepare, but it also elevates the humble Brussels sprouts into a deliciously caramelized centerpiece for any autumn meal. The combination of savory, sweet, and slightly nutty flavors make this dish a crowd favorite, perfect for family dinners or holiday gatherings.
Roasting the Brussels sprouts helps to bring out their natural sweetness and adds a beautiful caramelization to the outer leaves. By drizzling them with maple syrup, you enhance that sweetness even further, creating a beautifully glazed finish that pairs wonderfully with any main dish. Plus, the vibrant color of the maple glaze makes these sprouts a visually appealing addition to your table.
Ingredients:
- 1 pound Brussels sprouts, trimmed and halved
- 3 tablespoons olive oil
- 2 tablespoons maple syrup
- Salt, to taste
- Pepper, to taste
- 1 tablespoon balsamic vinegar (optional)
- ¼ cup walnuts or pecans, chopped (optional)
Preheat your oven to 400°F (200°C). Toss the halved Brussels sprouts in a large bowl with olive oil, maple syrup, salt, and pepper until they’re well coated. Spread them out on a baking sheet in a single layer, making sure there’s enough space between each sprout for even roasting.
Roast in the preheated oven for about 20-25 minutes, or until the sprouts are golden brown and tender, stirring halfway through for even cooking. If using, sprinkle the chopped walnuts or pecans over the sprouts during the last 5 minutes of roasting for a delightful crunch.
For an extra layer of flavor, consider adding a splash of balsamic vinegar before serving. This helps to balance the sweetness of the maple syrup with a hint of acidity.
Additionally, be sure not to overcrowd the baking sheet, as this can lead to steaming instead of roasting. If you’re preparing a larger batch, it’s best to roast the Brussels sprouts in multiple batches for a perfectly caramelized result. Enjoy this delectable dish warm, and feel free to experiment with different nuts or even a sprinkle of Parmesan cheese for an added twist!
Sweet Potato and Black Bean Chili
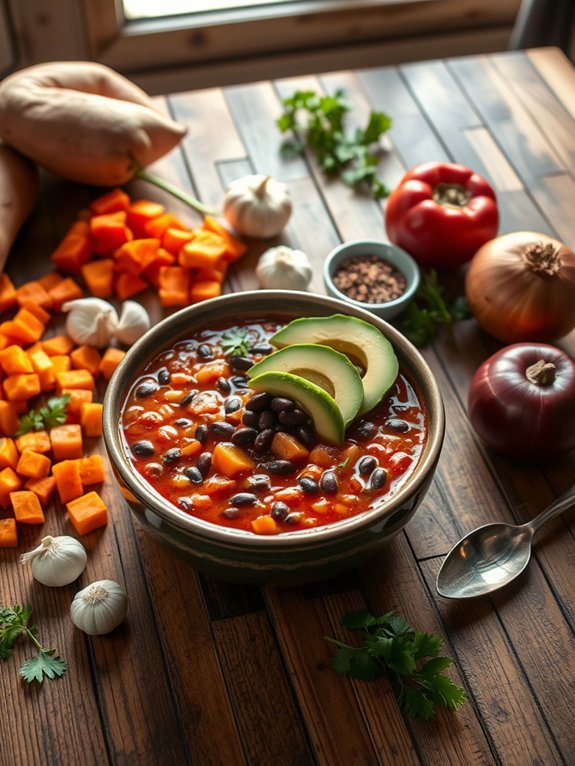
Sweet Potato and Black Bean Chili is a hearty and nutritious dish that’s perfect for those chilly fall evenings. The combination of sweet potatoes and black beans not only makes for a filling meal but also offers a delicious blend of flavors and textures. This chili is packed with vitamins, fiber, and protein, making it a wholesome choice for both vegetarians and meat-eaters alike.
Plus, the spices used in this recipe create a warm and comforting aroma that fills your kitchen, inviting everyone to gather around the dinner table.
This chili is incredibly easy to prepare, and it’s a great option for meal prep or feeding a crowd. You can make it on the stovetop, or for a more hands-off approach, throw it in a slow cooker and let it simmer while you attend to your day. Whether served on its own or with a side of cornbread, Sweet Potato and Black Bean Chili is sure to become a staple in your fall recipe rotation.
- 2 medium sweet potatoes, peeled and diced
- 1 can (15 oz) black beans, drained and rinsed
- 1 can (14 oz) diced tomatoes with green chilies
- 1 onion, chopped
- 2 cloves garlic, minced
- 1 red bell pepper, diced
- 2 cups vegetable broth
- 1 tablespoon chili powder
- 1 teaspoon cumin
- 1 teaspoon smoked paprika
- Salt and pepper, to taste
- 2 tablespoons olive oil
- Fresh cilantro, for garnish (optional)
- Avocado slices, for serving (optional)
In a large pot, heat the olive oil over medium heat. Add the chopped onion and red bell pepper, sautéing until softened, about 5 minutes. Then, stir in the garlic, chili powder, cumin, and smoked paprika, cooking for an additional minute until fragrant.
Next, add the diced sweet potatoes, black beans, diced tomatoes, and vegetable broth. Bring the mixture to a boil, then reduce the heat and let it simmer for about 25-30 minutes, or until the sweet potatoes are tender. Adjust seasoning with salt and pepper to taste before serving.
For an extra kick, feel free to increase the amount of chili powder or add a pinch of cayenne pepper. You can also customize this chili by adding other vegetables, such as zucchini or corn, based on what you have on hand.
If you prefer a thicker chili, you can mash some of the sweet potatoes during cooking or allow it to simmer longer. Serving with toppings like fresh cilantro and avocado can enhance the flavors and provide a fresh contrast to the dish. Enjoy your fall culinary adventure with this delightful recipe!
Harvest Vegetable Stew

As autumn settles in, there’s nothing quite like a warm bowl of harvest vegetable stew to celebrate the bounty of the season. This hearty dish isn’t just satisfying; it’s also a delightful way to incorporate a variety of seasonal vegetables into your meal. With earthy flavors and a comforting consistency, this stew is perfect for chilly evenings when you want something nutritious and nourishing.
Preparing a harvest vegetable stew is an enjoyable experience that allows your kitchen to fill with the warm aromas of fall. The beauty of this recipe is its versatility; you can use whatever vegetables you have on hand or prefer. Root vegetables such as potatoes and carrots blend beautifully with squash and leafy greens, creating a colorful and appetizing meal that feels like a warm hug in a bowl.
- 2 tablespoons olive oil
- 1 medium onion, diced
- 2 garlic cloves, minced
- 2 medium carrots, sliced
- 1 medium parsnip, diced
- 1 potato, cubed
- 1 cup butternut squash, cubed
- 1 zucchini, sliced
- 1 bell pepper, diced
- 4 cups vegetable broth
- 1 teaspoon dried thyme
- 1 teaspoon dried rosemary
- Salt and pepper to taste
- 2 cups fresh kale or spinach, chopped
- 1 can (15 oz) diced tomatoes, undrained
- Optional garnishes: fresh parsley, grated Parmesan cheese
In a large pot, heat the olive oil over medium heat. Add the diced onion and sauté for about 5 minutes until translucent. Stir in the garlic, followed by the carrots, parsnip, potato, butternut squash, zucchini, and bell pepper. Cook these vegetables for about 5 more minutes, until they start to soften.
Pour in the vegetable broth and add the thyme, rosemary, salt, and pepper. Bring to a boil, then reduce the heat and let simmer for 25-30 minutes until the vegetables are tender. Add in the kale or spinach and the diced tomatoes, cooking just until the greens are wilted, then serve hot.
For an extra layer of flavor, consider roasting the root vegetables ahead of time to enhance their natural sweetness. Don’t hesitate to experiment with different herbs or spices that resonate with your palate or local cuisine.
Additionally, this stew stores well in the refrigerator for a few days and can be frozen, making it a great option for meal prep! You can also top it with fresh herbs or a sprinkle of cheese just before serving to give it an extra touch of indulgence.
Spiced Pear Crumble
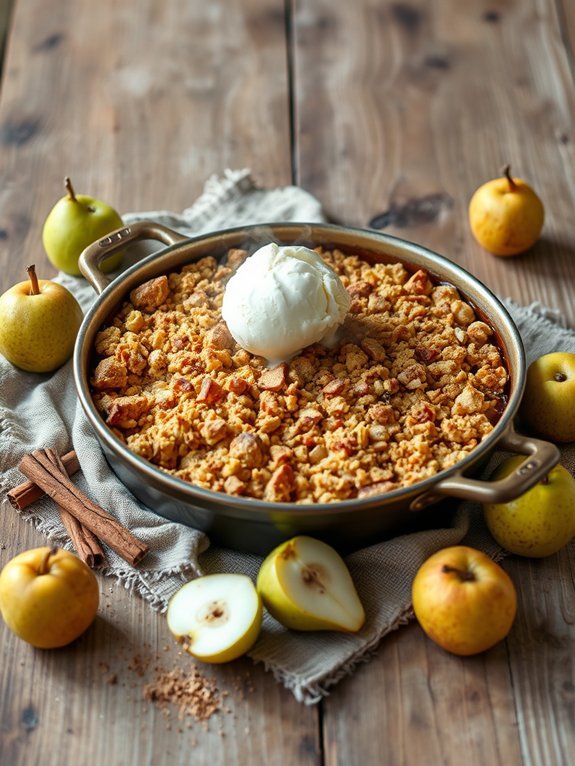
As the leaves turn golden and the air becomes crisp, there’s nothing quite like indulging in a warm dessert that celebrates the flavors of fall. Spiced pear crumble is the perfect dish for this season, combining the natural sweetness of ripe pears with aromatic spices that evoke the essence of autumn.
This delightful dessert isn’t only simple to prepare but also offers a comforting way to enjoy the seasonal harvest.
The buttery crumble topping adds a satisfying crunch that complements the soft, spiced pears underneath, making it an ideal treat for cozy evenings or festive gatherings. Serve it warm with a scoop of vanilla ice cream or a dollop of whipped cream for an added touch of indulgence. Gather your ingredients, and let’s make this heartwarming dessert that will become a seasonal favorite.
Ingredients:
- 4 ripe pears, peeled, cored, and sliced
- 1 tablespoon lemon juice
- 1 teaspoon ground cinnamon
- 1/2 teaspoon ground nutmeg
- 1/4 teaspoon ground ginger
- 1/3 cup brown sugar
- 1 cup rolled oats
- 1/2 cup all-purpose flour
- 1/3 cup granulated sugar
- 1/2 cup unsalted butter, melted
- 1/4 teaspoon salt
Preheat your oven to 350°F (175°C). In a large mixing bowl, combine the sliced pears, lemon juice, cinnamon, nutmeg, ginger, and brown sugar. Arrange the mixture evenly in a greased baking dish.
In another bowl, mix together oats, flour, granulated sugar, melted butter, and salt until crumbly. Spread the crumble topping evenly over the pears. Bake for about 35-40 minutes, or until the topping is golden and the pears are bubbly.
When making spiced pear crumble, feel free to experiment with additional spices like cloves or cardamom for an extra layer of flavor. To add some texture, you can throw in chopped nuts such as walnuts or pecans into the crumble mixture.
If you’re short on time, opt for pre-sliced pears or even canned pears (drained) to make the preparation quicker. Enjoy this delightful dessert warm, and remember that leftovers (if there are any) can be stored in the refrigerator for a few days!
Caramel Apple Muffins

As the leaves turn vibrant shades of red and gold, there’s nothing quite like indulging in the warm and comforting flavors of fall. Caramel Apple Muffins are a delightful treat that perfectly encapsulate the essence of autumn. With a sweet and moist base filled with fresh apples and a surprise caramel filling, these muffins make for a perfect breakfast, snack, or dessert. The combination of cinnamon and nutmeg enhances the flavors, making each bite a cozy experience that invites you to embrace the seasonal change.
Making these muffins isn’t only easy but also a fun activity that you can enjoy with family or friends. The aroma of baking apples and caramel wafting through your kitchen will have everyone enthusiastic about a taste. Plus, once you master this recipe, you can easily adapt it by adding nuts or swapping the caramel for chocolate for a different delicious twist.
- 1 ½ cups all-purpose flour
- 1 cup granulated sugar
- ½ cup brown sugar, packed
- 1 tablespoon baking powder
- 1 teaspoon ground cinnamon
- ½ teaspoon ground nutmeg
- ½ teaspoon salt
- ½ cup unsalted butter, melted
- 1 large egg
- 1 teaspoon vanilla extract
- ½ cup milk
- 1 ½ cups peeled and chopped apples (about 2 medium apples)
- ½ cup caramel sauce (plus more for drizzling on top)
Preheat your oven to 350°F (175°C) and line a muffin tin with paper liners. In a large bowl, whisk together the flour, granulated sugar, brown sugar, baking powder, cinnamon, nutmeg, and salt.
In another bowl, combine the melted butter, egg, vanilla extract, and milk. Gradually mix the wet ingredients into the dry ingredients until just combined. Gently fold in the chopped apples.
Fill each muffin cup halfway, add a teaspoon of caramel sauce into the center, and then top with more batter until full. Bake for 18-20 minutes or until golden brown and a toothpick comes out clean.
To take your Caramel Apple Muffins to the next level, consider adding a cinnamon sugar topping before baking. Simply combine 2 tablespoons of granulated sugar with 1 teaspoon of cinnamon and sprinkle it over the muffins before they go into the oven.
Another tip is to use tart apples like Granny Smith for a nice contrast against the sweet caramel. Make sure to let the muffins cool for a few minutes in the pan before transferring them to a wire rack for ideal texture and flavor. Enjoy your muffins warm for the best experience!
Cinnamon Roll Bundt Cake

Cinnamon Roll Bundt Cake is the perfect treat for any fall gathering or cozy brunch. Combining the classic flavors of cinnamon rolls with a moist and tender cake, this dessert makes for a stunning centerpiece. Its delightful swirls of cinnamon sugar and rich, creamy glaze will have everyone coming back for seconds.
The beautiful bundt shape not only makes it visually appealing but also guarantees that each slice is filled with the delicious flavors that evoke the warmth of autumn.
Making this cake is simpler than you might think, and it requires no special skills. By using a boxed cake mix as a base combined with some delicious cinnamon and sugar, you can achieve that perfect cinnamon roll experience without the fuss of traditional dough.
With the addition of a smooth icing, this cake provides a delightful balance of sweet and spice that pairs exceptionally well with a hot cup of coffee or tea.
Ingredients:
- 1 (15.25 oz) box of vanilla cake mix
- 3 large eggs
- 1 cup sour cream
- 1/2 cup vegetable oil
- 1/4 cup water
- 1 tablespoon vanilla extract
- 1 cup brown sugar, packed
- 2 tablespoons ground cinnamon
- 1/2 cup chopped pecans or walnuts (optional)
- 1/2 cup powdered sugar
- 2 tablespoons milk or cream
Preheat your oven to 350°F (175°C) and grease a bundt pan with non-stick spray. In a mixing bowl, combine the cake mix, eggs, sour cream, vegetable oil, water, and vanilla extract.
In another bowl, mix the brown sugar and cinnamon to create the cinnamon filling. Pour half of the cake batter into the prepared bundt pan, followed by the cinnamon filling, and then top with the remaining batter.
Use a knife to swirl the filling slightly into the batter. Bake for 35-40 minutes, or until a toothpick inserted in the center comes out clean. Allow the cake to cool in the pan for about 10 minutes before inverting onto a serving plate.
For the perfect glaze, mix the powdered sugar with the milk or cream until smooth. Drizzle over the cooled cake before serving. To enhance the flavor, consider adding extras like raisins or caramelized apples to the filling mix.
Make sure to fully cool the cake before glancing on the glaze to prevent it from running off. Additionally, if the cake is properly stored in an airtight container, it will remain fresh and flavorful for several days—if it lasts that long!
Cranberry Orange Bread

Cranberry Orange Bread is a delightful and festive treat that’s perfect for autumn and winter gatherings. The tartness of fresh cranberries pairs beautifully with the bright, zesty flavor of fresh oranges, creating a deliciously moist bread that isn’t overly sweet. This bread can be served as a breakfast option, a snack, or even as a dessert. It also makes a thoughtful gift when wrapped in parchment paper and tied with a ribbon.
Preparing this delightful bread is incredibly simple, and it comes together quickly. It’s a wonderful opportunity to utilize fresh cranberries if you have them on hand, or you can opt for frozen ones available year-round. The aromatic combination of orange zest and juice infuses the bread with an uplifting citrus note, making it a true seasonal favorite.
Plus, the vibrant color of cranberries speckled throughout the loaf makes it as beautiful as it’s delicious.
Ingredients:
- 2 cups all-purpose flour
- 1 cup fresh or frozen cranberries, chopped
- 1 cup granulated sugar
- 1 teaspoon baking powder
- 1/2 teaspoon baking soda
- 1/2 teaspoon salt
- 1 tablespoon orange zest
- 1/2 cup fresh orange juice
- 1/2 cup vegetable oil
- 2 large eggs
- 1 teaspoon vanilla extract
- 1/2 cup chopped walnuts or pecans (optional)
In a large mixing bowl, combine the flour, sugar, baking powder, baking soda, and salt, stirring until well mixed.
In a separate bowl, whisk together the orange zest, orange juice, vegetable oil, eggs, and vanilla extract until blended. Gradually add the wet ingredients to the dry mixture, stirring until just combined. Fold in the chopped cranberries and nuts, if using.
Pour the batter into a greased 9×5 inch loaf pan, smoothing the top with a spatula. Bake in a preheated oven at 350°F (175°C) for 60-65 minutes, or until a toothpick inserted into the center comes out clean.
Allow the bread to cool in the pan for about 10 minutes before transferring it to a wire rack to cool completely.
To enhance the flavor of your cranberry orange bread, consider adding a drizzle of orange glaze on top after it cools, made from powdered sugar and fresh orange juice. Additionally, for an extra burst of flavor, experiment with adding spices such as cinnamon or nutmeg.
Be cautious not to overmix your batter, as this can lead to a denser bread. This recipe also freezes beautifully; simply wrap the cooled loaf tightly in plastic wrap or aluminum foil before placing it in the freezer. Enjoy your homemade treat!
Hot Chocolate With Marshmallows

As the leaves start to turn and the air gets crisp, there’s nothing quite like a warm cup of hot chocolate to bring comfort and joy. Perfect for cozy evenings or chilly afternoons, hot chocolate not only warms you up from the inside out but also brings a sense of nostalgia with every sip.
The combination of rich chocolate and sweet marshmallows is a match made in heaven, creating a delightful treat that can be customized to suit your taste. Crafting the perfect hot chocolate is an art that can easily be mastered.
Whether you prefer using cocoa powder for a classic version or melting chocolate for a richer experience, both methods will elevate your cocoa game. Adding marshmallows gives it that extra touch of indulgence, making it not just a drink, but an experience that feels like a warm hug in a mug.
Ingredients:
- 2 cups whole milk (or any milk of your choice)
- 2 tablespoons unsweetened cocoa powder
- 2 tablespoons granulated sugar (adjust to taste)
- 1/4 cup semi-sweet chocolate chips (optional for extra richness)
- 1/2 teaspoon vanilla extract
- Pinch of salt
- Whipped cream (optional, for topping)
- Mini marshmallows (or regular marshmallows cut into smaller pieces)
In a medium saucepan, combine the milk, cocoa powder, sugar, and a pinch of salt over medium heat. Whisk until the cocoa powder and sugar are fully dissolved, and the mixture is heated (but not boiling). If you’re using chocolate chips, add them now and continue to whisk until melted and smooth.
Stir in the vanilla extract, then remove from heat. Pour the hot chocolate into your favorite mug and top generously with marshmallows and whipped cream, if desired.
When making hot chocolate, feel free to experiment with different types of chocolate or flavored syrups to create your perfect blend. For an extra layer of flavor, consider adding a sprinkle of cinnamon or nutmeg.
If you prefer a creamier texture, you can use half-and-half or even add a splash of coconut milk for a tropical twist. Remember, the key to a great hot chocolate lies in the balance of sweetness and richness, so taste and adjust as you go! Enjoy your cozy creation!

