This post may contain affiliate links. Please read our policy page.
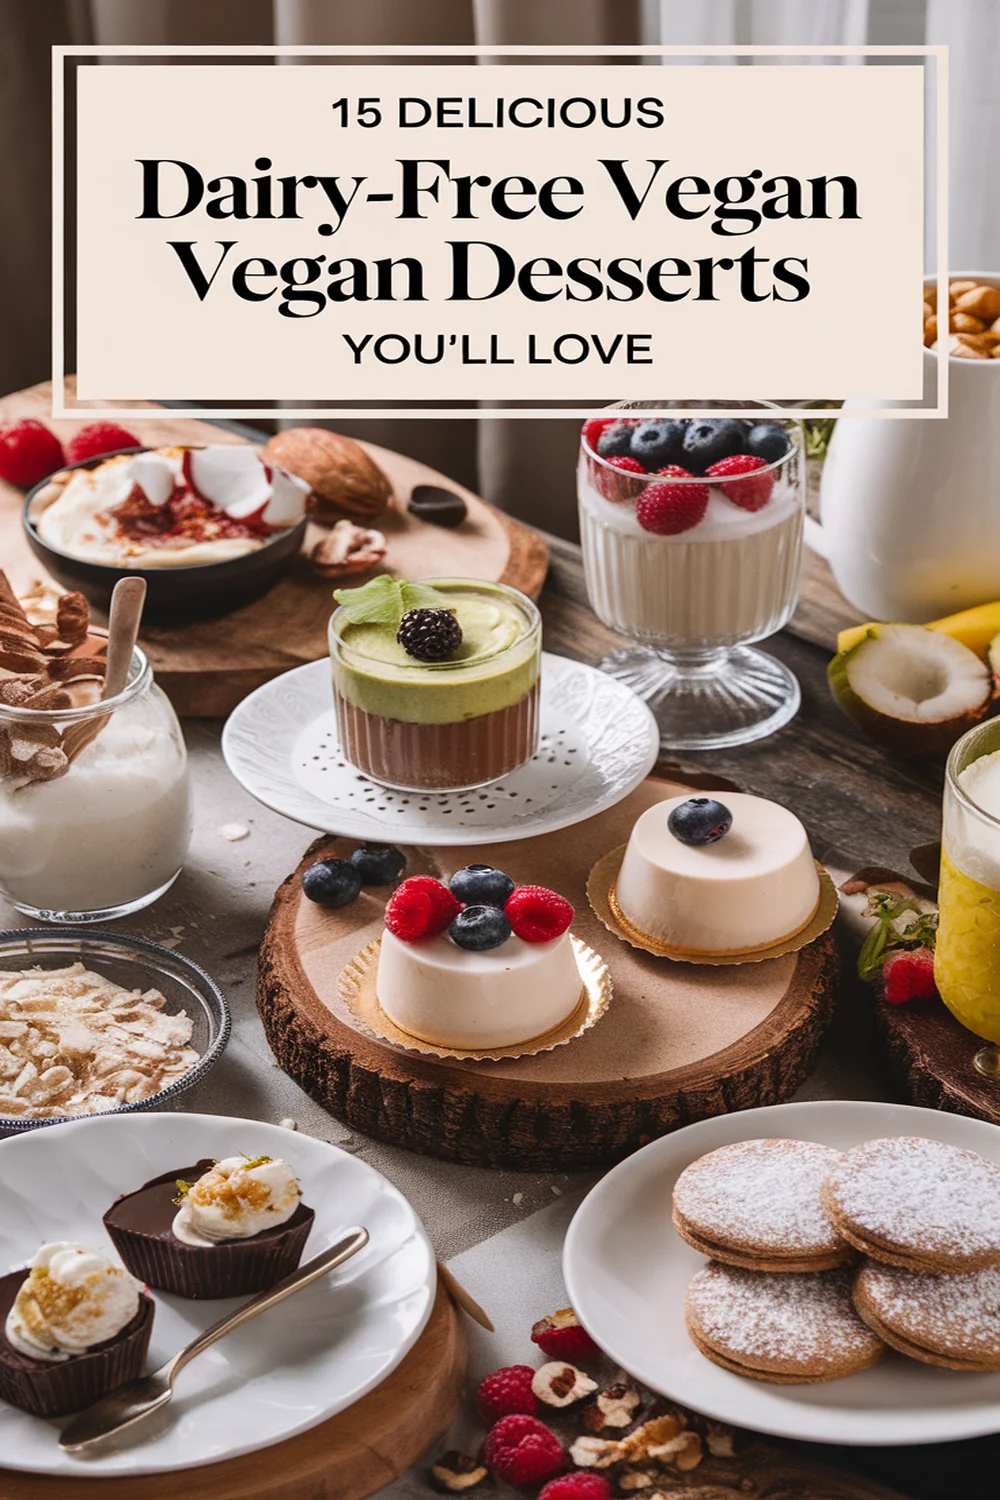
If you’re craving something sweet, you’ll love these 15 delectable dairy-free vegan desserts! From the rich and moist Decadent Vegan Chocolate Cake to the creamy Coconut Milk Ice Cream, each treat is designed to satisfy your taste buds. You can indulge in Classic Almond Butter Brownies or try a revitalizing Raw Vegan Cheesecake. There’s something for everyone, whether it’s a simple snack or an elegant treat. Stick around to uncover a variety of delightful options!
Decadent Vegan Chocolate Cake

If you’re on the hunt for a dessert that satisfies your chocolate cravings while keeping things dairy-free and vegan, search no more than this decadent vegan chocolate cake. This rich, moist cake is a delightful treat that proves you can enjoy all the flavors and textures of traditional chocolate cake without using any animal products.
Made with wholesome ingredients, it’s perfect for birthdays, special celebrations, or simply when you need a sweet pick-me-up. This cake gets its luscious moisture from a combination of plant-based milk and applesauce, which also adds a hint of natural sweetness, complementing the rich cocoa flavor.
Topping it off with a simple vegan chocolate frosting, this dessert is both impressive and easy to whip up, making it a winner in any kitchen. You’ll find that this cake not only tastes divine but is also surprisingly easy and quick to prepare.
Ingredients:
- 1 ½ cups all-purpose flour
- 1 cup granulated sugar
- ⅓ cup unsweetened cocoa powder
- 1 tsp baking soda
- ½ tsp salt
- 1 cup unsweetened almond milk (or any preferred plant-based milk)
- ⅓ cup unsweetened applesauce
- ⅓ cup vegetable oil
- 1 tsp vanilla extract
- 1 tsp apple cider vinegar
Preheat your oven to 350°F (175°C) and grease two 9-inch round cake pans or line them with parchment paper.
In a large mixing bowl, whisk together the flour, sugar, cocoa powder, baking soda, and salt. In another bowl, combine the almond milk, applesauce, vegetable oil, vanilla extract, and apple cider vinegar.
Pour the wet ingredients into the dry ingredients and mix until just combined, being careful not to overmix. Divide the batter evenly between the prepared pans and bake for about 30-35 minutes, or until a toothpick inserted into the center comes out clean.
Allow the cakes to cool completely before frosting.
For added texture and flavor, consider adding in vegan chocolate chips, nuts, or even a splash of espresso to enhance the chocolate experience. When frosting, use a dairy-free chocolate frosting made from coconut cream or avocado for a unique twist.
You can also sprinkle some fresh berries or coconut flakes on top for an extra burst of flavor and color. Enjoy your decadent cake with friends and family, and don’t hesitate to get creative with your toppings!
Coconut Milk Ice Cream
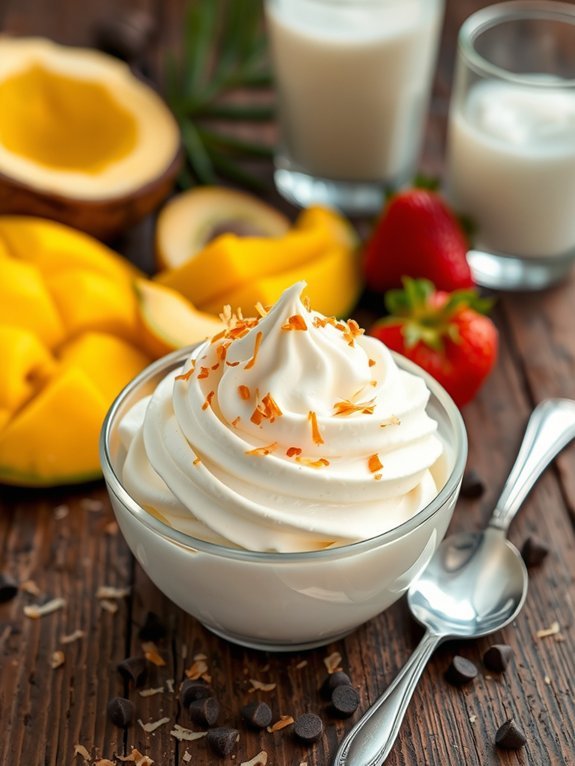
Coconut milk ice cream is a delightful treat that isn’t only dairy-free but also incredibly creamy and rich in flavor. This recipe captures the tropical essence of coconut, making it a perfect dessert for warm weather or anytime you’re craving something sweet and invigorating.
Coconut milk serves as the base for this ice cream, providing a luscious texture that’s sure to please everyone, even those who aren’t following a vegan diet.
Making coconut milk ice cream at home is easier than you may think! With just a few simple ingredients, you can create a delicious dessert that’s free from dairy and packed with natural sweetness. Whether you choose to enjoy it plain or customize it with your favorite mix-ins such as fruits, nuts, or chocolate chips, this coconut milk ice cream can be adapted to suit your tastes. Get ready to treat yourself to a smooth and creamy delight!
- 2 cans full-fat coconut milk
- 3/4 cup maple syrup (or agave syrup)
- 1 tablespoon vanilla extract
- Pinch of salt
- Optional: 1/2 cup shredded coconut, chocolate chips, or fresh fruit
In a mixing bowl, combine the coconut milk, maple syrup, vanilla extract, and salt. Whisk until the mixture is well blended and smooth.
If you want to incorporate any optional add-ins like shredded coconut or chocolate chips, fold them in at this stage. Pour the mixture into an ice cream maker and churn according to the manufacturer’s instructions until it reaches a soft-serve consistency.
Once churned, transfer the ice cream to an airtight container and freeze for at least 4 hours or until firm.
When making coconut milk ice cream, it’s crucial to use full-fat coconut milk for the best texture and creaminess. If you don’t have an ice cream maker, you can still make this recipe by placing the mixture in a shallow dish in the freezer.
Stir the mixture every 30 minutes for the first few hours to break up ice crystals until the ice cream is evenly frozen and creamy.
Enjoy experimenting with different flavors and toppings to create your perfect scoop!
Recommended Items
Get ready to indulge in some delightful treats! Here are our recommended products and equipment to enhance your dairy-free vegan dessert experience—feel free to explore!
Classic Almond Butter Brownies
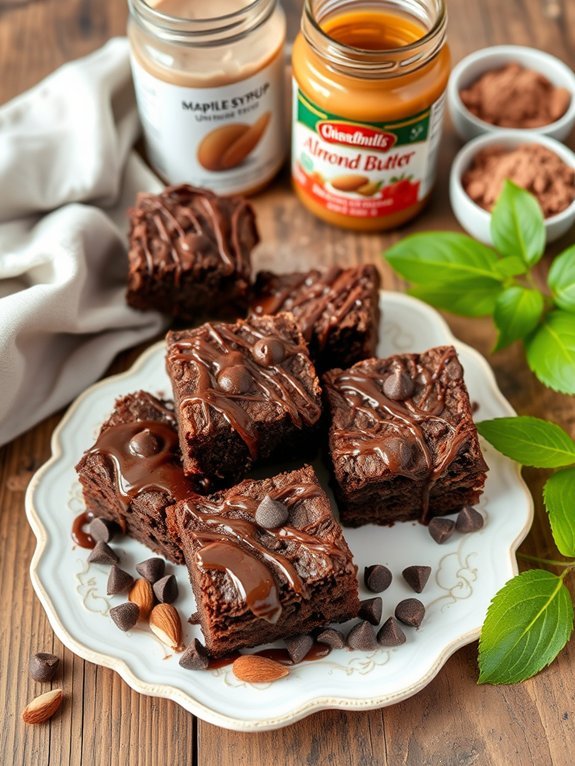
Classic Almond Butter Brownies are the perfect treat for anyone looking to indulge in a rich, fudgy dessert without using dairy or eggs. These brownies are packed with the nutty flavor of almond butter and sweetened naturally with maple syrup, making them not only delicious but also wholesome. They come together quickly and require just a handful of simple ingredients, making them a go-to recipe for last-minute gatherings or cozy nights in.
Not only are these brownies dairy-free and vegan, but they also boast a satisfying chewy texture that will leave you wanting more. With the option to customize them with your favorite add-ins, such as vegan chocolate chips or chopped nuts, you can create your own version of this classic dessert. These brownies are sure to please everyone, whether they follow a plant-based lifestyle or not.
Ingredients:
- 1 cup almond butter
- 1/2 cup maple syrup
- 1/4 cup unsweetened cocoa powder
- 1/2 teaspoon baking soda
- 1/4 teaspoon salt
- 1 teaspoon vanilla extract
- 1/2 cup vegan chocolate chips (optional)
- 1/4 cup chopped nuts (optional)
Preheat your oven to 350°F (175°C) and grease an 8×8 inch baking dish or line it with parchment paper. In a mixing bowl, combine the almond butter, maple syrup, cocoa powder, baking soda, salt, and vanilla extract. Mix until smooth and well-blended.
If you’re adding chocolate chips or nuts, fold them into the batter before transferring it to the prepared baking dish. Spread the batter evenly, then bake for 20-25 minutes, or until a toothpick inserted in the center comes out clean. Allow the brownies to cool in the pan before slicing into squares.
For the best results, make sure your almond butter is well-stirred and smooth before you begin. If you prefer a sweeter brownie, feel free to add an extra tablespoon or two of maple syrup. To enhance the flavors, try adding a pinch of cinnamon or a splash of almond extract for an additional depth.
Store any leftovers in an airtight container for up to a week at room temperature, or refrigerate for extended freshness.
Raw Vegan Cheesecake
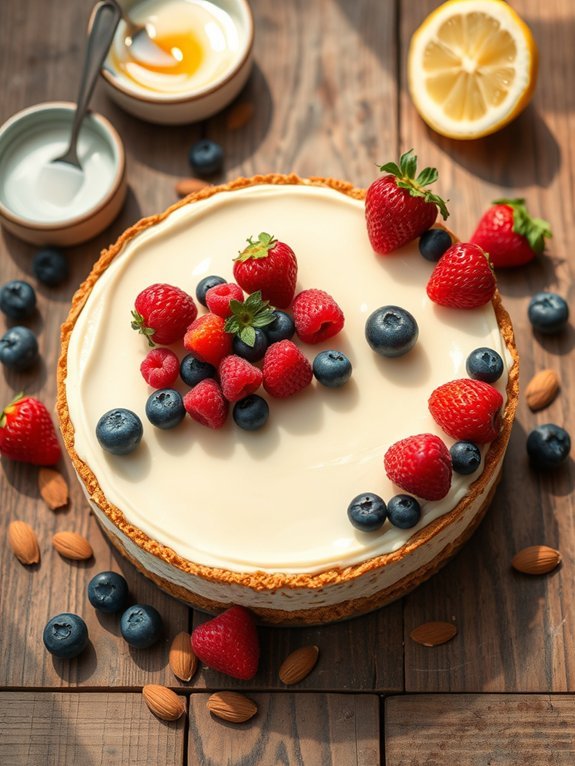
Raw vegan cheesecake is a delicious and indulgent dessert that’s completely dairy-free, making it a great option for those with lactose intolerance or those looking to switch to a plant-based lifestyle. This dessert is rich in flavor and can be made with simple, wholesome ingredients, showcasing the natural sweetness of fruits and the creaminess of nuts. The absence of baking means that making the cheesecake is quick and easy, all while preserving the nutrients from the raw ingredients.
One of the best aspects of raw vegan cheesecake is its versatility. You can easily customize the flavors to suit your tastes, whether it’s a classic vanilla, a luscious chocolate, or a fruity berry topping. The crust is made from nuts and dates, providing a satisfying crunch that perfectly complements the silky smooth filling. This dessert isn’t only a treat for your taste buds but also a feast for the eyes, making it a wonderful addition to any gathering or celebration.
Ingredients:
- 1 cup raw almonds
- 1 cup medjool dates, pitted
- 2 cups raw cashews (soaked for 4 hours)
- 1/2 cup coconut milk
- 1/3 cup maple syrup
- 1/4 cup lemon juice
- 1 tablespoon vanilla extract
- A pinch of salt
To make the raw vegan cheesecake, first, blend the almonds and dates in a food processor until they form a crumbly mixture. Press this mixture into the bottom of a springform pan to create the crust.
Next, drain the soaked cashews and blend them with coconut milk, maple syrup, lemon juice, vanilla extract, and a pinch of salt until smooth and creamy. Pour the cashew filling over the crust and smooth the top with a spatula. Place the cheesecake in the freezer for at least 4 hours to set.
When making raw vegan cheesecake, feel free to experiment with different toppings like fresh fruit, chocolate sauce, or nut butter to enhance the flavors.
Also, remember to let the cheesecake sit at room temperature for about 10-15 minutes before serving to allow it to soften slightly, which will make slicing and serving easier. If you’re not serving it right away, keep it well covered in the freezer, and it will stay fresh for several days!
Vegan Chocolate Mousse
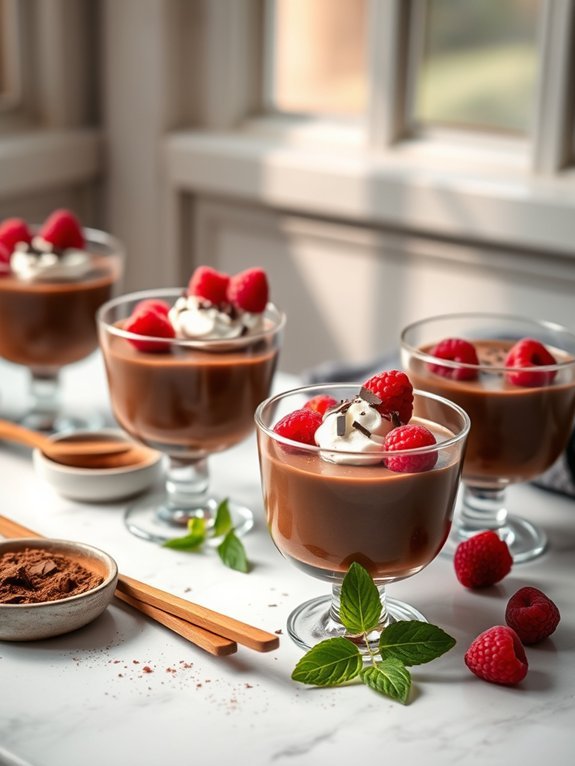
Vegan chocolate mousse is a decadent dessert that satisfies any chocolate lover’s cravings while being completely dairy-free and plant-based. This rich and creamy dessert is surprisingly easy to whip up, making it perfect for special occasions or a simple weeknight treat.
The use of silken tofu not only creates a luscious texture but also provides a protein boost, making this mousse a guilt-free indulgence. You can easily customize the sweetness or flavors to suit your preferences and impress your guests with its velvety finish.
To create the ultimate vegan chocolate mousse, you’ll want to guarantee you use high-quality cocoa powder or dark chocolate. This dessert can also be enhanced with vanilla extract or a hint of espresso powder for a more complex flavor profile. With just a few ingredients, you can enjoy a dessert that’s both satisfying and health-conscious, proving that vegan treats can be just as delicious as their dairy-laden counterparts.
- 1 block (12 oz) silken tofu
- 1 cup dairy-free dark chocolate chips
- 1/4 cup maple syrup (or to taste)
- 1 tsp vanilla extract
- A pinch of salt
Begin by draining the silken tofu and placing it in a blender or food processor. Melt the dark chocolate chips in a microwave or double boiler until smooth.
Add the melted chocolate, maple syrup, vanilla extract, and a pinch of salt to the blender with the tofu. Blend everything together until it’s creamy and well combined. Once you achieve a smooth consistency, pour the mixture into serving cups or bowls and refrigerate for at least 1-2 hours to allow it to set.
For an even more delightful experience, consider adding toppings such as fresh berries, coconut whipped cream, or shaved dark chocolate when serving. You can also experiment with flavor variations by incorporating ingredients like almond extract or a touch of chili powder for a little kick.
Make sure to taste the mousse before chilling to adjust the sweetness to your liking, as the flavors can deepen as it sets. Enjoy your deliciously creamy vegan chocolate mousse!
Delicious Dairy-Free Vegan Desserts Guide
Fruity Chia Seed Pudding
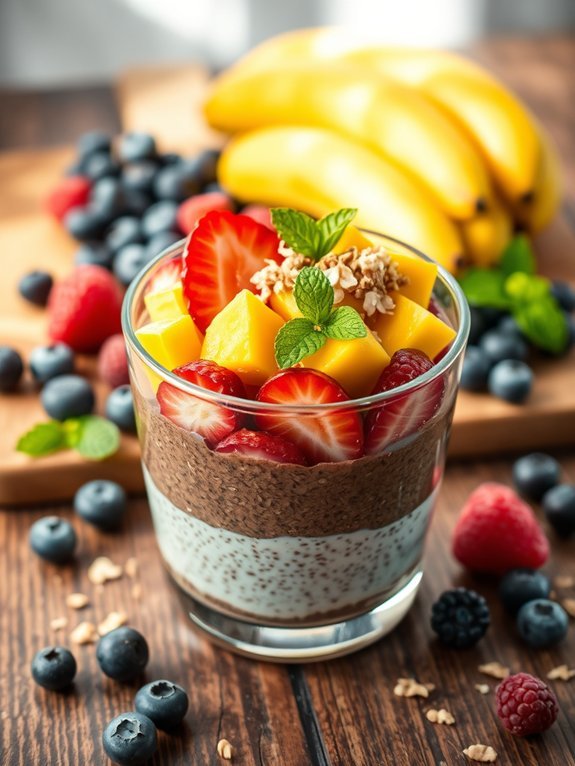
Fruity chia seed pudding is a delightful and nutritious treat that’s perfect for breakfast, a snack, or even dessert. Packed with fiber, omega-3 fatty acids, and protein, chia seeds are tiny powerhouses that absorb liquid and expand to create a satisfying texture. When mixed with your favorite fruit and plant-based milk, they transform into a creamy pudding that can be customized to suit your taste and dietary preferences. The combination of fruity flavors and the nutty undertone of the chia seeds makes this dish both delectable and visually appealing.
Making fruity chia seed pudding is simple, quick, and requires minimal effort. You can prepare it the night before so that it’s ready to enjoy in the morning, making it a convenient option for busy days. Choose from a variety of fruits, whether it’s berries, bananas, or mango, and feel free to experiment with different plant-based milk options like almond, coconut, or oat to find the perfect match for your palate.
Once you get the hang of this easy recipe, you’ll have a go-to dessert that’s versatile and wholesome.
- 1/2 cup chia seeds
- 2 cups plant-based milk (such as almond, coconut, or oat)
- 1-2 tablespoons sweetener (such as maple syrup, agave nectar, or coconut sugar)
- 1 teaspoon vanilla extract
- 1 cup diced fresh fruit (such as strawberries, blueberries, mango, or banana)
- Optional toppings: nuts, seeds, granola, or coconut flakes
In a medium-sized bowl, whisk together the chia seeds, plant-based milk, sweetener, and vanilla extract until well combined. Allow the mixture to sit for about 5 minutes, then stir again to prevent clumping. Cover the bowl and refrigerate for at least 2 hours, or overnight, until the chia seeds have absorbed the liquid and the pudding has thickened.
Once ready, layer the chia seed pudding with your choice of fresh fruit in serving glasses or bowls, and enjoy!
For added flavor and texture, don’t hesitate to enhance your chia pudding with various spices like cinnamon or nutmeg. You can also play around with different flavor combinations by adding cocoa powder for chocolate lovers or blending in some nut butter for creaminess.
If you have leftovers, store them in an airtight container in the refrigerator for up to five days, but keep the fruit separate until you’re ready to serve to maintain freshness.
Creamy Avocado Chocolate Pudding
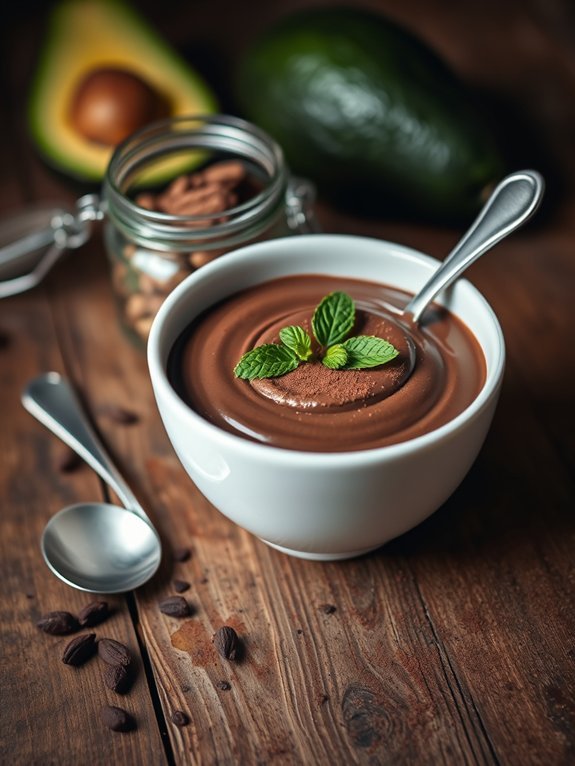
Indulging in desserts doesn’t have to mean compromising on health or dietary preferences. This creamy avocado chocolate pudding is the perfect example of a delicious, dairy-free, and vegan treat that’s rich in flavor and packed with nutrients.
Avocado provides a silky texture, while cocoa powder gives a deep chocolate essence, creating a dessert that satisfies your sweet cravings without the guilt. Making this pudding isn’t only simple but also requires minimal ingredients, making it a perfect go-to treat for a last-minute dessert fix.
The natural creaminess of avocado blends beautifully with the richness of the cocoa and the sweetness of maple syrup, resulting in a decadent pudding that you’ll want to make time and time again. Whether you’re serving it at a gathering or enjoying it all by yourself, this dessert is sure to impress.
- 2 ripe avocados
- 1/2 cup unsweetened cocoa powder
- 1/4 cup maple syrup (adjust to taste)
- 1/4 cup almond milk (or any plant-based milk)
- 1 teaspoon vanilla extract
- A pinch of salt
In a food processor or blender, combine the ripe avocados, cocoa powder, maple syrup, almond milk, vanilla extract, and a pinch of salt. Blend on high until the mixture is completely smooth and creamy, scraping down the sides as needed.
Taste the pudding and adjust sweetness by adding more maple syrup if desired. Once blended to perfection, transfer the pudding into serving bowls or cups and refrigerate for at least 30 minutes to chill.
When making this creamy avocado chocolate pudding, it’s crucial to use ripe avocados as they contribute to the creamy texture and overall taste. Avoid using overripe or underripe avocados, which can alter the final flavor and consistency.
You can also experiment with different flavor variations by adding a touch of espresso powder or a sprinkle of cinnamon for a unique twist. Enjoy this delicious pudding within a few days for the best freshness, and remember to give it a quick stir before serving, as it may thicken in the fridge.
Banana Oatmeal Cookies
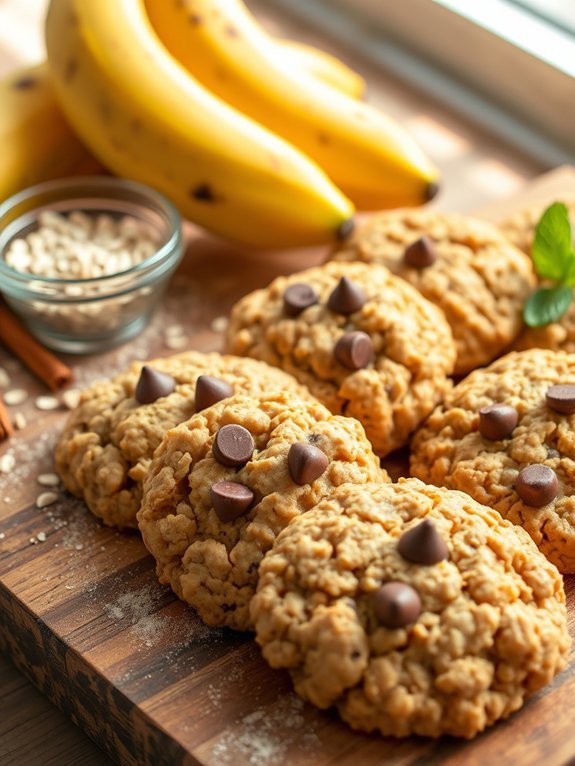
Looking for a simple and delicious dairy-free vegan treat? Banana oatmeal cookies are the perfect solution! These soft and chewy cookies aren’t only easy to make, but they’re also packed with wholesome ingredients that come together beautifully. The ripe bananas provide natural sweetness and moisture, making it unnecessary to add refined sugars or oils.
Plus, oats offer a satisfying texture and added fiber, making these cookies a guilt-free indulgence that can satisfy your sweet tooth.
What’s great about banana oatmeal cookies is their versatility. You can tweak the recipe based on your dietary preferences or whatever you have in your pantry. Add some dark chocolate chips, chopped nuts, or dried fruits for extra flavor and texture, or keep them plain for a classic taste. Either way, they make an excellent snack or dessert option for everyone, from kids to adults who crave something wholesome yet delightful!
Ingredients:
- 2 ripe bananas
- 1 cup rolled oats
- 1/2 teaspoon cinnamon
- 1/4 teaspoon salt
- 1/4 cup maple syrup (optional)
- 1/4 cup dairy-free chocolate chips or nuts (optional)
- 1 teaspoon vanilla extract
In a mixing bowl, mash the ripe bananas until smooth. Stir in the rolled oats, cinnamon, salt, maple syrup (if using), vanilla extract, and any optional ingredients like chocolate chips or nuts until well combined.
Preheat your oven to 350°F (175°C) and line a baking sheet with parchment paper. Scoop tablespoon-sized portions of dough onto the prepared baking sheet, gently flattening them with the back of a spoon. Bake for about 10-12 minutes or until they’re lightly golden on the edges. Let them cool for a few minutes before transferring them to a wire rack to cool completely.
When making banana oatmeal cookies, the ripeness of the bananas is essential. The riper the bananas, the sweeter and more flavorful your cookies will be! Additionally, you can customize the texture by adjusting the amount of oats to your preference – more oats will yield a chewier cookie.
If you prefer a crunchier cookie, consider baking them a little longer, but keep a close eye on them to prevent burning. Enjoy these delicious treats fresh from the oven or store them in an airtight container for a delightful snack throughout the week!
Vegan Peanut Butter Cups
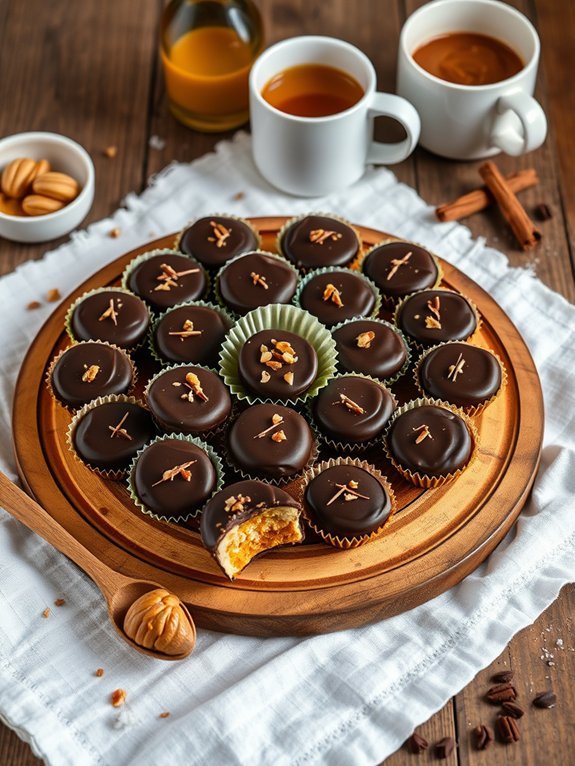
Peanut butter cups are a classic treat that many crave, but traditional versions often contain dairy and other animal products. Luckily, creating a delicious vegan version at home is quite simple and incredibly satisfying. With just a few ingredients, you can whip up a batch of these indulgent sweets that cater to both health-conscious individuals and those following a vegan lifestyle. Not only are they dairy-free, but they’re also free from refined sugars, making them a perfect guilt-free treat.
This recipe calls for creamy vegan peanut butter and rich dark chocolate, combining their flavors to create a delectable dessert that satisfies any sweet tooth. With a satisfying crunch and a melt-in-your-mouth texture, these vegan peanut butter cups are the ultimate combination of sweet and savory. Whether enjoyed as an after-dinner treat or a mid-afternoon snack, they’re sure to brighten your day.
Ingredients:
- 1 cup dairy-free dark chocolate chips
- 1/2 cup natural creamy peanut butter
- 1/4 cup maple syrup or agave nectar
- 1 teaspoon vanilla extract
- 1/4 teaspoon sea salt
- Paper cupcake liners
Melt the dairy-free dark chocolate chips in a double boiler or microwave until smooth. Line a muffin tin with paper cupcake liners and pour a small layer of melted chocolate (about 1 tablespoon) into each liner, gently spreading it around the edges. Allow the chocolate to set in the fridge for about 10 minutes.
In a separate bowl, mix together the peanut butter, maple syrup, vanilla extract, and sea salt until well combined. Once the chocolate has set, dollop a tablespoon of the peanut butter mixture onto the hardened chocolate, then cover it with another layer of melted chocolate. Return the muffin tin to the fridge and let them chill until fully set, about 30 minutes.
For best results, verify that the chocolate is tempered correctly to achieve a nice sheen and snap when bitten into. If you want to add a touch of flavor, consider mixing a pinch of cinnamon into the peanut butter filling or sprinkling some crushed nuts on top before the final chocolate layer. For a fun twist, you can even experiment with different nut butters like almond or cashew!
Enjoy your homemade vegan peanut butter cups in moderation and store any leftovers in an airtight container in the fridge for up to a week.
Coconut Macaroons
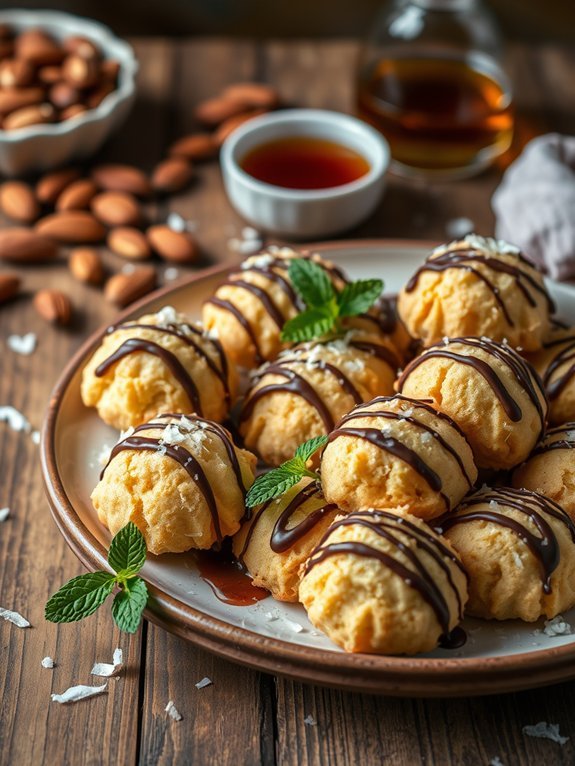
Coconut macaroons are a delightful treat that combines the natural sweetness of shredded coconut with a chewy texture that’s hard to resist.
They’re often mistaken for macarons, which are entirely different; macaroons are thicker, more rustic, and full of coconut flavor. The best part is that these gluten-free little morsels can easily be made dairy-free and vegan, making them suitable for various dietary preferences while still being utterly indulgent.
The simplicity of coconut macaroons is what makes them so appealing. With just a few ingredients, you can create a batch that’s perfect for snacking, dessert, or any gathering.
Whether you enjoy them plain or choose to dip them in dairy-free chocolate, these macaroons are sure to please anyone who encounters them.
- 2 ½ cups shredded unsweetened coconut
- 1 cup almond flour (or any nut flour)
- ½ cup maple syrup or agave syrup
- ½ teaspoon vanilla extract
- ¼ teaspoon salt
- ¼ teaspoon almond extract (optional)
- Dairy-free chocolate (for dipping, optional)
Preheat your oven to 350°F (175°C) and line a baking sheet with parchment paper. In a large mixing bowl, combine the shredded coconut, almond flour, maple syrup, vanilla extract, and salt.
Mix until well-combined, then scoop tablespoonfuls of the mixture onto the prepared baking sheet, forming small mounds. Bake for about 20-25 minutes, or until the macaroons are golden brown.
Allow them to cool completely before enjoying, or dipping in melted dairy-free chocolate for an extra treat.
For best results, make sure to use unsweetened shredded coconut, as sweetened versions could lead to overly sweet macaroons.
If you’d like to enhance the flavor, consider toasting the shredded coconut lightly in the oven before adding it to your mixture.
Keep an eye on them while baking, as oven times can vary; it’s important to pull them out as soon as they’re golden brown to maintain the chewy texture.
Additionally, you can store leftover macaroons in an airtight container at room temperature for a few days or longer in the refrigerator for added freshness.
Chocolate Avocado Truffles
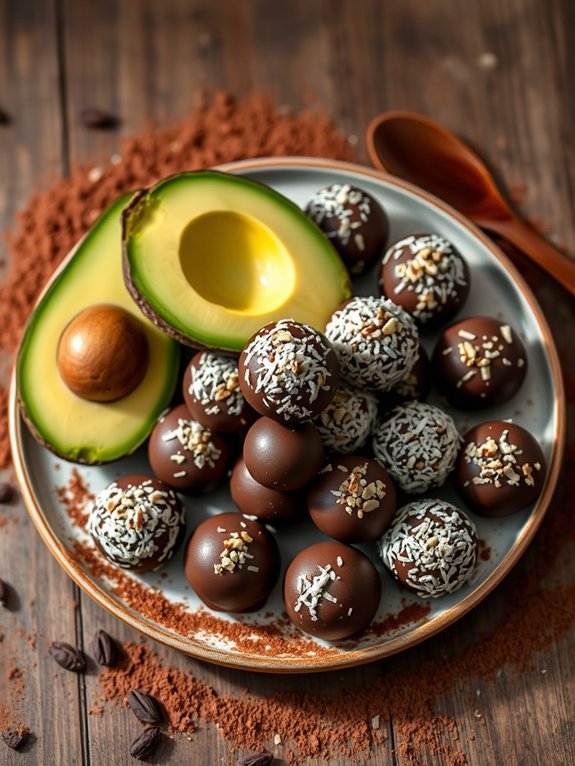
Chocolate avocado truffles are a decadent yet healthy dessert option that prove you really can indulge without compromising your dietary choices. Made primarily from ripe avocados, these truffles have a rich, creamy texture that beautifully mimics the traditional ingredients found in standard chocolate truffles. Infused with pure cocoa powder and natural sweeteners, they create a delightful balance between indulgence and nourishment.
These truffles aren’t only dairy-free and vegan, but they’re also quick and easy to make. With minimal preparation and cooking time, you can satisfy your sweet tooth without the guilt. Perfect for parties, gifts, or simply as a treat for yourself, chocolate avocado truffles are versatile and can easily be customized with various flavors or toppings.
- 2 ripe avocados
- 1 cup dark cocoa powder
- 1/2 cup maple syrup or agave nectar
- 1 teaspoon vanilla extract
- A pinch of sea salt
- Unsweetened shredded coconut or chopped nuts (for coating)
Begin by scooping out the flesh of the ripe avocados and placing them in a blender or food processor. Add the dark cocoa powder, maple syrup, vanilla extract, and sea salt. Blend until the mixture is smooth and creamy, making sure there are no lumps.
Once combined, chill the mixture in the refrigerator for 30 minutes to allow it to firm up. After chilling, use a melon baller or your hands to scoop out small portions and roll them into bite-sized balls. Finally, roll each truffle in shredded coconut or chopped nuts for an added texture before placing them on a parchment-lined tray.
When making these truffles, verify that your avocados are perfectly ripe for the best flavor and texture. If you prefer a sweeter truffle, feel free to adjust the amount of maple syrup to your liking.
Additionally, experimenting with different flavors, such as adding a splash of almond extract or a sprinkle of cinnamon, can elevate these truffles to a new level. For storage, keep them in an airtight container in the refrigerator, where they can last for up to a week, though they probably won’t last that long!
Dairy-Free Tiramisu
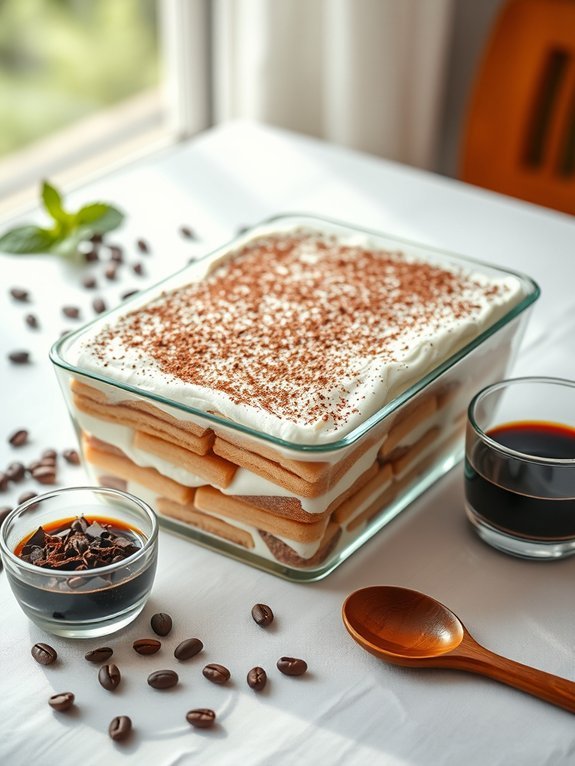
Dairy-Free Tiramisu is a delightful twist on the traditional Italian dessert, perfect for those looking to indulge without the dairy. This version uses rich coconut cream and a caffeine kick from espresso, ensuring that the classic layers of flavor and texture are preserved while staying entirely plant-based.
It’s a wonderful option for parties, gatherings, or simply a cozy night in. Preparing this dessert isn’t only easy but also a fun way to impress friends and family with your vegan culinary skills. The balance of creamy, sweet, and coffee-soaked flavors creates a delightful experience with each bite.
With just a few simple ingredients and steps, you’ll find that you can whip up a delectable Dairy-Free Tiramisu that can compete with any conventional recipe.
Ingredients:
- 1 cup strong brewed espresso or coffee (cooled)
- 1 cup coconut cream (chilled and solidified from a can)
- ¼ cup maple syrup or agave syrup
- 1 teaspoon vanilla extract
- 1 package of dairy-free ladyfinger cookies
- Unsweetened cocoa powder (for dusting)
- Dark chocolate shavings or cacao nibs (optional for garnish)
In a mixing bowl, combine the chilled coconut cream, maple syrup, and vanilla extract, and beat with a hand mixer until light and fluffy. Dip each dairy-free ladyfinger in the espresso quickly, ensuring not to soak them, and start layering them in the bottom of a rectangular or square dish.
Spread half of the whipped coconut cream mixture over the ladyfingers, followed by another layer of dipped ladyfingers, and finish with the remaining cream. Dust the top generously with cocoa powder and optional chocolate shavings, then refrigerate for at least 4 hours (preferably overnight) before serving.
When preparing your Dairy-Free Tiramisu, it’s important to use full-fat coconut cream for the best texture and flavor. If you find that your coconut cream isn’t thick enough, refrigerating the can overnight before using it can help.
Additionally, to enhance the coffee flavor, feel free to add a splash of coffee liqueur to the espresso. Ultimately, let the dessert chill for a longer time if possible; this allows the flavors to meld beautifully, giving you a more delicious result.
Zesty Lemon Bars
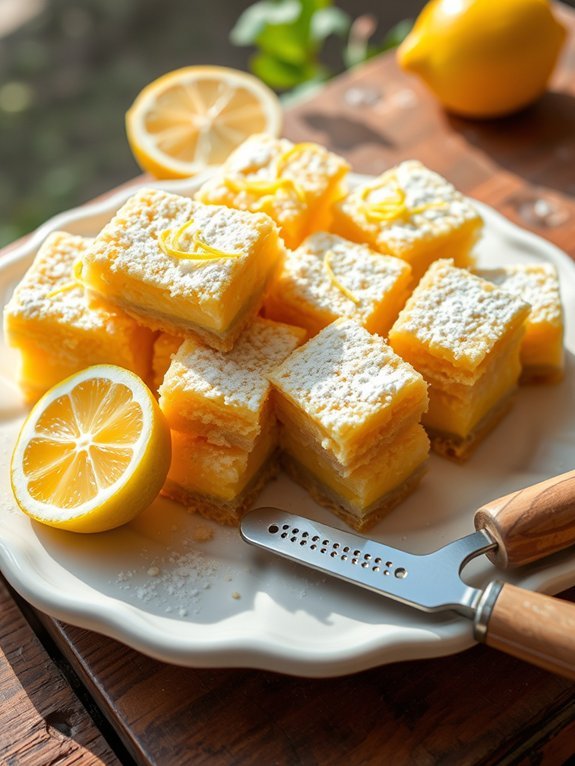
Zesty lemon bars are the perfect dessert for anyone looking to indulge in a sweet yet revitalizing treat. These tangy and tart bars aren’t only dairy-free and vegan, but they also provide an explosion of citrus flavor that brightens up any occasion. With a crumbly, buttery crust and a smooth lemon filling, they’re a delightful balance of sweetness and zest.
Whether you’re serving them at a summer barbecue, a family gathering, or simply enjoying them at home, these lemon bars are sure to impress everyone who takes a bite.
Creating these vegan lemon bars is simple and requires minimal ingredients, making them a go-to recipe for busy bakers. The combination of almond flour and coconut oil in the crust adds a lovely nutty flavor, while the filling is infused with fresh lemon juice and zest for that signature zing.
With their vibrant color and invigorating taste, these bars won’t only satisfy your sweet tooth but also leave you feeling guilt-free!
Ingredients:
- 1 ½ cups almond flour
- ½ cup coconut oil, melted
- ¼ cup maple syrup
- 1 cup fresh lemon juice
- Zest of 2 lemons
- ½ cup coconut sugar
- 1/4 cup cornstarch
- 1/4 teaspoon turmeric (for color)
- Pinch of salt
Preheat your oven to 350°F (175°C). In a bowl, mix the almond flour, melted coconut oil, maple syrup, and a pinch of salt until you have a crumbly dough. Press the mixture into the bottom of an 8×8-inch baking pan tightly.
Bake the crust for about 10-12 minutes or until lightly golden. In another bowl, whisk together the lemon juice, lemon zest, coconut sugar, cornstarch, and turmeric until smooth. Pour the lemon filling over the crust and return it to the oven. Bake for an additional 25-30 minutes until set, then let the bars cool completely before cutting them into squares.
When making these lemon bars, it’s critical to verify that your lemon juice is freshly squeezed, as this will greatly enhance the flavor. Additionally, let the bars cool thoroughly before slicing to achieve clean edges; refrigerating them for a few hours after baking can help them set up even more.
For an extra burst of flavor, feel free to garnish with additional lemon zest or a sprinkle of powdered sugar just before serving. Enjoy!
No-Bake Vegan Energy Bites

No-Bake Vegan Energy Bites are the perfect snack for those looking for a quick energy boost without the additives found in many store-bought options. These little bites aren’t only delicious but also packed with nutrients, making them an ideal choice for post-workout fuel or an afternoon pick-me-up. They combine whole foods like oats, nuts, and seeds, and can be easily customized with your favorite mix-ins, allowing for endless variations.
Preparation is simple and requires no baking, making them accessible for even novice cooks. In just a few minutes, you can whip up a batch of these tasty treats, store them in the fridge or freezer, and enjoy a healthy snack any time you need a little extra energy.
Plus, they’re great for meal prepping, allowing you to have a nutritious option ready to go during your busy week.
Ingredients:
- 1 cup rolled oats
- 1/2 cup nut butter (almond or peanut)
- 1/3 cup maple syrup or agave nectar
- 1/2 cup shredded coconut (unsweetened)
- 1/4 cup chia seeds
- 1/2 cup chocolate chips (dairy-free)
- 1 teaspoon vanilla extract
- A pinch of salt
In a large mixing bowl, combine the rolled oats, nut butter, maple syrup, shredded coconut, chia seeds, chocolate chips, vanilla extract, and salt. Use a spatula or your hands to mix everything until well combined.
Once the mixture is uniform, roll it into small balls (about 1 inch in diameter) and place them on a baking sheet lined with parchment paper. Once you’ve formed all the bites, refrigerate them for at least 30 minutes to firm up before enjoying.
When making your No-Bake Vegan Energy Bites, feel free to get creative with the ingredients! You can add spices like cinnamon or nutmeg, or include extras like dried fruit, nuts, or seeds to suit your taste.
Adjust the sweetness by adding more or less maple syrup according to your preference. Finally, store the bites in an airtight container in the fridge for up to a week, or freeze them for longer storage, ensuring you always have a healthy treat on hand.
Vegan Strawberry Shortcake

Indulging in a delightful strawberry shortcake doesn’t have to mean sacrificing your dietary preferences. This vegan strawberry shortcake recipe isn’t only dairy-free, but it also serves up all the deliciousness you expect from this classic dessert, with a twist.
Made with fresh, succulent strawberries, fluffy sponge cake, and a creamy coconut whipped topping, this dessert is a showstopper for any occasion. Perfect for warm summer afternoons or family gatherings, the vibrant flavors and textures promise a satisfying treat for all.
Creating this vegan version is simple and allows you to enjoy the natural sweetness of strawberries without any animal products. This recipe uses wholesome ingredients, guaranteeing that you can relish the joy of dessert without a hint of guilt.
With just a few steps, you’ll have a stunning strawberry shortcake that’s sure to impress both vegan and non-vegan guests alike.
Ingredients:
- 2 cups all-purpose flour
- 1 cup almond milk (or any dairy-free milk)
- 1 cup organic cane sugar
- 1/3 cup vegetable oil
- 1 tablespoon baking powder
- 1 teaspoon vanilla extract
- 1/4 teaspoon salt
- 2 cups fresh strawberries, hulled and sliced
- 1 tablespoon maple syrup (for strawberries)
- 1 can coconut cream, chilled
- 2 tablespoons powdered sugar (for whipped topping)
- 1 teaspoon vanilla extract (for whipped topping)
In a mixing bowl, combine the flour, baking powder, sugar, and salt. In another bowl, whisk together the almond milk, vegetable oil, and vanilla extract.
Pour the wet ingredients into the dry ingredients and mix until just combined. Pour the batter into a greased round cake pan and bake at 350°F (175°C) for about 25-30 minutes, or until a toothpick inserted into the center comes out clean.
Let the cake cool completely before slicing it in half horizontally. Whip the chilled coconut cream with powdered sugar and vanilla until fluffy.
Layer the cake with the sliced strawberries (mixed with maple syrup) and the coconut whipped cream, then top with the other half of the cake and decorate as desired.
When making vegan strawberry shortcake, verify that your coconut cream is well-chilled before whipping, as this will help it achieve the right texture.
Feel free to experiment with different fruits or add a hint of lemon zest to brighten the flavors. If you’re looking for a gluten-free option, substitute the all-purpose flour with a gluten-free blend.
To enhance the presentation, consider garnishing with a sprig of mint or a dusting of powdered sugar. Enjoy your delicious vegan strawberry shortcake!

