This post may contain affiliate links. Please read our policy page.
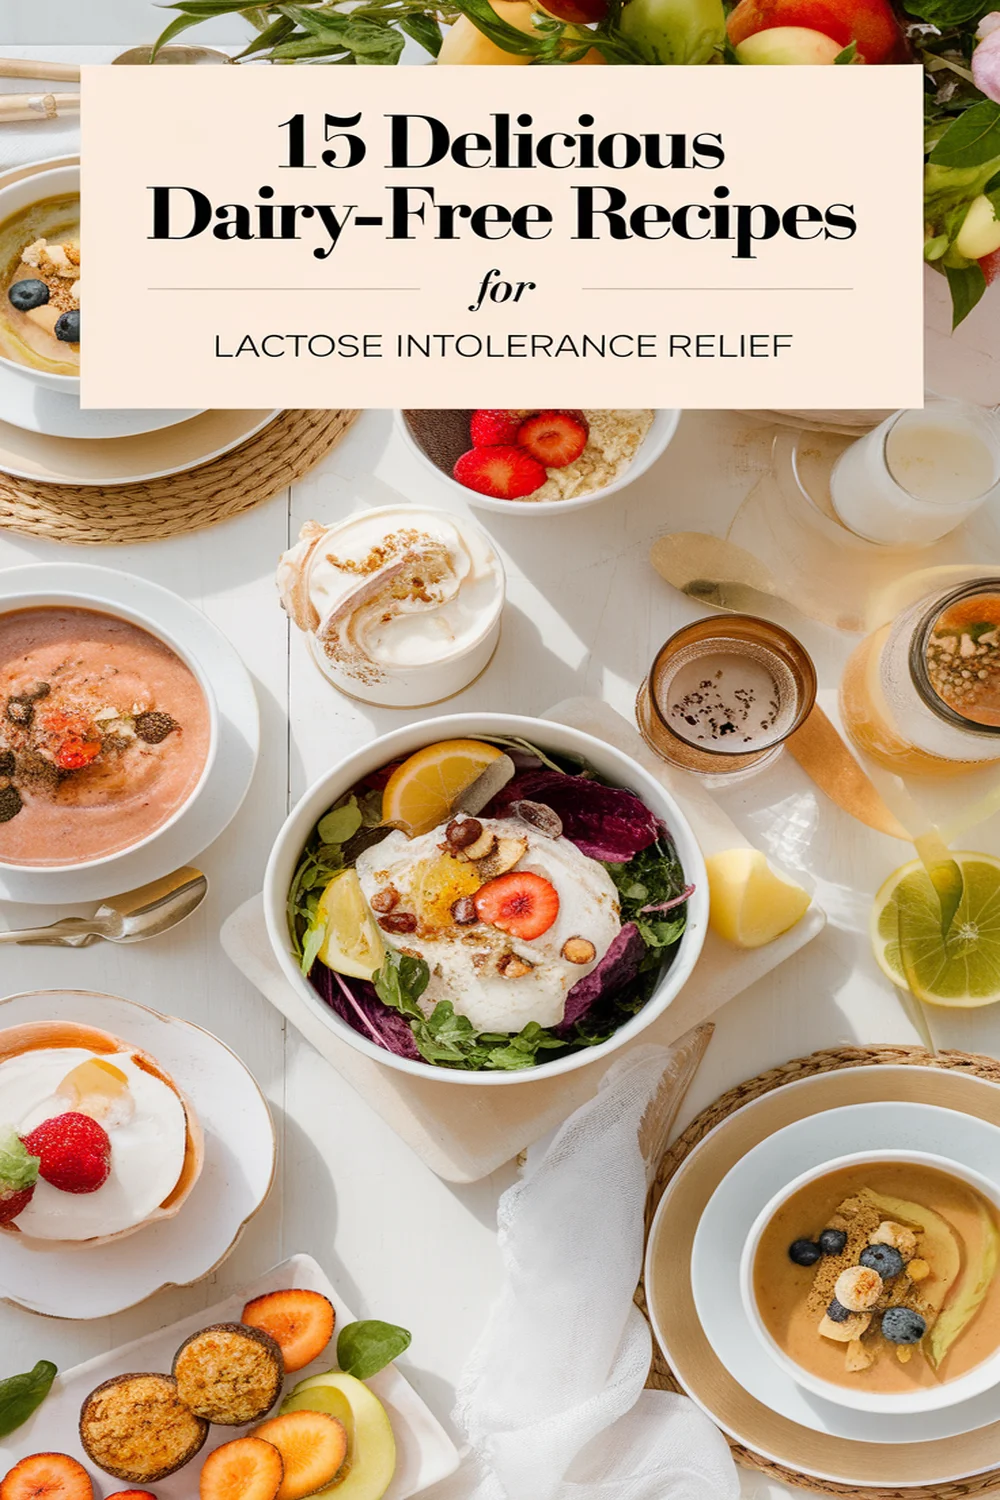
If you’re looking for delicious dairy-free recipes to ease lactose intolerance, you’ve got options! Try the creamy vegan pasta primavera or the savory lentil shepherd’s pie. For something lighter, the zesty quinoa salad with avocado dressing is invigorating. Sweet cravings? Bake dairy-free chocolate chip cookies or whip up almond joy energy balls. All these dishes are packed with flavor and nutrients. Keep exploring and you’ll uncover even more satisfying meal ideas.
Creamy Vegan Pasta Primavera
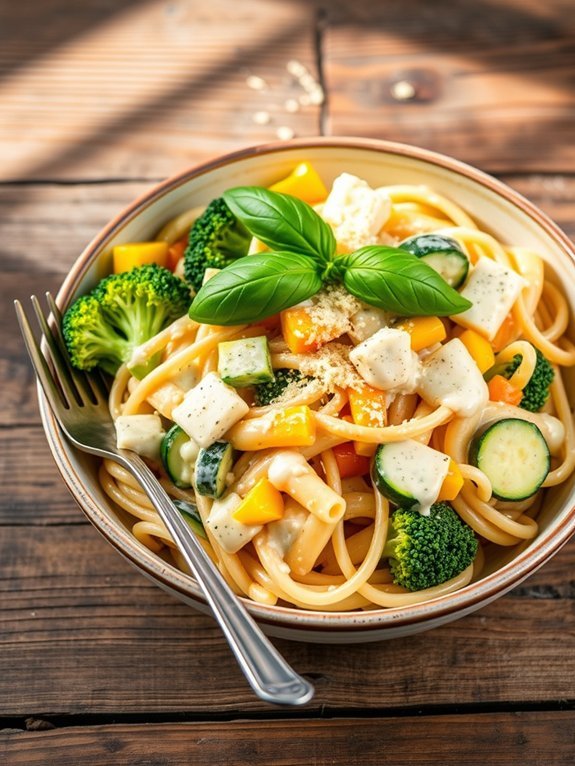
Creamy Vegan Pasta Primavera is a delightful and colorful dish that celebrates the vibrant flavors of fresh vegetables, all while being completely dairy-free. This recipe is perfect for those who are lactose intolerant or simply looking to adopt a plant-based lifestyle. The creamy sauce is made from a blend of cashews and nutritional yeast, which provides a rich, cheesy flavor without any dairy.
This pasta primavera isn’t only delicious but also packed with nutrients, making it a great way to incorporate more vegetables into your diet. You can customize the dish with your favorite seasonal vegetables, ensuring that it’s both versatile and satisfying. Serve this dish warm, and you’ll have a comforting meal that everyone will love, regardless of dietary restrictions.
Ingredients:
- 8 oz of pasta (gluten-free if needed)
- 1 cup raw cashews (soaked for 4 hours)
- 1/4 cup nutritional yeast
- 1 cup vegetable broth
- 2 tablespoons olive oil
- 2 cloves garlic (minced)
- 1 zucchini (sliced)
- 1 bell pepper (sliced)
- 1 cup cherry tomatoes (halved)
- 1 cup broccoli florets
- Salt and pepper to taste
- Fresh basil for garnish (optional)
Cook the pasta according to package instructions until al dente. In a blender, combine the soaked cashews, nutritional yeast, vegetable broth, and a pinch of salt and pepper, then blend until smooth and creamy.
In a large skillet, heat olive oil over medium heat, add the minced garlic and sauté until fragrant. Add the sliced zucchini, bell pepper, broccoli, and cherry tomatoes, cooking until they’re tender. Pour the creamy cashew sauce over the sautéed vegetables, combine with the cooked pasta, and stir until everything is well-coated and heated through.
For the best results, make sure to soak the cashews for the right amount of time; this allows them to blend smoothly into the sauce without any graininess. You can also experiment with different vegetables according to the season or your preferences, and remember to adjust the seasoning to suit your taste.
If you want an extra punch, consider adding a squeeze of fresh lemon juice or a pinch of red pepper flakes for some heat!
Zesty Quinoa Salad With Avocado Dressing
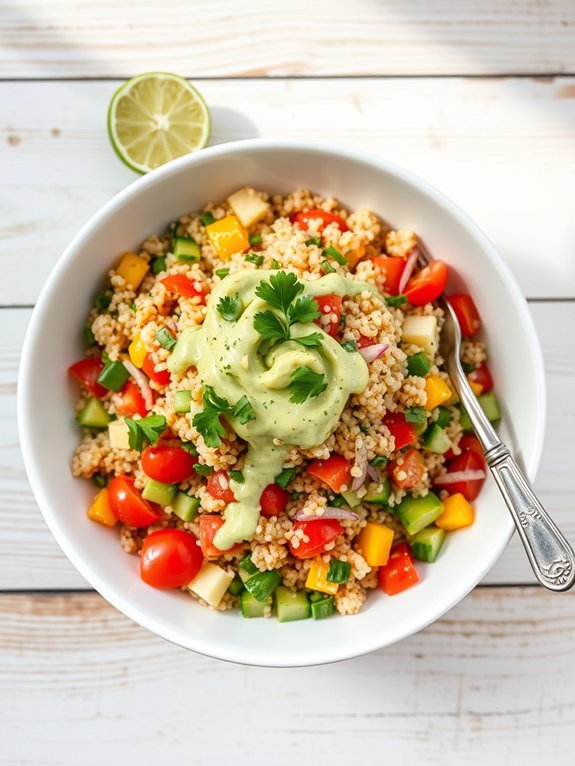
Indulging in a revitalizing and zesty quinoa salad is a fantastic way to enjoy a nutritious meal while being mindful of lactose intolerance. This vibrant salad combines protein-packed quinoa with a variety of fresh vegetables, all topped off with a creamy avocado dressing that provides a satisfying, dairy-free alternative. It’s not only easy to prepare but also packed with flavor and health benefits!
Quinoa is a superfood that’s rich in fiber, iron, and essential amino acids, making it a great addition to any diet. Toss in some crisp bell peppers, juicy tomatoes, and crunchy cucumbers, and you have a colorful dish that’s as pleasing to the eyes as it’s to the palate. The avocado dressing elevates the salad by lending a velvety texture and a zesty flair, making it perfect for a light lunch or as a side dish for dinner gatherings.
Ingredients:
- 1 cup quinoa
- 2 cups water or vegetable broth
- 1 cup cherry tomatoes, halved
- 1 cup cucumber, diced
- 1 bell pepper, diced (any color)
- 1/4 cup red onion, finely chopped
- 1 avocado
- 2 tablespoons lime juice
- 1 tablespoon olive oil
- Salt and pepper, to taste
- Fresh cilantro or parsley, for garnish
Rinse the quinoa under cold water and then cook it according to package instructions using water or vegetable broth for added flavor. Once cooked, let it cool and fluff with a fork.
Meanwhile, in a blender, combine the avocado, lime juice, olive oil, salt, and pepper, blending until smooth. In a large bowl, mix together the cooled quinoa, chopped vegetables, and drizzle the avocado dressing over the top. Toss gently to combine and garnish with fresh herbs before serving.
To add more texture and flavor to your salad, consider incorporating additional ingredients such as black beans, corn, or even grilled chicken or shrimp for a protein boost. For a more intense lime flavor, you can adjust the lime juice to your taste, and don’t hesitate to experiment with different herbs like basil or mint for a fresh twist.
If you’re prepping ahead of time, keep the dressing separate until you’re ready to serve to maintain the salad’s crispness.
Dairy-Free Chocolate Chip Cookies

If you’re on the hunt for a delicious dessert that caters to lactose intolerance, search no further than these delectable dairy-free chocolate chip cookies. With their rich flavor and chewy texture, they’re sure to satisfy your sweet tooth without any discomfort.
Using dairy-free substitutes, these cookies are easy to whip up and perfect for sharing at gatherings or enjoying during a cozy night in.
These cookies boast classic flavors that everyone loves, and the best part is that they’re incredibly adaptable. You can experiment with various mix-ins such as nuts or dried fruits to create a personalized touch. Whether enjoyed warm straight from the oven or as an after-school snack, these dairy-free chocolate chip cookies are a delightful treat that everyone can enjoy, regardless of dietary restrictions.
Ingredients:
- 1 cup coconut oil (softened)
- 1 cup brown sugar
- 1/2 cup granulated sugar
- 1/4 cup non-dairy milk (almond, soy, or oat milk)
- 2 teaspoons vanilla extract
- 2 cups all-purpose flour
- 1 teaspoon baking soda
- 1/2 teaspoon salt
- 1 cup dairy-free chocolate chips
In a large mixing bowl, cream together the softened coconut oil, brown sugar, and granulated sugar until smooth and fluffy.
Mix in the non-dairy milk and vanilla extract until well combined. In a separate bowl, whisk together the flour, baking soda, and salt. Gradually add the dry ingredients to the wet mixture, stirring until just combined.
Fold in the dairy-free chocolate chips. Once the dough is prepared, scoop tablespoon-sized amounts onto a lined baking sheet, and bake in a preheated oven at 350°F (175°C) for about 10-12 minutes, or until the edges are golden brown.
Allow to cool slightly before transferring to a wire rack.
For best results, make sure that your coconut oil isn’t too warm, as this can affect the texture of your cookies.
If you find the dough is a bit sticky, chill it in the refrigerator for 30 minutes before baking. Additionally, feel free to adjust the amount of chocolate chips to your preference, or consider adding in chopped nuts for an extra crunch.
These small tweaks can help you achieve the perfect cookie every time!
Savory Lentil Shepherd’s Pie
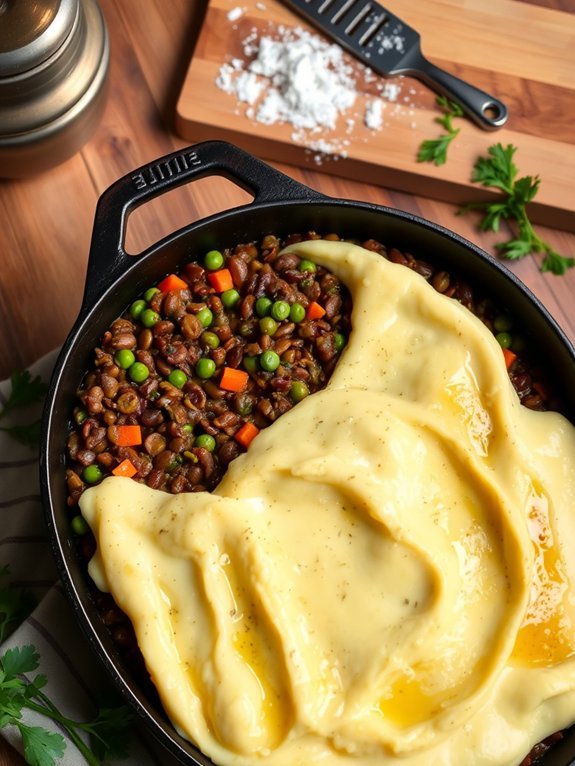
Savory Lentil Shepherd’s Pie is a hearty, comforting dish that’s perfect for anyone seeking a dairy-free meal that’s high in flavor and nutrients. This classic dish is typically made with ground meat, but here we’ll use lentils as the star ingredient. Lentils not only provide a rich, savory flavor but also pack a punch of protein and fiber, making this dish both wholesome and filling.
The combination of lentils with vegetables and herbs topped off with a creamy mashed potato layer creates a satisfying experience for everyone, regardless of dietary restrictions. Making this dish is straightforward and can easily be customized according to your taste preferences. Feel free to add in different vegetables or spices to really make it your own.
The lentils provide a wonderfully hearty texture, while the mashed potatoes form a deliciously smooth topping that’s sure to evoke comfort. Whether you’re dealing with lactose intolerance, looking to eat healthier, or simply craving a delicious meal, this Savory Lentil Shepherd’s Pie is here to fulfill.
Ingredients:
- 1 cup green or brown lentils, rinsed and drained
- 3 cups vegetable broth
- 1 tablespoon olive oil
- 1 onion, chopped
- 2 carrots, diced
- 2 celery stalks, diced
- 2 cloves garlic, minced
- 1 teaspoon dried thyme
- 1 teaspoon dried rosemary
- 1 cup frozen peas
- Salt and pepper to taste
- 4 cups mashed potatoes (dairy-free)
- Fresh parsley, chopped (for garnish)
In a large pot, heat the olive oil over medium heat and sauté onions, garlic, carrots, and celery until softened. Add in the rinsed lentils, vegetable broth, thyme, rosemary, and season with salt and pepper.
Bring to a simmer and cook for about 25-30 minutes or until the lentils are tender and the mixture is thickened. Stir in the frozen peas. Preheat your oven to 400°F (200°C). In a baking dish, spread the lentil mixture evenly, and top it with the dairy-free mashed potatoes, smoothing it out. Bake for about 20-25 minutes, or until the mashed potatoes are slightly golden on top.
When making this dish, it’s important to ascertain the lentils are fully cooked to achieve the right texture and flavor. If you prefer a creamier topping, consider mixing in a dairy-free butter or a splash of non-dairy milk into the mashed potatoes before spreading it over the lentil mixture.
Feel free to prepare the lentil base ahead of time and assemble it right before baking for a convenient weeknight meal. Enjoy your delicious, dairy-free shepherd’s pie!
Coconut Milk Rice Pudding
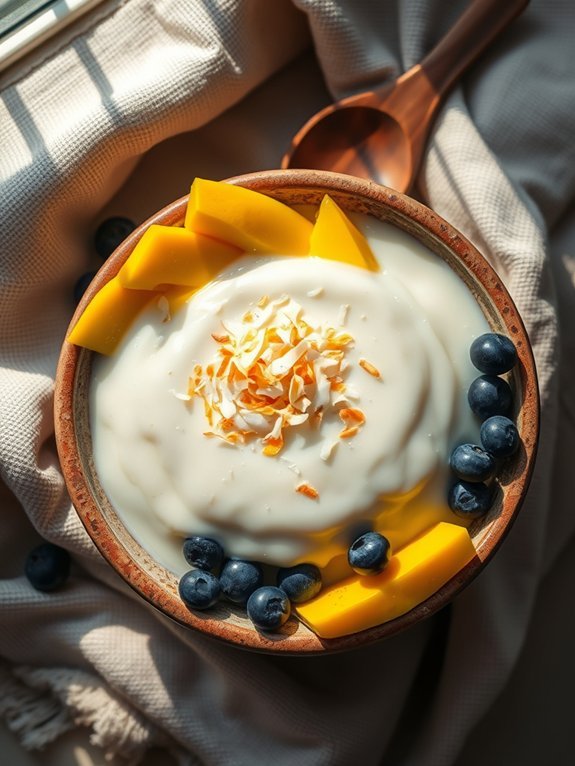
Coconut Milk Rice Pudding is a delightful and creamy dessert that’s both lactose-free and bursting with flavor. This dish is perfect for those with lactose intolerance as it uses rich coconut milk instead of traditional dairy products. The natural sweetness of the coconut pairs beautifully with the subtle flavor of rice, making it an indulgent treat that can be enjoyed by everyone.
Making Coconut Milk Rice Pudding is an easy process that requires minimal ingredients and effort. Whether you want to enjoy it warm as a comforting dessert or chilled for a revitalizing treat, this rice pudding can be effortlessly customized with your favorite toppings such as fresh fruits, nuts, or a sprinkle of cinnamon. With its luxurious texture and tropical flavor, it’s sure to become a favorite in your dessert repertoire.
- 1 cup arborio rice (or any short-grain rice)
- 4 cups coconut milk (canned or boxed)
- 1/4 cup sugar (adjust according to taste)
- 1 tsp vanilla extract
- 1/4 tsp salt
- Optional toppings: shredded coconut, chopped fruit, or nuts
In a medium saucepan, combine the arborio rice, coconut milk, sugar, vanilla extract, and salt. Bring the mixture to a gentle simmer over medium heat, stirring occasionally to prevent sticking. Once it reaches a simmer, reduce the heat to low and cook for about 25-30 minutes, or until the rice is tender and the pudding has thickened to your desired consistency.
Make sure to stir regularly to guarantee even cooking and to avoid any rice sticking to the bottom of the pan.
When making Coconut Milk Rice Pudding, keep in mind that the pudding will thicken further as it cools. If you prefer a creamier texture, feel free to add a bit more coconut milk at the end of cooking to loosen it up.
Additionally, you can experiment with flavorings by incorporating spices like cinnamon or nutmeg, or by mixing in some chocolate or citrus zest for a twist. Enjoy this simple yet decadent dessert warm or chilled, and don’t hesitate to get creative with your toppings!
Recommended Items
Explore our handpicked products and tools to enhance your dairy-free cooking experience!
Products
Spicy Chickpea Tacos With Lime Crema
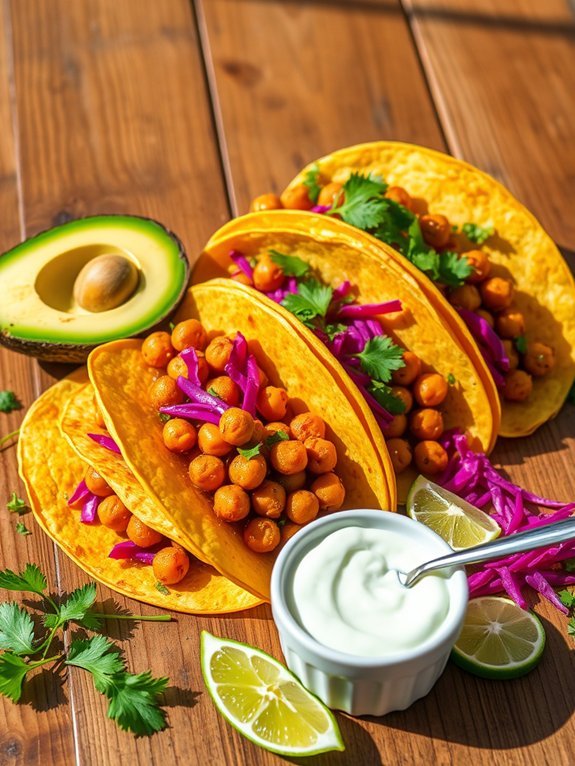
If you’re looking for a delicious and satisfying meal that’s both dairy-free and packed with flavor, these Spicy Chickpea Tacos with Lime Crema are a perfect choice. Made with seasoned chickpeas and fresh toppings, these tacos bring a burst of taste while remaining entirely plant-based.
They’re quick to prepare and can easily become a weeknight favorite or a standout feature for your next gathering. The lime crema adds a rejuvenating twist that perfectly balances the spiciness of the chickpeas. You can whip this dish up in under 30 minutes, making it ideal for busy schedules.
Serve it with your favorite toppings such as avocado, shredded cabbage, or fresh cilantro for an extra layer of flavor and crunch.
Ingredients:
- 1 can chickpeas (15 oz), drained and rinsed
- 2 tablespoons olive oil
- 1 teaspoon cumin
- 1 teaspoon paprika
- 1/2 teaspoon cayenne pepper (adjust for spice level)
- Salt and pepper to taste
- 8 small corn tortillas
- 1 avocado, sliced
- 1 cup shredded red cabbage
- Fresh cilantro for garnish
Lime Crema:
- 1/2 cup dairy-free sour cream or yogurt
- Juice of 1 lime
- Zest of 1 lime
- Salt to taste
In a large skillet, heat the olive oil over medium heat. Add the chickpeas, cumin, paprika, cayenne pepper, salt, and pepper. Sauté for about 5-7 minutes or until the chickpeas are heated through and slightly crispy.
While the chickpeas cook, mix the dairy-free sour cream or yogurt with lime juice, lime zest, and a pinch of salt in a small bowl to make the lime crema. Warm the corn tortillas in a separate skillet or directly over an open flame until soft and pliable.
For the best flavor, let the chickpeas marinate for a few minutes after cooking to absorb the spices fully. Additionally, you can customize your tacos by adding more vegetables or even a dollop of salsa for an extra kick.
If you’re preparing these for guests, consider serving the toppings separately so everyone can build their own tacos to their liking.
Enjoy the balance of spice and freshness while knowing you’re keeping it dairy-free!
Proposed Recipe
Roasted Vegetable and Hummus Wrap
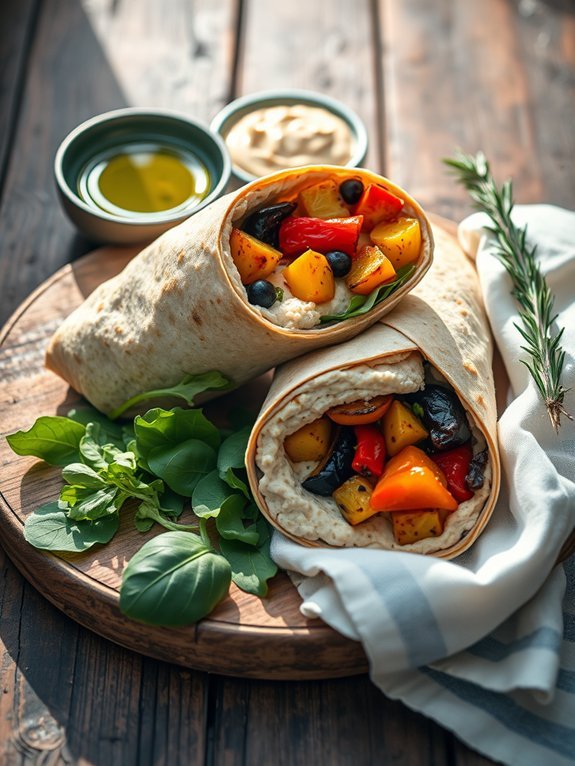
Roasted Vegetable and Hummus Wraps are a delightful solution for anyone dealing with lactose intolerance, providing a satisfying and nutritious meal that’s entirely dairy-free.
These wraps feature a colorful assortment of roasted vegetables, paired perfectly with creamy hummus, all wrapped up in a soft tortilla or flatbread. Not only are they easy to prepare, but they also make for a versatile dish that you can customize depending on your taste preferences or what you have available in your kitchen.
The process begins with perfectly roasting seasonal vegetables, which brings out their natural sweetness and enhances their flavors. The combination of roasted bell peppers, zucchini, eggplant, and onions creates a delicious and vibrant filling that contrasts nicely with the smoothness of the hummus. This wrap is great for lunches, quick dinners, or even as a healthy snack.
Plus, you can easily pack it up for a day out, making it a favorite for picnics or road trips.
Ingredients:
- 1 medium zucchini, sliced
- 1 medium eggplant, diced
- 1 red bell pepper, sliced
- 1 yellow bell pepper, sliced
- 1 medium onion, sliced
- 2 tablespoons olive oil
- Salt and pepper, to taste
- 1 cup hummus (store-bought or homemade)
- 4 large tortillas or flatbreads
- Fresh spinach or arugula (optional)
Preheat your oven to 425°F (220°C). In a large bowl, toss the sliced zucchini, diced eggplant, bell peppers, and onion with olive oil, salt, and pepper until well coated.
Spread the vegetables on a baking sheet lined with parchment paper and roast for about 25-30 minutes, or until they’re tender and slightly caramelized.
Once roasted, lay out the tortillas or flatbreads and spread a generous layer of hummus on each. Top with the roasted vegetables and a handful of fresh spinach or arugula, then roll tightly into wraps.
When preparing your wraps, feel free to experiment with different vegetables or add-ins based on your flavor preferences.
For extra protein, consider adding chickpeas or slices of grilled chicken that are also dairy-free. You can also try swapping out the hummus for a different spread, such as avocado or baba ghanoush, for a unique twist. Additionally, these wraps hold up well in the fridge, making them perfect for meal prep throughout the week.
Classic Tomato Basil Soup
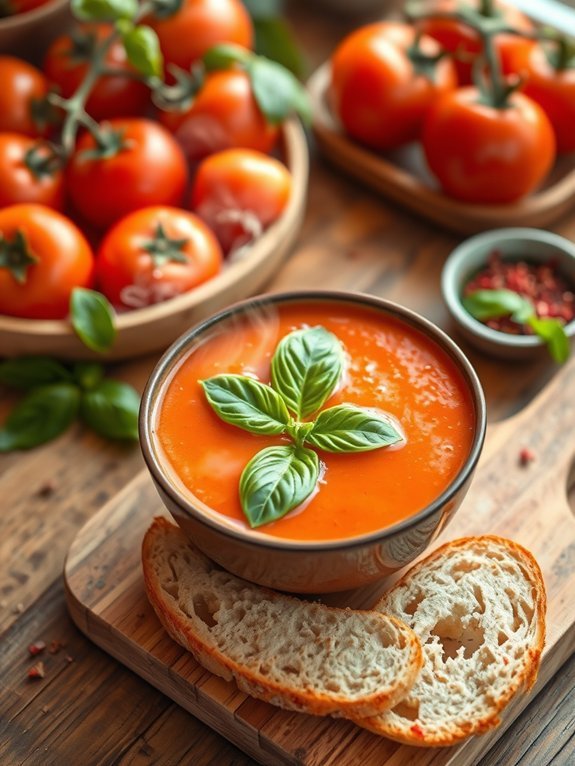
There’s nothing quite like a warm bowl of classic tomato basil soup, especially when you’re looking for comfort without the lactose. This creamy yet dairy-free soup bursts with the flavors of fresh tomatoes and fragrant basil, making it a perfect dish for lunch or dinner.
Whether you’re managing lactose intolerance or simply looking to explore plant-based options, this recipe guarantees you won’t miss out on the rich taste that traditional tomato soup offers.
This classic twist on tomato soup uses coconut milk for creaminess and a blend of spices to elevate its flavor. Easy to prepare, it requires minimal ingredients, making it a great go-to option for busy weeknights, rainy days, or when you’re simply craving something warm and soothing.
Serve it with crusty bread or a side salad for a complete meal that even non-vegan or lactose-intolerant diners will love.
- 2 tablespoons olive oil
- 1 medium onion, chopped
- 2 cloves garlic, minced
- 1 can (28 ounces) crushed tomatoes
- 1 cup vegetable broth
- 1 can (13.5 ounces) coconut milk
- 1 teaspoon dried basil (or ¼ cup fresh basil, chopped)
- Salt and pepper to taste
- Fresh basil leaves for garnish (optional)
In a large pot, heat the olive oil over medium heat. Add the chopped onion and sauté until translucent, about 5 minutes. Stir in the minced garlic and cook for an additional minute until fragrant.
Then, add the crushed tomatoes, vegetable broth, coconut milk, and dried basil. Stir well and bring the mixture to a gentle simmer. Allow it to cook for about 15-20 minutes, stirring occasionally.
Once done, use an immersion blender to puree the soup until smooth or transfer it in batches to a blender. Season with salt and pepper to taste, and garnish with fresh basil leaves before serving.
For an added depth of flavor, consider roasting the tomatoes beforehand for a sweeter taste. If you’re using fresh basil, remember to add it towards the end of cooking to preserve its vibrant color and aroma.
You can also customize the soup by adding ingredients like red pepper flakes for heat or a drizzle of balsamic vinegar for acidity, which can enhance the overall taste profile. Enjoy experimenting with the recipe to make it your own!
Cauliflower Buffalo Wings With Dairy-Free Ranch

Cauliflower buffalo wings are a fantastic alternative to traditional buffalo wings, offering the thrill of spicy flavor without the meat. They’re perfect for those who are lactose intolerant, especially when paired with a creamy dairy-free ranch dressing.
This dish isn’t only a healthier choice but also a great option for gatherings, game day, or when you’re just craving something deliciously spicy. Using cauliflower gives you that satisfying bite, while the buffalo sauce delivers a kick of heat that can be tailored to your liking.
To make these wings truly indulgent, the key lies in the batter and the baking process. A light coating will guarantee the cauliflower stays crisp, while the flavor from the marinade seeps through each bite. The dairy-free ranch dressing complements the heat of the buffalo sauce, providing a revitalizing contrast that enhances the overall taste experience.
Let’s explore the ingredients and cooking instructions for these delightful cauliflower buffalo wings.
Ingredients:
- 1 large head of cauliflower, cut into florets
- 1 cup all-purpose flour (or a gluten-free alternative)
- 1 cup plant-based milk (almond, soy, or oat)
- 1 teaspoon garlic powder
- 1 teaspoon onion powder
- 1 teaspoon smoked paprika
- 1/2 teaspoon salt
- 1 cup buffalo sauce (make sure it’s dairy-free)
- 1 tablespoon olive oil (for drizzling)
Cooking Instructions:
Preheat your oven to 450°F (230°C) and line a baking sheet with parchment paper. In a large mixing bowl, combine the flour, plant-based milk, garlic powder, onion powder, smoked paprika, and salt to create a batter.
Dip each cauliflower floret into the batter, making sure it’s fully coated, and place them on the baking sheet. Bake in the oven for 20-25 minutes, until golden and crispy.
Remove from the oven, toss the cauliflower with buffalo sauce, then return them to the oven for an additional 5-10 minutes for a nice glaze.
When making cauliflower buffalo wings, it’s crucial to verify that the florets are evenly coated in the batter, as this helps them crisp up nicely while baking. If you prefer a spicier kick, feel free to adjust the amount of buffalo sauce, or even try marinating the cauliflower in the sauce prior to baking.
Additionally, for an extra touch, consider adding some sesame seeds or fresh herbs as a garnish before serving to enhance the presentation and flavor.
Coconut Curry Lentil Soup
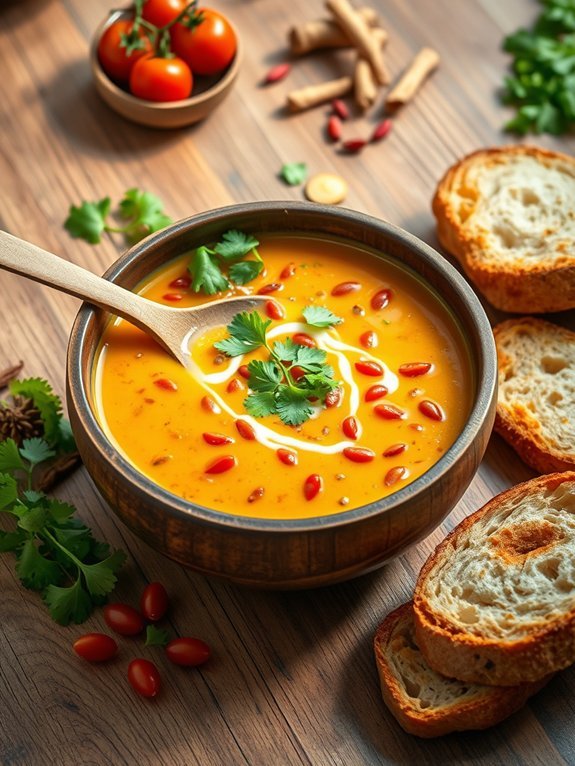
Coconut Curry Lentil Soup is a hearty and flavorful dish that’s perfect for those who are lactose intolerant. Packed with protein from lentils and rich in flavor from aromatic spices and coconut milk, this vegan-friendly soup will tantalize your taste buds while providing a nourishing meal. The combination of earthy lentils and creamy coconut creates a comforting and satisfying texture that can be enjoyed by everyone, regardless of dietary restrictions.
This soup not only delights with its rich taste but is also incredibly easy to make! With minimal preparation and simple ingredients, you can have a warming bowl of Coconut Curry Lentil Soup simmering on your stove in no time. It’s perfect for meal prep and can be stored in the fridge for a quick lunch or dinner throughout the week, ensuring you always have a healthy option on hand.
Ingredients:
- 1 tablespoon coconut oil
- 1 onion, diced
- 3 cloves garlic, minced
- 1 tablespoon fresh ginger, grated
- 2 tablespoons curry powder
- 1 teaspoon ground cumin
- 1 teaspoon turmeric
- 1 can (14 oz) coconut milk
- 4 cups vegetable broth
- 1 cup red lentils, rinsed
- 1 cup diced tomatoes (canned or fresh)
- Salt and pepper to taste
- Fresh cilantro for garnish (optional)
In a large pot, heat the coconut oil over medium heat. Add the diced onion and sauté until translucent, about 5 minutes. Stir in the minced garlic and grated ginger, cooking for an additional minute.
Then, incorporate the curry powder, ground cumin, and turmeric, stirring until the spices are fragrant. Pour in the coconut milk and vegetable broth, and add the rinsed lentils and diced tomatoes. Bring the mixture to a boil, then reduce the heat to low and simmer for 25-30 minutes or until the lentils are tender.
Season with salt and pepper to taste, and garnish with fresh cilantro if desired.
When making Coconut Curry Lentil Soup, feel free to customize it with additional vegetables like carrots or spinach for extra nutrition. You can also adjust the level of spice by adding chili flakes or a dash of hot sauce if you prefer a kick.
For a creamier texture, blend a portion of the soup with an immersion blender or in a blender after it cools slightly. This soup not only works wonderfully as a main dish but also pairs excellently with a side of crusty bread or over rice for a complete meal.
Banana Oatmeal Pancakes

Banana oatmeal pancakes are a delightful and nutritious twist on traditional pancakes, perfect for those with lactose intolerance. These pancakes aren’t only dairy-free but are also packed with the natural sweetness of ripe bananas and the wholesome goodness of oatmeal. They make for an excellent breakfast option that keeps you feeling full and satisfied throughout the morning.
Plus, they’re incredibly easy to whip up, making them a great choice for both busy weekdays and leisurely weekend brunches.
This recipe utilizes simple, wholesome ingredients that are likely already in your pantry. The oats serve as a fantastic base, lending a hearty texture and full-bodied flavor to these pancakes, while the banana acts as a natural sweetener, reducing the need for added sugars. You’ll love how quick and easy it’s to make these pancakes, and they can be customized with your favorite toppings for an extra treat!
- 1 cup rolled oats
- 1 ripe banana
- 1 cup almond milk (or any preferred non-dairy milk)
- 2 tablespoons maple syrup (optional)
- 1 teaspoon baking powder
- 1/2 teaspoon cinnamon
- Pinch of salt
- 1 tablespoon coconut oil (for cooking)
In a blender, combine the rolled oats, ripe banana, almond milk, maple syrup, baking powder, cinnamon, and salt. Blend until the mixture reaches a smooth consistency.
Heat a skillet or griddle over medium heat and add a small amount of coconut oil to coat the surface. Pour about 1/4 cup of the batter for each pancake onto the skillet, cooking until bubbles form on the surface (about 2-3 minutes), then flip and cook for another 2-3 minutes until golden brown.
For an added burst of flavor, consider mixing in some blueberries or chocolate chips into the batter before cooking. You can also experiment with different types of non-dairy milk, such as coconut or oat milk, to adjust the flavor profile to your liking.
Additionally, these pancakes can be stored in the fridge for a couple of days or frozen for later use, making them a convenient option for quick breakfasts!
Chickpea and Spinach Stew
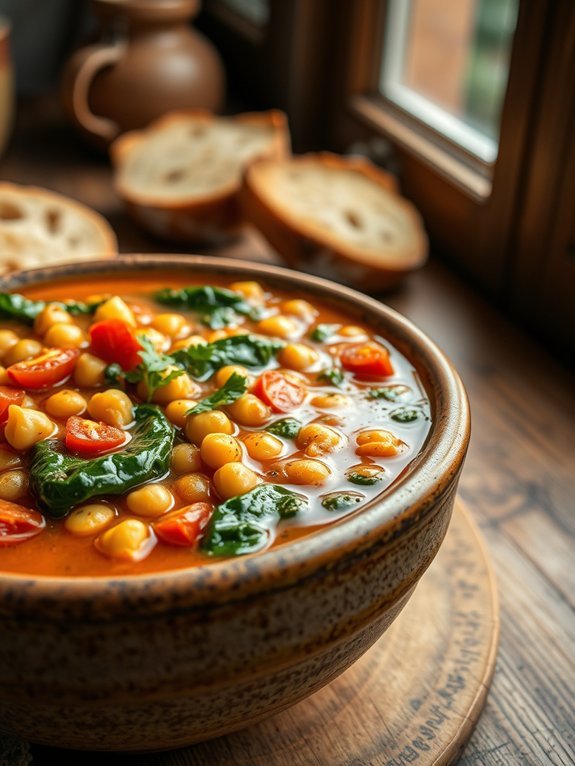
Chickpea and spinach stew is a nutritious and hearty dish that isn’t only versatile but also incredibly satisfying. Packed with protein from the chickpeas and a wealth of vitamins from the spinach, it’s an ideal meal for those following a lactose-free diet. This one-pot wonder is simple to make, full of flavor, and can be enjoyed on its own or served with some crusty bread or over rice for a more filling option.
The blend of spices adds warmth and depth to the dish, making it a favorite for both weeknight dinners and special occasions. Cooking this stew can be a delightful experience, as the aromatic ingredients release their flavors, creating a comforting and inviting atmosphere in your kitchen.
The combination of chickpeas, spinach, and various spices makes for a nutrient-packed, dairy-free dish that everyone can enjoy. Whether you’re preparing it for a gathering or just a cozy night in, this chickpea and spinach stew is sure to please and nourish.
Ingredients:
- 1 tablespoon olive oil
- 1 onion, diced
- 3 cloves garlic, minced
- 1 teaspoon ground cumin
- 1 teaspoon paprika
- 1 can (15 oz) chickpeas, drained and rinsed
- 1 can (14 oz) diced tomatoes
- 4 cups fresh spinach, roughly chopped
- 2 cups vegetable broth
- Salt and pepper, to taste
- Fresh lemon juice (optional, for serving)
- Fresh parsley or cilantro, for garnish
In a large pot, heat the olive oil over medium heat. Add the diced onion and sauté until translucent, about 5 minutes. Stir in the minced garlic, cumin, and paprika, cooking for another minute until fragrant.
Then, add the chickpeas, diced tomatoes (with their juices), and vegetable broth. Bring the mixture to a simmer and let it cook for about 15 minutes, allowing the flavors to meld. Fold in the fresh spinach, cooking until wilted, then season with salt, pepper, and a squeeze of lemon juice if desired.
When making this stew, feel free to customize it by adding other vegetables, such as carrots or bell peppers, for added texture and flavor. You can also adjust the spices to suit your taste or even incorporate a splash of coconut milk for a creamier texture without the dairy.
This dish stores well, so consider making a larger batch to enjoy leftovers throughout the week!
Zucchini Noodles With Avocado Pesto
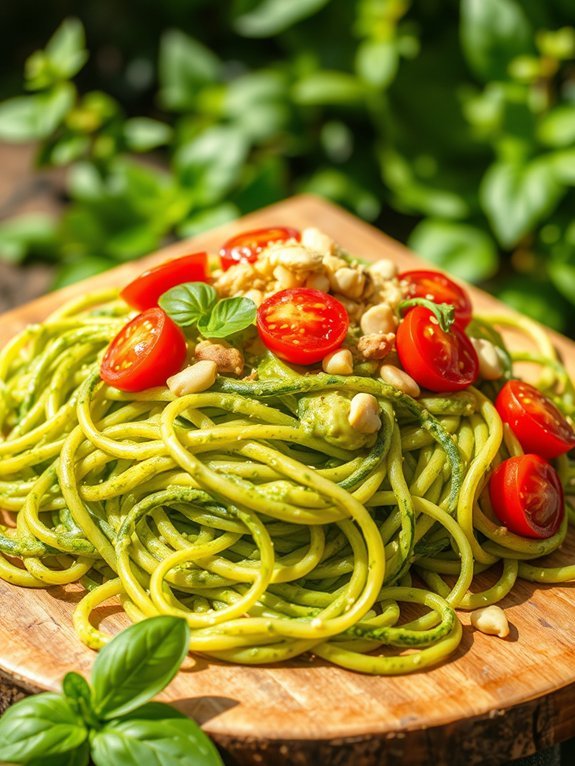
Zucchini noodles, also known as “zoodles,” are a fantastic alternative to traditional pasta that adds a healthy twist to your meals while keeping them dairy-free. They’re gluten-free and low in carbohydrates, making them perfect for those following a restrictive diet, such as individuals with lactose intolerance.
Pairing zoodles with a creamy avocado pesto creates a delightful dish that’s both nourishing and flavorful, appealing to everyone at the table.
Making zucchini noodles is a simple and enjoyable process. With just a spiralizer or a vegetable peeler, you can turn fresh zucchinis into long, noodle-like strands. The avocado pesto is equally easy to prepare; with no cooking required, you can blend ingredients together to create a vibrant, creamy sauce bursting with taste.
Whether you’re preparing a quick weekday meal or looking to impress your guests, these zucchini noodles with avocado pesto are sure to be a hit.
Ingredients:
- 2 medium zucchinis
- 1 ripe avocado
- 1 cup fresh basil leaves
- 2 tablespoons lemon juice
- 2 tablespoons olive oil
- 1 clove garlic
- Salt, to taste
- Pepper, to taste
- Cherry tomatoes (optional, for garnish)
- Pine nuts (optional, for garnish)
Using a spiralizer or vegetable peeler, create zucchini noodles and set them aside. In a food processor, combine the ripe avocado, fresh basil, lemon juice, olive oil, garlic, salt, and pepper. Blend until smooth and creamy. If the pesto is too thick, you can add a little water to achieve your desired consistency.
Toss the zucchini noodles with the avocado pesto until they’re evenly coated, and add halved cherry tomatoes and pine nuts for garnish, if desired.
When cooking zucchini noodles, be mindful not to overcook them, as they can become soggy quickly. If you prefer a warm dish, lightly sauté the zoodles in a pan for just 1-2 minutes, or until heated through, while still maintaining their crunch.
Additionally, you can customize your avocado pesto by adding nuts or nutritional yeast for extra flavor and texture. This dish can be served immediately or chilled for a revitalizing salad option.
Almond Joy Energy Balls
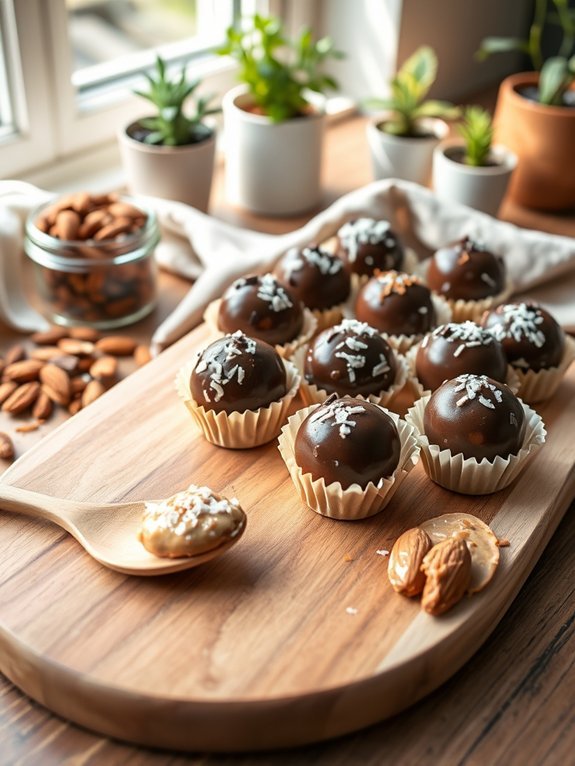
If you’re looking for a delicious and nutritious snack that caters to your lactose intolerance, Almond Joy Energy Balls are the perfect option. These energy bites aren’t only dairy-free but also packed with wholesome ingredients that will keep your energy levels up throughout the day. With the combination of almonds, coconut, and dark chocolate, they replicate the classic Almond Joy candy bar in a healthier form.
Plus, they’re incredibly easy to make and require no baking, making them a convenient choice for anyone on the go.
To make these energy balls, all you need are a few simple ingredients that you may already have in your pantry. They’re also customizable, allowing you to tweak the proportions or even substitute certain elements to suit your taste preferences.
Whether you’re looking for a post-workout snack, an afternoon pick-me-up, or a quick dessert, these Almond Joy Energy Balls are versatile enough to fit any occasion while being considerate of dietary restrictions.
- 1 cup almond flour
- 1/2 cup unsweetened shredded coconut
- 1/4 cup maple syrup
- 1/4 cup almond butter
- 1/4 cup dark chocolate chips (dairy-free)
- 1 teaspoon vanilla extract
- A pinch of salt
In a mixing bowl, combine almond flour, shredded coconut, maple syrup, almond butter, dark chocolate chips, vanilla extract, and salt. Stir until the mixture is well combined and forms a sticky dough.
Once combined, use your hands to roll the dough into small balls, about 1 inch in diameter. Place the energy balls onto a baking sheet lined with parchment paper and refrigerate for at least 30 minutes to firm up before serving.
When preparing your Almond Joy Energy Balls, feel free to experiment with different nut butters like cashew or sunflower seed butter for a change in flavor. You can also add additional mix-ins such as chia seeds, hemp hearts, or nuts for extra crunch and nutrition.
If the mixture seems too dry, add a little more maple syrup or almond butter until the desired consistency is reached. Finally, store any leftovers in an airtight container in the fridge for up to a week to maintain freshness.
Strawberry Coconut Chia Pudding
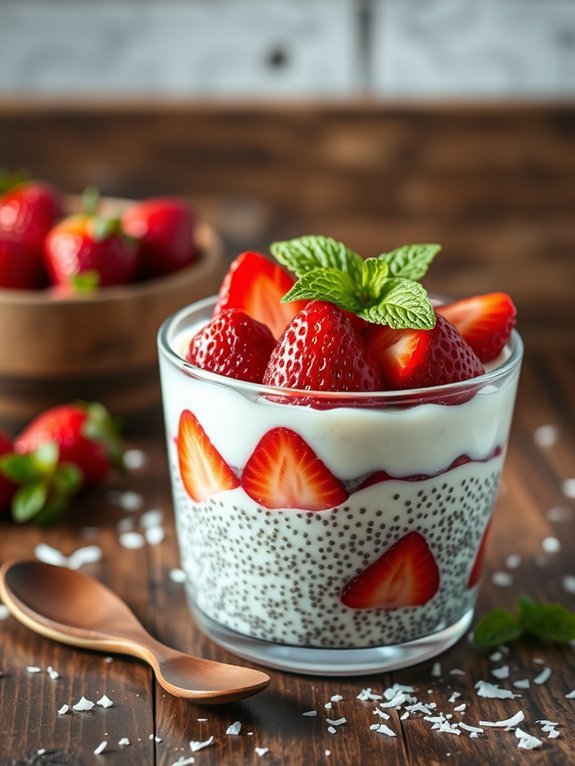
Strawberry Coconut Chia Pudding is a delicious and nutritious option for those seeking a dairy-free dessert or breakfast. This delightful dish not only caters to lactose intolerance but also combines the rich flavors of coconut and fresh strawberries for a revitalizing treat.
Chia seeds are renowned for their health benefits; they’re high in fiber, omega-3 fatty acids, and protein, making them an excellent addition to your diet. The pudding is simple to prepare and sets quickly, offering a sweet and satisfying option that can be enjoyed at any time of the day.
In addition to being easy to make, this recipe allows for creativity and personalization. You can adjust the sweetness level to your liking or opt for different fruits if strawberries aren’t in season. The creaminess of the coconut milk complements the tiny, gelatinous chia seeds, creating a delightful texture that makes this pudding a favorite among both kids and adults.
Plus, it’s an excellent make-ahead option for busy mornings or a quick snack.
Ingredients:
- 1 cup coconut milk (canned or carton)
- 1/4 cup chia seeds
- 2 tablespoons maple syrup (or sweetener of choice)
- 1 teaspoon vanilla extract
- 1 cup strawberries, hulled and sliced
- Fresh mint leaves for garnish (optional)
To prepare the Strawberry Coconut Chia Pudding, start by whisking together the coconut milk, chia seeds, maple syrup, and vanilla extract in a bowl. Make sure the chia seeds are well incorporated to prevent clumping.
Let the mixture sit for about 10 minutes, then stir it again to guarantee even distribution of the chia seeds. Cover the bowl and place it in the refrigerator for at least 2 hours, or ideally overnight, until the pudding thickens.
When you’re ready to serve, layer the pudding in a glass with sliced strawberries and top with fresh mint if desired.
When making this dish, it’s important to give the chia seeds enough time to absorb the liquid and expand, which results in a wonderful pudding-like texture. You can also experiment with different variations by adding other fruits like blueberries, bananas, or even a swirl of nut butter for added flavor.
If you prefer a sweeter pudding, adjust the amount of maple syrup according to taste. This dish stores well in the refrigerator for a few days, so consider making a larger batch for an easy grab-and-go breakfast or snack option!

