This post may contain affiliate links. Please read our policy page.
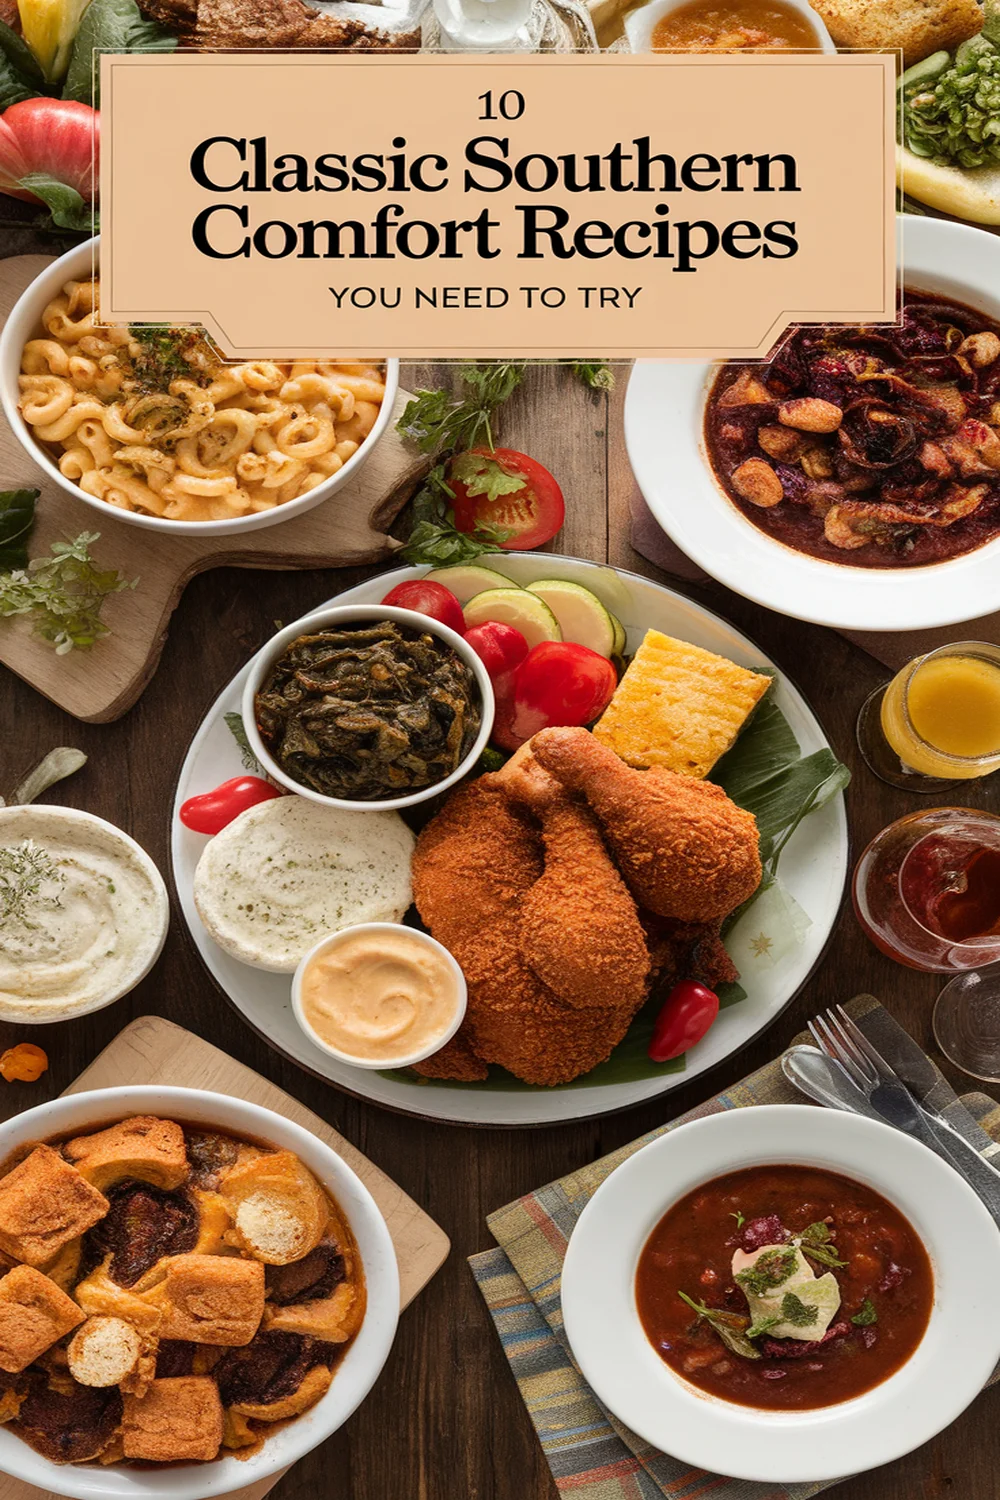
If you want to savor the essence of Southern cuisine, you need to try these 10 classic comfort food recipes. Picture flaky buttermilk biscuits, crispy fried chicken, and creamy shrimp and grits that awaken your taste buds. Add some nutritious collard greens, rich macaroni and cheese, and heartwarming chicken and dumplings for a true feast. Don’t forget the sweet satisfaction of cornbread, red beans with rice, and delightful peach cobbler. Discover more about each dish’s irresistible charm!
Buttermilk Biscuits
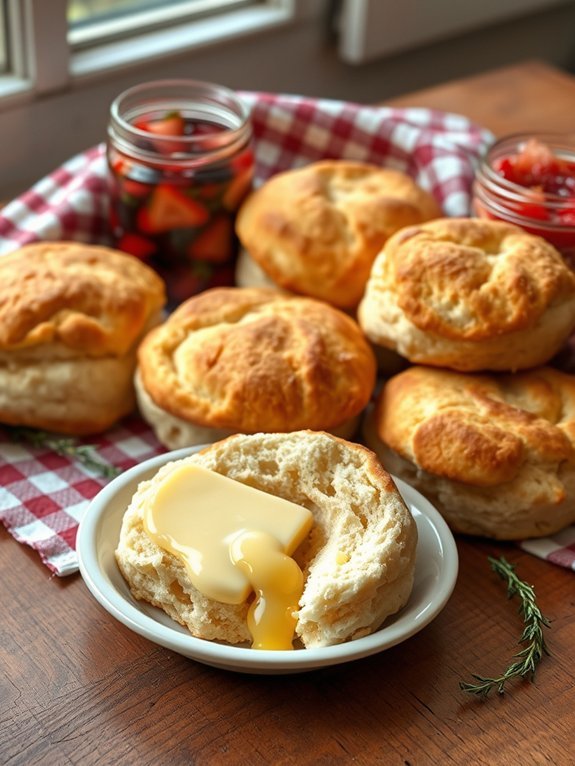
Buttermilk biscuits are a quintessential Southern comfort food that bring warmth and joy to any table. Their flaky, tender texture combined with the slight tang of buttermilk creates a delightful treat perfect for breakfast or as a side accompaniment to meals.
Whether you’re enjoying them fresh out of the oven or slathered with butter and homemade jam, these biscuits are sure to impress family and friends alike.
Making buttermilk biscuits from scratch is surprisingly simple and requires minimal ingredients — yet the results are irresistibly delicious. Ideal for a quiet morning in or a holiday gathering, the aroma of freshly baked biscuits wafting through your kitchen is a sure way to elevate any meal.
Once you master this basic recipe, you can experiment by adding herbs, cheese, or even a hint of sweetness.
- 2 cups all-purpose flour
- 1 tablespoon baking powder
- 1/2 teaspoon baking soda
- 1 teaspoon salt
- 1/4 cup unsalted butter, cold and cubed
- 3/4 cup buttermilk, cold
- 1 tablespoon honey (optional)
Preheat your oven to 450°F (230°C). In a large mixing bowl, whisk together the flour, baking powder, baking soda, and salt. Add the cold, cubed butter to the flour mixture and use a pastry cutter or your fingers to blend until the mixture resembles coarse crumbs.
Gently stir in the cold buttermilk (and honey if using) until just combined. Turn the dough onto a floured surface, knead gently a few times, then pat into a 1-inch thick round. Cut the biscuits using a floured biscuit cutter, place them on a baking sheet, and bake for 12-15 minutes or until golden brown.
For best results, make sure your ingredients are cold, especially the butter and buttermilk, as this will help create those nice flaky layers. Avoid overworking the dough — the less you handle it, the more tender your biscuits will be.
If you want to elevate your biscuits even further, consider brushing them with melted butter right after they come out of the oven to enhance flavor and give them a beautiful sheen!
Classic Fried Chicken
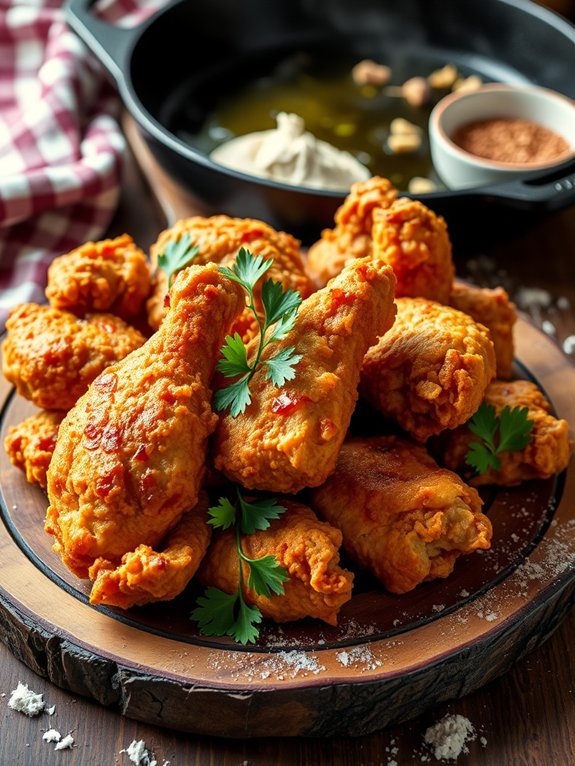
Classic Southern fried chicken is a staple of comfort food that brings a taste of the South to your dinner table. This iconic dish features crispy, golden-brown skin enveloping juicy, tender meat. It’s traditionally seasoned with a blend of spices that not only enhance the flavor but also bring that unmistakable Southern charm to the table.
Whether served for a family gathering, a picnic, or a casual weeknight dinner, fried chicken is invariably a crowd-pleaser.
The secret to perfect fried chicken lies in the marination process, which allows the flavors to meld beautifully into the chicken. By soaking the chicken in buttermilk, you not only tenderize the meat but also create a luscious base for the coating.
Following the marination, the chicken is dredged in a spiced flour mixture before being fried to crispy perfection. The aroma wafting through your kitchen will be irresistible, beckoning everyone to gather around.
Ingredients:
- 4 lbs whole chicken, cut into pieces
- 2 cups buttermilk
- 1 tablespoon hot sauce (optional)
- 2 cups all-purpose flour
- 1 tablespoon paprika
- 1 tablespoon garlic powder
- 1 teaspoon onion powder
- 1 teaspoon cayenne pepper
- 1 teaspoon salt
- ½ teaspoon black pepper
- Vegetable oil (for frying)
Place the chicken pieces into a large bowl and pour buttermilk over them, adding hot sauce if using. Cover and refrigerate for at least 2 hours (or overnight for deeper flavor).
In another bowl, mix the flour with paprika, garlic powder, onion powder, cayenne pepper, salt, and black pepper. Heat oil in a deep skillet or fryer to 350°F (175°C).
Remove chicken from buttermilk, letting excess drip off, then dredge in the flour mixture, pressing to adhere. Fry chicken in batches for 15-18 minutes, turning occasionally, until golden brown and cooked through (internal temperature should reach 165°F/74°C). Transfer to a wire rack to drain excess oil.
When cooking fried chicken, patience is key—allow the oil to return to the correct temperature between batches to guarantee the chicken cooks evenly and thoroughly. Avoid overcrowding the skillet, as this can lower the oil’s temperature, resulting in greasy rather than crispy skin.
Additionally, letting the cooked chicken rest for a few minutes before serving helps the juices redistribute, guaranteeing each bite is succulent. Enjoy the juicy goodness and the delightful crunch!
Shrimp and Grits
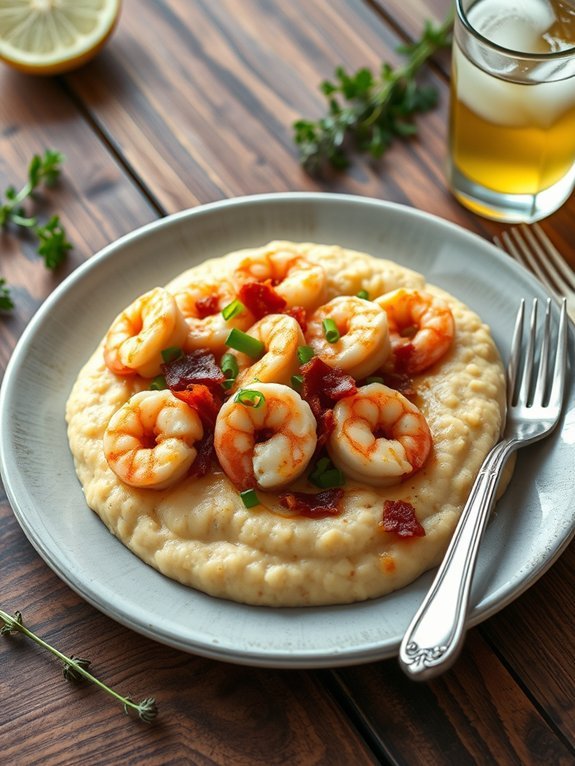
Shrimp and grits is a beloved Southern dish that brings together the rich flavors of the sea with the comforting, creamy texture of grits. Originating from the coastal regions, this dish often varies from kitchen to kitchen, allowing cooks to express their creativity while honoring traditional recipes. The combination of succulent shrimp sautéed in a savory blend of spices, served over smooth and cheesy grits, is a match made in culinary heaven.
What makes shrimp and grits truly special is its versatility. You can enhance it with additional ingredients such as bacon, garlic, or various vegetables to create your own signature version. Whether served as a hearty breakfast, a satisfying lunch, or an elegant dinner, this dish continues to be a favorite at family gatherings and Southern restaurants alike.
Now, let’s explore the ingredients and steps to create this delightful meal.
- 1 lb large shrimp, peeled and deveined
- 1 cup stone-ground grits
- 4 cups water
- 1 cup shredded sharp cheddar cheese
- 4 slices bacon, chopped
- 1 small onion, diced
- 2 cloves garlic, minced
- 1 tablespoon lemon juice
- 1 teaspoon cayenne pepper
- Salt and black pepper to taste
- 2 tablespoons chopped green onions (for garnish)
- 2 tablespoons butter
In a medium pot, bring water to a boil and add the grits, stirring frequently to prevent lumps. Reduce heat to low and simmer until thickened, about 20-30 minutes, stirring in the cheddar cheese and butter once done.
Meanwhile, in a large skillet over medium heat, cook the bacon until crispy. Remove bacon and reserve drippings in the pan, then sauté onions and garlic in the bacon grease until translucent. Add the shrimp, lemon juice, cayenne, and season with salt and pepper. Cook until shrimp are pink and cooked through, about 5 minutes.
To serve, spoon the cheesy grits onto a plate, top with the shrimp mixture, and garnish with crispy bacon and green onions.
For a spicier kick, consider adding diced jalapeños or hot sauce to the shrimp mixture. Additionally, using homemade chicken stock instead of water for the grits can elevate the flavor even further. If you prefer a smoother texture, blend the grits after cooking for an extra creamy consistency. Finally, feel free to substitute the shrimp with other proteins like chicken or sausage, or toss in seasonal vegetables for a personalized touch on this classic dish.
Enjoy your cooking adventure!
Southern Collard Greens
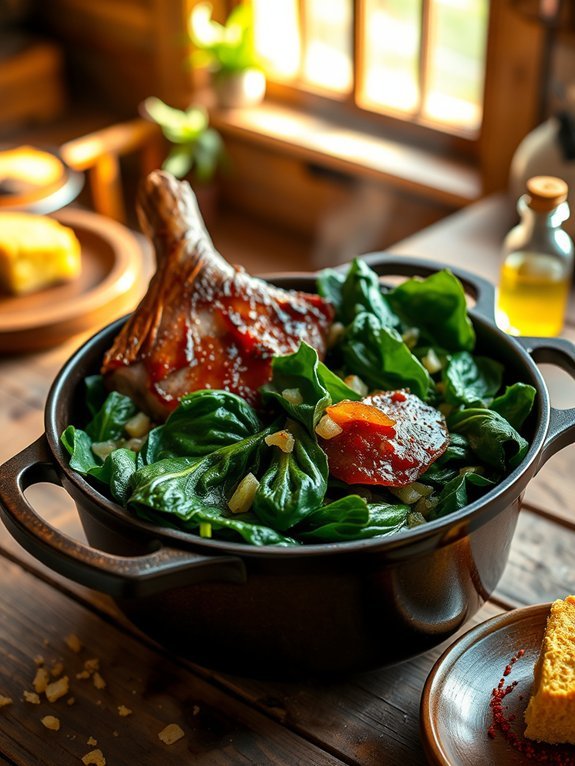
Collard greens are a staple in Southern cuisine, celebrated for their rich flavor and nutritional benefits. This leafy green vegetable is often enjoyed as a side dish, typically served with cornbread and a hearty main course. When properly cooked, collard greens become tender and take on a savory depth from the broth and seasonings used in the cooking process.
To prepare the perfect collard greens, choosing fresh and vibrant greens is essential. This dish can be seasoned in numerous ways, but a classic approach involves the use of smoked meat, which imparts a deliciously smoky flavor. Whether you prefer your collards with a hint of heat or a touch of vinegar, there’s always a way to personalize the flavor profile to suit your tastes.
- 2 pounds fresh collard greens, washed and chopped
- 1 tablespoon olive oil or bacon grease
- 1 onion, diced
- 3 cloves garlic, minced
- 4 cups chicken or vegetable broth
- 1 smoked ham hock (or other smoked meat)
- 1 teaspoon red pepper flakes (optional)
- Salt and black pepper, to taste
- 1 tablespoon apple cider vinegar (optional)
In a large pot, heat the olive oil or bacon grease over medium heat. Add the diced onion and cook until translucent, about 5 minutes. Stir in the minced garlic and red pepper flakes, cooking for an additional minute.
Then, add the smoked ham hock to the pot, followed by the collard greens. Pour in the chicken or vegetable broth, cover, and bring to a boil. Once boiling, reduce heat to low and simmer for about 45 minutes to an hour, or until the collard greens are tender.
Season with salt, black pepper, and apple cider vinegar to taste before serving. For the best results, allow the collard greens to simmer longer for a deeper flavor if time permits. The longer they cook, the more tender and flavorful they’ll become.
Additionally, serving them the next day after cooking allows the flavors to meld together even further, making them an excellent dish to prepare in advance. When storing leftovers, the greens can maintain their flavor for several days in the fridge, making them perfect for meal prep.
Don’t forget to pair them with some cornbread to soak up all the delicious broth!
Recommended Items
Get ready to whip up some delicious Southern comfort food with these must-have ingredients and cooking tools!
Macaroni and Cheese
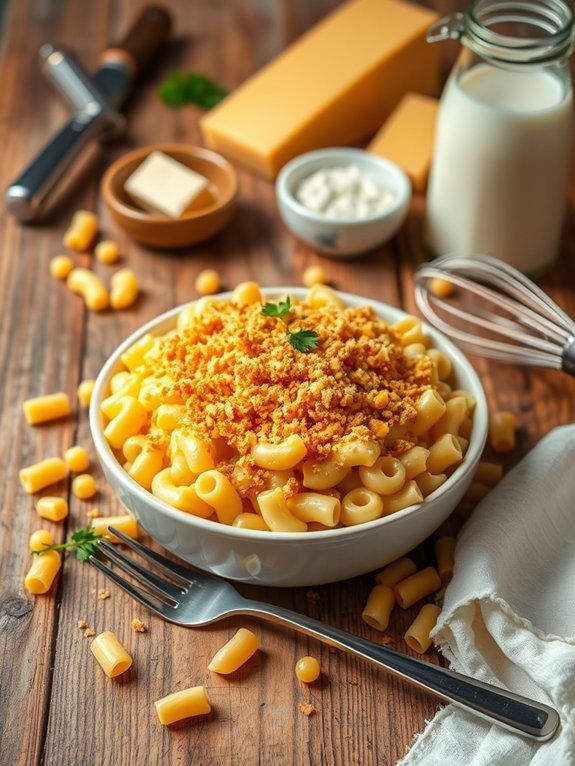
Macaroni and cheese is a beloved comfort food that brings warmth and satisfaction to any meal. This creamy and cheesy dish combines tender pasta with a rich cheese sauce, making it a classic staple in Southern cuisine.
Whether served as a main course or a side dish, macaroni and cheese has a way of bringing people together around the table, evoking cherished memories of family gatherings and festive occasions.
The beauty of macaroni and cheese lies in its simplicity and versatility. You can customize it to suit any palate by using different types of cheese, adding spices, or incorporating vegetables and meats.
While traditional recipes use cheddar cheese, feel free to experiment with Gouda, mozzarella, or even a touch of blue cheese for a unique twist. So roll up your sleeves and get ready to indulge in this creamy, dreamy dish that’s sure to win over your heart.
- 8 ounces elbow macaroni
- 2 tablespoons unsalted butter
- 2 tablespoons all-purpose flour
- 2 cups milk
- 2 cups shredded sharp cheddar cheese
- 1 teaspoon salt
- 1/2 teaspoon black pepper
- 1/2 teaspoon mustard powder (optional)
- 1/2 cup breadcrumbs (optional for topping)
Begin by cooking the elbow macaroni according to the package instructions until al dente, then drain and set aside.
In a saucepan, melt the butter over medium heat, then whisk in the flour until well combined, cooking for about 1 minute. Gradually add the milk and continue whisking until the mixture thickens.
Stir in the shredded cheddar cheese, salt, pepper, and mustard powder (if using) until the cheese is melted and the sauce is creamy.
Combine the cheese sauce with the drained macaroni and mix well. If desired, transfer the macaroni and cheese to a baking dish, top with breadcrumbs, and bake at 350°F for 20-25 minutes until bubbly and golden.
For an extra creamy texture, consider adding a bit of cream cheese or sour cream to the cheese sauce. This dish can also be easily modified with your favorite ingredients; try mixing in cooked bacon, sautéed vegetables, or even lobster for a gourmet twist.
To elevate the flavor, experimenting with different cheese combinations or adding spices like paprika or garlic powder can take your macaroni and cheese to another level. Enjoy experimenting to find the version that makes your heart happy!
Barbecue Ribs
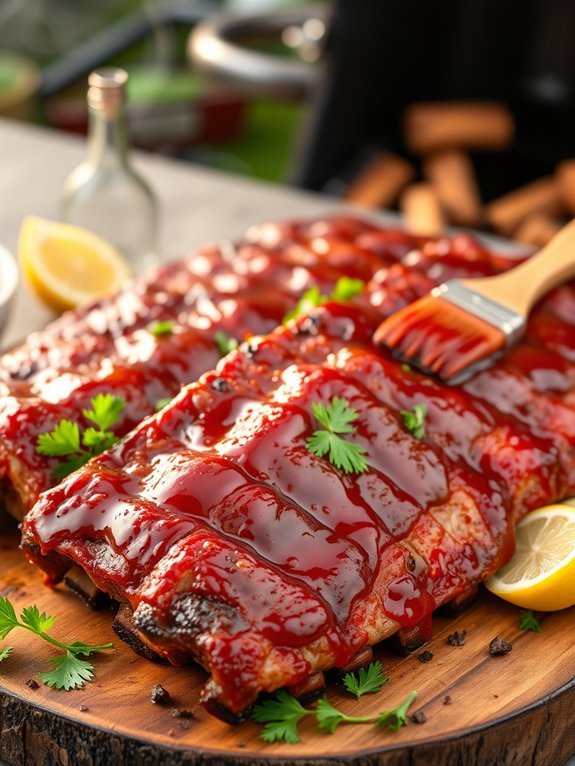
Barbecue ribs are a quintessential dish in Southern comfort food, embodying the rich flavors and outdoor cooking traditions that many cherish. The tender, fall-off-the-bone meat combined with a smoky, sweet, and tangy barbecue sauce makes this dish a favorite for family gatherings, picnics, and celebrations.
Cooking ribs can seem intimidating, but with the right approach, you can achieve a restaurant-quality result right in your own backyard.
To prepare the perfect barbecue ribs, it’s crucial to start with high-quality pork ribs, such as baby back or spare ribs. The cooking process generally involves a combination of seasoning, slow cooking, and a flavorful sauce. When fully cooked, these ribs aren’t just a dish, but a memorable experience that brings people together around the table. Preparing them ahead of time allows you to enjoy the process without the pressure of last-minute cooking.
Ingredients:
- 2 racks of pork ribs (baby back or spare ribs)
- 2 tablespoons paprika
- 1 tablespoon brown sugar
- 1 tablespoon garlic powder
- 1 tablespoon onion powder
- 1 teaspoon cayenne pepper
- 1 teaspoon black pepper
- 1 teaspoon salt
- 1 cup barbecue sauce (homemade or store-bought)
- Apple cider vinegar (for moisture)
- Optional: wood chips for smoking (hickory or applewood)
To cook the ribs, first preheat your oven to 300°F (150°C).
Prepare the ribs by removing the silver skin from the back and then pat them dry with paper towels. In a bowl, mix the paprika, brown sugar, garlic powder, onion powder, cayenne pepper, black pepper, and salt together to create a dry rub. Generously apply the rub over both sides of the ribs, ensuring they’re well-coated.
Place them on a baking sheet and cover them tightly with aluminum foil. Bake for about 2.5 to 3 hours until tender, removing the foil for the last 30 minutes. During this time, brush on your favorite barbecue sauce, and for an extra touch, you can char them on the grill for a few minutes to add a smoky flavor.
When cooking barbecue ribs, patience is key. Low and slow is the name of the game; this allows the collagen in the meat to break down and become tender. If you’re experimenting with smoking, let the ribs absorb the smoke for about 30 minutes to an hour during the final cooking phase.
Always let the ribs rest for a few minutes before slicing to allow the juices to redistribute, ensuring moist and flavorful servings.
Chicken and Dumplings
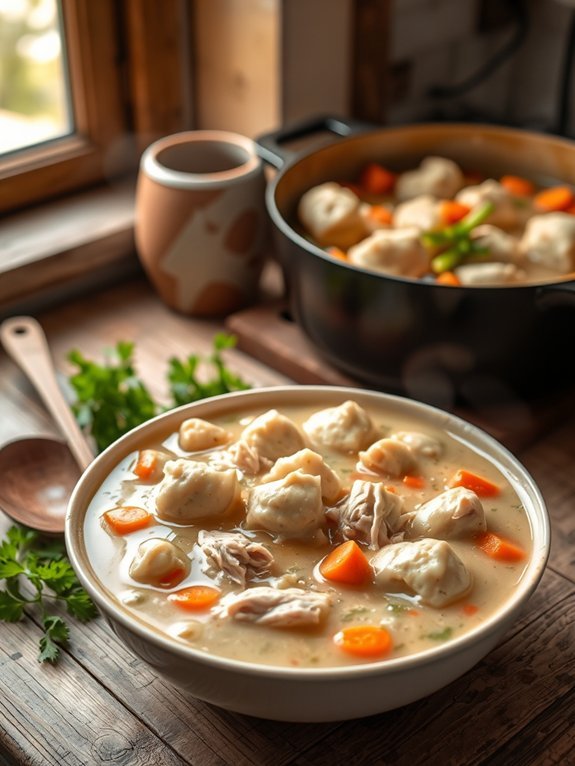
Chicken and dumplings is a beloved Southern comfort food that warms the soul and fills the belly. This dish features tender, seasoned chicken simmered in a rich broth, combined with fluffy dumplings that absorb the delicious flavors. Whether enjoyed on a chilly evening or gathered around the table with family and friends, chicken and dumplings offer a heartwarming taste of Southern hospitality.
Making chicken and dumplings requires a few simple ingredients and a little patience, but the end result is completely worth it. The key is to let the chicken develop its flavor and create a broth that’s full of depth, which serves as a succulent base for the dumplings.
This recipe embraces the traditional cooking method while allowing for personal touches, so whether you prefer your broth more seasoned or your dumplings a tad fluffier, feel free to make this dish your own.
Ingredients:
- 1 whole chicken (about 3-4 pounds)
- 4 cups chicken broth
- 2 cups water
- 1 medium onion, diced
- 2 carrots, sliced
- 2 celery stalks, chopped
- 3 cloves garlic, minced
- 2 cups all-purpose flour
- 1 tablespoon baking powder
- 1 teaspoon salt
- 1 cup milk
- 1/4 cup unsalted butter, melted
- Salt and pepper to taste
- Fresh parsley, chopped (for garnish)
To cook the chicken and dumplings, start by placing the whole chicken in a large pot and adding chicken broth, water, diced onion, sliced carrots, chopped celery, and minced garlic.
Bring it to a boil over medium-high heat, then reduce to a simmer and cover, cooking for about 1 to 1.5 hours or until the chicken is fully cooked and tender.
Once cooked, remove the chicken and let it cool slightly before shredding the meat and discarding the skin and bones. Return the shredded chicken to the pot and season the broth with salt and pepper.
In a separate bowl, combine flour, baking powder, salt, milk, and melted butter to make the dumpling dough. Spoon the dough over the simmering broth and cook for an additional 15-20 minutes with the lid on until the dumplings are cooked through.
For the best results, make sure that your broth is at a gentle simmer before adding the dumplings, as boiling may cause them to become tough.
You can also enhance the flavor profile by adding herbs and spices like thyme or sage, and consider using leftover turkey for a delicious twist.
If you have extra broth left after cooking, consider freezing it for future use, and don’t forget to garnish your dish with fresh parsley for a burst of color and freshness.
Step-by-Step Cooking Guide
Cornbread
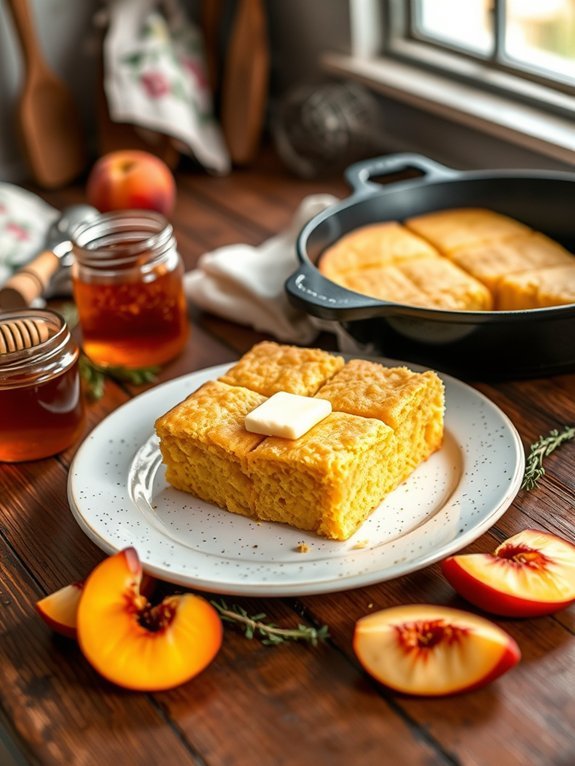
Cornbread is a quintessential Southern dish that captures the essence of comfort food. Its soft, crumbly texture and slightly sweet flavor make it the perfect accompaniment to a variety of meals, from hearty stews to fried chicken. Originating from Native American cooking, cornbread has been a staple in Southern kitchens for generations and represents the simplicity and heartiness of Southern cuisine.
This versatile bread can be enjoyed plain, slathered with butter, or even topped with honey or jam for a delightful treat. Making cornbread is a straightforward process that requires minimal ingredients, yet it delivers a satisfying result that will have your family coming back for seconds.
Whether you’re serving it at a barbecue, a holiday gathering, or a cozy weeknight dinner, cornbread is sure to become a favorite around your table.
Ingredients:
- 1 cup cornmeal
- 1 cup all-purpose flour
- 1/4 cup granulated sugar
- 1 tablespoon baking powder
- 1/2 teaspoon salt
- 1 cup milk
- 2 large eggs
- 1/4 cup vegetable oil or melted butter
Preheat the oven to 400°F (200°C) and grease a 9-inch square baking pan or cast-iron skillet. In a large mixing bowl, combine the cornmeal, flour, sugar, baking powder, and salt.
In another bowl, whisk together the milk, eggs, and oil or melted butter until well blended. Pour the wet mixture into the dry ingredients and stir gently until just combined. Pour the batter into the prepared pan and bake for 20-25 minutes, or until golden brown and a toothpick inserted into the center comes out clean.
For best results, use fresh cornmeal for a more robust flavor, and don’t overmix the batter; a few lumps are perfectly fine. You can also experiment by adding ingredients such as jalapeños, cheese, or corn kernels for added flavor and texture.
If you want a crispy crust, preheat the skillet or pan in the oven before pouring in the batter, or consider brushing the top of the cornbread with melted butter right before it finishes baking. Enjoy your cornbread warm for the best taste!
Red Beans and Rice
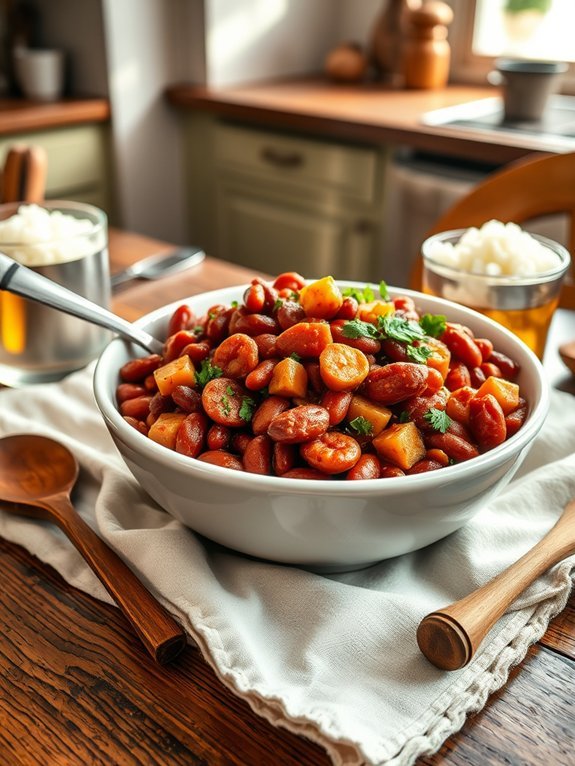
Red beans and rice is a classic Southern dish that holds a special place in the hearts of many. This hearty meal is a staple, especially in Louisiana Creole cuisine, and is known for its incredible flavor, comforting qualities, and ease of preparation. Traditionally made with red kidney beans, this dish is simmered to perfection, allowing the beans to develop a rich, velvety texture while absorbing the savory spices and seasonings.
Often served with smoked sausage or ham, red beans and rice is a satisfying one-pot meal that’s perfect for gathering friends and family around the table.
The origins of red beans and rice trace back to the early days of New Orleans, where it was a common dish among Creole families. Typically cooked on Mondays, after the Sunday roast, the dish reflects the Southern tradition of making the most of leftovers while allowing flavors to meld throughout the day.
Whether you’re preparing it for a casual family dinner or a festive gathering, this soul-warming dish is sure to bring everyone together and leave them asking for seconds.
Ingredients:
- 1 pound dry red kidney beans
- 1 medium onion, diced
- 1 green bell pepper, diced
- 2 stalks celery, diced
- 4 cloves garlic, minced
- 1 pound smoked sausage or andouille sausage, sliced
- 4 cups chicken broth
- 1 tablespoon Cajun seasoning
- 2 bay leaves
- Salt and pepper to taste
- Cooked rice for serving
- Fresh parsley, chopped (for garnish)
Start by rinsing the kidney beans and soaking them overnight in water. In a large pot, sauté the diced onions, bell pepper, celery, and garlic in a bit of oil until they become soft and fragrant.
Add the sliced sausage to the pot and cook until browned. Then, drain the soaked beans and add them to the pot along with the chicken broth, Cajun seasoning, bay leaves, and some salt and pepper.
Bring the mixture to a boil and then reduce the heat to a simmer. Cover the pot and let it cook for about 1.5 to 2 hours, stirring occasionally, until the beans are tender.
Serve over cooked rice and garnish with fresh parsley.
When preparing red beans and rice, it’s important to let the dish simmer low and slow, allowing the flavors to meld beautifully. Feel free to adjust the seasoning according to your taste, and don’t hesitate to add other ingredients like chopped tomatoes or a dash of hot sauce for an extra kick.
For those looking to save time, you can use canned beans—just reduce the cooking time and add them towards the end to prevent mushiness. Also, consider making a larger batch; red beans and rice make fantastic leftovers, as the flavors continue to improve with an overnight rest in the fridge!
Peach Cobbler
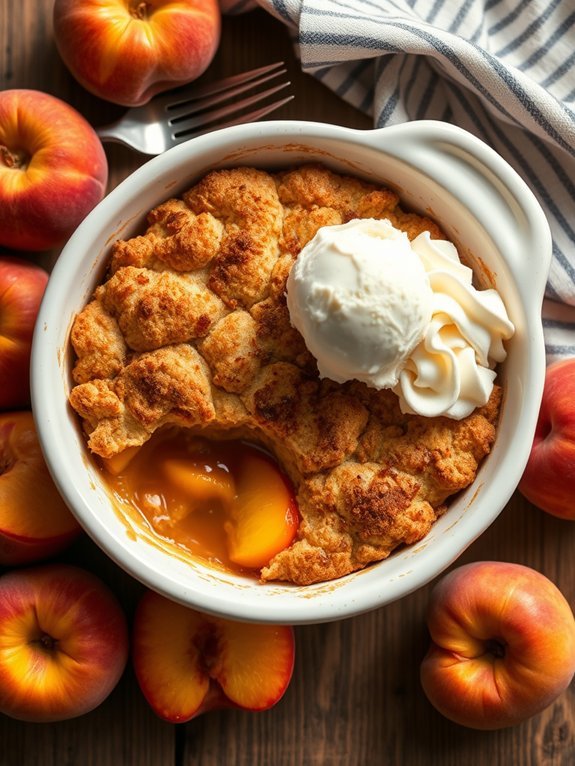
Peach cobbler is a beloved Southern dessert that perfectly embodies the essence of comfort food. With its sweet, juicy peaches and a rich, buttery crust, this dish is a staple at family gatherings, barbecues, and potlucks. The combination of warm, gooey fruit and a crumbly topping is sure to evoke nostalgic memories, making it a favorite among all ages. Whether you choose to serve it warm with a scoop of vanilla ice cream or at room temperature, peach cobbler is always a crowd-pleaser.
This delightful dessert isn’t just a simple combination of fruit and dough; it’s a tradition passed down through generations. Using fresh, ripe peaches adds an authentic flavor that elevates the cobbler from good to truly exceptional. If fresh peaches are out of season, frozen or canned peaches can also be used in a pinch, though the taste will vary slightly.
With a few easy steps, you can whip up this mouthwatering dish that surely feels like a warm hug in each bite.
Ingredients:
- 4 cups fresh peaches, sliced (about 6-8 medium peaches)
- 1 cup granulated sugar
- 1 tablespoon lemon juice
- 1 teaspoon vanilla extract
- 1 teaspoon ground cinnamon
- 1 teaspoon baking powder
- 1 cup all-purpose flour
- 1 cup whole milk
- 1/2 cup unsalted butter, melted
- 1/2 teaspoon salt
Preheat your oven to 350°F (175°C). In a large bowl, combine sliced peaches, 1/2 cup of sugar, lemon juice, vanilla extract, and cinnamon, then stir until well combined.
In another bowl, mix the flour, remaining 1/2 cup of sugar, baking powder, whole milk, melted butter, and salt until smooth. Pour the peach mixture into a greased baking dish and pour the batter on top without mixing.
Transfer to the oven and bake for about 45-50 minutes, or until the cobbler is golden brown and bubbly.
For an added layer of flavor, consider sprinkling a bit of brown sugar on top of the cobbler before baking, or garnish it with a cinnamon sprinkle right after it comes out of the oven. Additionally, pairing the cobbler with homemade whipped cream or a scoop of your favorite ice cream can enhance the experience.
Always taste your peaches before cooking; if they aren’t very sweet, adjust the sugar in the recipe accordingly. Enjoy your delightful peach cobbler that’s sure to impress!

