This post may contain affiliate links. Please read our policy page.
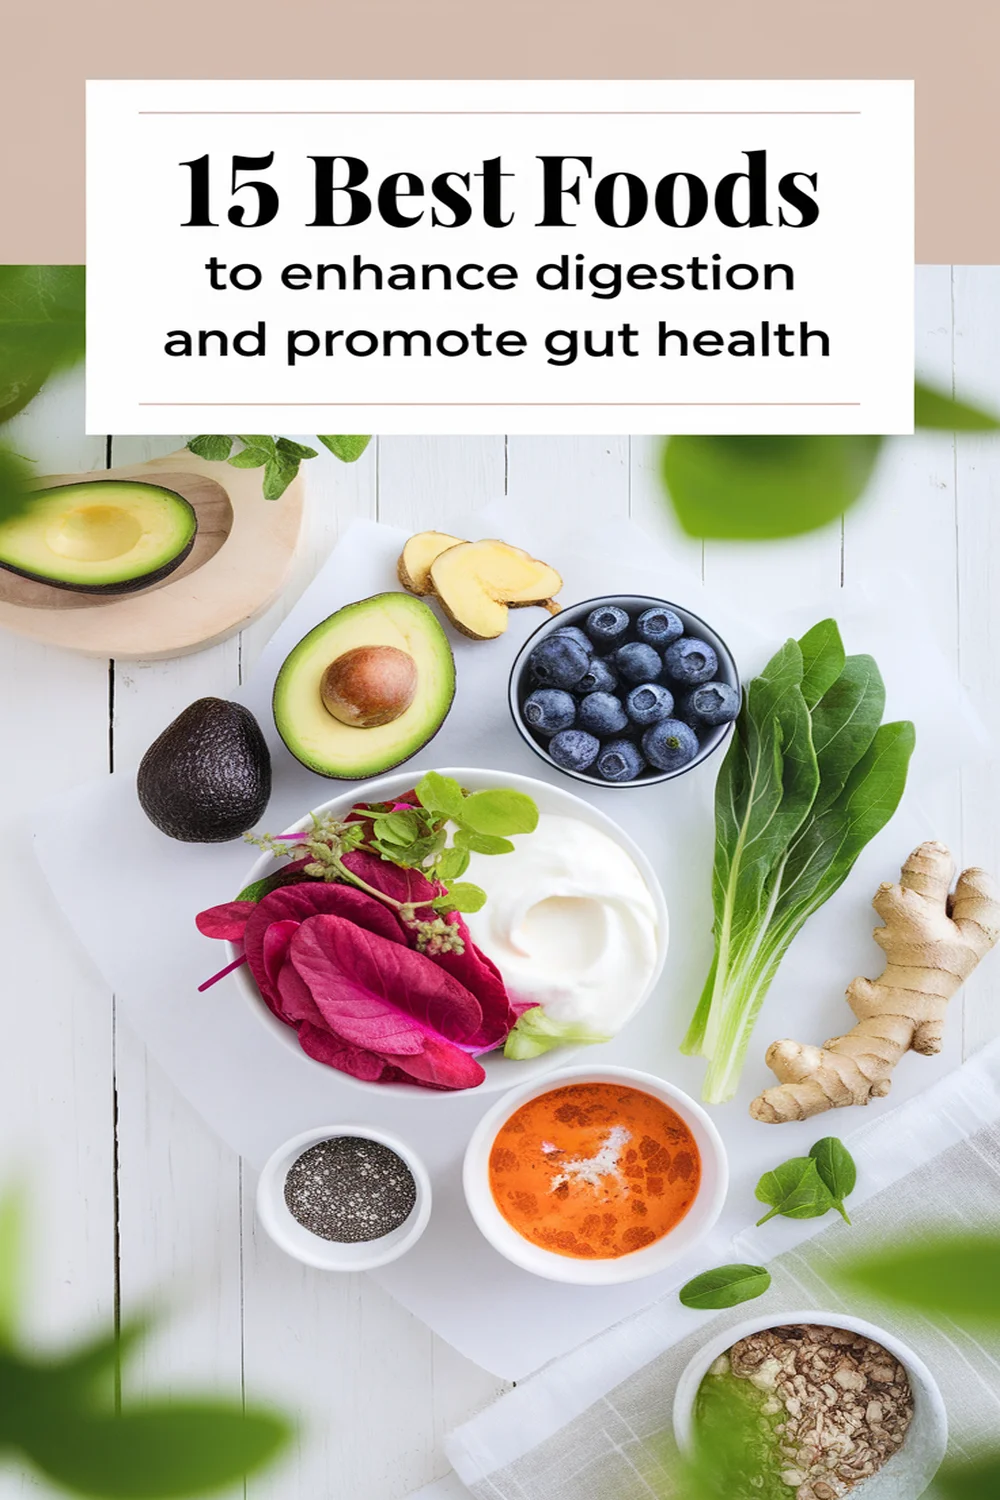
To enhance digestion and promote gut health, consider incorporating probiotic-rich foods like yogurt, kefir, sauerkraut, and kimchi. Don’t forget fiber-rich options like oats, quinoa, and chia seeds. Flavorful add-ins such as garlic and ginger can also help soothe your digestive system. Protein-rich fish provides omega-3 fatty acids that reduce inflammation. By including these foods in your diet, you can support your overall gut health and feel great. There’s even more to discover about optimizing your digestive health!
Yogurt

Yogurt is a versatile and nutritious food that not only enhances digestion but also supports overall gut health. It’s packed with probiotics, which are beneficial bacteria that help balance the gut microbiome.
Making yogurt at home can be a rewarding endeavor, as it allows you to control the ingredients and tailor the flavor to your liking. Plus, homemade yogurt can be a fun project to share with family and friends.
To get started, you’ll need very few ingredients and a little patience. The process of making yogurt involves fermenting milk with live cultures, resulting in a creamy and tangy treat. You can use this yogurt on its own, as a base for smoothies, or even in cooking and baking for added flavor and moisture.
Let’s explore the simple steps to create your own delectable yogurt!
- 1 quart of milk (whole, 2%, or low-fat)
- 2 tablespoons of plain yogurt with live active cultures (store-bought or from a previous batch)
- Cheesecloth or a clean kitchen towel
- A thermometer (optional)
- A large pot
Heat the milk in a large pot over medium heat until it reaches about 180°F (82°C), stirring occasionally to prevent scalding.
Remove the pot from heat and let the milk cool to around 110°F (43°C). Once cooled, stir in the plain yogurt thoroughly to guarantee it’s well combined with the milk. Cover the pot with a lid or a towel and store it in a warm place, like an oven with the light on or a yogurt maker, for 4 to 12 hours, depending on your desired thickness and tartness.
After fermenting, transfer the yogurt to clean containers, refrigerate, and enjoy!
When preparing yogurt, it’s important to use the freshest milk possible to avoid any unwanted bacteria interfering with the fermentation process. You can also experiment with different types of milk, such as almond or coconut milk, but keep in mind that the texture and taste will vary.
For a creamier yogurt, consider straining it through the cheesecloth or towel after fermentation to create a thicker texture similar to Greek yogurt.
Enjoy your homemade yogurt plain, or jazz it up with your favorite fruits, honey, or granola for added flavor and nutrients!
Sauerkraut
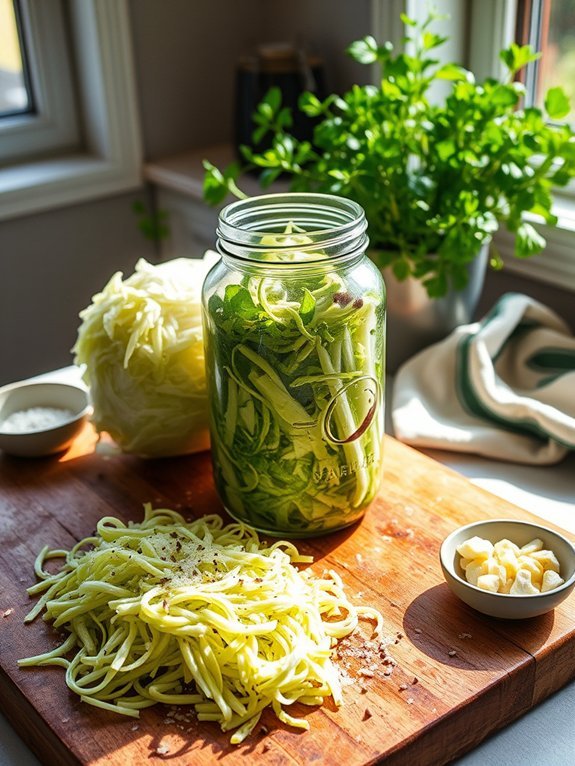
Sauerkraut is a traditional fermented food that not only adds a unique tangy flavor to dishes but also offers numerous health benefits for your digestive system. This fermented cabbage is rich in probiotics, which are beneficial bacteria that contribute to gut health and aid in digestion.
Making sauerkraut at home is surprisingly simple, and with just a few ingredients, you can create a delicious and gut-friendly side dish that pairs well with a variety of meals. The process of fermentation allows the natural sugars in cabbage to convert into lactic acid, preserving the cabbage and enhancing its nutritional profile.
As you enjoy your homemade sauerkraut, you’ll be pleased to know that it’s low in calories and packed with vitamins C and K, making it a nutritious addition to your diet. Whether served alongside sausages, in salads, or as a topping on sandwiches, sauerkraut is versatile and full of flavor.
- 1 medium head of green cabbage (about 3 to 4 pounds)
- 1 tablespoon sea salt
- Optional: 1 teaspoon caraway seeds or garlic for added flavor
Begin by removing any outer leaves from the cabbage, then cut it into quarters and remove the core. Shred the cabbage using a knife or a food processor, then place it in a large mixing bowl.
Sprinkle the sea salt over the shredded cabbage and massage it with your hands for about 5-10 minutes until the cabbage starts to release its juices. If using, mix in the caraway seeds or minced garlic at this point.
Pack the cabbage mixture tightly into a clean glass jar or fermentation crock, making certain the liquid covers the cabbage entirely. Seal the jar with an airlock lid or simply cover it with a cloth to allow gases to escape as it ferments.
Place the jar in a cool, dark place for 1 to 4 weeks, tasting it periodically until it reaches your desired sourness.
When making sauerkraut, it’s vital to use non-iodized salt to guarantee proper fermentation. Additionally, cleanliness is paramount—always use clean utensils and jars to prevent unwanted bacteria from contaminating your fermentation process.
Feel free to experiment with different spices or vegetables, such as adding shredded carrots or beets for additional flavor and color. Remember, fermentation is a personal process, so don’t hesitate to adjust the duration to suit your taste preferences. Enjoy the health benefits of your homemade sauerkraut as a staple in your meals!
Kimchi
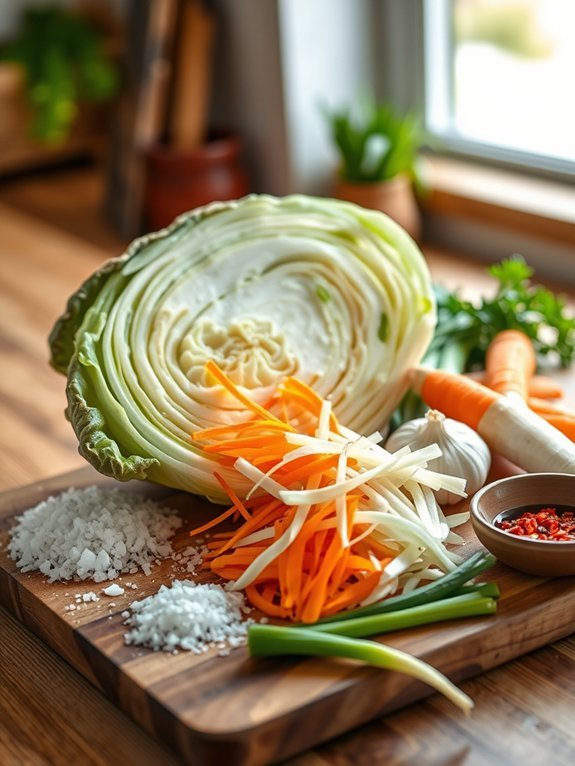
Kimchi is a traditional Korean dish that has gained worldwide popularity not only for its unique flavor but also for its numerous health benefits. This fermented vegetable medley is packed with probiotics, which play a crucial role in enhancing digestion and promoting gut health. By preparing kimchi at home, you can control the ingredients and spice levels to suit your preference, making it a delicious addition to any meal.
To make kimchi, napa cabbage and radishes are key ingredients, normally seasoned with a blend of spices that give the dish its distinctive taste. The fermentation process not only helps to develop complex flavors but also increases the presence of beneficial bacteria, making it a perfect food to support your digestive system. While making kimchi can take time, the process is relatively straightforward and can yield a large batch that keeps well in the refrigerator.
- 1 large napa cabbage
- 1 cup coarse sea salt
- 4 cups water
- 1 cup daikon radish, julienned
- 1 small carrot, julienned
- 4 green onions, chopped
- 5 cloves garlic, minced
- 1-2 inches ginger, minced
- 2 tablespoons fish sauce (or vegan alternative)
- 2 tablespoons sugar
- 2-3 tablespoons Korean red pepper flakes (gochugaru)
- 1 teaspoon sesame seeds (optional)
Begin by cutting the napa cabbage into quarters and then into bite-sized pieces. In a large bowl, dissolve the sea salt in water to create a brine. Submerge the cabbage pieces in the brine and let them soak for 1-2 hours, turning occasionally until they soften.
While the cabbage is soaking, mix the daikon radish, carrot, green onions, garlic, ginger, fish sauce, sugar, and Korean red pepper flakes in a separate bowl until well combined. Once your cabbage is ready, rinse it under cold water to remove excess salt and drain well. Combine the cabbage with the spice mixture, ensuring the vegetables are well coated.
Pack the mixture tightly into a clean glass jar, leaving some space at the top for fermentation, and seal it. Let it ferment at room temperature for 1-5 days, depending on your preference for tanginess, then refrigerate.
When making kimchi, it’s important to adjust the spice level to your taste buds. If you prefer a milder flavor, start with less gochugaru and work your way up to find the perfect balance. Also, using fresh, high-quality ingredients will elevate your kimchi, giving it better texture and flavor.
Remember to taste during the fermentation process, as the flavor will change over time – it’s all about creating a batch that satisfies your palate!
Recommended Items
Discover our top picks for enhancing digestion and promoting gut health—let’s dive in!
Products
Kefir

Kefir is a fermented dairy product that has gained immense popularity due to its numerous health benefits, particularly for gut health. It’s made from cow, goat, or sheep milk and contains a mix of beneficial bacteria and yeast, making it a powerful probiotic source. Incorporating kefir into your diet can help enhance digestion, strengthen the immune system, and even improve skin health.
Beyond just drinking it plain, kefir can be transformed into a delightful culinary creation that can be enjoyed in various ways. One of the delicious ways to enjoy kefir is by making a revitalizing Kefir Salad Dressing. This creamy dressing not only adds a burst of flavor to your salads, but it also keeps your gut happy.
It pairs wonderfully with fresh greens, grilled vegetables, or as a dip for crudités. This quick and easy recipe allows you to harness the health benefits of kefir while enjoying a delicious accompaniment to your meals.
- 1 cup plain kefir
- 1 clove garlic, minced
- 1 tablespoon fresh lemon juice
- 1 tablespoon olive oil
- 1 teaspoon dried dill (or fresh dill if available)
- Salt and pepper to taste
In a mixing bowl, combine the plain kefir, minced garlic, lemon juice, olive oil, and dill. Whisk the ingredients together until they’re well blended. Season with salt and pepper according to your taste preference.
You can adjust the consistency by adding more kefir if you prefer a thinner dressing or a bit more olive oil for extra creaminess. When preparing this dish, feel free to experiment with different herbs and spices to create a flavor profile that suits your taste.
Fresh ingredients often provide the best flavor, so if possible, use fresh dill rather than dried. Additionally, if you have any leftover dressing, it can be stored in an airtight container in the refrigerator for up to a week, allowing its flavor to develop even further.
Meal Plan for Gut Health
Oats
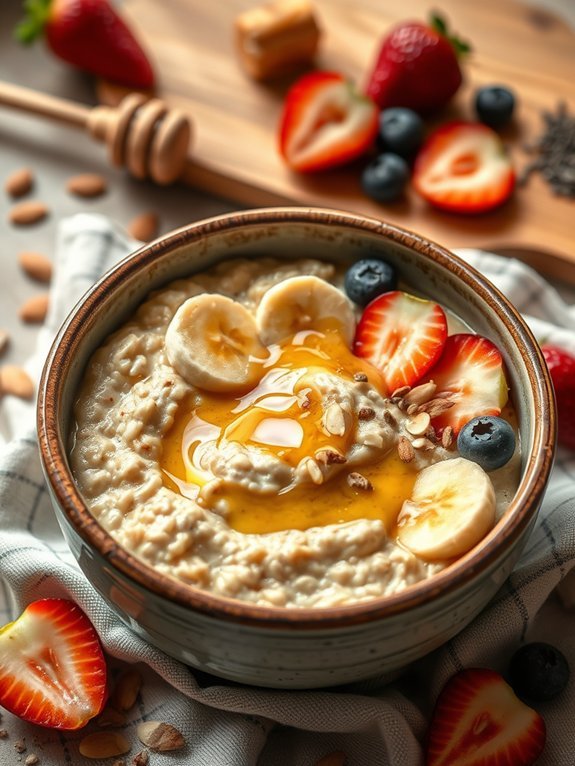
Oats are a powerhouse of nutrition, offering not only a satisfying base for breakfast but also significant benefits for digestive health. Packed with soluble fiber, oats help to regulate bowel movements, ensuring a smooth and healthy digestive system. Along with their ability to promote gut health, oats can help you feel fuller longer, making them an excellent choice for those looking to maintain a balanced diet.
Whether you prefer them warm and comforting or in a revitalizing overnight preparation, oats can be easily tailored to suit your taste.
Incorporating oats into your diet is simple, as they can be cooked in various ways. One of the most popular methods is preparing a delicious bowl of oatmeal, which can be enhanced with fruits, nuts, and spices to elevate the flavor and nutritional profile. This versatile dish can be enjoyed as a hearty breakfast or a wholesome snack throughout the day.
Let’s explore an easy recipe that showcases the inherent goodness of oats and transforms them into a delightful, gut-friendly meal.
- 1 cup rolled oats
- 2 cups water or milk (dairy or non-dairy)
- 1 ripe banana, mashed
- 1 tablespoon honey or maple syrup
- 1/2 teaspoon cinnamon
- Pinch of salt
- Toppings: sliced fruits (like berries or apples), nuts, and seeds
In a medium saucepan, bring the water or milk to a boil. Once boiling, add the rolled oats, mashed banana, honey (or maple syrup), cinnamon, and a pinch of salt. Stir well and reduce the heat to low. Let it simmer for about 5-7 minutes, stirring occasionally until the oats are fully cooked and creamy.
Remove from heat and let it sit for a minute before serving. Top with your favorite fruits, nuts, or seeds for added flavor and nutrition.
When cooking oatmeal, feel free to experiment with different toppings and mix-ins. Adding nut butter provides a creamy texture and extra protein, while a spoonful of Greek yogurt can enhance the creaminess and add probiotics.
If you prefer a more indulgent treat, consider adding dark chocolate chips or a dollop of almond milk yogurt. You can also make your oatmeal ahead of time and store it in the fridge for a quick breakfast option throughout the week—just reheat and add toppings before enjoying!
Bananas
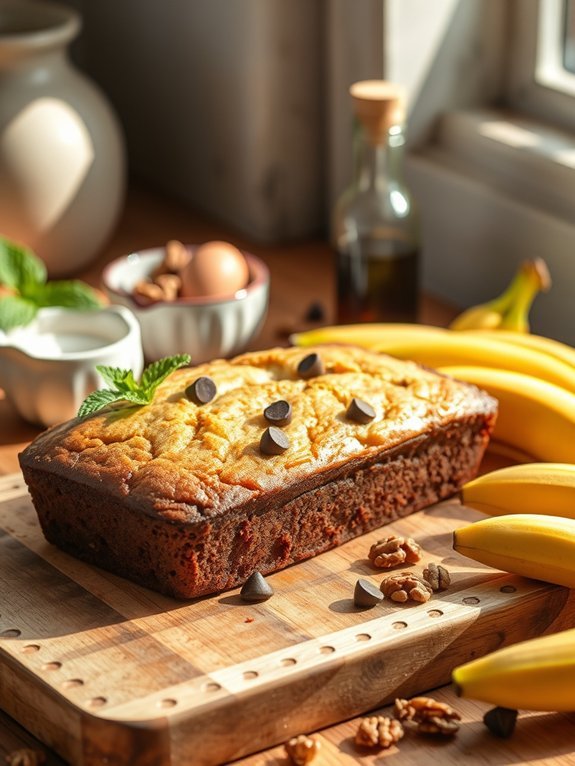
Bananas aren’t only a delicious snack but also a fantastic addition to many dishes, enhancing digestion and supporting gut health. Known for their high fiber content, particularly in the form of pectin, bananas can help regulate digestion and promote a healthy gut environment. Their natural sweetness makes them incredibly versatile, as you can enjoy them raw, baked, or blended into smoothies.
One popular way to enjoy bananas is by creating a tasty banana bread that combines the fruit’s benefits with wholesome ingredients. This recipe is sure to be a hit, whether served as breakfast, a snack, or even dessert. Additionally, this banana bread is easy to make and offers a delightful aroma that will fill your kitchen as it bakes, making it a perfect treat for family and friends.
- 3 ripe bananas, mashed
- 1/3 cup melted butter
- 1/2 cup sugar (adjust for sweetness preference)
- 1 egg, beaten
- 1 teaspoon vanilla extract
- 1 teaspoon baking soda
- Pinch of salt
- 1 cup all-purpose flour
- Optional: 1/2 cup chopped nuts or chocolate chips
In a mixing bowl, combine the mashed bananas with melted butter, then add sugar, beaten egg, and vanilla extract, mixing until well incorporated.
Next, sprinkle baking soda and salt into the mixture, and mix again. Gradually fold in the flour until just combined, being careful not to overmix. If desired, add nuts or chocolate chips for extra flavor and texture.
Pour the batter into a greased loaf pan and bake in a preheated oven at 350°F (175°C) for about 60 minutes, or until a toothpick inserted in the center comes out clean. Let it cool before slicing.
For the best results, use very ripe bananas as they contribute to a sweeter taste and better texture in your banana bread.
You can also experiment with whole wheat flour instead of all-purpose flour for added fiber, or try adding spices like cinnamon or nutmeg to enhance the flavor.
If you wish to store extra banana bread, it freezes well—simply wrap it tightly and place it in the freezer for a quick, healthy snack later on.
Ginger

Ginger is a powerful root that not only adds a zingy flavor to dishes but is also renowned for its numerous health benefits, particularly when it comes to digestion. Its active compounds, such as gingerol and shogaol, help soothe the stomach, reduce bloating, and alleviate nausea. Incorporating ginger into your meals can easily transform everyday recipes into something both delicious and gut-friendly.
One simple and effective way to enjoy ginger is through a warming ginger tea. This drink isn’t only invigorating but can also be a great detoxifier that aids digestion and promotes overall gut health. The best part is that this recipe can be easily adjusted to suit your taste, whether you prefer it sweeter, spicier, or more herbal.
Here’s how to prepare the perfect cup of ginger tea to boost your digestive wellness.
- Fresh ginger root (about 2 inches)
- 2 cups water
- Honey or maple syrup (to taste)
- Fresh lemon juice (optional)
- Mint leaves (optional, for garnish)
Start by peeling the ginger root and slicing it thinly to maximize flavor extraction. In a saucepan, bring the two cups of water to a boil, then add the sliced ginger. Lower the heat and let it simmer for about 10-15 minutes, depending on how strong you want the flavor to be. After simmering, strain the tea into a cup, sweeten with honey or maple syrup as desired, and add a splash of fresh lemon juice if you want an extra zing. Garnish with mint leaves for added vibrancy.
When using ginger, remember that the longer you simmer it, the more robust the flavor will be, so don’t be afraid to experiment with steeping times to find your perfect brew. Additionally, fresh ginger works best for this recipe, but if you’re in a pinch, powdered ginger can be used as a substitute—just reduce the quantity as it’s more concentrated.
To enhance gut health further, consider adding a pinch of turmeric or a dash of cayenne pepper for additional anti-inflammatory benefits. Enjoy your soothing ginger tea after meals for maximum digestive support!
Apples
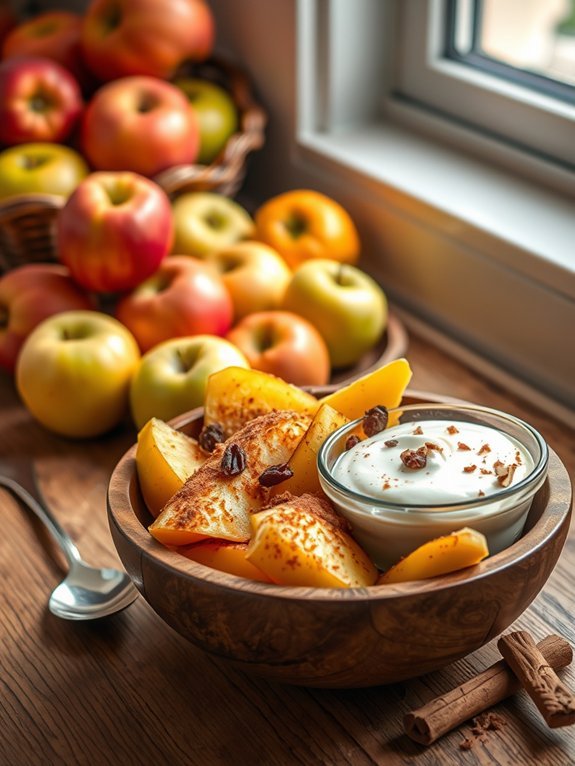
Apples aren’t only delicious but also packed with nutrients and fiber that can boost digestion and enhance gut health. Their high pectin content acts as a prebiotic, promoting the growth of beneficial gut bacteria. Incorporating apples into your diet is a scrumptious way to support digestive health, and one delightful way to do this is by making a warm, spiced apple dish.
This recipe takes advantage of the natural sweetness of apples while adding a hint of spice for an invigorating flavor. This easy-to-make dish can serve as a healthy dessert, a topping for oatmeal or yogurt, or simply a warm side dish. Plus, it can be adapted to suit your taste, allowing the use of different types of apples or spices to create your perfect combination.
So let’s plunge into cooking these enticing spiced apples that not only taste great but will also support your digestive health!
- 4 medium-sized apples (any variety you prefer)
- 2 tablespoons brown sugar (or honey)
- 1 teaspoon cinnamon
- 1/2 teaspoon nutmeg
- 1 tablespoon lemon juice
- 2 tablespoons unsalted butter
- Optional toppings: chopped nuts, raisins, or a scoop of yogurt
Start by preheating your oven to 350°F (175°C). Core and slice the apples into thin wedges and place them in a mixing bowl. Drizzle in the lemon juice, and then add the brown sugar, cinnamon, and nutmeg, tossing until the apple wedges are well coated.
Melt the butter in a large skillet over medium heat, then add the spiced apples and cook for a few minutes until they begin to soften. Transfer the apples to a baking dish and bake for about 20-25 minutes, or until they’re tender and caramelized.
When making spiced apples, experimenting with different varieties can yield unique flavors and textures. For instance, tart apples like Granny Smith will provide a nice contrast to the sweetness of the sugar, while sweeter apples like Honeycrisp or Fuji will create a more dessert-like experience.
Additionally, feel free to add your favorite nuts or dried fruits for extra texture and nutrition. Enjoy your dish warm for the best flavor and digestion benefits!
Leafy Greens
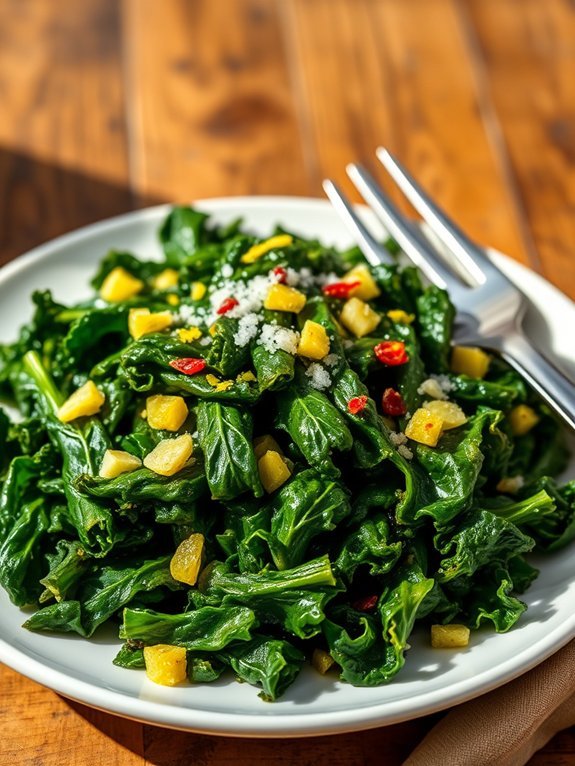
Leafy greens are nutritional powerhouses that aren’t only low in calories but also high in essential vitamins, minerals, and fiber. They can greatly enhance digestion and promote gut health due to their high concentrations of antioxidants and phytonutrients, which help to reduce inflammation and support beneficial gut bacteria.
This recipe for sautéed kale with garlic and lemon is a delicious way to incorporate leafy greens into your diet while bringing out their natural flavors.
Sautéed kale is versatile and can be enjoyed as a side dish or incorporated into salads, grain bowls, or even wraps. The use of garlic adds a delightful depth, while a squeeze of fresh lemon juice brightens the dish and enhances the absorption of key nutrients.
Not only is this dish quick and easy to prepare, but it also retains the nutrients of the greens, making it a perfect choice for a health-conscious meal.
Ingredients:
- 1 bunch of fresh kale
- 2 tablespoons olive oil
- 3 cloves garlic, minced
- 1 lemon (juiced and zested)
- Salt to taste
- Pepper to taste
- Red pepper flakes (optional)
Wash the kale thoroughly, remove the stems, and chop the leaves into bite-sized pieces. In a large skillet, heat the olive oil over medium heat and add the minced garlic. Sauté for about 1 minute until fragrant, being careful not to let the garlic burn.
Add the chopped kale and stir to coat it evenly with the oil and garlic. Cook for about 5-7 minutes, stirring occasionally, until the kale is wilted and tender. Squeeze the fresh lemon juice over the greens, add lemon zest, and season with salt, pepper, and red pepper flakes if desired. Toss again before serving.
When cooking with leafy greens like kale, remember that they can vary in toughness. Younger leaves may require less cooking time and will taste milder, while older, tougher leaves may need more sautéing to become tender.
Always taste as you go to verify that the seasoning is to your liking. You can customize this dish by adding other vegetables or garnishes such as nuts or seeds for added crunch and nutrition.
Berries
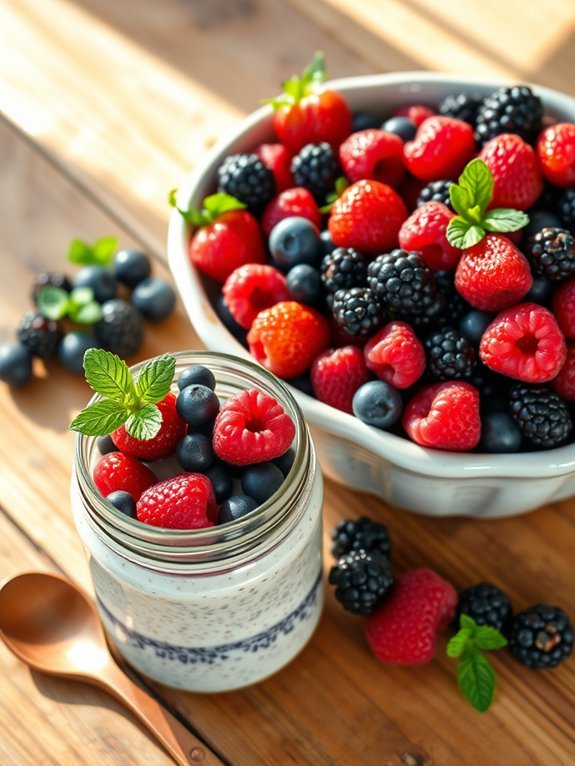
Berries aren’t only delicious but also packed with antioxidants, vitamins, and fiber that are beneficial for gut health and overall digestion. Including a variety of berries in your diet can enhance the growth of good bacteria in your gut, making them an excellent addition to any healthy meal plan.
One delightful way to incorporate berries is by making a Berry Chia Seed Pudding. It’s a simple, no-cook recipe that provides a sweet and nutritious treat any time of the day.
This Berry Chia Seed Pudding is versatile and can be customized according to your preference. You can use a mix of strawberries, blueberries, raspberries, and blackberries for a vibrant and flavorful meal. Soak chia seeds overnight in almond milk (or any plant-based milk of your choice) to allow them to swell and create a pudding-like consistency.
Once assembled, this dish not only looks beautiful but is also a great source of fiber and omega-3 fatty acids, boosting your digestive health.
- 1 cup mixed berries (strawberries, blueberries, raspberries, blackberries)
- 2 tablespoons chia seeds
- 1 cup almond milk (or any milk of choice)
- 1 tablespoon maple syrup (optional for sweetness)
- 1/2 teaspoon vanilla extract (optional)
- Fresh mint leaves (for garnish, optional)
In a mixing bowl, whisk together the almond milk, chia seeds, maple syrup, and vanilla extract until well combined. Let the mixture sit for about 5 to 10 minutes until the chia seeds start to absorb the liquid and thicken.
Once thickened, stir the mixture again to break up any clumps. Layer the chia pudding in a glass or jar, adding a layer of mixed berries between the chia pudding layers if you’d like. Refrigerate for at least 1 hour, or overnight for a firmer texture.
When preparing this dish, feel free to switch up the layers by adding granola for crunch or a sprinkle of cinnamon for added flavor. You can also substitute the almond milk with coconut or cashew milk for a different taste.
For a creamier texture, blend the pudding slightly before layering. Enjoy your berry chia pudding as a breakfast option, snack, or even dessert!
Almonds
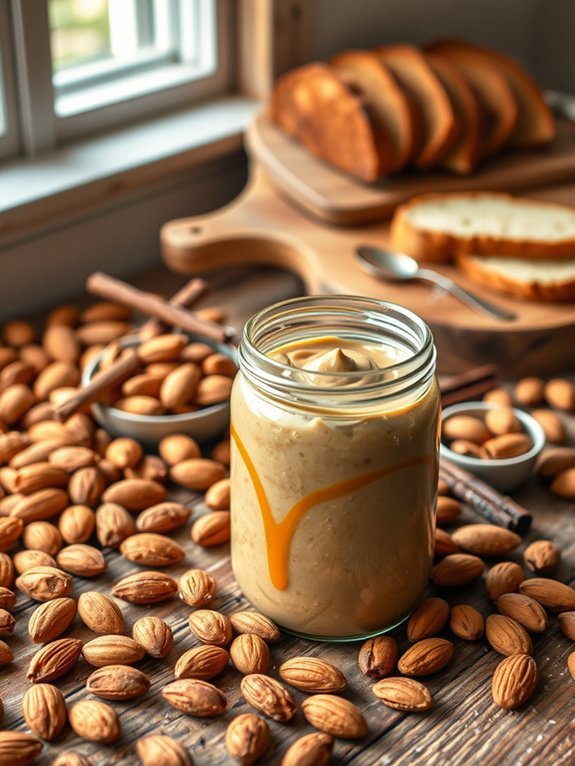
Almonds aren’t just a nutritious snack; they can also be transformed into a delicious, wholesome dish that enhances digestion and promotes gut health. One popular way to enjoy almonds is by making a simple, flavorful almond butter. This rich, creamy spread is great for breakfast, snacking, or even as an addition to smoothies and baked goods. Not only does almond butter provide protein and healthy fats, it’s also packed with fiber, which aids in digestion and keeps you feeling satisfied longer.
Creating almond butter is straightforward and requires only a handful of ingredients. You can also customize your almond butter according to your tastes, adding sweeteners or flavorings if desired. Store it in an airtight jar in the refrigerator, and it can last for several weeks. Enjoying your homemade almond butter allows you to reap the benefits of almonds while indulging in a creamy, delicious treat.
- 2 cups raw almonds
- 1-2 tablespoons honey or maple syrup (optional)
- A pinch of salt (optional)
- 1 tablespoon of almond oil (optional, for creaminess)
Begin by roasting the almonds in the oven at 350°F (175°C) for about 10-12 minutes until golden brown, ensuring to stir them halfway for even toasting. Once roasted, allow them to cool slightly, then transfer them to a food processor.
Blend the almonds until they turn into a smooth, creamy consistency, scraping down the sides as necessary. If desired, add honey or maple syrup for sweetness, a pinch of salt for flavor, and almond oil if you prefer a creamier texture. Blend again until well combined.
When making almond butter, patience is key; the process can take anywhere from 5 to 15 minutes, depending on the power of your food processor. If you prefer a smoother texture, allow the processor to run longer.
To elevate the flavor, consider adding in extras like cocoa powder, vanilla extract, or cinnamon. Make sure to let the almond butter cool before transferring it to a jar for storage, and keep it in the refrigerator to maintain freshness.
Chia Seeds
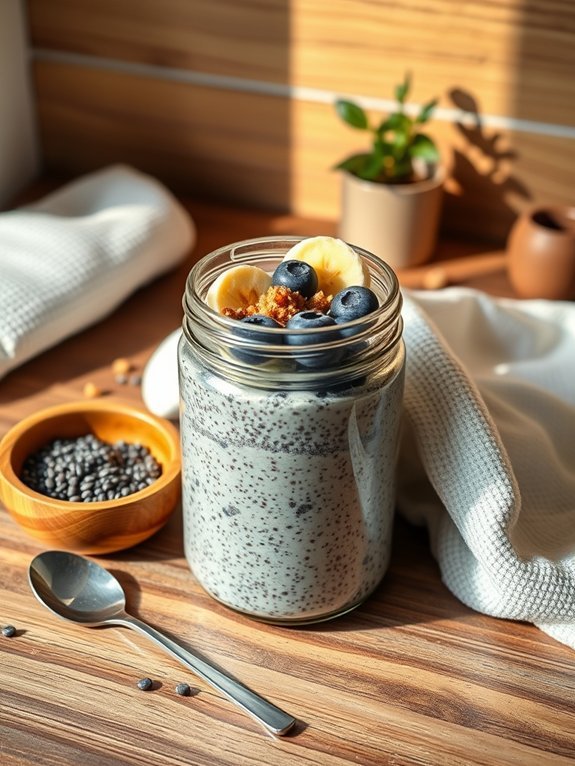
Chia seeds are an incredibly versatile superfood that can easily be incorporated into your diet to enhance digestion and promote gut health. Packed with fiber, omega-3 fatty acids, and essential nutrients, these tiny seeds provide a host of benefits for your digestive system, including improving bowel regularity and helping to soothe inflammation.
One delicious way to enjoy chia seeds is by preparing a tasty chia seed pudding, which can also be customized with various flavors and toppings to suit your preferences. This recipe for chia seed pudding isn’t only simple to make but also an excellent way to kickstart your day or enjoy as a satisfying snack.
The pudding can be made in advance and stored in the refrigerator for a quick grab-and-go option. By adding fruit, nuts, or even a drizzle of honey, you can create a delightful treat that not only tastes great but also supports your gut health.
- 1/2 cup chia seeds
- 2 cups almond milk (or any milk of choice)
- 1 tablespoon maple syrup (or honey for sweetness)
- 1 teaspoon vanilla extract
- Fresh fruit for topping (e.g., berries, banana, mango)
- Nuts or granola for crunch (optional)
In a mixing bowl, combine the chia seeds, almond milk, maple syrup, and vanilla extract. Stir well to guarantee the chia seeds are evenly distributed in the liquid. Allow the mixture to sit for about 5 minutes, then stir again to prevent clumping.
Cover the bowl and refrigerate for at least 2-3 hours or overnight until the pudding thickens to your desired consistency. Once set, serve the pudding in bowls or jars and top with your choice of fresh fruit and nuts.
When preparing chia seed pudding, remember that the longer the pudding sits, the thicker it will become. If you prefer a creamier texture, you can blend the ingredients together before refrigerating.
Additionally, feel free to experiment with different liquids, such as coconut milk or oat milk, and include spices like cinnamon or cocoa powder to create variations that excite your palate while remaining gut-friendly.
Quinoa
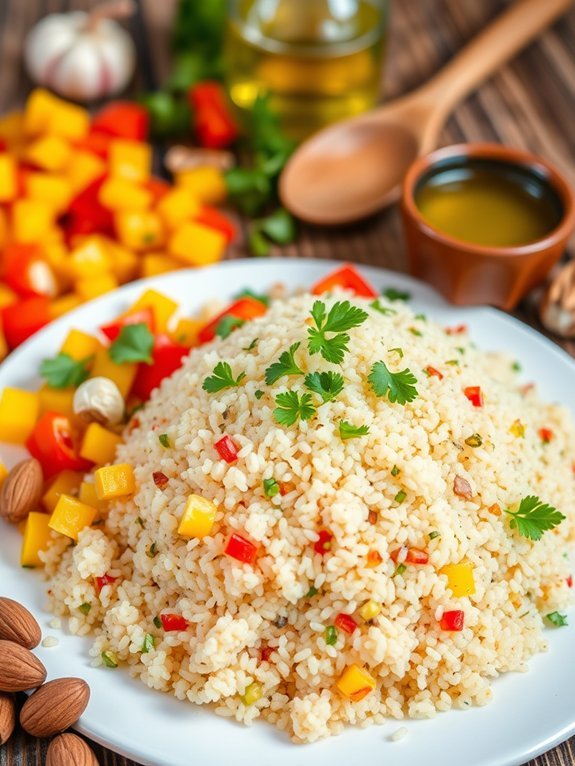
Quinoa is an ancient grain that has recently gained popularity due to its impressive nutritional profile and ability to promote gut health. Packed with essential amino acids, fiber, and vitamins, this gluten-free superfood is an excellent addition to a balanced diet. Not only is it easy to prepare, but quinoa also has a mild, nutty flavor that pairs well with various ingredients, making it an incredibly versatile option for meals.
This recipe will guide you in cooking perfectly fluffy quinoa that can be enjoyed on its own or as a base for other dishes. To prepare quinoa, the most important step is to rinse it thoroughly before cooking. This helps remove the saponins, a natural coating that can give quinoa a bitter taste.
Once rinsed, quinoa cooks swiftly and is ready to absorb flavors from your chosen seasonings or accompaniments. It’s an ideal component for salads, bowls, or even as a side dish with meat or vegetables. Follow the recipe below for a simple yet delicious quinoa preparation.
- 1 cup quinoa
- 2 cups water or vegetable broth
- 1 tablespoon olive oil (optional)
- 1/2 teaspoon salt
- Fresh herbs for garnish (optional)
In a medium saucepan, combine the rinsed quinoa, water or vegetable broth, olive oil, and salt. Bring the mixture to a boil over medium-high heat. Once boiling, reduce the heat to low, cover, and simmer for about 15 minutes or until all the liquid is absorbed.
After cooking, remove from heat and let it sit, covered, for an additional 5 minutes. Fluff the quinoa with a fork before serving. When cooking quinoa, you can experiment with flavors by adding spices, herbs, or even garlic to the water or broth for additional depth.
If you’re preparing a large batch, quinoa can be stored in the refrigerator for up to five days, making it a convenient option for meal prep. For a more colorful presentation, try adding diced vegetables or nuts once it’s cooked, turning your quinoa into a vibrant and nutritious dish.
Garlic
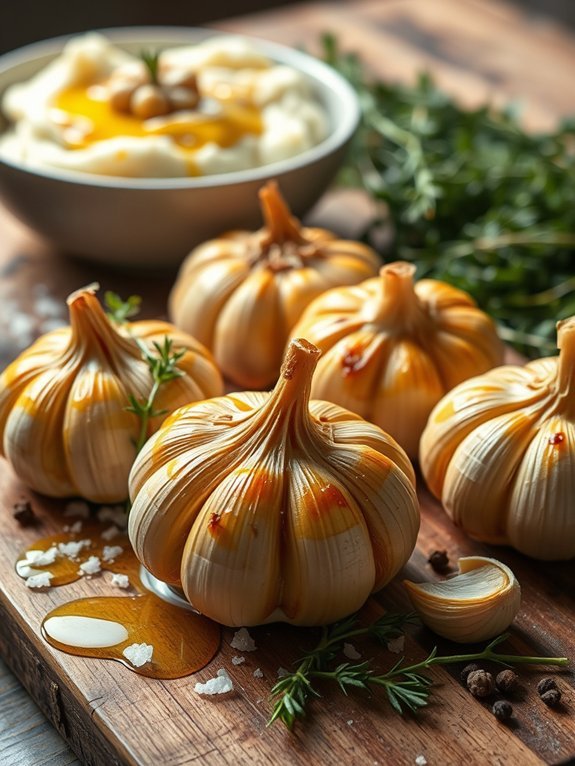
Garlic isn’t only a flavorful addition to a variety of dishes but also a powerhouse for promoting gut health. Known for its potent antimicrobial properties, garlic aids in digestion and can help combat various digestive issues.
Whether you enjoy it sautéed, roasted, or raw, incorporating garlic into your meals is a delicious way to enhance gut health while tantalizing your taste buds. One simple yet delightful preparation is roasted garlic, which mellows its flavor and creates a soft, spreadable texture perfect for various uses.
To make roasted garlic, you only need a few simple ingredients and minimal effort. The roasting process brings out the natural sweetness of garlic, transforming it into a versatile condiment that can be spread on bread, added to mashed potatoes, or used in salad dressings.
Whether you’re enjoying it alone or combining it with other ingredients, roasted garlic is an excellent way to boost your digestive support while savoring a rich, aromatic flavor.
- Whole heads of garlic
- Olive oil
- Sea salt
- Freshly cracked black pepper
- Aluminum foil (optional)
Preheat your oven to 400°F (200°C). Take the whole heads of garlic and slice off the top 1/4 inch, exposing the individual cloves. Drizzle olive oil over the exposed cloves, season with sea salt and black pepper, then wrap each head in aluminum foil or place them directly on a baking sheet.
Roast in the oven for about 30-35 minutes, or until the cloves are soft and golden brown. Let the roasted garlic cool slightly before squeezing the cloves out of their skins to use as desired.
When roasting garlic, feel free to customize it by adding your favorite herbs or spices, such as thyme or rosemary, before wrapping it. This can enhance the flavor even further.
Additionally, remember to store any leftover roasted garlic in an airtight container in the refrigerator for up to a week, so you can easily enjoy its benefits throughout the week.
Fish

When it comes to promoting gut health, fish is an excellent choice thanks to its abundance of omega-3 fatty acids, which have anti-inflammatory properties and can promote a healthy digestive system. Rich in nutrients and easy to digest, fish can be a versatile ingredient that suits a variety of cooking methods and cuisines.
One popular preparation is to bake fish with a mix of fresh herbs, citrus, and light spices, allowing the flavors to meld beautifully while retaining the nutritional benefits. This baked fish recipe isn’t only simple but also enhances the flavors of the fish without overpowering its natural taste.
The combination of lemon and herbs adds freshness, while the olive oil provides healthy fats that help with the absorption of fat-soluble vitamins, making it a perfect enhancement for gut health. Serve it with a side of steamed vegetables or a light salad to create a balanced meal that’s equally delicious and beneficial for digestion.
Ingredients:
- 2 fillets of white fish (such as cod, tilapia, or sole)
- 2 tablespoons olive oil
- Juice of 1 lemon
- Zest of 1 lemon
- 2 cloves garlic, minced
- 1 teaspoon fresh thyme (or ½ teaspoon dried thyme)
- 1 teaspoon fresh parsley, chopped
- Salt and pepper to taste
- Lemon slices (for garnish)
Season the fish fillets with salt and pepper, then place them in a baking dish. In a small bowl, whisk together olive oil, lemon juice, lemon zest, minced garlic, thyme, and parsley.
Pour this herb mixture over the fish, ensuring it’s well coated. Bake in a preheated oven at 375°F (190°C) for 15-20 minutes, or until the fish flakes easily with a fork. Garnish with lemon slices and serve warm.
When cooking fish, it’s important to not overcook it, as it can become dry and lose its delicate flavor. Keep an eye on the fish as it bakes, and use a fork to test for doneness.
If you want to enhance the dish further, consider adding other herbs such as dill or basil, which also provide additional health benefits and pair well with a fish dish. Finally, make sure to choose fresh fish for the best flavor and health benefits; the fresher, the better!

