This post may contain affiliate links. Please read our policy page.
As a busy home chef, you can save time and reduce stress by planning your meals in advance and embracing one-pot meals. Using a slow cooker or Instant Pot can help create rich flavors with minimal effort. Consider batch cooking and pre-chopping ingredients for even quicker weeknight meals. Don’t forget to utilize sheet pan dinners and stick to simple recipes. Involving your family in cooking can make it more enjoyable. Discover even more efficient strategies to streamline your kitchen chaos!
Plan Your Meals in Advance
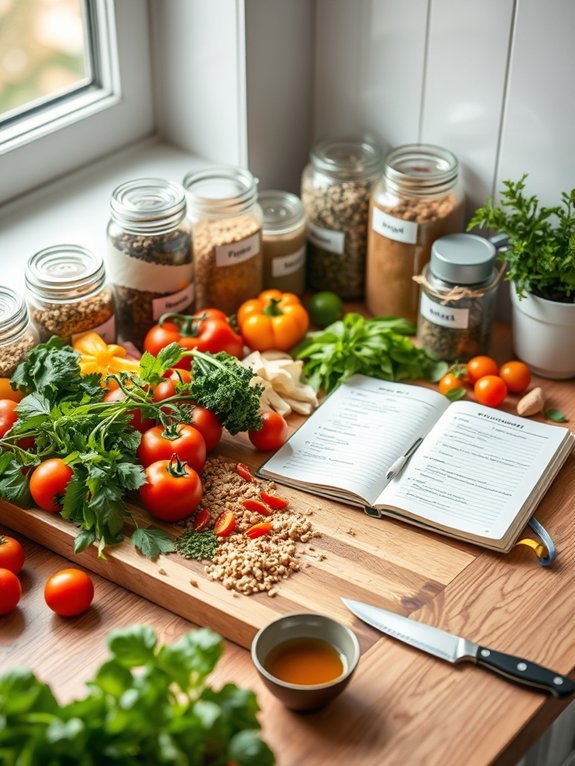
Planning your meals in advance can notably streamline your cooking process and minimize the stress that often accompanies daily meal preparation. By dedicating a little time each week to decide what you’ll eat, you can save yourself from the last-minute rush of figuring out what to cook. This approach not only helps in managing your grocery list but also allows you to better utilize the ingredients you have on hand, reducing food waste.
Furthermore, when you have a plan, you can experiment with new recipes that align with your dietary goals or your family’s preferences.
Let’s explore a simple yet delicious recipe that fits perfectly within a meal plan: a One-Pan Chicken and Vegetable Bake. This dish isn’t only wholesome but also requires minimal cleanup, making it a fantastic choice for busy weeknights. By batch cooking this recipe in advance, you can enjoy hearty meals throughout the week by just reheating and serving.
Plus, the combination of seasoning and roasted vegetables ensures that it never gets boring.
- 4 boneless, skinless chicken breasts
- 2 cups of mixed vegetables (carrots, bell peppers, broccoli)
- 2 tablespoons olive oil
- 1 teaspoon garlic powder
- 1 teaspoon onion powder
- 1 teaspoon paprika
- Salt and pepper to taste
- Fresh herbs for garnish (optional)
Preheat your oven to 400°F (200°C). In a large bowl, mix the olive oil, garlic powder, onion powder, paprika, salt, and pepper. Add the chicken breasts and the mixed vegetables to the bowl, tossing everything together until well coated. Transfer the mixture onto a baking sheet lined with parchment paper, ensuring that the chicken is spread out evenly among the vegetables.
Bake in the preheated oven for about 25-30 minutes, or until the chicken is cooked through and the vegetables are tender.
When planning to make this dish, consider marinating the chicken overnight in your seasoning mix to enhance the flavor. Additionally, you can customize the vegetables based on what’s in season or what you have in your fridge—zucchini, asparagus, or sweet potatoes work well too.
Finally, this dish can easily be stored in the fridge for up to 4 days, making it perfect for meal prep. Just reheat each serving in the oven or microwave when you’re ready to eat!
Embrace One-Pot Meals
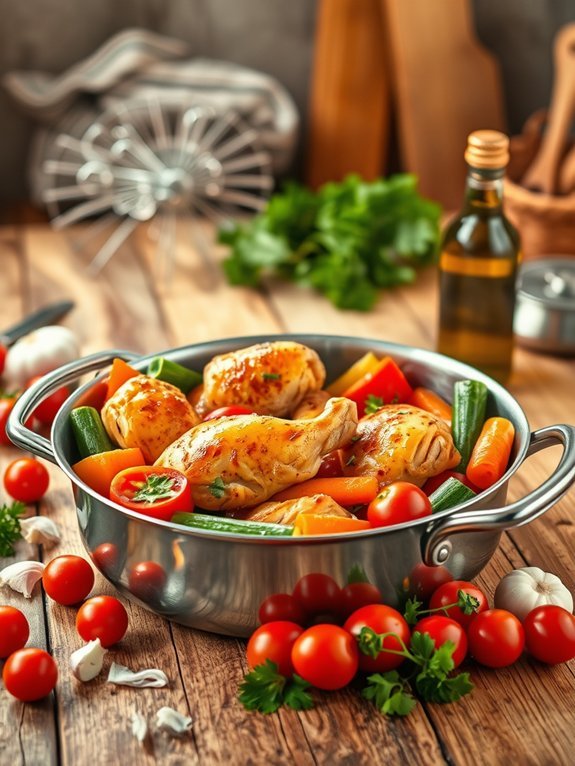
One-pot meals are a perfect solution for home chefs seeking simplicity without compromising on flavor. These meals allow you to combine all your ingredients into a single pot or pan, saving time on both cooking and cleanup.
Whether you’re looking for a hearty stew, a savory pasta dish, or a comforting rice bowl, one-pot meals can cater to any palate. Today, we’ll explore a delicious and versatile one-pot chicken and vegetable dish that encourages creativity while keeping things straightforward.
This wholesome meal isn’t only flavorful but also nutritious, incorporating various vegetables and proteins that create a balanced dinner in just one pot. By melding tender chicken with colorful vegetables and aromatic spices, this dish becomes a delightful feast for the senses, while also being adaptable to whatever ingredients you have on hand.
It’s a fantastic way to use up leftover produce while making dinner a breeze.
Ingredients:
- 1 lb chicken thighs, boneless and skinless
- 2 cups mixed vegetables (bell peppers, zucchini, carrots)
- 1 onion, chopped
- 3 cloves garlic, minced
- 1 cup chicken broth
- 1 cup cherry tomatoes
- 1 tsp dried oregano
- 1 tsp paprika
- Salt and pepper to taste
- 2 tbsp olive oil
- Fresh parsley for garnish
Heat the olive oil in a large pot or deep skillet over medium heat. Season the chicken thighs with salt, pepper, paprika, and oregano. Once the oil is hot, add the chicken and cook until browned on both sides. Remove the chicken from the pot and set aside.
In the same pot, add the chopped onion and minced garlic, sautéing until fragrant. Next, stir in the mixed vegetables and cook for another 5 minutes. Return the chicken to the pot, add the chicken broth and cherry tomatoes, and bring the mixture to a simmer. Cover and cook for about 20-25 minutes, or until the chicken is fully cooked, and the vegetables are tender.
When making this one-pot dish, feel free to customize it based on what you have readily available. You can substitute chicken thighs with chicken breasts or even try different proteins like shrimp or tofu.
Likewise, the vegetables can vary according to the season or your preferences; consider adding spinach, broccoli, or mushrooms for added nutrition. To bring extra flavor, experiment with fresh herbs or a squeeze of lemon juice before serving.
Use a Slow Cooker or Instant Pot
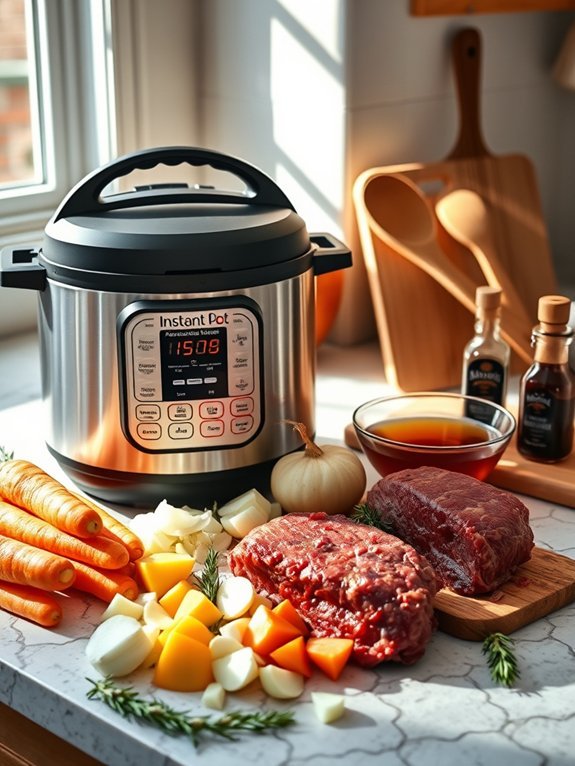
Slow cookers and Instant Pots are fantastic kitchen appliances that can save you a significant amount of time and effort while cooking. For busy home chefs, these gadgets provide the convenience of setting it and forgetting it, all while developing rich flavors in your dishes.
From tender meats to hearty stews, these appliances are versatile and allow for a variety of culinary creations with minimal hands-on time required.
One popular recipe that lends itself perfectly to slow cooking is a classic beef stew. The beauty of this dish lies in the ability to prepare it in advance and let the slow cooker or Instant Pot do the hard work. You end up with a savory, comforting meal that warms your heart and satisfies your hunger without having to watch over it constantly.
Ingredients:
- 2 lbs beef chuck, cut into 1-inch cubes
- 4 carrots, sliced
- 4 Yukon Gold potatoes, diced
- 1 onion, chopped
- 3 cloves garlic, minced
- 4 cups beef broth
- 2 tablespoons tomato paste
- 1 teaspoon dried thyme
- 1 teaspoon dried rosemary
- Salt and pepper to taste
- Optional: 1 tablespoon Worcestershire sauce for an extra kick
Add all the ingredients to your slow cooker or Instant Pot. For the slow cooker, cook on low for 7-8 hours or high for 4-5 hours. If using an Instant Pot, seal the lid and cook on the ‘meat/stew’ setting for 35 minutes, followed by a natural release. Once done, stir and adjust seasoning if needed before serving.
When using a slow cooker, it’s ideal to brown the beef before adding it to enhance the flavor, but this step can be skipped to save time when using an Instant Pot.
Additionally, don’t overload your slow cooker; filling it just to the brim can yield uneven cooking results. If you’re looking for a thicker stew, consider adding a cornstarch slurry (cornstarch mixed with cold water) in the last hour of cooking for the slow cooker or after a quick release in the Instant Pot.
Enjoy your hearty beef stew!
Batch Cooking for the Win
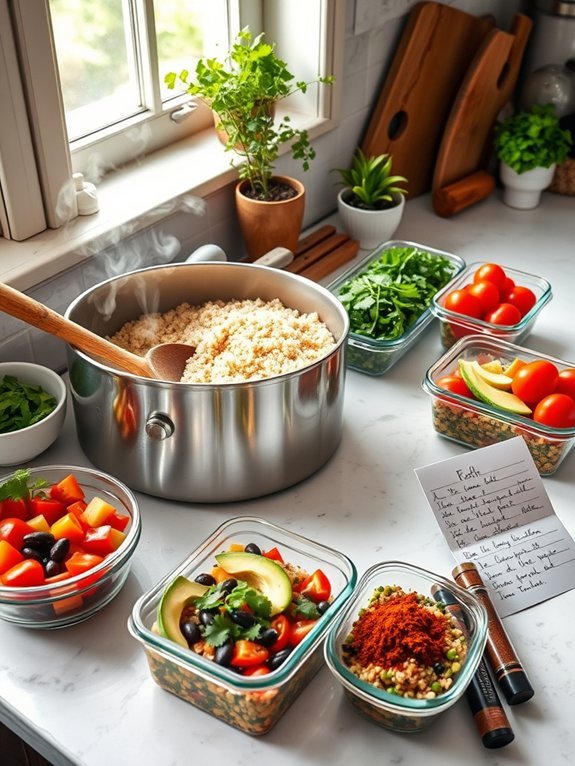
Batch cooking is a fantastic strategy for home chefs looking to save time and effort during the busy week. By preparing larger quantities of meals at once, you not only streamline your cooking process, but you can also take the stress out of daily meal prep.
Whether you’re making a hearty chili, a comforting stew, or flavorful roasted vegetables, batch cooking allows you to embrace flavors and ingredients that you love while guaranteeing there’s always something delicious on hand.
One of the key advantages of batch cooking is that you can mix and match the prepared ingredients throughout the week for various meals. For instance, by cooking a large pot of quinoa, you can easily turn it into a wholesome salad, a side for your protein, or even a base for a nourishing bowl.
Additionally, many batch-cooked meals freeze beautifully, allowing you to enjoy homemade comfort food even on the busiest of days.
Ingredients:
- 2 cups quinoa
- 4 cups vegetable broth or water
- 1 can (15 oz) black beans, drained and rinsed
- 1 bell pepper, diced
- 1 cup cherry tomatoes, halved
- 1 tsp cumin
- 1 tsp paprika
- Salt and pepper to taste
- 1 avocado, sliced (for serving)
- Fresh cilantro, chopped (for garnish)
To cook, start by rinsing the quinoa under cold water until the water runs clear. In a large pot, combine the rinsed quinoa and vegetable broth (or water) and bring to a boil.
Once boiling, reduce the heat to low, cover, and simmer for about 15 minutes, or until all the liquid has been absorbed. Remove from heat and let it sit covered for an additional 5 minutes before fluffing with a fork.
Stir in black beans, bell pepper, cherry tomatoes, cumin, paprika, salt, and pepper. Mix until everything is well combined and heated through.
When batch cooking, consider portioning out your meals into individual containers for easy grab-and-go options. This helps with portion control and guarantees that you always have a balanced meal ready at your fingertips.
You can also experiment with adding different vegetables or proteins to keep things exciting throughout the week.
Finally, if you plan to freeze portions, be sure to cool them completely before sealing, and remember to label the containers with dates for easy organization.
Pre-Chop Ingredients
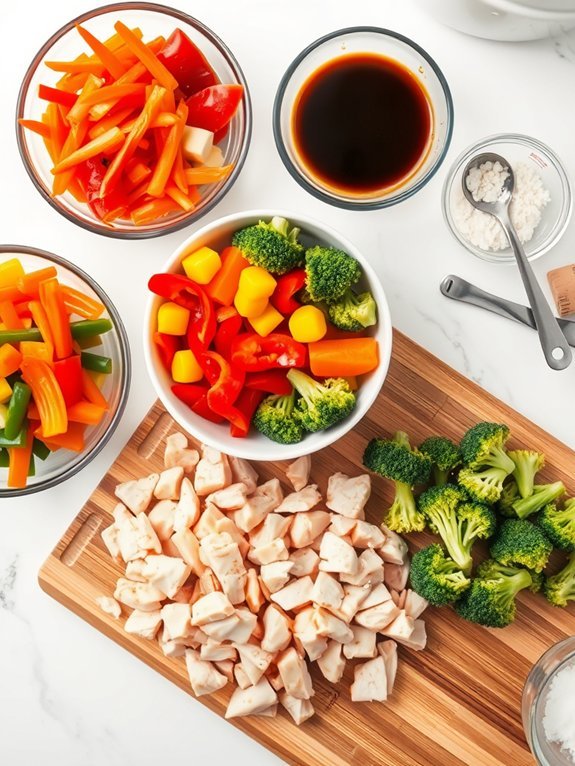
Pre-chopping ingredients can greatly enhance your cooking experience, turning potentially lengthy meal prep into a streamlined process that saves you time in the kitchen. By spending a little moment prepping your ingredients beforehand, you’ll not only create a more organized environment, but you’ll also make your cooking experience far more enjoyable and efficient.
This strategy is especially useful for busy weeknights when you want to whip up dinner quickly without sacrificing flavor or quality.
One simple yet delicious dish that benefits tremendously from pre-chopped ingredients is a stir-fry. By having all your vegetables, proteins, and sauces ready to go, you can bring this classic dish to life in no time. From crunchy bell peppers to tender chicken, having everything prepared allows you to focus on the cooking method rather than scrambling in your kitchen.
- 1 cup cooked chicken, diced
- 2 cups mixed vegetables (bell peppers, broccoli, carrots)
- 2 tablespoons soy sauce
- 1 tablespoon sesame oil
- 2 cloves garlic, minced
- 1 teaspoon ginger, grated
- 1 teaspoon cornstarch mixed with 2 tablespoons water
- Cooked rice, to serve
In a large skillet or wok, heat the sesame oil over medium-high heat. Add the minced garlic and grated ginger, stirring for about 30 seconds until fragrant.
Then, add the pre-chopped mixed vegetables and cook for 3-5 minutes until they’re just tender but still crisp. Next, stir in the cooked chicken and pour the soy sauce over everything.
Finally, mix in the cornstarch slurry to thicken the sauce, cooking for an additional minute until it bubbles and coats the stir-fry evenly.
When cooking this dish, consider varying your protein or vegetables based on what you have available or what’s in season. Fresh ingredients often lead to brighter flavors, and introducing a variety of colors can make your dish visually appealing as well.
Additionally, don’t be afraid to experiment with different sauces or aromatics, such as adding a splash of vinegar or a sprinkle of sesame seeds before serving for added depth. Always remember to taste as you go to ascertain the perfect balance of flavors!
Recommended Items
Check out these handy products and tools that will make your cooking experience quicker and easier!
Products
Make Use of Leftovers
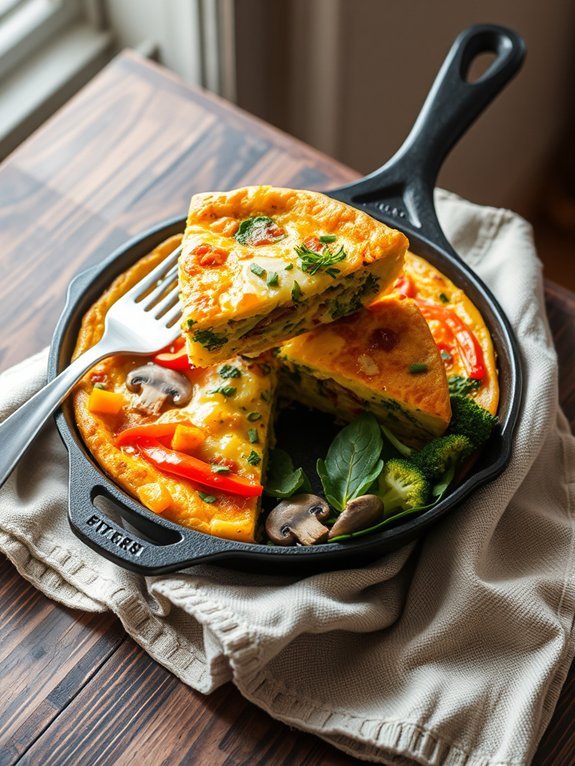
Using leftovers can be a game changer in your kitchen, transforming what might be considered waste into wholesome meals. By incorporating leftover ingredients into new dishes, you not only save time but also reduce food waste, making your cooking both economical and environmentally friendly.
One great way to make use of leftovers is to whip up a hearty vegetable frittata. This versatile dish allows you to utilize whatever vegetables, meats, or cheeses you have on hand. Frittatas are fundamentally a type of Italian omelet, and they’re perfect for breakfast, lunch, or dinner. They come together quickly, cook in one pan, and can be served hot or at room temperature. The beauty of a frittata is its adaptability; you can add ingredients according to your taste, so feel free to get creative with what you have left over in your fridge.
- 6 large eggs
- 1 cup leftover cooked vegetables (such as bell peppers, spinach, broccoli, or mushrooms)
- 1 cup leftover cooked meat (like ham, chicken, or bacon)
- 1 cup shredded cheese (cheddar, feta, or mozzarella)
- 1/4 cup milk or cream
- Salt and pepper to taste
- Fresh herbs for garnish (optional)
- Olive oil or butter for cooking
In a mixing bowl, whisk together the eggs, milk, salt, and pepper until combined. Heat a non-stick, oven-safe skillet over medium heat and add a splash of olive oil or a pat of butter. Once hot, add the leftover vegetables and meat, cooking for about 2-3 minutes until warmed through.
Pour the egg mixture over the toppings and gently stir to combine. Cook without stirring for about 5 minutes, allowing the edges to set. Sprinkle the cheese on top, then transfer the skillet to a preheated oven at 375°F (190°C) and bake for 10-15 minutes, or until the eggs are fully set and the top is lightly golden.
When making a frittata, remember that leftovers can notably alter the cooking time. If your vegetables or meats are already cooked through, you only need to warm them slightly in the skillet before adding the eggs. Additionally, cooking your frittata longer guarantees a nice crust, but be cautious—overcooking can lead to a dry texture.
Finally, don’t hesitate to experiment with different flavor combinations and spices to elevate the dish. Enjoy your delicious, frugal meal!
Time-Saving Cooking Tips Overview
Invest in Smart Kitchen Gadgets
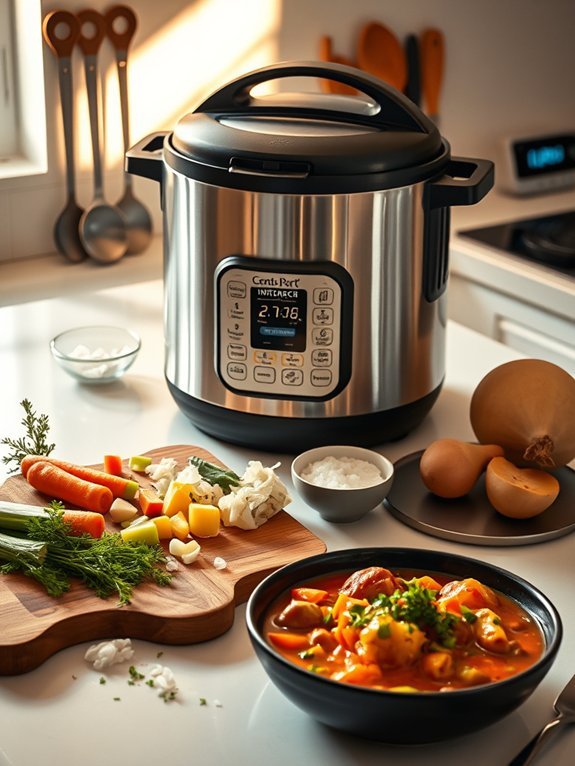
In today’s fast-paced world, home chefs are continually seeking ways to streamline their cooking processes without sacrificing flavor. One effective way to achieve this is by investing in smart kitchen gadgets that can help save time and effort in the kitchen. These gadgets range from multi-function pressure cookers to smart scales that guarantee precise measurements, allowing both novice and experienced cooks to whip up delicious meals with minimal fuss.
One clever gadget that’s particularly useful is an electric pressure cooker. It efficiently cooks meals in a fraction of the time compared to traditional methods. The following recipe utilizes a smart electric pressure cooker to prepare a delectable chicken and vegetable stew that not only is easy to make but also nurtures your family with wholesome ingredients.
Let the smart technology assist you in creating a hearty meal that will leave everyone satisfied and enthusiastic for seconds.
Ingredients:
- 1 lb boneless, skinless chicken thighs
- 2 cups chopped carrots
- 2 cups diced potatoes
- 1 cup chopped celery
- 1 onion, diced
- 4 cloves garlic, minced
- 4 cups low-sodium chicken broth
- 2 teaspoons dried thyme
- 1 teaspoon salt
- 1/2 teaspoon black pepper
- 1 tablespoon olive oil
Add the olive oil to the smart electric pressure cooker and set it to the sauté mode. Once heated, add the diced onion and garlic, cooking until the onion is translucent.
Then, add the chicken thighs, carrots, potatoes, celery, thyme, salt, and pepper, stirring to combine. Pour in the chicken broth and close the lid, guaranteeing the valve is sealed. Cook on high pressure for 15 minutes.
Once finished, allow the pressure to naturally release for 10 minutes before manually releasing the remaining pressure. Carefully open the lid and stir, shredding the chicken into bite-sized pieces if desired.
When using a smart pressure cooker, always make certain to read the manual for specific cooking and safety guidelines, as different models may have varying functionalities.
Additionally, you can customize this dish by adding your favorite herbs for extra flavor or experimenting with different vegetables based on seasonal availability. Embrace the versatility of your kitchen gadget by doubling the recipe for meal prepping or freezing leftovers for quick, wholesome meals on busy days.
Master the Art of Freezing
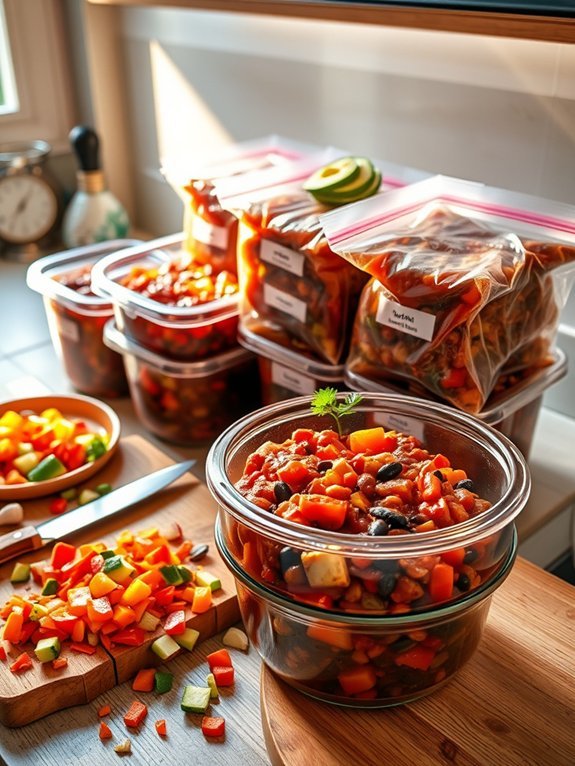
Mastering the art of freezing not only helps reduce food waste but also allows you to have ready-to-cook meals at your disposal. By preparing dishes in bulk and freezing them in individual portions, you can create a treasure trove of future dinners. This is particularly useful for busy weeknights when cooking from scratch may be difficult.
One excellent dish to freeze is a flavorful vegetable and bean chili, which can be made in large batches and frozen in single-serving containers. Chili is also incredibly versatile; you can customize it by adding different vegetables, beans, or spices according to your taste preferences. By prepping a hearty chili, you guarantee that not only do you have a convenient meal ready to go, but you also encourage healthy eating habits.
This recipe will guide you through making a comforting vegetable and bean chili that freezes beautifully.
- 1 tablespoon olive oil
- 1 onion, diced
- 2 cloves garlic, minced
- 2 carrots, diced
- 1 bell pepper, diced
- 1 zucchini, diced
- 1 can (14 oz) diced tomatoes
- 1 can (15 oz) kidney beans, drained and rinsed
- 1 can (15 oz) black beans, drained and rinsed
- 1 cup vegetable broth
- 1 tablespoon chili powder
- 1 teaspoon cumin
- Salt and pepper to taste
- Optional toppings: chopped cilantro, avocado, shredded cheese
In a large pot, heat the olive oil over medium heat. Add the diced onion and garlic, cooking until softened. Stir in the carrots, bell pepper, and zucchini, cooking for an additional 5 minutes until the vegetables are tender.
Add the diced tomatoes, both types of beans, vegetable broth, chili powder, cumin, and salt and pepper. Bring the mixture to a simmer, cover, and cook for 20-30 minutes, stirring occasionally. Once cooked, allow the chili to cool before portioning it into airtight containers for freezing.
When freezing your chili, make sure you leave some space at the top of each container, as liquids expand when frozen. For best results, freeze the portions flat in freezer-safe bags to save space and allow for quicker thawing.
To reheat, simply move the desired portion from the freezer to the refrigerator for overnight thawing or microwave it directly from frozen, adding a splash of water to keep it moist. Enjoy your ready-made meal whenever you need a quick, comforting option!
Choose Quick-Cooking Grains
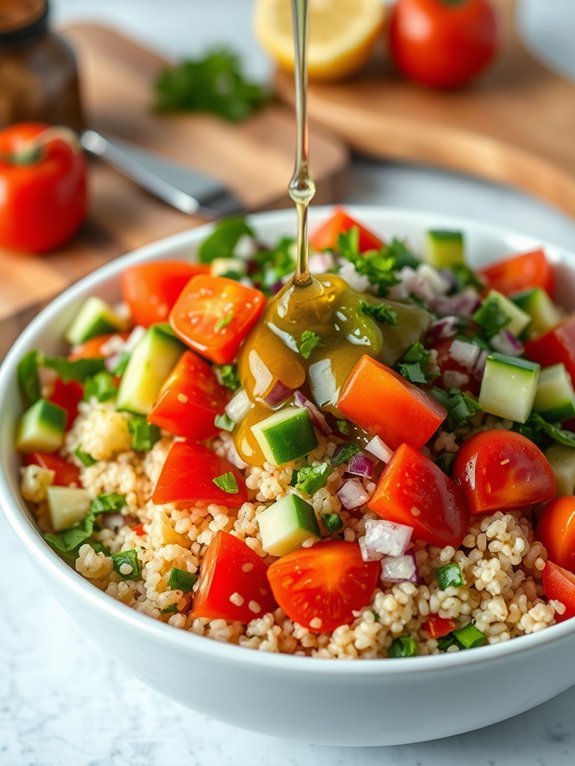
When you’re looking to save time in the kitchen, one of the simplest switches you can make is to opt for quick-cooking grains. These grains provide all the nutrition you need without taking up a large chunk of your day. Quick-cooking grains like quinoa, couscous, and instant brown rice can be ready in under 15 minutes, and they’re incredibly versatile.
With a few additional ingredients, you can create a delicious meal that feels hearty and satisfying. For this recipe, we’re focusing on quick-cooking quinoa, which is packed with protein and fiber, making it a great base for various dishes. By tossing in fresh vegetables, a splash of lemon juice, and some herbs, you’ll have a vibrant bowl that’s not only quick to prepare but also bursting with flavor.
Ready in minutes, you can enjoy it as a side dish or as a wholesome main course.
Ingredients:
- 1 cup quick-cooking quinoa
- 2 cups vegetable broth or water
- 1 cup cherry tomatoes, halved
- 1 cup spinach, roughly chopped
- 1/2 cup cucumber, diced
- 1/4 cup red onion, finely chopped
- 1/4 cup fresh parsley, chopped
- 2 tablespoons olive oil
- 1 tablespoon lemon juice
- Salt and pepper to taste
Bring the vegetable broth or water to a boil in a medium saucepan. Add the quick-cooking quinoa, reduce the heat to low, cover, and simmer for 8-10 minutes until the liquid is absorbed and the quinoa is fluffy.
Once cooked, remove from heat and let it sit for a couple of minutes before fluffing it with a fork. In a large mixing bowl, combine the cooked quinoa with halved cherry tomatoes, chopped spinach, diced cucumber, red onion, and parsley.
Drizzle the olive oil and lemon juice over the top, season with salt and pepper, and toss everything together until well combined.
For the best flavor and texture, consider adding roasted vegetables or protein, such as chickpeas or grilled chicken, to your quinoa dish. You can also get creative by incorporating various spices, such as cumin or paprika, for a different flavor profile.
Storing any leftovers in an airtight container allows for easy meal prep throughout the week—a quick reheat, and you’re good to go!
Simplify Your Grocery List
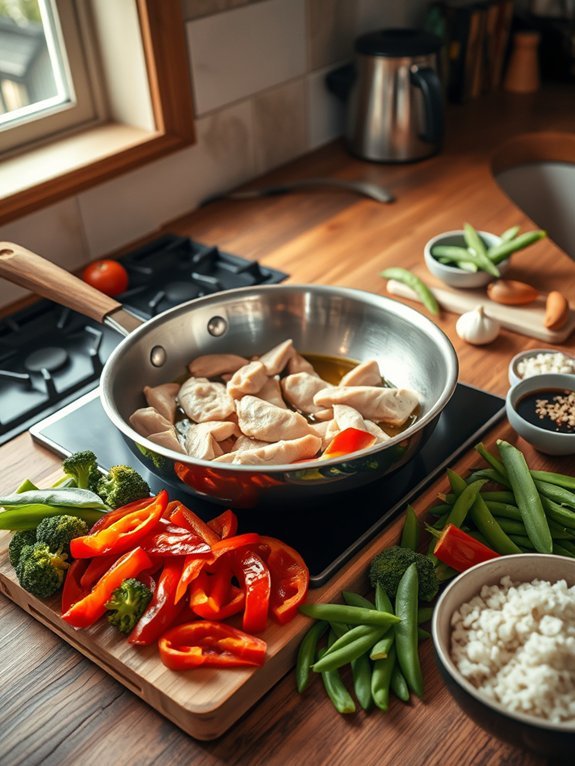
When it comes to simplifying your grocery list, starting with a versatile recipe that uses common ingredients is key. One great option is a one-pan chicken and vegetable stir-fry. This dish not only brings vibrant colors and flavors to your table but also allows you to use up various vegetables you might’ve on hand. By operating on a minimal yet nutrient-dense list of ingredients, you can grocery shop efficiently and reduce waste.
This meal is perfect for busy weeknights when time is of the essence. With only a few steps and minimal cleanup, you’ll have a delicious and healthy dinner ready in no time. Plus, you can easily swap in whatever vegetables you have in your fridge, allowing you to get creative while keeping your grocery list streamlined.
- 1 pound of chicken breast, sliced into thin strips
- 2 cups mixed vegetables (e.g., bell peppers, broccoli, and snap peas)
- 2 tablespoons soy sauce
- 1 tablespoon olive oil
- 2 cloves garlic, minced
- 1 teaspoon ginger, minced
- Salt and pepper, to taste
- Cooked rice or noodles, for serving
Heat olive oil in a large skillet over medium-high heat. Add the sliced chicken and cook until browned, about 5 minutes. Then, add garlic and ginger, cooking for another 1-2 minutes until fragrant.
Next, toss in the mixed vegetables and soy sauce, stirring everything together until the vegetables are tender and the chicken is cooked through, about 5-7 more minutes. Season with salt and pepper to taste and serve over cooked rice or noodles.
For this dish, feel free to customize based on what’s available in your kitchen. If you prefer a spicier kick, add some red pepper flakes or sriracha.
Additionally, if you’re short on time, precut veggies or frozen vegetable mixes can save you preparation time. Consider doubling the recipe to have leftovers for lunch the next day, making your meal preparation even more efficient.
Organize Your Pantry
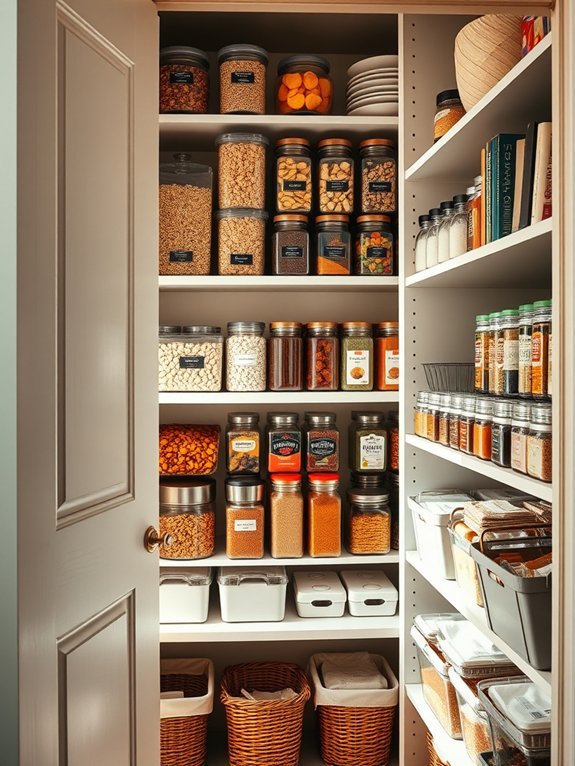
Organizing your pantry is essential for any home chef looking to streamline their cooking process. A well-organized pantry not only saves time but also reduces food waste and helps you maintain a clear overview of what you have on hand.
When you can easily see your ingredients, meal planning becomes simpler, and you’re less likely to duplicate purchases or forget about items nearing their expiration dates.
To begin, take everything out of your pantry and categorize your ingredients. Group similar items together — grains, canned goods, spices, snacks, and baking supplies.
Utilize clear storage containers for items like pasta, rice, and snacks to keep them fresh and visible. Label all containers, and don’t forget to arrange them in a way that’s ergonomic. For example, place frequently used ingredients at eye level and less-used items on higher shelves.
This process will create a functional work area that enhances your cooking experience.
- Clear storage containers
- Labels (optional)
- Spice jars or racks
- Shelf organizers
- Baskets or bins for bulk items
Once your pantry is empty, start by cleaning the shelves with a mild cleanser and a soft cloth to remove dust and spills.
Next, measure out your storage containers and consider grouping similar items together for better organization. Place the heaviest items on the bottom shelves and lighter items above, making sure to keep frequently used ingredients at the front for easy access.
When organizing your pantry, consider the best methods for each category of item. For example, spices can be stored in a tiered rack to make them easily visible, while larger items such as pasta and flour can be stored in clear, labeled containers.
Don’t be afraid to get creative with vertical space by adding stackable shelves, and remember to regularly check for expired items to maintain a tidy and efficient pantry.
Preheat and Prepare Your Oven
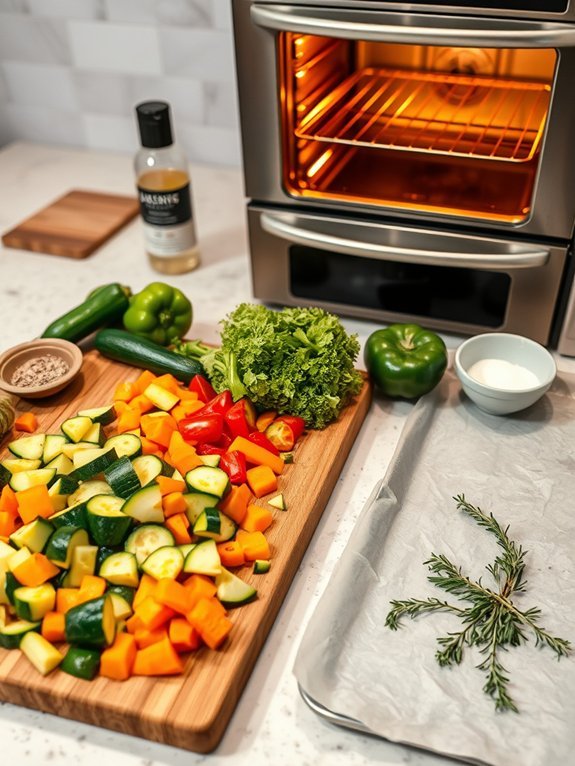
Preheating and preparing your oven is an essential first step in guaranteeing your cooking experience is smooth and your dishes come out perfectly. Whether you’re roasting vegetables, baking bread, or broiling meat, giving your oven the proper preparation time is vital. It allows for consistent cooking temperatures, which lead to better texture and flavor in your dishes. By preheating, you guarantee that your food cooks evenly and thoroughly, preventing common issues associated with undercooked or overcooked meals.
Once your oven is preheating, you can maximize your time in the kitchen by engaging in a few quick prep tasks. This might include gathering your ingredients, chopping vegetables, or measuring out spices.
Utilizing your oven space effectively can also help streamline your cooking process. For instance, if you’re planning to roast two trays of veggies, preparing them simultaneously helps save both time and energy and allows for a delightful mix of flavors and textures on your plate.
Ingredients:
- 2 cups chopped seasonal vegetables (like zucchini, bell peppers, carrots)
- 2 tablespoons olive oil
- 1 teaspoon garlic powder
- 1 teaspoon dried oregano
- Salt and pepper, to taste
- Optional: 1 tablespoon balsamic vinegar or lemon juice
Combine the chopped vegetables in a large bowl. Drizzle with olive oil, and sprinkle garlic powder, dried oregano, salt, and pepper over the top. Toss well to guarantee the vegetables are evenly coated with oil and seasonings.
When the oven reaches the preheated temperature (usually around 400°F), spread the veggies in a single layer on a baking sheet and roast them for 20-25 minutes, or until they’re tender and caramelized, turning halfway through for even cooking.
As an extra tip, consider using parchment paper on your baking sheet for easier cleanup, and don’t hesitate to experiment with different herbs and spices based on your preferences.
If you find yourself short on time, precut vegetables from the grocery store can be a great option. Just remember to check for freshness and limit any added preservatives.
Additionally, planning meals ahead of time can help you take full advantage of your preheating and preparation time, allowing you to stack multiple dishes to be roasted or baked together.
Utilize Sheet Pan Dinners
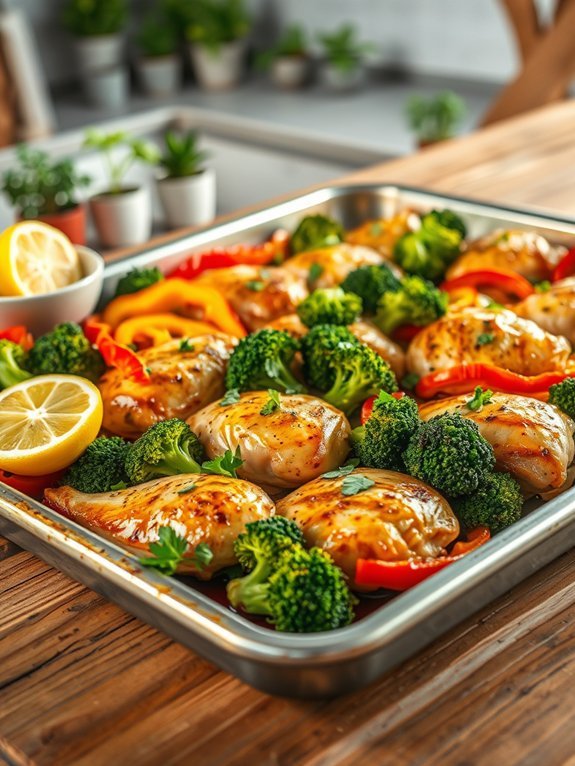
Sheet pan dinners are a fantastic solution for busy home chefs looking to create a delicious and balanced meal without spending hours in the kitchen. The concept is simple: you throw your proteins and vegetables on a single sheet pan, season them well, and let the oven do the work. The result is a meal that isn’t only easy to prepare but also minimizes cleanup, allowing for more time to enjoy the food and less time washing up.
By utilizing sheet pan dinners, you can customize your meals to fit your preferences or dietary needs, making them incredibly versatile. Whether you prefer chicken, fish, or plant-based proteins, the options are endless. Plus, roasting everything together allows the flavors to meld beautifully, creating a satisfying and flavorful dish for you and your family.
Ingredients:
- 1 pound chicken breast, cut into bite-sized pieces
- 1 cup broccoli florets
- 1 cup sliced bell peppers (red, yellow, or green)
- 1 medium red onion, sliced
- 3 tablespoons olive oil
- 2 teaspoons garlic powder
- 1 teaspoon Italian seasoning
- Salt and pepper to taste
- Lemon wedges, for serving (optional)
Preheat your oven to 425°F (220°C). On a large sheet pan, combine the chicken, broccoli, bell peppers, and red onion. Drizzle the olive oil over the ingredients, then sprinkle with garlic powder, Italian seasoning, salt, and pepper. Toss everything together until well coated, spreading the ingredients out evenly across the pan. Roast in the preheated oven for 20-25 minutes, until the chicken is cooked through and the vegetables are tender and slightly caramelized.
When preparing sheet pan dinners, feel free to experiment with different seasoning blends or marinades based on your family’s tastes. You can also swap out proteins and vegetables based on what you have on hand or what’s in season, making this dish endlessly adaptable.
For an added boost of flavor, consider adding a sprinkle of fresh herbs, like parsley or cilantro, before serving. Additionally, for a crispy texture, broil the pan for the last few minutes of cooking to get that perfect char on the chicken and veggies!
Stick to Simple Recipes
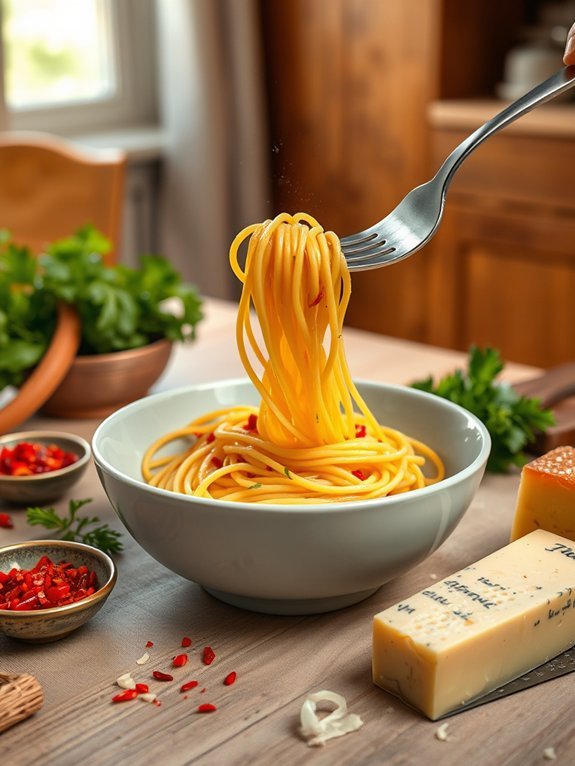
When it comes to cooking at home, sticking to simple recipes can be a game-changer, especially for those with busy lifestyles. One such recipe that’s both uncomplicated and delicious is a classic spaghetti aglio e olio.
This dish, hailing from Italy, requires minimal ingredients and can be prepared in less than 20 minutes, making it a perfect option for weeknight dinners or when you’re short on time. The beauty of this recipe lies in its simplicity—using just garlic, oil, and chili flakes helps highlight the flavors of the pasta itself while allowing you to enjoy a home-cooked meal without the fuss.
This pasta dish isn’t just quick; it’s also versatile. You can easily customize it by adding vegetables such as spinach or cherry tomatoes, or even protein like shrimp or chicken if you desire more substance. The basic technique stays the same, ensuring that even novice cooks can replicate it successfully.
In addition, it’s an excellent base recipe that encourages experimentation, so you can gradually introduce more complex flavors as you grow more confident in the kitchen.
Ingredients:
- Spaghetti (8 ounces)
- Olive oil (1/4 cup)
- Garlic (4 cloves, thinly sliced)
- Red pepper flakes (1 teaspoon)
- Fresh parsley (1/4 cup, chopped)
- Salt (to taste)
- Grated Parmesan cheese (optional)
Cook the spaghetti in a large pot of salted boiling water according to package directions until al dente. While the pasta cooks, heat the olive oil in a large skillet over medium heat.
Add the sliced garlic and red pepper flakes, cooking gently until the garlic is golden (not burnt). Once the pasta is done, reserve a cup of the pasta water, then drain the spaghetti and add it directly to the skillet. Toss the pasta with the garlic oil, adding reserved pasta water as necessary to create a sauce.
Finish by mixing in the fresh parsley, salt to taste, and top with grated Parmesan if desired.
A few tips to enhance your spaghetti aglio e olio experience include opting for high-quality olive oil, which will make a noticeable difference in flavor. Additionally, be careful not to burn the garlic as it can become bitter; cook it just until it turns golden.
Adjust the amount of red pepper flakes based on your spice tolerance, and don’t hesitate to experiment with adding other ingredients like lemon zest or capers to give the dish your personal twist. Enjoy your cooking!
Involve the Family in Cooking
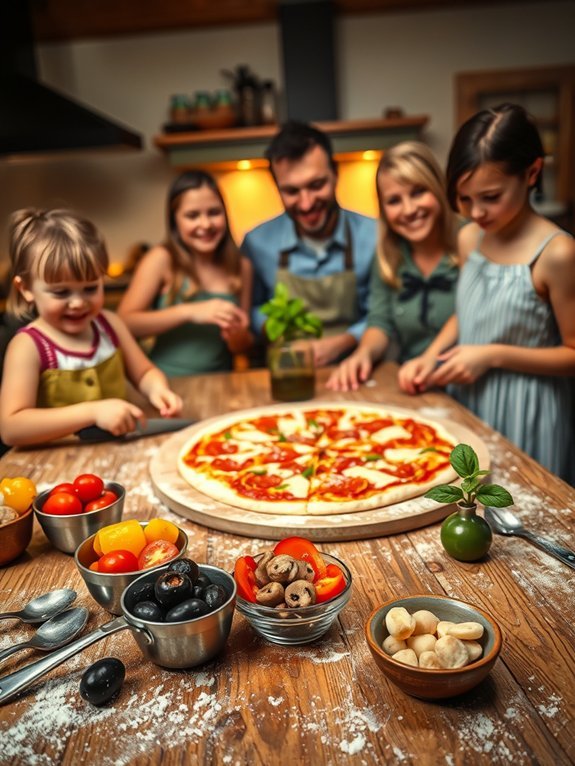
Cooking together as a family can be a delightful experience, fostering not only teamwork but also a sense of accomplishment when the meal is shared. One wonderful dish that’s perfect for involving everyone in the kitchen is homemade pizza. Each family member can have a hand in preparing their unique pizza, from rolling out the dough to adding their favorite toppings. This not only makes for a fun and engaging activity, but it also allows you to customize each pizza to individual tastes, guaranteeing everyone gets exactly what they want.
Gathering the family around the kitchen for pizza night is a great way to create lasting memories. Children can learn valuable skills such as measuring ingredients and following recipes, while parents can supervise and enjoy quality time with their loved ones. This recipe for homemade pizza is simple enough for even the youngest chefs to contribute, making it a perfect evening activity. So, roll up your sleeves and get ready for a delicious and interactive cooking session!
Ingredients:
- 2 1/4 teaspoons active dry yeast
- 1 teaspoon sugar
- 1 cup warm water (110°F)
- 3 cups all-purpose flour
- 1 teaspoon salt
- 1 tablespoon olive oil
- 1 cup pizza sauce
- 2 cups shredded mozzarella cheese
- Assorted toppings (pepperoni, bell peppers, onions, mushrooms, olives, etc.)
In a large mixing bowl, dissolve the yeast and sugar in the warm water, letting it sit for about 5 minutes until it becomes frothy. Add the flour, salt, and olive oil, then mix until a dough forms. Knead the dough on a floured surface for about 5-7 minutes until smooth and elastic.
Place the dough in a greased bowl, cover it with a damp cloth, and let it rise in a warm place for about 1 hour or until doubled in size. After the dough has risen, preheat the oven to 475°F.
Roll out the dough, place it on a pizza stone or baking sheet, spread the sauce over it, sprinkle with cheese, and add desired toppings. Bake for 12-15 minutes or until the crust is golden brown and cheese is bubbly.
For an extra touch of fun, consider having a “pizza topping bar” where everyone can customize their slices with various toppings. This not only makes each pizza personal but also encourages creativity. If time is short, you can use store-bought pizza dough as a base to save on preparation time.
Additionally, make sure to let younger chefs know about kitchen safety, such as being cautious around hot surfaces, and provide age-appropriate tasks to guarantee that everyone feels involved and successful in the process.

