This post may contain affiliate links. Please read our policy page.
To strengthen your immune system, you’ll want to include immune-boosting foods in your diet. Citrus fruits, packed with vitamin C, and antioxidants-rich berries are excellent choices. Garlic and ginger can enhance immune function too. Don’t forget leafy greens like spinach and nutrient-dense sweet potatoes. Other beneficial foods include kiwi and pomegranate. Adding a variety of these items to your meals can support your health substantially, and there’s even more to explore about how these foods work for you.
Citrus Fruits

Citrus fruits aren’t only bursting with flavor but also serve as a powerhouse of nutrients that can help enhance your immune system. Incorporating a variety of these fruits into your diet can provide your body with essential vitamins, such as vitamin C, which is known for its immune-boosting properties.
One delightful way to enjoy citrus fruits is by making a revitalizing citrus salad that combines a variety of these zesty fruits, offering a cheerful and healthy addition to your meals. This citrus salad is incredibly easy to prepare and can serve as a perfect side dish, a light snack, or even a brunch centerpiece.
By mixing different citrus shades and textures, you create an eye-catching presentation that’s as delicious as it’s nutritious. The addition of fresh mint and a drizzle of honey elevates the flavors perfectly while keeping the dish light and invigorating.
- 2 oranges, segmented
- 2 grapefruits, segmented
- 1 lemon, segmented
- 1 lime, segmented
- 1 tablespoon honey
- Fresh mint leaves, for garnish
- 1 tablespoon olive oil (optional)
- Pinch of salt (optional)
In a large mixing bowl, combine the segments of oranges, grapefruits, lemon, and lime, ensuring you remove any seeds and pith. Drizzle with honey and olive oil (if using) to enhance the sweetness, and add a pinch of salt to balance the flavors.
Gently toss the mixture to combine without breaking up the fruit segments. Serve immediately or let it sit for a few minutes to allow the flavors to meld before garnishing with fresh mint leaves.
When preparing this citrus salad, feel free to get creative by adding other fruits or even a sprinkle of nuts for added texture and flavor. You can also adjust the sweetness according to your taste preference by modifying the amount of honey.
For an extra boost, consider incorporating a splash of lime juice or a handful of pomegranate seeds for a bit of tartness and crunch. Enjoy this vibrant salad as a revitalizing pick-me-up any time of the day!
Berries

Berries aren’t only delicious but also pack a powerful punch of antioxidants, vitamins, and minerals that can help bolster your immune system. This recipe for a berry compote is a delightful way to enjoy a variety of berries while boosting your health. It can be served on top of yogurt, pancakes, or even enjoyed on its own as a nutritious dessert.
The compote is incredibly easy to prepare, making it a perfect choice for a quick snack or a sweet treat any time of the day. You can use fresh or frozen berries, depending on what’s available and in season. Customize the sweetness and flavor by adjusting the amount of sweetener or spice to suit your taste.
Ingredients:
- 1 cup fresh or frozen strawberries, hulled and halved
- 1 cup fresh or frozen blueberries
- 1 cup fresh or frozen raspberries
- 2 tablespoons maple syrup or honey (adjust to taste)
- 1 tablespoon lemon juice
- 1 teaspoon vanilla extract
- 1/2 teaspoon cinnamon (optional)
Combine all the ingredients in a medium saucepan over medium heat. Cook for about 10-15 minutes, stirring occasionally until the berries break down and the mixture thickens slightly.
If desired, mash the mixture gently with a fork or potato masher for a smoother texture. Once done, remove it from heat and let it cool slightly before serving.
For added flavor, consider experimenting with spices like nutmeg or ginger to complement the berries. If you’re using frozen berries, there’s no need to thaw them beforehand; they can go straight into the pan.
Keep in mind that compote can be stored in the refrigerator for up to a week, so it’s great for meal prep or to have on hand for a quick healthful addition to your meals. Enjoy it warm or chilled, and feel free to mix different types of berries for variety!
Garlic
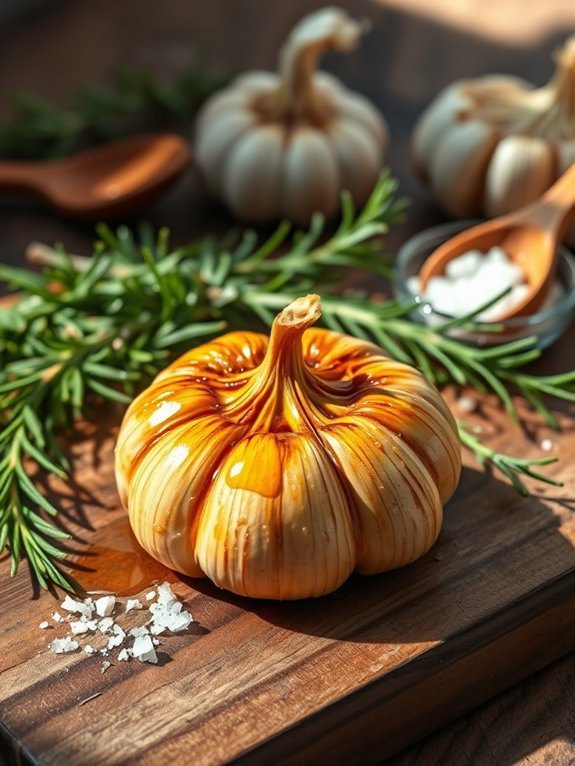
Garlic, an age-old culinary staple, is renowned not only for its distinctive flavor but also for its formidable health benefits. Packed with compounds like allicin, garlic is known to enhance immune function, making it a worthy addition to your diet. Incorporating garlic into your dishes is a delightful way to boost your overall health while enjoying the wonderful aroma and taste it brings.
This simple roasted garlic recipe transforms raw cloves into a sweet, buttery delight, perfect for spreading on toast, mixing into mashed potatoes, or drizzling over grilled vegetables. Roasting garlic mellows its sharpness, allowing its rich flavors to shine through without being overwhelming. This dish not only offers the health benefits of garlic but also provides a crowd-pleasing element that complements a wide array of dishes.
Ingredients:
- 1 head of garlic
- 2 tablespoons olive oil
- Salt, to taste
- Freshly ground black pepper, to taste
- Optional: fresh herbs (such as rosemary or thyme)
To prepare roasted garlic, start by preheating your oven to 400°F (200°C). Slice the top off the head of garlic to expose the cloves, then drizzle the olive oil over it, ensuring that it seeps into the garlic. Season with salt and pepper (and herbs if desired), then wrap the garlic head in aluminum foil.
Bake in the preheated oven for about 30-35 minutes, or until the cloves are soft and golden brown. Allow it to cool slightly before squeezing the roasted garlic from the papery skin.
When using roasted garlic, be sure to experiment with different dishes! It can be blended into sauces, stirred into soups for added depth, or combined with cream cheese for a delicious spread.
Additionally, you can easily adjust the roasting time based on how caramelized you want the garlic, keeping an eye to avoid burning. Roasted garlic can be stored in an airtight container in the refrigerator for up to a week, so feel free to make a larger batch for future meals!
Ginger

Ginger is a versatile and aromatic spice that not only enhances the flavor of many dishes but also offers numerous health benefits, particularly when it comes to boosting your immune system. Its natural anti-inflammatory and antioxidant properties make it a wonderful ingredient to incorporate into your daily meals.
This recipe for Ginger Tea is simple and delicious, perfect for a soothing drink that can help ward off colds and support overall wellness. In this Ginger Tea recipe, fresh ginger root is the star, paired with honey and lemon to create a rejuvenating concoction.
The warmth of the ginger, along with the zesty kick of lemon, provides an invigorating beverage that not only comforts the throat but also revitalizes the body. Whether you’re feeling under the weather or just want a warm and spicy drink, this ginger tea is sure to become a new favorite.
- 2 inches of fresh ginger root, peeled and sliced
- 2 cups of water
- 1 tablespoon of honey (adjust to taste)
- 1 tablespoon of lemon juice (freshly squeezed)
- Optional: lemon slices for garnish
Start by bringing 2 cups of water to a boil in a small pot. Once the water is boiling, add the sliced ginger and let it simmer for about 10 minutes. Afterward, remove the pot from heat, strain the liquid into a cup, and stir in honey and lemon juice. Adjust the sweetness and acidity to your taste before serving hot, garnished with lemon slices if desired.
When preparing ginger tea, it’s important to remember that the longer you let the ginger steep, the stronger the flavor will become. If you prefer a milder taste, reduce the simmering time or use less ginger.
Additionally, experiment with adding other ingredients like mint leaves or turmeric for extra flavor and health benefits. Enjoy your ginger tea with a peaceful moment for the ultimate soothing experience.
Recommended Items
Check out our favorite products and equipment to help boost your immune system—happy shopping!
Products
Spinach
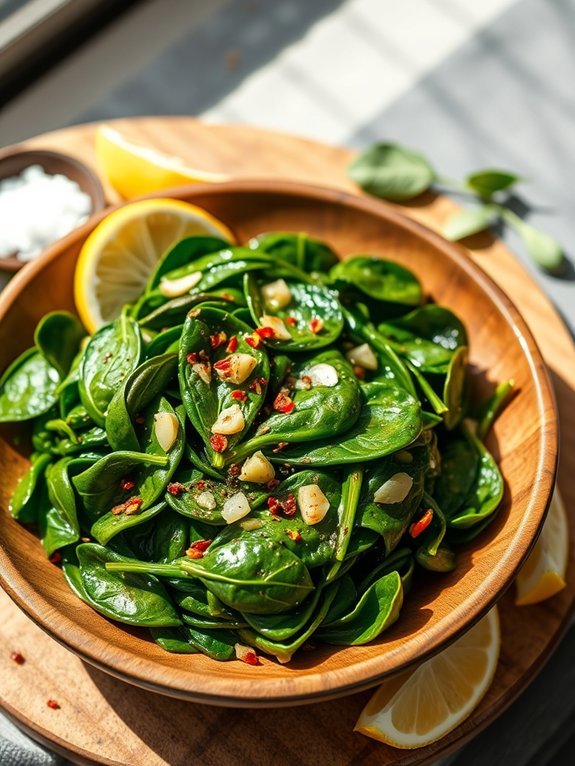
Spinach is a powerhouse of nutrients, often regarded as a superfood for its rich vitamin and mineral content. This leafy green is packed with antioxidants, iron, and vitamins A, C, and K, all of which contribute to boosting the immune system and promoting overall health.
Whether enjoyed raw in salads or sautéed as a side dish, spinach is incredibly versatile and can be incorporated into various recipes to enhance both taste and nutrition.
In this recipe, we’ll prepare a simple yet delicious sautéed spinach that serves as a perfect accompaniment to any meal or as a healthy snack on its own. With just a few ingredients, this dish showcases the natural flavors of spinach while adding a touch of garlic and lemon that elevates its taste.
It’s not only quick to prepare but also provides a fantastic way to reap the health benefits of this vibrant green vegetable.
- Fresh spinach (about 10 ounces)
- 2 tablespoons olive oil
- 3 cloves garlic, minced
- 1 tablespoon lemon juice
- Salt and pepper to taste
- Optional: a pinch of red pepper flakes for heat
Heat the olive oil in a large skillet over medium heat.
Add the minced garlic and sauté for about 30 seconds until fragrant, being careful not to burn it.
Then, add the spinach to the skillet and toss it with the garlic until it begins to wilt. This should take 2-3 minutes.
Once the spinach is tender, drizzle with lemon juice, and season with salt, pepper, and red pepper flakes if desired. Toss everything together and serve immediately.
When cooking spinach, be mindful not to overcook it, as this can lead to a loss of nutrients and a mushy texture.
A quick sauté will retain its vibrant color and essential vitamins.
Additionally, you can experiment by adding other ingredients such as nuts, seeds, or cheese to enhance the dish further.
Yogurt

Yogurt isn’t just a delicious snack; it’s a versatile ingredient that can enhance immune function and contribute to overall health. Rich in probiotics, yogurt helps maintain a healthy gut microbiome, which is vital for a robust immune system.
Making homemade yogurt can be an easy and rewarding process, allowing you to control the ingredients and flavor profiles while guaranteeing the highest quality.
To make yogurt at home, you’ll need a few simple ingredients and tools. The process involves fermenting milk with live cultures, which creates a creamy, tangy product that can be enjoyed on its own or paired with various toppings, fruits, and spices. Homemade yogurt isn’t only a great breakfast option but also serves as a base for many dishes, sauces, and smoothies, making it a staple in your kitchen.
- 4 cups of whole milk (or any milk of your choice)
- 1/2 cup of plain yogurt (with live active cultures)
- A heavy saucepan
- A thermometer
- A whisk
- A clean jar or container for storage
- A towel or blanket for wrapping
Begin by heating the milk in a heavy saucepan over medium heat until it reaches about 180°F (82°C). This step is important to denature the proteins in the milk to guarantee a smooth texture.
Once you’ve reached the target temperature, remove the saucepan from heat and allow the milk to cool down to around 110°F (43°C). Whisk in the plain yogurt until smooth, then transfer the mixture to your clean jar or container.
Cover the jar with a towel or blanket to keep it warm and maintain the ideal environment for fermentation. Let it sit undisturbed for 6 to 12 hours at room temperature until it thickens to your desired consistency.
When making yogurt, it’s important to maintain a stable temperature during the fermentation process. You can create a warm environment by placing the yogurt in an oven with the light on, or by using a yogurt maker if you have one.
The longer you let the yogurt ferment, the tangier it will become, so feel free to experiment with the fermentation time based on your taste preferences. After fermentation, store your homemade yogurt in the refrigerator, and enjoy it fresh or with your favorite toppings!
Ingredient Breakdown
Almonds
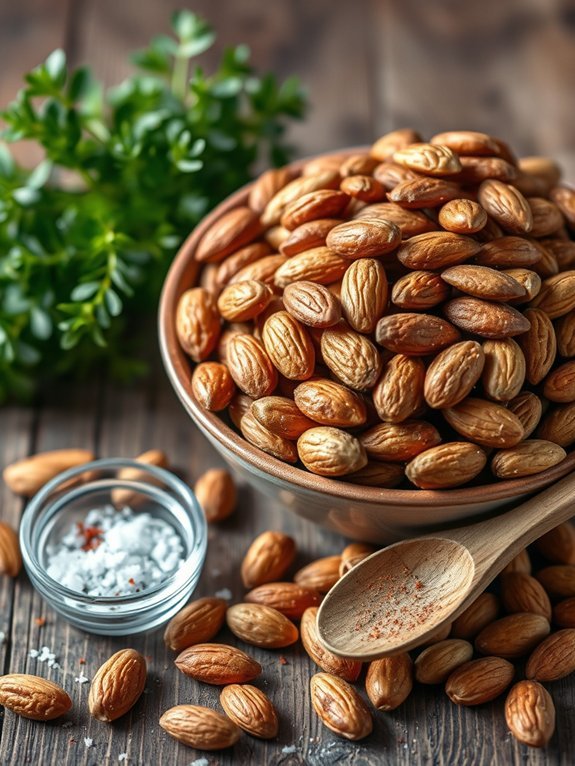
Almonds aren’t only a delicious snack but also packed with nutrients that play a vital role in boosting our immune system. These nutritious nuts are rich in vitamins such as vitamin E, which acts as an antioxidant, and magnesium, which is essential for various bodily functions. Incorporating almonds into your diet can support your overall health and help fend off infections, making them a perfect ingredient for immune-boosting recipes.
One tasty way to enjoy almonds is by making roasted almonds. They’re simple to prepare and can be seasoned in a variety of ways to cater to your personal taste. Roasting brings out the natural flavors and adds a satisfying crunch, making it an ideal snack or topping for salads and yogurt. Plus, roasting almonds enhances their aroma, making them even more irresistible.
- 2 cups raw almonds
- 1 tablespoon olive oil
- 1 teaspoon sea salt
- 1/2 teaspoon garlic powder (optional)
- 1/2 teaspoon smoked paprika (optional)
- 1/2 teaspoon cayenne pepper (optional for spice)
Preheat your oven to 350°F (175°C). In a large bowl, combine the raw almonds with olive oil, sea salt, and any additional seasonings you desire, such as garlic powder, smoked paprika, or cayenne pepper. Mix well to guarantee the almonds are evenly coated in the oil and spices.
Spread the seasoned almonds in a single layer on a baking sheet and roast them in the preheated oven for approximately 10-15 minutes, or until they’re lightly golden and fragrant. Be sure to stir them halfway through for even roasting.
When cooking roasted almonds, keep an eye on them, as they can go from perfectly toasted to burnt quickly. It’s a good idea to check them after 10 minutes, and if you prefer a deeper flavor, you can roast them for a few extra minutes, just be certain to give them a stir.
Once they’re finished roasting, allow the almonds to cool completely on the baking sheet before serving or storing, as they’ll continue to crisp up as they cool. You can store roasted almonds in an airtight container at room temperature for up to two weeks.
Turmeric

Turmeric is a vibrant yellow spice known for its numerous health benefits, primarily due to its active component, curcumin. This flavorful root has been used in traditional medicine for centuries and is revered for its anti-inflammatory and antioxidant properties. Incorporating turmeric into your meals not only enhances flavor but also provides a delicious way to boost your immunity and overall well-being.
One of the most delightful and simple ways to enjoy turmeric is by preparing a fragrant turmeric rice dish. This recipe combines the earthy tones of turmeric with fluffy rice, making it a wonderful side dish for any meal. It’s versatile enough to accompany proteins or vegetables, making it a staple to have in your culinary repertoire. Let’s plunge into making some delicious turmeric rice!
- 1 cup basmati rice
- 2 cups water or vegetable broth
- 1 tablespoon turmeric powder
- 1 tablespoon olive oil or butter
- 1 onion, finely chopped
- 2 cloves garlic, minced
- Salt to taste
- Fresh cilantro or parsley for garnish (optional)
In a medium saucepan, heat olive oil or butter over medium heat. Add the chopped onion and minced garlic, sautéing until the onion is translucent.
Stir in the turmeric powder and cook for about a minute until fragrant. Add the basmati rice, stirring to coat the rice in the turmeric-oil mixture. Then, pour in the water or vegetable broth and add salt to taste.
Bring it to a boil, reduce the heat to low, and cover the saucepan. Allow it to simmer for about 15 minutes or until the rice is tender and the liquid has absorbed. Fluff with a fork and garnish with fresh cilantro or parsley if desired.
When cooking turmeric rice, feel free to customize it by adding vegetables like peas, carrots, or bell peppers for added nutrition and color. Using vegetable broth instead of water can enhance the flavor further, and adding a squeeze of lemon juice before serving elevates the dish with a revitalizing zing.
Remember to rinse your rice before cooking to remove excess starch, which can result in fluffier grains. Enjoy your immune-boosting dish!
Green Tea

Green tea isn’t only a soothing beverage but also a powerhouse of health benefits. Known for its high concentration of antioxidants, particularly catechins, green tea can help boost your immune system, enhance metabolic rates, and improve your overall well-being. Incorporating green tea into your diet is simple and can be both invigorating and versatile when used in various recipes beyond just being brewed traditionally.
This particular recipe embraces the natural flavors of green tea while transforming it into a delightful beverage that can be enjoyed warm or chilled. Whether you’re looking for a comforting drink to warm you up on a chilly day or a rejuvenating iced tea for a hot summer afternoon, this green tea recipe won’t disappoint. It combines the earthy flavors of green tea with a hint of sweetness and acidity, perfect for quenching your thirst and nourishing your body.
- 2 cups water
- 2 teaspoons loose green tea leaves or 2 green tea bags
- 1-2 tablespoons honey (to taste)
- 1 tablespoon fresh lemon juice
- Lemon slices for garnish
- Mint leaves (optional, for garnish)
Bring the water to a gentle boil in a pot, then remove it from the heat. Add the loose green tea leaves or the tea bags and steep for 3-5 minutes, depending on your desired strength. Strain the tea or remove the tea bags, then stir in honey and lemon juice until dissolved.
Pour the tea into cups or a pitcher for serving, and add ice if you prefer it cold. Garnish with lemon slices and mint leaves before serving.
For a unique twist, consider infusing your green tea with fresh fruits like berries, peaches, or even herbs such as basil or rosemary. You can also adjust the level of sweetness by varying the amount of honey, or for those who prefer a sugar-free option, try using stevia or agave syrup.
Experimenting with the steeping time can also yield different flavor profiles, so feel free to adapt the recipe to suit your taste preferences!
Broccoli
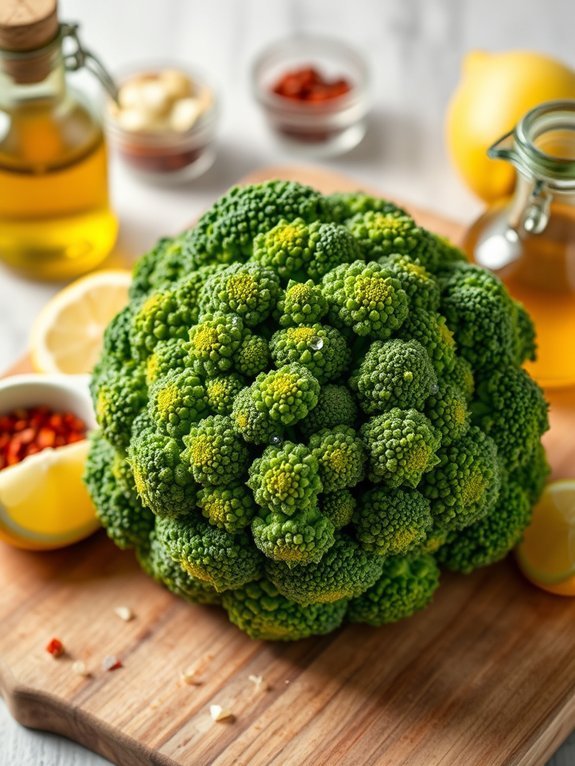
Broccoli is a powerhouse of nutrients that can help strengthen your immune system. This versatile vegetable is rich in vitamins C, E, and K, as well as fiber, which contribute to overall health and well-being. Not only does broccoli help fight inflammation, but it also contains antioxidants that protect your cells from damage. Incorporating broccoli into your meals is a simple way to boost your nutrient intake and enhance your body’s defenses.
One popular and nutritious way to enjoy broccoli is by preparing it as a sautéed side dish. This cooking method preserves the vegetable’s vibrant color and crunch while infusing it with flavors from aromatic garlic and a dash of lemon juice. Paired with a sprinkle of sea salt and freshly ground pepper, sautéed broccoli makes for a delicious and healthful addition to any meal.
- 1 bunch of fresh broccoli
- 2 tablespoons olive oil
- 3 cloves garlic, minced
- 1 lemon (juiced)
- Salt and pepper to taste
- Optional: red pepper flakes for a spicy kick
To prepare the sautéed broccoli, begin by washing and trimming the broccoli into small florets. Heat the olive oil in a large skillet over medium heat and add the minced garlic, cooking for about 30 seconds until fragrant.
Add the broccoli florets and sauté for about 4-5 minutes until tender-crisp, stirring occasionally. Squeeze the lemon juice over the broccoli, season with salt, pepper, and red pepper flakes if desired, and cook for an additional minute before serving.
When cooking broccoli, it’s crucial to avoid overcooking, as this can lead to a mushy texture and loss of nutrients. To maintain its bright green color and crunch, keep an eye on the cooking time and taste test for doneness.
Additionally, you can customize this recipe by adding your favorite herbs or substituting olive oil with sesame oil for an Asian twist. Enjoy the simple yet flavorful delight of sautéed broccoli as part of your immune-boosting meals!
Shellfish

Shellfish, renowned for their impressive nutrient profile and flavor, serve as a fantastic choice for those looking to boost their immune system. Packed with essential minerals such as zinc, iron, and selenium, shellfish have been shown to support immune function and promote overall health. Additionally, varieties like shrimp, clams, mussels, and oysters are rich in omega-3 fatty acids, which are known to reduce inflammation and support heart health.
Cooking shellfish can be a quick and rewarding endeavor. One of the simplest and most tasty methods to prepare shellfish is by sautéing them in garlic and butter, allowing their natural flavors to shine through. This easy recipe can be served over pasta, tossed into a salad, or enjoyed on its own with a squeeze of lemon for a invigorating and nutritious meal.
Ingredients:
- 1 pound of mixed shellfish (shrimp, clams, mussels)
- 4 tablespoons unsalted butter
- 3 cloves garlic, minced
- 1 lemon, juiced
- Salt and pepper to taste
- Fresh parsley, chopped (for garnish)
Melt the butter in a large skillet over medium heat, then add the minced garlic and sauté for about 1-2 minutes until fragrant. Add the mixed shellfish to the skillet, season with salt and pepper, and pour in the lemon juice. Cover the skillet and cook for approximately 5-7 minutes or until the shellfish have opened and are opaque. Be sure to stir occasionally for even cooking, and remove any shellfish that don’t open.
When cooking shellfish, be mindful of the freshness of the seafood, as it greatly affects the final dish’s flavor and safety. Always verify that clams and mussels are alive before cooking; they should close their shells when tapped.
It’s also ideal to avoid overcooking to prevent shellfish from becoming tough and chewy. Experimenting with additional flavors, such as white wine or herbs, can further enhance the dish. Enjoy your shellfish meal as a powerful ally for your immune system!
Kiwi
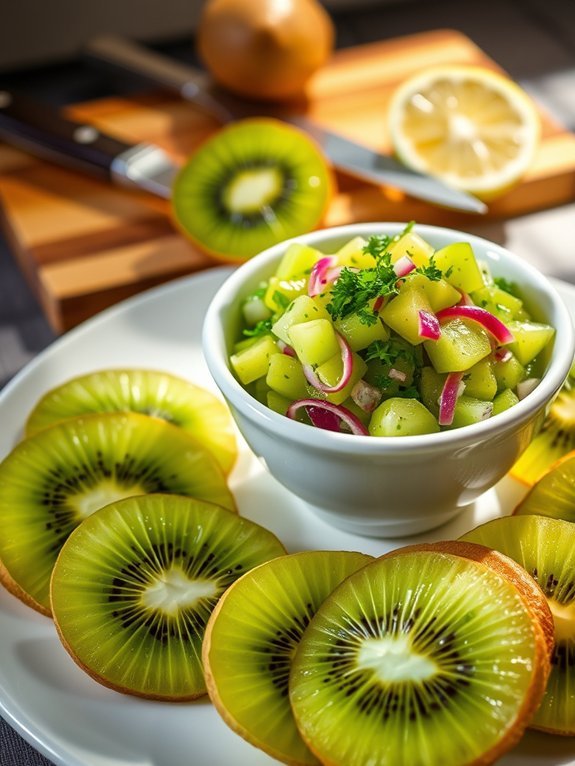
Kiwis are a delicious and nutritious fruit that can play a significant role in boosting your immune system. Rich in vitamin C, antioxidants, and dietary fiber, they’re a powerhouse of nutrition that can help your body fight off infections and inflammation.
Adding kiwi to your diet can be as simple as enjoying it fresh, but you can elevate its flavor and health benefits by cooking it into a delightful kiwi salsa that can accompany a variety of dishes.
This kiwi salsa isn’t only invigorating but also incredibly easy to make. The subtle sweetness of the kiwi pairs beautifully with the tang of lime and the savory kick from diced red onion and jalapeño. Whether you serve it atop grilled chicken, fish, or use it as a dip with tortilla chips, this salsa is a perfect way to incorporate kiwi into your cooking while maximizing its health benefits.
- 3 ripe kiwis, peeled and diced
- 1 small red onion, finely chopped
- 1 small jalapeño, seeded and minced
- 1/4 cup fresh cilantro, chopped
- Juice of 2 limes
- Salt, to taste
In a medium bowl, combine the diced kiwis, red onion, jalapeño, and cilantro. Squeeze the lime juice over the mixture and stir gently to combine. Season with salt to taste. Allow the salsa to sit for at least 10 minutes to let the flavors meld before serving.
When making this salsa, feel free to adjust the ingredients according to your taste preferences. If you like a bit more heat, you can leave some seeds from the jalapeño, or if you prefer a milder flavor, you can reduce the amount of onion or jalapeño.
This recipe is versatile, so don’t hesitate to experiment by adding ingredients like diced cucumber or bell peppers for added crunch. Enjoy your healthy and zesty kiwi salsa!
Sweet Potatoes

Sweet potatoes aren’t only delicious but also packed with nutrients that can help boost your immune system. Rich in beta-carotene, vitamins A and C, and antioxidants, these vibrant tubers offer a wonderful way to elevate your meals while supporting your overall health.
Whether you enjoy them baked, mashed, or roasted, sweet potatoes can be a versatile addition to any recipe. One of the most enjoyable ways to prepare sweet potatoes is by roasting them, which brings out their natural sweetness and creates a lovely caramelized flavor.
This simple yet satisfying dish can complement any meal or stand alone as a tasty snack. With just a few ingredients, you can create a healthy side dish that’s both nutritious and easy to prepare.
- 4 medium sweet potatoes, peeled and cut into cubes
- 2 tablespoons olive oil
- 1 teaspoon garlic powder
- 1 teaspoon paprika
- Salt and pepper to taste
- Fresh parsley for garnish (optional)
Preheat your oven to 425°F (220°C). In a large bowl, toss the sweet potato cubes with olive oil, garlic powder, paprika, salt, and pepper until they’re evenly coated.
Spread the seasoned sweet potatoes in a single layer on a baking sheet lined with parchment paper and roast for 25-30 minutes, turning halfway through, until they’re tender and golden brown.
For an enhanced flavor profile, consider adding some fresh herbs like rosemary or thyme to the mix before roasting. You can also experiment with different spices such as cinnamon or cumin for a unique twist.
To achieve perfectly roasted sweet potatoes, be sure to cut them into uniform pieces so they cook evenly, and keep an eye on them towards the end of the cooking time to prevent burning.
Mushrooms
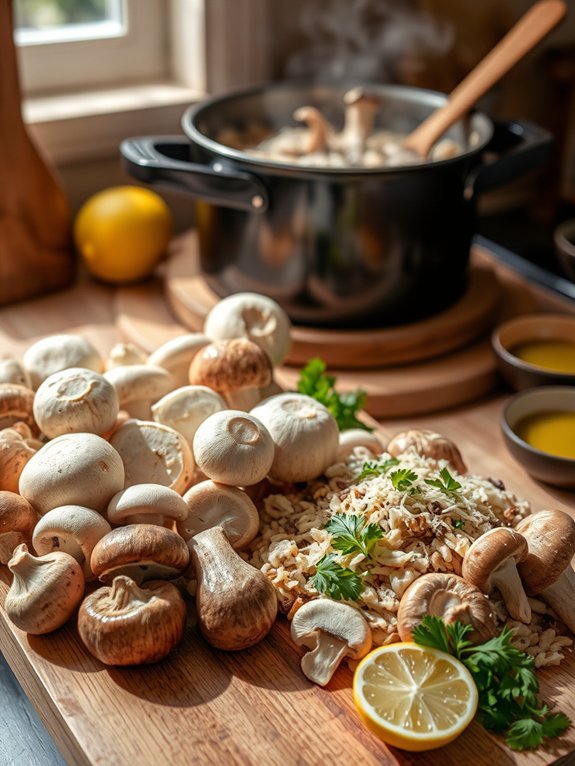
Mushrooms aren’t only a delightful ingredient but also a fantastic addition to a diet aimed at boosting your immune system. Rich in vitamins and antioxidants, mushrooms such as shiitake, maitake, and reishi have been recognized for their immune-enhancing properties. Incorporating these fungi into your meals can contribute to overall health while adding a savory, umami flavor that elevates various dishes.
One delicious way to enjoy mushrooms is by preparing a comforting mushroom risotto. This dish allows the deep, earthy flavors of the mushrooms to shine and offers a creamy texture that’s hard to resist.
To create a mushroom risotto, you’ll need a selection of fresh mushrooms, arborio rice, and a few other simple ingredients. The slow absorption of broth into the rice creates a creamy feel without the excess use of cream, making it a healthier choice. This risotto not only serves as a filling side dish but can also stand alone as a hearty vegetarian meal, making it ideal for any occasion.
- 1 cup arborio rice
- 1 lb mixed fresh mushrooms (shiitake, cremini, and button)
- 1 medium onion, finely chopped
- 2 cloves garlic, minced
- 4 cups vegetable broth
- 1/2 cup dry white wine (optional)
- 1/2 cup grated Parmesan cheese
- 1 tablespoon olive oil
- 2 tablespoons butter
- Salt and pepper to taste
- Fresh parsley, chopped (for garnish)
Begin by heating the vegetable broth in a saucepan and keeping it warm over low heat. In a separate large skillet, add the olive oil and butter over medium heat. Once melted, sauté the onions until they’re translucent, then stir in the garlic and mushrooms. Cook until the mushrooms release their moisture and become tender.
Add the arborio rice to the mixture, stirring for a few minutes until the rice is lightly toasted. Pour in the white wine (if using) and stir until it’s mostly absorbed. Gradually add the warm vegetable broth, one ladleful at a time, allowing the rice to absorb the liquid before adding more. Continue this process until the rice is creamy and al dente, about 18–20 minutes.
Stir in the Parmesan cheese, season with salt and pepper, and garnish with fresh parsley before serving.
When cooking mushroom risotto, patience is key. Stirring constantly while gradually adding the broth is essential to achieve that signature creamy texture, so avoid rushing the process.
Feel free to experiment with different varieties of mushrooms for varying flavors and health benefits, or add other ingredients like spinach or peas for extra nutrients and color. If you want to make the dish heartier, consider adding a protein source, such as grilled chicken or shrimp, before serving. Enjoy your delicious, immune-boosting mushroom risotto!
Pomegranate
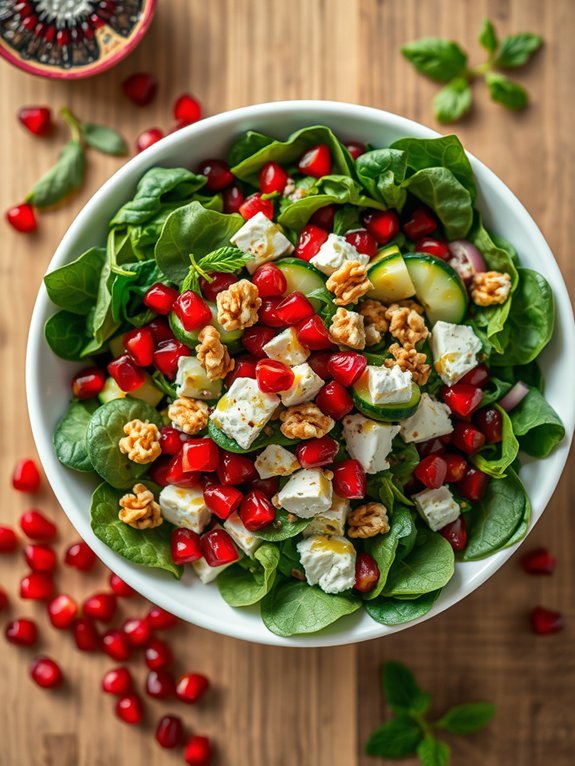
Pomegranate isn’t just a beautiful fruit; it’s also packed with antioxidants, vitamins, and anti-inflammatory properties that can help boost your immune system. Incorporating pomegranate into your meals can elevate both the flavor and health benefits of your dishes. One delicious way to enjoy this vibrant fruit is by creating a rejuvenating pomegranate salad that can serve as a side dish or a light main course. Bursting with flavor, textures, and nutrients, this salad is sure to please your palate while also fortifying your body.
The sweet and tart notes of pomegranate complement a variety of ingredients, making it a versatile addition to salads. By combining it with fresh greens, nuts, and a zesty dressing, you can craft a delightful dish that not only pleases your taste buds but also enhances your well-being. This pomegranate salad is also a quick and easy preparation, making it perfect for any meal, from a holiday feast to a casual weeknight dinner.
- 1 cup pomegranate arils
- 3 cups mixed salad greens (e.g., spinach, arugula, romaine)
- 1/2 cup diced cucumber
- 1/4 cup crumbled feta cheese
- 1/4 cup chopped walnuts or pecans
- 1/4 cup red onion, thinly sliced
- 3 tablespoons olive oil
- 1 tablespoon balsamic vinegar
- Salt and pepper to taste
In a large bowl, combine the mixed salad greens, diced cucumber, pomegranate arils, crumbled feta cheese, chopped walnuts, and sliced red onion. In a separate small bowl, whisk together the olive oil, balsamic vinegar, salt, and pepper before drizzling the dressing over the salad. Toss everything gently to combine, ensuring the dressing evenly coats the ingredients, then serve immediately.
To enhance the flavor of your pomegranate salad, consider adding some freshly chopped herbs like mint or parsley for a burst of brightness. You can also experiment with different nuts or cheeses based on your taste preferences, making this a customizable dish.
Don’t hesitate to prepare the salad a bit ahead of time; however, it’s best to toss the dressing in just before serving to keep the greens crisp and fresh.


