This post may contain affiliate links. Please read our policy page.
To keep your pantry stocked with healthy snacks, consider almonds for a protein boost, Greek yogurt for a creamy snack rich in probiotics, and hummus paired with colorful veggies for crunch. Air-popped popcorn offers a low-calorie option, while rice cakes with nut butter satisfy sweet cravings. Chia seed pudding and oatmeal provide nutritious bases for customization. Don’t forget apple slices with cinnamon and edamame for variety. Discover even more tasty and wholesome snack ideas to elevate your nutrition.
Almonds
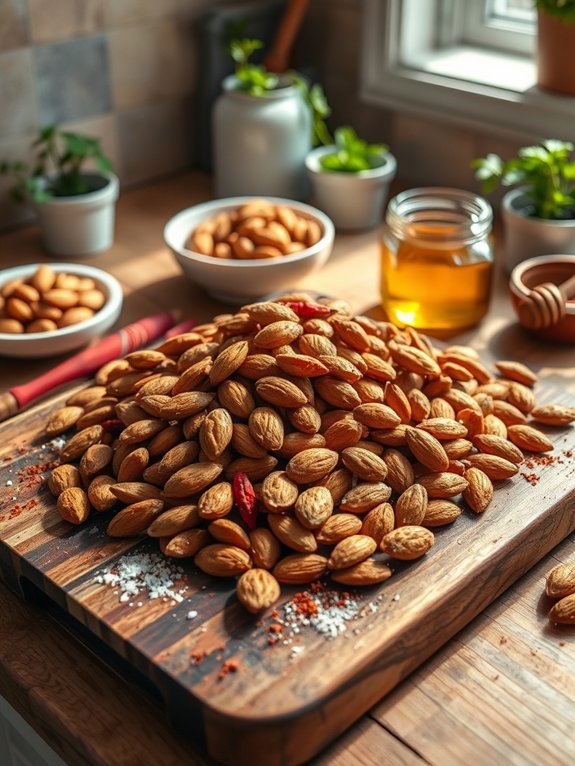
Almonds are a delicious and nutritious snack that can be enjoyed in various forms, whether raw, roasted, or seasoned. Rich in healthy fats, protein, fiber, and essential vitamins and minerals, they provide an excellent energy boost and support heart health.
Roasting almonds is a simple way to enhance their flavor and aroma, making them irresistible as a snack or addition to salads, cereals, and baked goods.
To prepare roasted almonds, you need only a few basic ingredients. The process is quick and straightforward, taking just a couple of minutes to get the perfect crunchy snack. You can customize the flavor with different spices or seasonings based on your personal taste preferences. This versatility makes roasted almonds not only a nourishing option but also a fun culinary endeavor.
- 2 cups raw almonds
- 1 tablespoon olive oil (optional)
- 1 teaspoon sea salt
- Optional seasonings (e.g., paprika, garlic powder, cinnamon)
Preheat your oven to 350°F (175°C). Spread the raw almonds evenly on a baking sheet and drizzle with olive oil if desired. Toss the almonds to guarantee they’re evenly coated, then sprinkle with sea salt and any optional seasonings you choose.
Spread them out in a single layer and roast for about 10-12 minutes, stirring halfway through, until they’re golden brown and fragrant.
When roasting almonds, keep a close eye on them towards the end of the cooking time, as they can quickly go from perfectly toasted to burnt. Adjust the roasting time based on your oven’s performance, as some may heat unevenly.
Allow the almonds to cool completely on the baking sheet before transferring them to an airtight container for storage, ensuring they remain crispy. You can also experiment with different flavor combinations or try adding a touch of sweetness by tossing the almonds in a bit of honey or maple syrup before roasting.
Greek Yogurt
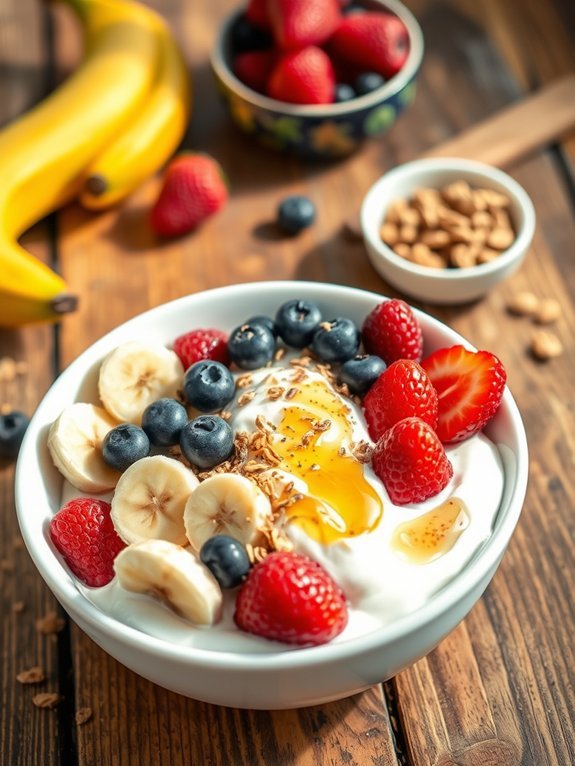
Greek yogurt is a creamy and versatile snack that not only satisfies your hunger but also packs a nutritional punch. Rich in protein and probiotics, Greek yogurt can be enjoyed on its own or used as a base for a variety of delicious toppings and mix-ins. Whether you’re looking for a quick breakfast option, a post-workout refuel, or a light dessert, Greek yogurt can be tailored to fit your needs and taste buds.
To create the perfect Greek yogurt bowl, you can customize it with fruits, nuts, seeds, and even a drizzle of honey or maple syrup for added sweetness. This allows you to experiment with flavors and textures, making each bowl unique and delicious. The combination of creamy yogurt with crunchy toppings and fresh fruits not only satisfies your cravings but also provides a healthy way to nourish your body throughout the day.
- 1 cup Greek yogurt (plain or flavored)
- 1/2 cup mixed berries (strawberries, blueberries, raspberries)
- 1 banana, sliced
- 2 tablespoons granola
- 1 tablespoon honey or maple syrup
- 1 tablespoon chia seeds or flaxseeds (optional)
- A sprinkle of cinnamon or nutmeg (optional)
In a serving bowl, scoop the Greek yogurt as your base. Top it with mixed berries and banana slices. Sprinkle granola over the fruits for a satisfying crunch. Drizzle honey or maple syrup on top for added sweetness and finish with chia seeds for an extra health boost. If you like, a light dusting of cinnamon or nutmeg can enhance the flavor profile.
When preparing your Greek yogurt snack, feel free to get creative with the toppings! Consider adding nuts like almonds or walnuts for extra protein, or try different fruits such as kiwi or peaches for variety.
You can also experiment with flavored Greek yogurts to save time or mix in spices like vanilla extract for a different taste. Don’t forget to adjust the portion sizes to suit your dietary needs, and enjoy this nutritious treat any time of the day!
Hummus and Veggies
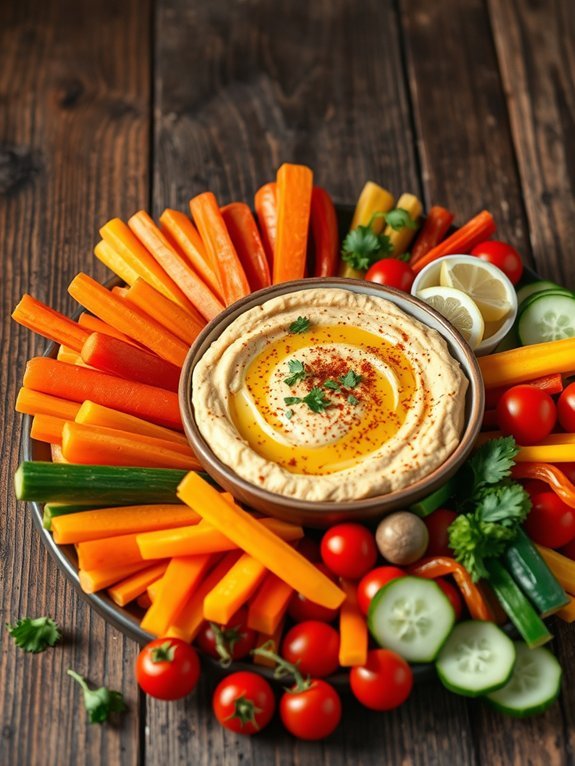
Hummus and veggies make for a delicious and healthy snack that’s easy to prepare. This nutritious combination pairs the creamy texture of hummus with a variety of colorful vegetables, providing a satisfying crunch and burst of flavors.
Whether you’re looking for a midday snack, a party appetizer, or a boost after a workout, this dish is sure to please your taste buds while keeping your health goals in check.
Making hummus from scratch allows you to customize the flavors to your liking, but store-bought options can also work well for a quick and convenient choice. You can serve this delightful dip alongside an array of fresh veggies, such as bell peppers, cucumbers, carrots, and cherry tomatoes, for a well-rounded snack that’s rich in vitamins and minerals.
Enjoy the contrast of flavors and textures as you dip each veggie into the hummus.
- 1 can (15 oz) chickpeas, drained and rinsed
- 1/4 cup tahini
- 2 tablespoons olive oil
- 2 tablespoons lemon juice
- 1 garlic clove, minced
- 1/2 teaspoon ground cumin
- Salt and pepper to taste
- Fresh vegetables (e.g., bell peppers, cucumbers, carrots, cherry tomatoes)
In a food processor, combine the chickpeas, tahini, olive oil, lemon juice, minced garlic, ground cumin, salt, and pepper. Blend until the mixture is smooth and creamy, scraping down the sides as necessary.
If the hummus is too thick, add a tablespoon of water at a time until you reach your desired consistency. Serve the hummus in a bowl alongside your choice of fresh vegetables for dipping.
One of the best parts of making hummus is that it’s highly customizable. Feel free to add ingredients like roasted red peppers, sun-dried tomatoes, or fresh herbs like parsley or cilantro to enhance the flavor profile.
Experimenting with different spices can also create unique variations, so don’t hesitate to get creative! Additionally, store any leftover hummus in an airtight container in the fridge, where it will last for up to a week.
Recommended Items
Check out these fantastic products and equipment to help you create delicious and healthy snacks!
Products
Air-Popped Popcorn

Air-popped popcorn is a delicious and healthy snack that can be enjoyed at any time of day. Popcorn is a whole grain and is naturally low in calories, making it an excellent choice for those looking to satisfy their crunchy cravings without the guilt.
The air-popping method guarantees that you avoid excess oils and fats, leaving you with a light and airy treat that can be seasoned to your liking.
Making air-popped popcorn is incredibly straightforward and requires minimal ingredients. All you need is some popcorn kernels and an air popper to get started. However, to elevate your snacking experience, you can add various toppings and flavors after popping to cater to your personal taste preferences.
- 1/2 cup popcorn kernels
- Salt (to taste)
- Optional seasonings (such as nutritional yeast, garlic powder, or chili powder)
To cook the air-popped popcorn, simply place the popcorn kernels in your air popper according to the manufacturer’s instructions. Turn the machine on and allow it to pop until you hear a pause of about 2 seconds between pops, which usually takes about 3 to 5 minutes.
Once the popping is done, pour the popcorn into a large bowl and season with salt and any desired toppings, tossing to guarantee even distribution.
When making air-popped popcorn, feel free to experiment with different seasoning combinations to keep your snack exciting. For a healthier twist, consider using nutritional yeast for a cheesy flavor without the calories of cheese.
You can also create sweet popcorn by sprinkling it with a little cinnamon and a drizzle of honey or maple syrup after popping. Remember to store any leftover popcorn in an airtight container to maintain its freshness and crunchiness.
Rice Cakes With Nut Butter
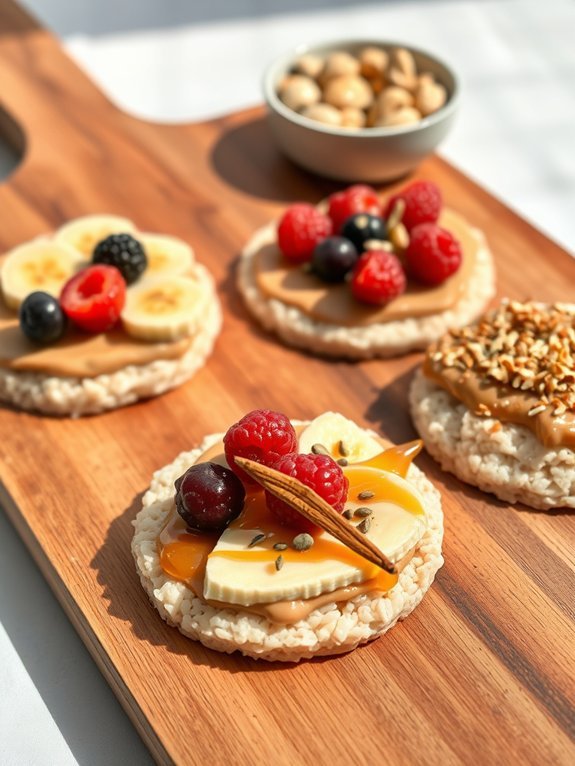
Rice cakes with nut butter make for a quick and nutritious snack option that’s perfect for any time of day. These little treats are light and crunchy, providing the ideal base for a variety of toppings. Nut butters come in many varieties—ranging from classic peanut to almond, cashew, or even sunflower seed butter—giving you the freedom to customize each rice cake to suit your taste preferences.
Preparing this snack is incredibly straightforward, requiring minimal effort and time. Whether you’re looking to satisfy your sweet tooth or need a protein-packed pick-me-up, rice cakes with nut butter can be easily tailored to meet your nutritional needs.
Add in some fruit, seeds, or drizzle of honey for an extra flavor burst to elevate this healthy snack even further.
- Rice cakes
- Nut butter (peanut, almond, cashew, etc.)
- Optional toppings (sliced bananas, berries, chia seeds, honey, or cinnamon)
To prepare the rice cakes with nut butter, simply spread a generous layer of your chosen nut butter over each rice cake. If you’d like to add more dimension to your snack, layer on optional toppings such as banana slices, fresh berries, or a sprinkle of chia seeds. Finish with a light drizzle of honey or a dash of cinnamon if desired.
When selecting your rice cakes, consider choosing whole grain or brown rice options for added fiber and nutrients.
Additionally, don’t hesitate to experiment with different combinations of nut butters and toppings to find your favorite flavor pairings. This snack isn’t only healthy but can also be made to cater to various dietary preferences, making it a versatile addition to your snacking repertoire.
Dried Fruit

Dried fruit is a wonderfully versatile healthy snack that captures the natural sweetness of fruits and preserves them for a longer shelf life. Making your own dried fruit at home can be a rewarding experience, allowing you to control the drying process and the quality of the fruit you use.
Whether you prefer apples, apricots, or mangoes, the process is simple and can yield a delightful snack that’s perfect for on-the-go munching or adding to your favorite recipes.
To dry fruit at home, you can use a dehydrator, an oven, or even the air drying method, depending on the type of fruit and your preference. Drying not only intensifies the flavors but also provides a nutritious treat that’s packed with vitamins, minerals, and fiber.
Plus, homemade dried fruit doesn’t contain any preservatives or added sugars, making it a healthier alternative to store-bought options.
- Fresh fruits (such as apples, bananas, apricots, mangoes, or strawberries)
- Lemon juice (optional, for preserving color)
- Sugar or honey (optional, for added sweetness)
Begin by washing your chosen fruits thoroughly and slicing them into evenly sized pieces to guarantee even drying. If you wish to maintain the color of the fruits, you can soak them in a mixture of water and lemon juice for about 10 minutes.
Next, arrange them in a single layer on dehydrator trays or a baking sheet lined with parchment paper. If using an oven, set it to the lowest temperature (around 140°F or 60°C) and leave the door slightly ajar to allow moisture to escape.
Dry the fruit until it reaches your desired tenderness – this can take anywhere from 4 to 12 hours in a dehydrator or 2 to 6 hours in an oven, depending on the type of fruit.
When drying fruit, you might want to experiment with different fruits and thicknesses of slices to find your preferred texture. Keep in mind that fruits with higher water content, like watermelon or citrus, may take longer to dry.
Always store your dried fruit in an airtight container to maintain freshness, and consider labeling them with the date for easy tracking. Additionally, if you plan to make a larger batch, making sure the fruit is thoroughly dried is crucial to prevent mold during storage.
Enjoy your healthy snack life with delicious homemade dried fruit!
Mixed Nuts
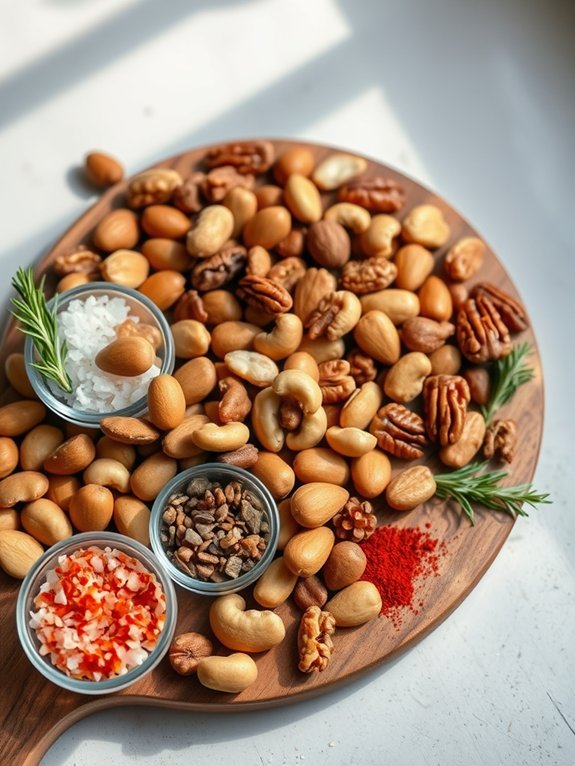
Mixed nuts are an incredibly versatile and nutritious snack option that can be enjoyed on their own or incorporated into a variety of recipes. Not only are they packed with healthy fats, protein, and essential vitamins and minerals, but they also provide a satisfying crunch that can curb cravings for less healthy snacks.
The combination of flavors and textures from different types of nuts makes them a delightful treat, whether you prefer the buttery taste of cashews, the earthy notes of almonds, or the rich flavor of walnuts.
Making mixed nuts at home allows you to tailor the blend to your preferences, adding your favorite nuts and even other components like spices or dried fruits for additional flavor and complexity. Roasting the nuts enhances their natural flavors and gives them a satisfying crunch, making them an irresistible snack for any occasion, from movie nights to party platters.
To get started, gather your ingredients and prepare to create your own delicious mix of roasted nuts.
- 1 cup almonds
- 1 cup walnuts
- 1 cup cashews
- 1 cup pecans
- 1 tablespoon olive oil
- 1 teaspoon sea salt
- 1/2 teaspoon garlic powder (optional)
- 1/2 teaspoon smoked paprika (optional)
- 1/4 teaspoon cayenne pepper (optional)
Preheat your oven to 350°F (175°C). In a large mixing bowl, combine all the nuts and add the olive oil, sea salt, and any optional spices you’d like to include. Toss everything together until the nuts are evenly coated.
Spread the mixture onto a baking sheet in a single layer and roast in the preheated oven for about 10-15 minutes, stirring halfway through to guarantee even roasting. Keep an eye on them, as nuts can burn quickly; they should be golden and fragrant when done. Remove from the oven and let them cool completely before storing.
When preparing mixed nuts, feel free to experiment with different types of nuts, or even add seeds or dried fruits for variety. You can also adjust the seasoning according to your preferences; for a sweeter version, consider adding a dash of cinnamon or a drizzle of honey before roasting, or try using spices that match your favorite cuisine (like curry powder or Italian herbs).
Additionally, always allow the nuts to cool completely before storing them in an airtight container to keep them fresh and crunchy.
Dark Chocolate
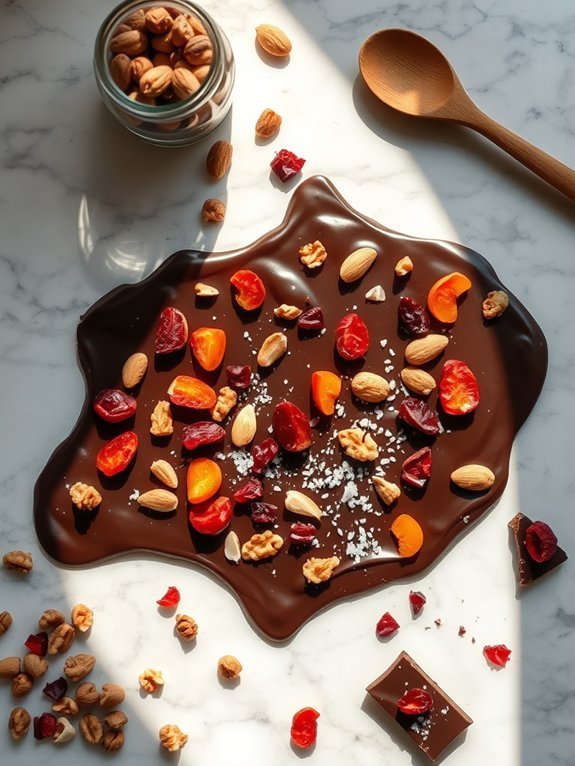
Dark chocolate isn’t only a delicious treat, but it also boasts numerous health benefits when enjoyed in moderation. Rich in antioxidants, dark chocolate can help lower blood pressure, improve heart health, and even enhance brain function. Creating a snack with dark chocolate can be both pleasurable and nourishing. By incorporating it into various recipes, you can enjoy its luscious flavor and health perks.
Making dark chocolate snacks at home allows you to customize your treats according to your own tastes and dietary preferences. One popular way to enjoy dark chocolate is by making dark chocolate bark. This simple method allows for endless variations, as you can add a range of toppings such as nuts, seeds, dried fruits, or even a sprinkle of sea salt to elevate the flavor. The best part is that it requires minimal ingredients and can be made in less than an hour.
- 8 ounces of dark chocolate (70% cocoa or higher)
- 1/2 cup of nuts (almonds, walnuts, or cashews)
- 1/2 cup of dried fruit (cranberries, apricots, or raisins)
- A pinch of sea salt (optional)
- Parchment paper (for lining the baking sheet)
Begin by melting the dark chocolate. You can do this by breaking the chocolate into small pieces and placing it in a heatproof bowl over a saucepan of simmering water (double boiler) or microwaving it in 30-second intervals until fully melted. Once melted, remove from heat and let it cool slightly.
Then, pour the chocolate onto a parchment-lined baking sheet, spreading it out to your desired thickness. Before it sets, sprinkle the nuts, dried fruit, and a pinch of sea salt over the top. Allow it to cool completely at room temperature or refrigerate until hardened, then break into pieces.
When making dark chocolate bark, it’s important to use high-quality chocolate, as this will greatly impact the flavor of your finished product. Feel free to experiment with various toppings to find your perfect combination. You could also add a touch of spice, like cinnamon or chili powder, for a unique twist.
Store the finished bark in an airtight container in a cool place, and it should keep for up to two weeks—if it lasts that long!
Cottage Cheese
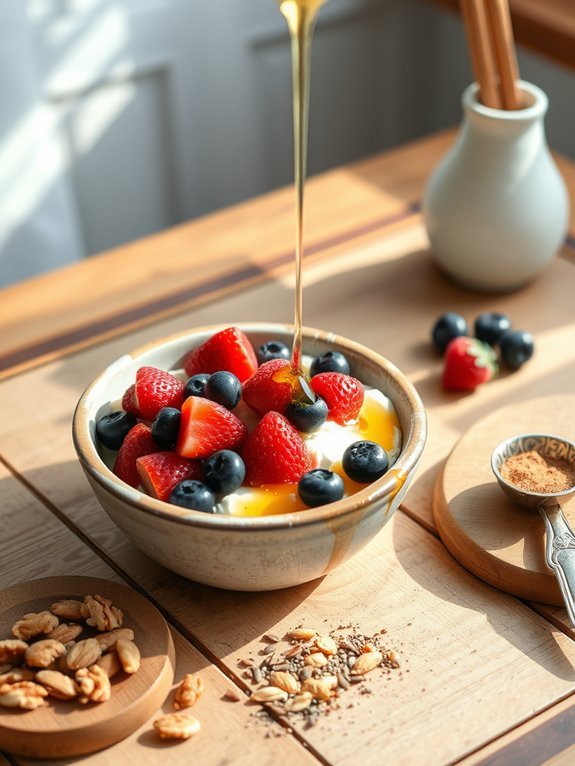
Cottage cheese is a versatile and nutritious option that’s perfect for a healthy snack. Its mild flavor and creamy texture allow it to pair beautifully with a variety of ingredients, making it a favorite among health enthusiasts. Whether you’re looking for a protein-packed snack or a light meal, cottage cheese can easily fit the bill.
Plus, it can be combined with both sweet and savory additions, giving you a wide range of choices to satisfy your cravings.
This recipe highlights the deliciousness of cottage cheese by turning it into a delightful snack bowl. By incorporating fresh fruits, seeds, and a drizzle of honey, you can create an easy-to-make dish that isn’t only tasty but also full of essential nutrients. This snack isn’t only quick to prepare, but it can also be customized to suit your personal taste preferences, allowing you to mix and match ingredients for variety throughout the week.
- 1 cup cottage cheese
- ½ cup fresh berries (strawberries, blueberries, raspberries)
- 1 tablespoon honey or maple syrup
- 2 tablespoons nuts or seeds (walnuts, almonds, chia seeds)
- 1 teaspoon cinnamon (optional)
In a serving bowl, scoop out the cottage cheese and top it with the fresh berries. Drizzle the honey or maple syrup over the cottage cheese and berries, then sprinkle with nuts or seeds for added crunch. If you like, add a dash of cinnamon for extra flavor, and your delicious snack bowl is ready to enjoy!
When preparing your cottage cheese snack, consider using a variety of fruits and toppings to keep things interesting. You can try adding sliced bananas, peaches, or even a scoop of nut butter for a different flavor profile.
Also, if you’re looking for a creamier texture, opt for a full-fat cottage cheese instead of low-fat varieties. Don’t hesitate to experiment with spices, such as nutmeg or vanilla extract, to create a unique and personalized snack each time!
Roasted Chickpeas
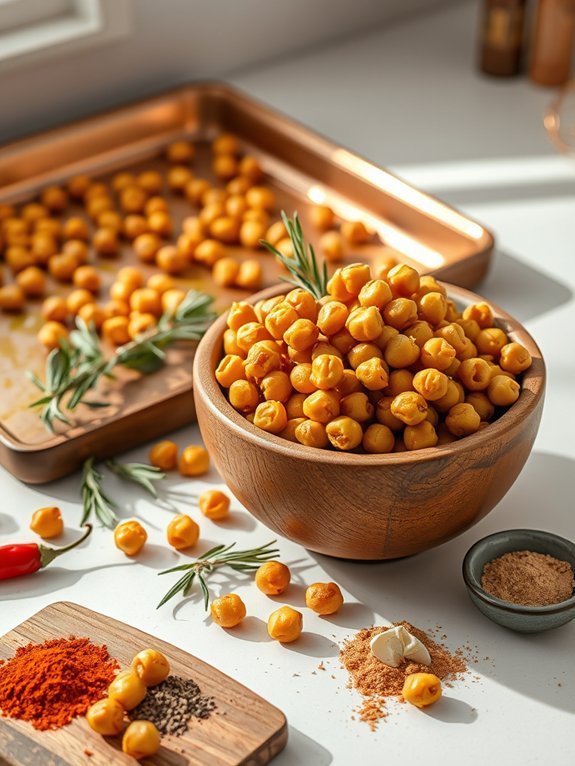
Roasted chickpeas are a delicious and healthy snack that’s high in protein and fiber, making them an excellent choice for anyone looking to satisfy their cravings without the guilt. This crunchy treat can be seasoned in countless ways, allowing you to customize it to suit your taste preferences.
Whether you prefer a spicy kick or a lighter, herby flavor, roasted chickpeas provide a satisfying crunch that makes them irresistible.
Making roasted chickpeas is simple and can be done with just a few ingredients that you may already have in your pantry. With a little preparation, you can transform canned chickpeas into a crunchy, flavorful snack that’s perfect for munching at home, at work, or on the go.
They also make a great topping for salads or soups, adding both texture and nutrition to your meals.
- 1 can of chickpeas (15 ounces)
- 1 tablespoon olive oil
- 1 teaspoon salt
- 1 teaspoon paprika (or seasoning of choice)
- ½ teaspoon garlic powder (optional)
- ½ teaspoon cumin (optional)
- Fresh herbs for garnish (optional)
Preheat your oven to 400°F (200°C). Drain and rinse the chickpeas thoroughly, then spread them on a clean kitchen towel to dry for about 15-20 minutes.
Once dry, transfer the chickpeas to a baking sheet, drizzle with olive oil, and sprinkle with salt and your choice of seasonings. Toss to coat evenly and spread them out in a single layer.
Roast in the preheated oven for 25-30 minutes, flipping halfway through, until they’re golden brown and crispy.
For best results, make sure the chickpeas are as dry as possible before roasting; this step is essential for achieving that perfect crunchy texture.
Feel free to experiment with different spices and herbs depending on your mood—cayenne pepper for heat or dried rosemary for a more aromatic flavor.
Additionally, keep an eye on the chickpeas towards the end of the cooking time to prevent burning, as they can go from perfectly crisp to burnt quickly.
Protein Bars
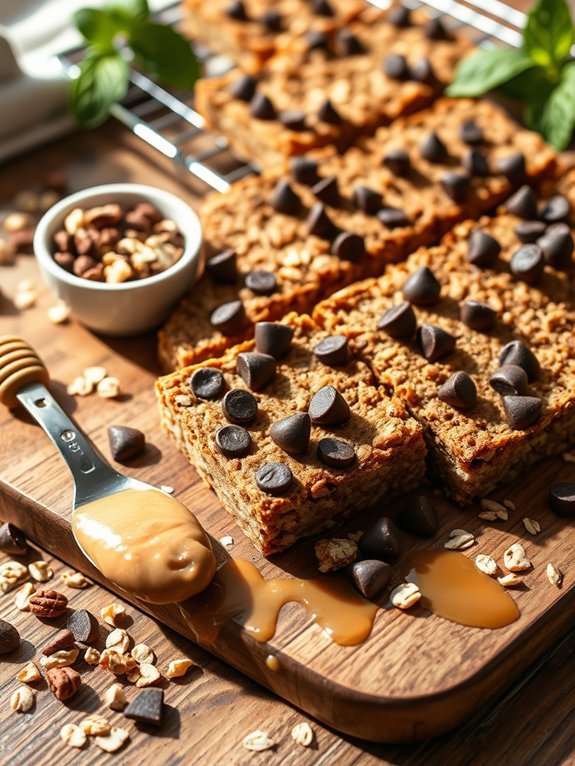
Protein bars are a fantastic way to fuel your body, especially for those on-the-go or in need of a quick snack that packs a nutritional punch. They’re versatile and can be tailored to your taste preferences, making them an ideal healthy option for anyone looking to increase their protein intake.
Unlike store-bought varieties, homemade protein bars allow you to control the ingredients, ensuring you’re avoiding unnecessary sugars and unhealthy additives.
Additionally, making your own protein bars can be a fun culinary adventure, inviting you to experiment with different flavors and textures. From chocolate peanut butter to nutty oatmeal, the possibilities are endless. Plus, you can easily adjust the recipe to cater to dietary preferences, making it gluten-free, vegan, or nut-free, if desired.
- 1 cup rolled oats
- 1/2 cup nut butter (peanut, almond, or sunflower)
- 1/4 cup honey or maple syrup
- 1/2 cup protein powder (vanilla or chocolate)
- 1/4 cup dark chocolate chips (optional)
- 1/4 cup chopped nuts or seeds (optional)
- 1/2 teaspoon vanilla extract
- A pinch of salt
In a mixing bowl, combine the rolled oats, nut butter, honey or maple syrup, protein powder, and vanilla extract. Stir until well mixed, then fold in the chocolate chips and chopped nuts or seeds if using.
Line an 8×8 inch baking dish with parchment paper and press the mixture evenly into the dish. Refrigerate for at least an hour until firm, then cut into bars or squares.
When making protein bars, feel free to get creative with your ingredients to suit your taste. You can substitute different nut butters, add dried fruits, or even spice it up with cinnamon or cocoa powder.
Additionally, these bars can be stored in an airtight container in the refrigerator for up to a week or frozen for longer freshness. Just remember that the consistency may vary based on the nut butter and types of protein powder used, so adjust ingredients accordingly if needed.
Chia Seed Pudding
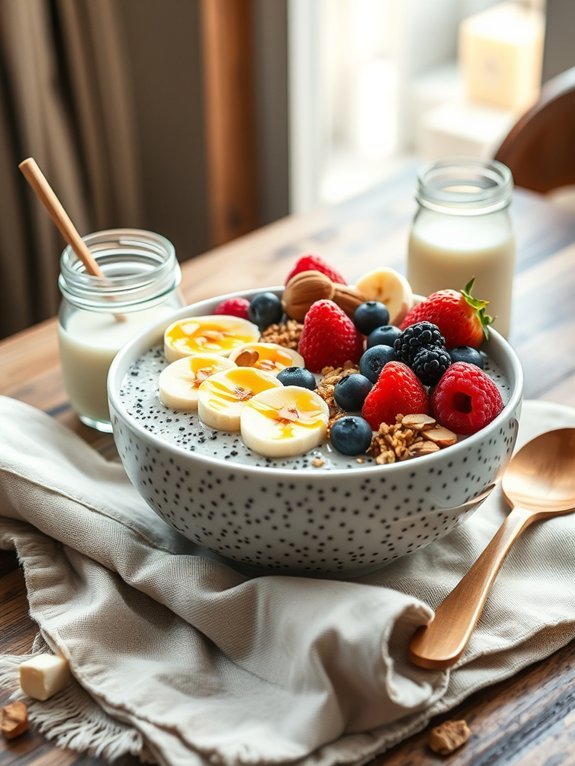
Chia seed pudding is a nutritious and versatile snack that can be enjoyed any time of day. Rich in omega-3 fatty acids, fiber, and antioxidants, chia seeds have gained popularity for their numerous health benefits. The seeds absorb liquid and swell up to create a delightful, pudding-like consistency, making them the perfect base for a light and satisfying treat.
Additionally, chia pudding is incredibly easy to prepare and can be customized to suit your taste preferences with various flavors and toppings. Creating chia seed pudding is an excellent way to incorporate healthier ingredients into your diet while still indulging in a delicious snack.
This recipe requires minimal effort and can be made ahead of time, making it a convenient choice for busy individuals or families. With so many variations available, you can mix and match different fruits, nuts, and sweeteners to create your favorite version of this delightful pudding.
- 1/2 cup chia seeds
- 2 cups almond milk (or other milk of choice)
- 2 tablespoons maple syrup (or sweetener of choice)
- 1 teaspoon vanilla extract
- Fresh fruit for topping (e.g., berries, bananas, or mango)
- Nuts or granola for garnish (optional)
In a medium-sized mixing bowl, combine chia seeds, almond milk, maple syrup, and vanilla extract. Whisk the mixture well to guarantee that the chia seeds are evenly distributed and not clumping together.
Once the mixture is well-combined, cover the bowl and refrigerate for at least 4 hours or overnight until the pudding thickens to your desired consistency. After it’s set, stir again before serving and top with your favorite fruits and nuts.
To take your chia seed pudding to the next level, consider experimenting with different types of milk, such as coconut or oat milk, for varying flavors. You can also infuse the pudding with additional ingredients like cocoa powder for a chocolatey treat or matcha powder for a green tea twist.
If you prefer a sweeter pudding, adjust the amount of sweetener according to your taste. Finally, be sure to serve the pudding chilled; it can also be stored in an airtight container in the refrigerator for up to five days, making it a perfect make-ahead snack.
Healthy Snack Preparation Guide
Oatmeal
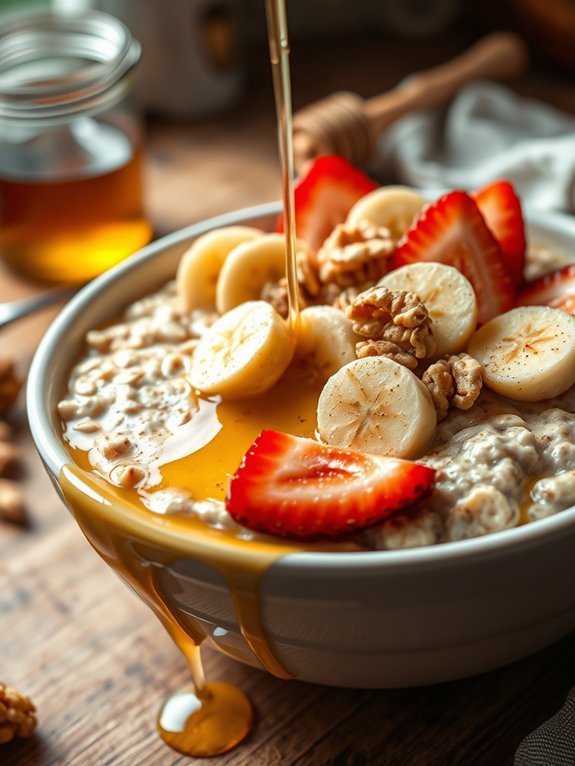
Oatmeal is a wholesome and versatile snack that appeals to both health enthusiasts and those looking for a hearty meal. It’s rich in fiber, which not only aids in digestion but also keeps you feeling full longer.
The beauty of oatmeal lies in its adaptability. You can customize it with fruits, nuts, and spices to suit your personal taste, making it a favorite among many. In addition to its nutritional benefits, oatmeal can be prepared quickly and easily, making it the perfect choice for a busy lifestyle.
This simple, hearty snack can be whipped up in no time, whether you prefer it creamy and smooth or thick and chewy. Cooking oatmeal allows you to experiment with flavors and textures, creating a dish that can be enjoyed at any time of day. From classic flavors like cinnamon and apple to more adventurous combinations with tropical fruits or nut butters, the possibilities are endless.
With a few basic ingredients and some creativity, you can turn plain oatmeal into a delicious and healthy masterpiece.
- 1 cup rolled oats
- 2 cups water or milk
- 1/2 teaspoon salt
- Sweetener (honey, maple syrup, or brown sugar) to taste
- Toppings (fruits, nuts, seeds, or spices) of your choice
In a medium saucepan, bring the water or milk and salt to a boil. Once boiling, add the rolled oats, reduce the heat to low, and simmer for about 5-7 minutes, stirring occasionally, until the oats are soft and have absorbed most of the liquid.
Remove from heat and let it sit for a minute to thicken. Serve warm, topped with your favorite fruits, nuts, or sweeteners.
When cooking oatmeal, it’s crucial to adjust the cooking time and liquid amount based on your preferred texture. For creamier oatmeal, you can use more liquid or cook it for a little longer. If you prefer it thicker, reduce the liquid and cooking time.
Additionally, adding toppings while cooking can enhance flavor, but for a fresh taste, consider adding them after cooking to maintain their texture and nutritional benefits. Experiment with different ingredients and flavors to make this simple dish your own!
Apple Slices With Cinnamon
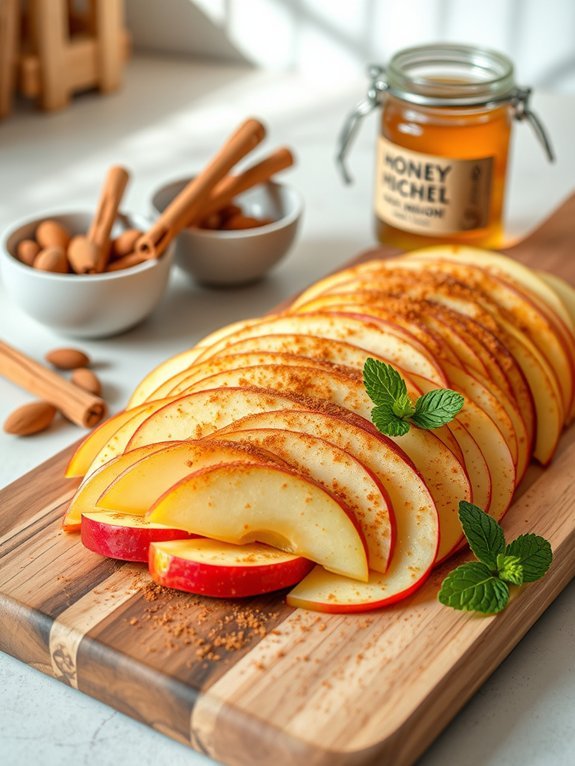
Apple slices with cinnamon is a delectable and healthy snack that can be enjoyed at any time of the day. They’re quick to prepare, making them perfect for busy individuals seeking nutritious options.
This delightful combination of sweet and savory offers a satisfying crunch while providing essential vitamins and nutrients found in apples, alongside the warm, aromatic flavor of cinnamon, which has its own health benefits.
Not only does this snack satisfy your sweet tooth, but it also promotes overall well-being. Apples are rich in dietary fiber and antioxidants, which help to support digestion and boost your immune system.
Pairing apple slices with cinnamon enhances their natural sweetness and provides a comforting flavor that’s sure to please both children and adults alike.
- 2 medium-sized apples (any variety)
- 1 teaspoon ground cinnamon
- 1 tablespoon honey or maple syrup (optional)
- Lemon juice (to prevent browning)
- A pinch of salt (optional)
Begin by washing the apples thoroughly and removing the core. Slice each apple into thin wedges and, if desired, toss the slices in a little lemon juice to prevent them from browning.
In a mixing bowl, coat the apple slices with cinnamon and, if you like, drizzle in honey or maple syrup for added sweetness. Once evenly coated, arrange the slices on a plate and enjoy!
When preparing apple slices with cinnamon, feel free to experiment with different apple varieties to discover your favorite flavor combination.
For an extra crunch, consider adding some chopped nuts or granola. Additionally, if you prefer a warm snack, you can microwave the seasoned apple slices for about 30 seconds to a minute, allowing the flavors to meld together beautifully. Enjoy your healthy treat!
Edamame

Edamame, young soybeans that are typically harvested before they mature, are a staple in Japanese cuisine and are prized for their high protein content and rich flavor. These versatile legumes can be enjoyed in many different ways, whether as a snack on their own or incorporated into salads, stir-fries, or rice dishes. They’re nutrient-dense, packed with vitamins, minerals, and fiber, making them a perfect healthy snack option.
Cooking edamame is simple and quick, which makes it an excellent choice for a last-minute snack. You can find edamame in the frozen section of most supermarkets, usually either in the pod or shelled. For this recipe, we’ll focus on a basic preparation method that retains the edamame’s natural flavors while adding a hint of seasoning. The key to perfectly cooked edamame isn’t to overcook them, allowing them to maintain their bright green color and slight crunch.
Ingredients:
- 2 cups frozen edamame in pods
- 1 tablespoon sea salt (plus extra for serving)
- 1 teaspoon red pepper flakes (optional)
- 1 teaspoon sesame oil (optional)
- Water
Bring a large pot of salted water to a boil. Add the frozen edamame pods and cook for 5-7 minutes until tender but still firm to the bite. Drain the edamame and immediately rinse under cold water to stop the cooking process. If desired, drizzle with sesame oil and sprinkle red pepper flakes before tossing to combine. Serve warm or at room temperature, sprinkling extra sea salt on top to taste.
When preparing edamame, consider experimenting with different seasonings to enhance the flavor. You can try adding garlic powder, lemon zest, or even a sprinkle of Parmesan cheese for a unique twist. Additionally, make certain that you don’t overcook the edamame; they should be tender yet maintain a slight crunch for the best texture.
Buy high-quality edamame for a more enjoyable taste experience, and remember that the pods aren’t typically eaten but rather used to pop the beans out directly into your mouth.


